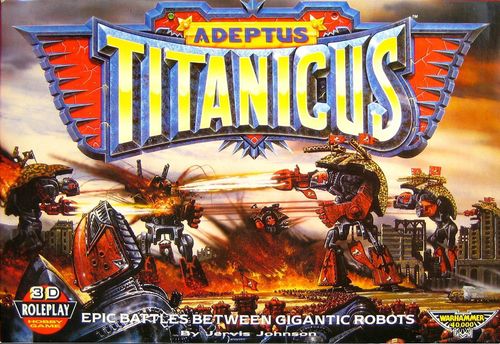
Adeptus Titanicus
Adeptus Titanicus Rulebook
Table of Contents
Table of Contents
- Titans
- Components
- Starting the Game
- The Basic Game
- Sequence of Play
- The Order Phase
- The Movement Phase
- The Repair Phase
- The Combat Phase
- Targeting
- Firing
- Damage
- Combat Tables
- Damage Effects
- Close Combat
- The End Phase
- Standard Game Scenarios
- The Advanced Game
- Designing Titans
- Advanced Equipment
- Random Scenarios
- The Campaign Game
- Creating the Order
- Campaign Scenarios
- Downtime
- Experience Phase
- Honour Phase
- Salvage Phase
- Repair Phase (Downtime)
- Recruiting Phase
- Reference Sheets
Titans
Titans are immense fighting machines, mechanical humanoid warriors up to 100 feet tall. They instill terror by their mere presence, and little can equal their armament. Few enemies, apart from another Titan, can stand against one.
Titans are powered by comparatively old-fashioned plasma reactors. The Titan's Void Shield Generators alone require such huge amounts of energy that nothing else will suffice.
The Void Shields are the Titan's main line of defence. A Shield absorbs damage until its Void Shield Generator (VSG) becomes overloaded. Cut-offs prevent the Generator burning out when this happens, and the Void Shield then collapses. However, once the excess power has been drained off, the Generator can be restarted, raising the Void Shield once more. Where possible, Titans carry a sufficiently large VSG so that, in theory, some of its shields will be operable at all times. In practice this may not always be the case, and once a Titan has lost its Shields it is vulnerable. In emergencies the Princeps can override the VSG cut-offs, pushing the Shields to their limits. If it works, this risky tactic can defeat almost any attack. If it fails (as is most likely), the Princeps will reduce his Titan's defences to pools of useless, molten slag.
The plasma generators also provide the power for many of the weapons; power transmission is via hydroplastics coupled to actuators. These operate the weapon systems and other facilities throughout the machine. A Titan's limbs are moved by electrically-motivated fibre-bundles which function very much like muscles.
Titan Types
Titans are divided into a number of broad types, depending on their size and function. Battle Titans and Emperor Titans are among the most numerous, but there are lesser types, such as the dreaded Psi-Titans, and the fast, lightly-armed Scout Titans.
Battle Titans stand between 40 and 80 feet tall. Each Battle Titan is protected by up to six Void Shield Generators, and armed with a variety of weapons.
Emperor Titans are taller - some 70 to 100 feet tall - and considerably bulkier. They can carry even more Very Heavy Weapons than Battle Titans, making them fearsomely destructive machines.
All Titans are split into a number of classes according to their basic design. By far the most common class of Battle Titan is the Warlord, and this is the type represented by the models in this box.
Finally, each class has a number of variants. The variant type of a Titan is determined by its armament pattern. There are, for example, four main variants of the Warlord class Battle Titan: the Night Gaunt, Eclipse, Death Bringer and Nemesis. As you will see from the Titan Data Cards, these are the four types of machine covered in the game: sufficient plastic components are provided so that any of these variants can be represented in a game.
Titan Crews
Each Titan is operated by a crew of three to five, all of whom are linked to their machine through mind-impulse units. A Titan crew is commanded by a Princeps. It is he who controls the movement of the Titan. He has charge of the Titan's defensive systems, deciding when (if at all) to overload the Void Shield Generators. He also co-ordinates the actions of the Moderati, the ordinary crewmen who control the Titan's weapon systems. It is the task of the Princeps to direct the awesome firepower of the Titan; each Moderatus must make sure that his assigned weapon is functioning correctly and accurately.
The crew are protected within support bubbles that can be ejected from the Titan in an emergency.
Components
A complete listing of the components of Adeptus Titanicus can be found on the back of the box.
Assembling the Titan Models
The models provided with this game are used to represent the Titans which take part in the battles you will fight. The components on the sprues allow you to field up to 6 Warlord Class Battle Titans. Remove the parts from the sprue using a pair of nail scissors or a modelling knife.
Notes on assembly: All parts can be clipped together, no glue is required. All weapons are fully interchangeable - apart from the Power Fist which only fits in the left arm. The card Void Shield Wheel is intended to be rotated between the top and bottom halves of the base.
Titan Weapons
The illustrations in the rulebook show the complete range of weapons available (heavy weapons, plasma gun, power fist, and a pole for banners).
Buildings
The polystyrene buildings are used to represent the terrain you will be fighting over. Keep them in the box for the time being - you won't need them until you are ready to set up the scenery for your first game.
Titan Data Cards
There are literally hundreds of different classes and variants of each type of Titan (Battle, Emperor, etc) but the Titan Data Cards give you a selection of pre-designed Warlord Class Battle Titans, ready for use. Rules for designing your own Titans can be found later in this book.
A Titan Data Card shows the following:
- CLASS: Each class of Titan has a name given according to the basic model design. All the models in this box are Warlord Class Battle Titans.
- VARIANT: All Warlord Class Battle Titans are named according to the amount of weaponry they carry. The example in the rulebook is known as a Nemesis.
- CARAPACE: Any weapons mounted on the top of the Titan - the left and right headers are from the model's perspective. A number in brackets represents the number of barrels the weapon has.
- ARM: Any weapons mounted on the Titan's arms - the left and right headers are from the model's perspective. A number in brackets denotes the number of barrels the weapon has.
- VSG: The number of Void Shields with which the Titan starts the game. Note that when the Void Shield Generator is destroyed, all shields are rendered inoperative (see Damage).
- SPEED: The distance in centimetres that the Titan can move in a turn. There are two numbers, separated by a slash (/). The first number is the Advance distance, and the second number is the Charge distance. This is explained in the movement rules.
- BATTLE RATING: Some scenarios let players pick their own Titans, rather than dictating which ones will be used. In these cases, players are given a number of points to spend on their forces. The total points cost of each class of Titan is given on its Data Card in terms of its Battle Rating. The greater the Battle Rating of a Titan, the more effective it is in battle.
- REMARKS: Any further information about the Titan is covered here (for example, limited manoeuvrability).
Void Shield Wheel
The wheel in the Titan's base can be turned so that different numbers are visible through the hole in the base. It is used to record how many Void Shields the Titan has working at any time.
For example: a Death Bringer Battle Titan has four Void Shields, as shown on its Data Card. At the start of the game, the Void Shield Wheel is turned to show the number 4. If the Titan is hit during the game, its number of active Void Shields will be reduced, and the Void Shield Wheel is moved accordingly. This is explained more fully in the game rules later on.
Range and Movement Ruler
This is a clear plastic ruler marked in 1 cm increments. It is used to measure distance for movement and weapon ranges. You should cut out the semi circle at the end of the ruler which will then double as a turning template and a weapon arc template (see below). By making a hole at the other end (in the spot shown) you can easily measure ranges over 36cm by putting a pencil point through the hole and spinning the ruler through 180 degrees.
Turning Template
Sometimes a Titan will be allowed to make a 45 degree turn during its move. To measure such a turn, place the template so that the central arrow on the template is pointing at one of the arrows on the plastic base (it doesn't matter which one). The Titan may then be turned to the left or right, as long as the arrow on its base is not moved past the left and right arrows on the template.
Order Counters
The order counters are used to record a Titan's planned action for each turn. Each Titan in the game will need four order counters, one each of First Fire, Advance, Charge and Repair. The use of order counters is explained in the Order Phase section.
Damage Counters
The damage counters are used to show the effects of damage on a Titan. Their use is explained in the Damage section.
The Dice
All dice rolls in Adeptus Titanicus are made with standard six-sided dice. Throughout the rules, the abbreviation 'D6' refers to a six-sided dice. For example, 'roll a D6' means roll one six-sided dice, and 'roll 2D6' means roll two six-sided dice.
The Weapon Arc Template
When a Titan makes an attack, it may only fire weapons that can be pointed at the target. To decide which weapons can be used, line up the arrow on the template with the arrow on the front of the Titan's plastic base. The template shows the arc over which the weapons on the Titan may make an attack. (In the diagram, the central arc is marked ALL WEAPONS MAY FIRE; the side arcs are marked LEFT ARM ONLY MAY FIRE and RIGHT ARM ONLY MAY FIRE.)
Burst Circle Template
Some weapons create a huge explosion which will affect any target within the burst radius. When such a weapon is used, a burst circle is placed with its centre at the point of aim. Any Titan whose base falls under the template (even if only partially) is affected by the attack.
Playing Surface
This is one component you won't find in the box. Adeptus Titanicus is designed so that it can be played on any flat surface the size of the average dining table. Larger areas can make for bigger and more interesting games - so if you have a wargames table so much the better - but as long as your table is at least 3' by 2' you'll be able to have an enjoyable game.
"Used correctly, terrain is a second weapon in your arsenal, equal to your Titan itself. Make the battlefield work for you, or you will find itworking for your opponent." - Grand Master Ferromort, Ordo Sinister, Divisio
Starting the Game
First, read briefly through the section of this rulebook headed The Basic Game. Don't try to learn the rules as you go; just read them through so that you get an idea of where things are in the rulebook. The best way to actually learn the rules is to play the game - so let's get started!
Setting Up
First, you will need to find a suitable playing surface. Any table or area of floor 3' by 2' will do just fine; larger areas are even better.
Next comes the scenario.
What Is a Scenario?
A scenario is basically a set of notes, telling you all you need to know about the battle you are about to fight. It will tell you which forces are involved, which Titans each player has (or sometimes, how many points each player has to spend on Titans), what each side's objectives are, and so on. You will find a range of scenarios at the end of the basic game rules, but for your first game, we'll use the following scenario.
A lone Eclipse Battle Titan (Battle Rating: 630) has encountered an enemy Death Bringer class Titan (Battle Rating: 630). Both are far from their own forces and cannot call on any reinforcements, so the battle is a straight one-to-one fight to the finish.
Preparing for Battle
First, decide which player will take which side. If you can't decide, roll a dice - the player with the higher score chooses which side he wants to play and is First Player at the start of the battle (see below).
Next, find the Data Cards for the Titans featured in the scenario (be sure to get the Death Bringer and Eclipse Titans with the right Battle Rating - 630). Using the information on the Data Cards, build all the models you need. In this scenario, you need one Eclipse Battle Titan and one Death Bringer Battle Titan. If you need instructions to build the models, refer to Assembling the Model Titans in the Components section.
Each Titan needs a full set of Order Counters - one each of First Fire, Advance, Charge and Repair. Separate the necessary counters from the counter sheet and give each player as many as he needs.
Separate the Damage counters from the counter sheet and keep them handy.
Place all of the buildings in the lid of the box. Each player should take it in turn to place one building anywhere on the playing surface, until all the buildings are set up.
Finally, each player rolls a D6, and the player with the higher score may choose which edge of the playing area he will set up on. He may set up his Titans anywhere along that side of the playing area, within 12cm of the edge. The other player must then set up on the opposite edge, again within 12cm of the edge, unless the scenario states otherwise.
If a specific instruction in a scenario ever contradicts these general notes, always assume that the scenario is correct.
Now, you're ready to play.
The Basic Game
The rules are split into two sections: the Basic Game and the Advanced Game.
The Basic Game introduces all of the most important rules for the game, and the basic rules can stand on their own. They are enough for you to be able to play a number of simple but enjoyable games.
The Advanced Game adds more detail and complexity, but doesn't change any of the basic rules - it simply gives you more choices and options. Once you've played a few basic games, and have got the hang of the basic rules, then you'll probably want to try the advanced rules out.
More Than Two Players
Throughout the basic rules, we assume that there will only be two players. If more than two players are taking part, split into two teams and choose a scenario that has enough Titans to allow at least one per player.
Sequence of Play
Adeptus Titanicus uses a strict sequence of play. Each turn consists of a number of separate phases. It may seem complicated at first, but don't worry - you'll soon get the hang of it. A lot of things can happen in a turn - movement, combat, repair, and more. In real life, these things happen simultaneously, which is why combat in real life is so confusing.
Each turn in Adeptus Titanicus is split into 5 phases. During the movement phase, both sides move their Titans; during the combat phase, both sides fire their weapons; and so on. An action may only be performed in the appropriate phase; so, for example, you can't move a Titan in the combat phase.
The basic rules are laid out in the same order as the sequence of play. The best way to learn them is to read briefly through them once, and then start playing your first game. As you come to each new phase, read through the appropriate rules section and then perform any actions for that phase.
The First Player
Throughout the rules, we refer to the First Player. The First Player is the player who goes first in any phase. Being the First Player offers both advantages and disadvantages; you will have to move your Titans first, but you also get the first shot in the combat phase. If players cannot agree who will be First Player to start, they should each roll a die - the highest score gets to choose.
In the first turn of the game, the First Player is the player who set up his Titans first. He takes the First Player marker to indicate that he is First Player. At the end of the turn, the other player takes the First Player marker, and so on throughout the game.
The Sequence of Play
- Order Phase. The players must place an Order counter (face down) beside each of their Titans.
- Movement Phase
- Titans with Charge orders are moved. The players take turns (starting with the First Player) to pick one Titan and move it.
- Titans with Advance orders are moved, in the same way.
- Titans with First Fire orders may change facing (without moving), as above.
- Repair Phase. Both players must:
- Roll to Repair 'downed' VSGs.
- Roll to Repair damaged Systems.
- Roll to see if any damaged systems malfunction.
- Combat Phase
- Titans with First Fire orders may fire. Players take it in turn (starting with the First Player) to pick one Titan and fire its weapons.
- Titans with Advance orders may attack, as above.
- Titans with Charge orders may attack, as above.
- Titans engaged in Close Combat may attack.
- End Phase. The First Player marker changes hands, and a new turn begins.
The Order Phase
In the order phase of each turn, the players must place one Order counter face down beside each of their Titans. Orders cannot be changed once the order phase is over. If a Titan is left without an order, it may not move or fire in that turn, and any enemy Titans that attack it receive a +1 to hit modifier.
There are four types of Order counter:
First Fire: The Titan may not move, apart from turning up to 45°. During the combat phase, Titans with First Fire orders attack first, and receive a +1 to hit bonus.
Use First Fire orders when you are on the defensive or have no desire to move. If you are out-gunned with nowhere to run, getting off the first shot could be vital.
Advance: The Titan may move up to its Advance rate during the movement phase, making up to four 45° turns during the move. Two 45° turns may be combined to make one 90° turn, and so on. Titans with Advance orders attack after Titans with First Fire orders, but before Titans with Charge orders.
An Advance will probably be the most common order you will choose, as it allows you to both move and fire quite effectively. If you are not sure exactly what you want to do in the turn, pick an Advance order.
Charge: The Titan moves before Titans with First Fire or Advance orders, and may move up to its Charge rate, turning up to 45° once during the move. Titans with Charge orders attack last in the combat phase. They suffer a -1 to hit penalty when firing.
Charge orders allow you to move fast, but the accuracy of your shooting will be reduced. Use them when you need a long move more than you need effective gunnery.
Damage Control: The Titan may not move or fire, but may add +1 to any Repair Rolls it makes that turn. Because the Titan is stationary, enemy Titans receive a +1 to hit modifier when shooting at it.
Damage Control orders help a Titan to repair downed Void Shields and damaged systems, but make it very vulnerable to enemy fire. Use them when your Titan is severely damaged, but safe from enemy fire.
Optional Rule
You may find that it helps the pace of the game if you limit the order phase to two minutes. This helps speed up the game (some players can take ages to make up their minds) and rewards the player who thinks quickly and clearly - a vital quality for any Princeps in charge of a Titan.
Example - Orders
At the start of the third turn of the game, the Death Bringer has managed to outflank the Eclipse. The Eclipse can only bring the weapons in its left arm to bear, while the Death Bringer can use all of its weapons. In the previous turn, the Death Bringer used this advantage to full effect, knocking down all of the Eclipse's Void Shields and damaging the weapons in its left arm. The Eclipse didn't even manage to score one hit...
Considering the situation, the player controlling the Eclipse decides to get under cover among the buildings as quickly as possible. He chooses Charge orders.
The Death Bringer, on the other hand, is quite happy with the situation, and chooses First Fire orders - giving it the chance to shoot the Eclipse as it runs for cover.
The Movement Phase
The movement phase is split into three segments:
- Charging. In the first segment, all Titans with Charge orders are moved. Each Titan has two speed ratings on its Data Card; the higher number is its charge distance in centimetres. Titans with Charge orders may make one turn of up to 45° at any point during the move. (Example: a Titan with a Charge Speed of 14 makes one 45° turn.)
- Advancing. In the second segment, all Titans with Advance orders are moved. The lower of the two numbers given on the data card is the Titan's advance distance in centimetres. A Titan with Advance orders may make up to four 45° turns during its move. The turns may be made at any time during the move, and more than one can be taken at the same time.
- First Fire. In the third segment, all Titans with First Fire orders may turn up to 45° but may not move.
Sequence of Movement
Within each segment, Titans from either side move alternately. The First Player chooses one of his Titans to move, then his opponent chooses one of his Titans to move, and so on. Once all the Titans that can move in a segment have done so, move onto the next segment.
Minimum Move
A Titan can be moved any distance up to the maximum for the orders it received that turn. For example, a Titan with Charge orders and a Speed of 10/20 could move any distance from 0 to 20cms in the Charge Segment of the Movement Phase. Players are never forced to move a Titan unless they want to.
Damage Control
Titans with Damage Control orders may neither move nor turn; they cannot do anything during the movement phase.
Changing Moves
Once a player has moved a Titan and removed his hand from the model, the move may not be changed. The Princeps is committed to the move, and must go through with it!
Move Direction
Titans must always move straight ahead, and can only change direction by making a turn. Titans with Advance orders can move in reverse (ie directly backwards), but may make only one turn of up to 45° during the move.
Obstacles
Titans may never move through a building or another Titan. This rule applies to the model of the Titan, not just its base.
Entering Close Combat
A Titan can enter close combat with another Titan by moving in such a way that their bases end up touching. Close Combat is a deadly affair in Adeptus Titanicus, so make sure you really want to do it before you take the risk.
A Titan may not move in the same turn as it has been engaged in close combat, but it may turn in place.
Leaving Close Combat
A Titan which has been engaged in close combat in a previous turn may attempt to move away, though it may be subject to a 'free attack'. This is explained under Close Combat - refer to these rules when you encounter your first close combat situation.
Example - Movement
Carrying on from the previous example, the Eclipse hurries for cover, moving its full charge distance of 16cms straight ahead. At the end of its move, the Eclipse turns 45° to the left, so that it can bring as many of its weapons as possible to bear on the Death Bringer. The Death Bringer can't move, but is allowed to turn in place. It turns its full 45°, tracking the Eclipse as it heads for cover.
The Repair Phase
If you are playing your first game, ignore this rules section until a Titan has been hit in combat.
During the game, Titans will take various forms of damage in the combat phase. The most common (and least damaging) is the loss of Void Shields, which can be knocked down by enemy fire. Far more dangerous is damage caused to the Titan's movement, fire and control systems once all its Void Shields have been knocked down.
Fortunately, Void Shields can be raised again once the energy they have absorbed has been drained off, and all Titans have built-in auto-repair units for repairing damaged systems. Sometimes, however, repeated or severe damage will be impossible to repair - systems can be destroyed, or the Titan itself may be completely disabled. This event is called Catastrophic Damage.
Conducting Repairs
In the repair phase both players roll to repair all damaged systems and downed Void Shields. When a system is not successfully repaired, there is a chance that it will suffer further damage - so players must make a malfunction roll for systems that have not been successfully repaired. These rolls are made in the following order:
- Repair Void Shields
- Repair Damaged Systems
- Malfunction Rolls
Void Shields
Roll a D6 for each downed Void Shield. Add +1 to the dice roll if the Titan has Damage Control orders. On a roll of 5 or more, the Void Shield becomes operational again. Move the Void Shield Wheel in its base to indicate that it is now working. Remember that a Titan may never have more Void Shields than the number printed on its Data Card - in other words, you can't repair Void Shields that don't exist!
Damaged Systems
A system is defined as one of the following: Void Shield Generator (VSG), Mind Impulse Units (MIUs) and the Titan's Reactor. All weapons and anything that is named on the Body Damage Table is a system, and a separate repair roll must be made for each damaged system during the repair phase.
Many combat results (see The Combat Phase) cause a system to be damaged, which is represented by placing a damage counter on the base of the Titan model.
Roll a D6 for each damaged system, adding +1 if the Titan has Damage Control orders. On a roll of 5 or more the system has been repaired, and the damage counter should be removed.
Malfunction Rolls
Whenever a system is not successfully repaired in a repair phase, there is a chance that it will malfunction. Roll a D6 for each damaged system that was not repaired in step 2. On a roll of 6, the system malfunctions and suffers Catastrophic Damage, the devastating effects of which are outlined on the Damage Effects Table in the Damage section.
Void Shields never malfunction, so you don't have to make malfunction rolls for them.
Turning Off the Ignition
At the end of the repair phase, after all malfunction rolls have been made, a player may "switch off" any of his Titans. A Titan which has been "switched off" may take no further part in the game, but does not have to make any more Cumulative Damage rolls, which can be important if it has a damaged reactor.
Example - Repair
The Death Bringer is undamaged, so it doesn't have to make any repair rolls.
The Eclipse, on the other hand, is in a bad way. All four of its Void Shields are down, and the weapons in its left arm have been damaged.
The Eclipse player rolls first to raise the Void Shields. He rolls four dice, which roll 2, 3, 3 and 5. The Eclipse does not have Damage Control orders, so these rolls are not modified. There is one roll of 5 or more, so one of the Eclipse's Void Shields comes back into operation. The player turns the Eclipse's Void Shield Wheel to show the number 1.
Next, the player rolls for the damaged weapons in the Eclipse's left arm. This time he rolls a 6 - the weapons are repaired! Breathing a sigh of relief, the player removes the damage counter from the Eclipse's base.
All damaged systems have been successfully repaired, so the Eclipse player does not need to make a malfunction roll.
The Combat Phase
The rules for combat may appear quite complicated at first glance, but don't be put off. The underlying principles are very simple, and the main bulk of these rules is taken up with explanation and diagrams.
Summary of Combat
In the combat phase, Titans may fire their weapons if they have a target, and engage in close combat if they are in base-to-base contact with an enemy.
Each Titan on the table is dealt with in turn. The order in which Titans fire is determined by two things: who is First Player for that turn, and what orders the Titan has for the turn. Remember that Titans with Damage Control orders may not fire.
If a Titan is engaged in close combat - that is, if it is in base-to-base combat with an enemy Titan - it always fights in the close combat segment, which takes place after all other firing. This is regardless of the orders it has for the turn.
A dice roll is made for each weapon that fires. This may be modified by the Titan's orders for the turn. In the case of multi-barrelled weapons, a dice is rolled for each barrel. Each weapon has a score to hit - modified according to the range - and each dice that rolls this number or more indicates a successful hit.
Each successful hit knocks down one of the target's Void Shields. If the target has no remaining Void Shields, it will take damage.
Sequence of Combat
The combat phase is split into four segments:
- First Fire. All Titans with First Fire orders may fire any or all of their weapons.
- Advance. All Titans with Advance orders may fire any or all of their weapons.
- Charge. All Titans with Charge orders may fire any or all of their weapons.
- Close Combat. All Titans engaged in close combat resolve their attacks.
Firing Order
Within each segment, Titans from either side fire alternately. The First Player chooses one of his Titans to fire, then his opponent chooses one of his Titans to fire, and so on. Remember that a Titan may only fire in the appropriate segment - it can't 'save' weapons to fire later in the combat phase! Once all Titans that can fire in a segment have done so, move onto the next segment.
Targeting
The first thing a player must do when one of his Titans fires is to choose targets. Each of the Titan's weapons may fire at a different target if desired, but multi-barrelled weapons must all fire at the same target. Weapons for which no target is selected do not fire - their shots cannot be saved for later!
Obviously, if a Titan can't bring any weapons to bear on a target, it can't fire at it! Targeting is affected by three things: weapon arcs, line of sight and range.
Weapon Arcs
A weapon must be physically able to point at a target in order to fire on it. The Weapon Arc template is used to determine whether a target is within a weapon's arc of fire.
Line of Sight
If there is an obstacle between the Titan and its target, it may not be able to fire. In order to fire on a target, a Titan must be able to draw a line of sight (LOS) to it. To find out if a Titan has a LOS, draw a straight line from the head of the attacking Titan to any part of the target's model (except its base). If the line crosses any terrain, the LOS may be blocked.
Terrain will block the LOS if:
- It is taller than both Titans;
- It is taller than one of the Titans, and the smaller Titan's base is touching the terrain.
The LOS may be blocked for some weapons but not for others. For example, if a Titan is firing round the corner of a building, it will not be able to use some of its weapons.
In the rulebook's diagram: Titan A does not have a LOS to Titan B as it is blocked by the building; does have a LOS to Titan D; does have a LOS to Titan C, but may not use the weapons mounted in its Right Arm as they are blocked by the building.
Range
Measure the range to the target using the range ruler, and then refer to the Weapons Table to find out if the target is at short or long range for the weapon being used. This will affect the number required for a successful hit.
Firing
Once a Titan has chosen its targets, it can fire. Dice are rolled for each weapon in turn, and one hit is scored for each dice that rolls the to hit number or more. The to hit number can be found by cross-referencing the weapon and the range (short or long) on the Weapons Table.
To Hit Modifiers
The following factors will modify the to hit roll:
| Factor | Modifier |
|---|---|
| Firer's Orders: First Fire | +1 |
| Firer's Orders: Charge | -1 |
| Target's Orders: Damage Control | +1 |
| Target is in cover | -1 |
All modifiers are cumulative; so if a target with Damage Control orders (+1 to hit) is in cover (-1 to hit), the net result is zero and the roll is unmodified. Similarly, a Titan with First Fire orders firing on an exposed target with Damage Control orders has two +1 modifiers, and adds +2 to all its to hit rolls.
The Rule of One and Six
A dice roll of 1 is always a miss, regardless of modifiers. A dice roll of 6 is always a hit, regardless of modifiers.
Cover
If the target is partially hidden by terrain from the attacker, then it is in cover. As stated above, Titans shooting at a target which is in cover suffer a to hit penalty of -1. There is, however, one exception to this rule:
A Titan which is touching a piece of terrain is said to be hull down. When a Titan is hull down, it receives the benefit of cover from the terrain, but its targets do not.
(Diagram: Titan hull down from C; in cover from B; not in cover from A; in cover from C.)
When two hull down Titans face each other across a piece of terrain, both receive the benefit of cover against the other's fire.
Multi-Barrelled Weapons
Some weapons have more than one barrel. These are indicated on the Titan Data Cards by a number (the number of barrels) in brackets after the weapon's name. So, for example, the Multi-launcher (2) on the Eclipse's Data Card is a two-barrelled multi-launcher.
When a multi-barrelled weapon is fired, a dice is rolled for each barrel. The Eclipse player would roll two dice for the twin-barrelled multi-launcher, for instance. If it had been a multi-launcher (4) he would roll four dice every time it fired, and so on.
Although a multi-barrelled weapon rolls more than one to hit dice, it is only a single weapon. This means that it can only fire at one target per turn. You can't fire one barrel at one target and the other at another target - you have to pick one target and give it the whole lot!
Burst Circles
Some weapons have a burst circle. This means that the shot affects a wider area than just the point of impact. Weapons with a burst circle are marked (B) on the Weapons Table. When a Titan fires a weapon with a burst circle, the controlling player can place the Burst Circle template wherever he likes on the table - subject to the normal targeting rules, of course - and all Titans whose bases are within the burst circle can be attacked. Make separate to hit rolls for each target within the burst circle.
Following Fire
Some weapons have following fire. This means that the weapon fires a hail of shots, rather than just one. Weapons with following fire are marked (F) on the Weapons Table. If a following-fire weapon scores a hit, the attacking player can roll to hit again - and again, and again, until a to hit roll is failed. This represents the enemy being caught in a swathe of fire.
Plasma Weapons
Plasma Guns and Plasma Cannon each have two entries on the Weapons Table, one for sustained fire and one for maximal fire. Before the weapon is fired, the controlling player must declare which fire mode is being used. If a Titan is armed with more than one plasma weapon, they must all fire on the same setting.
Example - Combat 'To Hit'
The Death Bringer has First Fire orders, while the Eclipse has Charge orders. Therefore, the Death Bringer fires in the first segment of the combat phase, while the Eclipse must wait until the third segment.
The Eclipse is within the weapon arcs of all three of the Death Bringer's weapons, and there is a clear line of sight. The range is measured at 43 cms - well within the 72cm range for both Macro-Cannon and Auto-Cannon. The player controlling the Death Bringer does not bother placing the Burst Circle on the table, as there is only one target that can be hit.
The basic to hit roll is 3+ for the Macro-Cannon and 6+ for the Auto-Cannon. The Death Bringer's First Fire orders give it +1 to hit, so it needs 2 or more to hit with the Macro-Cannon and 5 or more for the Auto-Cannon, following the Rule of One and Six.
The Death Bringer's player rolls three dice - one for each weapon, the first being for the Macro-Cannon - scoring 2, 4, and 6. Two hits. The first hit knocks down the Eclipse's single remaining Void Shield, and the second hit will cause damage.
Damage
If a Titan has any Void Shields left in operation, each successful hit against it will knock down one Void Shield. Every time a Void Shield is knocked down, move the Void Shield Wheel in the model's base down one point.
If a Titan has no Void Shields left in operation, then hits scored on it will cause real damage.
Damage Results
Work out the damage caused by each hit as soon as the attacking Titan has fired all its weapons for the turn. The attacking player may decide in what order the successful hits took place.
For example, if your Titan hits its target with three Multi-Launchers and a Defence Laser, you could decide that the Multi-Launchers hit first followed by the Defence Laser. In general, save the weapons with the lowest critical hit rolls until last. By that time, the target's Void Shields might all be knocked down, leaving him vulnerable to your most powerful weapons.
Remember that combat (apart from Close Combat) is not simultaneous. Damage takes effect as soon as it has been inflicted. In our example, the Death Bringer has First Fire orders while the Eclipse had Charge orders. This means that the Death Bringer fires first. If the Death Bringer were to disable one of the Eclipse's weapon systems, then the Eclipse would be unable to use that weapon to fire back at the Death Bringer.
Real Damage
Each successful hit scored while all a Titan's Void Shields are down gets through to the Titan itself, causing real damage. For each hit which causes real damage, follow this procedure:
- Roll for Level of Damage. Consult the Weapons Table and find the Critical Damage Roll for the weapon which scored the hit. Roll a D6; if the score is equal to the weapon's Critical Damage Roll or more, the hit has caused critical damage. If not, the hit has caused superficial damage. A roll of 1 always causes superficial damage, and a roll of 6 always causes critical damage.
- Roll for Hit Location. To find out where the hit landed, roll a D6 and refer to the Hit Location Table. If a target is hull-down in cover, any hits against locations that are completely behind the cover are treated as misses - it is assumed that the cover stopped them.
- Determine Result. Refer to the Damage Table, and cross-reference the location with the level of damage to find out what damage has been inflicted on the Titan.
- Determine Damage Effects. Finally, refer to the Damage Effects Table to find out what effect the damage has on play.
Damage Counters
The damage counters provided with the game are used to record damage to a Titan's systems, weapons, and so on. Simply place a damage counter on the base of the Titan to show how it has been damaged.
Cumulative Damage
A Titan can never have two damage counters of exactly the same type (ie two Damaged Reactor counters). Instead, if a damaged location is hit again, roll a D6.
On a roll of 4-6, the location suffers Catastrophic Damage. This is very bad news.
On a roll of 1-3, the extra damage has no effect - apart from giving your opponent a few anxious moments.
Example - Damage
The player controlling the Death Bringer rolls a D6 to see if the hit has caused superficial or critical damage. A Macro-cannon scores critical damage if a 3 or more is rolled, and the Death Bringer player duly scores a 3!
Next, the hit location must be rolled. This time the D6 comes up with a 2, which results in the weapon on the right arm (a Las-Cutter) being destroyed. The plastic Las-cutter is removed from the model to show that it has been destroyed.
Example - Combat Continued
At last, the Eclipse can return fire. Its right-arm Las-Cutter has been blown off, leaving it with its carapace-mounted Multi-launcher, and the Defence Laser in its left arm.
The Multi-launcher is at long range, which means it needs 6 to hit. The dice roll has a -1 penalty for the Eclipse's charge orders, but a roll of 6 is always a hit. The player decides to roll for the Multi-launcher first. A roll of 3 means that it misses. Finally, the player rolls for the Eclipse's Defence Laser. The base to hit roll is 3, but the -1 penalty takes this to 4. The dice is rolled - and scores 5! This is a hit, and knocks down one of the Death Bringer's Void Shields.
Combat Tables
The tables shown here provide all the information you need for resolving ranged combat. The Weapons Table shows the range bands and corresponding hit rolls for all weapons in the game, while the Hit Location and Damage tables are used to determine the results of hits which are not stopped by Void Shields. For ease of use during play, however, these tables have been combined into a flow chart on a single reference sheet at the back of this book.
The Weapons Table
The Weapons Table contains the following information about each weapon:
Range: The short and long range bands for the weapon.
To Hit Roll: This is the base number the player needs to equal or beat on a D6 to score a hit. If the hit number is followed by (F) the weapon has Following Fire, and if it is followed by (B) the weapon has a Burst Circle.
Critical Hit Roll: This is the number that the player must equal or beat on a D6 to score a critical hit.
| Weapon | Range Short | Range Long | To Hit Short | To Hit Long | Critical Hit Roll |
|---|---|---|---|---|---|
| Heavy Weapons | |||||
| Auto-Cannon | 36cm | 72cm | 5+ | 6+ | 6+ |
| Las-Cannon | 30cm | 60cm | 4+ | 6+ | 4+ |
| Multi-Launcher | 36cm | 72cm | 4+ (B) | 6+ (B) | 5+ |
Hit Location Table
| Dice Roll | Location |
|---|---|
| 1 | Left arm |
| 2 | Right arm |
| 3 | Carapace (Roll again: 1-3 left, 4-6 right) |
| 4-5 | Body |
| 6 | Legs |
Damage Table
| Location Hit | Superficial Damage | Critical Damage |
|---|---|---|
| Weapons | Damaged | Destroyed |
| Body | Note 1 | Roll on the Body Damage Table |
| Legs | Note 2 | Damaged |
Note 1: Roll on the Body Damage Table. If the location hit is already damaged, make a Cumulative Damage roll. If it is not, the hit has no effect.
Note 2: If the Legs are already damaged, make a Cumulative Damage roll. If not, the hit has no effect.
Body Damage Table
| Dice Roll | Location Hit |
|---|---|
| 1-3 | Void Shield Generators Destroyed |
| 4-5 | Mind Impulse Units Damaged |
| 6 | Reactor Damaged |
Damage Effects
Mind Impulse Units
Damaged. The Titan is given orders as normal, but may go out of control. Until the Mind Impulse Units are repaired, roll a dice at the start of each movement phase and each combat phase to see what the Titan will do:
| Dice Roll | Movement Phase | Combat Phase |
|---|---|---|
| 1-3 | Move normally | Fire normally |
| 4-5 | May not move | May not fire |
| 6 | Random move | Random fire |
Random Move: The opposing player may move the Titan, within the restrictions of the orders the Titan has for the turn.
Random Fire: The Titan fires all of its weapons at the closest target available - friend or foe! - within the restrictions of the orders the Titan has for the turn and the rules for LOS. If there is a choice of targets, the opposing player can choose which weapons are used and what they are fired at. The Titan will not attack itself!
Repair Rolls. The player may attempt to repair damaged Mind Impulse Units in each Repair Phase.
Catastrophic Damage. The Mind Impulse system of the Titan goes haywire, overwhelming the crew with a host of random terrifying images. The luckiest members of the crew are killed instantly by psychic shock, the rest are reduced to gibbering lunatics. The Titan grinds to a halt and is considered to be destroyed.
Void Shield Generators
Damaged. Void Shield Generators cannot be damaged, only destroyed.
Destroyed. The Titan's Void Shield Generators have been destroyed. All Void Shields are knocked down, and may not be repaired. The Titan is without Void Shields for the rest of the game. Count any further Void Shield Generators Destroyed results as Reactor hits instead.
Repair Rolls. You may not make repair rolls for destroyed Void Shield Generators.
Catastrophic Damage. Destroyed Void Shields cannot suffer Catastrophic Damage.
Reactor
Damaged. Power output from the reactor is reduced to a mere trickle. All available power is being channelled into the auto-repair systems. The Titan may not be given any orders until the reactor is repaired, and therefore cannot move or fire. Even Damage Control orders are not allowed until the reactor is repaired, since there is not enough power for the additional damage control systems.
Repair Rolls. You may attempt to repair a damaged reactor during each repair phase. Always roll to repair the reactor before you attempt to repair anything else - if you fail to repair the reactor, you may not make any other repair rolls. Since you must roll to repair Void Shields before any other system, this means that the Void Shields may not be repaired until the turn after the reactor has been repaired.
Catastrophic Damage. The reactor vessel is fractured, and a violent meltdown occurs. The Titan is vaporized, and all units within 8cm must roll for damage as if hit by a Plasma Cannon firing on maximal.
Legs
Damaged. The Titan may no longer be given Charge orders. If it is given Advance orders, it may only make one 45° turn during the course of the move. It may still make a 45° turn if it is given First Fire orders.
Repair Rolls. Damaged legs may not be repaired.
Catastrophic Damage. One leg gives way and the Titan crashes to the ground. Unable to move, and with most of the crew either dead, seriously injured or unconscious, the Titan is considered to be destroyed.
Weapon Location
Damaged. The weapon location (left arm, right arm or carapace) is damaged, and all weapons mounted on that location are unusable until it is repaired.
Destroyed. All the weapons in the location hit are destroyed. Remove them from the model. Any further hits to this location are applied to the Body instead.
Repair Rolls. You may attempt to repair a damaged weapon location during each repair phase. Only one repair roll is necessary for the entire location and all weapons mounted on it. Destroyed weapon locations may not be repaired, and cannot suffer Catastrophic Damage.
Catastrophic Damage. All weapons in the location are destroyed; see the Destroyed result above.
Close Combat
Close combat is swift and brutal. It takes place at very short range - the Titans actually get inside each others' Void Shields, so every successful hit gets through to the Titan's adamantium skin. There is a whole range of weapons developed specifically for close combat, and designed to cause maximum damage at close range.
Entering Close Combat
A Titan is considered to be in close combat when it ends the movement phase in base-to-base contact with an enemy Titan. A Titan must stop as soon as it is in base-to-base contact with an enemy Titan; if it has not yet moved, it loses its move for that turn.
(Diagram: Titan B moves as shown, and must stop as soon as it comes into contact with Titan A. Titan A loses its move and may only turn in place, unless it has moved already.)
Sequence of Close Combat
Close combat takes place in the Close Combat segment of the combat phase, after all firing has been dealt with. All close combat attacks are assumed to happen simultaneously. Work out the damage for each of the Titans involved, and then apply damage effects to both of them.
Close Combat Attacks
A Titan which ends the movement phase in base-to-base contact with an enemy Titan may use the attacks listed on the Close Combat Weapons Table. In the first turn of close combat, it may also use its normal armament of ranged weapons. In the second and subsequent turns of close combat, only close combat weapons or improvised attacks may be used.
Improvised Attacks
An improvised attack may be used by any Titan involved in close combat. It represents the Titan punching, kicking, and even head-butting its opponent. An improvised close combat attack may only be made against an opponent that falls in the arc of fire for Carapace-mounted weapons. Only one improvised attack may be made per turn.
Target Priority
A Titan in close combat must concentrate all available attacks on its close combat opponent - it can't fire at other targets while engaged in close combat. If a Titan is in base-to-base contact with more than one enemy Titan, then it may spread its attacks between its close combat opponents as the player wishes.
Weapon Arcs
The normal weapon arc rules apply in close combat - you can't use a weapon which can't be brought to bear on the target.
Void Shields
When Titans are engaged in close combat, they move inside each other's Void Shields. The Void Shields no longer provide protection against close combat attacks, and all successful hits will cause real damage. Void Shields will continue to protect the Titans normally against incoming fire.
Ranged Weapons
Ranged weapons - the normal armament of a Titan - may only be fired in the first turn of close combat; this simulates the Titans firing as they close.
The players on either side may choose when to fire. Weapons may be fired in the normal phase, according to the orders the Titan has for the turn, or they may be fired in the close combat phase, after all other firing has been finished.
If weapons are fired in the normal phase, the target gains normal protection from its Void Shields - the Titans are not close enough together to discount them.
If weapons are fired in the close combat phase, the target gains no protection from its Void Shields - the firer has moved within them, 'up close and personal'.
Burst Circles
Any weapons with a burst circle (ie those marked (B) on the Weapons Chart) will affect the attacker as well as the target if they are used in close combat, but with a -1 to hit modifier.
Close Combat Weapons
Close combat weapons must roll to hit as normal.
Each successful hit with a close combat weapon causes one or more critical hits. Roll the location for each critical hit separately, and work out damage as normal.
| Close Combat Weapon | To Hit Roll | Damage |
|---|---|---|
| Power Fist | 4+ | 1-3 Critical Hits (1) |
| Chain Fist | 3+ | 1-2 Critical Hits (2) |
| Las-cutter | 2+ | 1 Critical Hit |
| Improvised | 5+ | 1 Critical Hit |
(1) Roll a D6: 1-2 = 1 Critical Hit, 3-4 = 2 Critical Hits, 5-6 = 3 Critical Hits. (2) Roll a D6: 1-3 = 1 Critical Hit, 4-6 = 2 Critical Hits.
To Hit Modifiers
Only one modifier to hit applies to close combat weapons: +1 when attacking a Titan which has Damage Control orders.
Leaving Close Combat
As stated above, a Titan must stop when it comes into base-to-base contact with an enemy Titan. However, it may leave close combat in the next movement phase - after one turn of close combat has been fought out.
When a Titan leaves close combat, its opponent is allowed a 'free attack' with any close combat weapons it has. The free attack is resolved normally, but takes place in the movement phase, outside the normal turn sequence. A Titan which makes a free attack in the movement phase may still attack normally in the combat phase.
A Titan only gains a free attack when its close combat opponent moves away from base-to-base contact - Titans in close combat may turn up to 45° in place without allowing their opponent a free attack.
Example - Close Combat
A Night Gaunt Titan has just pounced on an unwary Eclipse Titan. Both Titans are undamaged. The Night Gaunt has Charge orders and so moves before the Eclipse which has First Fire orders. It uses its move to get round the flank of the Eclipse.
| Eclipse | Night Gaunt | |
|---|---|---|
| Class | Warlord | Warlord |
| Variant | Eclipse | Night Gaunt |
| Left Carapace | Las-Cannon (3) | None |
| Right Carapace | None | None |
| Left Arm | Multi-Launcher (2) | Power Fist |
| Right Arm | Las-Cutter | Las-Cannon (2) |
| VSG | 3 | 2 |
| Speed | 8/16 | 10/20 |
| Points |
In its move, the Eclipse desperately turns in place. Even after its turn, it is only able to bring the Multi-Launchers in its left arm to bear. The player controlling the Eclipse decides to fire his Multi-Launchers in the Close Combat segment, when it will bypass the Night Gaunt's shields, even though this means the Eclipse may be affected by its own attack as the Multi-Launchers have a burst circle.
The Eclipse's attacks are worked out first. The player controlling the Eclipse rolls 2D6, needing a 4 or more to score a hit. The dice come up with a 2 and a 5, for 1 hit. As this is a Close Combat, the Night Gaunt's Void Shields are ignored, so the player controlling the Eclipse rolls for the level of damage and is rewarded with a 6 - critical damage. The location rolled is the left arm holding the Night Gaunt's Power Fist, which is duly removed. Note that although the Power Fist has been destroyed, the Night Gaunt will still be allowed to attack with it, as attacks in the Close Combat segment are assumed to happen simultaneously.
The Eclipse must now see if the Multi-Launchers affect it as well as the Night Gaunt. 2D6 are rolled, needing a 5 or more to hit due to the -1 modifier, and come up with a 1 and a 3 - two misses!
The Night Gaunt now gets to attack back. The twin Las-Cannon both miss, but the Power Fist hits with a roll of 6. A D6 is rolled to see how many critical hits the Power Fist inflicts, and comes up with another 6 - that's 3 critical hits! The first hit location roll is (yet another!!) 6, resulting in the Eclipse's legs being damaged. The second roll comes up with a 1, and results in the Eclipse's Carapace-mounted weapons being destroyed. The third roll comes up with a 5, the body, and so a roll must be made on the Body Damage Table. The roll is a 1, and results in the Eclipse's Void Shields being destroyed. Crippled, the Eclipse will be easy meat for an attacking Titan.
Firing Into Close Combat
Titans may fire on enemy Titans which are engaged in close combat, but a number of special rules apply:
- To hit modifiers arising from the target's orders are ignored.
- Titans in close combat have effectively merged their Void Shields together. Therefore, hits will knock down one Void Shield on each of the Titans involved. If only one Titan has operating Shields, they will protect all the Titans involved in the Close Combat, and hits will only start causing real damage when all of the Titans involved have lost all of their Void Shields.
- When a hit causes real damage, the firer must roll to see which Titan is hit. The firer rolls a D6 - on a roll of 1-4 the Titan nearest to the firer is hit, and on a roll of 5 or 6 the Titan furthest from the firer is hit. If both Titans are the same distance from the firer, they have an equal chance of being hit: 1-3 friend, 4-6 enemy. If there are more than two Titans involved, roll one dice for each one, rerolling in the event of a tie; the Titan with the highest roll takes the damage.
- Weapons with a burst circle will always affect all the Titans involved in a close combat.
The End Phase
The most important thing that happens in the end phase is that the First Player hands the First Player Marker to his opponent, who becomes the First Player for the next turn.
Both players remove the turn's Order counters from the table, ready for next turn's order phase.
In addition, the end phase may be used for any book-keeping and clearing up that needs doing.
Ending the Game
The game ends when:
A. One player has no operational Titans left on the table. A Titan is operational as long as it has not suffered Catastrophic Damage to its Mind Impulse Units, Legs or Reactor. When only one player has operational Titans left on the table, he has won, and the game is over. Players may move their Titans off the table, but a Titan which has left the table may not return to play later on.
B. One player concedes defeat. A player may decide that he can't possibly win at any time during the game, and concede the game to his opponent.
C. One player achieves his Victory Conditions. Some scenarios have Victory Conditions other than simply wiping the other side out. For example, you may need to get your Titans safely across the table through an enemy ambush, or prevent the enemy making it to a point which you are defending. If you are playing a scenario which has a particular objective, then the game ends when one player has achieved his objective. The notes on the scenario will tell you how to handle this.
Standard Game Scenarios
What Is a Scenario?
In games like chess, the playing pieces are always set up in the same way, and what a player must do to win is the same every time. This isn't the case with Adeptus Titanicus, just as it isn't the case in combat in the real world. Instead, the forces a player will have at his command and the objective he must complete to win the game are decided by the scenario the players have chosen to play.
For your first game you will be playing Scenario 1 - The Duel. Both players should roll a dice, and the player with the highest score may decide to be the Rebel or Imperial Player. After you've played The Duel a couple of times to get used to the rules, feel free to choose any of the other scenarios.
This section contains 5 scenarios for use with Adeptus Titanicus. A scenario is basically a parcel of information, telling you everything you need to know in order to play a game. Each of the standard game scenarios gives you the following information:
- Imperial Player: The Titans under the command of the Imperial Player.
- Rebel Player: The Titans under the command of the Rebel Player.
- Special Rules: Sometimes a scenario will have special rules that apply throughout the game.
- Victory Conditions: Each scenario has its own Victory Conditions, telling the players what they must do to win the game.
- Free Choice Method: This is an option for experienced gamers. Instead of using the Titans listed in the scenario, the players can choose to design their own force. They can do this by buying Titans of the Battle Ratings given on their Data Cards, or by designing their own Titans using the advanced rules. If you decide to use this option, first read the rules for going Over The Top.
The Standard Scenarios
1. The Duel
A straight fight between two well-matched opponents.
Imperial Player: 1 Eclipse Battle Titan (Battle Rating: 630).
Rebel Player: 1 Death Bringer (Battle Rating: 630) Battle Titan.
Special Rules: None.
Victory Conditions: The first player to destroy or disable the opponent's Titan wins the game. A Titan is considered to be destroyed or disabled when it has suffered catastrophic damage to the Legs, Mind Impulse Units or Reactor.
Free Choice Method: The Imperial Player may choose any one Titan Data Card, or field a Titan of his own design. The Rebel Player may then choose or design any one Titan whose Battle Rating is not more than 50 points greater than the Battle Rating of the Imperial player's Titan. The Rebel Player is not allowed to go 'over the top' in this scenario.
2. Engage and Destroy
This is a larger version of scenario 1, which can be expanded to include as many Titans on each side as the players have models!
Imperial Player: 1 Death Bringer (Battle Rating: 840), 1 Death Bringer (Battle Rating: 930).
Rebel Player: 1 Nemesis (Battle Rating: 1140), 1 Eclipse (Battle Rating: 630).
Special Rules: None.
Victory Conditions: The first player to destroy or disable the entire opposing force wins the game.
Free Choice Method 1: Each player may spend up to 2000 points on a force of his own choice or design.
Free Choice Method 2: The players may agree to set the points value at any total they wish, using as many Titans as they have available to fight a huge apocalyptic battle!
3. Blitzkrieg
The Imperial forces launch a lightning attack on an overstretched part of the Rebel lines.
Imperial Player: 1 Death Bringer (Battle Rating: 630), 1 Eclipse (Battle Rating: 720), 1 Night Gaunt (Battle Rating: 360).
Rebel Player: 2 Eclipse Titans (Battle Rating: 360 each).
Special Rules: The Imperial Player is always First Player on turn 1. The Rebel Player may set up his Titans within 30 cms of his edge of the table.
The Imperial Night Gaunt class Titan is very manoeuvrable. If it has Charge orders it may make two 45° turns; both turns may be made together if desired.
Victory Conditions: The Imperial Player receives a number of Victory Points equal to the Battle Rating of any Rebel Titans that are destroyed or disabled, plus the Battle Rating of any Imperial Titans which make it across the table and off over the Rebel player's table edge. The Rebel Player receives a number of Victory Points equal to the Battle Rating of any of the Imperial Player's Titans that are destroyed or disabled, plus a bonus of 800 points. The player with the highest Victory Points total wins the game.
Free Choice Method 1: The Imperial Player may spend up to 1800 points, while the Rebel Player may spend up to 900 points.
Free Choice Method 2: The Imperial player may spend any number of points on Titans, provided that both players agree on the amount. The Rebel player may spend half as many points as the Imperial player.
4. The Cargo
An Imperial Titan carrying a vital cargo attempts to break through the Rebel line.
Imperial Player: 1 Nemesis (Battle Rating: 1440).
Rebel Player: 1 Eclipse (Battle Rating: 630), 2 Night Gaunts (Battle Rating: 300 each).
Special Rules: The Rebel player must set up first, within 30 cms of his table edge. The Imperial player is the First Player on turn 1. The number of weapons on the Nemesis Titan makes it cumbersome and unmanoeuvrable. It may only make two 45° turns if it has Advance orders, and may not turn at all if it moves in reverse. It may still make one 45° turn if it has Charge orders, but the turn must be made at the end of the move.
Victory Conditions: The Imperial Titan must make it across the table, leaving at any point on the Rebel Player's table edge.
Free Choice Method: The Imperial player may choose any one Titan. The Rebel Player may spend a number of points up to 85% of Imperial Titan's value.
5. The Trap
A group of Imperial Titans falls into a deadly ambush.
Imperial Player: 1 Nemesis (Battle Rating: 1440), 1 Death Bringer (Battle Rating: 840).
Rebel Player: 1 Eclipse (Battle Rating: 720), 2 Night Gaunts (Battle Rating: 300 each).
Special Rules: The Rebel player sets up all the scenery. He nominates a point on the table, and the Imperial player must set up all of his Titans within 12cms of that point. The Rebel player then sets up anywhere on the table, but at least 36cms away from any of the Imperial player's Titans. The Rebel Player is always the First Player on turn 1.
The Rebel Night Gaunts are very manoeuvrable. If they have Charge orders they may make two 45° turns; both turns may be made together if desired.
Victory Conditions: Both players receive a number of Victory Points equal to the Battle Rating of any enemy Titans that are destroyed or disabled. At the end of the game, the player with the highest Victory Points total is the winner.
Free Choice Method 1: The Imperial player may spend up to 2000 points. The Rebel player may spend up to 1300 points.
Free Choice Method 2: The players may set the points value of the Imperial force at any level they wish. The Rebel player may spend 2/3 as many points as the Imperial player.
Buying Your Force
Each of the scenarios offers the players the option of building their own forces; each player has a number of points to spend, and each Titan Data Card has the Battle Rating (in points) of that class of Titan. Advanced players may design their own Titans, using the rules in Designing Titans; the rules tell you how to calculate the Battle Rating of a self-designed Titan.
Over the Top
Sometimes, you will want to spend a few more points than the scenario will allow for your force. You can do this, but it carries a risk.
If you want to overspend, do so. You may never overspend by more than 70 points. Then, when all the scenery for the scenario has been set up, you must declare how many extra points you have spent. Roll a dice and refer to the Over The Top table. If the dice roll is in the range listed you must lose one Titan from your force. You choose which Titan you will lose.
The Over the Top Table
| Extra Points Spent | 1-20 | 21-40 | 41-50 | 51-60 | 61-70 |
|---|---|---|---|---|---|
| Dice Roll To Lose a Titan | 6+ | 5+ | 4+ | 3+ | 2+ |
For example, if you have overspent by 55 points, you will lose a Titan if you roll 3 or more; if you roll 1 or 2, you've got away with it! A roll of 1 always means you keep all your Titans, and a roll of 6 always means that you lose one.
The Advanced Game
This section of advanced rules allows you to expand the basic game. You can design your own Titans, use a variety of new rules and new equipment, create an almost endless supply of scenarios to play, and even create a campaign, taking your Titan force from being green rookies to battle-hardened aces as you play them through a succession of battles.
Before you start using the advanced rules, we recommend that you play a few games using only the basic rules, in order to get used to the game system. You may find it easier to introduce the advanced rules into your games a section at a time.
Optional Rules
Once you've mastered the basic rules, we recommend that you use the following optional rules.
Maximum to Hit
The Rule of One and Six states that a roll of 1 is always a miss and a roll of 6 is always a hit, regardless of modifiers. After you've played a few games, you may become dissatisfied with that rule, in which case you can use this more advanced mechanism:
No matter what happens, a roll of 1 on the dice is always a miss. That doesn't change from the basic rules.
If you require a score of 7 or more to hit, roll to hit as normal. If you score a 6, you have not necessarily hit. Roll again (this second roll is never modified by anything), and consult the following chart:
| Score Needed To Hit | 7 | 8 | 9+ |
|---|---|---|---|
| Roll required | 4+ | 5+ | 6 |
For example, a Las-Cannon is being fired at long range by a Titan with Charge orders, against a target that is in cover. Normally a 6+ would be required to hit, but because of the -2 modifier (-1 for Charge orders and -1 for cover) the attacker must roll an 8. Therefore, the player must roll a 6 followed by a 5 or 6 in order to hit.
Overloading Void Shields
Titans with three or more Void Shields are fitted with a device which allows the Princeps to bypass the Void Shields' overload cut-out mechanism as a last-ditch measure to stop a hit. Instead of going down when overloaded, the Void Shields stay up, taking the strain of the excess energy. Sometimes the Void Shields survive, and sometimes the Void Shield Generators are reduced to molten slag and the Titan is without Void Shields for the rest of the battle. Overloading Void Shields is a tactic of desperation.
A player must declare that he is attempting to overload his Titan's Void Shields as soon as the hits for that turn have been determined, and before damage is worked out. He then rolls a D6 for each hit in turn. On a roll of 1-4, the hit is stopped and the Void Shields are OK. On a roll of 5 or 6, the Void Shield Generators have burnt out - all the Titan's Void Shields are destroyed (just as if they had been hit on the Body Damage Table), and the hit goes in against the unshielded Titan.
Note that a player does not have to overload Void Shields, but may do so if he wishes. A player may try to stop any number of hits in the same turn this way, but as soon as he rolls a 5 or 6 the Void Shields are gone for good and all further hits strike the unshielded Titan.
Merging Shields
Just as Titans that are in close combat 'merge' their shields, friendly Titans can do the same thing as a defensive tactic to protect a damaged Titan. The Titans must be in base-to-base contact, and one must have First Fire orders. If both of these conditions are met, the Titans may merge their shields as if they were in close combat.
Snap Fire
Titans with First Fire orders may Snap Fire at any point in the Movement Phase. A player may interrupt an opponent's move by simply yelling out "SNAP FIRE!" The opponent must stop moving their Titan at this point, completing the move (if possible) once the attack has been resolved.
When a Titan makes a Snap Fire attack, all weapons must be fired at one target and the +1 to hit modifier for the attacker's First Fire orders is ignored. A Titan that has Snap Fired may only use Close Combat Weapons (or make improvised attacks) in the Combat Phase.
Example - Snap Fire
Carrying on our previous set of examples, we return to the game in the turn following that when the Eclipse was damaged. Both Titans are using the same orders as they used in the previous turn. The Eclipse turns 45° to the right in preparation for moving under cover, at which point the player controlling the Death Bringer yells out "SNAP FIRE!"
The Death Bringer fires all three weapons, this time needing a 3 and two 5's to hit as the +1 modifier for his First Fire orders is ignored. He rolls 1, 2, 4 and so only hits with the Macro-Cannon. The hit will damage the Eclipse, which has not yet had a chance to repair its Void Shields, and results in the Eclipse's reactor being damaged. The Eclipse is not allowed to finish its move, as a Titan with a damaged reactor may not move or fire, and is left stranded in the open. Things are starting to look very bad indeed for the Imperial Player...
Designing Titans
Although we have provided a selection of Titans on the Titan Data Cards included with the set, sooner or later you will want to start designing your own Titans. This is quite straightforward, and can be a lot of fun. This is your chance to find out if you can come up with a more devastating variant than the Tech-Priests of the Divisio Investigatus!
Blank Titan Data Sheets
At the end of this rulebook you will find a page of blank Data Sheets, which you may use for Titans you design yourself. You can photocopy these for your own use if you wish. You'll find it easier to work out the details of the Titan on a piece of scrap paper first, and then transfer the information to a Data Sheet.
Battle Rating
As we've already seen in the basic game, each Titan has a Battle Rating. The higher the Battle Rating, the more powerful the Titan is. These rules are mainly concerned with working out the Battle Rating of any Titan you might design - we leave the actual designing up to you!
Weapons
Each Titan has four weapon mounts: Right Arm, Left Arm, Right Carapace and Left Carapace.
Each mount can hold one of the following:
- One Heavy Weapon with up to four barrels; or
- One Very Heavy Weapon barrel; or
- One Close Combat Weapon.
Close Combat weapons may only be mounted in the arms.
Points costs for weapons are shown on the following table. Note that the points cost is for one barrel; so, for example, a Multi-launcher (4) costs 15 x 4 = 60 points.
| Weapon | Points Cost |
|---|---|
| Heavy Weapons | |
| Auto-Cannon | 5 |
| Las-Cannon | 15 |
| Multi-Launcher | 15 |
| Multi-Melta | 5 |
| Plasma Gun | 10 |
| Very Heavy Weapons | |
| Defence Laser | 30 |
| Macro-Cannon | 25 |
| Plasma Cannon | 20 |
| Close Combat Weapons |
Void Shields
Void Shields cost 10 points each. A Titan may have up to six Void Shields.
Points Multiplier
Once you have equipped your Titan with weapons and Void Shields, add up the total points cost and multiply it by the Points Multiplier for the Titan.
The points multiplier for all Battle Titans is 6, but this may be increased if you use any Devices.
Speed
The move distance for your Titan will depend on how laden down with weapons it is. The more heavily armed your Titan is, the slower it will move.
To find out the move rates for your Titan, add up the number of weapon barrels it is carrying. Remember to add up barrels, not just the number of weapons. Each Very Heavy Weapon or Close Combat Weapon counts as 3 barrels. Then refer to the Movement Rates Table below.
| Number of Barrels | Advance Move Rate | Charge Move Rate |
|---|---|---|
| 1-4 | 10cms * | 20cms * |
| 5-8 | 8cms | 16cms |
| 9-12 | 7cms | 14cms |
| 13-16 | 6cms ** | 12cms ** |
* Titans with less than 5 barrels are highly manoeuvrable. If they have Charge orders, they may make two 45° turns; both turns may be made together if desired.
** Titans with more than 12 barrels have only limited manoeuvrability. When they have Advance orders, they may make no more than two 45° turns; both turns may be made together if desired. If they have Charge orders, they may still make one 45° turn, but it may only be made at the end of the move.
Advanced Equipment
Support Missiles
Support missiles are one-shot weapons, and may only be mounted on the carapace of a Titan. Each support missile takes up one carapace mount. They are usually chosen and fitted just before a battle, depending on the situation that is likely to be encountered.
Support missiles can be used in any of the Basic Game scenarios, when the free choice method of force selection is being used. Once the scenario has been chosen, each player may decide to use support missiles. Players who decide to use support missiles receive a number of 'bonus' points, equal to 10% of their side's total for the scenario. These additional points may only be spent on support missiles.
Support missiles may only be mounted on the carapace of a Titan. If a player wishes to mount a support missile on the carapace of a Titan which already has two carapace-mounted weapons, then one of the weapons must be removed. A player who does this receives no points 'rebate' for the lost weapon.
Once a support missile has been fired, it cannot be used again, and is removed from the model. If a Titan is destroyed or disabled before it fires its support missile, the missile is lost.
Deviation
Even if a support missile misses its target, it can be important to know where it has landed. In such cases, the player rolls for deviation. Place the Deviation Template over the original target, with the '1' arrow pointing towards the Titan that fired the missile. Roll a D6 to find out the direction of deviation. Then roll 2D6 to determine the distance in cms.
Example - Deviation. The Death Bringer has just fired a Vortex Missile at the Eclipse and missed. The Deviation template is held over the Eclipse's head, with the '1' pointing back towards the Death Bringer. 1D6 is rolled for the direction of deviation, coming up with a '3', and then 2D6 are rolled for distance, coming up with a total of 7. The Vortex template is positioned 7 cms away from the Eclipse in direction '3'.
Missile Types
There are seven main types of support missile: Blind, Haywire, Mine Dispenser, Plasma, Stasis, Vortex, Warp.
Blind Missile. When a Blind Missile explodes, it scatters Blind Grenades over a wide area. Blind is a sophisticated form of smokescreen, combining dense smoke with broad-spectrum electromagnetic interference. None of a Titan's detection and targeting systems will operate through a cloud of Blind.
If a Blind Missile misses, roll for deviation normally. Once the point of impact has been determined, use the range ruler to draw a straight line from this point back to the firing Titan. This is the missile's flight path. The player who fired the missile may now place 3 Blind markers anywhere along the flight path, or at any point within 6 cms of the point of impact. Any line of sight that must be drawn through a Blind marker is blocked.
During each Repair Phase, roll a D6 for each Blind marker; on a roll of 1, the Blind dissipates, and the marker is removed from play.
Haywire Missile. Haywire Missiles release a massive burst of electrostatic and radioactive pulse waves when they explode, designed to disrupt the target's electrical control systems.
A Haywire Missile can only affect a target that has all of its Void Shields down. If a Haywire Missile hits a Titan which still has an operating Void Shield, it will have no effect - it won't even knock down the Void Shield! If the Haywire Missile hits a target without Void Shields, it automatically causes critical damage to the Mind Impulse Units of the target.
Mine Dispenser Missile. Mine Dispenser Missiles (MDM) scatter mines over a wide area. MDMs can be fired at any point on the table, within the restrictions of the rules for line of sight. When the landing point has been determined (either on target or after deviation), use the range ruler to draw a straight line from this point to the firing Titan. This is the missile's flight path. The firing player takes 2 Mine counters and 2 Dummy Mine counters, and places them face down on the table anywhere along the missile's flight path or within 6cms of the point of impact, so that his opponent cannot tell which mines are real and which are dummies. The mines become operational at the end of the movement phase in the following turn.
If a Titan (on either side) moves within 3cms of a Mine counter, the mines are activated. The counter is flipped over to reveal whether it is real or a dummy. Dummy mines have no effect, and are discarded immediately. Real mines explode (discard the counter), automatically hitting the target. A mine attack ignores any Void Shields - like a close combat attack, it is inside them - and causes critical damage on a D6 roll of 2+.
Optional Rule: As an alternative to their normal load, MDMs may carry a single Stasis or Vortex mine and three dummy mines. If you are using an alternative load, you should note this down before the game. The mines are dropped and activated in the normal way, but instead of exploding they create a field (stasis or vortex, as appropriate). Refer to the notes on Stasis and Vortex Missiles below. Altering the load of a MDM does not change its points cost.
Plasma Missile. The Plasma Missile is a huge and very effective weapon. While in flight, it splits into six masses of seething plasma, which spread out to saturate the target area.
When a Plasma Missile lands (either on target or after deviation), place the Burst Template at the point of impact. This is where the first of the six warheads landed; the remaining five deviate from this point, using the normal deviation procedure. Use any of the weapons templates to mark their landing points.
Any Titan under any of the templates will suffer a critical hit on a roll of 3+, ignoring normal modifiers for orders and cover.
Stasis Missile. The Stasis Missile carries a Stasis Field Generator (SFG) as its warhead. The SFG is a highly-sophisticated device which creates an area where time literally stands still. Anything caught within the stasis field is frozen in place and unable to do anything - but Titans outside the field cannot fire into it.
When rolling to hit with a Stasis Missile, ignore any modifiers for cover. If the missile misses, it will deviate normally. Wherever the missile lands, a 3cm Stasis Field is created. Place a Stasis Field marker on the table, centred on the point of impact. Any Titan wholly or partly within the field may neither move nor attack, but cannot be attacked itself. Its orders cannot be changed until the order phase after the Stasis Field dissipates or moves.
During the repair phase of each turn, roll 1D6 for each Stasis Field on the table:
| D6 | Result |
|---|---|
| 1-2 | The Stasis Field dissipates. Remove the marker from the table. |
| 3-4 | The Stasis Field stays in place. |
| 5-6 | The Stasis Field moves 2D6cm in a random direction - use the deviation procedure for this. The field will stop if it comes into contact with a Titan. |
If two Stasis Fields ever come into contact, they both dissipate immediately.
If a Stasis Missile is destroyed before it can be used, it explodes, creating a stasis field over the Titan that was carrying it.
Vortex Missile. When a Vortex Missile explodes, it creates a seething mass of energy known as a Vortex Field. This area is quite devastatingly destructive, even for a machine as tough as a Titan.
If a Vortex Missile misses, it will deviate normally. Wherever the missile lands, a Vortex Field is created. Place a Vortex Field marker on the table, centred on the point of impact. Any Titan wholly or partially within the field is automatically hit. Hits from Vortex Fields knock down all Void Shields, and automatically cause critical damage on the target - roll for hit location as normal.
During the repair phase of each turn, roll 1D6 for each Vortex Field on the table:
| D6 | Result |
|---|---|
| 1-2 | The Vortex Field dissipates. Remove the marker from the table. |
| 3-4 | The Vortex Field stays in place. |
| 5-6 | The Vortex Field moves 2D6cm in a random direction - use the deviation procedure for this. Anything in its path is hit. |
If a Vortex Missile is destroyed before it can be used, it explodes, creating a Vortex Field centered on the Titan that was carrying it.
Warp Missile. A Warp Missile actually travels through Warpspace, the strange chaotic universe used by starships to span immense distances in space. The missile enters Warpspace when it is fired, and is programmed to re-enter normal space on the other side of the target's Void Shields. It may sometimes materialise inside the target itself.
Ignore any modifiers for cover when rolling to hit. If a Warp Missile misses, do not roll for deviation. A miss indicates that the missile has left Warpspace at the wrong point - and this could be anywhere in any of a million universes...
When a Warp Missile hits, it ignores any Void Shields the target may have, and automatically causes damage. Roll on the following table:
| D6 Roll | Damage |
|---|---|
| 1 | Superficial Damage |
| 2-5 | Critical Damage |
| 6 | The missile explodes partially inside the target, inflicting two critical hits. |
Roll for damage location normally.
Support Missile Table
| Missile Type | Range Short | Range Long | To Hit Short | To Hit Long | Critical Hit Roll | Points Cost |
|---|---|---|---|---|---|---|
| Blind | 72cms | - | 2+ | - | none | 50 |
| Haywire | 36cms | 72cms | 3+ | 5+ | see notes | 50 |
| Mine Dispenser | 72cms | - | 2+ | - | none | 100 |
| Plasma | 72cms | - |
Hard Points (Optional)
The number and type of weapons that may be attached to a location on a Titan is, in reality, much more varied than the rules above give scope for. If your opponent agrees, you can use the following rules to decide which weapons are allowed to be fitted to your Titan. Note that you will not be able to represent this with the mix of weapons provided with the game and will have to keep a written record instead or follow the guidelines for representing mixed weapons given below.
Hard Points. Each location on a Titan has 4 Hard Points to which weapons can be attached. The number of hard points taken up by the weapon depends on the size of each weapon barrel that is fitted to the location:
- A Heavy Weapon Barrel takes up 1 Hard Point.
- A Close Combat Weapon takes up 2 Hard Points.
- A Very Heavy Weapon takes up 3 Hard Points.
If you are using these rules, you are allowed to fit different weapon barrels to the same location, as long as the total number of Hard Points used does not exceed 4. However, only 1 Close Combat Weapon may be fitted in each arm (and you are still not allowed to fit Close Combat Weapons to the Carapace).
Support Missiles. The rules for Support Missiles are unchanged (ie you may fit one to any free locations on the Carapace).
Mixed Weapons. A Location that holds different types of weapon barrel is known as a mixed weapon. A mixed weapon must fire all of its barrels at the same target. When a location holds a Close Combat Weapon and one or two Heavy Weapons, only one or the other can be used. So, for example, if an arm held a Power Fist and two Auto-cannons, you could either fire the Auto-Cannons or attack with the Power Fist, not both.
Representing Mixed Weapons. It is quite easy to represent mixed weapons on your model Titans by simply gluing together two or more of the plastic weapons included with the game. An example of what can be done:
| Class | Warlord |
| Type | Predator |
| Left Carapace | Defence Laser (1) + Las-Cannon (1) |
| Right Carapace | Defence Laser (1) + Las-Cannon (1) |
| Right Arm | Auto-Cannon (2) + Multi-Melta (2) |
| Left Arm | Power Fist + Las-Cannon (2) |
| Void Shields | 4 |
| Speed | 6/12 |
| Battle Rating | 1140 |
| Remarks | Limited manoeuvrability. |
Devices
Titans can be fitted with various additional non-weapon systems to enhance their combat performance. A selection of these devices is covered here but note that devices may only be used with Titans of the player's own design.
Points Multiplier Adjustments. These optional systems are not paid for with points, unlike weapons and Void Shields. Instead, each optional system fitted increases the Titan's points multiplier by 1 point. So, for example, a Battle Titan (base points multiplier 6) fitted with COBRA and Cameleoline (2 devices) would have a final points multiplier of 8.
Cameleoline. Cameleoline is a reactive camouflage which mimics the background and helps mask a Titan from all forms of sighting device. It works on a broad spectrum, and hides the Titan from sight and all other sensing systems. Any attacks against a Titan fitted with Cameleoline are treated as though the range were 10cm greater than the measured distance - so, for example, a shot from 23cms is treated as a range of 33cms. This does not apply to attacks which are resolved in the close combat segment of the combat phase.
COBRA. COBRA (Command Override Battle Reaction Automation) is a generic term covering a number of different devices which allow a Titan to react to a threat more quickly. COBRA allows a Titan to fire one segment earlier than normal in the combat phase, but it can never allow a Titan to fire before the First Fire segment. COBRA does not affect modifiers to hit arising from the Titan's orders for that turn.
Jump Packs. Battle Titans may be fitted with a Jump Pack, allowing them to fly short distances. Jump Packs allow a Titan with Charge orders to move over (but not onto) a building or another Titan. The move distance is unaffected.
RELAY. RELAY is a device that allows a Titan to take over the guidance of support missiles fired by other Titans, and home them in on a target within its own line of sight. The Titan with RELAY must be within 36cms of the Titan(s) that are firing the missile(s), and have a clear line of sight to it/them. If both these conditions are met, then the range and chance to hit are worked out as if the Titan with RELAY is firing the missile(s).
A single RELAY unit can control any number of missiles at once, but they must all be aimed at the same target - a single RELAY unit can't designate two targets at once. A Battle Titan can be fitted with up to three RELAY units, and can designate one target with each unit if desired.
It is possible to set up 'chains' of Titans with RELAY, with each Titan passing on control of the missile(s) to the next one in the chain.
Random Scenarios
The following system has been designed to give you an almost infinite variety of scenarios, ensuring that two games will never be the same and allowing you to try out different strategies and tactics. It is especially recommended if you are using Titans of your own design.
Base Force Level
First of all, the players should decide what the base force level (BFL) will be for the scenario. This can be done before or after setting up the scenery. The higher the BFL, the bigger (and longer) the game will be. A BFL can be from 1000 to 6000 points.
After choosing the BFL, both players roll a D6. The player with the higher score has the choice of being the Attacker or the Defender.
Objectives
Sort out the objective randomiser counters. There are 24 of these, 12 are labelled "A" (for the Attacker), and 12 are labelled "D" (for the Defender). Put all the attacker's counters into a cup, or similar container, and put all the defender's counters into another. Each player then draws one counter, at random, from the appropriate container.
The numbers on the counters correspond to the Objectives listed in the following pages. These give the player a force level and a set of victory conditions. The victory conditions tell the player what he must achieve in order to win the game, and should be kept secret from the other player. The force level modifies the BFL: the number of points the player can spend on his force is determined by cross-referencing the BFL and the Force Level on the Force Table:
Force Table
| BFL | Force Level I | Force Level II | Force Level III |
|---|---|---|---|
| 1000 | 750 | 1000 | 1250 |
| 2000 | 1500 | 2000 | 2500 |
| 3000 | 2250 | 3000 | 3750 |
| 4000 | 3000 | 4000 | 5000 |
| 5000 | 3750 | 5000 | 6250 |
| 6000 | 4500 | 6000 | 7500 |
Notes:
- It is possible (highly likely, in fact) that the players will not have an equal number of points to spend.
- To calculate Force Level from a BFL which is not on the table, apply the following formula: Force Level I is 3/4 the BFL, Force Level II is equal to the BFL, and Force Level III is 1 1/4 times the BFL.
If the players are using the rules for support missiles the 10% bonus to total points still applies.
Setting Up the Titans
The Defender may choose which edge of the table he wants to set up on, and must then place his Titans within 24cms of that edge. The Attacker may then set up his Titans up to 6cms in from the opposite side of the table. Play then proceeds as normal, with the Attacker being the First Player on turn 1.
Leaving the Table
Each player may only move their Titans off the table from their own edge, unless the Objective specifically states otherwise.
Winning the Game
The Objectives list conditions for Major and Minor victories. In some cases the level of victory will be decided by attaining objectives, and in others it will be decided by Victory Points.
However victory is decided, a Major Victory beats a Minor Victory, any kind of victory beats no victory at all, and if both players achieve the same level of victory (or defeat), the game is a draw.
Victory Points
When a scenario refers to Victory Points, refer to the Victory Points table:
| Case | Victory Points |
|---|---|
| For each enemy Titan disabled or destroyed | The Battle Rating value of the Titan |
| For each enemy Titan that left the table, unless this was to achieve a Victory Condition | Half the Battle Rating of the Titan |
| For each enemy Titan that has had its Void Shields destroyed, or at least one weapon destroyed, or ends the game with damage to the Reactor, Mind Impulse Unit or Legs | A quarter of the Battle Rating of the Titan |
The above cases are not cumulative. If more than one case applies, only take the one that provides the most Victory Points.
Attacker Objectives
1. Engage & Destroy (Force Level III). Your mission is simple - you will destroy any enemy force you encounter.
- Major Victory: Disable or destroy the entire opposing force.
- Minor Victory: Score more Victory Points than your opponent.
2. Propaganda Wars (Force Level III). News of the war is beamed instantly throughout the Imperium. The eyes of countless millions are upon you. It is vital to your cause that you inflict a crushing defeat on your opponent.
- Major Victory: Disable or destroy one opposing Titan without your opponent scoring any Victory Points.
- Minor Victory: End the game without having any of your Titans disabled or destroyed, and score more Victory Points than your opponent.
3. War of Attrition (Force Level II). The war grinds endlessly on and on. The final victory will lie with the last man on his feet. Your orders are to cause as much damage to your opponent as possible, while minimising your own losses.
- Major Victory: Score twice as many Victory Points as your opponent.
- Minor Victory: Score more Victory Points than your opponent.
4. Blitzkrieg (Force Level II). Your force is one component in a major offensive. Your task is to break through the enemy defences, sweeping all before you and moving on to take up position for the next phase of the master plan.
- Major Victory: Score more Victory Points than your opponent and exit half the points value of your force over the opposing player's table edge.
- Minor Victory: Exit half the points value of your force over the opposing player's table edge.
5. Convoy (Force Level II). One of your Titans carries a special cargo, which is of incalculable value to your cause. You must break through the enemy lines and carry it safely to its destination.
Special Rule - One Titan holds a vital cargo. Specify which (secretly) before the start of the game.
- Major Victory: Exit the Titan carrying the cargo over the opposing player's table edge and score more Victory Points than your opponent.
- Minor Victory: Exit the Titan carrying the cargo over opposing player's table edge.
6. Rescue Mission (Force Level II). The war is not just a military affair. Intelligence is all-important, and a spy in the right place is worth any number of Titans in the wrong place. One of your spies has been discovered, but has escaped with vital information. You must pick him up and deliver him to your command point for debriefing.
Special Rule - A spy with vital information is hiding close to the enemy lines. To pick up the spy a Titan must spend a turn next to the building closest to the opposing player's table edge. The spy may not be transferred to another Titan after he has been picked up.
- Major Victory: Exit the Titan carrying the spy from your own table edge.
- Minor Victory: Pick up the spy (even if the Titan is later destroyed) and score more Victory Points than your opponent.
7. Spoiling Attack (Force Level I). Both sides are continually testing each other's defences; the first to show weakness will be the first to die. Your force has been chosen for a raid on the enemy lines.
- Major Victory: Disable or destroy one opposing Titan and score more Victory Points than your opponent.
- Minor Victory: Score more Victory Points than your opponent.
8. Break-Out (Force Level I). Your force has been surrounded. You have the choice of being killed where you are or trying to break through the enemy lines to make contact with friendly forces. The answer is simple.
- Major Victory: Exit more than half the points value of your force over the opposing player's table edge.
- Minor Victory: Score more Victory Points than your opponent.
Defender Objectives
1. Engage & Destroy (Force Level III). Your mission is simple - you will destroy any enemy force you encounter.
- Major Victory: Destroy or disable the entire enemy force.
- Minor Victory: Score more Victory Points than your opponent.
2. Tripwire Defence (Force Level III). The lines are stretched thin, covering a vast front against attack. You must contain any enemy activity, calling on reinforcements when you can.
Special Rule: Only Titans equal to half the points you have available start on the table. The remainder of your force starts to enter on the turn after one of your Titans fires for the first time. You may only enter one reinforcement Titan per turn.
- Major Victory: Stop your opponent achieving any of his Major Victory conditions and score more Victory Points than your opponent.
- Minor Victory: Score more Victory Points than your opponent.
3. The Trap (Force Level III). It's a simple tactic, as old as war itself. Dangle a part of your force in front of the enemy as bait, and if they take it - annihilate them.
Special Rule: Only Titans equal to the points for Force Level I start on the table. The remainder of your force enters on the third turn (or later if you wish) from either 'neutral' edge (ie an edge where neither player set up at the start of the game).
- Major Victory: Destroy or disable the entire opposing force.
- Minor Victory: Score more Victory Points than your opponent.
4. Defensive Line (Force Level II). It's not glamorous, but it's war just the same. Your orders are to hold this position and thwart any and all enemy action in your area.
- Major Victory: Stop your opponent achieving any of his Major Victory conditions and score more Victory Points than your opponent.
- Minor Victory: Score more Victory Points than your opponent.
5. Covering Force (Force Level II). The fortunes of war have swung against you, and your side is on the run - for now. Your force must fall back and regroup, fighting off enemy offensives all the way.
Special Rule: Only Titans equal to half the points you have available start on the table. The remainder of your force enters on the fourth turn from either neutral edge (ie an edge where neither player set up at the start of the game), at any point within 36cms of the opposing player's table edge.
- Major Victory: Exit more than half of the points value of your force from your own table edge.
- Minor Victory: Score more Victory Points than your opponent.
6. Holding Action (Force Level I). An enemy assault is expected. Your orders are to inflict maximum casualties before pulling back to the next line of defence. Hurt them if you can - but no senseless gestures.
- Major Victory: Score more Victory Points than your opponent and exit at least half of the points value of your force from your own table edge.
- Minor Victory: Score more Victory Points than your opponent.
7. No Retreat (Force Level I). This is it. Your force has been isolated by enemy offensives - you are cut off and backed into a corner. Your chances are slim - but you're going to take some of them with you.
Special Rule: You may not retreat off the table or disengage.
- Major Victory: Disable or destroy at least one opposing Titan and score more Victory Points than your opponent.
- Minor Victory: Score more Victory Points than your opponent.
The Campaign Game
So far, we have been dealing with one-off battles which take place in isolation. It can be much more enjoyable to link your games together, like the battles of a real military campaign. The campaign rules that follow are simple and easy to use, but you will find that they add a great deal to the games you play. You can create your own Military Order of Battle Titans, and trace its history through an entire campaign. Between battles, Titans may be repaired or re-equipped, and as crews become increasingly experienced, they turn from green recruits into battle-hardened aces.
To enjoy a campaign to the full, we suggest that you make a permanent model for each Titan in your Order, with the appropriate weapon mix and painted in the colours you devise. You may find that there aren't enough plastic Titan models for your purposes in this box, but don't worry. Citadel Miniatures produce extra Titans in both plastic and metal for just this purpose.
The Campaign Roster
At the end of this rulebook you will find a Campaign Roster Sheet. Permission is given to photocopy this roster for your own personal use. The roster has spaces for the following information:
- Order: The name of your Order of Battle Titans.
- Grand Master: Your name. You are now the Grand Master of a Military Order of Battle Titans!
- Motto: The Order's sacred motto, often used as a warcry as the Titans enter battle. The motto can be as short or as long as you like, after all, you're the Grand Master and you decide these things!
- Forge World: The name of the planet where the Order is based when it is not fighting. If you get stuck for a name, just use the name of the street or town where you live, suffixed by the number of your house. For example, if you lived at 4 Albert Road, Glasgow, you could name your Order's Forge World 'Albert IV' or 'Glasgow IV'.
- Honour Points: Use this section to keep track of the Order's current Honour Points total. Basically, the order will gain Honour Points for winning battles, and lose them for losing battles. An Order's current Honour Points total directly affects its chance of receiving new equipment - in the harshly efficient Imperium no-one wastes new equipment on losers!
- Armoury Points: The Order's current Armoury Points total. Between games you will get the chance to collect Armoury Points, which can be used to repair damage to your Titans and buy new Titans and equipment. You don't have to spend Armoury Points straight away, you can save them up if you wish. Any saved Armoury Points are recorded in this section of the roster.
- Titans: This is the most important part of the roster. Each line in this space records all the details of one of the Order's Titans - Variant, Battle Rating, crew experience, crew skills, modifications and devices, etc.
- Support Missiles: There is a space for each type of missile. Use this space to record the number of each type of missile which the Order has available, and cross them off as you use them. You may only use support missiles which your Order has available.
Use a pencil to fill in the roster - things change all the time, so you'll need to be able to rub entries out and amend them. Alternatively, cover the roster in clear plastic and use a wipe-off marker.
Creating the Order
Buying Titans
You have 10,000 points with which to set up your Order. You can buy any of the pre-generated Titans from the Data Cards, or use ones you have designed yourself. An Order must have at least 8 Titans. Any support missiles are also bought from these 10,000 points. You don't have to spend all 10,000 points if you don't want to - any points left over go into the current Armoury Points total. Be sure to record all your Order's Titans and support missiles on your Campaign Roster.
Choosing the Titans for your Order involves some far reaching decisions, so don't be hasty. Try to make sure that you have a good selection of Titans with differing Battle Ratings and armament, so that when you play a game you can always call on the right Titans for the job.
Once you have picked your Titans, record the information on the Campaign Roster, and record any left-over points in the Armoury Points section.
Crew Experience
Next, you must generate the experience level of each of your Titan crews. Generate one crew for each Titan in the Order, writing their experience levels down on a piece of scrap paper, and then allocate them to the Titans as you see fit. If you are using painted Titans, it should be easy to tell which one is which. If you are using unpainted Titans or if you have difficulty telling your painted Titans apart, put a small numbered sticker (available from most stationers) on the base of each one.
Crews can either be Green, Experienced, Veteran, Elite or Ace. When you are creating an Order, the experience level of each crew is worked out randomly. After that their experience level will depend on how many Experience Points they have.
When you are setting up an Order, roll once on the Crew Experience Chart for each Titan in your Order. Note down the Experience Level and Experience Points for each crew, and as you allocate each crew to a Titan, fill in the appropriate boxes on the Campaign Roster.
Note that you can never get Elite or Ace crews when setting up an Order - this level of competence only comes with many battles!
Crew Experience Table
| 2D6 Roll | Experience Level | Experience Points |
|---|---|---|
| 2-5 | Green | 0 |
| 7-10 | Experienced | 2 |
| 11-12 | Veteran | 5 |
(The table is printed in this form in the rulebook; a roll of 6 is not listed.)
Honour Points
All Orders have 0 Honour Points when they are first set up. Rules for how Honour Points are gained and used are given later.
Name, Forge World, etc
All the other details on the Campaign Roster are left for you to fill in. This is your opportunity to give your Order of Titans an individual identity and character of its own!
Campaign Scenarios
Having created your Order of Titans, the next step is to send them into battle! Use the Random Scenarios rules, but decide the BFL each time by rolling a D6 and multiplying the score by 1,000. The Titans you use must come from your Order and nowhere else! Support Missiles may be used, but must be selected from those available on the Order's Campaign Roster - you don't get a 10% bonus to spend on support missiles in the campaign game.
Crew Casualties
In the campaign game, it is important to keep track of what happens to the crew of a destroyed or disabled Titan. Is the crew killed, or do they survive to fight another day in another Titan?
As previously stated, a Titan is destroyed or disabled by Catastrophic Damage to its Mind Impulse Units, Legs or Reactor. The effects of this on the crew are as follows:
Mind Impulse Units. Catastrophic Damage to a Titan's Mind Impulse Units causes a surge of feedback through the MIUs - and, of course, through the minds of the crew. This is nearly always fatal, and those who survive suffer severe brain damage. Catastrophic Damage to the MIUs effectively destroys the Titan's crew - strike them from the Campaign Roster.
Legs. There are few more impressive sights in war than the sight of a Titan losing a leg. The metal giant totters for a few seconds, stabilising jets overload themselves trying to compensate, and finally the sixty-foot figure comes crashing down like a felled tree. The stabilising jets buy a few vital seconds before they burn themselves out, and there is a good chance that the crew will be able to eject in this time. When a Titan suffers Catastrophic Damage to the Legs, the player rolls a D6:
- 1: Crew failed to eject. Roll again: 1-5 Crew survive; roll on Escape Table 3. 6 Crew killed; delete from Campaign Roster.
- 2-6: Crew ejected safely. Roll on Escape Table 1 and see Ejecting, below.
Reactor. Plasma reactors are old-fashioned, crude and dangerous. When a Titan's plasma reactor suffers Catastrophic Damage, it will become unstable almost instantly, and begin an unstoppable and spectacular meltdown. The crew's only hope is to eject and get far enough away from the Titan before the reactor explodes. When a Titan suffers Catastrophic Damage to the Reactor, the player rolls a D6:
- 1-4: Crew killed; delete from Campaign Roster.
- 5-6: Crew ejected safely. Roll on Escape Table 1 and see Ejecting, below.
Other Damage. The crew is only affected by Catastrophic Damage to the Mind Impulse Units, Legs or Reactor. Any other damage to a Titan has no effect on the crew.
Ejecting
All Titans are fitted with ejector systems, so that the crew can escape from a destroyed or disabled Titan. When the ejector mechanism operates, all crew members are automatically moved from their battle stations to the main cabin in the head of the Titan. This then disengages from the body and flies away from the battle zone using its built-in drives and anti-grav units.
A successful eject doesn't necessarily mean that the crew will survive the battle, however; the detached cabin must run a gauntlet of fire to make it back to base. When a crew ejects successfully, refer to the Escape Table 1.
Switching Off
If a player decides to switch off the ignition on a Titan, the crew will automatically eject at this point, and will not suffer any adverse effects for damage inflicted on the Titan later in the battle. Roll on Escape Table 1.
Self-Destruct
When a crew ejects, they may rig their Titan to self-destruct if the player wishes. When a player exercises this option, he rolls a D6:
- 1: Phut! The Titan fails to self-destruct. Treat as 'switched off'.
- 2-6: Ka-Booom! The Titan immediately explodes, just as if the reactor had suffered Catastrophic Damage.
Escape Tables
Table 1
| D6 Roll | Result |
|---|---|
| 1-2 | The Ejector System is damaged. Roll on Table 2. |
| 3-6 | The crew escapes successfully. |
Table 2
| D6 Roll | Result |
|---|---|
| 1 | The Ejector System is destroyed by enemy fire. The crew cannot escape. There are no survivors. Delete the crew from the Campaign Roster. |
| 2-4 | The Ejector System is damaged by enemy fire. The cabin crash-lands in no man's land. Roll on Table 3. |
| 5-6 | The Ejector System is damaged by enemy fire. The cabin crash-lands in friendly territory. The crew may not be used for the next two games while they recover from their injuries. |
Table 3
| D6 Roll | Result |
|---|---|
| 1 | The crew is killed by enemy troops in no man's land. Delete them from the Campaign Roster. |
| 2 | The crew is captured by enemy troops in no man's land. Roll on Table 4. |
| 3-6 | The crew makes it back to friendly territory, but may not take part in the next three games while they recover from their injuries. |
Table 4
| D6 Roll | Result |
|---|---|
| 1 | The crew is killed attempting to escape. Delete them from the Campaign Roster. |
| 2-4 | The crew fails to escape, and is transferred to a PoW camp. For them, the war is over - delete them from the Campaign Roster. |
| 5-6 | The crew escapes. Roll on Table 3. |
Crews Without a Titan
When a crew survives the destruction of its Titan, leave the crew on the roster, but erase the information on the Titan itself. When you replace the Titan, enter the data for the new Titan in this space.
Downtime
In the campaign game, what happens between battles can be as important as what happens in battles. To handle this, we introduce Downtime.
Downtime takes place at the end of every battle. It is made up of a sequence of phases, which must be followed as strictly as the sequence of play in the Basic Game. Downtime must be carried out immediately after the battle, so that the players can witness each other's dice rolls and so on.
Downtime Play Sequence
- Experience Phase
- Honour Phase
- Salvage Phase
- Repair Phase
- Recruiting Phase
Experience Phase
During this phase, experience points are awarded to each crew which survived the battle, and any changes in experience level are dealt with.
Gaining Experience
As they survive from one battle to another, crews become more efficient. Long experience teaches them how to use their Titan to best effect, and moulds them into an increasingly effective fighting unit. To reflect this in the game, we use experience points.
As you have seen on the Crew Experience Table, all crews have a number of experience points which reflect their experience and expertise. After each battle, each surviving crew receives a number of experience points, raising its current total. When a crew's experience points total reaches a certain level, it progresses to the next experience level.
A Titan crew gains experience points as follows:
- For surviving the battle: 1 experience point
- For each kill scored: 1 experience point
Kills
A crew scores a kill when their Titan makes an attack which leads directly to an enemy Titan being disabled or destroyed.
For example, if a crew made an attack and damaged the target's reactor, and subsequently the reactor malfunctioned and the target blew up, the crew would score a kill. Similarly, if an attack hit a damaged reactor, and the Catastrophic Damage roll caused the reactor to blow up, the crew would be credited with a kill.
It is up to each player to keep track of the kills scored by each of his crews. If there is any doubt as to who gets the credit, no-one does!
Increasing Experience Level
A crew's experience level is measured by its current experience point total, as shown on the Experience Level Chart. Crews cannot change experience level during a battle - all changes take place in the Experience Phase of Downtime.
Experience Level Chart
| Experience Points | Experience Level |
|---|---|
| 0 to 1 | Green |
| 2 to 4 | Experienced |
| 5 to 9 | Veteran |
| 10 to 15 | Elite |
| 16 or more | Ace |
The Benefits of Experience
So what effect does a crew's experience level have on the game? The effects of experience are represented by dice rerolls. The following chart shows how dice rerolls relate to experience level:
| Experience Level | Dice Rerolls |
|---|---|
| Green | nil |
| Experienced | 1 |
| Veteran | 2 |
| Elite | 3 |
| Ace | 4 |
Dice Rerolls
Keep track of the number of dice rerolls available to each Titan crew in your Order. This is the number of times in each battle that you may reroll any dice roll which affects that Titan.
So, for example, you may miss a roll to hit with one of your Titans. If you have an experienced crew (and if they have any dice rerolls left for the battle!), you may ignore the first roll and try again.
Or, if an enemy Titan has just landed a successful hit, the crew of your Titan may use a reroll to force your opponent to roll again - in the hope that he'll miss this time!
Every time a crew uses a reroll, make a note of it. A crew may never use more rerolls than it actually has; some groups of players have devised particularly painful punishments for those who break this rule.
Skills (Optional)
When a crew reaches Ace status, it still carries on gaining experience points. Although the crew can't increase its experience level beyond Ace, the experience points are still useful, because the crew can gain skills.
A crew will gain one skill when it reaches 20 experience points, and one additional skill for each 10 experience points thereafter (ie at 30, 40, 50, etc).
When a crew accumulates enough experience to gain a skill, the player chooses one from the following list. Skills are recorded in the appropriate section of the Campaign Roster.
- Fast Reactions: This skill allows the crew to fire one segment earlier than normal in the combat phase, but never before the First Fire segment. Any modifiers to the hit roll for the Titan's orders still apply, however. This skill may not be used if the Titan is fitted with COBRA.
- Accuracy: The Titan's crew is exceptionally good at gunnery. All attacks except close combat attacks gain a +1 modifier to hit; this is cumulative with other modifiers.
- Marksmanship: The Titan's crew is capable of shooting with great accuracy. You may modify the Hit Location roll by 1 point in either direction. This modifier is applied after the dice has been rolled. It does not apply to any rolls on the Body Damage Table.
- Close Combat Attack: The crew is highly adept at landing telling blows in close combat. Apply a +1 modifier to hit to any attacks made with close combat weapons; this is cumulative with other modifiers.
- Close Combat Defence: The crew is highly adept at avoiding close combat attacks. Enemy Titans suffer a -1 modifier to hit to any attacks made with close combat weapons against this crew; this is cumulative with other modifiers.
- Damage Control: The crew react quickly and efficiently to minimise damage to their Titan. Apply a +1 modifier to any Repair rolls.
- Very Lucky: This skill is used in conjunction with a reroll, and may only be used once per game. Use the reroll as normal, but don't roll the dice. Instead, you may choose what number is rolled on the dice.
- Natural Leader: This skill may only be used once per game. In the End Phase of a turn you may decide who will be the First Player for the next turn.
Honour Phase
Your Order receives 2 Honour Points for a Major Victory and 1 Honour Point for a Minor Victory. The Order loses 1 Honour Point for a defeat. An Order's Honour Point total can never fall below zero.
Honour Points reflect the Order's fighting reputation, and the esteem in which it is held by the rest of the Imperium. You will find it easier to requisition new equipment if your Order has a high Honour Points score - see Requisitioning.
Salvage Phase
The battlefield can provide rich pickings for the Forge Master of a Military Order, as precious spares can be salvaged from disabled Titans.
A player may salvage from a battlefield at the end of a battle only if his Order is in sole possession - that is, if he has at least one operational Titan on the battlefield, and his opponent has no operational Titans on the battlefield. An Order may lose a battle and still command the battlefield at the end of it.
The salvage potential of a Titan depends on the level of damage that it has suffered:
- Intact: 'Switched-off' Titans may be salvaged whole. The Titan may either be repaired (see below), or any intact weapons, Void Shield Generators and Mind Impulse Units can be stripped out and fitted to other Titans.
- Legs: Titans which have suffered Catastrophic Damage to the Legs may yield any intact weapons, VSGs and MIUs as spare parts for other Titans.
- Mind Impulse Units: Titans which have suffered Catastrophic Damage to the MIUs may either be repaired (see below), or stripped of any intact weapons and VSGs as spare parts for other Titans.
Salvaging Devices
- Cameleoline: Cameleoline may never be salvaged from a Titan, although if a Titan equipped with Cameleoline can be repaired, the Cameleoline functions as normal.
- COBRA: Titans which have been 'switched off', or which have suffered Catastrophic Damage to the Legs, can be stripped of COBRA if they are equipped with it. Catastrophic Damage to the MIUs automatically burns out the COBRA device, and Catastrophic Damage to the Reactor (or self-destruction) destroys the COBRA along with everything else.
- Jump Packs: Titans which have been 'switched off', or which have suffered Catastrophic Damage to the MIUs, may be stripped of Jump Packs if they are equipped with them. Jump Packs are destroyed if the Reactor or the Legs suffer Catastrophic Damage, or if the Titan self-destructs.
- RELAY: Titans which have been 'switched off', or which have suffered Catastrophic Damage to the Legs, can be stripped of RELAY if they are equipped with it. Catastrophic Damage to the MIUs automatically burns out the RELAY device, and Catastrophic Damage to the Reactor (or self-destruction) destroys the RELAY along with everything else.
Salvage Condition
Roll on the Salvage Table for each part that is salvaged.
| D6 Roll | Result |
|---|---|
| 1 or less | The part no longer works, and must be discarded. |
| 2-6 | The part is in working order, and may be used. |
The roll is made with a -2 modifier when dealing with parts taken from enemy Titans.
If you decide to repair a Titan with destroyed MIUs, roll once for the whole Titan to see if it is repairable.
Repair Phase (Downtime)
Damaged Titans may, of course, be repaired. This may be done with parts salvaged from other Titans, or with new parts requisitioned from the Adeptus Mechanicus (see Requisitioning).
Spare Parts
Salvaged spare parts can be used to repair damaged Titans, or to improve undamaged Titans.
Void Shield Generators can be used to replace destroyed VSGs, or to increase a Titan's number of Void Shields. Note that a Battle Titan may never have more than 6 Void Shields.
Weapons may be mounted on any spare location, either to replace destroyed weapons or to increase the Titan's armament. Note that you may not split the barrels from a salvaged multi-barrelled weapon among several different locations, nor use them to increase the number of barrels an already-fitted weapon has.
Mind Impulse Units may be used to replace any MIUs that were destroyed by Catastrophic Damage.
Devices may be fitted to any Titan that is not already equipped with them. Note, however, that COBRA cannot be fitted to a Titan whose crew has the Fast Reactions skill.
Support Missiles may be added to the Order's Armoury and used as required.
Points Costs
Salvaged weapons, systems and devices are free; they do not cost the Order any Armoury Points.
Requisitioning
In Downtime, each Order receives a number of Armoury Points equal to 20% of the BFL for the scenario that has just been played.
During the Repair Phase of Downtime, an Order may spend any or all of its current Armoury Points to buy new Titans and new parts for existing Titans. This represents requisitioning supplies from the Adeptus Mechanicus workshops (those loyal to the Emperor or those following Horus, depending on which side your Order is on), rather than simply fitting salvaged systems to your Titans.
An Order may never 'sell' material back to the Adeptus Mechanicus in order to gain more Armoury Points. On the other hand, it doesn't have to fit everything it has onto a Titan; it can leave weapons, devices and other parts in storage on its Forge World until they are needed.
Weapons, Void Shields and Devices may be bought to improve undamaged Titans, and new missiles may be bought to add to the missile armoury.
Fitting
New equipment may be fitted to existing Titans, subject to the same restrictions as for salvaged equipment above.
Points Costs (Requisitioning)
The cost of a weapon or Void Shield is equal to its basic points value, multiplied by the Points Multiplier of the Titan it will be fitted to.
Mind Impulse Units have a cost equal to 20% of the Battle Rating value of the Titan they will be fitted to.
Devices cost an amount equal to the difference between the Titan's Battle Rating before and after the device is fitted. For example, a Battle Titan with a Battle Rating of 600 is to be fitted with COBRA. It has no other devices, so its Points Multiplier is 6 - the base value for Battle Titans. Adding COBRA will change its Points Multiplier from 6 to 7; this will change its Points Value to (600/6) x 7 = 700 - an increase of 100 points. Therefore, in this case the COBRA device will cost the Order 100 Armoury Points.
Appeals
Each player may try to increase the number of Armoury Points he receives in the Repair Phase by making an Appeal to the controllers of the Adeptus Mechanicus Workshop. A player may appeal for any number of extra points - but the more you ask for, the greater the chance that the appeal will be refused. When you make an appeal, roll on the Appeal Table.
Appeal Table
| 2D6 Roll | Result |
|---|---|
| 2-5 | Appeal denied |
| 6-12+ | Appeal granted |
Dice Roll Modifiers:
- Add the Order's current Honour Point total to the roll.
- Subtract 1 from the roll per 100 extra points requested. Round fractions of 100 points down.
Modifications
Any changes to a Titan's weaponry, Void Shields or devices should be recorded in the Modifications section of the Campaign Roster. Note that the modifications may also change the Titan's Battle Rating and its move rates.
Recruiting Phase
In this phase, an Order may recruit new crews from those in reserve and/or training on their Forge World, but only if it has more Titans than crews. You may only recruit one crew per uncrewed Titan - you can't have spare crews sitting around waiting their turn!
Generate each new crew's experience level on the Crew Experience Table, but add +1 to the dice total for every 5 Honour Points your Order has collected. Fractions of 5 Honour Points don't count, so if your Order has 19 Honour Points the modifier is 3, and if the Order has 4 Honour Points the modifier is 0.
A modified score of more than 12 is counted as a 12 - you can't recruit crews of a higher level than Veteran.
Reference Sheets
The rulebook closes with reference pages that restate tables given above (Sequence of Play, Repair Rolls, Orders, Weapons Table, Close Combat Weapons Table, Designing Titans points costs and movement rates, Force Table, Support Missiles, Field Table, Effects of Catastrophic Damage on Crew, Self-Destruct, Escape Tables, Downtime sequence, Crew Initial Experience Table, Experience Level Chart, Salvage Table, Appeal Table), a flow chart combining the Hit Location, Damage and Damage Effects tables, and blank Titan Data Sheets and a Campaign Roster. Points of difference or additional detail on those pages:
- Orders (reference): Advance - the Titan may move up to its Advance distance in the movement phase, making up to four 45° turns, or it may move a similar distance in reverse, making only one turn of up to 45°. Charge - only one 45° turn may be made.
- Cumulative Damage: Roll 1D6 for each location taking two or more hits. 1-3 - no effect, 4-6 - Catastrophic damage.
- Repair Rolls: Void Shields: 1D6, 1-4 no effect, 5-6 Shield repaired. Damaged Systems: 1D6, 1-4 no effect, 5-6 system repaired. Malfunction Roll: 1D6, 1-5 no effect, 6 Catastrophic Damage. Add 1 to the dice roll if the Titan has Damage Control orders.
- Close combat to hit: Close combat 'to hit' rolls are never modified for the Attacker's orders.
- Weapons Table discrepancy: the reference-sheet Weapons Table lists the Multi-Melta's Critical Hit Roll as 3+, while the Combat Tables page (blurred in the scan) appears to read 5+.
- Blind markers: Roll a D6 for each marker during the Repair Phase. It is removed on a roll of 1.
- Field Table: Roll once for each Vortex Field or Stasis Field during the Repair Phase. 1-2 the field dissipates; 3-4 the field stays in place; 5-6 the field moves 2D6cm in a random direction - use the deviation procedure for this. A Stasis Field will stop if it comes into contact with a Titan, a Vortex Field will not.