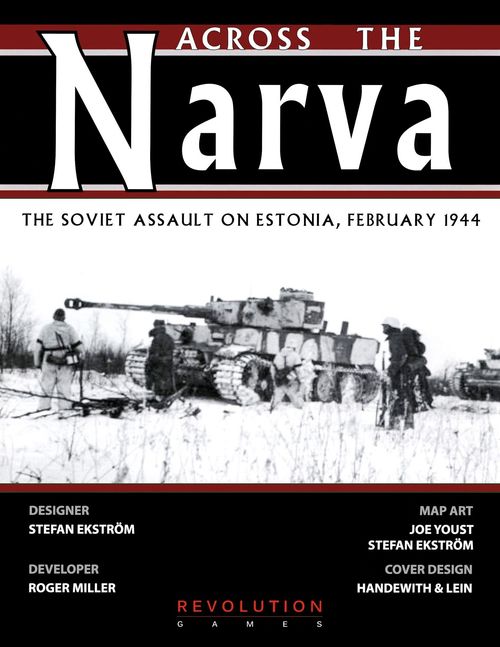
Across The Narva: The Soviet Assault on Estonia, February 1944
Across The Narva: The Soviet Assault on Estonia, February 1944 Rulebook
Table of Contents
Table of Contents
- 1.0 Introduction
- 2.0 Components
- 3.0 Sequence of Play
- 4.0 Command
- 5.0 Zones of Control
- 6.0 Movement
- 7.0 Stacking
- 8.0 Reinforcements
- 9.0 Combat
- 10.0 Supply and Isolation
- 11.0 Special Rules
- 12.0 Air Units
- 13.0 How to Win the Game
- 14.0 Setup
- 15.0 Players Notes
1.0 Introduction
1.1 Historical Background
Across the Narva represents the fighting that took place between February 2 and April 25, 1944, in the Narva region of Estonia. Each turn represents a week. The units are battalions, regiments, and brigades.
1.2 General Abbreviations
These abbreviations are used throughout the rules.
| Abbr | Explanation |
|---|---|
| CRT | Combat Results Table |
| EZOC | Enemy Zone of Control |
| MA | Movement Allowance |
| MP | Movement Point |
| PD | Prepared Defenses |
| RP | Replacement Point |
| TEC | Terrain Effects Chart |
| TRT | Turn Record Track |
| VP | Victory Point |
| ZOC | Zone of Control |
1.3 Unit Abbreviations
All are German unless otherwise indicated.
| Abbr | Unit |
|---|---|
| AA | Aufklarungs Abteilung (Recon) |
| BE | Beute |
| FUS | Fusilier |
| FBB | Fuhrer Begleit Battalion |
| FHH | Feldherrenhalle |
| G | Grenadiers (German) |
| G | Guards (Soviet) |
| GNES | Gnesen |
| GRZ | Grenz (border) |
| HÄME | Hamel |
| HOHN | Hohnschildt |
| HVS | Hermann von Salza |
2.0 Components
Across the Narva includes the following components:
A. One 22" by 34" map B. One sheet of ½" die-cut counters C. This rule booklet D. One cover/player aid
2.1 Rules
Each major grouping of the rules is called a rule; a part within a rule is a section. A specific section can contain several related cases, such as 3.5.1, 3.5.2 etc.
2.1.1 Cumulative Effects
In all cases where a unit is subject to multiple modifiers to its strength, the effects are cumulative. A unit halved for terrain and halved for supply in combat is quartered overall.
2.1.2 Standard Rounding Rule
When units involved in a combat must halve (or quarter) their combat strengths, first add up all fractions, then round down.
2.1.3 Fog of War (Optional)
A. Neither side cannot examine the units comprising an enemy stack unless an attack has been announced and the odds are being calculated. B. Both sides can observe an enemy stack's top unit (or marker if applicable). C. The active side cannot cancel an attack after announcing it (unless at least 1-2 odds are not achieved.).
2.1.4 Preparation for Play
A. The players select their side (German or Soviet), deploying their units per the setup. (14.0). B. Place the Turn marker on Turn 1 of the Turn Record Track (TRT). C. Place all reinforcements on their correct arrival turn on the TRT. D. Place the Soviet air units in the Air Army 13 boxe and the German air unit in the Luftwaffe box. E. Place the German Divisional defense markers in the upper left box (value 3) on the Prepared Defense Track. F. Use a cup to draw Command and Action Chits from. Place all Command and Action Chits that do not have a turn number on them in the cup to start the game.
2.2 Map
The map represents the parts of Estonia and the Soviet Union over which the historical campaign was fought. The map scale is approximately 1.3 km per hex. Several charts, tables, tracks, and boxes are printed around the map.
2.2.1 Turn Record Track
A. This track provides a place to mark the current turn. B. Advance the Turn Marker one box at the end of each turn.
2.2.2 Terrain Effects Chart
A. The Terrain Effects Chart (TEC) provides a map key and shows the effects of the different terrain features on movement and combat. Points of interest and lakes have no effect on play. B. If a hex has a mix of terrain, the worst terrain is used for movement and combat.
Example: A hex with woods and swamp is treated as a swamp hex for movement and combat.
2.2.3 Combat Results Table
A. The Combat Results Table (CRT) is used to resolve combat. B. The last column of the CRT is the Barrage CRT.
2.2.4 Luftwaffe and Soviet Air Army Boxes
These boxes are used to hold Soviet and German Air units.
2.2.5 Soviet and German Activations Tracks
These boxes are used to hold the Soviet and German Command Chits after they have been drawn and are numbered to indicate the order in which they were drawn.
2.2.6 Airbase Box
This box is used to hold grounded and refitting air units.
2.2.7 Supply Source Hexes
A. Hexes with a black and white supply source symbol are supply sources for German units. B. Red and white supply source symbols are supply sources for Soviet units.
2.2.8 Bridges
A. A river crossed by a road (any type) or railway is a bridged river hexside. Conversely, a river hexside not crossed by a road or railway is an unbridged river hexside. B. A bridge cancels all movement, supply, retreat, and ZOC effects of a river. Attackers are still halved when attacking across a bridge.
2.2.9 Barrage Roll Table
Used to determine the number of barrage attacks resulting from a Barrage action Chit.
2.2.10 Prepared Defense Track
Records the current number of steps in the defenses and the current combat shifts when they are attacked.
2.2.11 German Entry Point Track
Allows Germany to reroute reinforcements.
2.2.12 Errata
Hex 1003 displays Pljussa as the name of the river but it should be Narva.
2.3 Command Chits
A. Soviet Command Chits are used to activate specific Army HQs, which in turn allow a Soviet Army HQ to activate a Corps HQ which then activates the combat units under its command to move and attack. B. German Command Chits generally correspond to Corps and when drawn, Germany chooses a Divisional HQ corresponding to that chit which then activates the units under its command for movement and combat. C. Place all available Soviet and German Command Chits in the same cup; they are randomly drawn one at a time. D. The Turn Track specifies how many of the German and Soviet HQs can be activated each turn.
Example: In Turn 3, Germany may activate the first two German HQs whose chits are drawn from the cup. The third and subsequent HQs cannot be activated that turn.
2.4 Special Command Chits
2.4.1 Wehrmacht
A. Allows Germany to activate any non-SS HQ. B. This chit is in play the first three turns of the game. Remove it from the game in Turn 3 Reinforcement Phase.
2.4.2 Army Group Narwa
A. Allows Germany to activate any HQ. B. Allows the HQ to activate two other combat units anywhere on the map. These two units may move but may not participate in combat.
2.5 Action Chits
A. Each white Action Chit has one or both national insignias on it, indicating which side is affected. B. Add Action Chits with a turn indicated on them to the cup in the Reinforcement Phase of that turn. C. Action Chits do not count against the number of activated Command Chits drawn per turn. However, once all Command Chits are drawn for that turn, no further chits are drawn, so action chits may remain in the draw cup. D. Return all drawn action chits to the cup during the next Turn Advance Sequence.
2.5.1 Barrage Action Chits
2.5.1.1 Procedure
A. The Soviets have two Barrage Chits and Germany has one. B. When a Barrage Chit is drawn, roll 1d6 on the Barrage Roll Table to determine the number of barrage attacks. C. A Barrage attack may only be made against an enemy-occupied hex adjacent to a friendly unit. D. The same hex may not be targeted twice. E. The same unit may be targeted twice if it retreated into a hex that is then subject to another Barrage attack.
2.5.1.2 Barrage CRT
A. The first loss in a city is not negated. B. The first retreat is not negated in a city, village, or prepared defense.
2.5.1.3 Pinned Results
A. The P result is for pinned. Mark the hex as pinned, and those units may not move or attack for the rest of the turn. B. Any attacks against pinned units gets a one column shift to the right. C. If pinned units are forced to retreat, they do so and lose the pinned marker. D. Remove all Pinned markers at the end of the turn.
2.5.1.4 Other Barrage Attacks
Barrage Attacks can also result from the German Strachwitz HQ and Random Event Table. They are is resolved in same manner as above.
2.5.2 Random Event Action Chit
A. When this Action Chit is drawn, roll 2d6 and compare the result with the Random Events Table. Instantly apply the result before proceeding with the new chit draw. B. Results are very literal. If it states to move all units of one division, only those units move. Whether the units are in command or in supply is of no relevance.
2.5.3 Stavka Directive
A. The Soviets must attack two hexes anywhere on the board. They choose an enemy-occupied hex and all Soviet units adjacent to that hex attack the target hex. B. The combat receives a one column shift to the right. C. The Soviets suffers an additional A1 result. D. All attacker retreats are converted to loss results. E. After use, place the chit two turns ahead on the TRT as a reinforcement.
Example: On Turn 6 the STAVKA chit is pulled. An attack results in Ar1. The Soviet units take two losses, one for the retreat and one for the extra A1 loss. Then place the STAVKA chit on Turn 8 on the TRT to enter as a reinforcement in that turn's Reinforcement Phase.
2.5.4 Free Move
A. The Soviets may activate for movement one HQ, which may activate all its units and three other units in the range of the HQ, or they may activate three units anywhere on the map and no HQ. B. In either case the units activated may not move if they start in an Enemy Zone of Control (EZOC) nor may they enter an EZOC at any time during their move. C. The activated units may not participate in combat.
2.5.5 Withdraw 59 Army
When drawn, place this chit on the following turn's box on the TRT. Remove the 59th Army from play in the Reinforcement Phase along with all its command chits. (This gives the Soviets the remainder of the turn the chit is drawn and the following turn to prepare for this event.)
2.5.6 2nd Shock Out of Supply
A. When this chit is drawn, place it next to the Soviet Activations Track. B. The next time this chit is drawn use the chit normally, then discard it from the game. C. The 2nd Shock Out of Supply chit could wait for multiple turns for the next 2nd Shock Command chit; this is the designer's intent. D. Once the 2nd Shock Out of Supply chit is used to remove a 2nd Shock Army Command Chit, the 2nd Shock Army out of supply Chit is placed on the following turn's box on the TRT. It will be placed back in the draw cup in that turn's Reinforcement Phase.
Example: On Turn 8 the 2nd Shock out of supply Action Chit is drawn. No 2nd Shock Army Command Chits are drawn for the rest of the turn. A 2nd Shock Army Command Chit is drawn on Turn 9. The chit is used normally and then removed from the game. Place the 2nd Shock Army Out of Supply chit on Turn 10 where it will return to the draw cup in the Reinforcement Phase.
2.5.7 Withdraw the 214 Division
When drawn place this chit on the following turn's box on the TRT. In that turn's Reinforcement Phase remove all units of the 214th Division from the game. (This gives Germany the remainder of the turn the chit is drawn and all the following turn to prepare for this event.)
2.6 Markers
The following markers are used in the game:
2.6.1 Turn Marker
A. Place this on the TRT to record the turn currently in progress. B. Advance the marker one box on the TRT during the Turn Advance Phase at the end of each turn.
2.6.2 Pinned Marker
Used to mark pinned results from barrages.
2.6.3 Out of Supply/Isolated
A. Place this marker on units that are out-of-supply. B. The reverse side is used when a unit becomes isolated.
2.6.4 Divisional Defense Markers
Used to mark the current state of the Prepared Defenses.
2.7 Combat Units
The ground and air units used to play the game are described on the back of the cover.
2.7.1 German Units
| Color | Type |
|---|---|
| Black | German SS |
| Green | 26th Army Corps |
| Gray | 43rd Army Corps |
| Blue | Police/Border |
2.7.2 Soviet Units
The color of Soviet units is based on their location rather than their army. For example, the 43rd Corps, 109th Corps, and 124th Corps are all part of the 2nd Shock Army, but the 124th is in the northern area, while the 43rd and 109th are in the southern area.
| Color | Type |
|---|---|
| Orange-Tan | Western Area |
| Drab | Northern Area |
| Red | Guards |
3.0 Sequence of Play
The game proceeds following the phases outlined below.
A. Air Unit Phase
- Refitted Unit Return Segment
- Grounded Unit Refitting Segment B. Command Phase
- Command Segment
- Movement Segment
- Combat Segment C. Reinforcement Phase
- German Reinforcement Segment
- Soviet Reinforcement Segment D. Supply Phase
- Supply Segment E. End of Turn Phase
- Sudden Death Victory Segment
- Turn Advance Segment
4.0 Command
A. All combat units must be activated by a HQ to move and attack other units. Exceptions: 2.4.2, 2.5.4, and 8.6. B. A HQ may be activated more than once in a turn as long as the following rules are followed.
4.1 Command Phase
4.1.1 Command Chit Draws
A. Draw Command Chits from the cup randomly one at a time during the Command Phase; it does not matter who draws them. B. Check the TRT to see how many HQs can be activated that turn. Once that limit has been reached, no more Command Chits for that force can be activated that turn. C. The owner of the drawn chit becomes the active side; place the drawn chit in the first available box of the Activations Display on the map. D. If the Soviets are active, the Army HQ drawn may then activate a Corps HQ in its command radius. E. If Germany is active, it may activate a division corresponding to the Corps Command chit drawn.
| Chit | HQs |
|---|---|
| 3rd SS Corps | all SS HQs |
| Wehrmacht | all non-SS HQs |
| 26th Corps | all Divisions labeled 26 |
| 43rd Corps | all divisions labeled 43 |
| Army Group Narwa | any German HQ + 2 units (2.4.2) |
F. Two German HQs, KVO and 285S, are not assigned to any corps and may be activated only by the Army Group Narwa chit.
4.1.2 Two Activations in a Row
A. No German Divisional HQ or Soviet Corps HQ may be activated twice in a row. This does extend across turns. Thus, such an HQ cannot activate last on one turn and first on the following turn. B. The Soviet Free Move Action Chit does count as an activation for the purposes of this rule. If it is used to only move three units, it would still allow all other friendly HQs to refresh and be activated with the next activation. C. Enemy activations do not affect this rule. D. The back of each HQ is printed with a last activated reminder for players who want memory help.
4.1.3 Soviet Army HQ Move
The Soviets may activate an Army HQ and then reposition it to anywhere on the board as its sole action for that activation. The Army HQ may not activate another HQ if it does this.
4.2 HQs and Command Execution
4.2.1 Combat Unit Activation
A. The activated HQ can now activate all units of its formation and three units not of its formation (independent or from another formation) within its command range to move and attack. B. Once all applicable units have moved and/or attacked, place the drawn Command Chit face up into the Activations Track in the first available empty box.
4.2.2 Independent Units
Units without a color bar are independent.
4.2.3 German Strachwitz HQ
A. The German Strachwitz HQ (STRAC on the counter) has no units under its direct command (i.e., color-coded). B. It can command four units (independent or from other formations) within its command range. C. It also may make a single barrage attack anywhere on the map adjacent to a German unit, before any of its activated units are moved. D. This HQ may only be activated once per turn.
Errata: The German HQ Strachwitz belongs to the 43rd Corps. Its background color is incorrect.
4.2.4 Command Range
A. Command Range is measured in terms of hexes, counted from the HQ unit. An HQ with a Command Range of four can thus activate friendly combat units up to four hexes away. B. Determine Command Range at the instant the HQ is activated. A combat unit may only be activated if it is within the Command Range of a suitable HQ at that moment. C. Activated combat units may later leave the HQ's Command Range during movement or combat. Exceptions: 2.4.2, 8.6
4.2.5 Soviet Army Command Span Restriction
A. Soviet Army HQs may not be within each other's command span. B. A reinforcing army HQ may not be placed where it would create this situation. Other than the restriction of being within the command range of another Soviet Army HQ, a reinforcing Soviet Army HQ must be placed in a supplied hex. C. An Army HQ that cannot be placed must wait until a Reinforcement Phase where it can legally enter. D. If a Soviet Army HQ is displaced into a hex where it is within the command range of another, it is displaced further till it reaches a hex where it no longer is so.
4.2.6 Out of Command
A. Any unit that is not within command range when the HQ is activated is considered out of command. An out of command unit may not move or attack. B. A unit is only out of command while its HQ's activation is resolved. It does not persist through the turn and has no effect on supply status or defense strength.
5.0 Zones of Control
A. A zones of control (ZOC) represents a unit's ability to inhibit enemy movement, retreat, and supply around them. The ZOCs of enemy units are called enemy zones of control (EZOCs). B. A unit exerts a ZOC into all adjacent hexes. Exceptions: 5.2, 5.6.
5.1 ZOC Effects
A. Units pay two additional movement points (MPs) to enter and another +2MPs to leave an EZOC. These extra costs are cumulative. B. Given the MPs, units can move directly from EZOC to EZOC and can move into and exit any number of EZOCs.
5.2 ZOC Capable Units
A. HQs and Soviet assault guns exert no ZOCs. B. All other units with a printed Attack Strength of 1 or more have ZOCs. C. Combat units without ZOCs are marked with a red dot in the upper left of the counter.
5.3 ZOC and Reinforcements
A. Reinforcements cannot be placed directly into enemy ZOCs. B. Friendly units do not negate EZOCs for placement of reinforcements.
5.4 Retreats and EZOCs
A. A stack that retreats into an EZOC loses one step. This is one step total, not one step per unit. B. This occurs for each EZOC entered on a hex by hex basis. C. Friendly units do not negate EZOCs for retreat purposes. D. The retreating side chooses the step to lose.
5.5 Supply and EZOCs
5.5.1 In General
A. EZOCs block supply lines. B. Friendly units negate EZOCs in their hexes for supply purposes only.
5.5.2 Out of Supply/Isolated Units and ZOCs
Out of supply and isolated units continue to exert ZOCs in the normal manner.
5.6 ZOC Limitations
ZOCs do not extend across unbridged major rivers, whether frozen or unfrozen.
6.0 Movement
A. In the Movement Segment, the active side can move its activated HQs and combat units as far as desired within each unit's printed movement allowance (MA). B. The movement of one unit must be fully completed before another unit can be moved.
6.1 How to Move Units
A. To enter an adjacent hex, a unit must expend the MP cost indicated by the TEC for the hex (and hexside, if applicable) plus any applicable EZOC costs. B. Mechanized units pay higher movement cost for some terrain. C. A unit may always move a minimum of one hex as long as it is not entering or crossing prohibited terrain or moving from one EZOC to another EZOC.
Example: A Soviet infantry unit with an MA of 4 wants to cross a frozen major river into a swamp hex that is in an EZOC. The cost to do that is 5 MPs, so it may enter such a hex per this rule.
6.2 Terrain Effects on Movement
The TEC specifies the MP cost for each hex and hexside feature.
6.2.1 Roads
A. The term road refers to all varieties of roads; rollbahn, road, track, trail, major and minor railway when used as tracks, and winter trail. B. Units may use roads only when following a continuous path along the road to enter a given hex. Such units pay the road movement cost and ignore the MP costs of the hex entered or hexside crossed. C. The winter trail exists only if the weather is frozen, on Turns 1-7 unless a random event prolongs it to Turn 8. After that, treat such hexes are normal swamp hexes.
6.2.2 Major Rivers
A. Major rivers can contain islands, some of them sizable. The islands are ignored for all game purposes. B. During Turns 1-7, most major rivers are frozen. A random event may prolong this to Turn 8. C. The Narva River below Krivasoo, (to Lake Peipus) was kept ice free by the Germans with explosives and is never treated as frozen.
6.2.2.1 Frozen Major Rivers
A. Frozen major rivers may be crossed by infantry units at a cost of +1 MP. B. Infantry units may advance after combat and retreat across a frozen major river. C. Mechanized units may not cross, advance after combat, or retreat across a frozen major river.
6.2.2.2 Unfrozen Major Rivers
A. Unfrozen major rivers may not be crossed except at bridges or ferries. B. One infantry unit may cross per ferry per HQ activation at a cost of all of its MPs. It may move a minimum movement of one hex (6.1.2), so it could be into an EZOC.
Example: The Soviets activate 124 Corps in Turn 9 (post-thaw). It has three ferry hexes, each stacked with two Soviet infantry units. In each hex one infantry could cross the ferry at the cost of all its MPs.
C. Infantry units may advance after combat and retreat across ferries. D. Mechanized units may not cross, advance after combat, or retreat across a ferry.
6.2.3 Minor Rivers
Minor rivers are treated the same during freeze or thaw.
6.3 Movement Restrictions
A. A unit may not move or retreat off the map or into a water hex. B. Units may not enter enemy occupied hexes. Exception: A combat unit can overrun a lone enemy HQ by simply entering the hex, displacing the HQ (11.1.4). This can be done during regular movement, strategic movement or during advance or retreat after combat. C. Only German units of the 4th SS and 11th SS may enter hexes with Prepared Defense symbols. D. Only German SS units may enter the city of Narva or the area across the Narva River enclosed by the Prepared Defenses, inclusive. E. Thus, the 20th SS can enter Narva and help defend the areas across the river behind the prepared defenses but cannot help in the prepared defenses.
Players Note: No Wehrmacht units can help in the city defense at all, so be sure to keep enough SS units around to prevent a Soviet auto victory.
6.4 Strategic Movement
6.4.1 In General
A. A unit using a road to enter an adjacent road hex expends fewer MPs if it starts the Movement Segment in a road hex and only moves along a road for its entire movement. (See TEC for the different costs.) B. Trails may not be used for strategic movement.
6.4.2 Strategic Movement Restrictions
A. A unit may neither start nor end in an EZOC, nor may it enter an EZOC during any part of strategic movement. B. A unit may not exceed the stacking limit at any time while performing strategic movement. Thus, a combat unit passing through a hex already occupied by two combat units, or a HQ passing through another HQ, or a Soviet assault gun passing through another Soviet assault gun may not do so using strategic movement.
6.5 Rail Movement
A. A reinforcement, not in EZOC, starting its move on a major railway hex may move an unlimited distance along major railway hexes. (Units may never move along minor railway hexes.) B. Such a unit must stop when entering an EZOC, or if the rail line is physically blocked by an enemy unit with no ZOC. (Germany's rail line from entry area A was cut in first turn of this battle and is shown that way on the map.) C. A reinforcement may not combine rail movement with other forms of movement. D. Only reinforcements may use rail moves.
7.0 Stacking
7.1 General Rule
A. A stack occurs when a hex contains more than one unit. B. A hex may contain:
- Two combat units (whether full-strength or reduced-strength), and
- One HQ, and
- One Soviet assault gun. C. Enforce stacking at the end of each phase and at the instant a unit finishes its movement, retreat, or advance after combat.
7.2 Overstacking
A. Reinforcements and rebuilt units can overstack initially upon placement but must be stacked legally by the end of the phase. B. If a unit exceeds the stacking limit in the last hex of a retreat, it must attempt to retreat one additional hex. If it cannot legally do so, it is eliminated instead. C. If through retreat, two or more HQs do end up stacking in the same hex, retreat the HQ one additional hex. If it cannot do so, it is eliminated.
8.0 Reinforcements
A. Place reinforcements into the hex containing their entry area designation. B. Reinforcements enter in supply and in command, and have a movement phase upon entry, using regular, strategic, or rail movement as applicable.
8.1 Stacking
Reinforcements can overstack upon placement provided they separate during that phase.
8.2 Movement Allowance
Placing reinforcements does not cost MPs. Units have a full MA upon placement.
8.3 EZOCs
A. Reinforcements cannot be placed upon enemy units, nor into EZOCs. Friendly units do not negate EZOCs for this purpose. B. If enemy units occupy the entry hex or have it covered by an EZOC, the reinforcements may arrive within ten hexes of their entry hex along the same map edge. Exception: Soviet 260th MS brigade (8.6).
8.4 German Entry Point Track
A. Germany may reroute its reinforcements. For a one turn delay, a unit may enter at any other reinforcing point then the original one. Place the unit in the box on the display corresponding to the new entry hex. B. A unit may not be rerouted a second time and must enter in the following turn.
Example: On Turn 4 the units of the 11th Division enter at B. Germany moves all the units to the A box on the display for entry on Turn 5. The units may not be further delayed until Turn 6.
8.5 Restrictions
Reinforcements that cannot enter the map under any circumstances are considered eliminated.
8.6 Soviet 260th MS Brigade
A. On Turn 2, or any later turn, this unit may be placed in either of the two hexes of Merekula. If both hexes are occupied by enemy combat units, it may enter in either of the two coastal hexes adjacent to the village if those are not occupied by combat units. B. The unit may be placed in a hex with just an enemy HQ, displacing the HQ. C. When the 260th MS lands in a coastal hex Germany may immediately barrage the hex. This represents the German coastal artillery. If this unit suffers a Dr1 due to the barrage, is it destroyed. D. The 260th MS is activated and may move and attack each turn when the first 2nd Shock Army chit is drawn. This is in addition to the activation of one of the corps, and its activation does not count as one of the three units not directly under the command of the HQ activated. E. The 260th MS never needs supply.
8.7 Reinforcement Chits
Place Command and Action chits in the drawing cup in the Reinforcement Phase indicated on the counter.
9.0 Combat
A. In the Combat Segment, the active side can attack enemy units adjacent to its activated combat units. B. Empty hexes or HQs alone cannot be attacked. C. Attacks are never mandatory, although units must defend if attacked.
9.1 Combat Results
A. The Combat Results Table (CRT) gives results that either affects the attacker (A) or the defender (D). B. Germany and the Soviets use different lines for the odds ratios. C. The defender always implements its result first. D. Losses in red affect only the Soviets when they are attacking. E. The possible results are:
| Result | Explanation |
|---|---|
| NR | No result, nothing happens |
| # | Number of steps lost |
| r# | Number of hexes to be retreated. |
Example: A result of D1r2 means that the defender must lose one step and retreat two hexes.
9.2 Combat Restrictions
9.2.1 Attack Direction
A. Any number of units can attack in a single combat, and attacks can be made from any direction or set of directions. B. Units stacked together may attack different hexes, but no single unit can contribute to more than one attack.
9.2.2 Defining Defending Target
A. Attack all units in a hex as a single defending strength. The defender cannot withhold units in a hex from attack. B. Units within a stack cannot be attacked singly; stacks always defend together.
9.2.3 Zero Combat Value Units
Units with a combat value of zero can participate in an attack with other non-zero units. While they add nothing in the way of combat strength, such units can help absorb step losses and may advance after combat.
9.3 Odds Determination
A. Total the modified attack strength and divide by the total modified defense strength to produce the Combat Ratio. B. Apply the Standard Rounding Rule (2.1.2) to the totals and express the two numbers as a ratio, Attacker to Defender. C. Several factors can affect the attack and defense strengths; these are cumulative:
- Hills and Swamps double defense strengths. (Do this before any halving for being out of supply or isolated). A unit may only be doubled once for defense. Example: A hill in the middle of a swamp still only doubles the defender.
- Major rivers, minor rivers, and ferries halve attack strength of units attacking across them. These effects are not cumulative, and units may only be halved once for any these features. Example: The hexside being attacked across has a ferry, a major river, an island, and then what looks like a minor river on the back of the island. The attacker is halved.
- Halve the attack and defense strengths of units that are out of supply or isolated.
- Villages and towns are cumulative in the sense they affect the result but do not shift the combat.
9.3.1 Column Shifts
A. When occupied by defending units, some terrain types provide favorable ratio combat shifts. B. An attack on a hex with a Pin marker provides a shift of one column to the right. C. Air Units provide column shifts to the right (12.0). D. Column shifts are cumulative.
9.3.2 Restrictions
A. If the final Combat Ratio is less than the lowest column on the CRT after applying any column shifts, cancel the attack. B. If the ratio is greater than the highest column on the CRT, resolve the combat on the highest column on the CRT. C. If the total defense strength in a hex is reduced to zero by rounding down, the combat is resolved on the highest column of the CRT, regardless of any potential column shifts.
9.4 Step Losses
A. Full-strength units which take a step loss are flipped over and become reduced. B. Reduced-strength units which take a step loss are destroyed and removed from play. C. Not all units have two steps. HQs do not have a step as they are not a combat unit.
9.4.1 First Step Loss
A. When a result calls for a step loss, the first step to be removed must be from that side's strongest unit which participated in that combat. B. The strongest unit is the one with the highest printed attack strength (for the attacker) and defense strength (for the defender). If two units have equal strength, the owner chooses.
9.4.2 Multiple Step Losses
A. Beyond the requirement for the strongest unit to take the first loss, any additional losses can be distributed as the owner desires. B. There is no requirement for every unit to take one loss before any units take a second one.
9.4.3 Single Step Units
A. Some units have only one step. These units have printing on only one side. B. On step loss eliminates any such unit.
9.4.4 Negating First Step Loss
A. Units located in a city ignore the first loss result from the CRT. Exception: Barrage (2.5.1). B. Units taking multiple losses may ignore the first loss but must take any additional losses as normal.
9.5 Retreats
A. The defender retreats its units first, then the attacker retreats its units. B. Units may not retreat through enemy units. Exception: A retreating combat unit can overrun a lone enemy HQ by simply entering the hex. C. Retreat priorities are listed below; in order of precedence.
9.5.1 Terrain Restrictions
A. Units can retreat only into or through hexes that the units could move through during movement. B. Units which cannot complete their retreat for this reason must lose one step per hex that the stack could not retreat. C. The owner freely selects the unit to take these losses.
9.5.2 Length
A. Retreats are given as the number of hexes the affected units must retreat. B. Each retreat hex must be further away from the unit's original hex than the last (e.g., the second hex retreated is two hexes away from the combat hex). C. Units which cannot complete their full retreat must lose one step per hex the stack cannot retreat. D. The owner freely selects the unit to take these losses.
9.5.3 Effect of EZOCs
A. If possible, units must not retreat into an EZOC. B. If a stack must retreat into an EZOC, it must retreat into the fewest possible hexes containing an EZOC. C. Each hex containing an EZOC entered by retreating units costs the retreating stack one step. This loss is in addition to the combat result itself. D. The strongest unit in the stack takes the loss. Use defense strength when defender is retreating and attack strength when the attacker is retreating. E. Friendly units do not negate EZOCs for this purpose.
9.5.4 Supply
A. If possible, a retreating unit must end its retreat in a supplied hex. B. By retreating into a swamp or woods hex the unit could make the hex supplied (10.1). This is allowed.
9.5.5 Retreating Stacks
A. Retreating units can stay together as a stack or retreat using separate paths, at the owner's discretion. B. If a unit exceeds the stacking limit in the last hex of a retreat, it must attempt to retreat one additional hex. If it cannot legally do so, it is eliminated instead. C. If an HQ retreats into a hex with another HQ, it must retreat one additional hex. If it cannot do so, it is eliminated.
9.5.6 Negating First Retreat Result
A. Units located in a village, prepared defense, or city ignore the first increment of a retreat result. Exception: Barrage (2.5.1). B. Attacking units in villages and cities have their first retreat negated as well. C. A hex with a village and a prepared defense has no additional effect. Only the first retreat result is ignored.
9.6 Advance after Combat
A. When an attack (except barrage) results in the defender's hex becoming vacant, attacking units can occupy that hex. B. Advance after combat is optional; the attacker may advance all, some, or none of its attacking units, subject to stacking limits. C. The defender's original hex must be the first advance hex. D. While advancing after combat, advancing units do not expend MPs and they ignore EZOCs.
9.6.1 Infantry Advance Restrictions
A. Infantry units cannot advance after combat over an unbridged, unfrozen major river hexside except at a ferry. B. Infantry may freely advance after combat across a frozen major river.
9.6.2 Defending Units
The defender cannot advance after combat.
9.6.3 Mechanized Units
A. When the defender retreats or is eliminated, mechanized combat units can advance up to two hexes. B. Mechanized units that participated in the same combat can end their advance in different hexes, normal stacking restrictions apply.
9.6.4 Mechanized Units and Terrain
A. A mechanized unit may never advance across an unbridged major river hexside. B. A mechanized unit that crosses an unbridged minor river hexside or enters a village or city in the first hex of its advance after combat must stop and cannot advance a second hex.
9.6.5 HQs
An HQ may advance after combat with the unit/units in its stack.
9.6.6 Overrun
An advancing combat unit may overrun a lone enemy HQ and displace it by simply entering its hex (11.1.4).
10.0 Supply and Isolation
A. During the Supply Phase, both sides check each of their units to determine if a supply line exists. B. If a supply line cannot be traced to a specific unit, mark the unit with an Out of Supply marker. C. If the unit already has an Out of Supply marker on it and is still out of supply, it becomes isolated instead. Flip over the Out of Supply marker to its Isolated side. D. If the unit already has an Isolated marker, it suffers no further penalties for remaining out of supply. E. If a supply line can be traced for such units in a later Supply Phase, remove the Out of Supply or Isolated marker.
Design Note: Some units begin the game unable to trace supply, but they are not out of supply until the Supply Phase.
10.1 Tracing a Supply Line
A. A supply line is a path traced from a unit to its side's supply source, free of enemy units and EZOCs. B. The path may be of any length but may only consist of road, hill, and clear hexes. C. A friendly unit in a swamp or woods hex converts that hex to a clear hex for the purposes of supply tracing.
Players Note: This is a very restrictive supply rule. Most of the time you are sitting on a road hex or perhaps a hex or two off the road linked back by clear hexes or chains of friendly units.
10.1.1 Supply Restrictions
A. A supply line cannot cross unbridged major river hexsides, even frozen ones, except at ferry hexes (which are considered to connect the roads in both hexes for the purposes of supply tracing). B. Friendly units negate EZOCs in their hexes for supply purposes.
10.1.2 Supply Duration
A. After a successful trace, units are supplied until the next Supply Phase, regardless of changing circumstances. B. Conversely, units that are out of supply must wait until (at least) the next Supply Phase to qualify as being in supply.
10.2 Supply Sources
10.2.1 Regular Supply Sources
A. The Soviets may trace supply to any Soviet supply source (red and white) on the east or south map edges. B. Germany may trace supply to any German supply source (black and white) on the west map edge.
10.2.2 Limited Supply Center
A. If any hex of the rollbahn between entry area A and the city of Narva is occupied by a Soviet unit during the supply phase, then all German units in Narva and the area on the other side of the river enclosed by the Prepared Defenses, inclusive, are considered out of supply regardless of any other supply path into this area. B. Units in this area never become isolated, as Narva serves as a limited supply source.
10.3 Out of Supply
10.3.1 Out of Supply Effects
A. Out of supply units have their attack and defense strengths halved. B. Units that are out of supply retain their full MA.
10.3.2 Isolation
Isolated units have their attack strength, defense strength, and MA halved.
11.0 Special Rules
11.1 HQ Rules
11.1.1 Retreats
If a stack containing an HQ must retreat as a result of combat, the HQ must also retreat.
11.1.2 Advance After Combat
A. If a stack containing an HQ attacks and advances after combat, the HQ may advance with the units, at the attacker's option. B. The HQ may advance two hexes if it is stacked with mechanized units advancing two hexes.
11.1.3 Displacement
A. An HQ is displaced from its current location and placed in a in supplied hex, not in an EZOC, at least five hexes (owner's choice if more) from its current location under the following circumstances:
- If all units it was stacked with are eliminated. This includes barrage combats.
- If it is overrun (11.1.4). B. The HQ may be displaced even if completely surrounded by enemy units and/or their ZOCs.
11.1.4 Lone HQs and Overruns
A. Lone HQs can be overrun by enemy combat forces in the movement accompanying the Reinforcement Segment, bringing on a replacement, the regular Movement Segment, or as part of retreating and advancing after combat. B. The enemy unit must have the MPs to enter the hex; being adjacent is not enough.
Players Note: Defending HQs with friendly combat units is an important tactic to use.
11.2 Replacements
A. Germany may get replacements from the Random Event Table. B. Replacements allow the rebuild of a stepped unit on the map or the return of an eliminated two-step unit back to the map on its reduced side. C. Eliminated one-step units may not return to the map. D. A mechanized step may not be rebuilt.
11.2.1 Procedure
A. The cost of rebuilding a German step is one replacement point (RP). B. A unit may not return from being previously eliminated at full strength in one turn. It would have to return at reduced strength and be rebuilt in a future turn.
11.2.2 Placing Rebuilt Units
A. A rebuilt unit must be placed in the hex with its HQ. B. The hex must be in supply. C. Independent units may be placed with any HQ. D. Rebuilt units may be placed in EZOCs. E. After the unit is placed, it may immediately move using regular or strategic movement. F. Rebuilt units may overstack, but they must be stacked legally after their movement.
11.2.3 Restrictions
A. Units that are out of supply or isolated may not be rebuilt. B. Rebuilt units may not be placed with an out of supply HQ.
11.2.4 Improving Prepared Defenses
A. Germany may spend RPs to improve the Prepared Defenses around Narva. B. One RP allows Germany to move a Prepared Defense marker up two boxes on its track.
11.3 Prepared Defenses
A. Some hexes on the eastern side of the Narva River are marked with the prepared defense symbol. These are further divided into a group of hexes marked for the Nederland division and another for the Nordland division, color coded for each division. B. A track on the map records the current state of the prepared defenses (PD) for each division using the markers corresponding to each division.
11.3.1 Restrictions
A. Only the Nederland and Nordland divisions may enter the PD hexes. B. Each division may enter the other's PD hexes.
11.3.2 Defensive Benefit
Soviet attacks against PD hexes suffer a left column shift equal to the number in the box on the Prepared Defense Track.
11.3.3 Effect on Retreats
A PD hex negates the first retreat result received by a German unit. Exception: Barrage (2.5.1).
11.3.4 Effect of Combat on Prepared Defense Track
A. Combat results (including barrage) suffered by a German unit in a PD hex are taken as movement of the marker on the PD track for that hex's division until the marker is in the final (zero) box). B. Each loss moves the marker down the track one box. C. Each retreat that was not negated also moves the marker one box down the track. D. Once the marker is in the zero box, any remaining combat result is applied to the units in the hex.
Example: A German unit in a PD hex of the Nederland division is attacked with a result of D2r2. The Nederland marker would be moved down the PD track two boxes for the loss result and one for the retreat (as the first retreat was negated). If the PD marker reached zero after the first loss the units would have suffered one loss and one retreat.
11.3.5 End of Turn Improvement
In the Turn Advance Segment at the end of each turn Germany may move the PD marker of one division up one box on the PD track (Germany's choice as to which division).
11.4 Turn Advance Sequence
A. All chits are returned to their draw cups. Exception: 2nd Shock out of supply Chit (2.5.6). B. Remove all Pinned markers. C. Germany may move a PD marker (11.3.5).
12.0 Air Units
A. Germany has one air unit and the Soviets have six. B. Most air unit have two values, +2 on the front (full attack) and +1 on the reverse (normal attack). C. One Soviet bomber has a +3 full attack and no normal attack on its reverse.
12.1 Air Attack
12.1.1 Procedure
A. During a Combat Segment, the attacker can support any combat by placing one or two (maximum) air units onto the targeted hex by moving the air unit(s) from the Air Army13 box or the Luftwaffe box located on the map. B. Units may perform a normal attack or a full attack. Exception: The Soviet bomber unit may only make a full attack. C. The number on the air unit is the number of shifts to the right that the air unit contributes to the combat.
12.1.2 Returning to Base
A. Place an air unit that has used full attack in the Grounded side of the airbase box. B. Place an air unit that has used normal attack in the Refit side of the airbase box.
12.2 Air Units Recovery
12.2.1 Refit
In the next Refitted Unit Return Segment, move the air unit to its holding box (Air Army 13 Box for the Soviets or Luftwaffe Box for Germany).
12.2.2 Grounded
In the next Grounded Unit Refitting Segment, move the air unit to the Refit side of the airbase box.
13.0 How to Win the Game
13.1 Sudden Death Victory
A. If the Soviets occupy any hex of Narva, (3030, 3029, 3028, or 2930) in the Sudden Death Victory Segment with a supplied unit, they win a sudden death victory. B. If this never happens, determine victory at the end of Turn 12 using the conditions below.
13.2 Victory Conditions
The Victory conditions are based on the Soviet possession of Victory Points (VPs). To control a VP hex, that side must have been the last to pass through the hex with a combat unit with a ZOC.
| VPs | Level |
|---|---|
| 56+ | Soviet Massive |
| 46-55 | Soviet Major |
| 36-45 | Soviet Minor |
| 26-35 | German Minor* |
| 16-25 | German Major |
| 0-15 | German Massive |
* historical result
13.3 VP Hexes and Events
| VPs | Hex* or Event |
|---|---|
| 15 | Entry hex A |
| 10 | Entry hex B** |
| 10 | Entry hex C |
| 2 | Hills 1429, 1530, 1629** |
| 3 | Ivanagrod 3129, 3130, 3131** |
| 2 | Narva Joesu (Hungerburg) 2337 |
| 1 | Krivasoo 1820 |
| 1 | Each village hex west of Narva river |
| 2 | Each Soviet occupied hex on the rollbahn from point A to Narva 2930 (Inclusive) |
| 1 | Each box moved down on the PD track by marker*** |
* If a hex contains multiple VP features, that side earns VPs for each. ** per hex *** at the end of Turn 12
14.0 Setup
A. Set up units in the specified hexes. Color for a corps (or Soviet grouping) indicates the general color of a counter. Color for a division indicates the horizontal band across its units. B. A superscript R indicates the unit sets up reduced. C. Units with a number and letter or * in upper right corner are reinforcements, and are not included below.
14.1 German 26th Army Corps
14.1.1 61st Division (Purple)
| Hex | Unit |
|---|---|
| 2626 | 151G (R) |
| 1312 | 61F |
| 1210 | 161 Pio |
| 0920 | 162G |
| 1220 | 176G (R) |
14.1.2 FHH Division (Gray)
| Hex | Unit |
|---|---|
| 1827 | HQ |
| 1928 | PZG |
| 2022 | MOK |
| 2431 | BECK |
| 1029 | PZ |
| 1820 | FUS |
| 2423 | AA |
14.1.3 170th Division (Brown)
| Hex | Unit |
|---|---|
| 2326 | 391G |
| 2732 | 399G |
14.1.4 227th Division (Yellow)
| Hex | Unit |
|---|---|
| 2030 | HQ |
| 2832 | 366G |
| 2132 | 227 Pio (R) |
| 2633 | 328G |
| 2634 | 227F |
14.1.5 Independent Unit
| Hex | Unit |
|---|---|
| 2533 | 2/502 |
14.2 German 43rd Army Corps
14.2.1 225th Division (Yellow)
| Hex | Unit |
|---|---|
| 0213 | HQ |
| 0607 | 376G (R) |
| 0804 | 225 Pio |
| 1107 | 333G |
| 1109 | 377G |
14.2.2 58th Division (Black)
| Hex | Unit |
|---|---|
| 2126 | 209G |
14.2.3 KUST (Green)
| Hex | Unit |
|---|---|
| 2235 | Hohn |
| 2337 | SCHN |
14.3 German SS (Black)
14.3.1 11th SS Division (Red)
| Hex | Unit |
|---|---|
| 3029 | HQ |
| 3127 | 2/24 |
| 2931 | AA |
| 2829 | KAUS |
| 3329 | 3/24 |
| 3027 | 11 Pio |
| 2830 | HVS |
| 3227 | HAME |
| 2928 | 23 |
| 3228 | KRUG |
14.3.2 4th SS Division (Orange)
| Hex | Unit |
|---|---|
| 3130 | HQ |
| 3331 | 2/48 |
| 3231 | 1/49 |
| 3330 | 1/48 |
| 3132 | 2/49 |
| 3031 | 54 Pio |
14.3.3 KUST (Green)
The KUST HQ is part of the 3rd SS Corps but the units it commands are Wehrmacht and police so it has different base colors.
| Hex | Unit |
|---|---|
| 2134 | HQ |
14.4 German Police and Border (Blue)
| Hex | Unit |
|---|---|
| 1005 | 30P |
| 1532 | 32P |
| 1721 | 29P |
| 2435 | 31P |
14.5 Soviet Western (Orange-Tan)
| Hex | Unit |
|---|---|
| 3024 | 2nd SH HQ |
14.5.1 122nd Corps (Red)
| Hex | Unit |
|---|---|
| 1306 | HQ |
| 1207 | 163 |
| 1409 | 219 |
| 2305 | 320 |
| 1105 | 65 |
| 1103 | 147 |
| 2306 | 708 |
| 2020 | 1074, 1076 |
| 2021 | 1078 |
14.5.2 124th Corps (White)
| Hex | Unit |
|---|---|
| 1408 | 172 |
| 1507 | 296, 119 |
14.6 Soviet Southern Area (Drab)
14.6.1 109th Corps (Green)
| Hex | Unit(s) |
|---|---|
| 2120 | HQ |
| 2122 | 381, 456 |
| 2422 | 602 |
| 1921 | 657, 749 |
| 3026 | 864 |
| 3226 | 880 |
| 2021 | 466 |
| 3429 | 891 |
14.6.2 43rd Corps (Yellow)
| Hex | Unit(s) |
|---|---|
| 2935 | HQ |
| 3333 | 268 |
| 3332 | 301, 328 |
| 2635 | 4 |
| 2636 | 166 |
| 2736 | 308 |
| 2734 | 593 |
| 3032 | 695 |
| 2733 | 743 |
14.6.3 Independent Units (No Band)
| Hex | Unit |
|---|---|
| 2538 | 48 |
| 3430 | 16UR |
| 3232 | 50 |
14.7 Soviet Guards (Red)
| Hex | Unit(s) |
|---|---|
| 3015 | 30 GD HQ |
| 3406 | 131 |
| 3108 | 129 and 134 |
| 3014 | 188 |
| 2816 | 190 |
| 2716 | 192 |
| 2718 | 197 |
| 2719 | 191 |
| 2820 | 194 |
14.8 Air Units
| Nation | Turn | Unit(s) |
|---|---|---|
| Germany | Start | JU-87 |
| USSR | Start | IL-2M, LI-2, MIG 3, YAK-8 |
| USSR | 3 | IL-2M |
| USSR | 4 | MIG 3 |
14.9 Chits
| Turn | Germany | USSR | Event |
|---|---|---|---|
| Start | 2 x 3SS, WER | 3 x 2SH | |
| 1 | WER | 2SH | |
| 2 | Barrage | ||
| 3 | 26, 43, AGN | 8, 59 | Barrge |
| 4 | 26 | 2 x 59 | Barrage, Stavka |
| 5 | Random Event | ||
| 7 | 43 |
14.10 First Turn Rules
A. The Soviets move first and start with a 2nd Shock Army Command chit to play as if they had picked it. B. The Soviets apply a +1 die roll modification to each combat die roll this turn only.
14.11 Reinforcements
HQs are listed as its own parent for the sake of clarity.
| Abbr | Explanation |
|---|---|
| AG | Assault Gun |
| Eng | Engineer |
| PzG | Panzer Grenadier |
| Tk | Tank |
14.11.1 German Reinforcements
| Turn/Entry Hex | Parent | Unit(s) |
|---|---|---|
| 1A | 61 | 61 HQ |
| 1A | 170 | 170 HQ, 410F, 170F |
| 1A | 20SS | 1/46, 2/46 |
| 1A | FHH | FHH Pio |
| 1A | Ind | GNES, FBB PzG, 540 |
| 1A | KVO | TART, VIL J, PARN |
| 1B | 58 | 58F |
| 2A | 58 | 220G, 158 Pio |
| 2A |
14.11.2 Soviet Reinforcements
| Turn/Entry Hex | Parent | Unit(s) |
|---|---|---|
| 1D | Ind | 40G, 622, 781, 1434 AG |
| 1F | 30G | 30 Tk |
| 1F | Ind | 185 Tk |
| 1G | Ind | 71 |
| 1H | 14 | 1254, 1256, 1258 |
| 2 | Ind | 260 (8.6) |
| 2D | 117 | 117 HQ, 92, 122, 191, 245, 255, 272, 289, 538, 543 |
| 2D | 124 | 124 HQ, 77, 153, 218, 483, 486, 502 |
| 2E |
15.0 Players Notes
15.1 Soviet Union
The Soviets can win by getting to Narva from the north, south, or through the prepared defenses (though that is hard to do unless the Germans strip them almost entirely). They can also win by getting enough VPs by taking the entire southern area or by getting to highway by the central bridges and the winter trail. If Germany shuts down one area by putting a lot of reinforcements, consider attacking in other areas. The ability to move HQs at a cost of an activation is extremely powerful and can change a quiet front to a very active one.
15.2 Germany
Keep your forces balanced by area, react to the Soviets, and keep an eye on the VPs. Losses mean nothing so it' s all about controlling terrain. Use you limited attacks and barrages to eliminate Soviet armor.