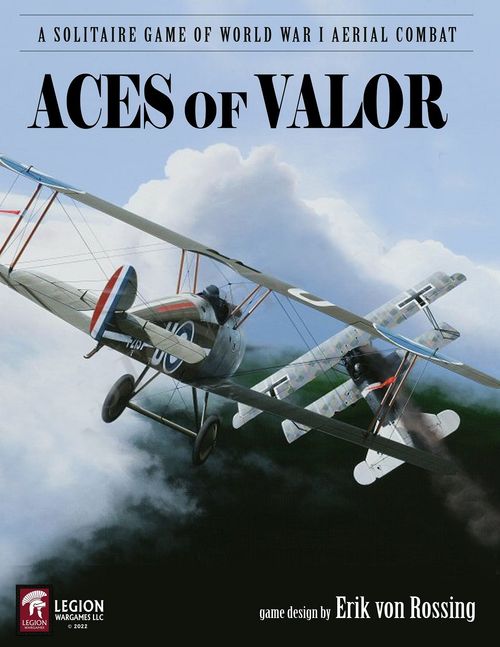
Aces of Valor
Aces of Valor Rulebook
Table of Contents
Table of Contents
- 1.2 Scale
- 1.3 Components
- 1.4 Game Map
- 1.5 Cards
- 1.6 Die Rolls
- 2.0 Glossary of Terms
- 3.0 Counters
- 3.1 Aircraft
- 3.2 Aircraft Ordnance
- 3.3 Ground Targets
- 3.4 Markers
- 4.0 Victory
- 5.0 Campaigns & Missions
- 6.0 Pre-Mission Phase
- 7.0 Flight Phase
- 8.0 Combat
- 9.0 Post-Mission Phase
- 10.0 Optional Rules
- Example of Play
- Designer's Notes
- Historical Note: Top Aces
1.2 Scale
Each aircraft counter represents one aircraft and its crew (pilot, or pilot and observer). A mission simulates a single combat flight, while a campaign occurs over a period of a few months or years. Each sector on the campaign map is approximately 5-10 miles wide.
1.3 Components
The game includes:
- One Game Map
- One Rules Booklet
- 3 Counter Sheets
- 270 counters (.75")
- 64 counters (.6")
- 54 Cards (Poker Size)
- 2 Player Aids
- 1 Bi-fold (11" x 17" double-sided)
- 1 Tri-fold (11" x 25.5" single-sided)
- 4 Six-sided Dice
The game requires you to frequently draw random counters from various groups, so it is suggested you have several opaque containers (e.g., coffee cups) nearby.
Play Note: Throughout the rules, references are made to tables and charts on the player aids. These are based on the table's name and/or code in brackets (Weather [M1], Aircraft Damage [C8], etc.).
1.4 Game Map
The game map combines several functions, including the campaign map, operations chart, and numerous tracks and tables.
1.4.1 Campaign Map
The campaign map is a semi-historical representation of the Western Front. It is split evenly between the Entente and German sides, each having its own trench and rear areas. It is further divided into "sectors", most of which have ground features such as airfields, trenches, towns, etc., while others are either clear or woods. Sectors are used to regulate movement and identify the location of targets assigned by the mission cards. Trench and balloon sectors have an anti-aircraft (AA) symbol indicating automatic enemy AA attacks when the player's flight is in that sector. See the Player Aid for the map key.
Design Note: As mentioned in Scale (1.2), map sectors are abstracted to equal width for game purposes. In reality the trench and balloon lines area would have only been a few miles wide.
1.4.2 Operations Chart
The operations chart has two sections. The upper "Squadron Status" section has four boxes to keep track of the player's aircraft during the game, while the lower "Combat" section is used to handle aircraft and ground targets during combat.
1.5 Cards
There are three types of cards in the game:
- Mission Cards
- Post Mission Events
- Optional Rules
Mission cards are used in all campaigns, while Post Mission Events and Optional Rules cards are used at the player's discretion. A Mission card is drawn during the Pre-Mission Phase, detailing the type of mission, composition of the player's flight, target and the way the player earns MPs for successful completion. See 10.0 for more details on Post Mission Events and Optional Rules.
1.6 Die Rolls
The game requires many die rolls during play. Typically one or more six-sided dice will be rolled, and the result may be modified by a die roll modifier ("drm"). When a 2D6 is needed, roll two dice and add the numbers together to get a result from 2 to 12. If a table calls for a "D2" or "D3", roll a six-sided die and divide the result by three (for D2) or two (for D3) and round up. For example, if rolling a D3, a roll of 5 is divided by two to get 2.5, which is rounded up to a final 3 result.
2.0 Glossary of Terms
2-Seater – Reconnaissance aircraft randomly assigned to join the player's flight for photo recon and artillery spotting missions. Has both a forward firing and defensive (rear) machine gun.
Anti-Aircraft ("AA") – Ground fire from artillery, machine guns, and small arms when flying over enemy AA sectors or attacking ground targets.
Attack – An aircraft combat action to shoot at an enemy aircraft, bomb a ground target, or conduct a photo recon or artillery spotting attempt.
Bomber – Day-bomber aircraft randomly assigned to join the player's flight for certain missions. Carries a heavy bomb load and has a defensive machine gun.
Break Off – An aircraft combat action to withdraw from the current combat.
Campaign – A complete game consisting of 8, 12 or 16 missions.
Damage – Combat hits are usually rolled again and compared to the target's structure rating (aircraft) or damage rating (ground targets) to determine the effect.
Enemy AA Sector – Any sector on the enemy's side (trenches or balloon line) with an AA symbol. These require an AA/ground fire check whenever the player's flight ends the turn in that sector.
Enemy Rear – Any sector behind the enemy's trench sectors.
Fighter – "Scout" aircraft with forward firing machine guns; if using optional rules the player's fighters may carry bombs or rockets.
Flight – The player's group of fighters, 2-seaters, and bombers flying a particular mission.
Friendly Rear – Any sector behind the player's trench sectors.
Ground Target – Enemy objectives or targets of opportunity that the player's flight can attack during a mission.
Hits – Dice rolled in combat result in "hits". Hits are usually rolled again to determine how much damage is caused to an aircraft or ground target.
Home Airfield – The airfield to which the player's squadron has been assigned. This may change at the end of every fourth mission.
Initiative ("IN") – The order in which aircraft take actions in combat, and how much advantage they have over their targets based on the difference in initiative.
Heavy Bombers – Two counters (Gotha G.IV for the Germans, Handley Page O.100 for the Entente) that appear as a Post Mission Event special target.
Mission – A single scenario up to 24 turns in duration with an objective based on the mission card drawn by the player.
Mission Points ("MPs") – Points awarded or lost during a mission based on achieving objectives and aircraft shot down (of either side).
Ordnance – Bombs or rockets carried by the player's bombers, and possibly fighters. Both aircraft types have reduced performance when carrying ordnance.
Pilot – The single crewman of a fighter aircraft.
Post Mission Event – Players have the option to randomly draw one of these 16 event cards at the end of each mission (except the last one) to add flavor and unpredictability to the campaign.
Squadron – A group of up to 8 fighter aircraft controlled by the player.
Strafing – A player's fighter aircraft may choose to attack a ground target with machine guns.
Tier – Represents fighter aircraft improvement during the war. Tiers 1, 2 and 3 generally represent early, mid, and late war periods, respectively, although it is likely for different tiers to appear together during the same campaign and/or mission.
Upgrade – Occurs when a player's aircraft counter is replaced with the corresponding counter of the next tier, indicating the pilot/crew has received an improved machine.
Victory Points ("VPs") – Points that measure the overall success of the campaign; they are attained by spending MPs.
Aircraft Statistics
Forward Gun – Indicates the aircraft has a gun for attacking enemy aircraft and ground targets.
Gun Rating – The minimum die roll required to score a hit in air combat with any gun carried by the aircraft. If there are two numbers separated by a slash, the second value is the roll required to score 2 hits.
Defensive Gun – Carried by 2-seaters and bombers for defensive fire when attacked during air combat. If there are two numbers separated by a slash, the second value is the roll required to score 2 hits. Heavy bombers have 2 defensive guns.
Aircraft Performance – The speed and maneuverability of the aircraft. Used to determine initiative in air combat, and for landing rolls. The rating is reduced if the aircraft carries ordnance.
Pilot/Crew Skills – Air skill is the flying and air combat skill modifier of the pilot or crew. Ground skill is the modifier when attacking ground targets. Fighter pilot skills can be improved during a campaign (8.7).
Structure Rating – The durability and maneuverability of the aircraft. Indicates the amount of damage it must take in a single attack to be damaged (flipped) or destroyed (eliminated).
3.0 Counters
3.1 Aircraft
Design Note: An aircraft and its pilot/crew are considered a single "unit". You cannot assign a pilot or crew to a different aircraft or vice versa (although the aircraft itself may be "upgraded" to an improved tier – 9.0 #2). A damaged aircraft represents significant structural damage and/or the crew has been wounded.
There are four types of aircraft in the game:
- Fighters
- 2-seaters
- Bombers
- Heavy Bombers
Players will have fighters assigned to their squadron, while 2-seaters and bombers will be temporarily under a player's control for specific missions. Heavy bombers only appear as a special post-mission event if those cards are in use.
All aircraft have a front (undamaged) and back (damaged) side. Most of the aircraft's statistics are reduced on its damaged side. A damaged aircraft that is damaged again is destroyed. See the Player Aid for aircraft counter details.
Play Note on Heavy Bombers: Enemy heavy bombers only appear as an optional post-mission event. They have two defensive guns - when attacked by the player's aircraft, both sets of defensive guns fire separately and simultaneously. Yes they are dangerous!
3.2 Aircraft Ordnance
3.2.1 General
Bombers always carry a full load of six (6) bombs for their missions. 2-seaters never carry ordnance. Optional rules give Entente fighters the option to carry rockets or bombs to more effectively attack assigned mission targets and other targets of opportunity, at the expense of reduced range and maneuverability.
3.2.2 Ordnance Capacity
See the Aircraft Ordnance Capacity table [M2] to determine how much ordnance may be carried. Use markers to indicate the current load. Markers are immediately adjusted when an aircraft is damaged (reduced carrying capacity) or if it uses ordnance against a ground target.
3.2.3 Performance Reduction
As indicated on the Player Aid, aircraft have reduced performance when carrying ordnance (-2 for fighters, -1 for bombers).
3.2.4 Mission Length Reduction
If ANY of the player's fighter aircraft carry ordnance of any type on a mission, reduce the total mission turns from 24 to 22 to simulate extra fuel expenditure (6.0).
Example: The player commands a French squadron and the "Entente Anti-Balloon Rockets" optional rule is in effect (10.1). For a Balloon Busting mission the player wishes to arm a French Spad VII with rockets. The aircraft can carry up to 2 rockets and the Total Mission Length mission counter is placed on turn 22 of the Mission Turn track. The aircraft's performance rating is 5 (not 7) for combat purposes. If the aircraft is damaged it immediately jettisons (removes) all rocket counters and its performance rating will remain 5 based on its damaged side.
Design Note: Although a variety of aircraft weapons systems were trialed throughout the war, the use of bombs and rockets by fighters was uncommon, and almost never used by the Germans. If playing as the Entente, the optional rules allow the player to incorporate these two types of ordnance into the squadron's arsenal.
3.3 Ground Targets
Ground target counters are used to represent enemy ground targets encountered during missions. Like aircraft, they have a front (undamaged) and back (damaged) side. MPs are awarded if the ground target is damaged or destroyed (8.4.6). See the Player Aid for ground target counter details.
Design Note: There are two Town ground target counters – one for towns A, C, and E, and one for towns B, D, and F.
Note that balloons are considered ground targets for game purposes.
Ground Target Statistics
AA Defense – Intensity of protective anti-aircraft fire. Indicates number of AA dice rolled against aircraft attacking the target.
Initiative Rating – The ground target's position on the initiative track during combat.
Destruction Rating –The amount of damage the ground target must take to be damaged (flipped) or destroyed (if already damaged).
Mission Points (MPs) – The number of MPs awarded when the target is damaged (front) and destroyed (back).
3.4 Markers
Markers are used to record various game functions.
4.0 Victory
At the end of the game, the player uses the Campaign Victory Result table [V1] to determine the level of victory based on the length of the campaign and number of Campaign VPs the player has acquired (9.0). Note that VPs may never go below zero.
5.0 Campaigns & Missions
5.1 Campaign Set Up
To set up a campaign, use the following steps (details and charts are provided on the Player Aid):
- Choose Campaign Length: The player chooses the Campaign Length, which is the total number of missions to be flown during the game.
- Short = 8 Missions
- Medium = 12 Missions
- Long = 16 Missions
- Place Game Markers: Place the Mission Turn marker on the first box of the Campaign Length Track. Campaign VP and Mission VP markers are placed on the starting space of the VP & MP track.
- Pick Side and Determine Starting Aircraft Type: Pick your squadron's nationality and roll on the Squadron Aircraft Assignment table [S1] to determine starting aircraft type. Higher tier aircraft of your side should be placed to the side for future upgrades, while all enemy aircraft should be sorted by nationality and tier and placed nearby for mission encounters.
- Draw Initial Squadron Aircraft: Randomly draw eight fighter aircraft of the proper nationality and tier and place in the Ready box of the Operations Chart.
- Determine Home Airfield: Roll on Home Airfield table [S2] and place the Home Airfield marker in the appropriate map sector.
- Shuffle Mission Cards: Shuffle the mission cards and place face down on the map as the starting Draw Deck.
- Begin Missions: Fly the first mission!
5.2 Mission Sequence
Each mission is divided into three phases:
A. Pre-Mission Phase: Type of mission is determined; aircraft are selected (6.0). B. Flight Phase: Mission is conducted; events and combats are resolved (7.0). C. Post-Mission Phase: Outcome of the mission, VPs purchased and changes to the squadron are assessed (9.0).
After all phases of a mission are completed, the next mission begins unless the campaign mission length has been reached, in which case the game is over and the player's victory level is determined.
6.0 Pre-Mission Phase
The Pre-Mission Phase consists of the following steps:
- Update Mission Number: Adjust Current Mission marker to indicate current mission number.
- Draw Mission Card: Draw a mission Card to determine the objective of the current mission and the types and numbers of aircraft that will participate. If the "Scramble" mission is drawn, proceed directly to rule 6.2. Otherwise, place objective counters on the map if needed as a reminder of the destination sector(s).
- Roll for Weather: Roll for weather using the Weather table [M1]. Use the Weather counter as needed. Weather affects photo recon and artillery spotting missions as well as anti-aircraft.
- Choose Aircraft for Mission: Choose the aircraft participating in the mission from those in the squadron's Ready box. If the squadron is short of fighters, it must fly the mission with as many as possible. If the mission requires 2-seaters or bombers, they are drawn randomly from their respective pools. Place the chosen aircraft in the Current Flight box. If using the optional Entente ordnance rules, assign ordnance as desired to any fighters in the flight per the Aircraft Ordnance Capacity table [M2] and reduce Mission turns from 24 to 22.
- Place Flight and Begin Mission: Place the Flight Counter on the Home Airfield and begin the Flight Phase.
6.1 Notes on Missions
6.1.1 Voluntary Termination. The player must try to fulfill the mission card objectives. However, once any aircraft in the flight is damaged or destroyed, or continuing the mission would require the flight to land in a non-airfield sector due to remaining fuel, the player may terminate the mission and move the flight normally (i.e., one sector per turn) to a friendly airfield and end the mission. Note that landing in a friendly airfield other than the home airfield results in a loss of -1 MP.
6.1.2 Attacking Ground Targets. Trench Strafing, Ground Support, and Balloon Busting missions indicate the number of ground targets randomly generated when the flight enters the objective sector. When entering objective sectors for these missions, roll the Flight Event check (7.0, step 4) normally but ignore Ground Target results and do not reroll. Note it is not mandatory to attack all ground targets in a sector.
6.1.3 Patrols. Patrols are opportunities to exert air superiority over the front. Follow the normal detection check process when encountering enemy aircraft – however combat is not mandatory. The flight may engage enemy ground targets of opportunity if desired.
- Offensive Patrol. The flight must proceed to the objective sector and may remain there (loiter in the sector from turn to turn) until the player decides to return to a friendly airfield. Note that the chances of additional enemy aircraft appearing during a combat check over an enemy airfield are higher. To receive the +2 MP award at least one aircraft must reach the objective and all aircraft in the flight must successfully land at the home airfield. The flight may attack any enemy ground units that are encountered.
- Defensive Patrol. The flight must fly in a circular pattern through the assigned sectors until the player decides to terminate the mission. To receive the +2 MP award, the flight must fly over all sectors at least once and all aircraft must successfully land at the home airfield.
Play Note on +2 MP Award: This means that some fighters on the patrol may return prematurely to the airfield (engine trouble, damage, etc.) as long as they all land successfully and at least one aircraft accomplished the mission.
6.1.4 Photo Recon and Artillery Spotting. See 8.5 for details.
6.2 Scramble Mission Special Rules
The Scramble mission is a special combat-only mission simulating a surprise attack on the player's home airfield. It consists of the following steps:
- Roll for Weather: Roll for weather using the Weather table [M1]. Use the Weather counter as needed.
- Place Airfield: Place the Airfield ground target counter on the IN track (initiative rating 2) to represent your airfield.
- Select Initial Friendly Aircraft for First Round: Select D3+2 aircraft to begin the first round of combat.
- Determine Enemy Force: Roll D3+1 to determine the number of enemy fighters escorting the 2 enemy bombers. Then use step 1.a and 1.b of the Combat Sequence (8.1) to determine enemy fighter type. The enemy bombers each carry 6 bombs.
- Conduct Combat: Proceed immediately to combat rounds (there is no initial Detection Check). Roll 1D3 for each enemy bomber to determine which round it drops its bombs (use hit markers as reminders). Then roll IN for all aircraft. When eligible, enemy bombers drop all available bombs on the airfield (6 bombs if undamaged, 3 bombs if damaged).
Special Combat Rules:
- Prior to the second and third combat rounds the player may launch up to D3+2 additional ready squadron fighters.
- There is no Combat Event check during Scramble missions.
- The enemy flight will remain until both bombers have dropped bombs (regardless of whether the airfield has been damaged).
- On the round after both bombers have dropped their bombs and/or been destroyed, all surviving enemy aircraft will break off.
- End the Mission: There will be a maximum of 3 combat rounds and then any remaining enemy aircraft depart. The mission ends and play proceeds to the Post-Mission Phase. MPs are gained and lost for destroyed aircraft on either side normally, and the player loses 5 MPs or 10 MPs if the home airfield is damaged or destroyed.
If the player's airfield is destroyed, the player loses ("skips") one mission for repairs to aircraft and facilities. For example, if the scramble mission was mission #2 and the airfield was destroyed, the player skips mission #3 and proceeds with mission #4. The player may still spend MPs normally prior to skipping the next mission.
7.0 Flight Phase
The Flight Phase consists of the following steps:
-
Damaged Aircraft Check: For each aircraft in the flight that is damaged, roll on the Damaged Aircraft Check table [F1], and if necessary, roll on the Damaged Aircraft Result table [F2]. This may result in a crash with total loss of aircraft and crew (place counter in the Lost box), or an immediate roll on the Forced Landing table [F3] or Difficult Landing at Airfield table [F4]. Damaged aircraft that remain in flight after this step may voluntarily return to a friendly airfield - remove the aircraft from the Current Flight box and place it on the Home Airfield sector with a Difficult Landing Check marker – at the end of the mission these aircraft are checked for safe landings with any other damaged aircraft still in the flight on table [F4]. Prior to rolling on [F4] an aircraft may jettison ordnance (remove all ordnance counters) to improve its performance rating.
-
Move the Flight: Move the flight counter to any adjacent (non-diagonal) sector. A flight may remain in place if desired (e.g., circling, looking for targets), but this still counts as a mission turn. If the flight leaves a sector containing enemy ground targets that appeared due to a flight event check, the ground targets are removed from the map.
-
Enemy AA Check: If the flight moves into or remains in an enemy AA sector, roll on the AA/Ground Fire table [F5] to see if the flight is attacked by AA, and at what intensity.
- Intensity determines the number of AA attack dice (1 to 3) rolled against each aircraft in the flight.
- Each AA attack roll of 6 causes a hit on the target aircraft.
- If the aircraft takes hits, roll on the Aircraft Damage table [C8] and apply the results.
Example: During a mission with heavy clouds, the player's flight moves into an enemy balloon sector (note that all balloon sectors have an AA symbol). The player rolls a D6 and gets a 6, which is reduced to 5 due to the weather modifier and results in moderate AA (2 dice). For one of the player's aircraft two 6's are then rolled. This causes two hits, so the player then rolls a D6 with a +1 DRM on the Aircraft Damage table [C8].
-
Flight Event Check: Based on the Flight's location, roll on the Flight Event Check table [F6] to determine if an event occurs. If an event occurs, use the following steps to resolve:
Roll on the Flight Event Outcome table [F7] to determine event type. Note that if the flight is escorting 2-seaters or bombers (i.e., bomber escort, artillery spotting and recon missions) a Ground Target result is treated as No Effect.
- If enemy aircraft are encountered, roll the die indicated to determine the number of enemy aircraft. Depending on the outcome the player may be required to have air combat, or have the choice to engage or evade. If air combat occurs, proceed to the Combat Sequence.
8.0 Combat
8.1 Combat Sequence
Combat occurs when the player's flight encounters enemy aircraft (and does not evade - see step 2 below), attacks an enemy ground target, and/or conducts a photo recon or artillery spotting attempt. The combat sequence consists of the following steps (if no enemy aircraft are present skip to step 3):
-
Determine Enemy Aircraft Type (skip if no enemy aircraft present): The number of enemy aircraft will have been previously determined during step 2 of the Flight Event Check (7.4). To determine the type of enemy aircraft present: a) If playing the Germans, the German player may choose the opposing Entente flight's nationality or roll on the Enemy Flight Nationality table [C1]. Note There is no difference in composition or aircraft performance between the three Entente nationalities; this step is for historical flavor only. b) Roll on the Enemy Fighter Type table [C2] to determine the enemy fighter's tier, then consult the Squadron Aircraft Type table [S1] and randomly draw the appropriate number of that type of enemy fighter from their pool. When determining the player's current "flight tier", use the majority of fighter aircraft in the flight (use higher tier if tied). If the player's flight consists only of 2-seaters or bombers, it is considered Tier 1.
Example: If the player has two D.IIIs (tier 1) and two Dr.1s (tier 2) in the flight, the current flight tier is 2 since it is a tie.
c) If an enemy raid was encountered, also draw the appropriate number of enemy 2-seaters.
-
Detection Check (round 1 only; skip if no enemy aircraft present): Roll on the Detection Check table [C3] to determine if either side has an advantage in the air combat, and whether the player may choose to "evade" (i.e., no combat occurs): a) Each side uses the best air skill of any aircraft on its side for the drm (including 2-seaters and bombers). b) When determining if the enemy has an equal or greater force, count all aircraft types on each side.
If the player successfully evades, enemy aircraft are returned to their pools and the player may continue combat if conducting bombing, artillery spotting or photo recon.
-
Combat Rounds: Up to three combat rounds are conducted, using the following process:
A. Determine Bombing Round (Bombing Mission Only) - Roll 1D3 for friendly bombers separately to determine in which of the three rounds each bomber will drops its bombs (use markers as reminders). B. Determine Initiative - Prior to determining initiative, the player may choose to jettison ordnance (remove all ordnance counters) of any of the player's aircraft to improve its performance rating. Then determine the initiative position for all units participating the combat using the Combat Initiative chart [C4]. Place units on the appropriate space of the IN Track. Multiple units of either side can share the same IN space. Units remain on the IN Track for the remainder of the combat round until they conduct an attack (aircraft only), are destroyed, or break off from combat. C. Perform Actions - Starting with the highest occupied IN space and in decreasing IN order, aircraft of both sides perform either an Attack action or Break Off action (8.2). Where there are multiple aircraft in a space, order is based on the Initiative Priority chart [C6]. The player chooses the order for friendly aircraft with the same priority. D. – Roll on the Combat Event Check table [C10] to determine if any enemy aircraft enter or exit the combat for the next round. If enemy aircraft arrive, follow step 1 of the Combat Sequence (8.1) to determine type. If playing the Germans, use the same enemy nationality that are currently in the combat. Note there is no detection check if enemy aircraft arrive in rounds 2 or 3.
8.2 Aircraft Combat Actions
8.2.1 Aircraft Options. Aircraft have two options when it is their turn to perform an action during a combat round:
- Attack
- Break Off
See the Aircraft Action chart [C5]. The chart indicates options and/or mandatory actions for both the player's and the enemy's aircraft. Following an action, the aircraft is placed in the appropriate box below the Initiative Track.
8.2.2 Attack. Aircraft performing an attack action against an enemy aircraft may only attack an enemy aircraft in a lower IN position, and only an enemy aircraft in the next lowest position from the attacker's position (see the Air-to-Air Combat examples below). If there are no eligible enemy aircraft, the player's fighters may attack an enemy ground target if desired or go to Action Taken in order to remain in the combat. Friendly 2-seaters never attack ground targets (photo recon and artillery spotting is not directed at a specific ground target counter – see 8.5).
8.2.3 Break Off. Aircraft of either side that Break Off are placed in the Break Off box and do not participate in any further rounds of the current combat. At the end of the combat, enemy aircraft in the Break Off box return to their pool, while friendly aircraft return to the Current Flight box.
Play Note: Per table [C5], if desired a friendly 2-seater can engage in air combat but will not be able to take photos or conduct artillery spotting that round.
8.3 Air-to-Air Combat
8.3.1 Attacking Aircraft. When an aircraft attacks an opposing aircraft, use the following steps: a) Determine target (see below). b) Roll number of attack dice per Air-to-Air Gun Attack chart [C7] to determine number of Hits. Attacked 2-Seaters and Bombers get simultaneous defensive fire (8.3.3). Note that natural 1's always miss.
Roll on the Aircraft Damage table [C8] to determine the damage caused and apply results to targeted aircraft. Note that multiple hits cause a positive drm to this roll. Extra (unused) hits may not be carried over to another target.
8.3.2 Target Determination. Following are the key concepts for targeting opposing aircraft:
- Aircraft must attack enemy aircraft in the 'next lowest' IN position. They may not attack an enemy aircraft in the same IN space, nor one in a lower IN position than the first available target.
- If there are multiple eligible targets in an IN space, the player always decides which enemy aircraft are attacked.
- When enemy aircraft have multiple target options, the player rolls a die as needed to randomly choose which friendly aircraft is attacked.
Example 1: There is one friendly aircraft and one enemy aircraft each in IN spaces 11, 9, and 8 (six total aircraft). The aircraft in space 11 may not attack each other and may not attack the aircraft in space 8 – they must attack the aircraft in space 9 since it is the 'next lowest' space that contains enemy aircraft.
Example 2: An enemy fighter in IN space 10 is doing an Attack action. There are no friendly aircraft in IN space 9, and three friendly aircraft in IN space 8. The player rolls one die; on a 1-2, the first friendly aircraft is attacked, on a 3-4 the second, and on a 5-6 the third. If there were four friendly aircraft, each would be assigned a number 1 through 4, and rolls of 5 or 6 would be re-rolled until the target is identified.
8.3.3 2-Seater and Bomber Defensive Fire. When attacked by opposing aircraft, 2-Seaters and Bombers use their defensive gun against the attacking aircraft. Use the Air-to-Air Gun Attack chart [C7] to determine the number of Hits. Results are applied simultaneously with the enemy's attack. Note this is not considered an action by the defending aircraft.
8.3.4 Jettison Ordnance. If an aircraft carrying bombs is damaged, its carrying capacity is immediately reduced [M2] and it must immediately jettison the excess bombs with no effect on any ground targets.
8.3.5 MP Awards. At the end of the mission the player receives MPs for all destroyed enemy aircraft and loses MPs for destroyed friendly aircraft as shown on the Mission Points table [P1].
Play Note: When fighters on either side are destroyed, the downed pilot's air skill is added to the MP gain or loss (unless the player's pilot survived and returned to base), simulating the heightened morale impact of a noted pilot being brought down.
8.4 Ground Target Attacks
8.4.1 Attacking Ground Targets. When an aircraft attacks an enemy ground target, use the following steps: a) Determine target (see 8.4.2). b) Roll the number of dice equal to the target's AA Defense (this may be zero); each '6' is a hit on the attacking aircraft. Note that only the ground target being attacked fires AA in defense. c) Make a Damage Roll and apply results to the attacking aircraft per Aircraft Damage table [C8]. d) Determine the type of weapon being used to attack the ground target (guns or bombs). Fighters strafe with guns while bombers always drop their entire bomb load when attacking ground targets (6 if undamaged, 3 if damaged). c) For strafing attacks, roll on the Strafing Attack table [C11] to determine damage caused to the ground target. Note that fighters use the ground skill die roll modifier against balloons, and natural 1's always miss against any target d) For bomb attacks, roll number of dice per the Bomb/Rocket Attack table [C12] to determine number of hits, then roll on the Ground Attack Damage table [C13] to determine damage caused to the target. Note that natural 1's always miss.
Play Note: If using the optional rules, Entente fighters carrying ordnance may choose whether to use its gun or bomb/rocket against ground targets. Rockets may only be used against balloons, and the fighter must fire both in a single attack.
8.4.2 Ground Target Selection. It is possible in some missions to have multiple enemy ground targets in the same combat. In these cases, the player chooses which ground target is attacked by each friendly aircraft (it is not necessary to attack the enemy ground target in the highest IN position). The same enemy ground target can be attacked by different aircraft in a combat round.
8.4.3 Ground Target Damage. Use damage markers to track damage points inflicted on ground targets.
- When the number of damage points equals or exceeds the Destruction Rating on its undamaged side, the ground target is flipped over and moved to its new IN position based on its Difficulty Rating (retain all damage).
- If the number of damage points equals or exceeds the Destruction Rating on its damaged side, the ground target is destroyed and removed from the track (place nearby to keep track of its destroyed status for MP purposes).
- Note it is possible to damage and destroy a ground target in a single attack if enough damage points are inflicted. Extra hits may not be carried over to a different target.
- Ground target damage carries over from round to round, and from turn to turn so long as the player's flight remains in the sector (8.4.5).
8.4.4 Fighters Cannot Attack Damaged Bomber Ground Targets. Once a bombing mission ground target (i.e., airfield, depot, town, rail yard, HQ) has been damaged, fighters can no longer cause any damage to the target, and their hits do not carry over to the damaged side. In other words, once a bomber target has been damaged, only bombers can destroy it.
8.4.5 Ground Targets Remaining in Place. Ground targets and their current damage markers remain in place until the player's flight leaves the sector, in which case the target is removed from the map and is no longer an eligible target. In other words, the player's flight may attack ground targets in subsequent turns (initiating a new combat) until it leaves the sector.
8.4.6 MP Awards. At the end of the mission the player receives MPs for all damaged and destroyed ground targets. If the target was damaged, the player receives the MP award on the front; if the target was destroyed, the player receives the MP award on the back.
Example: If Town C is damaged, at the end of the mission the player will receive 5 MPs. If it is destroyed, the player receives 10 MPs.
8.5 Photo Recon and Artillery Spotting Missions
8.5.1 General. Photo recon and artillery spotting missions are performed by a player's 2-seater aircraft as an "attack" action during a combat round when the flight is in the appropriate target sector. Placing the flight on the IN track and rolling initiative are not necessary unless enemy aircraft or ground targets are present. In these types of missions the target sector has its own AA defense and friendly fighters are in an escort role to engage enemy fighters or attack ground targets of opportunity that appear as the result of an event check.
8.5.2 Photo Recon and Artillery Spotting Attempts. To make the attempt, use the following steps: a) Roll on the Photo Recon/Artillery Spotting AA table [C14] to determine the target's AA strength, then roll that number of dice to determine the effect of AA against the 2-seater. b) Roll on the Photo Recon/Artillery Spotting Results table [C15]. After making the attempt the 2-seater is placed in the Action Taken box.
8.5.3 Number of Attempts. A 2-seater can make one photo recon or artillery spotting attempt each combat round (3 total). All attempts must be conducted in the same game turn – it may NOT conduct any more attempts in a subsequent turn. Recall that any combat lasting three rounds requires fuel expenditure (8.1.3.F).
8.5.4 MP Awards. The player receives the cumulative MP award for all attempts. EXCEPTION: In the case of photo recon, the player only receives an MP award if the crew survives the mission (i.e., if damaged they must make it back to base [F3] or have a safe landing [F4]). Use the Photo MP marker to track this type of MP in case the 2-seater crew does not survive.
8.6 Damaged & Destroyed Aircraft
8.6.1 Aircraft Damage. If an aircraft is damaged it is flipped to its back side. If already damaged, the aircraft is destroyed. Hits on aircraft do not carry over from attack to attack; each attack must do enough damage on its own to damage or destroy the target.
8.6.2 Friendly Aircraft. Damaged friendly fighters, 2-seaters, and bombers must make a Damaged Aircraft check at the start of each turn (7.0.1). When a player's fighter aircraft is destroyed in combat, use the Destroyed Friendly Fighter Check table [C9] to determine if the pilot survives. If he survives, place the counter in the Recovery box. Otherwise, the aircraft goes to the Lost box. If friendly 2-seater and bombers are destroyed, they are returned to their cup.
8.6.3 Enemy Aircraft. At the end of a combat all enemy aircraft, whether damaged or destroyed, are returned to their pool and are immediately available to be drawn again.
8.6.4 MP Awards. At the end of the mission the player receives MPs for destroyed enemy aircraft and loses MPs for destroyed friendly aircraft as per [P1].
8.7 Pilot Skill Improvement
The player's squadron fighter pilots can improve their skills during a campaign. Each time a pilot destroys (not damages) an enemy aircraft or ground target, roll a D6. If an enemy aircraft is destroyed, the player adds the enemy pilot's air skill to the roll as a positive drm. On a net '6' the pilot improves to "Skilled" (+1 to air and ground skills). If already Skilled, he improves to "Ace" (+2 to air and ground skills). Skills may not be improved beyond Ace. Note these skills are in addition to the inherent skills the pilot already has on the counter and are transferred to the new counter if an aircraft is upgraded.
Example: During a combat British pilot Albert in his Sopwith Pup manages to shoot down an enemy aircraft that has a +1 air skill. The player immediately rolls a D6 and gets a 5, adding +1 for the enemy pilot's air skill. The net 6 means Albert improves to "Skilled", and the marker is placed on top of his counter. Albert now has +2 Air Skill and +1 Ground Skill.
Play Note: The player decides the order of attacks when friendly aircraft have the same initiative and selects targets with the same initiative. Therefore, the player can influence which pilot has the opportunity to 'destroy' an enemy aircraft or ground target and improve his skills.
9.0 Post-Mission Phase
Once all friendly aircraft have landed at a friendly airfield, made forced landings, or been destroyed, the mission is over and play proceeds to the Post-Mission phase which consists of the following steps:
-
Determine Mission Points Gained and Discard Mission Card: Validate the total number of Mission Points (MPs) gained or lost during the Mission as per [P1]. Then place the current Mission Card face-up in a discard pile.
-
Spend Mission Points for Campaign VP's and Squadron Improvements: The player may spend MPs as desired using the Campaign MP Cost table [P2]. VP costs on the chart indicate how many points it cost to buy that many VPs for that missions (e.g., 1 VP costs 1 MP, 2 VPs cost 4 MPs, etc.). No more than 4 VPs can be purchased after each mission. Unspent MPs may NOT be carried over from mission to mission – if they are not spent, they are lost (move the MP counter to zero before the next mission).
If the mission resulted in zero or negative MPs and the player wishes to repair or replace any aircraft, the player has two options:
- Option 1 – Reduce ("forfeit") 1 or 2 Campaign VPs and receive 1 or 2 MPs respectively. The player's VPs may not go below zero.
- Option 2 – Pass ("skip") the next mission and repair all aircraft in the Recovery box and replace up to 2 aircraft if eligible (see below).
When spending MPs on repairs, replacements, and upgrades:
- Repair (1 MP) – An aircraft in the Recovery box is returned to Ready status. Aircraft that are not repaired remain in the Recovery box and may be repaired after a future mission.
- Replacement (2 MPs) - If the squadron has less than 8 fighter aircraft in the Ready and Recovery boxes, the player may randomly draw a replacement from the pool. The player draws from the pool of the lowest aircraft tier currently in the squadron's Ready or Recovery boxes. If due to previous losses there are not enough aircraft in the pool to draw replacements, all aircraft in the Lost box are "recycled" and returned to their pool as eligible replacements.
- Upgrade (3 MPs) – The player selects any aircraft in the Ready or Recovery boxes and replaces it with the upgraded counter (i.e. same pilot) in the next higher tier based on the Squadron Aircraft Type chart [S1]. No aircraft can be upgraded a second time until all aircraft in the squadron are the same tier.
Play Note: Upgraded aircraft in the Recovery box remain in the Recovery box. This is because damaged aircraft counters can also represent wounded crews that are recuperating and unable to fly their improved machine.
-
Change Home Airfield: At the end of every fourth mission the player rolls on the Home Airfield table [S2] to determine if it has a new home airfield.
-
Optional: Draw Post Mission Event card and resolve (10.2).
10.0 Optional Rules
At the start of the game the player may elect to use any or all of the rules below.
10.1 Optional Rules Cards
8 cards in the deck are labeled "Optional Rules" that increase the game's realism in exchange for additional rules complexity. The player may choose to use any or all of these at the start of the game (or draw them randomly). It is recommended the player place Optional Rules cards that are in use near the map as a convenient reminder that they are in play.
10.2 Post Mission Events
16 cards in the deck are labeled "Post Mission Events". These introduce random events into the game for more fun and variability. If the player chooses to use Post Mission Events, they are shuffled as their own deck face down near the map at the start of the game. As the final step of the Post-Mission Phase, the player draws the top card and follows the instructions. Once a Post Mission Event has been drawn and resolved it is discarded from the game (even if the conditions were not met).
10.3 Other Optional Rules
One of the benefits of a solitaire game is the ability to experiment and modify rules to suit the player's preferences. In addition to the optional rules on the cards, the player may adopt any of the following rules to enhance the gaming experience.
10.3.1 Choose Initial Aircraft Tier. Instead of rolling on table [S1], the player may choose the starting aircraft tier.
10.3.2 Extended Patrolling. The player's flights are expected to return to an airfield once the mission objectives have been attempted. However occasionally fighters with extra fuel would remain in the air looking for targets of opportunity. Once a flight consisting of only fighters has completed its mission objectives, the player may keep the flight in the air for as desired as long as it can reach a friendly airfield prior to running out of fuel.
10.3.3 Enemy Aircraft Total Number Limit. Although rare, it is possible for an unlucky set of combat event checks to result in the player's flight being very heavily outnumbered by enemy aircraft. To counter this, no additional enemy aircraft will arrive in a combat if it would cause the total to exceed 3 times (3x) the number of friendly aircraft, or 12, whichever is lower.
Example: The player's flight consists of 4 fighters and 2 bombers (6 total). As a result of a flight event check the flight engages 6 enemy fighters. At the end of combat round 1 a combat event check results in 6 additional enemy fighters joining the combat. Since there are now 12 enemy fighters in the combat, no additional enemy fighters can arrive unless any break off or are destroyed.
10.3.4 MP Penalty for Not Engaging Enemy Raids. Each time the player's flight is on a Defensive Patrol and it encounters an Enemy Raid, the player loses -1 MP if the flight does not engage in at least one round of combat.
10.3.5 Increase Fuel Expenditure in Combat. Instead of reducing remaining Mission Turns only if a combat lasts three rounds, it is reduced by one after each round. Note this makes it more likely a long-range mission will be harder to achieve.
10.3.6 Heavy Clouds Reduce Chance of Events. In addition to providing a -1 DRM on Map AA checks, heavy clouds also provide a -1 drm to event checks as well.
Example of Play
The following example of play follows the fate of a French artillery spotting mission to highlight various game mechanics. Where aircraft skill ratings are highlighted in parentheses, the number before the slash is the air skill, and after the slash the ground skill).
Pre-Mission Phase
The player's squadron is based at Airfield C (near Amiens). The player draws an Artillery Spotting mission card and rolls an 8, so a Mission Objective marker is placed in Sector E. The weather is rolled as Light Clouds.
The player randomly draws a 2-seater (0/1), and from the squadron's ready aircraft box chooses three fighters for escort: Georges (2/1), Marcel (0/0) and Pierre (0/0). Georges is in a Spad VII while Marcel and Pierre have Nieuport 17's.
Flight Phase
Taking off from Airfield C, the flight travels due north. The player rolls 2D6 on [F6] for the Flight Event Check at the start of each turn, and on turn 3 rolls an 11, which in the friendly rear is enough to trigger an event. The player rolls an 8 on [F7], which means enemy fighters are in the area, and then rolls a D6 for the number of enemy aircraft and gets a 6 – six enemy planes! At this point play proceeds to combat.
The player's flight is French so rolling for enemy nationality on [C1] is not necessary (it's automatically German); the player rolls a D6 on [C2] for the enemy's tier and gets a 5. Since there are two Tier 1 N.17s and one Tier 2 Spad VII in the player's flight, it is considered Tier 1. The player draws the enemy German aircraft: a 2-seater (0/0) and four D.IIIs - Manfred (2/2), Werner (1/0), Max (0/0) and Carl (0/0).
The player next rolls the Detection Check on table C3. Since each side has a +2 air skill pilot and a 2-seater, the DRMs cancel out. The roll of 5 means the enemy engages if they have an equal or greater force, and with five enemy aircraft to the player's four, there is air combat.
Play Note: Enemy 2-seaters do not perform missions and engage in combat just like fighters.
Combat Round 1
For combat round 1 the player rolls each aircraft's Initiative (IN), taking into account aircraft performance, pilot air skill, and any initiative drm (none in this case).
Each aircraft now performs its actions in IN order. The player uses [C5] to determine options and actions for each side's aircraft.
When opposing aircraft are in the same IN space, the player uses [C6] to determine which one goes first. In the case of Georges and Manfred, they are both fighters, both have an air skill of 2, but Georges' Spad VII has a higher performance rating (7) than Manfred's D.III (6) so Georges goes first.
Georges could Break Off but wants to engage the fighters and try to protect the French 2-seater, so he attacks Carl who is in the next lowest IN space (note he may not attack Manfred). Georges has a 1 IN advantage over Carl so per [C7] he rolls 2 dice with his forward guns, each die getting a +2 drm due to his air skill. He rolls a 4 and a 5, which become a 6 and 7; each net roll is 6 or more and causes 2 hits each, for a total of 4 hits. Moving to [C8], the player rolls one die and adds a +3 drm (+1 for each hit beyond the first), getting a 4 which becomes a 7. This exceeds Carl's structure rating of 5 by 2 points, which is enough to damage him. Carl's counter is flipped, and Georges moves to the Action taken box.
Manfred goes next and must target Marcel. With a 2 IN advantage he rolls 2 dice, and adds his +2 air skill drm to each die. He rolls a 1 and a 6; a natural 1 always misses and the second die is a net 8 which causes 2 hits. He rolls a die on [C8] with a +1 drm and gets a 4, which becomes a 5. This equals Marcel's structure rating so Marcel dodges a literal bullet and is unharmed. Manfred moves to the Action taken box.
Carl is next. The player checks [C5] and since he is damaged a die is rolled for a result of 4; Carl breaks off and his counter is moved to the Break Off box where he remains for the rest of the combat.
Working down the track to IN 9, the player determines whether Max or Marcel will go next. Both are fighters with the same air skill and performance rating, so the player rolls a die and decides that on an even result Marcel will go first, while on an odd result Max goes first. The result is a 3 so Max is first.
Max cannot attack Marcel and the next lower IN space (7) has 2 targets – Pierre and the French 2-seater. A die roll is again used to determine which aircraft is attacked, resulting in Max attacking the 2-seater.
Max has a 2 IN advantage and rolls 2 dice with no drm, getting two 4's for 2 hits. Max rolls on [C8] with a +1 drm and gets a 3, which becomes a 4, not enough to damage the 2-seater. The 2-seater has defensive guns and simultaneously counterattacks Max. A 2 IN difference for defensive guns means the 2-seater rolls 3 dice, with no drm as it has 0 air skill. The result is a 2, 2, and 5, which causes 1 hit. The 2-seater rolls 1 die on [C8] but rolls a 1, not even close to causing damage, and Max moves to the Action taken box.
Marcel now attacks Werner, rolling 2 dice but failing to cause any damage and he moves to the Action Taken box. Werner is next and a die roll determines he will attack Pierre, but he likewise does not cause any damage and he moves to the Action Taken box.
The player has two friendly aircraft in IN space 7 and the choice of which aircraft goes first. He decides to start with Pierre, whose only target is the enemy 2-seater. Pierre misses the 2-seater but the defensive fire damages him in return. Pierre is flipped to his damaged side and placed in the Action taken box.
Finally, the player may take an action with the 2-seater and decides to conduct an artillery spotting attempt. He rolls a die on [C14] to determine the strength of enemy AA on round 1, getting a 6 which is 3 AA dice. One of the three dice is a 6 which causes a hit, but since the 2-seater has a structure rating of 6 a single hit cannot damage it and the player ignores it. The 2-seater now conducts its artillery spotting attempt by rolling on [C15]. Light clouds cause a -1 drm, but this is countered by the 2-seater's +1 ground skill so the net drm is 0. The roll is a 2 which is unfortunately poor spotting and the player receives no MPs.
Since the combat will continue next round, the player rolls on [C10] for the Combat Event Check. The combat is occurring over the trenches and there is no drm. The player rolls an 8 and the five enemy aircraft depart; they are placed back in their respective pools.
Combat Round 2
(Note: When there are no enemy aircraft or ground targets present, the player does not need to roll for aircraft IN. If desired, the player can instead move any aircraft to the Break Off box to protect them from potential damage in future rounds in case enemy aircraft appear due to a Combat Event check.)
There are no enemy aircraft in the combat and there will be no attacks against enemy ground targets, so the player skips the IN rolls to speed things up and moves straight to the 2-seater's second artillery spotting attempt.
The player rolls on [C14] for AA fire, getting a 5 which is 4 AA dice. The AA rolls are 2,3,6,6, which is 2 hits so there is potential damage to the 2-seater. Rolling on [C8] with a +1 drm results in a net 5, and the 2-seater again avoids damage. The player rolls on [C15] for the artillery spotting result, getting a 4 which is modified by a +1 drm ( -1 for light clouds, +1 for ground skill, +1 for round 2), for a net result of 5 which nets 3 MPs. The player places the Photo MP marker on the MP track at 3 and moves the 2-seater to the Action Taken box.
The player rolls for the Combat Event check on [C10] but no enemy aircraft appear.
Combat Round 3
The player has one more round to increase the MP awards for artillery spotting. The round 3 AA check on [C14] results in 4 AA dice, but the 2-seater is not damaged. The final artillery spotting attempt has a net +2 drm and rolls a 2 (net 4), so 2 more MPs are gained. The Photo MP marker is moved to 5; this ends the combat and the player's aircraft are moved back to the Current Flight box and the next turn begins.
Rest of Mission
For the remainder of the mission the flight heads back to friendly territory, checking for events each turn. Although Airfield B is closer (5 sectors away versus 7), the player returns the flight to its home Airfield C to avoid the -1 MP penalty for landing at a non-home airfield.
Post Mission Phase
For purposes of the example, we assume no other MPs are gained or lost during the mission. The player earned 5 MPs for artillery spotting and Pierre successfully landed without further damage and was placed in the Recovery box. The mission card is discarded and the player refers to [P2] to decide how to spend the MPs. 4 MPs are spent to purchase 2 VPs and the VP marker is increased 2 spaces. The last MP is spent to repair Pierre – he is flipped back to his undamaged side and moved from the Recovery to the Ready box. On to the next mission!
Designer's Notes
I have always had a great interest and fascination with World War I aerial combat. Perhaps it goes back to a few wonderful films such as Aces High, The Blue Max, Von Richtofen and Brown and the silent classic, Wings. I remember back in high school in the mid-1980s seeing the game Richthofen's War by Avalon Hill and knew I had to have it! Although it was a great game, I felt that the system was a bit complicated and combat could be slow and tedious at times. I would modify the game to suit my personal preferences and attempted to simplify and speed up the flow of the game. I guess you can say that was my first venture into game designing.
A key design goal for all my games is to capture as much historical detail, concepts and flavor and put them in a simple, fast, and fun game system. Aces of Valor is a "game" and not a simulation. Simulations are more complex and tend to have more math than I prefer (I try to keep my math to a minimum).
Over the decades, I have read a considerable number of books on the Air War of WWI and always wanted to design a game where the player or players commanded a squadron of WWI pilots and aircraft. I felt that a squadron was an ideal and manageable force for an individual to command. When I set out designing the game, there were many elements I wanted to capture in this game and I wanted to have a variety of missions to make the game more interesting, including bomber escort, ground attacks, trench strafing, balloon busting, combat patrols and raids. I knew from the beginning that the aerial combat system was to be the focus of the game and that it had to be an abstract system. I felt that using an Initiative track was the perfect method for simplifying the complex nature of aerial dogfights. I knew that the key elements to dogfighting were pilot skill, aircraft performance and a bit of luck!
In game terms, aircraft performance is a combined rating of speed and maneuverability. Pilot skill is based on experience and other innate abilities that certain pilots have. The luck factor is obviously resolved by the roll of the dice. The greater the distance along the IN track from the attacker and target reflects the advantage and firing position the attacker has. A distance of 5 or more reflects an attack position right on the target's tail and possibly slightly above.
A distance of 1 or 2 reflects just a passing reflection shot. I enjoy using dice to resolve the actual attacks because it gives a feel of bullets being fired and hits being achieved and the better the attack position, the more dice are rolled. I gave aircraft a Structure Rating that reflects the size and durability of the aircraft. Aircraft structures at this time were made of wood and canvas and not all that durable. I had to balance damage so that it was not too easy to shoot down an aircraft, especially the player's aircraft. I know the feeling of losing your favorite pilot, so I tried to provide the player's aircraft certain advantages.
Historical Note: Top Aces
For historical flavor, here are the top-scoring fighter aces of each nationality represented in the game:
- Germany: Manfred von Richthofen (1892-1918) – 80 kills
- France: René Fonck (1894-1953) – 75 kills
- Britain: William Bishop (1894-1956) – 72 kills
- United States: Eddie Rickenbacker (1890-1973) – 26 kills