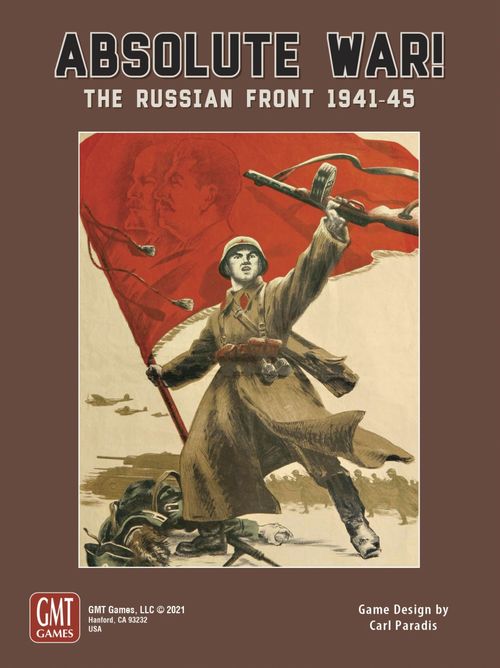
Absolute War! The Russian Front 1941-45
Absolute War! The Russian Front 1941-45 Rulebook
Table of Contents
Table of Contents
- Using These Rules
- [1.0] Introduction
- [2.0] Components
- [2.1] Map Zones and Scale
- [2.2] Play-Aid Cards
- [2.3] Playing Pieces
- [2.4] Game Cards
- [2.4.1] Card Number
- [2.4.2] Card Name/Picture
- [2.4.3] Card Year Timing Restrictions
- [2.4.4] Support Points
- [2.4.5] Historical Quote
- [2.4.6] War Status Goals
- [2.4.7] Major Offensive War Status Icon
- [2.4.8] Battle Odds
- [2.4.9] Battle Results
- [2.4.10] (Red) Event Timing
- [2.4.11] Event Text
- [2.4.12] Offensive Value
- [2.4.13] Offensive Stance
- [2.4.14] Partisan Warfare
- [2.5] Card Event Text
- [3.0] Key Game Concepts
- [4.0] Setting up the Game
- [5.0] Sequence of Play
- [6.0] Event Phase
- [7.0] Supply Phase
- [8.0] Combat Marker Phase
- [9.0] Card Phase
- [10.0] Strategic Phase
- [11.0] Movement Phase
- [12.0] Combat Phase
- [12.1] Designate Major Offensive Zones
- [12.2] Choose a Target Location
- [12.3] Combat Sequence
- [12.4] Repeat for Each Zone
- [12.5] Combat Strength and Resolution
- [12.6] Combat Sub-Types
- [12.7] Apply the Combat Results
- [12.8] Advance After Combat
- [12.9] Mobile Exploitation
- [12.10] Flip Combat Markers
- [12.11] Major Offensive Success Check
- [13.0] Reserve Phase
- [14.0] Used Marker Phase
- [15.0] Objective Phase
- [16.0] End Of Turn Phase
- [17.0] How to Win
- [18.0] Special Units
- [19.0] Special Markers
- [20.0] Special Map Locations
- [21.0] Event Listings
- [21.1] Game Events
- [21.1.1] Turn 1, Surprise Attack
- [21.1.2] Turn 2, Stalin Line
- [21.1.3] Turn 3, Death Squads
- [21.1.4] Turn 4, Pearl Harbor
- [21.1.5A] Turn 5, Lend-Lease
- [21.1.5B] Turn 5, War Status Check*
- [21.1.6] Turn 6, Soviet Industry x2
- [21.1.7] Turn 7, Midway
- [21.1.8] Turn 8, Stalin Order #277
- [21.1.9] Turn 9, Operation Jubilee
- [21.1.10] Turn 10, Operation Lightfoot
- [21.1.11A] Turn 11, Lend-Lease
- [21.1.11B] Turn 11, War Status Check*
- [21.1.12] Turn 12, German Industry
- [21.1.13] Turn 13, Operation Vulcan
- [21.1.14] Turn 14, Operation Husky
- [21.1.15] Turn 15, Operation Avalanche
- [21.1.16] Turn 16, German Industry
- [21.1.17A] Turn 17, Lend-Lease
- [21.1.17B] Turn 17, War Status Check*
- [21.1.18] Turn 18, Hitler's Directive #53
- [21.1.19] Turn 19, Operation Overlord
- [21.1.20] Turn 20, Operation Cobra
- [21.1.21] Turn 21, Manpower Crisis
- [21.1.22] Turn 22, Battle of the Bulge
- [21.1.23] Turn 23, Yalta Conference
- [21.1.24] Turn 24, Operation Varsity
- [21.1.25] Turn 25, Operation Grapeshot
- [21.1] Game Events
- [22.0] Special Card Events
- [23.0] Advanced Game Rules
- [24.0] Solitaire Game Rules
- Extra Event Card Explanations
- Basic Game Rules
- Using This Play Aid
- First Steps
- Event Phase
- German Player Turn — Supply Phase
- Combat Marker Phase
- Card & Resource Phase
- Movement Phase
- Strategic Phase
- Combat Phase
- Combat Sequence
- Combat Resolution
- Apply Combat Result
- Advance After Combat
- Mobile Exploitation
- Flip Combat Markers
- Reserve Phase
- Used Marker Phase
- Soviet Player Turn
- End of Turn
- How to Win
- Optional Rules (February 2023 Update)
Using These Rules
The instructions for this game are organized into major rules sections (large, white text on dark red band); these explain the game's components, core mechanics, setup instructions, and victory conditions.
The game has three modes of play: a Basic Game mode, the Regular Game mode, and an Advanced Game mode.
- The Basic Game rules, mostly printed on a separate 4-page inset, are meant for gamers unfamiliar to the genre.
- The Regular Game is this rulebook's main subject matter.
- The Advanced Game, with all the extra bells and whistles, and the solitaire instructions, is at the end of the rules.
Text in blue-shaded boxes like this provides the voice of the game's designer, who is addressing you to explain an idea or concept that is not, itself, a rule or a case.
Text like this in a red-outlined box is an important rules note.
[1.0] Introduction
Absolute War! The Attack on Russia 1941-45 is a strategic-level game depicting the struggle between Hitler's Germany and its allies against Stalin's Soviet Union during World War II. Players represent the military high command of both nations.
Common Abbreviations:
- CRT: Combat Results Table
- MP: Movement Point
- SP: Support Point
- CP: Combat Point
- CM: Combat Marker
- RP: Resource Point
- TEC: Terrain Effects Chart
- WSP: War Status Point (not used in Basic Game)
[2.0] Components
Parts Inventory:
- One 22" x 34" map
- Two identical 8.5" x 11" TEC/Battle Results cards
- Two identical 8.5" x 11" Event/Quick Reference cards
- Two sheets of die-cut playing pieces
- One 32-page Rules of Play manual (this booklet)
- One 32-page Playbook
- One 4-page Basic Game Rules booklet
- 110 cards: one pack of 55 cards per player
[2.1] Map Zones and Scale
The Game Turns are one or two months long.
The game map represents the regions of Eastern Europe where military operations took place. The map is divided into Zones, separated by dashed lines or rivers, to regulate the movement and location of the playing pieces. Each Zone contains a Major/Minor City, Town, or Country name for identification purposes.
There are three types of Zones:
- Hex: Represents a Major City Zone about 100km across.
- Area: Represents a land Zone about 200km across.
- Map Box: Represents a large Zone about 400km across. Map Boxes are not used in the Basic Game.
- Greater Germany: The darker Zones of the west part of the map, initially under German control.
- USSR/Soviet Union: The lighter Zones of the east part of the map, initially under Soviet control.
- Town: Tiny city graphic, used only to identify its Area.
- Minor City: A City in an Area.
- Major City: A City in a Hex.
[2.1.1] Special Map Sites
Some Zones sport "Site" icons to point out special map effects:
- War Economy Sites: Represented by a "Card Hand" icon; their loss lowers the number of cards drawn each turn, gray for the German player, red for the Soviet (9.1), two per player.
- War Aim Sites: Represented by a Black Cross icon for locations initially controlled by the German player and a Red Star icon for the Soviet; control of these might result in a game win (17.1).
- War Production Sites: Represented by an "Industrial Plant" icon, they are both players' main supply sources (7.1), and the location for their Industry markers.
- Lend-Lease Sites: Represented by a white star icon, Lend-Lease markers are placed there (19.5).
- War Crime Sites: Represented by a "Skull", tan for German, red-tinted for Soviet. Capture of one of your opponent's War Crimes Sites awards you one WSP (15.1.4).
- Partisan/Winter Line: A red dotted line, shows the limits of Partisan placement (23.1) and of Snow/Winter Weather.
IMPORTANT! Make sure you understand the Zone/Hex/Area/Box definitions; these will be referred to often in the rules. Note that most Boxed Zones contain a Major City (Hex) Zone inside of it.
The Holding Boxes:
- The Shattered and Destroyed Units Holding Boxes are used to keep counters that were combat casualties.
- The Captured Units Holding Boxes are used to keep counters that were surrounded and surrendered.
- The Air and Strategic Reserve Holding Boxes are used to keep counters in transit behind the frontline.
[2.2] Play-Aid Cards
These are used to summarize and illustrate certain game functions. They include the Combat Result tables (CRT), Terrain Effects Chart (TEC), Events Table, various "Sequence of Play" Tables and the Basic Game's rules.
[2.3] Playing Pieces
The square counters are called units, representing the military formations that fought in this campaign.
- German: The German player controls German units (gray-green) and their Axis Allies (blue).
- Soviet: The Soviet player controls the Soviet units (dark red & brown).
- Markers: The round and hexagonal pieces are called markers. They provide the players with game and unit status information during play. A few also influence Combat results.
Exception: The "Forts" hexagonal counters are units.
Unit Size & Designation:
- Large Units: Represent Fronts of about 400,000 men (Soviet) or Armies of 200,000 men (German & Axis Allies).
- Small Units: Represent groups of Armies (Soviet) or Corps (German) of 50,000-100,000 men. Only four Small Units are used in the Basic Game; see 18.10.
- Special Stacking Units: Air units represent between 1,000 to 5,000 operational aircraft; Forts represent sizeable field fortifications and local garrisons.
[2.3.1] Unit ID
The unit name, on the counter's top.
[2.3.2] Unit Type
This is the icon in the middle of unit counters, taken from WW2 German and Soviet military symbols. Mobile units also have a vehicle picture in their symbol. German SS units have a dark gray fill to their unit type symbol.
The Unit Type chart is displayed on the CRT Play-Aid card.
[2.3.3] Unit Size
There are three unit sizes in the game:
- Small Unit: One unit-type symbol.
- Large Unit: Two overlapping unit-type symbols.
- Special Stacking Unit: Fort or Air-type symbol.
[2.3.4] Combat Strength
Burst-type icons represent Combat Points (CP) and measure unit battle value; each color gives CPs different Combat abilities.
- Red: Attack.
- White: Defense (but see 12.2.1).
- Gray: Attack / Defense.
- Yellow: Attack / Defense / Support.
- Circled: Are considered Gray if the German player does not have War Initiative (3.1).
[2.3.5] Unit Movement
There are no movement points (MP) pictured on the counters, each unit type has a specific maximum movement rate instead:
- Leg Units: 2 MPs. These are the infantry units.
- Mobile Units: 3 MPs. These are the motorized units.
- Air Units (special): Air units move directly from their Air Units Box and into Zones, and from a Zone back to that Box (10.1.3).
- Static Units: 0 MPs (i.e., cannot Move).
By using a CM (Combat Marker), Leg and Mobile units may move all their MPs without being Disrupted (11.1).
[2.3.6] Entry/Exit in the Game
All units and some markers have a number or letter on the left of the counter to indicate how and when they enter or leave play.
- Number: Entry turn (enters on that counter side).
- Shaded Boxed Number: Soviet Front Upgrade (10.3).
- Underlined Boxed Number: Departure turn (back of counter).
- Letter: Indicates Special Deployment rule.
[2.3.7] Unit Step Dots
Multi-step units have one or two dots on the right of their unit type, indicating the number of steps remaining before being eliminated. One-step units do not have any step dots.
IMPORTANT! Early Soviet Large units have two sides (Trained & Untrained), but only have one step to lose (10.2.1).
[2.3.8] Special Unit Features
Some counters have a Special Feature letter/symbol on the right of their CPs. Those features are listed on the CRT Play-Aid card and explained in section 18.1.
[2.4] Game Cards
Each player has a 55 card set: a 43-card Event deck (black-outlined back) and a 12-card Offensive deck (red-outlined back). Cards are a resource that can be played for their Event text (2.5), Resource Points (3.8), War Status Goals (15.1), Combat Support (12.5.1) to determine Battle Results (12.7), and Partisan Warfare (23.1). The decks cannot be examined during play.
[2.4.1] Card Number
Each card in a player's deck has a unique number, from 1 to 55. Event cards are numbered 1 to 43, and Offensive cards from 44 to 55.
[2.4.2] Card Name/Picture
Each card possesses a historical name and picture related to the Event simulated.
[2.4.3] Card Year Timing Restrictions
Cards can be played for their Event Text, Offensive Value, or Support Points during specific years only, shown left of the card's picture.
- No Date: The cards without Year Timing Numbers are played without timing restrictions.
- Resource Points: When discarded for their RP value (9.2), there are no timing restrictions.
- Assault Card Draws: The two cards randomly drawn for their SPs during Assault Combat Resolution have no timing restrictions (12.3).
[2.4.4] Support Points
Many cards have yellow colored Support Point icons right of their main picture. They can be played for effect, if Card Timing allows, during the Combat Phase to aid an Assault (12.5.1), or to aid a Battle in the Basic Game. A red-barred CP is considered a negative number.
[2.4.5] Historical Quote
A quote related to the Card, usually made by an East Front WW2 historical figure.
When played it should be read aloud for dramatic effect in critical circumstances to unnerve your opponent...
[2.4.6] War Status Goals
A list of map locations that may award War Status Points (WSP) during the Objective Phase if they are friendly-controlled. They are not affected by a Card's Timing (2.4.3).
[2.4.7] Major Offensive War Status Icon
The yellow hexagon indicates that the War Status Goals score only by using a successful Major Offensive marker (15.1.2).
[2.4.8] Battle Odds
The differential between the Attacker and Defender strengths used when drawing a Card to resolve a Battle. The Battle Result is indicated under the final Battle Odds number.
Example: If Card #15 above is drawn, and the Battle Odds are +4, the Battle Result will be "BB" (Bloodbath).
[2.4.9] Battle Results
They are cross-referenced on the CRT to get Battle Combat Result instructions (12.7.1).
[2.4.10] (Red) Event Timing
Indicates when the Card's Event can be played for various effects (2.4.3), if Timing allows. Red-colored Events must be played when drawn.
[2.4.11] Event Text
Describe the Event's prerequisite conditions and instructions when played for its effect (2.5).
[2.4.12] Offensive Value
The number of Major Offensive markers that must be used when an Offensive card is played for its Major Offensive Event (10.6).
[2.4.13] Offensive Stance
Indicates if the card can be used to declare a Major Offensive ("Major Offensive" label) or not ("No Offensive" label).
[2.4.14] Partisan Warfare
The Soviet "Red Star" and German "Death's Head" icons are used in the Advanced game only (23.1), to resolve Partisan operations.
[2.5] Card Event Text
Event text is implemented as indicated on each card after it is played. Once played, cards are usually discarded.
Card play itself is sequential; i.e., cards are resolved in the order they were played unless they conflict, in which case the card played last takes precedence. The Card's Event Text and War Status Goals are not used in the Basic Game.
[2.5.1] Event Effects
The Event's text describes its exact timing and effects, just follow the instructions. Don't forget card timing restrictions (2.4.3).
[2.5.2] Event Precedence
When there is a conflict between Event text and these rules, the Event text always takes precedence.
[2.5.3] Red Events
When drawn, a card with a red Event Timing caption must immediately be played for its Event. The Event text must be followed if possible; if not the card is discarded without effect.
IMPORTANT! Once is Enough: Each card Event can be used only once in the same Player Turn.
The Event cards represent doctrine, leadership, artillery concentrations, logistical support, bad weather, political events, fortunes of war etc.
[3.0] Key Game Concepts
Certain global concepts tie the key systems of this game together. Here is a quick description of them.
[3.1] War Initiative
War Initiative represents the side with the global strategic advantage and ascendancy in the conflict. It is managed with War Status Points. Managed by Turn Track Events in the Basic Game.
- Initiative Changes: War Initiative will change sides during the game, either by War Status Checks, Card Events, or on special occasions (e.g., "General Winter" turns, Rule 16.1).
- War Status Checks: Checks are made at the start of each year (6.4), or when called by an Event card.
- Non-Initiative Player: He commits his Combat Cards and Support markers first (12.3).
- Initiative Player: He gains advantages in card draws, unit values etc. See section 19.6.
War Initiative will ebb and flow during the game, but starts in the German camp and will slowly but surely, barring major disasters, entrench itself firmly on the Soviet side as the war goes on.
[3.2] War Status Points
The WSP total of each player determines who has the Initiative; a high total could end the game (15.0). They are gained or lost in the following ways:
- Instantly after capturing Major Cities and War Crime sites (15.1.4)
- Instantly after capturing Large enemy units (12.7.6)
- Controlling War Goal Locations (15.1)
- Immediately when some "BB" Combat Results occur (12.7.1)
- The successful use of Pocket markers (7.0-D)
Some card Events will also award WSPs to the player.
[3.3] Stacks
A stack may contain any combination of the following: one or two Leg or Mobile units, up to one Air unit, and up to one Fort. The order of units in stacks is important in this game.
- Large Stack: Contains at least one Large-sized unit, otherwise it is considered a Small stack.
- Mobile Stack: All units are of Mobile type.
- Armored Stack: The top unit is of Armor type.
- Stacking Unit Order: It can be changed after Reinforcement (10.3), Movement (11.0), Retreat (12.7.4), Advance (12.8), Exploitation (12.9), or Deployment (13.0).
Exception: Air and Fort units are not taken into account for determining stack type (e.g., Large, Mobile, Armored), or for "Pincer" maneuvers (12.6.2).
In the Basic Game there is only one unit in a stack. Remember, one unit alone is still considered a stack!
[3.4] Combat Markers
CMs are used to declare Attacks, Combat, Support, Fort Flips, Air Repairs, and special Moves. There are three types: Attack!, Support, and Mobile/Armor. Flip Attack! and Support markers to their "Done" sides after their combat sequence is done.
- Use: Each can be used once per Game Turn.
- Limit: Each player has a limited number (eighteen).
- Recycling: The markers are replenished during their owner's Combat Marker Phase (8.0).
They represent the resources available for fighting battles and doing rapid movement: Planning, Ammo, Fuel, etc. The burst icons on these have no game effect.
[3.5] Pincer/Pocket Markers
The Phasing player puts Pocket markers on the map during the Combat Phase to represent surrounded "Large" enemy formations following a Pincer Maneuver (12.6.2). When removed in the Supply Phase, such markers may award a WSP or an RP (7.0-D).
The German markers have a gray-green outline, Soviet have a brown outline. Each player has four "Pocket" markers: it's a game maximum.
[3.6] Major Offensive Markers
These markers are brought into play by Major Offensive Event cards, and used to declare a Major Offensive against a Zone (12.1). Major Offensive markers are brought automatically into play in the Basic Game.
- They allow renewed Assaults (12.7.3), and a CP Bonus (12.1).
- They allow Pincer Maneuver Battles (12.6.2).
- If successful, they may award you WSPs from the Major Offensive cards' War Status goals, but if unsuccessful they cost you WSPs (12.11).
[3.7] Control of Zones
The last player to have a stack in a Zone controls it; if there are stacks of both players in the same zone the zone is considered Contested and no player Controls the Zone until one side completely leaves it.
- Control Markers: Use them as reminders for instances where Zone control is not obvious.
- Supply Line: During the Supply Phase, Control can change if a Zone cannot trace Supply (7.0).
- Contested Zone: It is not friendly to any player.
- Air Unit: It can not Control or Contest a Zone.
- WSP Award: The instant that a player captures an enemy-controlled Major City Hex he immediately gains one WSP, and one WSP for an enemy War Crime Site. The WSP award is not used in the Basic Game.
IMPORTANT! Do not forget that the WSP award for a Major City or War Crime Site capture happens instantly at the moment you gain Control of that Zone.
[3.8] Resource Points
Resource Points are tracked with the round Resources marker on each player's Resource Point Track. They represent each side's ability to wage war and are used as "game money" to purchase unit replacements, upgrades, and to complete other tasks. Card Events, Card Discards, and some Industry markers (19.5) will award extra RPs.
[3.9] Victory Locations
The Control of specific map locations during the Objective Phase (15.0) or when captured will gain a player WSPs (War Goals) and may be a prerequisite to the victory conditions (War Aims).
- War Aim Locations: German Crosses, Soviet Stars.
- War Goals Locations: Major Cities, Cities, Oil Wells, a few special locations (15.1.3).
[4.0] Setting up the Game
Refer to the separate Playbook, choose a scenario, and follow its setup and special rules.
- Map: Place the game map between the two players, facing on the long side.
- Cards: Shuffle and place facedown near each player their Event Deck (43 black-outline cards) and Offensive Deck (12 red-outline cards). The Offensive Decks are not used in the Basic Game.
- Play Aids: Put the Reference Sheet and the CRT/TEC cards next to the map for easy access.
- Combat Markers: Each player takes his 18 CMs (3.4) and puts them in any convenient place near him.
- Other Markers: The Track markers will be set up per Scenario instructions; the other markers (Pincers, Pocket, Major Offensive, etc.) are kept aside near the mapboard.
- Counters: The Counters on map will be set up as per Scenario instructions; you can place those scheduled to arrive on the Turn Track as per their turn of entry dates.
For your first game, it is recommended that you use the Barbarossa or the Stalingrad scenarios. The German side is easier to play.
[5.0] Sequence of Play
How the Turns Work: Each Game Turn consists of a Housekeeping Preparation, then a German Player Turn, followed by a Soviet Player Turn (flip the Turn marker to indicate the current phasing Player Side).
During each Player Turn, several phases are conducted in strict sequence (e.g., Supply, Movement, Combat, etc.).
My Turn, Your Turn: The player currently conducting his Player Turn is called the Phasing player. His opponent is known as the non-Phasing player.
Procedure:
I. New Turn Housekeeping
- New Turn Phase: Advance the Game Turn marker one space on the Turn Track. This phase is skipped on the first Game Turn.
- Event Phase (6.0): If there is a gray or red Event name in the current turn box on the Turn Track, apply its effects (21.0).
II. German Player Turn
- Supply Phase (7.0): The Phasing player (German in this case) checks supply for his stacks and Zones, and flips his Industry/Lend-Lease markers. The Phasing player removes his "Pocket" markers from the map, unless in a Contested Zone. The non-Phasing player (Soviet in this case) checks supply for his stacks and Zones.
- Combat Marker Phase (8.0): The German player puts in his available marker pile (a pile near him used to indicate what markers he has available) all his CMs to be used anew (i.e., Attack, Support, Mobile/Armor markers).
- Card Phase (9.0): The German player draws four Event cards and one Offensive card. The cards in hand and the "Resource" Industry markers can then be used to purchase Resource Points (9.2). The German player can not have more than six cards total (Event & Offensive) in hand at the end of this phase: The excess is discarded. The Offensive cards are not used in the Basic Game.
- Strategic Phase (10.0): The German player completes the following, in order: Withdrawals, Upgrade units, Reinforcements, Replace Eliminated units, create Reserves, and declare Major Offensives.
- Movement Phase (11.0): The German player can move his stacks on the map.
- Combat Phase (12.0): All German Attacks are declared and resolved as per the Battle Sequence, in any order that player desires.
- Reserve Phase (13.0): The German player can deploy on the map units located in his Strategic Reserve box.
- Used Marker Phase (14.0): The German "Disrupted", German "Armor," and both players' "Done" markers are removed from the map.
- Objective Phase (15.0): the German player reveals his hidden "War Goal" Card and scores War Status Points for its German-controlled objectives, checks his successful "Offensive" cards in the same manner, then draws a new War Goals Event Card. The Objective Phase is not used in the Basic Game.
III. Soviet Player Turn
The Soviet player becomes the Phasing player and repeats the same phases as in the German Player Turn. Replace the word "German" by "Soviet" and vice-versa.
IV. End of Turn
Initiative player first, check if any player wins the game by "Instant Victory" (17.1), if not, go back to Procedure I. New Turn Housekeeping to restart a new Game Turn. If it is the last turn, check for "End of Game" Victory (17.2).
In the next pages the rules will explain how the game works, following the Sequence of Play order.
STOP! If you intend to play the Basic Game only, stop reading and refer to the Basic Game's 4-page rules insert.
[6.0] Event Phase
Each Game Turn has an Event listed at the bottom of each turn box on the Turn Track, which is repeated on the Game Events Play-Aid card (see 21.0).
[6.1] Theatre Game Events
The gray-colored Game Events are historical occurrences directly linked with the conflict happening on the map. They indicate a special rule taking effect or markers coming into play.
[6.2] Global War Events
The red-colored War Events are historical occurrences elsewhere in the world that indirectly affects what is happening in the game. They are represented by a change in WSPs, CMs, or card draws for a player.
[6.3] War Initiative Events (Basic Game)
The German cross or Soviet star icons depicted in each Game Turn box are used in the Basic Game (only) to show which player has the War Initiative (3.1) for the turn, instead of using the War Status Check procedure.
[6.4] War Status Check (War Initiative)
On the first Jan/Feb turn of a year, War Status is checked to determine which player has the War Initiative. A Card Event can also call for this check.
- WSP Total: The player with the highest total of WSPs now has War Initiative and gets special abilities (3.1); the other becomes the Non-Initiative player. In case of a tie the Initiative does not change.
- Initiative Marker: Flip the marker to the War Initiative player's avatar side (gray for the German, red for the Soviet).
- General Winter: During that type of extreme Weather, the War Initiative will temporarily switch to the Soviet player (16.1).
[6.5] Weather
Note the Weather indicated by the Turn Track. The Weather affects unit movement and combat.
[7.0] Supply Phase
During this phase, both players check the supply status of each of their on-map stacks and unoccupied Controlled Zones, plus the supply status of the Phasing player's "Pocket" markers. The Non-Phasing player does Procedures A-B-C, and then the Phasing player does the whole Procedure, in exact order.
Procedure:
A. Check "Unsupplied" Stacks: If a stack with an "Unsupplied" marker cannot trace a supply line of unlimited length to a Supply Source, it is put in the Captured Units Box. If it can trace a supply line of one or two Zones from itself to a Supply Source, replace its "Unsupplied" marker with a "Disrupted" marker. Otherwise, it keeps its "Unsupplied" marker. Thus, "Unsupplied" stacks will be destroyed next time they check and cannot trace Supply.
B. Check Other Stacks: If a stack (not checked for Supply in Procedure A) cannot trace a one or two Zones supply line from itself to a friendly Supply Source, then put an "Unsupplied" marker on it and remove any "Disrupted" marker it may have.
C. Check Zone Supply: If an unoccupied Zone cannot trace a supply line of unlimited length range from itself to a friendly Supply Source, it changes player Control immediately.
D. Remove Pocket Markers: Remove the Phasing player's "Pocket" markers from the map, unless it is in a Contested Zone (the Battle's issue is still in doubt). The Phasing player scores one WSP for each marker in a Zone he Controls (for the captured troops). The non-Phasing player gets one RP for each marker in a Zone he Controls (for the rescued troops).
E. Flip Industry and Lend-Lease Markers: The Phasing player flips his markers to their "Ready" sides (e.g., Resource, Card, Upgrade).
[7.1] Supply Sources
Supply is traced to a Friendly Supply Source, which is:
- War Production Site: A Friendly-Controlled or Contested Zone containing an Industrial Plant icon, in the Siberia Box for the Soviets, and in the Germany or Czechoslovakia Boxes for the Germans/Axis.
- Source City: A Friendly-Controlled Minor City or Major City that can trace a Supply Line of unlimited length to a War Production Site (2.1.1).
Thus, most Supply lines will go to a Minor or Major City up to two Zones away, and on to a Box with an Industrial Plant icon.
[7.2] Tracing Supply Lines
When tracing a Supply line, count the Supply Source Zone but not the starting zone (i.e., the Zone supplied).
- Water: Trace for free over Lakes, Straits, Rivers, and Major Rivers.
- Major City Hex: Trace for free into that Zone.
Example: A "two-zone range" Supply line means that there is one Zone between the stack and the Supply Source, unless one Zone is a Major City Hex or a Lake: in that case there could be two intervening Zones.
[7.2.1] Forbidden Paths
Supply Lines cannot be traced through these:
- Contested Zones (Exception: can be traced into).
- Enemy-Controlled Zones.
- Impassable Terrain Zones.
[7.2.2] Special Paths
Supply can be traced when in these Zones:
- German/Axis: A stack in a Zone adjacent to the Baltic Sea can trace supply directly to the Germany Box at no range cost.
- Soviet: A stack in a Zone adjacent to the Black Sea or Caspian Sea can trace directly to the Siberia Box at no range cost.
- Motti Lands: Finnish units are always in supply in the two "Motti Lands" Areas in the north of the map.
[7.3] Lack of Supply
When a stack can not trace a Supply Line in the Supply Phase and gets an Unsupplied marker, it suffers the following ill effects:
- If the stack was already under an Unsupplied marker, it is Eliminated (12.7.6).
- Its move is reduced to a maximum of one Friendly-Controlled Zone.
- It cannot give Combat Support (12.2.2).
- It loses two CPs when attacking (12.5.6).
- It cannot use "Mobile/Armor" markers (3.4).
- It cannot be deployed to the Reserve Box (10.5).
IMPORTANT! As long as a stack does not have an "Unsupplied" marker, it is considered fully in supply.
All those effects are also detailed on the TEC.
[8.0] Combat Marker Phase
During this phase, the Phasing player will get back his used CMs. These markers are used to do Combat, Support, Fort Flips, Air Repairs, and special Moves.
Procedure: The Phasing player puts back in his available marker pile (e.g., any convenient space near him) all his used CMs, unless limited by Weather or a lost Oil Well.
- Marker Total: There are four "Mobile/Armor", six "Attack!" and eight "Support" markers per player.
- Lost Oil Well: A player gets back only one used "Mobile/Armor" marker if he does not Control his home country's unique Oil Well Zone.
- Weather Limits: The map's Turn Track key show the number of "Attack!" markers / Air Support units a player can use this Game Turn, based on the Turn's Weather; the excess are considered used.
- Limits: At fixed points during the game, the German player will lose permanently some "Attack!" markers, and the Soviet gain some, timing of which is shown on the Events Listings (21.0). Scenario Instructions indicate how many are available.
[9.0] Card Phase
During this phase, the Phasing player draws Event and Offensive cards from their respective draw piles to make up his card hand. He then may pay cards to purchase Resource Points (RPs).
[9.1] Draw Cards
The Phasing player draws to his hand four cards from his Event deck and one card from his Offensive deck. The cards are drawn one by one, playing red-text cards immediately (2.5.3). Check card hand limits at phase's end (9.3).
- Initiative Player: If the Phasing player has War Initiative (3.1), he can choose to immediately discard and redraw the first Offensive card drawn, unless it's a "Play Immediately" card.
- Last Draw: The last card of a deck is never drawn. In this case you reshuffle it together with the discard pile to make a new draw pile, and draw the top card afterwards.
- Lost Card Draws: A player loses one card draw (his choice of deck) for each of his "War Economy Sites" he does not Control. Or for the German, if called for by a Game Turn Event (21.1).
- Lend-Lease Draw: The Phasing Russian player can draw one extra Event or Offensive card by flipping his "Lend-Lease" marker to its Industrial Plant icon side.
[9.2] Purchase Resource Points
The Phasing player can use cards in his hand and Available Industry markers to purchase Resource Points (3.8).
- Cards: Add one RP to your Resource Point track for each card discarded.
- Industries: Add one RP to your Resource Point track for each friendly "Resource" Industry marker flipped to its Industrial Plant icon side.
[9.3] Maximum Cards & Resources
A maximum number of cards and RPs can be accumulated.
- Cards: Not more than six cards, of any type, can be in the Phasing player's hand at the end of this phase; discard the excess cards without effect.
- Resource Points: A player cannot, at any time, have more Resource Points than indicated on his RP track: four for the German, six for the Soviet, extra RPs are lost.
[10.0] Strategic Phase
The Phasing player performs steps (A-F) in exact order:
Procedure:
A. Withdrawals (10.1): Remove the units scheduled to leave the game this turn. Disband unneeded Forts. Air units go to your Air Box. B. Upgrades (10.2): During this phase you may be able to flip units on the map to their stronger (front) side. C. Reinforcements (10.3): Place the turn's Reinforcements in the Strategic Reserve Box or in a Major or Minor City. D. Replacements (10.4): Deploy Shattered units, use Resource Points (RPs) to rebuild Eliminated and Reduced units. E. Reserves (10.5): Units on the map may go to your Strategic Reserve Box. F. Major Offensive Declaration (10.6): "No Offensive" and "Major Offensive" card events can be played.
[10.1] Withdrawals
Units scheduled to leave the game this turn, as per their Exit number on their counter backs (2.3.6), are removed. These are also identified on the Reinforcements & Withdrawals Play-Aid Chart. Forts can now be disbanded.
[10.1.1] Eliminated Units
If the unit to be withdrawn is in the Destroyed or Captured Box, the owning player must lose one Resource Point (RP) or one War Status Point (WSP), his choice of which, for each such unit.
[10.1.2] Disbanding Forts
The phasing player may remove from the map any of his hex-shaped Forts units he wishes (not the Sevastopol Fortification). They are put in the Destroyed Units Box.
[10.1.3] Air Units Go Home
The Phasing player moves all his Air units currently on the map to his Air Units Box.
[10.2] Upgrades
The Phasing player may Upgrade his two-step units on their one-step side (Reduced), one-step "Untrained" and "Trained" Soviet units, and Forts on their pick-and-shovel side, and repair damaged Air side, and repair damaged Air units.
IMPORTANT! Only supplied units on the map, in an Air Box, or in Reserve, can be upgraded.
[10.2.1] Upgrading One-Step Large Soviet Units
For each Soviet red "Upgrade" Industry marker (7.0-E) spent (e.g., flipped to its front, Industrial Plant icon side) the Soviet player can upgrade one "Large" unit.
"Untrained" Soviet Unit Upgrade: Flip the unit to its "Trained" (darker) front side. The majority of the Large Soviet units have only one step, even if they have symbols printed on their two sides (e.g., they do not have step dots).
"Trained" Soviet Unit Upgrade: Later in the game, the Soviets will have Large red "Front Upgrade" counters available: Remove a brown Soviet unit on its "Trained" side from the game, and replace it with an available red "Front Upgrade" unit of equal number of CPs, on its front red side.
[10.2.2] Two-Step Soviet Unit Upgrade
For each Soviet "Upgrade" Industry or two RPs spent, the Soviet player flips to its front side a two-step unit.
[10.2.3] Two-Step German/Axis Unit Upgrade
At the cost of two RPs each, the German player can flip to its front side a two-step unit.
[10.2.4] Air Unit Repair
At the cost of one CM each, the Phasing player can flip to their front sides Damaged Air units located in his Air Units Box.
[10.2.5] Fort Unit Upgrade
At the cost of one CM the Phasing player can flip to their front side any Fort units on the map, if not stacked with an "Unsupplied" marker.
Note that the replacement for Captured German/Axis units is a two-step process: first they have to be moved to the Destroyed box, so they will take one extra turn to be back on the map, and at higher cost, compared to Soviet units.
Exception: When the Soviet player has War Initiative (3.1) the German player's Axis units cannot be upgraded.
IMPORTANT! On some Turns a player may get a "No Upgrades" Event: He can't pay RPs to Upgrade his units that turn (Forts and Air units can still be flipped by CMs).
Remember, most Large Soviet units start the game with just one step; the "Trained" front side of the counter is not an extra step but an improvement of their "Untrained" back side. They will stay on their "Trained" side if Eliminated, unless they go to the Captured Soviet Units Box (12.7.6).
[10.3] Reinforcements
The phasing player's units scheduled to arrive this turn (2.3.6) are placed, at a cost of one CM each, in the Strategic Reserve Box (on the counter side with the arrival turn number). Alternatively, they may be placed for free in a friendly-controlled Zone containing a Major or Minor City which is in Greater Germany for German units, or in the Soviet Union for Soviet units, as per rule 13.1 (Deploy Reserve units), and as per 18.6 for Axis units. "Front Upgrade" counters are put on the side of the map, ready to be used for Upgrades.
Exceptions: Forts are placed "pick and shovel" face up in a friendly-controlled Zone, Air units to their Air Unit Box.
[10.4] Replacements
Shattered, Eliminated, and Captured units can be moved from their Holding Box to another Holding Box or to the map; Forts can be rebuilt (18.3). Perform these in exact order.
Procedure:
A. Units in the Shattered Box: Can be moved to the Strategic Reserve Box for free. B. Units in the Destroyed Box: Can be moved to the Strategic Reserve Box at a cost of one RP each. C. German/Axis Units in the Captured Box: Can be moved to the Destroyed Box at a cost of two RPs each. D. Soviet Units in the Captured Box: Can be moved to the Strategic Reserve Box at a cost of two RPs each.
[10.4.1] Accelerated Replacements
By spending one CM, a Shattered or Eliminated unit may be deployed directly on the map immediately, using the Reserve Deployment procedure (13.0); each such unit gets a "Disrupted" marker.
[10.4.2] Excessive Replacements
Rebuilt units that cannot be placed in the Strategic Reserve Box due to lack of available space will come back as Reinforcements next Game Turn (put them on the Turn Track).
[10.5] Reserves
Units may go to the Strategic Reserve Box. They can get back to the map during the Reserve Phase (13.0).
[10.5.1] Deploy Limits
The Phasing player can deploy up to four units from the map to his Strategic Reserve Box, within the following limitations:
- Leg/Mobile Unit: Each unit costs one CM each.
- Static Unit: Cannot move to the Reserve Box.
- Unsupplied: Units with an "Unsupplied" marker cannot move to the Reserve Box.
- Reserve Holding Limit: Each Strategic Reserve Box may hold at most one unit in each of its four shaded squares.
[10.6] Major Offensive Declaration
The Phasing player may play any number of Offensive cards. "Major Offensive" cards declare Major Offensives, and "No Offensive" cards provide an Event effect.
- Major Offensive Markers: The phasing player gets a number of "Major Offensive" markers equal to the card's Offensive Value (2.4.12).
- Card/Marker Limit: There are four Major Offensive markers included in the game; this is the limit for the Player Turn. The total Offensive Value of all the cards played in this step may not exceed four.
- Played Cards Placement: The played Major Offensive and "No Offensive" cards, are placed, face up, next to the War Goals Event card (15.2), for later Scoring in the Objective Phase.
- German Player in General Winter: The German player does not get any Major Offensive markers in "General Winter" Weather from Major Offensive cards.
IMPORTANT! All the markers must be used in the next Combat Phase (12.1); if not, the owner loses one WSP for each unused marker.
[11.0] Movement Phase
The Phasing player may move none, some, or all of his units. Each may move on the map up to the limit of its Movement Allowance.
- Stop: Terrain in some Zones will stop a stack's movement when entering it (see TEC).
Note that Lakes are Water terrain: they are impassable and cannot be attacked across, unless it is a Strait.
Procedure: Friendly stacks are moved one at a time, from their current Zones to any passable adjacent Zone. A stack may continue moving until it has either spent all its MPs, moves into a Zone where it must stop movement, or the player desires to cease moving it. Stacks may be split only before moving; units may not be "dropped off" into new stacks while their original stack continues moving.
[11.1] Movement Allowance
Most units have a limited movement allowance:
- Leg Stack: 2MP. It becomes Disrupted if it moves the full 2MPs, unless a CM is immediately spent.
- Mobile Stack: 3MPs. It becomes Disrupted if it moves the full 3MPs, unless a CM is immediately spent.
- Static Unit: Cannot move out of their Zone.
- Air Unit: Special unlimited movement (see 18.5).
IMPORTANT! Some Soviet Tank units have a boxed and grey-barred "M" icon. Such a unit is not considered a Mobile unit for any game purpose including Pincer Maneuvers (12.6.2).
[11.2] Marker Effects
Some markers affect units' movement and stacking, they don't follow units into the Holding Boxes (see TEC).
- Unsupplied: 1 MP maximum. Friendly Zones only.
- Disrupted: 2 MPs maximum.
- Stacks Can't Merge: At the end of its Move, if with a Disrupt or Unsupplied marker, a stack cannot merge with a second stack, even if it sports the same marker.
[11.3] Weather Effects
Weather affects the Leg/Mobile units' maximum movement and how many Air units each player can have on the map; the other Air units must stay in their Air Unit Box (see TEC):
- Clear: 3 MP / 3 Air units
- Snow: 2 MP / 2 Air units
- Mud: 1 MP / 2 Air units
- General Winter: 2 MP / 1 Air unit
[11.4] Terrain Effects
The basic cost to enter a Zone is one MP. The cost to enter some Zones is zero MP, and some are impossible to enter, as shown on the Terrain Effects Chart.
- Move: A stack may enter a Zone only if it has sufficient MPs left to pay the cost of terrain.
[11.5] Stacking Effects
A stack usually consists of one or two square units (see 3.3). If units are overstacked, you must split them apart immediately, forming a new stack, and moving if needed to respect the Zone's stacking limit.
- Split: A stack may be split, so as to move part of it.
- Friendly Stack: A stack can move in a Zone that contains only friendly stack(s); you can combine it with stacks already there at the end of its move (but see 11.2).
- Enemy Stack: A friendly stack cannot move into an enemy-controlled and occupied Area/Hex, unless it is occupied only by enemy Air units, in which case the Air units go back to their Air Units Box (but see Advanced Rule 23.2.2).
- Enemy-Occupied Map Box: A stack can move into a Map Box even if it contains enemy stacks.
- Contested Zone: A stack can move into a Contested Zone even if it contains an enemy stack.
[11.5.1] Zone Stacking Limit
The limit varies depending on what type of Zone is entered. Both players could have stacks in the same Zone.
- Hex Limit: One stack.
- Area Limit: Two stacks (from any players).
- Box Limit: Eight stacks (Four per player).
Example: An Area can contain up to two German stacks, or two Soviet stacks, or one German and one Soviet stack.
Example: A map's Box could contain up to four German stacks, plus up to four Soviet stacks, plus up to one stack of either player (but not both) in the Box's Major City Hex (if present).
You can move a stack into a Contested Area, but the two-stack limit means you must either combine it with a friendly stack already there, or the other friendly stack must leave. You cannot enter an Area containing two enemy stacks (the two-stack limit is already attained).
[11.5.2] Over Stacking
If the Zones are over-stacked at the end of a Phase, the Phasing player must Retreat (12.7.4) his excess stack(s) one Zone. The excess still over-stacked Supplied units are put in the Shattered Units Box and the excess Unsupplied units are put in the Destroyed Units Box (owner's choice of which).
[11.5.3] No Infiltration
A stack cannot move directly from a Contested Zone to another Contested or Enemy-Controlled Zone; it must move to a Friendly-Controlled Zone first.
[11.5.4] Leaving a Contested Zone
A stack moving out of a Contested Zone automatically becomes Disrupted (19.1) before starting its move.
[11.6] Moving to/from Map Boxes
Units may only exit the map by moving across its colored dashed lines or double-arrow edges. The color of the dashed lines indicating to which it is adjacent for movement purposes.
[12.0] Combat Phase
During a friendly Combat Phase, each stack may participate in one combat only, unless a Special Combat Result says otherwise (12.7.3). When the Phasing player initiates an attack he completes all the steps of the Combat Sequence (12.3).
The player who initiates an attack is the "Attacker" and his opponent is called the "Defender".
Procedure:
A. Designate All Major Offensive Zones (12.1): Place one Major Offensive marker in each Zone that will be the Target of a Major Offensive. B. Choose a Target Location (12.2): One Zone to be attacked is chosen. C. Combat Sequence (12.3): Follow the Complete Combat Sequence for the attacked stack. D. Repeat for Each Zone (12.4): Repeat steps B and C for each Zone in which the Phasing player wishes to attack any stacks.
Types of Attacks: During the Combat Phase a specific Combat Result Table will be used for each Attack, depending on the Terrain of the defender's Zone (see TEC's Combat Column) of which there are two main types:
- Battle: Used for Zones with easy, open terrain.
- Assault: Used for Zones with difficult terrain.
[12.1] Designate Major Offensive Zones
The Phasing player puts all his "Major Offensive" markers in Zones that will be attacked this phase.
- Mandatory Use: The Phasing player may place his "Major Offensive" markers in any Enemy-Controlled or Contested Zones, one per Zone; he loses one War Objective Point for each unused marker.
- Major Offensive CP: The Phasing player may now pay one RP for each "Major Offensive" marker he wants to flip over, giving a future attack in this Zone a one CP bonus (e.g., the red explosion icon).
- CP Limit: The marker can be used once per Combat Sequence (12.3) for its CP bonus, flip the marker back to its front side after use, unless an Assault is repeated (12.7.3).
[12.2] Choose a Target Location
All Battles and Assaults are resolved in any order the Phasing player desires, and must be completely resolved in each Combat Zone before the next Zone is chosen.
- Target Location: Any Zone containing stack(s) of the non-Phasing player that is adjacent to one or more Zones containing Phasing player stack(s), or a Contested Zone, can be attacked.
- Contested Area: A Phasing stack located in a Contested Area at the start of the Combat Phase must attack the Enemy stack located in that Area and be the Lead Attacker, unless there is a "Forts" unit of any player in the Area. Otherwise the stack is Disrupted (19.1) and Retreats one Zone at the end of this step.
[12.2.1] Attacker & Target
The Phasing player decides which stack will initiate the attack and which stack will be attacked.
- Attacking Stack: Called the "Lead Attacker".
- Defending Stack: Called the "Target".
- "Attack!" Marker: Put an available marker on top of the "Lead Attacker" stack. An Air unit cannot attack alone.
- White CP Exception: A unit with white-colored CP(s) may add its CP(s) to an attack only when in a Contested Zone (3.7).
- No Multiple Targets: Only one "Target" can be attacked in each Combat Sequence.
IMPORTANT! Unless allowed by a Combat Result, each Defending stack can be attacked once per Combat Phase.
[12.2.2] Combat Support
Stacks other than the "Lead Attacker" or the "Target" may give Support, adding in their yellow Support CPs (2.3.4) to the Attack or Defense.
- "Support" Marker: Put one marker on each stack that gives Support, "Non-Initiative" player first.
- Attack Support: One stack per Zone, in or adjacent to the Target Zone, may give Attack Support.
- Defensive Support: One stack per Zone, in or adjacent to the Target Zone, may give Defensive Support.
IMPORTANT! A stack in an Area cannot give Defensive Support to an adjacent Area, unless it's a Contested Area, a stack with an Air unit on top, or by Card Event text.
The small size of a Hex, and the better transport infrastructure near Major Cities and Boxes, makes reinforcing into or out of these locations faster. Flying is also a good way to go!
Since there are six "Attack!" and eight "Support" markers per player, this restricts the number of stacks that can be attacked or supported in a Game Turn.
[12.2.3] Attackers/Supports in Multiple Zones
The Zone containing the "Lead Attacker" is used for the Major River, River and Straits Combat Terrain Effect (12.5.4).
[12.2.4] Battle Strength Unity
A stack's Combat Strength is unitary: it may not be divided among different Combats during a single phase.
[12.2.5] Forbidden Support (Markers)
Stacks with "Disrupted", "Unsupplied", or "Done" markers cannot give Combat Support (See TEC). This trumps Event card text.
[12.3] Combat Sequence
Battles and Assaults are conducted via the Combat Sequence. These Steps must be completed for each attack.
Combat Sequence:
- Support Step: First, the Non-initiative player may commit one Special Support marker (19.0) and one Event card to the Combat; then the Initiative player may do the same. Second, the Attacking player may attempt a Pincer Maneuver (12.6.2).
- Strength Step (12.5): Each player totals the CPs of their participating units on their respective Combat Point tracks, adding in any terrain, weather, marker, or Event card effects.
- Combat Resolution Step (12.5): Battles and Assaults each resolve combat in a different way:
- Battle: Subtract the Defender's CPs from the Attacker's to get the final Battle Odds. The Attacker then draws the top card of his Event deck, and notes the corresponding Battle Result under the Battle Odds number on the card (2.4.8).
- Assault: The Attacker draws the top card of his Event deck and adds its Support Points to his CP track disregarding any timing restrictions (2.4.3), and then the defender does the same. Remember, a red-barred Support Point is negative and subtracts from the card's owning player SP total. Subtract the Defender's CPs from the Attacker's to get the final Assault Result number.
- Apply Result Step (12.7): With the Combat total known, it is now applied on the Battle or Assault Combat column of the CRT.
- Advance After Combat Step (12.8): Some combat results will allow the Attacking stacks to advance into the Target Zone (this includes Supporting stacks).
- Mobile Exploitation Step (12.9): Mobile units that have advanced after combat may be allowed to advance a second Zone.
- Flip Combat Marker Step (12.10): Used "Attack!" and "Support" CMs are flipped to their "Done" Sides.
- Major Offensive Check Step (12.11): If a Major Offensive is successful, place the "Major Offensive" of that Zone on an active Offensive Event card (one per card maximum), if not discard the marker.
When Computing the Combat Strengths, the following subcases apply:
[12.4] Repeat for Each Zone
After the Combat Sequence above is done for the chosen Target Location, the Phasing player chooses a new Target Location and repeats the process until all the Attacks are done.
[12.5] Combat Strength and Resolution
[12.5.1] Event Cards
Each player can play one Event card per Combat in support, as per Step 1 above, if card timing restrictions allow (2.4.3).
- Battle: The card's Event text is used (2.4.11).
- Assault: The card adds its Event text (if applicable, but most can only be used in a Battle) or its SP value (2.4.4).
In the Basic game, the card Support Value is used for both Battle and Assault, as the cards' text is not used.
[12.5.2] Attacking Player
Each unit adds its combat strength depending on stacking order and support status.
- Lead Attacker: Add all units. Exception: If two Large units are stacked together, the bottom Large unit adds only its yellow-colored (support) CPs (2.3.3).
- Support Stacks: Add the top unit yellow-colored CPs; other units do not add any CPs.
[12.5.3] Defending Player
Each unit adds its combat strength depending on stacking order and support status.
- Targeted Stack: Add all units. Exception: If two Large units are stacked together, the bottom Large unit adds only its yellow-colored (support) CPs.
- Support Stacks: Add the top unit yellow-colored CPs; other units do not add any CPs.
Don't forget, Air units aren't Large, and some units have CPs counted only in Defense (white) or Attack (red) and can thus be worth zero CPs.
[12.5.4] Terrain
The bonus defensive CP due to Terrain is based upon the Defender's Zone (see TEC).
- Combat Across: If the Lead Attacker attacks across a River or Straits, the defender gets a CP bonus.
- Combat Type: The Defender's Zone Terrain type also determines what CRT will be used: Battle (easy terrain) or Assault (difficult terrain).
IMPORTANT! Note that there are two types of Major Cities on the TEC: "regular" Major Cities, and Major Cities with a "War Aim Site". The latter are represented by a War Aim German Cross or War Aim Soviet Star.
[12.5.5] Weather
Bonus defensive CPs caused by Weather are based upon the Defender's Zone and the time of the year (see TEC).
- Winter Line: During Snow and General Winter consider the Zones west of the Partisan/winter red dotted line on the map to be in Clear Weather for all game purposes.
- Movement: Use the Weather in the Zone each stack starts in for the whole of its Movement Phase.
Example: Attacking a Soviet stack in a Major City (1 CP) across a River (1 CP) in Mud Weather (1 CP), awards the defenders three extra Combat Points.
[12.5.6] Status Markers
These markers have Combat influence on the stack they are with (see TEC).
- Disrupted: An Attacking stack loses 1 CP.
- Unsupplied: An Attacking stack loses 2 CPs.
- Disrupted or Unsupplied: The stack cannot give Combat Support.
[12.5.7] Special Combat Support Markers
There are a few of these in the game, and affect the Combat results with extra CPs or modifying results. They are described in the Special Markers section (19.0).
[12.5.8] Battle Odds Limits
Whenever the Battle odds exceed +6, it still is resolved on row 6. When the Battle odds are less than -3, the outcome becomes an automatic "A1" (Attacker Defeated) result.
[12.6] Combat Sub-Types
Two Combat Sub-types will affect the Combat resolution.
[12.6.1] Major Offensive
If a "Major Offensive" marker is in the Targeted Zone, Pincer Maneuvers can be attempted, and an extra Attack CP gained by spending one RP to flip the marker (12.1).
[12.6.2] Pincer Maneuver
During the Support step (12.3.1) the Phasing player may attempt a Pincer Maneuver, which blocks a Defender's Retreat and may form a "Pocket" (3.5). Put a "Pincers" marker on the Target stack, and an available "Armor" marker on the Lead Attacker stack, if the conditions below are fulfilled:
- Major Offensive: There is a Major offensive marker in the Target's Zone.
- Attacker: The Lead Attacker's top unit is a Mobile Armored unit (ignore Air units).
- Defender: The Target's top unit is not Armored (ignore Air and Fort units).
- Multiple Attacking Zones: The Attackers' stacks are set up in two Zones or more.
- Terrain/Weather: The Target's Zone Terrain and Weather allows it (see TEC). (Note: No "Pincers" allowed in Mud).
IMPORTANT EXCEPTIONS:
Armor + Mobile: If a Mobile Armored stack advanced in the target's Zone by using a "Mobile" marker during Mobile Exploitation (12.9), then a Pincer Maneuver can be always attempted in a later Attack this Combat Phase, even if all the conditions of rule 12.6.2 are not fulfilled. You can keep the "Mobile" marker on the stack as a "Pocket" reminder until the Used Marker Phase (14.0).
Event Cards: Some Events also allow for Pincers to be attempted without all the conditions fulfilled (22.1).
Pincer Maneuvers need many conditions to be fulfilled, but they will fast become second-nature. There are lots of examples for these in the Playbook.
[12.7] Apply the Combat Results
[12.7.1] Battle Combat Result
Read from the Battle odds column on the Event card drawn, then on the Battle CRT.
Battle Combat Results:
- AE = Attacker Eliminated: Lead Attacking stack Retreats one Zone, then is Eliminated.
- A1 = Attacker Defeated: Lead Attacking stack Retreats one Zone, then loses one step.
- AS = Attacker Shattered: Lead Attacking stack Retreats one Zone, then goes to the Shattered Box.
- AB = Attacker Broken: The Lead Attacking stack Retreats one Zone, or loses one step.
- AR = Attacker Repulsed: If Lead Attacking stack is in a Contested Zone, it Retreats one Zone or may choose to lose one step, otherwise no effect.
- AA = Attacker Advances: Lead Attacker Advances into the Target Zone. No Mobile Exploitation allowed. No Advance if the Attacker is already in the Target Zone.
- BB = Bloodbath: Attacking player may choose to lose one RP, or make both players lose one step from a unit of their choice involved in the Battle.
- DR = Defender Retreat: Target stack Retreats one Zone. The Attacking stacks may Advance.
- DB = Defenders Broken: All non-Phasing stacks in the targeted Area Retreat two Zones. The Attacking stacks may Advance.
- DS = Defenders Shattered: All non-Phasing stacks in the targeted Area Retreat two Zones, then Target stack goes to the Shattered Box. The Attacking stacks may Advance.
- D1 = Defenders Defeated: All non-Phasing stacks in the targeted Area Retreat two Zones, then Target stack loses one step. The Attacking stacks may Advance.
- DE = Defenders Eliminated: All non-Phasing stacks in the targeted Area Retreat two Zones, then Target stack is Eliminated (12.7.6). Attacking stacks may Advance.
- DC = Defender Captured: All non-Phasing stacks in the targeted Area Retreat two Zones, then Target stack goes to the Captured Box. The Attacking stacks may Advance.
As you can see in the Battle results, a stack in a stacked Area may be affected by a Combat result even if not directly involved in the current Battle. This is not the case in a Map Box.
Example: Germans Attack with 10 CPs and Soviets Defend with 6 CPs. Battle Odds are thus +4. Note that only the top unit of a stack can give Combat Support, and that Adjacent stacks of the Defender in an Area can not get a Support marker unless an Air unit is on top (12.2.2) or a Card Event allows it. The modifier for the Dnepr River is not used, as the Lead Attacker is not across (12.5.4). The German player has War Initiative in this example, so the circled yellow burst CPs are considered of yellow color (see 18.1).
Example: Continuing the previous Attack example, the top card drawn from the German deck (card #39), for a Battle at +4 CP, gives a "D1" result. The two Soviet stacks in the attacked Zone must Retreat, and are Disrupted (brown Explosion on the CRT). Note that the "Fort" unit is Eliminated outright as it cannot Retreat (Circled R on the counter, see 18.1). After the retreat is done, the "Bryansk" unit must lose one step, as it is the Target stack: it has only one step so goes in the Soviet Destroyed Units Box.
[12.7.2] Assault Combat Result
It is the differential between the Defender and Attacker's total Combat Points.
Assault Combat Results:
- D+3 = Assault Defeated: Lead Attacking stack Retreats one Zone if it's in a Contested Zone, then loses one step (Defender has a 3CP superiority or more).
- D+2 = Assault Repulsed: If the Lead Attacking stack is in a Contested Zone, it either retreats one Zone or loses one step. Otherwise no effect (Defender has a 1-2CP superiority).
- EQ = Assault Indecisive: Attacking player may choose to lose one RP, or make both players lose one step from a unit of their choice involved in the Assault (CPs are equal).
- A+2 = Assault Successful: Defending player may choose to Retreat the Target stack one Zone, or make both players lose one step from a unit involved in the Assault. Attacking stacks may Advance (Attacker has a 1-2CP superiority).
- A+3 = Assault Victorious: Defending player may choose to Retreat the Target stack two Zones, or lose one step from that stack. Attacking stacks may Advance (Attacker has a 3CP superiority or more).
Example: The Defender has 1 CP more that the Attacker, resolve on the D+2 line (Assault Repulsed). The Attacker has 3 CPs more, resolve on the A+3 line (Assault Victorious).
[12.7.3] Special Combat Results
There are some extra Battle and Assault Combat Results that may be applied, indicated by graphics and icons on the CRTs.
- Oil Barrel: Put an "Unsupplied" marker on all Attacking/Support stacks still on the map after Combat resolution.
- German Cross: In a Major Offensive Combat, the German player loses one WSP if he has War Initiative.
- Brown Explosion: Put a "Disrupted" marker on all Defending/Support stacks on the map after Combat resolution.
- Black Airplane: Flip all Air units of both players that Attacked/Supported/Defended in this Combat to their "Damaged" sides if not Damaged already.
- Red Arrow: An attempted Pincer Maneuver is successful; the Target stack is Eliminated (Captured on DC result). Add in the Zone a Phasing player's "Pocket" marker for each Large unit Eliminated, up to a maximum of four "Pockets". Target Air unit returns to its Air Box.
- Major Offensive icon: If the Target stack does not Retreat, the Attacker may immediately repeat the Combat Sequence (12.3) with the same units (Attacker, Defender, Supports). A new "Attack" CM must be discarded; a flipped "Major Offensive" marker stays flipped. Played cards are discarded.
[12.7.4] Prohibited Retreat Zones
When required to Retreat, the owning player must move a stack a set number of Zones further away from the Combat Zone (net distance, no zigzagging).
- Retreat Zones: Stacks cannot Retreat into Enemy Controlled, Contested or Impassable Zones (Seas, Lakes and Alpine); or adjacent to an Enemy-Controlled Zone (if possible).
- Stacking: Stacks may not be split or recombined; overstacking must be resolved after the Retreat (11.5.2).
- Pincer Maneuver: If the maneuver is successful, the Target stack does not Retreat but is Eliminated.
- Static Unit: If it must Retreat, it is Eliminated.
- Air Unit: If it must retreat, it goes back to its Air Box, and thus cannot be Eliminated.
IMPORTANT! If a stack cannot Retreat for any reason, it is Eliminated instead (12.7.6) and do not forget that Pincers will stop a stack from Retreating, thus Eliminating it.
[12.7.5] Step Losses
Certain results cause step losses and/or Elimination to be suffered.
- Step Loss Effect: When a step loss occurs, a full-strength two-step unit is reduced (flipped over) to its one-step side; a unit with only one step left is Eliminated (12.7.6).
- Loss Choice: The top unit of a stack must be chosen, unless mandated otherwise. When there is a choice, the owning player determines which unit suffers a step loss.
- Pincer Maneuver: If the Attacker suffers a Combat step loss during a Pincer Maneuver (12.6.2), an Armor unit must take that loss.
- Two-Step Units: Only units with step dots (2.3.7) have two steps, even if they have two sides.
[12.7.6] Eliminated Units
Eliminated units go to different Boxes, depending upon their current state.
- Unsupplied Stacks: Units with an "Unsupplied" marker go to the Captured Units Box.
- Supplied Stacks: Place units in the Destroyed Units Box, on their current counter side.
- Forts & Air: Always go to the Destroyed Box.
- Captured Box: Small units go face up, Large units face down (but not one-sided Soviet Tanks). Captured Large Soviet and German units will cost the enemy one or two WSPs (see the map's Captured Holding Boxes).
IMPORTANT! Unless Eliminated when Unsupplied, a unit will be put in the Destroyed unit box on its counter side currently showing: for a face-up two-step unit, it is considered that substantial parts of the unit escaped to fight another day.
[12.8] Advance After Combat
When allowed by an "Attacker Advance" Combat result, the Lead Attacker and/or supporting stacks may Advance after Combat. The Zone of advance must be the Zone just attacked.
- MP Cost: Advance after Combat expends no MPs; stacks simply enter the Target Zone.
- Who Can Advance: Any non-static units involved in the Attack can Advance, including Support stacks.
- Splitting Stacks: Advancing non-static stacks may split and recombine, leaving some units behind, you may need to use extra "Done" markers for these (see 12.10).
- Enemy Stacks: You may Advance into a Zone still containing Enemy stacks, but be wary of stacking limits. Enemy stacks composed of only an Air unit go back to their Air Box.
- Terrain: It has no effect on the Advance.
Note that if the Attacker is in a Contested Zone with the Defender, it will not be able to advance as it is already in the Target Zone attacked in the Combat.
[12.9] Mobile Exploitation
Phasing player's Mobile units (Attacker or Supports) may further Advance an Extra Zone if stacked with an "Armor" marker, or by discarding an available "Mobile" marker if not already with an "Armor" marker (you may keep it on the unit as a "Pocket" reminder, see 12.6.2). Follow these restrictions:
- Terrain: Stacks can only Mobile Exploit into or from a Zone where Terrain allows it (see the Mobile column of the TEC).
- Markers: Stacks with a "Disrupted" or "Unsupplied" marker cannot Mobile Exploit.
- Weather: You cannot Mobile Exploit in certain types of Weather (see TEC).
- Enemy Stack: Stacks may Mobile Exploit to an Area containing one Enemy stack at most. If that Enemy stack is composed of only an Air unit, it goes back to its Air Box.
- Splitting Stacks: Exploiting stacks may split and recombine, but may need extra available "Done" or "Mobile/Armor" markers if you split a stack.
IMPORTANT! Do not forget that a stack that already has an "Armor" marker cannot use a "Mobile" marker (e.g., it has already done its Pincer Maneuver for the turn), and that Air and Some Soviet Tank units (18.1, "M" on counter) are not Mobile units.
Note that when you advance in a Zone containing an Enemy Stack, that Zone becomes Contested.
[12.10] Flip Combat Markers
After each Combat Sequence do the following actions:
- Flip to "Done" Side: All "Attack!" and "Support" markers used in this Combat Sequence by both players are flipped to their "Done" sides, indicating that they cannot do Attack or Support actions for the rest of this Player Turn.
- Split Stacks: If some stacks are split, the owning player must put an unused "Attack" or "Support" marker on its "Done" side on each newly created stack.
Note that the Target stack will not get a "Done" marker.
[12.11] Major Offensive Success Check
After a Combat and Advance/Exploitation, if there was a "Major Offensive" marker in the attacked Zone and it is now controlled by the Phasing player, the marker is put on any active "Major Offensive" or "No Offensive" card(s). This indicates that the card will be checked for War Status scoring in the Objective Phase (15.0). Not more than one marker can be put on each card, discard any extras.
Unsuccessful Offensive: If an "Offensive" card in play does not have a "Major Offensive" marker on it at the end of the Combat Phase, put the card back on its deck's discard pile.
IMPORTANT! If there are still remaining "Major Offensive" markers on the map, the Phasing player loses one WSP for each, then discards those markers.
This means you need to capture one enemy-controlled Zone per "Offensive" Card to score WSPs with it, and will Lose one WSP if you have not captured the Zone.
[13.0] Reserve Phase
The Phasing player may deploy units from his Strategic Reserve Box.
[13.1] Deploy Reserve Units
Units moving to the map from Reserve are placed in any Zone the Phasing player Controls, with these limitations:
- Supply: A valid Supply line of unlimited length must be traced from the Zone the unit is placed in, but this line cannot be traced using Special Paths (7.2.2), except for Sea Moves (see below).
- Stacking: Stacking can be adjusted if other friendly units are already in the Zone.
- Sea Moves: Only small units may be Deployed if the Supply Line passes through the Baltic Sea or Black Sea.
- Axis Units: These have extra limitations (see 18.6).
[14.0] Used Marker Phase
Some markers present on the map are pulled out, going back to the owning player's used marker pile:
- Phasing Player: "Disrupted"/"Armor" markers
- Both Players: "Done" and "Special Combat Support" markers
- "Partisan" marker: At a cost of one RP each, Advanced Game only (23.1.7).
Note that there should not be any face-up "Attack!" or "Support" markers on the map at the start of this phase.
[15.0] Objective Phase
[15.1] War Status Point Scoring
The Phasing player checks if he Controls the War Status Goal Locations on his War Goals Card and Offensive cards in play, then records points gained on his WSP Track.
[15.1.1] War Goals Scoring
The Phasing player reveals his face-down War Goal Event card, and scores one WSP for each location he controls or that is an Isolated Location (15.1.3).
A. Check for the card's left map location first. B. If the left location scores, you check the right side one. C. Discard the card to the Event card discard pile.
[15.1.2] Offensive Event Card Scoring
The Phasing player checks his successful "Offensive" cards (e.g., with a "Major Offensive" marker on it) and scores one WSP for each of the locations he controls or that is an Isolated Location (15.1.3).
A. Check for the card's left-side map location first. B. If the left location scores, check for the right one. C. Discard the card to the Offensive card discard pile.
[15.1.3] Special Locations Scoring
Some Goals have special conditions to be fulfilled, as explained below:
- USSR: If the German player Controls at least one zone in the Soviet Union, he scores one WSP.
- Germany: If the Soviet player Controls at least one zone in Greater Germany, he scores one WSP.
- Partisans (Regular Game only): From Turn 4 to Turn 22, if the German player does not pay a RP immediately, the Soviet scores one WSP.
- Isolated Location: If a Goal Location is not Controlled, one WSP is still scored if the enemy can not trace a land supply path of unlimited length to it (i.e., a land-only path that does not cross a sea, lake, or straits/Ice Road).
[15.1.4] Instant Scoring
Besides in the Objective Phase, WSPs are immediately gained for the following:
- Pocket: One WSP when removing from the map a friendly "Pocket" marker during the Supply Phase (7.0-D).
- Large Unit Capture: Owning Player loses one WSP for each Large Soviet unit, and two WSPs for each Large German (not Axis!) Unit put in the Captured Units Box.
- Major City Capture: One WSP is gained when capturing an Enemy-Controlled Major City.
- War Crime Site Capture: One WSP is gained when capturing an enemy site (once per game!). The German player scores red Skull sites, the Soviet tan Skull sites.
[15.1.5] Using the War Status Marker
The WSP total is adjusted on the player's War Status track.
- When the player's total is over 10 WSP, flip the marker to its +10 side.
- When the player's total would move over 19 WSP, lower the opponent's total for the amount instead, to a minimum of zero WSP.
There are no negative WSP totals or penalties. However, when the WSP differential is 19, the player with 19 WSP may win an Instant Victory at the end of the turn (17.1).
[15.2] War Goals Event Card Draw
The Phasing player draws a new card from his Event card deck, secretly looks at it, and places it face-down in front of him with a "Control" marker on top to identify it. It becomes his new War Goals card, and will be checked for Map Objective Scoring next Game Turn.
IMPORTANT! The War Goals card is not part of a Card Hand and does not count towards maximum Hand Size, and cannot be Discarded like a regular Event Card (9.2). The card's black or red Event text is never acted upon.
Note that since the card is drawn near the end of the Player Turn, in the first turn of a game such scoring will not be possible, unless scenario instructions tell otherwise.
[16.0] End Of Turn Phase
Initiative player first, check if the game ends in an "Instant Victory" (17.1). If not, go back to Procedure I. New Turn Housekeeping to restart a new Game Turn. If it's the last turn and there was no Instant Victory, check for a "Game End" Victory (17.2).
[16.1] "General Winter" Initiative
If the German player has the highest WSP total at the end of the "General Winter" turn, then War Initiative automatically switches to him.
You still score WSP for Isolated locations you Control.
[17.0] How to Win
There are three different victory types for the Regular and Advanced Campaign games; these are checked, Initiative player first, during the End of Turn Phase.
[17.1] Instant Victory
There are three ways for a player to instantly win the game at the end of a Game Turn, in order:
- War Status Points (German): If the German player has the Initiative and at least 19 WSPs, his opponent zero WSP, and the German player controls at least two of his opponent's War Aim Sites including Moscow, he wins.
- War Status Points (Soviet): If the Soviet player has the Initiative and at least 19 WSPs, his opponent zero WSP, and the Soviet player controls at least two of his opponent's War Aim Sites, including Königsberg, he wins.
- War Aim Sites (German/Soviet): If a player controls at least four of his opponent's six War Aim Sites, he wins.
- Berlin War Aim Site (Soviet): If the Soviet player controls Berlin, he wins.
OPTIONAL WSP win: If the Initiative player fulfills his WSP victory conditions, but does not control the two War Aim Sites required, he may draw a card from his "Offensive" deck. If the Card Timing dates (2.4.10) include the current year, he wins a "Moral Victory" (see 17.3). He keeps that card in his hand if the game continues.
The above optional "Moral Victory" win supposes a military coup that will result in a temporary armistice. The Western Allies become the dominant post-war power, and Europe will suffer far less pain and destruction.
[17.2] Game End Victory
At the end of a game, if there was no Instant Victory, the winner is decided by the following, in exact order:
[17.2.1] Short Campaign
Check at the end of Turn 22.
- Map Control (Soviet): If the Soviet player controls all of the map's Soviet Union Zones, he wins.
- War Aim Sites (German): If the German player controls his six War Aim Sites, he wins.
[17.2.2] Long Campaign
Check for the Short Campaign victory Conditions at the end of Turn 22, then for the conditions below at the end of Turn 26, in exact order:
- Berlin (Soviet): If the Soviet player controls the Berlin Hex, he wins.
- War Production (German): If the German player controls his two War Production Sites, he wins.
[17.3] Western Allies' Victory
In a few rare circumstances it could happen at the end of a game that neither player has won. In that case they both lose the game, having exhausted their resources and will to fight. The Western Allies are the post-war dominant power. In such a case, the player with the most WSPs can boast a Moral Victory.
Note that since the German player goes first in each Game Turn, it is more difficult for him to win by War Status Points, as the Soviet player will have his own turn to move his WSP total above zero before victory is checked.
[18.0] Special Units
Below is a summary of some special units and features.
[18.1] Special Unit Features
Some counters have a Special Feature letter/symbol to the right of their Combat Points. The Special Unit Features are displayed on the CRT chart.
- "A" in Triangle: If the unit is still part of the "Lead Attacker" stack, that stack may Advance after Combat (12.8) on any "BB" or "EQ" results.
- "R" in Circle: The unit is Eliminated if it has to Retreat.
- "M" in Box: The unit is not considered "Mobile" for any game purposes. Some Soviet Tanks have an "M" icon, indicating they are not Mobile for any game purposes, including Pincer Maneuvers (12.6.2).
- "2" in Circle: When eliminated it does not go in the Destroyed/Captured Boxes, but enters as a Reinforcement two Game Turns later (Turn 2 = arrives Turn 4).
- "Burst" in Circle: If the Soviet player has War Initiative, that yellow CP is considered gray, thus losing its "Combat Support" ability (12.2.2).
[18.2] Mobile Armor Units
Mobile Panzer (German) and Mobile Tank (Soviet) Armor stacks have a special Battle ability.
Pincer Maneuver: Mobile armor stacks can do a Pincer Maneuver under certain conditions (12.6.2). This allows you to surround an enemy stack in Battle, making its Retreat impossible. Weather and enemy Armor can forbid the maneuver (12.6.2).
[18.3] Forts Units
These units represent extensive field fortifications and local garrisons. Combat is not Mandatory in a Contested Area if there are any "Forts" in it (12.2).
- Steps: This unit has one step on its front side, and none on its "Construction" side.
- Movement: It can't move/retreat out of its Zone or be placed in the Strategic Reserve Box; but it may be Disbanded and removed from the map by the owning player in his Strategic Phase (10.1.2).
- Map Setup: When it arrives on the map, as Reinforcements or being rebuilt, it is set up on its "Construction" (pick and shovel) side. It will be upgraded (flipped) at a cost of one "Combat" marker in the next owner's Strategic Phase Upgrade step. When on its "Construction" side it cannot stop enemy units from entering its Zone, and is automatically Eliminated if they do.
- Stacking: Only one "Forts" unit can be part of a stack; it stacks for free over the two-counter limit.
[18.4] Sevastopol Fortress Unit
This Large unit represents the region's main fortified belts and the attached defending units.
- Movement: It can't move/retreat out of the "Sevastopol" Zone; or be put in Strategic Reserve.
- Steps: It has two steps, and cannot be Rebuilt or Upgraded, as indicated by the skull and crossbones icon on its brown side.
[18.5] Air Units
Air units represent a concentration of Air formations used to support troops in important Battles and Assaults.
- Steps: Each has one step, valid on both of its sides. When it takes a step loss (on any side) it is Eliminated. A "Damaged" unit is still fully functional, but is worth zero CPs. If already Damaged there is no effect.
- Movement: An Air unit can move out of its Air Box to a Friendly-Controlled or Contested Zone, or back to its Air Box. It can Advance After Combat (12.8) but can not do Mobile Exploitation (12.9), and goes back to its Air Box if it Retreats.
- Stacking: One Air unit may stack for free. If not part of a stack, it immediately moves back to the Air Unit Box when an enemy stack enters its Zone.
- Defensive Support: If on top of their stack, Air units can give Defensive Support even when in a Zone adjacent to the Target Zone (12.2.2). They cannot be the Lead Attacker if alone in a stack, only Support.
- Map Set Up: When it arrives on the map, as Reinforcement or being rebuilt, it is set up in the Air Unit Box on its Front (undamaged) side.
- Weather Limits: The map's Turn Track key shows the number of Air units a player can use in a Game Turn. Any excess are considered flown; put a Disrupted marker on them.
The small "CP" bursts on the back of the counter are cosmetic only and have no impact upon gameplay.
[18.6] Axis Units
German Axis units are represented by blue-colored counters. They possess a few special limitations.
- Limited Steps: When the Soviet player has War Initiative, German-Allied Axis units can't be Upgraded (10.2).
- Finnish: Can only Deploy (13.1) to the Helsinki or "Motti Lands" Zones, and no other units of any player can ever do so. They can Attack/Support against Soviet units only in those three Zones, but may move anywhere on the map in Zones empty of Soviet units. If the Soviet player has War Initiative, at the instant the two "Motti Lands" are Soviet-Controlled both Finnish units are permanently removed from the game.
- Hungarian: The 1+3 Hungarian Army cannot voluntarily leave the Hungary Box until an orange-dotted border Zone or adjacent becomes Soviet-Controlled. Can only Deploy to the Hungary or Kharkov Zones. Example: The Zone containing the city of Lvov.
- Romanian: Can only Deploy to the Bucharest or Odessa Zones. Romanian and Hungarian units cannot stack with each other.
- Romanian Defection: When the Soviet player has War Initiative, at the instant the Bucharest Zone is Soviet-Controlled or Contested Romanian units become Soviet-controlled for the rest of the game.
- Italian: Can only Deploy to the Austria or Kharkov Zones.
- Axis "AK" Unit: Can only Deploy to the Czechoslovakia or Minsk Zones.
As the Axis powers had limited war objectives, they'll be difficult to rebuild and move around.
The German 11th Army and Army Group F have light yellow unit type icons for historical purposes only: A lot of their troops were Axis Allied.
[18.7] Soviet Shock Armies Unit
This Large unit is only used in the Basic Game. It replaces the three Small "Shock I-II-III" units used in the Regular and Advanced games.
[18.8] Soviet Maritime Unit
This Small unit can only be located in a Zone adjacent to the Black Sea, or Attack/Support such a Zone, or be in Reserve. If not, it is immediately Eliminated. It can be Deployed (13.1) in any Soviet-Controlled Zones adjacent to the Black Sea.
[18.9] German Army Group F
This Large unit cannot voluntarily leave the Yugoslavia Box, unless there is a Soviet unit in or adjacent to that Map Box. This unit is not used in the Basic Game.
[18.10] Basic Game "Small" Units
Only the four Small units pictured are used in the Basic game, and are considered "Large" for all purposes.
[19.0] Special Markers
Below is an explanation and summary of special markers not otherwise explained elsewhere in the rules.
[19.1] Disrupted Markers
These markers portray disorganization caused by extended combat operations.
- When: Combat Results and some Card Events will put them on stacks, or when a unit moves its maximum movement allowance without using a CM (11.1).
- Battle CRT change: When committed in a battle (only) one "AA" (Attacker Advances) result becomes a "BB" (Bloodbath).
- Must Use: If in play, such a marker must be used by the owning player to defend against an Attack if possible (i.e., the enemy makes at least one attack). If it could be used in the Combat Phase but was not, lose 1 WSP. When used, put the marker on its corresponding Assault (with CP) or Battle (AA=BB) side.
- Effect: Movement and Combat abilities of the stack are curtailed. Extra Disruptions have no effect (see 11.2 and TEC).
- Stacking: The marker effect is for the whole stack; if the stack is split, use extra markers.
[19.2] General Winter Markers
These Combat Support markers portray the Soviet attack advantages in the first extremely cold winters of the war.
- When: At the start of a "General Winter" Game Turn, the Soviet player gets the two markers to use during that turn.
- Attack Use: The Soviet player can commit one marker per Combat for its Attack CP (12.3).
- Limits: The markers can only be used against Zones located East of the Partisan/Winter line.
[19.3] Volkssturm Markers
These Combat Support markers portray the increased resistance of the German troops in the last few months of the War, when the Red Army invaded their home country.
- When: The German player gets use of the two markers for the rest of the game by the play of German Event card #41 "Bottom of the Barrel". Each can be used once per Game Turn.
- Defensive Use: The German player can commit one marker per Combat for its Defense CP (12.3).
- Limits: The markers can only be used in Zones outside the USSR/Soviet Union (2.1).
[19.4] Order/Directive Markers
These Combat Support markers portray the "No Retreat!" orders both dictators often gave to their troops.
- When: Both players get one such marker as Game Events during the game. Each can be used once per Game Turn.
- Defensive Use: Each player may commit his marker once per Combat Phase for its Defense CP (12.3.1) or Battle CRT change.
- Assault CP Bonus: When committed in an Assault, the Defender gets one Defensive CP.
[19.5] Industry/Lend-Lease Markers
These markers portray the increased war industry activity and Allied Lend-Lease efforts.
- When: Players get them as Events (see 21.1). Each can be used once per Game Turn.
- Where: They are placed in a friendly War Production Site (Industry markers) or a Lend-Lease Site (Lend-Lease markers), one per Industrial Plant icon showing.
- Use: Depending on the back text, each can be flipped once per turn to get an extra card draw (9.1), Resource point (9.2), or Upgrade (10.2).
- Loss: If its Zone becomes enemy-controlled, put the marker in the Shattered Holding Box. It is put back in the same Zone, front side up, as soon as the owning player gains back control.
[19.6] War Initiative Marker
The player with the War Initiative (i.e., with his marker side showing) gets the following advantages and limitations.
- Card Draw: During Card Draw Phase (9.1), he can Discard and Redraw the first Offensive card drawn (or Event card drawn in the Basic Game), unless it is a "Play Immediately" card.
- Combat Support Order: During the Combat Phase (12.0), he commits "Support" markers and Combat Cards last.
- War Status Victory: During the End of Turn Phase, he could win the game if he has enough WSP (17.1).
- German War Initiative: The German player loses one WSP on BB or EQ Combat Results if that Combat is a Major Offensive (of any player). Valid in either player's Combat Phase (12.7.3).
- Soviet War Initiative: The German player's units' circled yellow CPs are considered gray CPs (2.3.4).
- Soviet War Initiative: The German player's Axis units cannot be Upgraded (18.6).
- Major Offensive Markers (Basic Game only): He gets two "Major Offensive" markers for the turn, his opponent gets just one.
There is a Historical section in the Playbook about the two soldiers depicted on the War Initiative markers.
[19.7] Objective Markers
These two markers are used — in the Basic Game only — to mark the number of game Objectives captured.
[20.0] Special Map Locations
Below is a summary of the special map locations.
- When a Major City Hex is located in a Map Box, it is treated as a separate Hex inside that Map Box. It is only adjacent to that Box Zone.
- There are two kinds, "Regular" Major Cities, and Major Cities with a "War Aim Site" icon (a Red Star or German Cross), see TEC.
[20.1] Leningrad Ice Road
The Ice Road is located near the north part of the map, in Lake Ladoga.
- The Leningrad and Volkhov Zones are considered adjacent to each other for Movement purposes.
- You cannot Attack from one of the Zones to the other, but you can do Combat Support (12.2.2).
- Retreat is allowed from Leningrad to Volkhov.
- Supply can be traced through (7.2.2).
Despite its name, the Ice Road is operational all year long, by truck in winter and naval shipping otherwise.
[20.2] Kerch Strait
The Kerch Strait makes the Kerch and Novorossiysk Zones adjacent for all game purposes.
[20.3] Major Cities
These important Zones have some special attributes.
- It costs zero MPs to enter such a Hex (see TEC), so even after spending all its MPs, a stack, if not located in "STOP" terrain, can move into it.
- Stacks in Adjacent Zones can give Defensive Combat Support, and vice-versa (12.5.3).
- They are worth one WSP each time they are captured from the enemy (15.1.4) (cities may change hands multiple times).
[20.4] Winter Line
During Winter/Snow turns, Zones west of that red dotted line are considered "Clear" weather.
[20.5] War Crime Sites
The capture of each enemy site awards one WSP (15.1.4) and represent locations where the major war atrocities were committed. They are discussed in the Playbook.
[21.0] Event Listings
Following are detailed explanations of Game Turn Events.
IMPORTANT! Events followed by an asterisk "*" are not used in the Basic Game.
[21.1] Game Events
These historical Events are printed in gray text on the Turn Track, and on the Play-Aid Card.
[21.1.1] Turn 1, Surprise Attack
For this turn only:
- German Combat: The German player's units can only Attack/Support with units sporting the same setup letter (i.e., F-N-C-S-R), unless an Air unit.
- German Move: The German player's units can't move more than one Zone in the Movement Phase.
- German Axis Allies: The units with an "R" group letter I.D. start stacked with "Disrupted" markers.
- Soviet Combat: The Soviet player's units can only attack/support with units sporting the same setup letter (i.e., B-FR-SL).
- Soviet Move: Soviet units cannot move into Greater Germany's Zones this Game Turn.
- Upgrades: No German or Soviet Upgrades.
You'll have less flexibility with your units on the first (shorter) turn, as your armies are fully committed to their respective pre-set Campaign Plans.
[21.1.2] Turn 2, Stalin Line
The two Soviet "SL" Fortified units must be immediately Deployed in any Soviet-Controlled Zone(s) east of, and adjacent, to the Partisan/Winter line (even if they are Shattered, Eliminated, or Captured). No German or Soviet Upgrades (10.2).
This represents the old "Stalin Line" fortifications and some smaller reserve formations. Do not forget that the "No Upgrades" event does not apply to Forts (10.2.5).
[21.1.3] Turn 3, Death Squads
Remove one German "Attack" marker from the game. No German Upgrades (10.2).
In September 1941, the Nazis started "Einsatzgruppen" operations in Eastern Europe: mobile killing squads specialized in mass murder of civilians and prisoners.
[21.1.4] Turn 4, Pearl Harbor
Increase Soviet WSP total by two points*. No German Upgrades (10.2). Start Partisans WSP Scoring (15.1.3).
[21.1.5A] Turn 5, Lend-Lease
One "Resource" Lend-Lease marker is placed — Industrial Plant icon face-down — in the "Onega" Lend-Lease Zone (2.1.1). No German Upgrades (10.2).
War Initiative switches for the turn. The Soviet player will lose it again next turn if he does not have the higher WSP total (16.1).
The three "Lend-Lease" markers represent the huge war resources sent by the Allies to help the USSR war effort.
[21.1.5B] Turn 5, War Status Check*
Due to the "General Winter" weather, the Soviet player temporarily gains War Initiative and the two "General Winter" markers.
War Initiative switches for the turn. The Soviet player will lose it again next turn if he doesn't have the highest WSP total (16.1).
The German Economy is put on a Full War Footing.
[21.1.6] Turn 6, Soviet Industry x2
Two "Upgrade" Soviet Industry markers are placed — Industrial Plant icon side face-down — in the "Urals/Siberia" War Production Site (2.1.1).
They represent the switch to a War Economy and the gradual gain of battle experience by the Soviets.
[21.1.7] Turn 7, Midway
Increase Soviet WSP total by one point*.
The first turning point of the Pacific Campaign, it stopped for good any Japanese threat against the Soviet Union.
[21.1.8] Turn 8, Stalin Order #277
Increase Soviet WSP total by three points*.
Represents Stalin's "Not a step back!" Order just before Stalingrad and the Red Army's increased resistance.
[21.1.9] Turn 9, Operation Jubilee
Add one Soviet "Attack!" CM to the game.
The disastrous Dieppe invasion by Canadian troops; it signaled the increase of Allied activity on the West Front.
[21.1.10] Turn 10, Operation Lightfoot
The German player draws one less card in his Card Phase (of any type).
The British Victory at El Alamein. "It is not even the beginning of the end. But it is, perhaps, the end of the beginning." (Winston Churchill)
[21.1.11A] Turn 11, Lend-Lease
One "Resource" Lend-Lease marker is placed — Industrial Plant icon face-down — in the "Makhachkala" Lend-Lease Site (2.1.1). No German Upgrades (10.2).
There are three "Lend-Lease" markers, representing the huge war resources sent by the Allies to help the USSR.
The USA war entry was a boon to the Allied war effort.
[21.1.11B] Turn 11, War Status Check*
Due to the "General Winter" weather, the Soviet player temporarily gains War Initiative and the two "General Winter" markers.
[21.1.12] Turn 12, German Industry
One "Resource" German Industry marker is placed face-down in the "Germany" War Production Site (2.1.1).
[21.1.13] Turn 13, Operation Vulcan
Add one Soviet "Attack!" CM to the game.
The Allied campaign ousted the Axis forces out of Africa.
[21.1.14] Turn 14, Operation Husky
The German player draws one less card in his Card Phase (of any type). Remove one German "Attack" marker from the game.
The Allied Invasion of Sicily, signaling the end of Mussolini's Fascist government.
[21.1.15] Turn 15, Operation Avalanche
The German player draws one less card in his Card Phase (of any type).
The Allied invasion of the Italian mainland and capitulation of Italy.
[21.1.16] Turn 16, German Industry
One "Resource" German Industry marker is placed — Industrial Plant icon side face-down — in the "Czechoslovakia" War Production Site (2.1.1).
The Soviet "Order #227" is removed from the game this turn. The German Economy is put on a Total War footing.
[21.1.17A] Turn 17, Lend-Lease
One "Card" Lend-Lease marker is placed — Industrial Plant icon face-down — in the "Urals/Siberia" Lend-Lease Zone (2.1.1).
Half of the Allied Lend-Lease aid to the USSR arrived at the Soviet port of Vladivostok on the Pacific coast and northern Siberia, using Soviet-flagged American Ships, right under the nose of the Japanese Navy.
[21.1.17B] Turn 17, War Status Check*
Compare players' WSPs to check War Initiative change (6.4).
This is the last yearly War Status check. The Soviet player should have gained War Initiative by now.
[21.1.18] Turn 18, Hitler's Directive #53
The German player gets the "Directive #53" marker. Permanently remove one German "Attack!" CM from the game.
Represents Hitler's new Fortified Areas and Strongpoints "No Retreat" War Strategy.
[21.1.19] Turn 19, Operation Overlord
The German player draws one less card in his Card Phase (of any type).
The Allied Invasion of France signaled the beginning of the end for Hitler's Thousand-Year Reich.
[21.1.20] Turn 20, Operation Cobra
The German player draws one less card in his Card Phase (of any type). The Basic Game Ends this turn.
The Allied Breakthrough from Normandy and mauling of the German 5th Panzer Army.
[21.1.21] Turn 21, Manpower Crisis
Permanently remove one German and one Soviet Industry marker each.
[21.1.22] Turn 22, Battle of the Bulge
The German player draws one less card in his Card Phase (of any type). Permanently remove one German "Attack!" CM from the game. The Short Game ends this turn (17.2.1). Stop Partisans WSP Scoring (15.1.3).
Hitler's final gamble, it used up the last of the German army's mobile Panzer and Luftwaffe reserves.
[21.1.23] Turn 23, Yalta Conference
Decrease Soviet WSP total by four points. The Soviet player removes any two Lend-Lease markers from the game. No German Upgrades.
The world's fate is decided in advance by the Allies, the Soviets try to grab as much of Europe they can before the end of the war. Hitler's proverbial writing is on the wall...
[21.1.24] Turn 24, Operation Varsity
Decrease Soviet WSP total by four points. The last German Industry and Lend-Lease markers are removed. No German Upgrades.
Represents the crossing in force of the Rhine River and final exploitation into Germany by the Western Allies.
[21.1.25] Turn 25, Operation Grapeshot
Decrease Soviet WSP total by four points. The last Soviet Industry marker is removed from the game. No German Upgrades.
Italy is completely occupied by the Allied armies.
[21.1.26] Turn 26, VE-Day!
Decrease Soviet WSP total by four points. No German Upgrades. The Long Game ends this turn (17.2.2).
The remains of the German army capitulate. The War in Europe is over!
Some extra explanations also at the end of the rulebook.
[21.2] Reinforcement, Withdrawal, and Upgrade Events
[21.2.1] Reinforcements
The units and markers entering the game are listed in bold text.
[21.2.2] Withdrawals
The units and markers exiting the game are listed in bold italic text.
[21.2.3] Upgrades
The units now available to replace Upgraded Soviet units are listed in red text. Place them face up, on the Soviet side of the mapboard, ready to take the place of the old Soviet units when they are Upgraded.
[21.2.4] No Upgrades
The listed player cannot use RPs to do unit Upgrades this Game Turn; Forts can be flipped (10.2.5).
The bloody two-front campaign was taking a toll on both sides' available manpower resources.
IMPORTANT! Reinforcements (not Upgrades) enter the game on the counter side showing the Entry Turn number.
[22.0] Special Card Events
[22.1] Armor Icons
An "Armor" icon that is part of a card's Event text means that, to be able to play that Event, the player must have an Armor stack (Mobile or not), as the "Lead Attacker", and needs to have an "Armor Marker" on that stack (12.6.2).
Because of rule 2.5.2 Event Precedence, it means that if the card's conditions are fulfilled, a Pincer Maneuver may be attempted even if it would otherwise be forbidden by the rules; e.g., No Major Offensive, Defending Armor, Bad Terrain, Bad Weather, Attack from just one Zone, no Mobile Armor.
[22.2] Hitler Orders Attack
When German card #51 "Hitler Orders Attack" is played, all the "Major Offensive" cards in the German player's hand must immediately be played for their Event, including card #51 itself. These Events will happen next Game Turn, so keep those cards on the side of the board in the meantime, face up.
"Major Offensive" cards that cannot be played because of bad Card Timing (2.4.3), plus all "No Offensive" cards, are discarded without effect.
There are only four Major Offensive markers in the game, used by both sides, so any card that would make it over that total must also be discarded without effect.
[22.3] Partisan/Atrocity Card Events
There are two Event cards that have event text affecting the Partisans/Atrocity markers (German card #11, "Pacification Campaign", and Russian card #31, "Partisan Offensive"). These Events apply only to the Advanced Game, as the markers are only used in that game.
For the Regular Game, consider the Event text on these two cards as "No Effect". The cards can still be used for their other effects. There is a green-boxed "A" on the right side of the card to indicate this.
[23.0] Advanced Game Rules
The Advanced game uses a few more detailed rules. You can use them all or pick-and-choose those that suit your play style.
[23.1] Partisan Warfare
The Partisan/Atrocity markers are controlled by Event card play (e.g., cards with the Partisan Warfare icons). They may award WSP when on the map, and impede Reserve movement of the German player's units.
Note that all those cards are of the "Play Immediately" kind.
[23.1.1] Entering Play
When "Partisan" markers enter play as Reinforcements (10.3), they are put directly in the Partisans Holding Box, Red Star side up.
[23.1.2] Stacking
Any number can be put in the Partisans Holding Box and one marker per Zone otherwise (any side up). They cannot stack with any other marker.
[23.1.3] Soviet Partisan Marker Activation
When the Soviet player draws a card with one or more "Partisan Warfare" icons (2.4.14), he must immediately do one of the following actions for each icon on the card, if possible (maximum of one action per Partisan marker):
- Deploy: Deploy one "Partisan" marker from the Partisans Map Box to a non-Clear Area or Area adjacent to it, East of the Partisan/Winter line, or in a German-controlled Yugoslavia Map Box.
- Recycle: Remove a "Partisan" or "Atrocity" marker from the map, to enter as a Reinforcement (10.3) next Game Turn, on its "Partisan" side.
- Recruit: Remove a "Partisan" or "Atrocity" marker from the map if in a Soviet-Controlled Zone. It is permanently removed from play and the Soviet player immediately gains one RP.
[23.1.4] German Atrocity Marker Activation
When the German player draws a card with one or more "Atrocity" icons (2.4.14) he must immediately do one of the following actions for each icon on the card, if possible:
- Recycle: Remove an "Atrocity" marker from the map, to enter as a Reinforcement (10.3) next Game Turn, on its Partisan side.
- Flip: Flip a "Partisan" marker located in a Zone on the map to its Atrocity side.
[23.1.5] Partisan Marker Effects
The markers on their "Partisan" side have the following effects in the game:
- War Status Point Award: If at least one marker is on its "Partisan" side on a German-Controlled map Zone when a Partisans Special War Goal scoring Event happens (15.1.3), the Soviet gains one WSP. This replaces the Regular game Partisans scoring rule (15.1.3).
- Reserve Interdiction: The German player cannot Deploy Reserve units (13.1) in Areas containing a face up Soviet "Partisan" marker.
[23.1.6] Atrocity Marker Effects
The markers on their "Atrocity" side have no direct effect in the game, other than stopping the deployment of a "Partisan" marker in the same Zone because of stacking restrictions (23.1.2).
Partisan Warfare does not have a large effect on the game, but can sometimes tip the scales in a tight contest.
[23.1.7] German Anti-Partisan Offensives
Once per turn, during his Used Marker Phase (14.0), the German player can pay one RP to move a "Partisan" marker from the map, to Enter play as Reinforcements next Soviet Player Turn. Only one marker per turn can be moved in this way.
[23.2] Small Stacks and Forts
Small stacks and Forts (e.g., a stack of Small units only) now have less influence on the map's Zones.
[23.2.1] Area/Box Control
A small stack or a "Forts" unit cannot gain Control of an Area or Box; if the stack or "Forts" unit is alone in an Enemy-Controlled Zone, treat the Zone as Contested (3.7) for Movement and Supply purposes and put an enemy "Control" marker in the Zone.
[23.2.2] Opposed Movement
A friendly stack can now enter an Area or Box that contains just one Small enemy stack or one "Forts" unit, and then it must stop.
Small stacks are now much less efficient in holding a line or exploiting a hole: use force concentration!
[23.2.3] Opposed Mobile Exploitation
A friendly stack doing Mobile Exploitation (12.9) can now enter an Area or Box that contains only Small enemy stacks and/or "Forts", these enemy stacks must then conform to stacking rules as if owned by the Phasing player (11.5.2).
[23.3] Limited Combat Markers
Players have less "Combat" markers they can use each Game Turn than the 18 markers of the Regular game.
[23.3.1] Initiative Player
He can use 16 markers per Game Turn. He chooses them in his Combat Marker Phase (8.0), the remaining two are considered already used.
[23.3.2] Non-Initiative Player
He can use 12 markers per Game Turn. He chooses them in his Combat Marker Phase (8.0), with a minimum of one of each kind, the remaining six are considered already used.
[23.4] Extended Advance After Combat
Stacks not involved in a combat might be allowed to advance.
- Who may advance: Stacks without a "Done" marker adjacent to an empty Enemy-Controlled Zone may Advance after Combat into it, following the same rules, but cannot do a "Mobile Exploitation".
- Attack "Done" Marker: Put an unused friendly Attack marker on its "Done" side on stacks who advance this way.
[23.5] Optional War Initiative Change
Using this rule, the Initiative will be a bit less variable and follow the historical path.
[23.5.1] Fixed Initiative Check
When the game's Initiative is to be checked by a War Status Check (6.4) or Card Event, the WSP total of each player is not checked anymore. Initiative will instead be decided by the Turn's War Initiative Icon, like in the Basic Game (6.3).
[23.5.2] Initiative Determination
The German Cross or Soviet star icons depicted in each Turn Box will decide which player gets the Initiative the Turn it is checked.
[24.0] Solitaire Game Rules
This game was meant for two players, but with a few extra adjustments can also be a good Short Campaign Game solitaire-friendly experience by giving the opposition some goals to attain each turn.
[24.1] Playing Both Sides
The Short Campaign game starts with the Germans as the "Friendly" Player Side, but this may change later (24.4).
- Player Side: This is the side you play to win with your full ability, preferably sitting on that player-side of the map.
- Non-Player Side: The other ("Enemy") side will be played under some limitations and advantages.
[24.2] Event Card Play
All the Event cards and Offensive cards are now always in full view. You play with the full knowledge of both sides' card hands.
Exception: The "Enemy" side War Goal card (15.2) stays face-down when drawn as in the regular game's rules, you turn it face-up at the start of the "Enemy" side Card Phase (9.0).
[24.2.1] Extra Card Draw
When the "Enemy" side draws its cards for the turn (9.1), it gets one extra Event card draw.
[24.2.2] Friendly "Play Immediately" Cards
When the "Friendly" side draws a "Play Immediately" card, the "Enemy" side must immediately discard a random card and then redraw a new card, of the same type (Event or Offensive). If no card can be discarded, a new card is still drawn. This may mean a series of successive discards/redraws.
[24.3] Enemy War Status Goals
The "Enemy" side will have some mandated Attacks he must do, called for by the War Status Goals (2.4.6) locations of his Offensive and War Goals cards.
[24.3.1] War Goals Cards Mandated Attacks
Check the two War Goals locations of the "Enemy" War Goals Card.
- The "Enemy" side must Attack one Zone that is within a 2 MP range of each location (remember, a Major City Hex costs zero, see 7.2).
- "Partisans" War Goals mean attacking one Zone that is within a 2MP range of a "Partisan" marker on the map. If there are none, there is no effect.
- "USSR" and "Germany" War Goals means exactly that: use any Zone in that country.
[24.3.2] Offensive Cards Mandated Attacks
Check the two War Goals locations of the "Enemy" played Offensive cards.
- The "Enemy" side must use any "Offensive" cards in hand during its Card phase if it can be played.
- The "Enemy" side must Attack two Zones that are within a 2 MP range of each location (remember, a Major City Hex costs zero, see 7.2).
- The gained "Major Offensive" markers must be used in attacking these locations.
- "Partisans" War Goals mean attacking one Zone that is within a 2MP range of a "Partisan" marker on the map. If there are none, there is no effect.
- "USSR" and "Germany" War Goals means exactly that: use any Zone in that country.
[24.3.3] Enemy Attack Maximum
Each "Enemy" side has a maximum number of Attacks that can be made per turn, depending on the year. If there are more mandated Attacks than the total, freely choose which will be applied.
- German "Enemy" side: 1941 = 6 Attacks, 1942 = 5 Attacks, 1943 = 4 Attacks, 1944 = 3 Attacks, 1945 = 2 Attacks.
- Soviet "Enemy" side: 1941 = 3 Attacks, 1942 = 4 Attacks, 1943 = 5 Attacks, 1944 = 6 Attacks, 1945 = 5 Attacks.
Exception: New Assaults caused by Major Offensive Icon Combat Results (12.7.3) don't count in that total.
[24.3.4] Mandated Pincer Maneuvers
The "Enemy" side must attempt at least one Pincer Maneuver per turn if possible, plus any that are on its Event cards.
[24.3.5] Mandated Replacements
Each "Enemy" side must attempt to rebuild and put back into play all "Large" enemy units in the Destroyed Units Holding Box during its Strategic phase. Freely choose for the other units.
[24.4] Switching Sides
When the "War Initiative" changes, Player Side will automatically change also; you then will play the old "Enemy" side as your own, reversing your game position. That is, you always will play the "Initiative" Player Side.
[24.5] Winning the Game
The Short Campaign Game victory conditions do not change, but if the Player Side does not win, the Non-Player Side automatically wins.
Extra Event Card Explanations
Move: When a Card Event allows a Stack to do a "Move", it's only a one-Zone movement that can be done, not the full movement allowance.
Support Marker: Unless the Card Event says otherwise, when a "Support" marker can be placed on the map, it can do Defensive Support even from an Area to an adjacent Area, something that the rules normally forbids (see 12.2.2, Important! box), it's trumped by card event rule 2.5.2, Event precedence.
Basic Game Rules
The following is the separate 4-page Basic Game Rules booklet, used to play the simplified Basic Game mode referenced throughout the Rules of Play above.
Using This Play Aid
These 4-page Basic Game Rules are meant for a quick introduction and use less of everything, with simpler rules.
STOP! Go back to the Rulebook and do a quick check of the first five sections, up to page 7. This will give you a general overview of the game's components, key concepts, sequence of play, and how to set up your first game.
First Steps
You should have just finished perusing the main Rulebook, and have a grasp of the game's concepts. Set-up the Basic Game Campaign game, or the Stalingrad mini-game, and pick up the two play aids; the Sequence of Play and Combat Sequence are both listed on it.
IMPORTANT! All the small-sized units but four (see 18.10) are not used in the Basic game.
Let's go along phase-by-phase. This will be as brief as possible; for any queries refer to the Regular Game Rules manual. If there are any differences they will be indicated here.
Event Phase
At the start of each Game Turn:
- Turn Event: Apply the current Game Turn Event, described in the Event Listings (21.0).
- War Initiative: Flip the Initiative marker to indicate the side has the War Initiative for the turn (shown by a German Cross or Soviet Star on the turn track; 6.4). Reshuffle the discards and card decks together whenever the War Initiative changes.
- Major Offensive: The Initiative player receives two "Major Offensive" markers and the Non-Initiative Player receives one such marker; you must use all your markers or lose War Objective Points. In "General Winter" Weather, the German player doesn't get the use of any such markers.
German Player Turn — Supply Phase
At the start of each Player Turn, Phasing player first:
- Supply Check (both players): Put an "Unsupplied" marker on friendly stacks that cannot trace a Supply line; if they already have such a marker, put the stacks in the Captured Units Box. Stacks with "Unsupplied" markers that can trace a Supply line have their markers flipped to their "Disrupted" sides.
- Supply Line: You trace supply from a stack's Zone to your own colored dotted map-board's edge (West for the German, East for the Soviet). The Supply line can be of any length and can only pass through friendly-Controlled Zones, but for the stack's own Zone.
- Sea/Lake Supply: The German player can trace Supply through the Baltic Sea, the Soviet through the Black Sea and the Caspian Sea. Both sides can trace Supply through lakes.
- Unsupplied Marker: Stacks under this marker have their movement & combat abilities lowered (see TEC).
- Pocket Reduction (Phasing player): Remove your "Pocket" markers from the map. For each marker not in a Zone you Control, the opponent gains one Resource Point.
- Industry Markers (Phasing player): Flip your "Industry" and "Lend-Lease" markers to their "ready" non-Plant sides so that they can be used anew.
Combat Marker Phase
The Phasing player recycles back his whole set of round Combat Markers (3.4), to the available markers' pile.
- Marker Total: Each scenario's instructions give the number of markers a player has for use.
- Weather Limits: Unlike the Regular Game, the number of "Attack" markers and Air units you can use does not vary because of Weather.
- Lost Oil Well: Only one "Mobile/Armor" marker is recycled if a player doesn't Control his Oil Well Zone.
Card & Resource Phase
The Phasing player draws new Event cards, and purchases Resources Points.
- Unused Card Sections: The Event text and War Status Goals are not used; only the Timing, Support Points and the Battle Results are.
- Number Drawn: Draw four cards, minus one card per lost Home War Economy Site (2.1.1).
- Initiative Player: The player with the War Initiative may choose to discard and redraw the first card he draws in this phase.
- Purchase Resources: Each card discarded for RPs adds one RP to the Resource Track.
- Resource Industry/Lend-Lease Marker: Each marker flipped adds one RP to the owning player's RP Track (9.2).
- Card Lend-Lease Industry Marker: The Soviet player gets one extra card draw by flipping this marker (9.1).
- Maximum Number: At the end of his Card phase, a player cannot have more than six cards in his hand, or more RPs than the maximum on the RP Track.
IMPORTANT! The two "Offensive" card decks are not used in the Basic Game, put these cards aside.
Movement Phase
The Phasing player may move his units. Each may move up to the limit of its Movement Allowance.
- Procedure: Stacks are moved one at a time, Zone by Zone, and may move until having spent all their MPs.
- Movement Allowance: "Leg" units may move up to two MPs, "Mobile" up to three MPs, "Air" to any friendly-controlled Zone, "Static" cannot move.
- Movement Limits: Markers, weather and terrain have an influence on how far units can move, see the TEC for all the details (11.0).
- Stack Size: Each stack can be composed of only one square unit, plus one "Fort" and one "Air" unit.
- Stacking Limits: A "Hex" Zone can contain one stack; an "Area" Zone two stacks (of any player); you cannot move into Map Boxes in the Basic game.
Example: An Area can contain up to two German stacks, or two Soviet stacks, or one German and one Soviet stack.
- Over-stacking: If units are over-stacked, any excess go to the Shattered Box, Unsupplied units go to the Destroyed Box.
- Enemy Stacks: You cannot move a stack into a Zone containing an enemy stack; but some Combat results might allow you to Advance in such a Zone.
Exception: You can move in a Zone containing only enemy "Air" units, these go back to their Air Units Holding Box.
Strategic Phase
The Phasing player performs these steps for his units, in the order listed:
- Withdrawals: He removes his departing units from the game as per the Withdrawal play aid sheet.
- Soviet "Untrained" Upgrades: Any Soviet unit can be flipped to its front (stronger) side at a cost of one "Upgrade" Industry marker flip (10.2.1).
- Soviet "Trained" Upgrades: The Soviet player will get red-colored two-step "Front Upgrade" counters. At a cost of one "Upgrade" Industry marker flip, remove from the game a supplied brown Soviet unit already on its front side, and replace it with a red "Front Upgrade" unit of equal strength, making it into a two-step unit.
- Other Upgrades: Two-step units on their one-step side can be flipped over at a cost of two RPs (10.2.2).
- Air & Fort Upgrades: Flip these counters to their Front side at a cost of one CM each (10.2.4).
- Reinforcements: Arriving units are placed in the Strategic Reserve Box at a cost of one CM each; or for free in a Supplied (not Sea Supply) and friendly-Controlled City or Major City Zone of the player's home country.
- Replacements: Shattered, Eliminated, and Captured units (in that order) can be moved from their Holding Box to another Holding Box or to the map by spending RPs. Follow the holding boxes' instructions (10.4).
- Reserves: Up to four Supplied units can be moved to the Strategic Holding box, at a cost of one CM each.
IMPORTANT! Only counters with "step dots" have two steps, the others only have one step (2.3.7).
Combat Phase
During a friendly Combat Phase, each stack may participate in one attack only, and each defending stack can be attacked once only, unless a special Combat Result says otherwise.
- Major Offensives: The Phasing player must place his "Major Offensive" markers in any Enemy-Controlled or Contested Zones, one per Zone; he loses one War Objective Point for each unused marker.
- Choose a Combat Location: The Phasing player chooses a Zone to be attacked, adjacent or containing at least one friendly stack, and follows the Combat Sequence; repeat for all Attacks.
- Contested Area: A stack starting the Combat phase in the same Area as an enemy stack must attack it, unless there is any "Fort" unit in that Area.
- Marker Conditions: Stacks with a "Done" marker cannot Attack/Support. Stacks with "unsupplied" or "Disrupted" markers cannot Support (see TEC).
- Attackers and Defenders: The Phasing player chooses the Attacking stack and the Defending stack. Put an "Attack!" marker on top of the Attacking stack.
- Combat Supports: Initiative player first, both sides can add other nearby stacks that will be Supporting the Combat. Put a "Support" marker on these.
- Support Conditions: Only stacks in the Zone attacked or adjacent can give support, one stack per Zone maximum.
Defensive Support Exception: A stack in an Area cannot give Defensive Support to an adjacent Area, unless it's Contested (3.7), or an Air unit is on top of the stack.
Combat Sequence
All the steps below must be conducted for each attack, of which there are two kinds: Battles and Assaults; depending on the terrain of the Zone attacked (see TEC).
- Support Step: The Non-initiative player, then the Initiative player, may commit one Event card for its CP bonus (2.4.4).
- Strength Step: Each player totals the CPs of their participating units on their CP track, adding in terrain, weather, marker and Event card CP bonuses.
- Combat Resolution Step (12.5): Battles and Assaults both resolve combat in a different way:
- Battle: Subtract the Defender's CPs from the Attacker's to get the final Battle Odds. The Attacker then draws the top card of his Event deck, and notes the corresponding Battle Result under the Battle Odds number on the card (2.4.8).
- Assault: The Attacker draws the top card of his Event deck and adds its Support Points to his Combat Point track without any timing restrictions (2.4.3), and then the Defender does the same. Subtract the Defender's Combat Points from the Attacker's to get the final Assault Result.
- Apply Combat Result Step (12.7): The result is applied on the Battle or Assault column of the CRT.
- Advance After Combat Step (12.8): Some combat results will allow the Attacking and Supporting stacks to advance into the Target Zone.
- Mobile Exploitation Step (12.9): Mobile units that have advanced after combat may be allowed to advance a second Zone.
- Flip Combat Marker Step (12.10): Used Combat markers are flipped to their "Done" Sides.
Combat Resolution
When computing the Combat Strengths, apply these cases:
- Attacking/Defending Stacks: Each unit adds its total CPs, if CP color allows (2.3.4).
- Support Stacks: Each unit only adds its yellow-colored CPs (usually only one).
- Terrain: The bonus defensive CPs due to Terrain are based upon the Defender's Zone.
- Weather: The bonus defensive CPs caused by Weather is based upon the time of the year.
- Across: If the Lead Attacker attacks across a River or Straits, the defender gets a CP bonus (see TEC).
- Combat Type: The Defender's Zone Terrain type also determines what CRT will be used: Battle (easy terrain) or Assault (difficult terrain).
- Disrupted/Unsupplied: Attacking stacks lose one (Disrupted) or two (Unsupplied) CPs (see TEC).
- Battle Odds Limits: If odds exceed +6, it still is resolved on row 6. When odds are less than -3, the outcome becomes an "A1" (Attacker Defeated).
Example: Attacking a Soviet stack in a Minor City (one CP) across a River (one CP) in Mud Weather (one CP), awards the defenders three extra Combat Points.
Major Offensive Marker: If such a marker is in the Targeted Zone, a "Pincer maneuver" may be attempted, and one Attack CP is gained by spending an RP to flip the marker for the Combat (12.1).
Pincer Maneuver: The Phasing player may attempt a "Pincer Maneuver", which may Eliminate a Defender if Successful (see TEC) and then form a "Pocket" (3.5). If the conditions below are fulfilled, put a "Pincer" marker on Defenders and an "Armor" marker on the Attackers:
- Attacker: There is a Mobile Armored unit in the stack.
- Defender: No Armored unit in the stack.
- Terrain/Weather: Defender's Zone and Weather have to allow for a "Pincer" (see TEC, no minimum number of Zones).
- Advancing Armor (Special): If a Mobile Armored stack without an "Armor" marker Advanced in the Defender's Zone, a "Pincer Maneuver" can still be attempted without conditions above being fulfilled.
Apply Combat Result
A more detailed explanation of the CRT results is listed in rules section 12.7. Refer to these if needed.
- Retreat: If a unit must Retreat into a Contested or Enemy-Controlled Zone it is Eliminated (12.7.6).
- Pincer Maneuver: If successful by the CRT result, the Defender is Eliminated; put a Phasing player's "Pocket" in the same Zone.
- Air Unit: It returns to its Air Box if it Retreats or is the target of a Successful "Pincer Maneuver".
- Step Loss: Unless there is a choice (BB, EQ, or A+2 result), the Attacking and Defending stacks must take the Loss. A full-strength two-step unit (2.3.7) is flipped over; a unit with one step left is Eliminated.
- Eliminated Units: They go to their Destroyed Box, on their current counter side; or to the Captured box (face down) if with an "Unsupplied" marker.
Exceptions: An Eliminated Soviet "Sevastopol" unit is removed from the game; Eliminated Forts/Air go to their Destroyed Units Box.
Advance After Combat
In an "Attacker Advance" result, the Attacker and its Supporting stacks may Advance into the Zone Attacked.
- Move Cost: This Advance is free.
- No Advance: Static units can't advance.
- Enemy: Advance in an Area containing one Enemy Stack is allowed, but watch stacking limits!
- Terrain/Weather: Have no effect on any unit's Advance.
Mobile Exploitation
Phasing player's Mobile stacks that Advanced after Combat (Attacker/Supports) may Advance one extra Zone if stacked with an "Armor" marker, or by discarding an available "Mobile" marker.
- Move Cost: This Advance is free. Stacking limits must be respected at the end of the Step.
- Enemy: You can advance in an Area containing one Enemy stack; this also allows a "Pincer Maneuver".
- Terrain/Weather/Markers: Exploitation is allowed into or from specific Terrain types and Weather, without Disrupted/Unsupplied markers.
- Soviet Tanks: Some Tanks have an "M" icon, indicating they are not Mobile (18.1).
Flip Combat Markers
After each Combat Sequence flip all "Attack!" and "Support" markers to their "Done" sides, indicating that the stacks under them cannot Attack/Support anymore this Combat Phase.
Note that the Target stack will not get a "Done" marker, but may already have one when attacked.
Reserve Phase
Units moving to the map from the Reserve are placed in any supplied Zone (not Sea Supply) the Phasing player Controls.
Exception: German Axis-Allied units have limits (18.6).
Used Marker Phase
Some of the markers present on the map are removed, going back to the owning player's marker pool:
- Phasing Player: "Major Offensive", "Disrupted" and "Armor" markers
- Both Players: "Done" markers
IMPORTANT! Scoring: The Phasing Player loses one WSP for each Major Offensive marker that was not in a Zone he now Controls.
Soviet Player Turn
The Soviet player becomes the Phasing player and repeats the same phases as in the German Player Turn.
End of Turn
Initiative player first, check if the game ends in an "Instant Victory". If not, start a new Game Turn. If it's the last turn of the game, you check for a "Game End" Victory.
How to Win
There are two different victory types; Scenarios have their own victory conditions, described in the Playbook.
Instant Victory
There are two ways to instantly win the Basic game at the end of a Game Turn, in exact order:
- War Aim Victory: If the German player controls at least four Soviet War Aim Sites, or the Soviet player controls at least one German War Aim Site, that player wins!
- War Status Victory: If the Initiative Player has 19 War Status Points, and his opponent Zero, he wins!
IMPORTANT! A Zone with a Black Cross is a German War Aim Site; a Zone with a Red Star a Soviet Site.
Game End Victory
At the end of a game, if there was no Instant Victory, the winner will be decided by the following, in exact order:
- No Germans in USSR: If the Soviet player Controls more Zones in Greater Germany than the German player Controls in the USSR, he automatically wins.
- War Objective Points: The player with the highest WSP total wins. In case of a tie, the Germans prevail.
- Scenario: By Special Scenario Victory Conditions.
Note that since the German player is first in a Turn, it is more difficult for him to win with a WSP superiority.
War Status Points
Both players accumulate WSPs the following way, and use their WSP marker to record these on the War Status Track. "Capture" means taking Control of the objective's Zone from the enemy player. Some Zones may give multiple awards.
- Major City Hex Capture: +1 Point
- Oil Well Capture: +1 Point
- War Aim Capture: +1 Point
- Major Offensive Marker Unused/Failed: -1 Point
- German Large Unit to Captured Box: -2 Points (German)
- Soviet Large Unit to Captured Box: -1 Point (Soviet)
- Axis Large Unit to Captured Box: No Effect
- Successful Pocket: +1 Point
- Over 19 WSP: If you go over 19 WSPs, lower the Opponent's WSP total by one for each point over instead.
Optional Rules (February 2023 Update)
The following official amendments were published separately by the designer in February 2023.
Supply Through a Contested Zone
You can trace supply across a Contested Zone that was initially controlled by your side before the enemy entered it, to an Adjacent Zone. In this case, use a Control marker in the said Zone to mark initial ownership.
[7.2.1] Forbidden Paths: Supply Lines cannot be traced through these.
- Enemy-Controlled Zones.
- Impassable Terrain Zones.
- Contested Zones (Exception: can be traced into; and through, to an adjacent Zone, if that Contested Zone was last controlled by your side).
Simpler Air Unit Rules
You can use a simpler "Quick-and-dirty" rule for the Air units (It almost made it into the rulebook).
- Keep the Air units in their holding box, don't put them on the map until the Combat Phase.
- Use them like a Special Combat Support Marker.
- They fly back to their Box after use: put a "Done" marker on the units.
- If you don't have any "Done" markers available, they are put in their "Shaken Units" box.
Optional Attack Marker
During the Combat Phase, you may use the (pretty useless, ahem) Basic Game "War Aims" markers to indicate which Zone/Stack is currently being attacked.