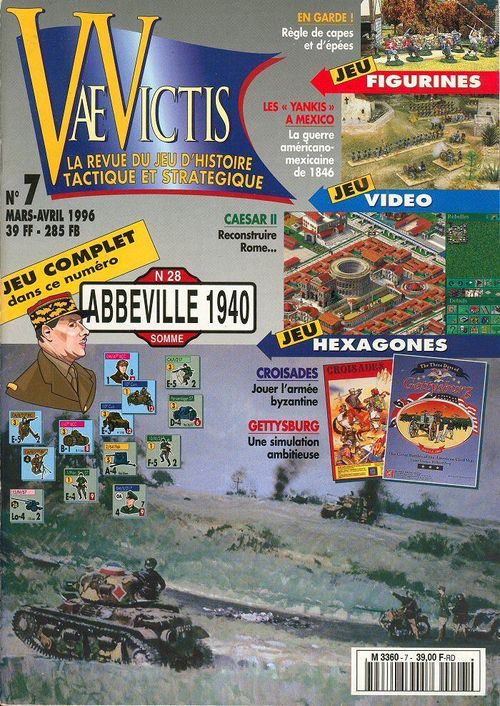
Abbeville 1940
Abbeville 1940 Rulebook
Table of Contents
Table of Contents
- 0 - Introduction
- 1 - Counters
- 2 Sequence of play
- 3 Organisation, command and doctrine
- 4 Line of sight and line of fire
- 5 Formation activation
- 6 Actions and reactions
- 7 Movement
- 8 Fire
- 9 Assault
- 10 Combat result
- 11 Formation demoralisation
- 12 Mines and defence works
- 13 Victory conditions
- Scenarios
- 15 Solitaire gaming
- Counter notes
- Tables
- Errata
0 - Introduction
0.1 Game scales
A game turn is equivalent to one hour off real time. The distance between two hexagons represents five hundred metres. The levels represent a change in elevation of 20 metres. Each counter represents a company, a demi-company, an artillery battery, or an HQ (EM).
0.2 Terrain
The map represents the region about Abbeville occupied by the German bridgehead. A hexagonal grid is superimposed on the map to regulate unit movement and fire. The effects of different terrain types upon movement and combat are summarised in the terrain effects table and the modifier table (see page 30).
0.3 Roads and elevation
A unit is always considered as being at the most important elevation indicated in the hex, as with terrain. The only exception concerns units that move upon road:
- if the road passes through a hex with several elevations and it traverses more than one, the unit is considered to be at the lowest level;
- if the route passes through a hex that does not contain more than one elevation, or crosses a hex at one elevation when it contains several, it is considered at that elevation.
1 - Counters
1.1 Combat units
Units are grouped in formations (see 3.1) and the counters have several values on them (see diagram 1 on page 24).
1.2 Combat unit reduction
Each unit has one or two combat steps. A disorganisation result inflicted on a unit is indicated by a disorganisation marker. A second disorganisation result on a unit inflicts a step loss: the unit is inverted to indicate that loss but the disorganisation marker is removed. A unit with one step is destroyed by the same process (after two disorganisation results).
Units with one combat step are destroyed by the first loss.
1.3 Head quarters (EM)
Head quarters represent formation command. They have several values (see diagram 2 below).
On the front, an EM indicates that the formation has not yet been activated and, on the back, that it has been activated (see 5).
If an EM is destroyed, the formation that it commands may be activated with a negative modifier.
An EM may not attack and it has only one combat step. An EM may be neutralised (see 10.2). In that case it is subject to a negative modifier for activation.
The EM of the 6th and 8th French tank demi-brigades are solely ahistoric designations in order to note the potential demoralisation of the attached battalions (necessary to spare counters). These two EM are simply placed in the French departure zone.
1.4 Artillery observers
Artillery observers (OA, see diagram 2) give fire orders to artillery batteries.
At the start of the game, the OA positions for each side are noted in secret, without placing the counters on the map. Each OA must be within 3 hexes of a friendly unit and not adjacent to an enemy unit. An OA is revealed when its hex is in the LoS of an enemy unit (see 4.2). Also, an OA is destroyed if an enemy unit moves into its hex, if it is alone.
OAs may not engage in combat and have one step. A neutralised OA gives fire control at reduced effectiveness (see 8.2).
OA movement, which occurs in phase 2.B (administrative), does not invoke reaction fire.
2 Sequence of play
Each scenario has a fixed number of game turns, which have the following sequence:
A Operations phase
During this phase, the two players alternate activating their formations and may undertake reactions to enemy operations.
- Initiative segment
Each player throws 1d6. The highest score goes first, with the French player going first in the event of a tie.
- Operations segment
The active player undertakes an operation; at the end of that, a new operations segment begins. Each segment consists of:
- attempt to activate a formation (see 5)
- or pass, if he does not wish to activate any units.
If the activation attempt fails or he passes, players swap roles, and a new operations segment starts.
If the attempt succeeds, the active player undertakes actions with units from the active formation (see 6.1) and the passive player may undertake reaction actions (see 6.2). When all actions and reactions are done, the active player may attempt another operations segment.
The operations segment finishes when:
- there are no more activation attempts possible;
- players pass in succession;
- a player throws 9 or more when attempting an activation (see 5).
B Administrative phase
All the following actions are carried out in the indicated order:
- Smoke markers are removed;
- EM counters are turned face up;
- units under new command remove their marker;
- neutralised OA are returned to normal;
- OA move;
- neutralised units and EM test to recover;
- fatigued formations test to recover;
- demoralised formations test and, if they fail, break.
Move the turn marker on one hour.
3 Organisation, command and doctrine
3.1 Formation organisation
A formation is made up of an EM and several units that are attached to it. Each formation has a colour code to identify it more easily. In Abbeville 1940, most formations are made up of infantry or tank battalions with their companies or organic squadrons.
3.2 Batteries and artillery groups
Artillery obeys the same activation rules as other formations but without an EM. For reasons of dispersion the different batteries and artillery groups follow the activation rules below:
- German artillery batteries or flak activate independently or by group (see colour code). The activation factor for German artillery is 7 and for flak 8.
- French off-board artillery groups activate independently. Each group represents 3 batteries with 4 tubes each. The AF is 7.
When a battery or flak unit moves, place an 'Attele' marker on the battery ('limbered'). Place an 'Activee' marker when it is activated.
3.3 Doctrine
Doctrine represents the variety of tactical policies of both sides, plus the problems that individual units had during this battle.
In Abbeville 1940 units may manoeuvre under the following restrictions:
- French tank and infantry companies may not be more than 3 hexes distant from their EM;
- German infantry must be within 8 hexes of their EM.
All units outside these limits are out of command (place a 'Non commandee' marker). If the EM of a formation is destroyed, all units of that formation are 'NC'.
Artillery and flak batteries do not follow doctrine, but German batteries that wish to activate as a group must be within 4 hexes of one another.
4 Line of sight and line of fire
4.1 Definition
The line of sight (LoS) between two units is a straight line drawn between the centres of each hex (see the dots on the map to help you). The line of fire (LoF) is the same, but limited to the range of the unit's weapons. Both may be blocked by terrain, in which case there is no LoS or LoF.
In general, the maximum LoS is 8 hexes, but may be less for certain target units:
- tanks in clear terrain: 8 hexes;
- tanks in town, wood or orchard: 4;
- infantry, CA (support troops), artillery, AC (antitank) in clear: 4;
- infantry, CA (support troops), artillery, AC (antitank) in town, wood or orchard: 2.
The LoS to an OA is always 1 hex (except for EM that double as OA).
4.2 Weapon range
Weapon range is reduced to one hex when an enemy unit is adjacent. A neutralised unit also has its range reduced to 1.
4.3 Checking the line of sight
A line of sight cannot pass through blocking terrain. If the LoS passes along a hex edge, one side is blocked and the other not, the LoS is valid. Terrain in the two hexes containing the units does not block the LoS. There is always a valid LoS between adjacent units.
- Both units on the same level
LoS cannot pass through wood, buildings, orchard or smoke.
Higher terrain between the two hexes blocks the LoS, but lower or the same level does not, unless it has other blocking terrain on the same level.
- Units at different levels
A hex with wood, buildings, orchard or smoke at a level lower than both units does not block the LoS.
If a hex is at a higher level than both units, the LoS is blocked.
If a hex is higher than one unit, but lower than another, the LoS is blocked in the hex directly behind a hex containing a terrain element. In contrast, the LoS is valid in the hex directly behind the
The LoS is blocked by elevations higher than both. The difference in elevation between the two units does not block the LoS.
[Use your common sense.]
5 Formation activation
Units may only act when their formation is activated. The term formation applies to any grouping.
5.1 Activating a formation
To activate a formation, the player designates the formation and throws 2d6, getting less than or equal to the activation factor of the EM, after modifiers.
5.2 Effects of activation
If the test is passed, that formation now becomes active. Units of that formation may undertake actions in any order desired. When the player has finished, invert the EM and start another operations segment.
5.3 Multiple activation and reactivation attempts
A formation in general may only be activated once - this is reactivation, and assumes that a unit has already successfully been activated. Nevertheless, a player may attempt reactivation as follows (exception: artillery):
- a formation may only be activated twice in a turn;
- the formation may not be fatigued or demoralised;
- the formation must have an unneutralised EM;
- the formation may not have just been activated.
Exception: artillery may only ever be activated once per turn (but it gets three attempts straight).
A player has three goes to activate a formation per turn, with the following limitations:
- that formation did not attempt activation in the last segment.
All new activation attempts receive a penalty.
Procedure and consequences
Units that are activated a second time may undertake new actions. Afterwards, a fatigue marker is placed on the EM - the formation is 'fatigued'.
Units undertake actions normally after a second or third activation test if it is passed.
5.4 Fatigue effects
All activation attempts of a 'fatigued' formation have a modifier. All fatigued unit actions are subject to a penalty.
Remove the fatigue marker if the formation is not activated during a turn, or if it passes a test during the administrative phase. Throw 2d6 and obtain less than or equal to AF-2.
Fatigued units are allowed to react (but have a modifier).
5.5 Activation modifiers
Modifiers are on the Activation Table and are cumulative. Also, the turn track has modifiers to apply.
5.6 Ending the operations phase
The operations phase ends in two ways:
- both players pass in succession;
- an unmodified 9 or more is scored on an activation attempt (no matter how many formations are still available).
6 Actions and reactions
6.1 Actions of active units
An active unit may carry out one of the following actions:
- move with all or part of its MP
- fire at full potential
- move one half of its MP and fire at reduced potential
- make an assault move using a quarter of its MP (rounded up)
- limber up and move half of its MP (artillery and flak)
- move when limbered (ditto)
- enter battery and fire (ditto)
- attempt rally (neutralised units)
An active unit may only act if it is in command at the start of the action. Neutralised units may only rally.
6.2 Reactions of passive units
A passive unit may undertake, during the enemy operations segment, one action on passing a reaction test:
- opportunity fire;
- withdraw to an adjacent hex.
Reactions occur in response to the movement or fire of enemy units.
Opportunity fire
Only direct fire is allowed.
A passive unit may opportunity fire (OF) at an enemy unit that moves or fires within range of that unit, and that unit has a LoF.
The passive unit stops the movement of the active unit in the relevant hex and announces that it will fire. After resolution, the active player may resume movement.
Each time a new hex is entered or a new attack occurs, the passive player is entitled to a reaction attempt if there is a capable unit.
In order to fire, throw 2d6 and score less than or equal to the reaction value of the unit. There are no limits on reaction attempts for a unit, except that the test needs to be passed.
A neutralised unit or one part of a demoralised formation may only react at a distance of 1 hex or less.
A unit that is part of a fatigued formation applies the relevant modifier, as does an 'NC' unit.
Withdrawal
A unit may withdraw if:
- it has a LoS to an enemy unit which moves within firing range;
- an enemy unit moves adjacent;
- it is fired on.
Once again, interrupt movement, and designate the destination hex. A unit may only withdraw once per segment. Neutralised units must take a reaction test in order to withdraw.
6.3 Reaction test modifiers
Reaction values and modifiers are on the table on page 30 (see Tables below).
7 Movement
7.1 Introduction
A unit uses its MPs to move from hex to hex; costs depend on the terrain.
A unit may use some or all of its MPs, but may not save or transfer them from turn to turn or unit to unit.
A unit may always move at least 1 hex (unless the unit requires transport).
The Terrain Effects Table indicates the cost of terrain, depending on unit type - foot, tank or motorised (tracked or wheeled). [Terrain Effects Table values are not present in the source text; see Tables below.]
7.2 Particular formations
Units may use different formations as follows:
Column (vehicles and infantry): a unit is in column to use the road bonus (place a 'Colonne' marker). If attacked or fired on it suffers a penalty. Remove the marker when it leaves road mode or is in an assault (see 9).
Dispersed (armour only): an armoured unit is automatically dispersed when in town, orchard or wood (unless in column). Again it receives unfavourable modifiers when firing or when in assault. There is no marker required.
7.3 Stacking
At most two units per hex, but this does not apply during movement. EM and OA do not count. For direct fire, the firer indicates a specific target in the hex; for indirect fire all units are affected.
7.4 German antitank and dummies
The antitank counters (AC) have a question mark on the front. The German player also has a number of blanks to simulate the uncertainty of his AT placement. Place both types '?' up.
Reveal a counter as follows:
- the AT fires (it must fire; a failed reaction test does not reveal it);
- a French unit assaults the counter;
- the AT moves within LoS of a French unit.
The dummy units act as real units whilst hidden. They respect the stacking rules and could undergo the results of indirect or direct fire (the player can place a Neutralised or Disorganised marker on a dummy).
8 Fire
There are two types of fire: direct fire (TD) and indirect fire. Some units can do both types of fire but, in general, the units on map direct fire and off-map artillery use indirect fire.
8.1 Direct fire
Direct fire requires a valid line of fire on the target (see 4.1). The units that can fire in TD are: armour, infantry units, antitank and some artillery cannons. Direct fire is always controlled against a particular designated target by the firing unit. Direct fire can be from active units, or opportunity fire of inactive units.
Direct fire procedure
Every unit fires separately. The player designates the unit that fires and its target, within range of direct fire. There must be a LoF between the firing unit's hex and the target. If a hex contains several hostile units, the firing unit may not examine a stack's order to choose its target before designating a firing unit. The fire is then resolved according to the rules (see 10).
8.2 Indirect fire
Indirect fire does not require a LoS between the firing unit and the target; another friendly unit could have a LoS in order to supervise the fire. The units that can indirect fire are artillery of all calibres and mortars. All these pieces use exploding shells or smoke. When an indirect fire is resolved in a hex, it attacks all the units present in the hex.
Procedure of indirect fire
The player places an Impact (or Fumigène) marker in the hexes aimed at by the different batteries of the active formation. Then each impact is resolved.
If the firing unit does not see the target but possesses an observer with a valid LoS on the target, this last could transmit its coordinates of fire:
- if the observer is an EM capable of observing, the player throws 2d6 and must roll lower than or equal to 7 in order to succeed (if the EM is neutralised, add 1 to the die);
- if it is an OA, the player must roll lower than or equal to 8 (if the OA is neutralised, add 1 to the throw of the die). If the OA is adjacent to the target, success is automatic.
If the test fails, the salvo is lost but the battery is considered as having been active. If the observer test is successful, or if the firing unit has a valid LoS on the target, then the salvo hits the hex.
Firing smoke
Designed to conceal movements and avoid direct fire, smoke blocks lines of sight and of fire (see 4). The procedure to fire is the same as that for exploding shells but, in case of success of the fire test, a Fumigène marker is placed in the hex aimed at. This Fumigène marker is removed during the administrative phase.
Grouped fire
Several artillery batteries of a group could concentrate their fire on the same hex during the same activation. The results of every salvo are calculated one after the other. The player declares their intention of concentrating fire in advance; if the target is destroyed before the utilisation of all the salvos, these are lost for this operation (and the possibility of changing objective). One fire test is done for all batteries.
Mortars
In contrast to artillery units, a mortar unit (of infantry) must possess a line of sight on the target in order to fire. Fire using an observer is impossible.
Off-map artillery
Some artillery batteries are not represented in the game by counters, the batteries situated outside the limits of the map. These units function in the same way as those situated on the map. They must be active in order to fire and require the presence of observers on the map in order to supervise their fire. See the details of organisation in the scenarios.
8.3 Fire modifiers
Some modifiers are applied during direct or indirect fire; they are indicated on the combat table (see Tables below, Table 2).
9 Assault
The assault represents fire at very short distance or hand-to-hand combat. An assault could be done together with movement. The assault is the only way of entering a hex occupied by an enemy unit.
9.1 Sequence of an assault
- Entry into the hex.
The attacking unit enters the enemy hex using a quarter of its MP + the cost of terrain (or all its MP if the case arises).
A unit who must spend all its MP in order to enter a hex and make an assault could not have spent any MP before this assault.
- Defensive fire
The units situated in the hex attacked perform direct fire at range 0, the attacker undergoing the possible losses. If the fire provokes the neutralisation of the attacker, this could be exchanged for a Disorganised marker. In this case, the assault sequence continues. Otherwise, the attacker moves back to its original hex and stops its movement (the assault is then ended).
- Offensive fire
The attacker, in turn, carries out direct fire at range 0. If the result is the neutralisation of the defender, this can either be exchanged for disorganisation and the attacker remains in the hex, or the defender moves back one hex of its choice and remains neutralised. If the result of the assault is a disorganisation, the defender could choose to remain in place or retreat.
Besides, at the end of offensive fire, a defender neutralised previously to the assault has to leave the hex if it did not succeed in throwing back the attacker.
- Assault
If both sides remain in place, every participant in the combat fires again; then, all fire now being considered as simultaneous.
- End of the assault
The sequence of assault finishes when one of the two sides is eliminated or moved back.
Precisions
A unit that could not move back into an adjacent hex following an assault (overstacking, hostile units, impassable terrain) is eliminated. At all events, the retreat cannot be into the hex that the attack came from in the case of the defender.
A neutralised unit can always defend, with a penalty, in the first round of assault fire.
A unit in column combats with a penalty in the first round of assault fire.
The assault modifiers are indicated on the table (see Tables below, Table 2).
9.2 Pursuit movement
A unit of tanks or of armoured cars ('automitrailleuses') that assaults a defence composed solely of infantry, of heavy weapons or of antitank could continue its movement after the assault if it has sufficient MP, even though there are surviving defenders in the hex.
Pursuit movement cannot happen if the assault took place in clear terrain or on road with the attacker in column.
A unit capable of pursuing can assault again, provided it has enough movement points.
10 Combat result
10.1 Resolution of combat
Whichever the type of fire or of combat (direct or indirect fire, assault, entrance into a field of mines), the resolution procedure is the same:
- Determination of attack factor
On the attack factors table (Table 1, p. 30), one determines the basic factor by comparing the target type and the weapon category.
- Modification of attack factor
The attack factor is then altered positively or negatively by the modifiers (Table 2, p. 30) in order to get the final attack factor.
- Determination of result
Finally, the player throws 2d6 on the result table (Table 3, p. 30) and determines the fire result according to the final attack factor.
10.2 Results of fire
There are four possible results:
- no effect;
- neutralisation (N): the target receives a Neutralised marker;
- disorganisation (D): the target receives a Disorganised marker;
- one step loss (1): the target is turned over (or eliminated if it has only one step).
10.3 Neutralisation effects
A neutralised unit cannot move; fire range is reduced to 1 hex; and all fire has a negative modifier.
Exception: a neutralised EM can move.
A unit who received a neutralisation can immediately replace it with disorganisation.
Removing neutralisation
When it is active during the activation phase, a neutralised unit or EM may test, by choosing the Rallying action, to remove its Neutralised status. To succeed, the player must throw, with 2d6, a number lower than or equal to the activation factor of its EM, less 1 (AF-1).
In the same way, during the administrative phase, all neutralised units or EM can test using the same procedure (lower than or equal to AF-1) in order to remove their Neutralised marker. A unit can therefore test twice per turn in order to remove its neutralisation.
11 Formation demoralisation
With every combat lost by a formation, the player tests the morale of the formation in order to determine if it becomes demoralised (exception: no test following the first lost combat). If the demoralisation test is failed, a Demoralised marker is immediately placed on the corresponding EM.
The demoralisation table (p. 30) indicates the probabilities of demoralisation, related to formation losses. (See Tables below; the demoralisation table values are not present in the source text.)
Effect of demoralisation
A demoralised formation cannot activate during the operations phase.
During the administrative phase, a demoralised formation must test in order to lose this status. The player must get, with 2d6, a number lower than or equal to the activation factor of the EM less three (AF-3).
If the test is passed, the formation is no longer demoralised. If the test fails, all the units of the formation have to rout toward the friendly side of the map (south for the French, north for the German) spending all their MP. In addition, units must move away from adjacent hostile units. Note: this movement does not activate reaction fire.
12 Mines and defence works
12.1 Mines
The minefields, of which the number is given by the scenario, are noted secretly by the German player, who reveals them only when a French unit enters a mined hex (place a Mined marker). The unit that entered the mined hex undergoes a mine "attack" (column Mines on Table 1, p. 30). In order to leave a minefield, a unit has to pay an additional cost in MP (see terrain effects table p. 30) but is not attacked.
A German unit may stack with a minefield in the same hex. If such a unit is subject to an assault, the attacking unit is subjected to an attack from the mines before the start of the assault. A minefield is active during the entire game.
12.2 Defence works
Individual defences
The scenarios indicate where individual German defences are placed, indicated by a marker. These are removed when the units that were in them are destroyed or leave the hex.
Abattis
The abattis are antitank obstacles destined to slow progression (+2 MP). They are placed on the map at the beginning of a scenario, only in hexes with buildings, wood or orchards. They cannot be destroyed.
13 Victory conditions
The French player wins if he seizes historical objectives according to the scenarios, and maintains possession of them at the end of the game (a French unit is present on the objective or is the last to be there).
At all events, the German player wins if he prevents the French player from fulfilling the victory conditions.
1st scenario
The objectives of the French player are the following: hill 104 (714), Bienfay (511), Mareuil-Caubert (1410 and 1411), Villers-sur-Mareuil (1011 and 1012), Mesnil-Trois-Fétus (609).
If the French player controls three objectives or less, he loses the game. If he controls four, it is a draw. With five objectives or more, he takes victory.
Scenario 2
The French player gets a tactical victory if he seizes Monts de Caubert (806, 807, 907 and 908), Yonval (506 and 507), Villers (1011 and 1012), Caubert (1009 and 1108) and the Planches (1007). He gets a strategic victory if he seizes, in addition, Rouvroy (603) and the bridges over the Somme (802 and 1103).
Scenarios
I The first day (28 May to 17 h)
Initial setup of German units
Artillery: 2/I/157: 507, 7/UI/157: 201 (limbered) (the source prints "UI" here; left as printed), 8/III/157: 1007, 9/III/157: 1009, 7/III/2 Mot: 406, 8/III/2 Mot: 908, 9/III/2 Mot: 1108, 11/IV/157: 1303, 12/IV/157: 1504.
2/64 Flak: within three hexes of 907 and/or 911.
Infantry: placed in the hex indicated and/or the six adjacent hexagons.
- 8/III/217: Fréchencourt (1715)
- 9/III/217: Caumont (1217)
- 10/III/217: Huppy (622)
- 1/I/217: Mareuil-Caubert (1411)
- 2/I/217: Caubert (1108)
- 3/I/217: Villers (1011)
- 6/II/217: Moyenneville (112 — the hex number is incomplete in the source text). This company cannot move until a French unit crosses the line from 214 to 814.
- 7/II/217: Béhen (216).
The supporting companies (CA), of engineers and the attached AC are placed in command range of the corresponding EM.
EM: I/217: Caubert; II/217: Moyenneville; III/217: Les Croisettes.
The German player could place five minefields, ten prepared positions and six AC dummies. Besides, two abattis are placed in Huppy (hex 722 and 423). The other three are placed at the choice of the player.
All the units are considered in command during the 1st turn.
Initial setup of French units
EM:
- 10' Cuirs: Saint-Maxent (227)
- 46' and 47' BCC: Warcheville (626)
- 4' BCP: Doudelainville (826)
- 44' BCC: Frucourt (1426)
- 2/24' BCC: 1822
- II/22' RIC: 1422
- I/22' RIC: 2117
The units of the different formations start adjacent to their EM, respecting the stacking rules.
The 3' Cuirs enter on turn 3 at hex 2217.
Off-map artillery
322' RATTT: two groups of three batteries of 75 (light).
73' RA: a group of 105 (medium) and one of 75 (light), of three batteries each.
I/305' RA: a group of 105 (medium) of three batteries.
General reserve: a group of 105 (medium) of three batteries.
The French artillery is active group by group; every group could fire three times with every activation (three batteries). The French batteries could fire everywhere on the map except beyond the line defined by the hexagons 105 to 2105. For simplicity, the activations of these groups could be noted by the player on free paper.
Length of scenario: 7 turns.
II The second day (29 May to 4 h)
Setup of German units
Historically, the Regiment Infantry 217 was partially relieved in the night of 28 May by the I.R. 179. Because of the limitations imposed by the format of the magazine, these units are represented by those of the I.R. 217 (identical in factors).
Infantry:
The EM and the companies of infantry set up in the hex indicated or the six adjacent hexes:
- 6/II/217 and EM of II/217: Moyenneville.
- 7/II/217: Béhen.
- 8, 9 and 10/III/217, EM of III/217: Hucheneville, Villers, Mareuil and a half company on hill 104 in prepared positions.
- 1 and 2/I/217, EM of I/217: Yonval.
The supporting companies (CA), of engineers and antitank set up in command range of the corresponding EM. Before the beginning of the game, the German player must eliminate five units of Pak 36 of his choice.
Artillery and flak:
- 2/64 Flak: within three hexes of 907 and/or 912.
- 2/I/157: 506
- 7/III/157: 504
- 8/III/157: 806
- 9/III/157: 807
- 11/IV/157: 1303
- 12/IV/157: 1504
Abattis: hex 1116.
The German player could place five minefields on the map, seven prepared positions (in addition to hill 104). He has five antitank dummies and three abattis (in addition to the one in hex 1016) to place freely.
Setup of French units
EM:
- 10' Cuirs: Trinquies (220)
- 47' BCC and 4' BCP: Huppy (621 and 622)
- 44' BCC (two companies only): Limercourt (917)
- 2/24' BCC (complete): Caumont (1217)
- II/22' RIC: Inval (1315)
- 3' Cuirs (squadron of S 35): Bailleul (1917)
- I/22' RIC (a company of infantry placed face down): Fréchencourt (1715)
The units set up adjacent to their EM, respecting the stacking rules.
Off-map artillery: identical to the previous scenario.
Length of scenario: 9 turns.
III Hypothetical scenario
The scenario is of the first day (1st scenario, with a free setup of French units). It allows one to examine the possibility of a better organised French attack. The German player sets up first, using the historic setup.
The French player has several game options:
- all his units are at their line of departure at 17 h: the 44' and 2/24' BCC have their EM in Limeux (1421) and the EM of 3' Cuirs is in Bellifontaine (2116).
- he could concentrate his armour on a narrower front or change his axes of attack. If he chooses one of these two options, the setup is free (respecting the departure zones) but the attack starts at 18 h (lasting until the beginning of tower 2).
The victory conditions are the same as for the first scenario.
15 Solitaire gaming
The hidden setup of German antitank, in particular the dangerous 88, makes Abbeville 1940 difficult to play alone.
The following rules are proposed in order to facilitate the setup of these units for the solitaire game:
- Place the two units of flak, two Pak 36 and two dummies in a mug on the table. These counters are then randomly placed on the map, respecting the setup rules for the 88.
- In the same way, place the Pak 36 and four dummies in a mug, then place these counters on the map as per the set-up for the AC.
The AC are revealed in the same way but, in case of reaction fire on their part, the player should test before revealing the counter in order to know if he was about to use a dummy or not.
Counter notes
- MP: lower right-hand corner. Red square = tracked; red circle = wheeled.
- Weapon type is the lower-left letter, followed by target type.
- Top left is range; black hex is indirect range, orange hex direct range.
- Top right on reverse may be an attack factor modifier.
EM have an activated and an inactive side. The active side has target type (bottom left), MP (bottom right) and AF (above MP on right).
OA have just target type and MP (right and left).
Artillery have range, artillery type, target type and MP as before.
Tables
Table 1: Attack factors
Note the modification for a step loss (-1).
The Table 1 attack factor values (the grid of basic factors by weapon category and target type) are not present in the source text and are not reproduced here.
Table 2: Modifiers table
| Firer or attacker | Direct | Indirect | Assault |
|---|---|---|---|
| Fatigued | -1 | -1 | -1 |
| Neutralised | -1 | -1 | impossible |
| In column | -1 | - | -1 for 1st round |
| Dispersed | -1 | - | -1 |
| Engineer (Genie) | - | - | +1 |
| Move & fire | -2 | - | -1 for 1st round |
| Range |
| Target of defender | Direct | Indirect | Assault |
|---|---|---|---|
| Town, wood, orchard | -1 | -1 | -1 |
| Single unit | -1 | -2 | -1 |
| In column | +1 | - | -1 |
| Superior level | - | - | Defender +1 |
| Range | - | - | Def. +1 if range 0 |
| Neutralised | - | - | Def. -1 |
| Dispersed |
Table 3: Result table
Note: results are modified by attack type and target.
- Direct fire: N = N, D = D, 1 = step loss.
- Indirect on vehicles: N, D, 1 = N.
- Indirect on personnel: N = N, D = D.
- Mines: N = N, D = D.
Note the arrows: to resolve an attack go 1, 2, 3 for the tables.
The result-table dice values themselves are not present in the source text and are not reproduced here.
Terrain effects table
The terrain effects table values are not present in the source text and are not reproduced here.
Activation attempt modifiers
- EM neutralised: -1
- EM destroyed: -2
- Reactivation attempt: +0
- Second activation attempt: -1
- Third activation attempt: -2
- Fatigued: -3
Reaction test
Base value:
- French tanks and heavy weapons: 7
- German antitank and flak: 8
- Infantry: 7
Modifiers to die roll:
- Out of command: +1
- Neutralised: +3
- Fatigued: +2
- For each hex from target to firer: +1
- Demoralised: +2
Other tests (throw 2d6)
- Demoralisation recovery: AF-3 or less
- Fatigue recovery: AF-2 or less
- Neutralised EM recovery: AF-1 or less
- Rally neutralised unit: EM AF-1 or less
- Rally with a destroyed EM: EM AF-3 or less
Demoralisation table
Throw 2d6; any result the same or less avoids demoralisation.
The demoralisation table probability values are not present in the source text and are not reproduced here.
Errata
All tank and antitank units with a movement rating of 2 move using 'hippomobile' and do not need to be limbered up (use infantry MP column). Other artillery, flak, AT with MP of 6 in a red circle need to limber up, etc., and unlimber to fire as per the rules. Additionally, pak 36 of PJ 57 may move 1 hex without limbering using the infantry column.
Motorcycles and observers are seen as infantry for LoS rules unless specified. Finally, the Germans set up first in each scenario.