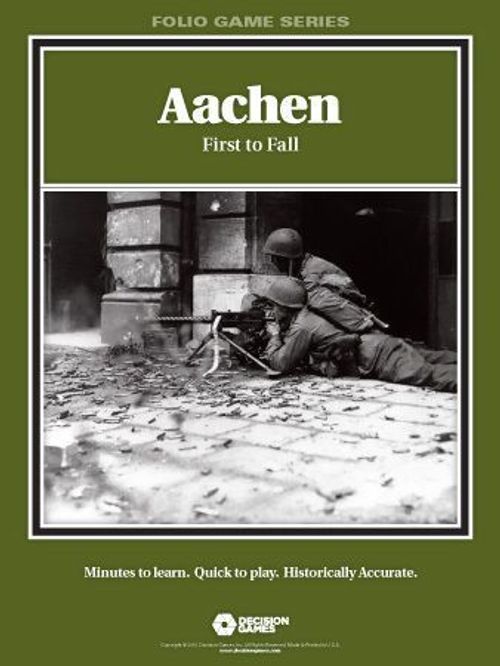
Aachen: First to Fall
Aachen: First to Fall Rulebook
Table of Contents
Table of Contents
- Components
- 1.0 Introduction
- 2.0 Game Equipment
- 3.0 Setting Up the Game
- 4.0 Sequence of Play
- 5.0 Movement
- 6.0 Zones of Control
- 7.0 Support Fire Markers
- 8.0 Bombardment & Ground Combat
- 9.0 Supply
- Combat Results Table
- 10.0 Exclusive Rules
- 11.0 River Crossing
- 12.0 SFM Bombardment Range
- 13.0 Fortified Hexes
- 14.0 Scenario Game Length & Set Up
- 15.0 Reinforcements
- 16.0 Victory Conditions
- 17.0 Game Notes
Components
Components include: Fire & Movement System Rules, Aachen Exclusive Rules, a 17 x 22 inch map, and 120 1/2-inch counters.
1.0 Introduction
Each game represents an actual or hypothetical battle, as included in the Exclusive Rules. The map included with the game represents each different battle's terrain. The pieces represent the actual (or hypothetical) units that participated or might have participated in the battle. The System Rules are rules that fit all games using the F&M system, and the exclusive rules are specific to each represented battle.
2.0 Game Equipment
See exclusive (scenario) rules.
2.1 The Game Map
The map sheet portrays the battle area. Printed over the terrain features is a hexagonal grid to regulate the movement and positioning of the game pieces throughout the game.
2.2 Charts & Tables
Various visual aids provide the players to collate, simplify and illustrate certain game functions. They are the Combat Results Table (CRT), the Terrain Key, and the Game Turn Record Track (GTRT). Exclusive rules may contain additional charts.
2.3 The Playing Pieces
The cardboard playing pieces (counters) represent the actual military units that took part in the battle. The different colored units (combat units) represent forces of opposing sides. The numbers and symbols on the counters represent the attack and defense strength, movement capability, and type of unit represented by each counter.
Important: In the system rule diagrams and examples, the exact units may not appear in the current game; however, all designations and terms used are consistent with the units in the current game unless the exclusive rules dictate otherwise. See exclusive rules for unit type symbols.
Black box = Leg Unit. Red box = Mobile Unit.
Note: The front side of a combat unit is the full-strength side and the back of the unit is normally its reduced side. For most games in the series, the reduced side shows the unit type symbol having the same background color as the counter. Not all combat units have a reduced side and thus are one-step units.
2.3.1 How to Read Units
Most units contain identifiers (or names) and sizes. The identifier or name of a unit has no bearing on play, except as part of set-up and reinforcement rules. An identifier that lists two numbers separated by a slash represents the battalion number and then the regiment number from which that battalion derives (though that parent regiment may or may not be in the game).
Example: A unit printed with 4/47 is referring to the 4th Battalion of the 47th Regiment. A single number identifier typically refers to a single formation of its type (9 could refer to the 9th Division).
Unit Sizes:
- •••: Platoon
- I: Company
- II: Battalion
- III: Regiment
- X: Brigade
- XX: Division
- XXX: Corps
Note: Games may include additional unit sizes. See exclusive rules.
2.3.2 Definition of Terms
Attack Strength: The relative strength of a unit when attacking other units, expressed in terms of attack strength points.
Bombardment Attack: An attack conducted by the active player using support fire markers only. Bombardment attacks take place during each player's Bombardment Phase (8.1).
Defense Strength: The relative strength of a unit when defending against the attacks of enemy units, expressed in terms of defense strength points. See attack strength.
Combat Modifier (Support Strength): The strength of support fire markers. They represent everything from corps artillery, naval support, aerial bombardment and organic mortars used to attack enemy units. The combat modifier (expressed in terms of a "+") value that players may add to the strength of a friendly unit during combat or as an attack strength when conducting bombardment.
Movement Allowance (MA): The number of movement points (MP) a unit may expend in a single Movement Phase. Each hex a unit moves into and/or each hexside crossed forces the unit to expend a given number of MP.
Leg Unit: A unit that is not a mobile unit. It represents any type of unit that lacks inherent conveyance or transport.
Mobile Unit: A unit that is not a leg unit. It represents any type of unit that moves by a means other than by foot. A mobile unit can be anything from tanks to wagons. Only mobile units may move during the Mobile Movement Phase and/or conduct attacks during the Mobile Combat Phase (4.1).
Support Fire Markers: Represent naval gunfire from ships offshore, bombers/fighters providing ground support or interdiction support, or artillery units of all types and sizes not represented as units in the game.
2.4 Game Scale
The exclusive rules will indicate the scale of the map and the time that each game turn (GT) represents.
3.0 Setting Up the Game
Players should determine the side each will play. Players then consult their respective setup instructions in the exclusive rules. The instructions will list the strength and position of each unit in play on the map during the first GT. The exclusive rules:
a) Will indicate the player who is the first (starting) player and the player who will set up first.
b) May assign units specific set-up hexes, general areas near a specific location/hex number, or instruct the players to choose the set-up hexes for their units.
c) Will specify the number and GT of arrival for any reinforcements scheduled for that battle. Players should place reinforcements to the side of the map or place them on the GT RT in the GT box for the GT they will arrive.
- Consult the exclusive rules to determine the placement of support fire markers. The support fire number may be on the GTRT. The number signifies the number of support fire markers (not points) available each GT.
Important: There has been a major update to the bombardment rules. Players may use these bombardment rules in previous games in the series, however, they have not been subject to play test with all games.
- The GTRT may contain other information pertinent to game play. See the exclusive rules for details.
4.0 Sequence of Play
Players conduct each game in successive GTs, each turn is composed of alternate player turns. During the GT players maneuver their units and resolve combat according to the sequence outline and within the limitations provided by the rules.
4.1 Sequence Outline
Each GT consists of a First Player Turn followed by a Second Player Turn. One player takes the First Player Turn while the other player plays the Second Player Turn. The GTRT on the map and/or exclusive rules will indicate which player is the first player. Complete each player turn in the order given below. Complete each phase before beginning the following phase.
Support Fire Marker Phase: Both players organize their support fire markers as outlined in 7.0 or as dictated by the exclusive rules.
First Player Turn
Movement Phase: The current (active) player may move any number of his eligible units, as he desires within the limits and restrictions of the rules of movement (5.0), zones of control (ZOC) (6.0) and the exclusive rules. The active player may bring reinforcements onto the map as allowed by his reinforcement schedule and the reinforcement rules.
Important: Mobile units that move during this phase cannot move during the upcoming Mobile Movement Phase.
Bombardment Phase: The active player may conduct bombardment attacks against enemy units (8.1).
Combat Phase: The active player may use his units to attack enemy units (8.2).
Important: Mobile units that participate in combat during this phase cannot conduct combat during the Mobile Combat Phase.
Mobile Movement Phase: Only mobile units can move during this phase. Mobile units that moved during the preceding Movement Phase cannot move this phase. Movement in this phase is otherwise identical to the Movement Phase.
Mobile Combat Phase: Only mobile units can attack this phase. Mobile units that participated in an attack during the preceding Combat Phase cannot conduct attacks this phase. Combat in this phase is otherwise identical to the Combat Phase.
Second Player Turn
After the first player has completed his turn, the second player then conducts his turn using the same procedures and order given for the first player.
Game Turn End Phase
After the second player completes his player turn, the GT ends. If it is the last turn of the game, players determine victory. If there are turns remaining, advance the turn marker one space along the GTRT and conduct that turn using the above procedures.
5.0 Movement
5.1 Procedure
During the Movement Phase, the active player may move any number of his eligible units as he desires.
- Units may move in any direction or combination of directions, up to the limits of each unit's printed MA.
- Always move units one at a time, tracing a path of contiguous hexes through the hex grid.
- As each unit enters a hex, it pays one or more MP from its movement allowance.
5.2 Movement Restrictions
Movement cannot take place out of sequence. Neither player can conduct movement during the opposing player's Movement or Mobile Movement Phase. A player can only move units during his own Movement or Mobile Movement Phase.
A unit:
- a) Cannot expend more MPs than its total printed MA during any one turn.
- b) Cannot accumulate unused MPs from phase to phase or from turn to turn, nor can players transfer MP from one unit to another unit.
- c) Cannot enter a hex if the unit does not possess enough remaining MPs to pay for the cost to enter, as well as the cost of any hexside terrain the unit crossed.
Important: There is no minimum number of hexes a unit may move; a unit may not have enough MA to move to any adjacent hex, in which case it may not move at all.
-
d) Cannot enter a hex containing an enemy unit.
-
e) Cannot enter a prohibited terrain hex or cross a prohibited hexside.
-
f) Cannot exit the map unless specifically allowed by the exclusive rules.
-
Units may have their movement affected by enemy zones of control (EZOC) (6.0).
-
Players may not move a unit that has completed its movement during that same turn except as a retreat or an advance after combat.
Important: Advance and retreat may take place during a Bombardment Phase, Combat Phase or Mobile Combat Phase. Advance after combat and retreat after combat are not movement and do not require the expenditure of MP.
5.3 Stacking Restrictions
Units cannot stack.
- Only one unit can occupy a hex at the end of any phase.
- A unit may move through hexes occupied by other friendly units at no extra MP cost.
- A unit cannot end its movement stacked with any other unit.
5.4 Effects of Terrain
A unit must expend one MP to enter a clear terrain hex.
Important: Hexes may depict more than one type of terrain. In this case, use the MP expenditure of the terrain with the highest cost in MP.
- To enter other types of hexes, a unit must expend more than one MP.
- The Terrain Key or TEC (normally printed on the map) list each type of hex and hexside terrain with the corresponding MP cost for each type of terrain.
Important: The following examples may not reflect the actual terrain types or movement costs for a particular game. Consult each game's terrain effects for specific MP costs.
Example: A jungle terrain hex costs 3 MPs to enter.
- Hexsides may display other types of hexside terrain features (such as a river) that require additional movement points to cross. This cost is in addition to the cost of the terrain in the hex.
Example: A unit crosses a river (+1 MP) and enters a clear terrain hex (1 MP). The cost to enter that hex would be 2 MP.
- In hex terrain may have a "+" and a number. If that is the case, add that number to the cost of other terrain in the hex.
Example: A unit enters a clear hex (1 MP) that contains a village (+1 MP) and that unit crossed a river hexside (+1 MP). The cost to enter the hex is 3 MP.
5.4.1 Road Movement
A unit that moves from one road hex directly into an adjacent road hex through a road hexside normally expends one-half (½) of a MP, regardless of other terrain in the hex or hexside terrain. See exclusive rules for exceptions.
5.4.2 Trail Movement
A unit that moves from one trail hex directly into an adjacent trail hex through a trail hexside expends only one MP, regardless of other terrain in the hex or hexside terrain.
5.5 Mobile Movement Phase
During the Mobile Movement Phase, the active player may move any number of his eligible units as he desires, subject to the following restrictions:
- Mobile units that moved in the Movement Phase of a player turn cannot move during the Mobile Movement Phase of the same player turn.
- Leg units cannot move during the Mobile Movement Phase.
- Units moving during the Mobile Movement Phase follow the same procedures as used during the Movement Phase (5.1 through 5.4).
6.0 Zones of Control
The six hexagons surrounding each hex constitute the zone of control (ZOC) of any unit in that hex.
- Zones of control extend into all types of terrain and across all types of terrain hexsides.
Exception: Games may have fortifications or other restrictions that will negate the projection of ZOC into specific hexes.
- Enemy and/or friendly units never affect the presence of ZOC.
- If an enemy and friendly ZOC extend into a hex, they have no effect upon each other, i.e., both co-exist. The ZOCs mutually affect the hex.
- If a unit is in an enemy zone of control (EZOC), the enemy unit is also in that unit's ZOC.
- All units not marked with a black hexagon in either the upper right or the left side of the counter exert a zone of control. ZOC are always in effect, regardless of the phase or the player turn.
6.1 Effects on Movement
ZOCs inhibit the movement of enemy units.
- A leg unit that begins its movement in a hex not in an EZOC that then enters a hex in an EZOC must immediately stop its movement, regardless of the number of MP it has remaining.
- A leg unit that begins its movement in an EZOC can move directly into another hex in an EZOC by expending all its printed MA as long as the terrain is not prohibited and the unit has sufficient MA to expend for the hexside/in-hex terrain.
- Any unit that begins its movement in an EZOC can move into a hex not in an EZOC. The unit would expend the normal MP costs for that hex. It may continue movement normally.
- A leg unit must halt its movement if it later enters another EZOC.
- A mobile unit must expend half (round down) of its printed MA (plus the normal cost of terrain) when it moves into an EZOC (i.e., a unit with MA of "7" would expend three movement points to enter an EZOC).
Exception: A unit may not move from EZOC to EZOC across a minefield hexside or to enter a fortification hex; however, this restriction does not apply to commandos. Commandos never pay additional movement costs to enter or exit an EZOC.
6.2 Effects on Retreat & Advance After Combat
Units retreating after combat cannot retreat into hexes in an EZOC (8.3). Units advancing after combat ignore EZOCs (8.5).
7.0 Support Fire Markers
Support fire markers represent indirect fire assets not represented in the game by actual counters. Support fire markers do not exist on the map as units; they represent the incoming fire from supporting assets.
7.1 Allocation of Support Fire Markers
Important: The exclusive rules may modify the availability and allocation of support fire markers. Players should check the exclusive rules before proceeding further.
Each side has its own pool of support fire markers, allotted by the support fire allotment number printed on each turn box of the GTRT.
- The support fire number equals the total number of support fire markers the players will receive at the beginning of that GT.
- If the allotment of support fire markers indicated on the GTRT is less than the total quantity of markers in the pool for that player's side, that player must select from the lowest-valued markers before selecting higher-valued markers. Players must select support fire markers in order from lowest to highest.
- If a box has two numbers, the first number is the support fire marker allotment for the first player, the second number is the support fire marker allotment for the second player.
Example: "8/9" printed in the first GT box indicates the first player has 8 support fire markers, and the second player 9 support fire markers.
7.2 Support Fire Application
All support fire markers function the same, though markers may have different printed "+" values (the combat modifier) and different icons.
Exception: Bombardment range (8.1.1).
- See the scenario instructions for allocation of support fire markers.
- Support fire markers used during the Bombardment Phase or any Combat Phase are not available again during the same GT.
- Once used, return support fire markers to the player's pool. They are not available for the remainder of the current GT but may be available in subsequent GTs.
- Players may not accumulate support fire markers from GT to GT. If not used during the GT allotted, players must return them to their respective pools.
- Players randomly pick support fire markers from the pool (unless scenario rules instruct otherwise) when allocated to bombardment and/or combat. Players must place them face down, meaning the "+" value is not showing.
- Players can only use a support fire marker once during each GT.
- The value represents the combat strength that players may apply to bombardments or combats that occur during the turn. Whether as the attacker or the defender, the applying player places his support fire marker(s) and then adds the support fire markers "+" number to his total attack or defense value.
- A player may not divide or split the "+" value of a support fire marker among different targets. A player may only apply each support fire marker to one target hex only.
- Combat results (bombardment and ground combat) have no effect on the allotment of support fire markers during the current or any future GT, except when stipulated differently by the exclusive rules.
Example: If two 4-4-10 units are attacking a 2-3-8 unit; the total attack value is "8". If the attacking player has added two "+2" support fire markers, the final attack value becomes "12". If the defending player has added one "+6" support fire marker to that same combat, the final defensive value would then become "9".
8.0 Bombardment & Ground Combat
There are two types of combat: bombardment which takes place during the Bombardment Phase, and ground combat which takes place in the Combat or Mobile Combat Phases. The rules below apply to both bombardment and ground combat.
- The active player is the attacker and the inactive player is the defender, regardless of the strategic or tactical situation.
- Combat is not mandatory. There is no requirement for unit to attack, although a defending unit cannot avoid combat.
- A single defending unit can be the subject of an attack in each of the Bombardment, Combat and the Mobile Combat Phases; however, it can only suffer one attack in each of the above phases.
- A single attack may only attack one defending hex (i.e., attackers may not attack more than one hex during a single attack).
- There is no requirement for an attacker to declare all his intended attacks at the outset of the Bombardment or Combat Phase. He can declare each eligible attack as he reviews the map and conducts each individual attack.
- Players must resolve each attack prior to conducting any other attacks.
- The attacker can resolve attacks in any order the attacker wishes, provided he resolves each combat before declaring the next combat.
8.1 Bombardment
During the Bombardment Phase, the active player may conduct attacks using support fire markers only.
- Bombardment attacks do not require a friendly unit to be adjacent to the enemy units attacked.
- Friendly ground units do not participate in a bombardment in any way, including advance after combat. Bombardment does not affect friendly units except as outlined in 8.1.3.
- Each support fire marker may only target one enemy occupied hex.
- A maximum of two markers may bombard the same hex during the same player turn.
- Markers may be of any value from among the markers drawn from the player's pool.
- Once a player uses a marker, follow the procedures outlined in the exclusive rules to determine the marker's eligibility for reuse in a later game turn.
8.1.1 Range
A player may use support fire markers to bombard targets anywhere on the map. The exclusive rules may assign specific ranges for certain types of support fire markers.
8.1.2 Procedure
To conduct a bombardment, the active player may select any enemy unit that is in range of the support fire markers used (8.1.1). Follow the procedures below, in the given order, for each bombardment.
-
The attacker identifies the enemy unit he will bombard.
-
He may select a maximum of two support fire markers, stating the number he has selected and their total strength.
-
Calculate the combat differential by totaling the support strength value minus the total defending unit's strength value. Locate the line on the CRT that matches the terrain in the defender's hex (8.2.2).
Exception: Do not apply hexside terrain (8.2.2).
- Next, on that line locate the column on the CRT that corresponds to the final combat differential. Roll one six-sided die and cross-reference the result within the combat differential column on the CRT. Apply the results immediately.
8.1.3 Results
Apply the results the same as ground combat with the following exceptions:
- Ae, A1, A2, A3 & Ex: Treat as no result.
- (A): Apply this result only if there is at least one unit friendly to the bombarding player adjacent to the hex bombarded (friendly fire).
8.1.4 Terrain Effects
Players may use bombardment regardless of intervening terrain or units (enemy or friendly). It is not subject to line of sight restrictions, except when stipulated differently by the exclusive rules. In all cases, the defending units benefit fully from the terrain in the hex they occupy (not hexside terrain) per the CRT.
8.1.5 Bombardment Retreat
Conduct retreat after bombardment using the procedures outlined in 8.3.
- The retreating unit must, if possible, retreat farther away from the closest enemy unit.
- If there are no enemy units on the map, the unit must retreat towards the closest friendly unit.
8.2 Ground Combat
Ground combat can only take place when friendly units are adjacent to enemy units.
- The active player may declare any number of attacks by eligible units as he wishes.
- The attacking player may decide which of his units will be participating in an attack against which defending units.
- A mobile unit cannot attack in both the Combat Phase and again in the Mobile Combat Phase of the same player turn.
- There is no requirement for all adjacent units to attack.
- Units that do not participate in one attack may participate in a later attack against another hex if the unit meets all other requirements.
- A player may attack a unit from all adjacent friendly occupied hexes.
- A unit cannot attack across a prohibited/restricted hexside or into a hex prohibited to the attacking unit.
- The type of terrain the attacking unit(s) occupy has no effect on their eligibility to attack.
- All attack and defense strengths are unitary. A player cannot divide a unit's strength among different combats, whether as the attacker or the defender. A unit may not combine its attack and defense strengths for any reason.
8.2.1 Combat Procedure
Follow the procedures below, in the given order, for each attack.
a) The attacker states the quantity and the strength of his attacking units, and the enemy unit that is the subject of the attack. Once declared, the attacking player cannot call of an attack.
b) Both players may select available support fire markers in support of the current combat. This is a five-step process:
-
The attacking player may select one support fire marker placing it value-side down near the battling units to indicate it will support that combat.
-
The defending player may then select one support fire marker placing it value-side down near the battling units to indicate it will support that combat. The defender may do this whether the attacker did or did not place a support fire marker.
-
The attacker may then select a second (one additional) support fire marker. He may do this whether either player did or did not already apply a support fire marker.
-
Finally, the defender may select a second (one additional) support fire marker. He may do this whether either player did or did not already apply any support fire markers.
-
Both players reveal their support fire marker values (flip the markers over).
Important: After each step, neither player can change his mind about having placed, or not placed, a support fire marker in a previous step.
c) Each player adds the combat strengths of his ground units and support fire markers into one total.
d) Calculate the combat differential by subtracting the defender's total from the attacker's total. Locate the line on the CRT that matches the terrain in the defender's hex, including hexside terrain. Then on that line locate the column on the CRT that corresponds to the final combat differential. Roll one six-sided die and cross-reference the result within the combat differential column on the CRT. Apply the results immediately.
8.2.2 Effects of Terrain
Only defending units benefit from the terrain in the hex they occupy and/or that hex's hexside terrain feature. The terrain within the hexes occupied by attacking units has no effect upon combat.
- Defending units do not benefit from river or ditch hexsides unless all the attacking units are attacking that defending unit across a non-bridged river or ditch hexside into that hex. If all units are attacking across a river and at least one of the units is attacking across a bridged hexside, use the bridged line on the CRT.
- The effect of terrain on combat is an integral part of the CRT. Refer to the terrain in the defending unit's hex and/or hexside and cross-reference that terrain type with the combat differential (8.2.1).
Important: Hexes may depict more than one type of terrain and may have hexsides that impact combat. In this case, use the terrain most beneficial to the defender.
Important: River hexsides contain a bridge wherever a road crosses a river. If at least one attacking unit is attacking across a bridged river hexside, that attack is an attack across a bridge (not across a river) when resolving an attack on the Combat Results Table (CRT).
8.2.3 Fortifications
If a game includes fortifications (whether printed, or as counters), the following applies to any unit occupying a hex containing a fortification:
- Double the printed defense strength of a unit.
- Halve (round down) the combat modifier (the "+" value) of an attacker's support fire marker when applied to a fortification hex.
- This rule does not apply to support fire markers applied by the defending player.
8.2.4 Combat Resolution
The combat results listed on the CRT are as follows:
- De: Eliminate the defending unit(s).**
- D3: The defending unit(s) must retreat three hexes.*
- D2: The defending unit(s) must retreat two hexes.*
- Ex: Flip one attacking unit and the defending unit to their depleted side (or eliminate if already depleted or a one-step unit). Among multiple attacking units, the attacker chooses the unit to deplete.
- A1: The attacking unit(s) must retreat one hex.*
- A2: The attacking unit(s) must retreat two hexes.*
- A3: The attacking unit(s) must retreat three hexes.*
- (A): Deplete one adjacent unit (or eliminate it if already depleted or a one-step unit). If conducting bombardment, this result applies if friendly unit is adjacent to enemy unit being bombarded.
- Ae: Eliminate all attacking units.**
- •: No effect.
* Note: The retreating player may choose to ignore his retreat requirement by declaring stiff resistance and depleting his unit instead (8.4).
** Note: On a De, or Ae result, eliminate all units. Do not deplete two-step units, eliminate them.
Important: If the combat result is a retreat, the retreating player retreats his own units in accordance with the retreat rules (8.3).
8.3 Retreat
When a combat result requires a unit to retreat, the owning player must immediately attempt to move that unit the indicated number of hexes away from its current hex. A retreat is not movement and does not require the expenditure of movement points.
Important: If a rule states that a unit is to deplete, eliminate the unit will if already depleted or is a one-step unit.
- If a unit cannot retreat at least one hex (for any reason), eliminate the retreating unit (this does not nullify the retreat).
- A unit should (if possible) end its retreat closer (in hexes) to a friendly map edge (or a friendly source of supply).
- If possible, a retreating unit must retreat along a path of vacant hexes (not occupied by other friendly units). A unit may retreat through friendly occupied hexes if no other retreat route of vacant hexes is possible. See 8.3.1 for effects.
- Under no circumstances may a unit retreat into or through a hex occupied by an enemy unit or a hex in an EZOC.
Important: Friendly units and friendly units with a ZOC into a hex do not negate any EZOC into that same hex for the purposes of retreat.
- A unit may not retreat into or through prohibited terrain (an all-sea hex).
- Seaborne units required to retreat to a sea hex must deplete (scenario rules will identify units that may be seaborne and may supersede this rule).
- A unit that must retreat must stop its retreat the number of hexes away required by the combat result retreat number (from its original combat hex). If the unit can retreat at least one hex but cannot retreat the required number of hexes for any reason, deplete the unit in the last hex to which it can legally retreat. If depleted, then eliminate the unit.
- Unless specifically stated in exclusive scenario rules, units may not retreat off the map.
8.3.1 Displacement
If a retreating unit's only available final hex in a retreat path is occupied by another friendly unit, the retreating player may choose to displace (move) that other friendly unit from its hex to one adjacent hex as if that other friendly unit was also retreating because of combat.
- Displacement is voluntary; a retreating unit unable to retreat because of the presence of other friendly units may deplete instead of displacing a friendly unit.
- A retreating unit may not displace a friendly unit if any eligible vacant hex is available.
- Displacements cannot be into a prohibited hex, into an EZOC, or into a hex in which the displaced unit would stack with another unit.
- After the displaced unit has moved, the retreating unit may retreat into the displaced unit's formerly occupied hex.
- A displaced unit can displace another friendly unit using the same procedure.
- The displacement of units may continue until all units are in a hex that does not contain a friendly unit.
- A given unit may displace more than once in a phase.
- An attacker's displaced unit is ineligible to conduct an attack during the remainder of the attacker's turn.
- A retreating unit does not displace a friendly unit when moving through that other unit's hex during a retreat, but only if ending a retreat in the other unit's hex.
8.4 Stiff Resistance
Instead of obeying a retreat combat result, a player may declare stiff resistance. The player makes this decision after the combat die roll. A player may use stiff resistance when defending against bombardment and ground combat.
- When declaring stiff resistance, there is no requirement to retreat.
- The unit conducting stiff resistance is immediately depleted. If the attacker declares stiff resistance, any unit that does not retreat must suffer depletion.
- A player may opt to declare a depleted or one-step unit to offer stiff resistance to avoid the retreat combat result. The player must eliminate the depleted or one-step unit and still fulfill the requirements of the stiff resistance. This prevents any advance after combat into that combat hex (8.5).
8.5 Advance After Combat
A player can only advance after combat following a retreat combat result on an attacked (defending) enemy unit (i.e., D2 or D3). Advance after combat does not take place after an Ex or De result.
- A defending unit may never advance after combat.
- There is no advance after combat when conducting a bombardment.
- When an enemy unit retreats due to combat, it will leave a path of vacant hexes behind it, called the path of retreat. If a unit was unable to retreat the required number of hexes, the retreat path is the last hex into which the retreating unit could legally retreat. This includes units when unable to complete the entire retreat (8.3).
- Any or all units that participated in the combat that caused the retreat are then eligible to advance along the path of retreat.
- The decision to advance after combat must come immediately after the retreat is complete.
- Advance after combat is voluntary and the owning player always determines which units and how far they advance.
- Advancing units ignore all EZOC along the entire path of retreat.
- Unit(s) advancing after combat may end their movement in any of the hex(s) along the path of retreat, but they may not stray from the path of retreat while moving.
- If multiple units advance after combat, no more than one unit may end its movement in any one hex of the path of retreat.
- After an advance after combat, an advancing unit is not eligible to attack or perform any other activity during that player turn (unless specified otherwise by an exclusive rule).
- An advanced unit is subject to attack by any eligible enemy units in the immediately following enemy Combat Phase, just like any other unit.
9.0 Supply
There are no supply rules (unless otherwise noted in a specific game's exclusive rules). All units are always in supply. Isolated or surrounded units suffer no penalties.
Combat Results Table
This is the Combat Results Table printed in the Aachen Exclusive Rules (page 4). Columns are numbered 1 to 12 from left to right as printed. Each terrain row gives the combat differential (attack strength minus defense strength) for each column; blank cells are not used for that terrain. Bold results are as printed.
| Defender Terrain | 1 | 2 | 3 | 4 | 5 | 6 | 7 | 8 | 9 | 10 | 11 | 12 |
|---|---|---|---|---|---|---|---|---|---|---|---|---|
| Mountain | −1 | 0 | +1 | +2, +3 | +4, +5 | +6, +7 | +8, +9 | +10 | ||||
| City, Rough, River | −2 | −1 | 0 | +1 |
| Die Roll | 1 | 2 | 3 | 4 | 5 | 6 | 7 | 8 | 9 | 10 | 11 | 12 |
|---|---|---|---|---|---|---|---|---|---|---|---|---|
| 1 | (A) | A3 | A2 | • | Ex | Ex | D2 | D2 | D2 | D3 | De | De |
- Attacks at less than the lowest differential are resolved at the lowest differential.
- Attacks at greater than +10 are resolved as +10 attacks.
- When conducting bombardment treat the results in Bold as No Effect.
- De: The defending unit is eliminated.
- D3: The defending unit must retreat three hexes.*
- D2: The defending unit must retreat two hexes.*
- Ex: One attacking unit and one defending unit must be flipped to their reduced side. If already reduced or is a one-step unit the unit is eliminated. Among multiple attacking units, the attacker chooses the unit to deplete/eliminate.
- A1: All attacking units must retreat one hex.*
- A2: All attacking units must retreat two hexes.*
- A3: All attacking units must retreat three hexes.*
- (A): One attacking unit must be reduced. If unit is already reduced or a one-step unit it is eliminated. Among multiple attacking units, the attacker chooses the unit to reduce/eliminate. If conducting bombardment, this result only applies if a friendly unit is adjacent to the enemy unit being bombarded.
- Ae: All attacking units eliminated.**
- •: No Effect.
* Stiff Resistance: The affected player may choose to ignore his retreat requirement by choosing to reduce one unit instead.
** Note: On a De or Ae result, all units are eliminated. Two step units are not reduced, they are eliminated.
10.0 Exclusive Rules
10.1 Introduction
Aachen is a simulation of the US attempt to capture the city of Aachen, Germany, in October 1944.
Aachen has one historic scenario of the US First Army's VII and XIX Corps attempt to capture the German city in October of 1944. Aachen was defended by the German 15th Army's LXXXI Corps, that occupied a double belt of bunkers, dragon's teeth, and anti-tank ditches. After the failure of Operation Market Garden, the Germans reinforced the West Wall with nearly a quarter-million troops; the US First Army encircled and besieged Aachen for nearly three weeks before finally taking the city.
Each game turn (GT) represents approximately two days. Each hex is 0.5 miles/0.8 km.
10.2 First Player
The Allied player is the first player (3.0).
10.3 Unit Types
Units represented in the game are composite units representing a combination of tank, mechanized or leg infantry, and various other supporting arms.
11.0 River Crossing
Important: There are no intact bridges spanning any river hexside. All the bridges have been demolished prior to the beginning of the scenario. Neither player may repair bridges.
11.1 Movement Range
Movement range of a unit is the printed number of MP of the unit attempting to demolish the bridge.
- When determining movement range count the number of hexes (do not use terrain costs) from the unit to a hex adjoining a river hexside.
- Terrain, enemy units, and ZOCs have no effect when determining if the unit is within its movement range of a river.
- When counting hexes, do not count the hex the unit is in, but do count the hex adjoining the river hexside.
- If the number of hexes is less than or equal to the unit's movement allowance, the unit is within its movement range.
11.2 Temporary Bridges
At the beginning (prior to moving any units) of a friendly Movement Phase and/or a friendly Mobile Movement Phase, a player may declare that an engineer unit is placing a temporary bridge across one (and only one per GT) river hexside if:
-
The hexside has an adjoining hex that is within the movement range of the friendly engineer unit; and,
-
The adjoining hex is not occupied by an enemy unit; and,
-
Neither adjoining hex (those hexes separated by the river hexside that is being bridged) is in an EZOC.
-
The temporary bridge may be used in both the current Movement Phase and ensuing Mobile Movement Phase of the current GT.
-
The engineer unit may move during the Movement/Mobile Phases and continue to provide the temporary bridge if, the engineer unit remains within its movement range of the designated hexside.
-
A temporary bridge allows friendly units to:
-
Treat the hexside as a bridge for movement purposes, including connecting with a road in either or both adjoining hexes.
-
Retreat across the river hexside.
-
-
Friendly units may use a temporary bridge to attack and advance after combat during either Combat Phase.
-
Enemy units cannot use a temporary bridged hexside for movement during a Movement or Mobile Movement Phase.
-
If at the end of any Combat or Movement Phase, an enemy unit occupies at least one adjoining hex, the temporary bridge is immediately removed.
-
Demolished bridges cannot be repaired using this procedure.
12.0 SFM Bombardment Range
Players allocate support fire markers (SFM) as per 7.1.
12.1 SFM Restrictions
When conducting bombardment or ground attack, player may select the SFM marker(s) they will use as per 8.1 and 8.2.1.
- All SFM with an aircraft icon may be used anywhere on the map (they do not have a limiting range).
- SFM markers with a support strength of four or five may conduct bombardment against targets that are up to four hexes (three intervening hex) distant from a friendly unit.
- SFM with a support strength of three may only conduct bombardment against hexes that are adjacent to friendly ground unit.
13.0 Fortified Hexes
Fortified hexes represent the West Wall fortifications.
- Any unit (of either side) that attacks from or defends in a fortified hex may ignore all retreat results (whether a defender retreat or an attacker retreat). All retreat results become a "no effect."
- Retreating units that begin their retreat not in a fortified hex do not stop their retreat when entering a fortified hex.
- ZOC do not extend into enemy-occupied fortified hexes. They do extend into friendly occupied or vacant fortified hexes.
Exception: The US 30th Infantry Division had been specially trained and equipped to assault the West Wall. As such, any US unit of the 30th Division (any US unit printed with "30") projects a ZOC into an enemy occupied fortified hex normally.
- Fortified hexes may not be destroyed during the game.
- Any unit (including a US unit) that captures a fortified hex will derive the fortification's benefit while occupying that fortified hex.
14.0 Scenario Game Length & Set Up
Place the GT marker in the GT 1 box on the GTRT. See 14.1 for game length.
- Units must comply with stacking restrictions.
- The German player sets up first. Place units by type and combat strengths in the hexes listed.
- The US player sets up second. Place units by type and combat strengths in the hexes listed.
Errata (Aachen Errata 11-13-23): The German 183/Fus. unit is incorrectly printed as a 2-7 on the counter; it should be a 2-2-7. The back of the counter is correct. Three German units have a superior ID of 3; they represent the 3rd PzGd Div. Ignore the US 3rd Armored Division insignia in the upper left corner of those counters.
German Units
| Hex | Unit |
|---|---|
| 0409 | 0-1-6 infantry |
| 1420 | 0-1-6 infantry |
| 0317 | 1-1-6 infantry |
| 0518 | 1-1-6 infantry |
| 0415 | 1-1-7 infantry |
| 2124 | 1-1-7 infantry |
| 1823 | 1-1-7 infantry |
| 1330 | 1-1-7 infantry |
| 1226 | 1-1-7 infantry |
| 1527 | 1-1-7 infantry |
| 0411 |
US Units
3rd Armored Division (units may set up along map edge hexes in the range given for each unit)
| Hex | Unit |
|---|---|
| 2630–3028 | 4× 2-2-12 mechanized infantry (printed: 1× 3-2-12 tank, 2× 2-2-12 mechanized infantry; changed by Errata 11-13-23) |
| 1934 to 2431 | 4× 2-2-12 mechanized infantry, 1× 2-2-12 tank destroyer (printed: 2× 3-2-12 tank, 4× 2-2-12 mechanized infantry; changed by Errata 11-13-23) |
30th Infantry Division
| Hex | Unit |
|---|---|
| 0205 | 2-3-7 infantry |
| 0203 | 2-3-7 infantry |
| 0302 | 2-3-7 infantry |
| 0209 | 2-3-7 infantry |
| 0207 | 2-3-7 infantry |
| 0211 | 2-3-7 infantry |
| 0213 | 2-3-7 infantry |
| 0215 | 2-3-7 infantry |
| 0117 | 2-3-7 infantry |
| 0107 | 2-2-12 tank destroyer (added by Errata 11-13-23) |
1st Infantry Division
| Hex | Unit |
|---|---|
| 0932 | 3-3-7 infantry |
| 1232 | 3-3-7 infantry |
| 1532 | 3-3-7 infantry |
| 1629 | 3-3-7 infantry |
| 1729 | 3-3-7 infantry |
| 1827 | 3-3-7 infantry |
| 1925 | 3-3-7 infantry |
| 1926 | 2-3-7 infantry |
| 2025 | 3-3-7 infantry |
| 1333 | 2-2-12 tank destroyer (added by Errata 11-13-23) |
Elements of 29th Infantry Division & Corps Assets
| Hex | Unit |
|---|---|
| 0301 | 2-2-7 infantry |
| 0332 | 3-3-8 engineer |
| 0630 | 5-4-8 engineer |
14.1 Excessive US Casualties
The length of the scenario is decreased by one complete GT for each US unit that is eliminated (not merely depleted).
Example: If the German player eliminates five US units, the game will end at the end of GT 15 (instead of GT 20).
- If a US unit is eliminated such that the last GT would be the current GT, the game ends immediately and no further phases are conducted.
15.0 Reinforcements
Players enter reinforcements in the hexes listed, or in any hexes within the hex-range listed (inclusive) at the beginning of each respective player's Movement Phase or Mobile Movement Phase.
- Units arriving as reinforcements operate normally beginning the GT of arrival.
- Stacking restrictions must be adhered to when placing reinforcements on the map.
- If a unit's arrival hex is occupied by an enemy unit, the reinforcement may not arrive until a GT wherein that hex is no longer occupied by an enemy unit.
- Reinforcements may be placed in an enemy zone of control but must abide by the normal movement rules regarding enemy zones of control.
- Arriving units must expend the number of movement points required to enter the hex of arrival. They may continue to move.
- Mobile units may arrive at the beginning of the Mobile Movement Phase instead of the Movement Phase and may continue to move normally.
15.1 German Reinforcements
| GT | Hex | Unit |
|---|---|---|
| 4 | 2204 | 1× 2-3-7 infantry |
| 4 | 2105 or 2205 | 1× 4-5-7 infantry |
| 6 | 2204 | 1× 3-5-8 infantry |
| 6 | 2105 or 2205 | 1× 4-5-8 engineer, 1× 6-4-12 panzer |
| 7 | 2204 | 1× 6-5-12 panzer |
| 8 | 2813 | 1× 2-1-12 panzer |
| 10 | 3014 or 3016 | 2× 5-6-12 mechanized infantry |
| 13 | 3014 or 3016 | 1× 3-5-12 armored recon, 1× 5-6-12 mechanized infantry, 6-5-12 panzer |
15.2 US Reinforcements
| GT | Hex | Unit |
|---|---|---|
| 4 | 0301 | 1× 2-2-7 infantry |
| 7 | 0301 | 1× 2-2-7 infantry |
| 11 | 0301 | 1× 2-4-7 infantry |
15.3 US 2nd Armored Division
The US player may receive the 2nd Armored Division (all nine units) at the beginning of any GT beginning GT 4, if at least three West Wall fortified hexes are occupied by any US ground units.
-
The occupied fortified hexes must be within two hexes of the Wurm River; and,
-
Each of the occupied fortification hexes must be adjacent to one of the other two occupied fortified hexes.
- All 2nd Armored Division units must arrive on the GT that the above requirements were determined to have been met. The US player may not withhold these units to a later GT.
- All units arrive between hexes 0102 through 0109 (inclusive).
Editorial note: the printed text numbers the conditions 6) and 7) only. Conditions 1) to 5) are not in the printed rules and are not transcribed. The printed text also gives no unit list for the nine 2nd Armored Division units.
Errata (Aachen Errata 11-13-23), for the 2nd and 3rd Armored Division: the counters were changed to reflect the divisional operational organizations. Each division has two combat commands consisting of four battalion-sized units. A tank destroyer unit was also added to their order of battle.
16.0 Victory Conditions
Victory is determined at the end of the game (14.1).
US Victory: The US player wins the game if:
-
US occupy or were the last units to occupy all Aachen city hexes; and,
-
US units occupy at least six of the east map edge hexes containing red stars.
Designer's Note: These roads represent the roads leading into the heart of Germany.
Draw: If the US player has met condition 1), but has not met condition 2), the game ends in a draw.
German Victory: If the US player does not meet condition 1), the German player is the victor.
Important: The east map edge road hexes are not considered when determining German victory.
17.0 Game Notes
The October fighting for Aachen marked the first time that the Americans had attempted to take a German city; the price they paid for Aachen caused a lot of the US 'top brass' to think twice about direct assaults against other German cities, not to mention Berlin.
Aachen depicts the situation in October, when the exhausted US 1st Infantry and 3rd Armored Divisions of Collins' 7th Corps had punched a hole in the West Wall and held a salient south of Aachen from a point just west of the city, about 25 kilometers eastward to the town of Stolberg (which was already partly controlled by the Americans). Far to the north, the US 30th Infantry Division of Corlett's XIX Corps was strung out just west of the Wurm River, opposite the towns of Ubach-Palenberg and Geilenkirchen.
Between those two American corps were elements of a half dozen German divisions from LXXXI Corps. Some of these "divisions" were ad hoc conglomerations of police, training formations, and whatever else could be scraped together. In the south, the Germans occupied a fairly deep salient, that at its narrowest point, was just 10 kilometers wide. Only 7th Corps' exhaustion (and the fortifications of the West Wall) allowed the German salient to remain tenable.
The American view of the situation was simple: If the West Wall could be cracked in the area just south of Geilenkirchen, the US 30th Infantry Division (supported by part of the 2nd Armored Division) might be able to link up with VII Corps around Haaren just northeast of Aachen, thereby pinching off the tip of the German salient. Aachen would then—presumably—fall quickly as the American offensive swung east toward the Stolberg-Eschweiler communications nexus and the Roer river crossings. The Americans hoped to accomplish these ambitious goals in a few days, however—despite an impressive XIX Corps breakthrough in the Ubach-Palenberg area—the operation required two full weeks of difficult fighting just to isolate Aachen, and another week to capture the city (earning the moniker "Bloody Aachen" from the G.I.'s).
In fact, rather than driving on toward the Roer, the US 30th Infantry Division found itself fighting for its own survival when the Germans eventually committed the 1st SS Panzer Corps' 3rd and 116th Panzer Divisions to the sector.