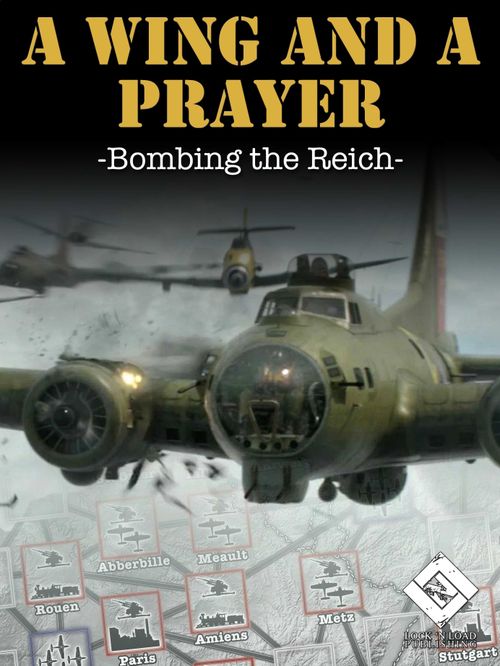
A Wing and a Prayer: Bombing the Reich
A Wing and a Prayer: Bombing the Reich Rulebook
Table of Contents
Table of Contents
- 1.0 Introduction
- 2.0 Components
- 3.0 Campaign Setup
- 4.0 Campaign Turn Sequence
- 4.1 Planning and Intelligence Phase
- 4.2 Mission Phase
- 4.2.1. Move Bomber Formation
- 4.2.2. Formation Shifting
- 4.2.3. Loose Formation Check
- 4.2.4. Damaged Aircraft Checks
- 4.2.5. Escort Range Check
- 4.2.6. Escort Rendezvous Site Check
- 4.2.7. Flak Site Attack Check
- 4.2.8. Formation Event Check
- 4.2.9. Conduct Air Combat
- 4.2.10. Check if your Formation is Tight, and Repeat the Previous Steps
- 4.2.11. Conduct the Bombing Run
- 4.3 Debriefing and Maintenance Phase
- 5.0 Selected Game Concepts in Detail
- 6.0 Flak Attack
- 7.0 Air Combat
- 7.1 Dogfight
- 7.2 Interceptors vs. Bombers Air Combat
- 7.3 Conclude Air Combat
- 8.0 Combat Results in Detail
- 9.0 The Bombing Run
- 10.0 Extended Air Combat Examples
- 11.0 Advanced Rules
- 11.1 Optional B-24 Squadron
- 11.2 Optional Starting Crews (replaces 3.2.3)
- 11.3 The Crew Log (modifies 4.2.14.2)
- 11.4 Secondary Targets (modification of 4.2.1, disables 4.1.5)
- 11.5 Crew's Fate (extension of 8.3)
- 11.6 Mixed Escorts (modification of 4.1.8)
- 11.7 Marksmanship (addition to 7.2)
- 11.8 Nose Art (addition to 4.1.6 and 4.2.14)
- 11.9 Historically Accurate Escort Units (replaces 4.1.8)
- 11.10 Historical Missions (addition to 4.1.3)
- 12.0 Two-Player Game
- 13.0 Designer Notes
- 14.0 Errata
1.0 Introduction
1.1 Community & Support
Lock 'n Load Publishing values nothing more than its customers and giving them the best support and resources for our games.
1.1.1. Game Questions
If you have any game questions, or if you are just looking for other gamers with whom to chat, about rules, strategies you can find quick replies on our LnLP forums: http://forums.lnlpublishing.com
1.1.2. Customer Support
If any parts of this game are damaged, order needs, or any other support needs, please use our Support Ticket system. You can open a support ticket at the link below: http://support.lnlpublishing.com
1.1.3. Resources
We want our customers to know they are supported before and after you purchase one of our products. The You may also find additional game resources such as scenarios, counters, special rules and other community design ideas in our resource section: http://forums.lnlpublishing.com/resources
Note: Section 1.1.4 (Permission to Print) is copyright and print-release boilerplate and is not transcribed.
1.2 How to Win the Game
You control Bombers, Crews and Escort Fighters of the US Army Air Force (USAAF). The enemy opponent, controlled by various game rules, represents German Interceptor Fighters and Flak defenses.
The object of the game is to complete a number of Missions directed by the Campaign you selected, and accumulate enough Victory Points to achieve the highest level of Campaign success possible. Refer to the Mission Victory Points and Campaign Victory Points tables on the SQUADRON BRIEFING CARD as well as the CAMPAIGN SUCCESS TABLE to get a general sense of the effort it will take to achieve that goal.
1.3 How to Read These Rules
This is a procedural game, and as such it is simple to learn. Each game, you basically go through pre-arranged procedures that simulate every part of an air raid over the Nazi occupied Europe. As you play, you will be directed to consult corresponding tables and charts. All the procedures are carefully explained in this rulebook with references to tables you need to consult.
You don't have to memorize anything, just read the rules to have a general idea about how the game is played. Then play your first game with just the Player Aid and Table Sheets. Have this rulebook at hand in case you occasionally need to consult details. When you feel confident, add a few Advanced Rules (11.0) to give the game a lot more historical feel.
Notes are Red, Examples are in green, Hints are in Blue, Important Procedures are in grey frames, and names of Tables, Cards and Map sections are in CAPITAL LETTERS.
2.0 Components
This section will cover the components included in this game and a brief overview of their use and function.
2.1 Dice
The game uses standard six-sided dice. 1D6 means one die is rolled. 2D6 means two die are rolled and added together. Sometimes a modifier may be required to add or subtract from the die roll result. You are welcome to use as many of your own dice as needed for convenience.
2.2 Game Tables and Player Aids
Although these rules thoroughly explain majority of the dice rolls and dice roll modifiers, you don't have to memorize them. The various game Tables that come with the game hold all the information necessary to conduct the rolls and modifications without any need of referring the rule book.
The game also comes with Player Aids that sum up the game flow.
Most Tables follow a standard procedure in which you roll the dice required and reference the roll result with the number of items being affected to determine the outcome. Usually the die roll result is in the center of the chart with the items and outcomes around the edge rows and columns. Some charts have the die roll result along the edge with the outcomes in the center.
2.3 The Mission Map
The MISSION MAP represents the 8th Air Force's area of operations and is used to conduct your Squadron's Missions. The Map is composed of color-coded square boxes that represent areas you fly over. The boxes are connected by black lines that mark all the possible flight paths you can use on your way to the Target box and back.
- The 8th Air Force Base box and two adjacent Green boxes represent England.
- Blue boxes represent areas over water.
- White boxes represent locations with minimal air defense systems.
- Brown boxes are Target locations defended by robust air defense systems (Flak Sites).
- Green boxes with the four-aircraft icon are Escort Rendezvous Sites.
The Map icons are: Aircraft Factory, Industrial Center, Marshalling Yard, Submarine Pens, Flak Site and Rendezvous Site.
Various tracks and other areas on the Map will be explained in detail in their own rules section. The Map contains a number of boxes and a variety of icons.
2.4 Formation Card
The FORMATION CARD represents the standard defensive Formation eventually adopted by the Eighth Air Force. It is used to hold your Squadron's Bombers and their Crews, Escort Fighters and Aces protecting them, as well as Enemy Interceptors and Aces. Your Bomber Formation is organized into Elements (Lead, High, Low and Tail), based on the number of Bombers in the Formation. Each Element has a Lead Bomber (in the middle). The Lead Bomber of the Lead Element is called The Formation Lead Bomber (see Rule 4.1.6.3).
[Formation Card and Mission Victory Points diagram. Element boxes: Lead Element, High Element, Low Element, Tail Element, Interceptors, Cloud Cover. Mission VP Track and Campaign VP Track run along the card.]
Mission Victory Points (on the Formation Card)
| Achievment | Mission VPs |
|---|---|
| Each BF-109 or FW-190 Destroyed | +1 |
| Each ME-110 | +2 |
| Each ME-262 Destroyed | +3 |
| Each German Ace Killed | +1 |
| Each USAAF Ace Killed | -1 |
| Each Escort Fighter Destroyed | -1 |
| Each Bomber Destroyed | -2 (-1 if Crew rescued) |
| Each Target Destroyed | VPs on Mission Card |
Campaign Progress Table (on the Formation Card)
| Mission VPs | Result / Campaign VPs |
|---|---|
| -10 or less | Complete Failure / -3 Campaign VPs. |
| -9 to -5 | Major Failure / -2 Campaign VPs. |
| -4 to -1 | Minor Falure / -1 Campaign VP. |
| 0-2 | Minimal Success / No Campaign VPs. |
| 3-4 | Successful Mission / +1 Campaign VP. |
| 5-6 | Great Success / +2 Campaign VPs. |
| 7 or more | Major Success! / +3 Campaign VPs. |
2.5 Squadron Briefing Card
Use the SQUADRON BRIEFING CARD to keep track of:
- Available and unavailable Bombers and Crews.
- Mission VP's as they are gained or lost during the Mission. Total your Mission VPs after each Mission and, based on the results, compute the Campaign VPs gained or lost.
Between Missions, Bombers and their Crews are either Ready or Not Ready. Ready Bombers and Crews are held in the READY section, while Damaged Bombers and their Crews are placed in the NOT READY section.
2.6 Mission Cards
Mission Cards represent Targets that your Squadron will be tasked to attack during the Campaign. Most Targets have two Mission Cards - a Blue Undamaged card and a Red Damaged card. Major Target Cards (see Rule 9.4.1) cannot be completely destroyed and thus they have only a Blue Undamaged card.
Note: If you received two sets of Bremen cards you may choose to ignore one set or play with both.
Mission cards have the following information and ratings:
- Name: The name of the Target box location on the Mission Map. The associated Map Icon provides the Target type (only informative).
- Year: The year in which the Target becomes available for attack (1942, 1943 or 1944).
- Flak Attack Value: Represents the intensity of Flak (Anti-Aircraft Fire) defending the Target.
- Difficulty Rating: Represents how difficult the Target is to hit.
- Destruction Rating: Represents how difficult the Target is to destroy.
- Victory Points: The amount of Victory Points you earn for inflicting Heavy / Light Damage to the Target during The Bombing Run.
- Bombers Required: The minimal number of Bombers your superior Headquarters requires for this Mission. If you have that number of READY Bombers, you have to assign them. If you have less, assign all you have.
- Escort Fighters: The number of Escort Fighters that will be escorting your Formation.
- a. Escort Fighters: represent the USAAF fighters that are tasked with protecting your Bomber Formation.
- b. Interceptors: represent the German fighters that are sent to disrupt or destroy your Bomber Formation.
[Counter and Mission Card Breakdown diagram (page 10). Crew Counter: Air Combat, Performance, Bombing. Aircraft Counter: Air Combat, Performance, Bombing, Structure. Target Mission Card: Target Name, Flak Attack Value, Difficulty Rating, Destruction Rating, Year, Victory Points (Heavily Damaged / Lightly Damaged), Bombers Required, Escort Fighters. Damaged Mission Card: Target Name, Year, Flak Attack Value, Difficulty Rating, Destruction Rating, VPs, Bombers Required, Escort Fighters.]
2.7 Game Counters
2.7.1. Aircraft Counters
Aircraft counters have two sides, the front is the Undamaged side, the back is the Damaged side (represented by an Aircraft image with fire and smoke trail). There are two major types of Aircraft counters - Bombers and Fighters.
Bomber counters represent the Bombers from your Squadron. Fighter counters represent the various fighter aircraft that appear in the game.
2.7.1.1. Aircraft Counter Ratings
Aircraft counters contain the following ratings. Each rating is identified by a specific color and location on the counter:
- Air Combat (yellow): The Aircraft's ability to inflict damage on Enemy Aircraft.
- Performance (white): The Aircraft's overall speed and maneuverability.
- Bombing (red): The Bomber's bomb load.
- Structure (green): The Aircraft's durability and capacity to withstand damage.
2.7.2. Crew Counters
Crew counters are assigned to each Bomber before a Mission. Each Crew has a color-coded Experience level, ranking from Green (Green) to Veteran (Gray) to Crack (Gold, the top possible experience). Throughout the Campaign a Crew's Experience can be upgraded.
Veteran and Crack Crews are named (for example "Memphis Belle" or "Hell's Angels"). Green crews are generic and unnamed; they are simply a "Green Crew".
2.7.2.1. Crew Ratings
Crew counters have 3 ratings (or skills) that are typically used as modifiers to their Bombers' ratings.
- Air Combat: the Crew's aerial gunnery skills and proficiency.
- Performance: the Crew's leadership, training and overall proficiency.
- Bombing: the Bombardier's skill, training and proficiency (used by the Formation Lead Bomber only).
2.7.3. Mission Counter
This counter is used on the MISSION / TURN TRACK to indicate the current Mission/Turn number during the Campaign.
2.7.4. Mission VP Tracking Counters
These counters are used to keep track of the Mission Victory Points as they are gained during a Mission. If the Mission Victory Points become negative, flip the Mission VP counters over to the backside with negative values.
Example: If you earned 15 VP during the current Mission, you would place the +10 counter in box 1 and the +1 counter in box 5. If you earned -5 VP during the current Mission, you would place the -10 counter in box 0 and the -1 counter in box 5.
2.7.5. Campaign VP Tracking Counters
These counters are used to keep track of Campaign Victory Points. If the Campaign Victory Points become negative flip the Campaign VP counters over to the backside with negative values.
Note: There are two sets of these counters. One set with the Eighth Air Force Emblem for use in this game, and another set with the Fifteenth Air Force Emblem for use in a later expansion.
2.7.6. Formation Counter
The Formation counter is used to indicate your Bomber Squadron's Formation and its position on the MISSION MAP. It is double-sided, because the Bomber Formation is always either Tight or Loose.
2.7.7. Range Tracking Counters
These counters (P-38, P-47 and P-51) are used on the FIGHTER ESCORT RANGE TRACKS of the MISSION MAP to keep track of the Escort Fighters' current range (see Rule 4.2.5). The "max" box marks their Maximum Safe Range, after which they have to return home:
- Range 5 for P-47.
- Range 8 for P-38.
- Range 12 for P-51.
Note: Maximum Safe Range (or Radius) is the maximum distance a Fighter can travel to keep enough fuel for the way back home. The Advanced Rule 11.9 makes the Safe Ranges yet more historically accurate, as they were changing with various drop tank volumes used.
2.7.8. Cloud Cover Counter
This counter is used on the FORMATION CARD to reflect the weather situation over the Target (Light Cloud Cover or Heavy Cloud Cover). If the Target cloud cover is Clear do not use the Cloud Cover counter (see Rule 4.1.4).
2.7.9. Lady Luck Counters
Lady Luck counters are drawn randomly as a result of a Formation Event Check (see Rule 4.2.8). There are 7 Lady Luck counters, each providing some sort of a beneficial effect for the U.S. Player. Lady Luck counters can be used at any applicable time during a Mission (see Rule 5.1, 5.2).
2.7.10. Fighter Ace Counters
Both sides in the game have several Fighter Ace counters that are randomly generated by the ACE TABLE when required (see Rule 5.3).
2.7.11. Flak Level Counters
Flak Level counters are used only in the Two-Player Game by the German Player when they make a Flak Attack (see Rule 12.5, 12.6).
2.8 Mission Log
Use the Mission Log to write down the most important data after each Mission. By doing so, you are also "saving" the game state between each two Missions, and so if are taking a break and need to put the game back into the box, you can easily start again just where you have stopped. Just pack the READY / NOT READY Bombers and Crews and Lady Luck counters you own in a separate bags.
If you use the Mission Log, you also don't have to use the Mission counter as the MISSION TURN TRACK is basically worked into the Mission Log.
2.9 Crew Log
The Crew Log can be used to record status of your named Crews after each Mission.
3.0 Campaign Setup
3.1 Setup the Mission Map
3.1.1. Formation Counter
Place the Formation counter, the Tight side up, in the 8th Air Force Base box on the MISSION MAP.
3.1.2. Select a Campaign
Select a Campaign type and determine the Mission Cards that will compose the Mission Deck, as well as the starting point (on the MISSION TURN TRACK). There are four Campaigns to choose from:
- 1942 Short Campaign: Start in box 1. Complete 5 Missions. Start with 1942 Mission Cards.
- Late-War Entry Campaign: Start in box 11. Complete 15 Missions. Start with 1942 & 1943 Mission Cards.
- 1944 Short Campaign: Start in box 14. Complete 12 Missions. Start with all Mission Cards.
- Full Campaign: Start in box 1. Attempt to complete 25 Missions. Start with 1942 Mission Cards.
3.1.3. Build the Mission Deck
After selecting the Campaign and the required Mission Cards, build the Mission Deck. Set aside all Red Damaged Mission Cards, shuffle the Blue Undamaged Mission Cards, and place them face down on the MISSION DECK box of the MISSION MAP.
3.1.4. Mission Tracking
Place the Mission counter in the appropriate starting box on the MISSION TURN TRACK, according to the Campaign you have selected. The counter will indicate both a year you are in and the Turn you are in.
3.1.5. Range Tracking Counters
Place all Range Tracking counters (P-38, P-47 and P-51) in the ESCORT COUNTERS box of the MISSION MAP.
3.2 Setup the Squadron Briefing Card
3.2.1. Victory Point (VP) Tracking Counters
Place both Mission VP counters ("1" and "10") in the "0" box on the MISSION VP TRACK. Place both Campaign VP counters ("1" and "10") in the "0" box of the CAMPAIGN VP TRACK.
3.2.2. Draw your Initial Squadron Bombers
Draw the 12 B-17F counters from the available game counters, and place them in a pile in the READY Section of the SQUADRON BRIEFING CARD. This is your Initial Squadron.
Note: While Bomber counters of a particular type are all the same and generic, it is the Crew that gives each Bomber its soul. The Crew gives the Bomber its name (Veterans and Cracks) and enhances its stats, making it unique. Later on, you can check the Advanced Rule 11.8, which directs you to keep a Bomber with its Crew together over the course of the game. The only difference is that when one is damaged the other one can't be used to fly a Mission.
3.2.3. Draw your Initial Crews
Draw randomly one Crack Crew counter, two Veteran Crew counters and nine Green Crew counters. Place these counters in a pile next to the READY Bomber counters.
Note: It is recommended to separate the Green Crew counters from the Veteran/Crack Crew counters for easier handling.
3.3 Select Advanced Rules
If you've had a few games under your belt, you can select a few Advanced Rules (11.0) to play with.
4.0 Campaign Turn Sequence
Each Campaign consists of a set number of Missions (or Turns). You will complete exactly one Mission on each game Turn, and so the terms "Mission" and "Turn" are interchangeable.
Follow the procedures below until you have completed the required number of Missions in your Campaign. Each Mission consists of 3 consecutive Phases. Each Phase is conducted in various steps.
The following is a brief summary of the Phases (each Phase is explained in detail later in its own section):
- Planning and Intelligence Phase (see Rule 4.1): Determine Mission and weather over the Target, assign Bombers and Crews, and assemble your Escort unit (if any).
- Execute Mission Phase (see Rule 4.2): Fly your Squadron to the Target box, conduct the Bombing Run and fly back to your Base in England.
- Debriefing and Maintenance Phase (see Rule 4.3): Adjust the Campaign VPs according to the gained Mission VPs, take care of the returned Bombers and Crews, check War Progress if called upon, and check for the Victory or Defeat if things become extreme.
4.1 Planning and Intelligence Phase
4.1.1. Advance Mission Counter
Note: Skip this step on the first Turn.
Advance the Mission counter to the next higher numbered box to indicate your Squadron's current Mission number (Turn), and Year.
4.1.2. Mission Deck Check
On Turn "17" (the Mission counter has just advanced to the box "17"), remove all 1942 Mission Cards from the Mission Deck. This action is noted by the Star icon in the "17" box.
Each time the Mission counter crosses over to the new Year's box, add and shuffle the new Year's Blue Undamaged Mission Cards in to the Mission Deck. There aren't any 1945 Mission cards.
On Turn "22" (the start of 1945), remove all Targets that are not located in Germany or Holland from the Mission Deck.
4.1.3. Target for Today
Draw the top Mission Card to determine the Target for today's Mission, and place it face up on the ACTIVE MISSION box of the MISSION MAP. The Mission Card will state the name, Difficulty and Destruction Rating of the Target, as well as the strength of its Flak defense. The Card also determines the minimum number of Bombers required and Escort Fighters available for the Mission, as well as the number of Mission VP's earned for damaging it lightly or heavily.
4.1.4. Target Cloud Cover
To determine the weather over the Target refer to TARGET CLOUD COVER TABLE. Roll 2D6:
- 2-4 = Clear.
- 5-9 = Light Clouds.
- 10-12 = Heavy Clouds.
If the Target Cloud Cover is Light Clouds or Heavy Clouds, place the Cloud Cover counter in the Cloud Cover box on the FORMATION CARD (the corresponding side up).
Note: Due to a Formation Event (see Rules 4.2.8, 5.1) the Cloud Cover can yet change. If it becomes worse than Heavy Clouds, the mission will be recalled.
4.1.5. Wait for Better Weather
The player may decide to wait for better weather. Waiting is simulated by re-rolling the Target Cloud Cover (see Rule 4.1.4). You either keep the result of the first re-roll, or re-roll for the second time, in which case you must keep the result of the second re-roll. Each re-roll will result in the loss of -4 Mission VPs. Adjust the Mission VP counter accordingly.
Note: This way you may start the Mission with a negative number of Mission VPs instead of 0.
4.1.6. Assign Bombers and Crews
4.1.6.1. Select the Bombers
Select the required number of Bombers from the READY Section of the SQUADRON BRIEFING CARD. Place them on the FORMATION CARD boxes in numerical order, one by one, starting from the "1" position in the Lead Element. All positions in an Element must be assigned before starting to assign positions in the next Element.
4.1.6.2. Select the Crews
Assign one READY Crew counter to each assigned Bomber (place it under the Bomber counter or behind it). If you are playing a short, 5 Mission Campaign, the Green Crews should be drawn randomly, otherwise you can selected the ones you want. Crews cannot change Bombers during a Mission.
4.1.6.3. Formation Lead Bomber
The Lead Bomber of the Lead Element is the Formation Lead Bomber.
Note: The selection of the Lead Bomber Crew is important because its Performance plays a significant role in the overall defense capability of your Squadron. Select a Crew with a high Performance Rating if possible.
4.1.7. Additional Bombers
When assigning Bombers to the Formation (see Rule 4.1.6), you may assign additional Bombers (and Crews) over the required number stated on the Mission Card. If you decide to do so, you have to "pay" -3 Mission VP for each additional Bomber. Adjust the Mission VP counter accordingly.
Important: There can never be more than 12 Bombers assigned.
4.1.8. Assemble the Escort Unit
The Mission Card indicates the number of Escort Fighters (called an Escort unit) that will be protecting your Squadron on this Mission.
To assemble an Escort unit:
- Determine the type of Escort Fighters that are available. Refer to the top part of ESCORT AVAILABILITY TABLE. Roll 1D6 and (using the column based on the current Turn number) select the corresponding type.
- To determine the number of Escort Fighters, refer to the Mission Card. Place that number of corresponding Escort Fighter counters in the ESCORTS Section on the FORMATION CARD.
- Finally Roll 1D6 on the ACE TABLE to determine the number of Ace pilots (if any) that will arrive with the Escort unit. Randomly draw that number of USAAF Ace counters and place them on chosen Escort Fighters. There can be no more than one Ace in one Fighter. They will stay paired that way until they leave or are Destroyed.
4.1.9. Place Formation Counter
Place the Formation counter with "Tight" side up on the 8th Air Force Base box.
4.1.10. Mission Route Planning
While not mandatory, it may be helpful to plan a route to the Target box before executing the Mission. You might want to find the most direct route to the Target box while at the same time avoiding as many Flak sites as possible. Also, you may want to consider the range of your Escorts when planning your route.
4.2 Mission Phase
Move your Formation on the MISSION MAP towards the designated Target box, resolve any events or attacks in each Map box entered. Once at the Target box, conduct The Bombing Run procedure. After the Bombing Run, move your Formation back, using the same Mission Phase steps, till you return to the 8th Air Force Base box, and complete the Mission.
4.2.1. Move Bomber Formation
Move the Formation counter to an adjacent box connected by a black line.
4.2.2. Formation Shifting
If the Lead Bomber in any Element has been Destroyed or had to leave the Formation, fill its position with the Bomber at the next higher number in the same Element.
If an entire Element has been eliminated, the Bombers from the next Element (= the Element with the next higher numbers) will shift up to take the place of the eliminated Element, and so forth. So the Formation stays as compact as possible, and each Element has a Lead Bomber assigned.
Example: If the High Element was eliminated, the Bombers from the Low Element would move to the High Element, and the Tail Element would move to the Low Element. If the Lead Bomber in position "4" is missing, move the Bomber currently it position "5" to take its place (or "6" if "5" is also missing).
4.2.3. Loose Formation Check
Your Formation starts each Mission as Tight, but later on it can become Loose (see Rule 5.5), which will negatively affect your defense and bombing efficiency.
If the Formation is currently Loose (Formation counter on the "Loose" side) you may attempt to "Tighten it up" by making a Loose Formation Check.
To conduct a Loose Formation Check: Roll 1D6 and add the Performance Rating of the Crew of the Formation's Lead Bomber (see Rule 4.1.6.3). On a result of 6+ the Formation Tightens up. Flip the Formation counter back to "Tight", and keep it like that till another Event flips it back.
4.2.4. Damaged Aircraft Checks
For each Damaged Bomber and Escort in the Formation, refer to the DAMAGED AIRCRAFT CHECK TABLE. Roll 1D6 and add the Crew's or Ace's (if any) Performance Rating:
- 1-3 = Aircraft Drops Out (see Rule 8.3)
- 4+ = Aircraft Stays in Formation
4.2.5. Escort Range Check
Refer to the FIGHTER ESCORT RANGE TRACKS. Advance the Range Tracking counter to the next higher number along the track.
If the counter exceeds the Maximum Safe Range (the "max" marked box):
- before the Formation reaches the Target box: The Escorts must leave the Formation (remove them from play – see Rule 5.6). They wouldn't have enough fuel to return home if they stayed any longer.
- at the same time or after the Formation has reached the Target box: The Escorts will stay with the Formation for the rest of the Mission. They will share the return path with the Formation.
In both cases, place the Range Tracking counter back into the ESCORT COUNTERS box. You don't need to track the range any more.
4.2.6. Escort Rendezvous Site Check
If the Formation counter is in a ESCORT RENDEZVOUS SITE box, you may check to see if you rendezvous with another Escort Fighter unit.
If the Formation is currently being Escorted you must choose to either keep the current Escort unit or to pick up a new one. Only one Escort unit is permitted during a Mission at a time.
To pick up a new Escort unit:
- Remove the old Escort and Ace counters (if any) from the FORMATION CARD. Place the old Range Tracking counter in the ESCORT COUNTERS box.
- Refer to the bottom part of ESCORT AVAILABILITY TABLE and determine the number of Fighters in the new Escort Unit. Roll 1D6 and (using the column based on the current Turn number) see the corresponding number. If the result states "0", the rendezvous has failed. Skip the rest and proceed to 4.2.7.
- Determine the new Escorts' type and number of Aces, just like you did in 4.1.8.
- Count the shortest path from the nearest England Green box (not the 8th Air Force Base) to the Rendezvous Site and place the Range Tracking counter on the FIGHTER ESCORT RANGE TRACKS box of the same number (the Escorts spent that fuel on the way to the Rendezvous Site). From this point on, you will be tracking the new Escorts' range the same way you tracked the old one (see Rule 4.2.5).
Example: You have just picked up an Escort Unit of four P-47s in the far away Rendezvous Site below Stuttgart. Place the P-47 Range Tracking counter on box "5". If your Formation has already dropped their bombs, the P-47s will stay with you till the rest of the Mission, because the shortest path to the nearest Green England box is "5" (you can place the Range Tracking counter back into the ESCORT COUNTERS box as you don't need to track their range any more).
If your Formation is still on the way to the Target box, the P-47s will leave you on your next Mission Phase at the step 4.2.5.
Note: If you play with "Historically Accurate Escort Units (11.9)", keep in mind that you cannot pick up an Escort in a Rendezvous site before Turn "10".
4.2.7. Flak Site Attack Check
If your Formation counter is in a MISSION MAP box with a Flak Site icon, Roll 2D6 and refer to FLAK SITE ATTACK TABLE.
- 2-6 = Flak Attacks. Resolve it (see Rule 6.0).
Important: If your Formation counter is in a Target box, you do not roll for the Flak Site Attack. You will have to undergo the Approach and Egress Flak Attacks during The Bombing Run (see Rules 4.2.11, 9.2, 9.5) instead. You do roll for the Formation Event as normal.
Important: All boxes with Flak Site Icon that are not located in Germany become inactive in 1945. On Turns "22-25", treat all these boxes as if they were blank.
4.2.8. Formation Event Check
Formation Events are mostly harmful. They will bring enemy interceptors upon your Formation, as well as weather changes and system failures; your Formation may also become Loose and suffer from decreased defense efficiency from then on. The farther you are from your Base, the more likely you will get ambushed by the enemy aircraft.
Note: There are two FORMATION EVENTS TABLES. One for 1942-43, and other one for 1944-45, when Germany lost their air superiority, and thus their interceptors will attack less frequently.
To conduct a Formation Event Check:
- Select the FORMATION EVENTS TABLE corresponding to the year you are in.
- Refer to the appropriate column based on your current distance (the smallest number of Map boxes from your Formation to the 8th Air Force Base box).
- Roll 2D6. If the roll fits in range where "Event Occurs", an Event will occur. Otherwise skip to 4.2.10.
- Roll 2D6 again and read down the column to determine which Event occurs.
Example: It is 1943. The Formation is over Paris, which is 5 boxes away from the 8th Air Force Base box. A 2D6 roll of "4" causes an Event (Event Occurs: 2-6), the second 2D6 roll result of "4" determines the Event is "Lady Luck". Formation Events are covered in detail in Rule 5.1.
4.2.9. Conduct Air Combat
If the Formation Event has brought any Enemy Interceptors in play, conduct the Air Combat (see Rule 7.0).
4.2.10. Check if your Formation is Tight, and Repeat the Previous Steps
If you lost any Bombers during 4.2.1 – 4.2.9, make sure your Formation stays Tight (see Rule 5.5).
Starting with Movement to another Map box, repeat the previous steps (Rules 4.2.1 – 4.2.9) until your Formation enters the Target box.
4.2.11. Conduct the Bombing Run
If the Bomber Formation is over the Target box, you must conduct The Bombing Run (see Rule 9.0).
Important: You can conduct the Bombing run only once each Mission.
4.2.12. Mission Victory Points
Adjust the Mission VP counters to reflect the number of VP's gained for bombing the Target.
4.2.13. Return to the Base
Repeat the steps 4.2.1 – 4.2.9 to move the Formation along a return path back to the 8th Air Force Base box. If you are in the Base box, you can land.
4.2.14. Land Aircraft and Upgrade Crews
4.2.14.1. Land Aircraft
When the Formation has made it back to the 8th Air Force Base box, each Bomber in the Formation rolls a 1D6 + the Bomber's Performance Rating + Crew's Performance Rating and consults the LANDING TABLE to determine how well each Bomber lands.
4.2.14.2. Upgrade Crew Experience
For each surviving Crew that has returned from the Mission, roll a 1D6:
- If you are checking a Green Crew and a "5" or "6" is rolled, the Green Crew is upgraded. Replace the counter with a randomly selected Veteran Crew counter.
- If you are checking a Veteran Crew and a "6" is rolled, the Veteran Crew is upgraded. Flip it over to its Crack Crew side.
- Crack Crews cannot be upgraded any higher.
Note: After completing a Campaign, it is suggested to use "The Crew Log" (see Rule 11.3) for upgrading Crew Experience instead.
Move any Damaged Bombers and their Crews to the NOT READY Section on the SQUADRON BRIEFING CARD, and the undamaged Bombers and their Crews to the READY Section. Keep the Bombers and Crews in separate piles (unless you play with 11.8).
4.3 Debriefing and Maintenance Phase
The Mission is complete. Clean up, adjust the Campaign VPs, take care of the landed Bombers and Crews, check War Progress if called upon. If this was the last Mission in the Campaign, conclude the Campaign.
4.3.1. Clean Up
If still on the table, shuffle the Active Mission Card back into the Mission Deck. Place the Range Tracking counter back on the ESCORT COUNTERS box (if not there yet).
Remove from play all Escort and Ace counters (see Rule 5.6). Keep the Cloud Cover counter at hand.
4.3.2. Campaign Victory Points
4.3.2.1. Determine Mission Victory Points
Throughout the Mission, you should keep track of the VPs gained or lost by referring to the MISSION VICTORY POINTS TABLE, and adjusting the Mission VP counters on the MISSION VP TRACK. When the Mission is complete the Mission VP's are translated into Campaign VPs, determining the Campaign Progress.
4.3.2.2. Determine Campaign Progress
Referring to the CAMPAIGN PROGRESS TABLE adjust the Campaign VP counters on the CAMPAIGN VP TRACK according to the amount of the Mission VP's earned this Turn.
4.3.2.3. Determine Campaign Success
When you have completed the required number of Missions for the Campaign, compare your final Campaign VPs with the CAMPAIGN SUCCESS TABLE, to determine your level of success.
4.3.2.4. End Of Game Check
If the required number of Missions have been completed, the game is over. Check CAMPAIGN SUCCESS TABLE to see what you achieved.
4.3.3. Damaged Bombers Repair and Replacement
4.3.3.1. Damaged Bomber Repair
Consult the REPAIR / RECOVER TABLE. For each Bomber in the NOT READY Section of the SQUADRON BRIEFING CARD Roll 1D6:
- 1-3 = No Effect.
- 4-6 = Repaired.
Move all Repaired Bombers to the READY Section; they will be available for the next Mission.
4.3.3.2. Bomber Replacement
Bombers that were Destroyed during the Mission are removed from play (see Rule 5.6).
If your Squadron has less than 12 Bombers (or less than 14 Bombers in 1945), roll 1D6 per a lost Bomber on the B-17 or B-24 BOMBER REPLACEMENT TABLE, and use the column based on the current Turn/Year to determine what type of a replacement Bomber. If you are out of counters for of that particular type, replace it with the type that is available in your out-of play counter pool.
Important: You either play with B-17s or B-24s. Use the corresponding table throughout the whole Campaign.
If a new Bomber arrives, take it from the out-of-play counter pool, and place it in the READY Section of the SQUADRON BRIEFING CARD. Also, randomly draw a Green Crew counter for the new Bomber.
4.3.4. Crew Recovery
Consult the REPAIR / RECOVER TABLE. For each Crew in the NOT READY Section on the SQUADRON BRIEFING CARD, roll 1D6:
- 1-2 = No Effect.
- 3-6 = Recovered.
Add all newly recovered Crews to the pile of Ready Crews in the READY Section; they will be available for the next Mission.
4.3.5. War Progress Events Check
Refer to the MISSION TURN TRACK. If the Mission counter is on a box with the War Event icon, roll 2D6 on the WAR PROGRESS EVENTS TABLE and apply the results.
Here is an overview of all possible War Event Results:
- ME-262s Arrive in 1943: For the duration of 1943, use the 1945 row on the ENEMY INTERCEPTOR TYPE TABLE. You may place a reminder counter on the MISSION TURN TRACK. No Effect if rolled again or later than in 1943.
- Allies Advance: +2 Campaign VPs.
- Stalemate: No Effect.
- Axis Advance: -1 Campaign VP.
- V-2 Rocket Attack on London: Advance Mission counter one box.
- Drop Tanks arrive in 1943: While you are in 1943, add 3 to the Maximum Safe Range of your Escorts. No Effect if rolled again, or after 1943. You may place a counter on the MISSION TURN TRACK as a reminder.
5.0 Selected Game Concepts in Detail
The following section details specific rules and concepts used during the course of play.
5.1 Formation Events
Formation Events occur during the Formation Event Check (see Rule 4.2.8).
Here is an overview of all possible Formation Event Results:
- Systems Trouble: One random Bomber (see Rule 5.4) must Roll 1D6: a 1-3 results in "Systems Trouble"; the Bomber is damaged. If the Bomber is already damaged, it Drops Out (see Rule 8.3).
- Lady Luck: Draw a Random Lady Luck counter; if you already hold all seven, ignore this Event. Lady Luck counters are discarded when used, but can be obtained again with another occurrence of this Event.
- Weather Change: If you are on the way to the target box, Roll 1D6:
- 1-3 the weather gets one step better (Heavy Clouds > Light Clouds > Clear).
- 4-6 the weather gets one step worse (Clear > Light Clouds > Heavy Clouds > Unacceptable).
If the weather becomes Unacceptable, the Mission is recalled, return to the base.
- Formation Check: Roll 1D6 + Performance Rating of the Crew in the Formation's Lead Bomber:
- 1-5 = Loose Formation.
- 6+ = Tight Formation.
- Enemy Fighters: Roll 1D6 (+2 in 1942-44, +0 in 1945). The result is the number of Enemy Fighters that come into play and start Air Combat. Proceed to 7.0 to initiate Air Combat.
If you are in the Target box or on the way back, the weather is not your concern anymore; ignore it and Roll 1D6:
- 1-4 No Effect.
- 5-6 Lady Luck.
5.2 Lady Luck Counters
The seven Lady Luck counters each provide some sort of beneficial effect for the U.S. Player. A Lady Luck counter is drawn randomly as a result of the Formation Event Check. Once drawn, it remains in your possession till used. It can be used at any applicable time during a Mission, at which point it is discarded but can be obtained again with another Event occurrence (unless you hold all seven already).
Note: We advise you refer to the detailed descriptions below any time you receive a Lady Luck counter. For obvious reasons the counters hold the information in brief and incomplete form.
Here is a detailed overview of the Lady Luck counters and their effects:
- Wing and a Prayer: Discard to ignore any Damage result.
- Clear Skies Ahead: Discard to ignore a Weather Change Event result. Weather over the Target improves one step (Heavy Clouds > Light Clouds > Clear). If Clear, it stays Clear.
- Bench Mark: Discard to ignore a Loose Formation Event result, or to change one "Fate" result to a more favourable number.
- Angel on my Side: Discard to ignore a Crew Damage (see Rule 8.4).
- Right on the Chin: Discard to add +2 Hits to any Bombing result.
- Smooth Landing: Discard to change a Landing result to a more favourable number.
- Covering Arcs: Discard to add +1 to all Bombers' Air Combat rolls for one Round.
5.3 Fighter Aces
Both sides in the game have several Ace counters that are randomly generated by the ACE TABLE when required.
Each Fighter Ace has a particular Air Combat (yellow) and Performance (white) Rating, which provide bonuses to his Fighter (Escort or Interceptor) ratings.
When an Ace comes into play, it is randomly chosen from among the available Ace counters and paired with a participating aircraft counter (maximum of one Ace in one Fighter). They will stay paired until the Fighter is Destroyed or leaves the play, in which case the Ace is removed from play together with the paired Fighter counter (see Rule 5.6).
5.4 Random Bomber Selection
When asked to randomly select a Bomber from within the Formation, refer to the RANDOM BOMBER SELECTION TABLE. Roll 1D6 and cross reference the result with the "Number of Elements" column to determine the random Bomber Element. Finally, assign values from 1-6 evenly among the Bombers in the Element and Roll 1D6 to determine which Bomber is affected.
Example: There are 3 Elements in the Formation. 1D6 = 2. The result points to the Lead Element. Roll again. 1D6 = 1. The random Bomber is the one on the left side of the Lead Element.
5.5 Loose Formations
Your Bomber Squadron always begins a Mission in Tight Formation. During the Mission, either as a result of a Formation Event, or if you lose enough Bombers, it may become Loose.
If your Formation is currently Tight, you need to check whether you have lost enough Bombers to become Loose at the start of each step 4.1.8. Refer to the LOOSE FORMATION TABLE to determine how many Bombers your Formation must lose to become Loose. The "Base number" is initially the number of Bombers you started the Mission with. If you had lost some, became Loose, but managed to tighten up, the new number of Bombers in your Formation becomes the new Base number, and so forth (note it down).
If your Formation becomes Loose, turn the Formation counter over to its "Loose" side. A Loose Formation will stay Loose for the rest of the Mission unless tightened up during the Loose Formation Check (see Rule 4.2.3).
Example: Look at the LOOSE FORMATION TABLE. You started the Mission with a Tight Formation of 9 Bombers. On a Turn, you lose one Bomber during a Damaged Aircraft Check, and then another two are destroyed by Enemy Interceptors. You will check your situation in 4.1.8 and became Loose (the Base number was 9 and you have lost 3). You manage to tighten up and become Tight. Your new Base number is 6, so now, if you lose a single Bomber, you will became Loose again.
5.5.1. Harmful Effects of a Loose Formation
All Bombers in a Loose Formation receive a -2 Air Combat Modifier when conducting their Defensive Fire against attacking Interceptors. Loose Formations also cause a -2 Row Shift to their Bombing Attack (see Rule 9.3) during The Bombing Run.
5.6 Out-of-Play Counter Pool
Damaged Interceptors, Destroyed Aircraft and Escorts that reached their Maximum Safe Range (before Target box) are removed from play. Green Crews and all Aircraft are considered generic, and once removed, they can later return to the same Campaign (see below).
Important: Named Crews that have been Destroyed with their Aircraft are lost and can never return to the Campaign. Put them back into the game box.
Counters that have been removed from play, together with any unused counters, create a pool of counters that are out of play but can be called into play at any time by various game mechanics (Bomber Replacement, a new Escort Unit, Enemy Attack, Green Crew upgrade,…).
5.7 Year 1945
This game reflects the great changes that had been in progress in the beginning of 1945:
- On Turn "22", remove all Targets that are not located in Germany or Holland from the Mission Deck.
- All Map boxes with Flak Site Icon that are not located in Germany or Holland become inactive in 1945. On Turn "22-25", treat all these boxes as if they were blank.
- On Turn "22-25", all Flak Site Attacks call for +2 row shift.
- The "Enemy Fighters" Event doesn't add any bonus to the rolled quantity of Interceptors.
- The maximum number of Bombers (ready or not) increase to 14 (see Rule 4.3.3.2). You still cannot assign more than 12 Bombers to a Mission.
Historical Note: After the successful amphibious invasion to Europe in June 6, 1944, the Allies started slowly pushing Nazis back to Germany. In the Fall of 1944 their advancement accelerated, and it the start of 1945, they have already liberated France and Belgium. Because of the lack of Aircraft, Germans, who have withdrawn their forces behind the Rhine, intensified way more accessible Flak to protect their skies.
6.0 Flak Attack
There are three kinds of Flak attacks you can run into while playing this game: Flak Site Attack (see Rule 4.2.7), Approach Flak (see Rule 9.2), and Egress Flak (see Rule 9.5).
To resolve a Flak Attack:
-
Determine the Attack Factor:
- If this is Flak Site Attack: Roll 1D6 and see the FLAK SITE ATTACK TABLE:
- 1-3 = Light, Attack Factor = 8.
- 4-5 = Moderate, Attack Factor = 12.
- 6 = Heavy, Attack Factor = 15.
- If this is Approach or Egress Flak, the Attack Factor is not rolled, it is written on the Mission Card.
- If this is Egress Flak and you inflicted a Heavy Hit on the Target, the Attack Factor = 8.
- If this is Flak Site Attack: Roll 1D6 and see the FLAK SITE ATTACK TABLE:
-
Determine the number of Attack Dice: Consult the ATTACK DICE TABLE and cross-reference the Attack Factor with the number of Bombers in the Formation ("Number of Targets" column).
- If this is Flak Site Attack, apply row shift modifier +2 if you are in 1945.
- If this is Approach or Egress Flak, apply the following row shift modifiers:
- -1 if Light Clouds (not if at Low Altitude).
- -2 if Heavy Clouds (not if at Low Altitude).
- +3 if at Low Altitude.
- The result is a number of D6 you must roll to Attack each Bomber in the Formation.
Example: A Formation of 6 Bombers enters a Map box with a Flak Icon. Your roll 2D6 to find out if the Site attacks and the result is "3", which means the Formation is attacked. Then you roll 2D6 to determine the Flak Strength. The result of "5" means the Flak attacks with Moderate strength. The ATTACK DICE TABLE shows that each Bomber in the Formation will be attacked with 3D6 (Attack Factor = 12, Number of Targets = 6).
Note: The Example above rolls 2D6 for Flak Strength, while step 1 of the Flak Site Attack calls for 1D6. Transcribed as printed.
7.0 Air Combat
Air Combat is conducted on the FORMATION CARD. Air Combat usually composes of a Dogfight (see Rule 7.1), followed by combat between Bombers and surviving Interceptors (see Rule 7.2).
7.0.1. Generate Interceptors
The number of attacking Interceptors is generated by the Formation Event that has initiated Air Combat.
To generate the attacking Interceptors:
- Determine the enemy Interceptor type. Refer to the ENEMY INTERCEPTOR TYPE TABLE. Roll 1D6 and (using the row based on the current year) select the corresponding type.
- Place the generated number of Interceptor counters in the INTERCEPTORS section of the FORMATION CARD.
- Finally Roll 1D6 on the ACE TABLE to determine the number of German Aces (if any) that will arrive with the attacking unit. Randomly draw that number of German Ace counters and place them on chosen Interceptors. There can be no more than one Ace in one Interceptor. They will stay paired that way until they leave or are Destroyed.
- If there are any Escort Fighters in the ESCORT Section, proceed to 7.1. Otherwise proceed straight to 7.2.
7.1 Dogfight
Dogfight is a Fighter vs. Fighter part of the Air Combat. Dogfight will be resolved in one or two Dogfight rounds.
Note: After you have read this chapter, you may want to see the extended example 10.1.
7.1.1. Position Interceptors
Line up all the Interceptors in one row, from left to right, across the top of the INTERCEPTORS Section. Make sure the Interceptors with Aces are placed first (in any order).
7.1.2. Aggressive Escorts
Refer to the AGGRESSIVE ESCORTS TABLE to determine how many Escort Fighters will break off to meet the Interceptors. Move at least that many Escorts from the ESCORT Section to the INTERCEPTORS Section.
Escorts that did not break off must stay in the ESCORT Section and cannot join this Dogfight. They must wait till the Interceptors make it through to the Bombers, and then they can provide Cover Support (see Rule 7.2.1) for the defending Bombers.
Note: It is suggested to use any Escorts with Aces in the Dogfight since Escort Cover Support (see Rule 7.2.1) only works as a -1 Air Combat Modifier to the Enemy fire, and its Ratings are ignored.
7.1.3. Resolve Dogfight
7.1.3.1. Engage Leaders
Each Escort Fighter in the INTERCEPTORS Section can attack one Interceptor. Pair Escorts with their enemies, so that the pairs face each other. These pairs are called Engaged Leaders.
Important: You must Engage with all German Aces first, if possible.
7.1.3.2. Assign Wingmen
If there are more Escorts than Interceptors, you may assign each extra Escort as a Wingman to one of their own Leaders.
If there are more Interceptors than Escorts, you may assign each extra Interceptor as a Wingman to one of their own Leaders.
Position the Wingman behind the chosen Leader. There can be no more than one Wingman to one Leader. A Wingman does not attack, it becomes a +1 Air Combat Modifier token to their Leader's attack (see AIR COMBAT MODIFIERS TABLE).
If there is a greater than 2:1 odds for one side over the other and thus there are remaining Fighters even after the Wingmen have been assigned, such remaining Fighters cannot participate in this Dogfight round.
7.1.3.3. Determine Advantage and Fire
For each pair of Engaged Leaders, from left to right, determine the Advantage and Fire.
Compare the Aircraft Performance Ratings (+ Ace's Performance Rating if applicable) of the Leaders in each set. The Fighter with the higher total is considered the Attacker and fires first. If the Defender is not Destroyed by the attack, it fires right after the Attacker.
Important: If an Aircraft is Damaged in Air Combat, its counter is immediately flipped to the Damaged side. When it returns fire (as a Defender), it will use the Damaged side Ratings. Similarly, if an Aircraft is Destroyed, it is removed from play and will not return fire.
If none of the Engaged Aircraft has Advantage (they both have the same Performance), resolve Air Combat simultaneously - let one side attack first and the other side right after, and then apply the Damage effects simultaneously to both Fighters.
To resolve each Fighter Attack:
- Subtract the Defender's Structure Rating from the Attacker's Air Combat Rating.
- Add +1 to the result if the Attacker has a Wingman. The total number is an Air Combat Modifier.
- Roll 2D6, add the Air Combat Modifier and consult the FIGHTER COMBAT TABLE to see what Damage the Defender received.
See Rule 8.1 for detailed information on the Damage results.
7.1.3.4. Conclude the Dogfight Round
If all Engaged pairs have fired, the Dogfight round is over. Remove all Damaged Interceptors from play, release all Wingmen. If there are still some Engaged pairs left, they will stay Engaged to the 2nd Round.
If there aren't any Interceptors in play, the whole Air Combat is over, proceed to 7.3.
-
If this was the 1st Dogfight Round, decide for each unengaged Escort if it is going to continue fighting or if it is going to withdraw. Move the withdrawn Escorts below the ESCORT Section.
If there aren't any Escorts in the INTERCEPTORS Section after this step, proceed to 7.2, otherwise start the 2nd Dogfight round:
- position all unengaged Interceptors (see Rule 7.1.1),
- then proceed to 7.1.3.1.
-
If this was the 2nd Dogfight Round, move all Escorts that are in the INTERCEPTORS Section below the ESCORT Section. Keep the undamaged Interceptors in play and proceed to 7.2.
Important: If an Escort Fighter participated in the Dogfight, even if only for one round, it cannot participate in the Interceptors vs. Bombers Air Combat.
7.2 Interceptors vs. Bombers Air Combat
Interceptors in the INTERCEPTORS Section will now attack the Bomber Formation.
Interceptors vs. Bombers Air Combat will be resolved in one or two rounds.
Note: After you have read this chapter, you may want to see the extended example 10.2.
7.2.1. Cover Support
Escorts that didn't participate in the Dogfight can provide Cover Support. If there are any Escort Fighters remaining in the ESCORT Section, you may assign any number of them to provide Cover Support to the Bombers. Escorts are assigned to Elements. They do not attack, they provide -1 attack modifier (cumulative) to each Interceptor in the Element (see AIR COMBAT MODIFIERS TABLE).
Hint: Cover Support is an efficient way to deal with advanced types of Interceptors you don't want to meet in Dogfight as well as to give a purpose to your Damaged Escorts that are not very useful in Dogfight.
7.2.2. Interceptors Engage with Bombers
For each Interceptor, determine randomly which Bomber it attacks (see Rule 5.4 for details). Each Interceptor will become Engaged with one Bomber.
Place each Interceptor adjacent to the Bomber it is Engaged with. Multiple Interceptors may be Engaged with the same Bomber, the attacks are however resolved individually.
7.2.3. Determine Advantage and Fire
Resolve combat in each Element that has pairs/groups of Engaged Aircraft. Aircraft in each pair/group will fire in order of their Performance. After all attacks in one Element have been resolved, move to the next Element etc.
7.2.3.1. Bomber Fire
A Bomber's Defensive Fire is resolved separately against each Interceptor it is Engaged with.
To resolve the Defensive Fire:
- Subtract the Interceptor's Structure Rating from the attacking Bomber's Air Combat Rating.
- Refer to the AIR COMBAT MODIFIERS TABLE (Bomber Defensive Fire), and apply any applicable modifiers to the result to get an Air Combat Modifier.
- Roll 2D6, add the Air Combat Modifier and consult the FIGHTER COMBAT TABLE to see what Damage the target Interceptor received.
See Rule 8.1 for detailed information on the Damage results.
7.2.3.2. Interceptor Fire
An Interceptor attacks the Bomber it is Engaged with.
To resolve each attack:
- Subtract the Bomber's Structure Rating from the attacking Interceptor's Air Combat Rating.
- Refer to the AIR COMBAT MODIFIERS TABLE (Fighter Fire), and apply any applicable modifiers to the result to get an Air Combat Modifier.
- Roll 2D6, add the Air Combat Modifier and consult the BOMBER COMBAT TABLE to see what Damage the target Bomber received.
See Rule 8.2 for detailed information on the Damage results.
Example: Two Interceptors with Performance 4 are engaged with a Bomber that has Performance 3. First, one of the Interceptors fires at the Bomber. Apply the Damage results. Then (if the Bomber hasn't been Destroyed), the second Interceptor fires at the Bomber. Apply the Damage results. Then (if the Bomber hasn't been Destroyed), the Bomber fires separately at each of the two Interceptors (in any order).
7.2.4. Conclude the Air Combat Round
Remove from play all Destroyed Aircraft and any Damaged Interceptors. Move all undamaged Interceptors back to the INTERCEPTORS Section. You can leave one undamaged Cover Support Escort in each Element for the 2nd Round. Move the rest of them below the ESCORT Section. They are done fighting in this Air Combat.
If there aren't any remaining Interceptors, or if this was its 2nd Round, the Air Combat is over, proceed to 7.3. Otherwise conduct the 2nd Round of attacks (repeat the above steps starting from Rule 7.2.1).
7.3 Conclude Air Combat
All Escorts (on and below the FORMATION CARD) are returned to the ESCORT Section. All Interceptors are removed from play. Proceed to Rule 4.2.10 of the Mission Phase.
8.0 Combat Results in Detail
8.1 Air Combat Results, Fighter Damage
Detailed explanation of the FIGHTER COMBAT TABLE results:
- Destroyed: Immediately remove the Fighter (and its Ace, if any) from the game (see Rule 5.6). Adjust the Mission VPs accordingly.
- Damaged: Flip the Fighter to its Damaged side. If it was already Damaged, it is now Destroyed (see above).
- Miss: No Effect.
Note: Dealing Damage to a Fighter is simple. Dealing Damage to a Bomber is a more complex procedure.
8.2 Air Combat and Flak Results, Bomber Damage
Detailed explanation of the BOMBER COMBAT TABLE results:
- Fatal Hit / Destroyed: The Bomber is Destroyed. Immediately remove it and its Crew from the game (see Rule 5.6). If the Crew was named, it cannot be used again during this Campaign. Adjust the Mission VPs accordingly.
- Heavy Hit: The Bomber was badly hit. If it was already Damaged, it is now Destroyed (see above). Otherwise carry out a Crew Damage Check (see Rule 8.4) and Roll 1D6:
- 1-3: Damaged. Flip the Aircraft to its Damaged side.
- 4-6: Damaged. The Bomber Drops Out of the Formation (see Rule 8.3).
- Light Hit: The Bomber was hit. Roll 1D6:
- If it was Undamaged:
- 1-3: No effect, just a scratch.
- 4-6: Damaged. Flip the Aircraft to its Damaged side.
- If it was already Damaged:
- 1-3: No additional Effect.
- 4-6: The Bomber Drops Out of the Formation (see Rule 8.3).
- If it was Undamaged:
- Miss: No effect.
A Fighter that Drops Out due to the Damaged Aircraft Check (see Rule 4.2.4) will leave the Formation and it is removed from play.
8.3 Aircraft Drops Out
A Bomber that Drops Out of the Formation is considered to be on the way back to the 8th Air Force Base. Roll on the LOST BOMBER FATE TABLE to determine what happens on its return flight. Count the number of MISSION MAP boxes the Bomber would have to fly through to reach the nearest Green England box to determine the distance. Roll 1D6 + its Performance Rating + its Crew's Performance Rating, and cross-reference the result with the distance to determine the Bomber's fate.
- Bomber Returns to Base: Place the Bomber and its Crew in the READY Section of the SQUADRON BRIEFING CARD. If Damaged, place the Bomber and its Crew in the NOT READY Section. The Crew is eligible for Experience upgrade (see Rule 4.2.14.2).
- Bomber Fails to Return: The Bomber has been Destroyed together with its Crew.
8.4 Crew Damage
If a Bomber receives a Heavy Hit as a result of Air Combat or Flak Attack (but it is not Destroyed), check to see if the experience of its Crew was reduced due to casualties.
Roll 1D6: 1-3 = There were causalities and the experience level of the Crew was reduced one step.
- A Crack Crew is reduced to Veteran, flip it to its Veteran side.
- A Veteran Crew is removed from play and replaced by a randomly selected Green Crew (from out-of-play counter pool, see Rule 5.6). The removed Veteran Crew can be later used again when a Green Crew gets upgraded.
- Green Crews are never reduced.
9.0 The Bombing Run
If the Formation is in the Target box (Rule 4.2.11 of the Mission Phase), follow the steps below.
9.1 Bombing at Low Altitude
You may raise your chances of a successful Bombing Run (especially if the Cloud Cover is unfavourable) by deciding that the bombing will be conducted at Low Altitude. Decide now.
Hint: The low Altitude bombing comes with harder Approach and Egress Flak (see below).
9.2 Conduct Approach Flak Attack
Resolve the Flak Attack (see Rule 6.0).
9.3 Conduct Bombing Attack
To Bomb the Target:
-
Total the Bomb Attack Ratings of all Bombers remaining in the Formation. This is your Attack Factor.
Note: The Crews do not add their Bombing skill to their Bombers. Only the Formation Lead Bomber's Crew adds their skill to the positive row shift (see below). A Formation would drop their loads only on the Lead Bombardier's command.
-
Consult the ATTACK DICE TABLE and cross-reference the Attack Factor with the column "1" (there is only one Target), to determine the number of Attacks the Target receives.
-
Apply all applicable row shift modifiers:
-
+/- for the Bombing Rating of Crew in the Formation Lead Bomber.
Note: If the Formation Lead Bomber is currently missing, there is no shift.
-
-2 for Loose Formation.
-
- Target Difficulty Rating.
-
+2 if at Low Altitude.
-
-
Roll 1D6 for each Attack. Consult the TARGET CLOUD COVER TABLE for "Hit Requirement". Each die within the range counts as a Hit.
- Clear: Hits on a 3-6.
- Light Clouds: Hits on a 4-6.
- Heavy Clouds: Hits on a 6.
-
Consult the TARGET DAMAGE TABLE. Find the Target's Destruction Rating. Read down that column to the range of the Hits you scored. Read across right to determine the result.
9.4 Bomb Damage Assessment
If the Target is an Undamaged (Blue) Mission Card:
- If it receives Heavy Damage, remove both Undamaged (Blue) Mission Card and Damaged (Red) Mission Card of the same name from play, and place them on the COMPLETED MISSIONS box of the MISSION MAP. For causing Heavy Damage to the Target, you receive the higher VP Value listed (to the left of the slash) on the Undamaged (Blue) Mission Card.
- If it receives Light Damage, remove the Undamaged (Blue) Mission Card from play and replace it with the Damaged (Red) Mission Card of the same name, then shuffle the Mission Deck. For causing Light Damage to the Target, you receive the lower (red) VP Value listed (to the right of the slash) on the Undamaged (Blue) Mission Card.
- If it receives an Ineffective result, shuffle it back into the Mission Deck. No VP's are earned.
If the Target is an already Damaged (Red) Mission Card:
- If it receives Heavy Damage, remove the Target's Damaged (Red) Mission Card from play, and place it on the COMPLETED MISSIONS box of the MISSION MAP. You earn the VP Value listed on the Damaged (Red) Mission Card.
- If it receives Light Damage, shuffle it back into the Mission Deck. No VP's are earned in this case.
- If it receives an Ineffective result, shuffle it back into the Mission Deck. No VP's are earned.
9.4.1. Major Targets
Major Targets are large areas that can be scored more than once. These Targets have only one Mission Card - an Undamaged (Blue) Mission Card.
Important: Major Targets are always shuffled back into the Mission Deck, so they can be scored repeatedly.
Note: Major Targets by the year they become available for attacks are: 1942: Antwerp / 1943: Paris, Wilhelmshaven / 1944: Berlin, Hamburg, Stuttgart, Vegesack.
9.4.2. 1944 Mission Cards (including 1944 Major Targets)
You are expected to cause a bit more than Light Damage with your 1944 arsenal. The 1944 Mission Cards have no VP Value for Light Damage (red number) on their Undamaged (Blue) Mission Card. To receive VP's for a 1944 Undamaged (Blue) mission Card, you must cause Heavy Damage. Light Damage has no effect. When you cause a Heavy Damage to:
- An Undamaged (Blue) 1944 Mission Card, score VPs, remove it from play and replace it with its Damaged (Red) counterpart (unless it is a Major Target, in which case shuffle it back into the Mission Deck).
- A Damaged (Red) 1944 Mission Card, score VPs and shuffle it back into the Mission Deck, so it can be scored again.
9.5 Conduct Egress Flak Attack
Resolve the Flak Attack (see Rule 6.0). Keep on mind that Egress Flak hits only on "6".
10.0 Extended Air Combat Examples
10.1 Dogfight Example
The Formation Event "Enemy Fighters" generated 5 attacking ME-109 Interceptors, one of them with an Ace.
1. Start of the 1st Round situation
Your Formation of 6 Bombers is protected by 6 Escort P-47 fighters. You rolled "2" on the AGGRESSIVE ESCORTS TABLE, which means at least one P-47 must break off and attack. You decide to send two of them to the Interceptor section to meet the Interceptors.
2. Engage and Fire
The opposing Aircraft will pair up. Escort F will Engage with Interceptor A (the Interceptors with Aces must be Engaged first) and Escort G will Engage with Interceptor B. Interceptors C and D will take the Wingmen posts. Since there is just too many Interceptors and too few Escorts, Interceptor E will have to stay out of combat this Round (see Rule 7.1.3.2). The Aircraft took their positions. Now, they will fire pair by pair, in order of their Performance Ratings.
Interceptor A has an Ace, and thus its Performance is 4. It will now fire at Escort F that has Performance only 3. A's Combat Rating is 5 (4 + 1 for the Ace), and F's Structure is 3. The difference is 2. Since the Interceptor has a Wingman (C), add +1, and so the final Air Combat Modifier is 3. You roll 2D6 and get 7 + Air Combat Modifier of 3 = 10. Check the FIGHTER COMBAT TABLE and you see that the Defending Escort (F) was Damaged. Flip F's counter to the Damaged side.
Now it is F's turn to fire back. Damaged F's Combat Rating is 4 (2 + 2 for the Ace), no Wingman, and A's Structure is 2. 2D6 of 6 + Air Combat Modifier of 2 = 8. The Interceptor A becomes Damaged. Flip A's counter to the Damaged side.
The second pair of Engaged Leaders will fire next. They both have Performance 3, and so they will fire at each other at the same time. You start with the Interceptor B. 2D6 = 11. 11+2 (4+1-3) = 13. The Escort G is Destroyed and will be removed from play. Adjust your Mission VP's by -1. However, because their equal Performance, the Escort can fire at the Interceptor yet before it explodes. 2D6 = 5. 5 + 2 (4-2) = 7. It sadly misses the Interceptor by a hair. Remove the Destroyed Escort from play (to out-of-play counter pool).
3. End of the 1st Round
All Aircraft will now disengage. The damaged Interceptor A is removed from play together with its Ace (to out-of-play counter pool). You decide to withdraw the Damaged Escort F from the Dogfight, and so you move it (together with its Ace) under the Escort section. It has to wait there, until the whole Air Combat is over. Since there are no Escorts to stop them anymore, the 4 surviving Interceptors will line up in the Interceptor section to attack the Bombers.
Note: If you decided to leave the lonely Escort F in the Dogfight, there would be the 2nd Round of it - one pair, one Wingman, and two Interceptors out of combat.
Note: If the Escort G weren't Destroyed, it would have to stay Engaged with the Interceptor B. In that case, there would be a good reason not to withdraw the Damaged Escort F, because it could work as G's Wingman in the 2nd Round, without risk of being Destroyed.
[Diagram: Dogfight Example, steps 1–3. Captions: "Two Escorts break off and hurry to combat the Enemy." "Pair by pair, the Leaders fire in order of their Performance." "Ready to attack the Bombers." "Ready to provide Cover Support." "Withdrawn Escorts are out of the whole Air Combat."]
10.2 Interceptors vs. Bombers Example
Your 6 Bombers are formed in Lead and High Element. The four surviving Interceptors from the example 10.1 are about to attack the Formation.
1. Engage and Fire
First of all, move any number of unused Escorts (from the Escort section) to the Elements where you want Cover Support. They will cumulatively provide a -1 modifier to the Interceptors' Attacks. You don't know yet which Element will be attacked, and so you have to position them blindly. You decide to move two Escorts to protect the Lead Element, one Escort to the High Element, and you leave one Escort unused for a possible 2nd Round. There is a maximum of 3 Cover Support Escorts in one Element.
The 4 surviving Interceptors, in this Example marked A-D, will randomly Engage with one Bomber each (use either the RANDOM BOMBER SELECTION TABLE or any kind of a working method you like). Interceptors A and B will engage with the leftmost Bomber in the High Element, C will engage the Leader of the High Element, and D will boldly engage the Formation Leader.
Let's focus on the High Element first. Let's start with the first group of Engaged Aircraft – Interceptors A and B are attacking the leftmost B-17 with a Green Crew in it. Since the B-17's Performance Rating is 1 (2-1 for the Green Crew), the Interceptors will Fire first. A and B have the same Performance, so let's start with the Interceptor A.
A's Combat Rating is 4, and B-17's Structure is 4. The difference is 0. Now check the AIR COMBAT MODIFIERS TABLE (Fighter Fire), and you see you also have to add -1 for the one Escort that provides Cover Support, and +1 for the Interceptor B attacking the same Bomber.
And so the final Air Combat Modifier is 0. Now, you roll 2D6 and get 8 (+0) = 8. Check the BOMBER COMBAT TABLE and you see that the B-17 received a Light Hit. Roll 1D6 to see how bad it is. The result of 4 means the B-17 has been Damaged. Flip its counter to the Damaged side.
Now, the Interceptor B fires. B's Combat Rating is 4, and the Damaged B-17's Structure is 3. The difference is 1. Add -1 for the one Escort that provides Cover Support, and +1 for the Interceptor A attacking the same Bomber. And so the final Air Combat Modifier is 1. Now, you roll 2D6 and get 7 (+1) = 8. The BOMBER COMBAT TABLE tells you the B-17 received a Light Hit again. Roll 1D6 to see how bad it is this time. You roll 5, and because it is Damaged already ("If previously Damaged"), the B-17 Drops Out yet before it can return the fire. Consult the LOST BOMBER FATE TABLE. Your Formation is 4 boxes away from the Base, and this time you roll 6 (+0-1). The result is 5, and it reads "Bomber Returns to Base". Place the Bomber and Crew in the NOT READY Section of the SQUADRON BRIEFING CARD. No Mission VPs were lost.
Note: If the B-17 didn't leave the Formation, it would successively fire at each Interceptor it was engaged with.
Interceptor C is engaged with the Lead Bomber in the same Element. Both Aircraft have the same Performance (B-17's Crew is adding +1 to it), and so
they will fire at the same time (which means the Damage will be applied only after they both have fired). Let's start with the Interceptor C.
C's Combat Rating is 4, and the B-17's Structure is 4. The difference is 0. Add -1 for the one Escort that provides Cover Support. Now, you roll 2D6 and get 4 (-1) = 3. The BOMBER COMBAT TABLE tells you the shot has missed.
Now it is the B-17's turn to fire back at the attacker. The Bomber's Combat Rating is 3, and the C's Structure is also 3. The difference is 0. Add +1 for the one undamaged, unengaged Bomber in the same Element. Now, you roll 2D6 and get 8 (+1) = 9. The Interceptor is Damaged. Flip it over.
This is it for the High Element. Another Element we need to resolve is the Lead Element, which has one engaged group. Let's just say the Lead Bomber fired first, and managed to Destroy the Interceptor D.
2. End of the 1st Round
All Aircraft will now disengage. The damaged Interceptor C is removed from play. The surviving Interceptors A and B are moved back to the Interceptor section. You can leave one Cover Support Escort in each Element, the rest are withdrawn and moved below the Escort section, where the used Fighters are kept. Since there are still two ready Interceptors (A and B) in the Interceptor section, there will be the 2nd Round. The Interceptors will again Engage random Bombers, and you have one last Escort to provide Cover Support and two already in play.
[Diagram: Interceptors vs. Bombers Example, steps 1–2. Captions: "Two engaged groups." "Group by group, the Aircraft fire in order of their Performance." "Previously used, surviving Escorts." "Ready for the 2nd Round." "Withdraw all but one." "Withdrawn Escorts are out of the whole Air Combat."]
11.0 Advanced Rules
After you have played a few games, and you are confident with the game flow, you may want to add some of the following rules to add more chrome and historical accuracy to the game.
11.1 Optional B-24 Squadron
A Wing and a Prayer includes two sets of B-24 Liberator Bomber counters. You are free to command a squadron of B-24's instead of B-17's. Although the B-17 and B-24 had similar Bomb Payloads and machine-gun firepower, the B-24 had a slightly better Performance Rating but it was not as durable as the B-17. Use the same Campaign Setup and Turn Sequence, substituting B-24G's for B-17F's.
11.2 Optional Starting Crews (replaces 3.2.3)
Don't use Crack Crews to start with. Use 3 (or optionally less) Veteran Crews.
11.3 The Crew Log (modifies 4.2.14.2)
When you play with this rule, always use the Crew Log to manage your crews from Mission to Mission.
You do not roll for Veterans to become Cracks. A Veteran Crew becomes a Crack Crew automatically after they have participated in 5 Missions.
As soon as a Crew is reduced to:
- A Veteran: note it in the Crew Log and restart counting from the next Mission it participates in.
- A random Green Crew: the reduced Veteran Crew Log history is erased. They can re-appear later on, when a Green Crew gets upgraded.
A Crack Crew will be "sent on leave" after participating in 5 Missions, and will be replaced with a Green crew (from out-of-play counter pool).
A Crack crew can return after 10 Mission break, anytime as a crew of a replacement Bomber.
11.4 Secondary Targets (modification of 4.2.1, disables 4.1.5)
Right after you have entered the Target box, and if there are Heavy Clouds over the Target box, you can decide to select a Secondary Target instead. This decision is final and cannot be later changed.
If you decide not to bomb the main Target:
- Select two different boxes with a target icon that are located one or two boxes away from the main Target box. Their Mission Cards must be available in the current Mission Deck.
- Roll for the Cloud Cover in each of them (see Rule 4.1.4). If both of them suffer from Heavy Clouds, the Mission has been recalled, return to the Base.
- Otherwise, if the Cloud Cover comes out better than Heavy Clouds in at least one of those boxes, select it as a Secondary Target (decide which one, if both satisfy).
Finish the Mission Phase (conduct the Flak Site Attack Check) and continue to the selected Secondary Target box. The Formation Event can change the Cloud Cover over the new Target.
- Execute the Bombing Run there just like if it was the main Target and return to the Base.
- You will only receive a half of the printed Mission VPs (rounded up) for damaging it.
- The Escorts must not exceed their Maximum Safe Range on the way to the Secondary Target box to stay with the Formation on the way back to the Base (see Rule 4.2.5). Otherwise they have to leave as soon as they exceed the Maximum Safe Range.
Important: If the Mission is recalled due to bad weather (see Rule 5.1), the Secondary Target cannot be selected.
11.5 Crew's Fate (extension of 8.3)
If a Bomber Drops Out and the LOST BOMBER FATE TABLE result is "Bomber Fails to Return", refer to the LOST CREW FATE TABLE. Roll a 1D6 to determine the Crew's fate.
Die Roll modifiers:
- +2 if the Bomber was downed in a Blue box (Return Factor = 1).
- +3 if the Bomber was downed in a Green England box (Return Factor = 0).
- -1 if the Bomber was downed anywhere else (Return Factor = 7).
- +1 if Veteran Crew.
- +2 if Cracks.
On a modified die roll result of "6+" the Crew has survived and will be rescued, or will sooner or later return from the hostile main land. Otherwise the Crew has been lost in action.
If the Crew has survived:
- Roll 1D6. On 1-3: There were causalities among them. A Crack Crew will be reduced to Veteran, flip it to its Veteran side. A Veteran Crew will be replaced by a randomly selected Green Crew (from out-of-play counter pool). A Green Crews will stay intact.
- Roll 1D6, add the Return Factor to the result, and place the Crew counter that number of spaces further along on the MISSION TURN TRACK. When the Mission counter advances to that space place the Crew counter in the READY Section of the SQUADRON BRIEFING Card.
11.6 Mixed Escorts (modification of 4.1.8)
At the start of every Turn, refer to the MIXED ESCORTS TABLE to see what fighter types are available, and in what quantities. Put the corresponding Escorts counters in a bowl. Instead of determining the type in the ESCORT AVAILABILITY TABLE, just get the number of arriving Escorts, and randomly pick that number from the bowl.
You have to track the range of each participating type separately.
Example: On Turn "10", put seven P-47s and two P-38s in a bowl.
11.7 Marksmanship (addition to 7.2)
As soon as a Bomber Destroys an Enemy Interceptor, roll to determine if its Crew's Experience gets upgraded (just like in 4.2.14.2).
Important: Do not use this rule together with "The Crew Log" (11.3).
11.8 Nose Art (addition to 4.1.6 and 4.2.14)
Each named Crew will be tied with their Bomber. If that Bomber is not-ready, the Crew is grounded, and cannot fly Missions. Keep the counters together at all times.
11.9 Historically Accurate Escort Units (replaces 4.1.8)
The game Escort rules were intentionally simplified to save on a number of dice rolls and tables you already have to put your head around. The term "range" is also a bit abstracted in the base game, to keep the rules simple. What follows is an advanced module you may want to give a go after you feel confident with the base game flow.
Historical Note: From the first Mission on 17 August 1942 till 4 May 1943 (when the new P-47s escorted their first mission to Antwerp), the Escort job was provided by RAF Spitfires (and very rarely also P-38s), however none of the available fighters could provide a full length escort deep into German territory, because of their insufficient range. The alarming situation was being legitimized by a prevailing, and terribly outdated doctrine that implied the bombers should be able to defend themselves. The doctrine would change after a couple of disastrous missions in 1943, however it took yet some time before a drop tank technology was put into practice, so that the fighters could protect the bombers all along.
Hint: It won't be easy to get past 1942 and 1943 with a decent score.
These rules will replace the corresponding standard Escort rules:
- Any time you need to determine the number of Escort Fighters that will protect you, refer to the bottom part of ESCORT AVAILABILITY TABLE. Roll 1D6 and (using the column based on the current Turn number) see the corresponding number. If the result states "0", you won't be escorted on this Mission. Ignore the number of Escorts stated on the Mission Card.
- Any time you have are assembling or picking up an Escort, determine their current Maximum Safe Range. Refer to the ACCURATE MAXIMUM SAFE RANGES TABLE. Mark the determined Maximum Safe Range on the FIGHTER ESCORT RANGE TRACKS by a reminder counter.
Note: Due to the introduction of various types of drop tanks, the range would progressively increase with time.
- Picking up a new Escort unit in a Rendezvous box is disabled before Turn "10".
- The escorting job was being done by RAF Spitfires before May 1943. Since the Spitfire counters are not available in the base game, we use P-38s. They were also available and sometimes used even before 1943.
11.10 Historical Missions (addition to 4.1.3)
In the beginning of each of the Turns listed below, you can decide to fly a historical Mission instead of a random one, and follow these general rules:
- Pick the matching Mission Card (if still in the deck) instead of a random Target for Today (4.1.3).
- The added Special rules replace the standard rules.
- The Cloud Cover and the number of assigned Bombers is set by the Special Rues and any game mechanic that would later change it will be ignored.
- After the Mission, return the Mission card to the deck where it belongs, even if Destroyed.
Hint: Historical Missions mostly assure Clear weather over the Target, which means you can score some easy bombing points, but a lot of them are weakly escorted or unescorted.
Turn 1: Locomotive workshop in Rouen (8/17/1942)
"On August 17, 1942, the 97th Bomb Group began the opening attack of the U.S. Army Air Forces' (USAAF) strategic bombing campaign against Germany. The mission was a strike by 12 Boeing B-17 Flying Fortresses against the railroad marshaling yards at Rouen, 40 miles into France from the English Channel."
Special rules: 12 Bombers. Clear. 4 P-38s. The lead Bomber has +2 Performance Rating.
Historical Note: While the number of Bombers assigned to a Mission in this game often represents just a fragment of the whole group of aircraft sent to bomb the target, this mission really was just 12 B-17s.
Turn 8: Foke-Wolf factory in Bremen (4/17/1943)
"115 B-17's were dispatched on the Eighth Air Force's largest mission to that date. Bombs destroyed at least half of the Focke-Wulf factory buildings."
Special rules: 9 Bombers. Light Clouds. No Escorts.
Turn 10: Hamburg industrial complex (7/25/1943)
"The industries in Hamburg were a major factor in German war production and included aircraft plants, a variety of machinery plants, and shipyards. The latter produced more than a third of all the U-boats built in Germany during the war. It also contained oil plants and refineries which were vital in creating lubricants."
There had been issues with the German detection system. This meant that German interceptors did not have the usual time to get airborne and take up a tactical position to be able to effectively engage the approaching enemy bombers. The issues with the German detection systems can be attributed to the use of WINDOW defensive tactics.
"The sirens had sounded at 1440 but it proved to be a false alarm. Suddenly, however, the drone of bomber engines could be heard to the south of the river. There had been no air-raid warning and the defenses had not received the usual 30-minute and 15-minute alert signals, nor indeed any advance warning that enemy aircraft were approaching."
Special rules: 9 Bombers. Clear. No Escorts. Interceptor Attack Events are ignored on the way to the Target (including the Target box).
Turn 12: The "Black Thursday". Ball bearing factory in Schweinfurt (10/14/1943)
"The first Schweinfurt raid took place on August 17, 1943 and the second, known as Second Schweinfurt, took place on October 14, 1943, a day that became known as 'Black Thursday'. On the way to the target, the group was attacked by about 300 interceptors, many of them firing rockets. Out of the 219 bombers that left for Schweinfurt and Regensburg, 60 were lost due to the Luftwaffe. After the disastrous Schweinfurt raids, the commander of the Eighth Air Force Ira Eaker immediately ordered that all unescorted daylight bombing raids deep into German air space be suspended. The Americans would wait until long-range fighter escorts were available and good weather made the raids viable."
Special rules: 12 Bombers. Light Clouds. Escorted by 6 P-47s. Low Altitude Bombing. When you are in the Target box, instead of a random Formation Event, conduct an Enemy Attack with 4 FW-190s and 4 BF-109s. No Escorts can be picked up in Rendezvous sites.
Turn 15: The "Big Week" starts by bombing Leipzig (2/20/1944)
"Big Week or Operation Argument was a sequence of raids by the United States Army Air Forces and RAF Bomber Command from 20 to 25 February 1944, as part of the European strategic bombing campaign against Nazi Germany. The planners intended to attack the German aircraft industry to lure the Luftwaffe into a decisive battle where the Luftwaffe could be damaged so badly that the Allies would achieve air superiority which would ensure success of the invasion of continental Europe."
Special rules: 12 Bombers. Clear. Escorted by 8 P-47s. When you are in the Target box, instead of a random Formation Event, conduct an Enemy Attack with 4 FW-190s and 4 BF-109s. The FW-190s should survive the Dogfight, make them Wingmen if possible.
Historical Note: It was a Luftwaffe tactic that they would send the Bf-109s first to engage the Escorts, and then the heavier armed FW-190s would follow and attack the unprotected Bombers.
Turn 17: Berlin (6/21/1944)
"Of 207 B-17s, 103 hit Berlin, 80 hit Basdorf and 5 hit targets of opportunity; 9 B-17s are lost; escort is provided by 108 P-38s, 81 P-47s and 91 P-51s; 1 P-38, 1 P-47 and 1 P-51 are lost (all pilot MIA) and 1 P-51 is damaged beyond repair."
Special rules: 6 Bombers. Clear. Escorted by 3 P-38s, 2 P-47s and 3 P-51s.
You have to track the range of each participating Escort type separately.
Turn 22: Dresden (2/14/1945)
"461 B-17s are dispatched to hit the marshalling yard at Dresden (311); targets of opportunity are Prague (62), Brux (25) and Pilsen (12) in Czechoslovakia and other (25); 5 B-17s are lost, 3 damaged beyond repair and 54 damaged; 4 airmen are KIA, 15 WIA and 49 MIA. Escorting are 281 P-51s; 3 are lost (pilots MIA) and 1 damaged beyond repair."
Special rules: 9 Bombers. Clear. Escorted by 8 P-51s.
12.0 Two-Player Game
In the Two-Player Game one player commands the U.S. Bomber Squadron with supporting Escorts, and the other player commands the German forces with the goal of preventing the U.S. Player from gaining Campaign VPs. Both Players decide on Campaign length and choose sides.
12.1 Differences from the Solo Game
- U.S. Player keeps his Mission Card hidden from the German Player.
- Crew counters are assigned secretly and hidden beneath the Bomber counters.
- German Player skips the set up. His pieces are generated each Turn, in a special step in the end of the Planning and Intelligence Phase (German Resources).
- German player decides if a Flak Site Attack will be conducted normally or by his Flak Level counters.
- Interceptor Attacks are not generated by the FORMATION EVENT TABLE. German Player will instead manage his Interceptor attacks in an added Mission Phase step (German Interception Check).
- German Player makes all die rolls for his side, or any time it seems appropriate. He also makes decisions for his units that would have otherwise been made by the rules and charts.
- The FORMATION EVENT TABLE is not split to two different war periods, and the Event type is rolled by 1D6.
12.2 Campaign Turn Sequence
Here is the Two-Player Campaign Turn Sequence with some differences marked out by a *. The differences are thoroughly explained in the paragraphs that follow.
I. Planning and Intelligence Phase
- Advance Mission Counter
- Mission Deck Check
- Target for Today * (see Rule 12.3)
- Target Cloud Cover / Wait for better Weather
- Assign Bombers and Crews * (see Rule 12.4)
- Additional Bombers
- Assemble the Escort Unit
- Place Formation Counter / Mission Route Planning
- German Resources * (see Rule 12.5)
II. Mission Phase
- Move Bomber Formation
- Formation Shifting
- Loose Formation Check
- Damaged Aircraft Checks
- Escort Range Check
- Escort Rendezvous Site Check
- Flak Site Attack Check * (see Rule 12.6)
- Formation Event Check
- German Interception Check / Air Combat * (see Rule 12.7)
- Conduct the Bombing Run
- Mission Victory Points
- Return to the Base
-- Repeat steps 1-9 --
- Land Aircraft and Upgrade Crews
-- Repeat steps 1-9 --
III. Planning and Intelligence Phase [sic; the steps listed below are the Debriefing and Maintenance Phase steps, as printed in the source]
- Clean Up
- Campaign Victory Points / End Of Game Check
- Damaged Bombers Repair And Replacement
- Crew Recovery
- War Progress Event Check
12.3 Target for Today
When the U.S. Player draws a Mission Card, he keeps it hidden from the German Player. It will be revealed as soon as the Formation enters the Target box.
12.4 Assign Bombers and Crews
The U.S. Player sets up the game normally, except that the Crew counters will be assigned secretly and hidden beneath the Bomber counters. They will be temporarily revealed when their stats are used and then hidden again. The German player can memorize them but must not make any notes.
12.5 German Resources
The German Player rolls a 2D6 on the GERMAN RESOURCE TABLE, and cross-references the "Current Year" column with the roll. The roll is modified by the "Modifier" column on the US CAMPAIGN VP MODIFIER TABLE (cross-reference the Campaign length with the current U.S. Campaign VP Total). The result determines the number and type of Flak Level counters and Interceptors available to them for the current Mission. This creates a ready pool of German counters that will be available during the Mission.
Note: The GERMAN RESOURCE TABLE reflects the varying resources Germans had available as the war progressed. As the U.S. Player gains Campaign VPs, the German Player will have fewer Interceptors available; however, they will have more Flak available.
12.6 Flak Site Attack
In case of a Flak Site Attack (6.0), the German Player can either let the U.S. Player roll for the Flak Attack Factor, or he can elect to determine the Flak Attack Factor by using one of his Flak Level counters.
If the German Player decides to use his Flak Level counter:
He selects one of his available Flak Level counters and places it on the Bomber Formation counter. To resolve the Flak Site Attack, follow the standard rules (6.0), using the number indicated on the Flak Level counter as the Flak Attack Factor. After the Flak Site Attack has been resolved, remove that Flak Level counter from play for the remainder of the Mission.
Note: Approach and Egress Flak Attacks are conducted normally, as their Flak Attack Factor is determined right on the Mission card.
12.7 German Interception Check
In this step, the German Player can decide to attack the Formation with Interceptors that are available in his pool (see Rule 1.5). If the German Player decides to conduct the Interception, he has to first roll on the INTERCEPTION CHECK TABLE to determine if he can.
Count the number of distance from the Bomber Formation's current box to the nearest Green England box. Roll 2D6, if the result is within the range indicated by "Current Year" and the distance, the Interception was successful and Air Combat will happen.
Note: Interception Checks cannot be conducted in a Green England box.
12.7.1. Air Combat
Important: The Damaged Interceptors are not automatically removed from play after each Round.
The Destroyed Interceptors are immediately removed from play as usual, but keep them separately from other out-of-play counters, as they may later return to the ready pool (see Rule 12.7.2).
To prepare for Air Combat, the German player conducts the following steps:
- Roll 1D6 on the AVAILABLE INTERCEPTORS TABLE to determine the maximum number of Interceptors available to attack the Formation.
- Selects that number of Interceptors (or less) from your pool of counters. Unlike in the solo game, it can be a mixture of available types.
- Roll 1D6 on the ACE TABLE to determine the number of Aces (if any) that will arrive with his unit. Randomly draw that number of German Ace counters, and place them on chosen Interceptors. There can be no more than one Ace in one Fighter. They will stay paired that way until they leave or are Destroyed.
- Line up your Interceptors from left to right in the INTERCEPTORS Section of the FORMATION CARD. Make sure the Interceptors with Aces are placed first (in any order).
From this point on, follow the standard Dogfight rules, starting from step 7.1.2, except for that now the German Player makes die rolls and decisions for their units that would have otherwise been made by the rules and charts.
German Played can decide:
- Which Interceptor will have a Wingman.
- Which Interceptor will be withdrawn between Rounds. The withdrawn Interceptors go to the ready pool of German counters (both Damaged and Undamaged, see Rule 12.5).
When the Dogfight is complete, the German Player may now conduct attacks on the Bomber Formation with Interceptors that are still available in the INTERCEPTORS Section. Since they don't have to withdrawn, even Damaged Interceptors can attack the Bombers.
Follow the standard rules 7.2, except for that now the German Player makes die rolls and decisions for their units that would have otherwise been made by the rules and charts.
German Player can decide:
- Which Interceptor attacks which Bomber (maximum of 2 Interceptors attacking one Bomber).
- Which Interceptor will be withdrawn between Rounds. The withdrawn Interceptors go to the ready pool of German counters (both Damaged and Undamaged).
12.7.2. Interceptor Replacement
After Air Combat is over, all German Interceptors that have not been Destroyed go back to the ready pool of available Interceptors for this Mission. The Damaged Interceptors are restored to their Undamaged sides.
For each Destroyed Interceptor, the German Player Rolls 1D6 on the Interceptor Replacement row of the GERMAN RESOURCES TABLE to determine if the Interceptor is replaced. If the roll result falls within the range indicated for the Current Year the Interceptor is returned to the ready pool of German counters, otherwise it is removed from play as if it was Destroyed.
13.0 Designer Notes
Below are some explanations of some of the key concepts in designing this game.
- Performance Ratings: This is reflective of the aircraft's Speed and ability to climb and best represents the Initiative of the aircraft.
- Air Combat Ratings: These were mostly based on the Aircraft's maneuverability and firepower. The P-51 and P-47 were fairly comparable as fighters. The P-51 was better at climbing than the P-47, however, the P-47 was very durable and had eight .50 caliber Machine guns vs. the Mustang's six. The P-51 had a longer range, though, which was extremely important, especially on raids into Germany.
- Aircraft Durability: This was mostly based on the Aircraft's structural integrity and design and ability to absorb damage. However, in the case of the ME-262, the higher Durability is related to its high speed which made it a harder target to hit.
- Downed Aircraft Rules: These were to reflect the Aircraft's fate after being shot down or forced out of formation. It is presumed the aircraft would have traveled as far as possible (barring intercepts from Fighters and Flak) and then bail out. A Destroyed or Lost Aircraft represents the Bomber being destroyed and the crew either killed or captured.
- Air Combat: I wanted to design a system that could be resolved quickly, but, reflect the various aspects of Air Combat involving Bomber Formations and/or Fighter Escorts. I feel that the system used captures the key components of Bomber Escort Air Combat and resolves it quickly and keeps the game play flowing.
- The Bombing Run: I wanted to capture the feel of the Bombers approaching the Target, being attacked by Flak, Dropping their Bomb Loads and then "getting the Flak" out of there. I felt that rolling a bunch of dice captured the best feel of Flak bursts and Bombs dropping.
Note: The designer's acknowledgments at the start of this section are credits and are not transcribed.
14.0 Errata
14.1 General Errata
- Map: Abberbille should be Abbeville.
- Map: Sutgart should be Stuttgart.
- Map: Edem should be Emden.
- Map: Hanover should be Hannover.
- Map and Card: Meault should be Méaulte.
- Emden Card: Bombers Required should be "9", not "19".
- MISSION TURN TRACK should be MISSION/TURN TRACK.
- Formation Card: The numbers printed under each Element should be yellow, not red, as they are Air Combat Modifiers.
14.2 2.4 Ruleset Changes
- FIGHTER ESCORT RANGE TRACKS should have "P-47 MAX" in the box "5".
- The P-38 and P-51 availability marks are wrong. The marks are however not necessary, since the fighter availability is clearly determined by ECSCORT AVAILABILITY TABLE.
- Turn "22" should have a star mark just like Turn "17", as there are changes in the Mission Deck.
Note: The Mission Log and Crew Log (printed record sheets, pages 52–53) and the credits, dedication and back-cover pages (pages 54–56) are not transcribed. The Mission Log and Crew Log are blank tracking forms; the Mission Log is described in Rule 2.8 and the Crew Log in Rule 2.9.