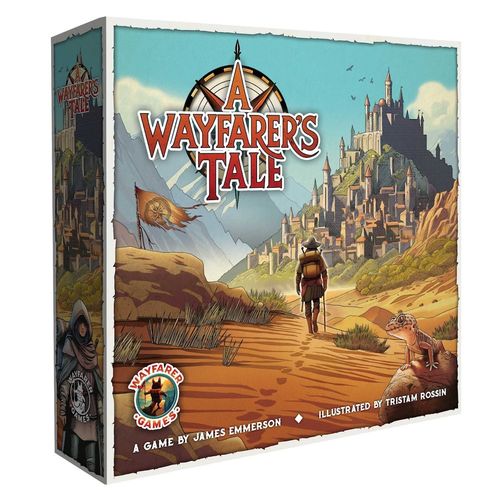
A Wayfarer's Tale: The Journey Begins
A Wayfarer's Tale: The Journey Begins Rulebook
Table of Contents
Table of Contents
Components
- 4 Island Maps: Map 1: The Great River, Map 2: Ravine Of The Damned, Map 3: Many Heights, Map 4: The Twins
- 4 Player Aid Cards
- Pens (pen design/type may vary)
- 4 Character Discs
- 1 Active Die (red)
- 3 Travel Dice (white)
- 1 Treasure-Monster Die (blue)
- 4 Player Boards
- 96 Player Cubes
- 8 D12 Player Markers
- General Supply: 48 Town Tokens, 12 Chest Tokens, 12 Shield Tokens, 5 Quest Tokens
Solo Mode Cards
5 Solo Mode Cards. See the separate Solo Rules Manual.
Optional Cards
- 4 Storm Cards
- 4 Fortune Teller Cards
Tavern Expansion
- 5 Companion Tiles
- 5 Companion Cards
- Companion Cubes/Markers
- 6 Benefactor Cards
- 5 Quest Cards
Game Setup
Gather Player Components
- Each player takes a Player Board and places it in front of them.
- As a group, decide which island Map to play. Each player takes a copy of that map and places it beside their Player Board, along with a Permanent Marker.
- Each player takes a Companion Disc and places it within view of the other players.
- Each player selects a color and places their Player Cubes and D12 Markers within reach.
- Finally, each player takes the number of Town Tokens required for the map (as specified in the map key).
Player Board Setup
Use one player cube as a Scoretrack Marker. Place it on the green arrow in the upper-left corner of the Player Board (not depicted).
The game begins in a town (see next page), so all players place their first Town Token on their Player Board and then block off the number of spaces designated on the map key under "Town Cubes" (because some maps have fewer than twelve towns).
Common Resources
- Create a common supply of Shield Tokens, and Chest Tokens.
- Determine who will go first (see below) and hand the red Active Die and the three White Travel Dice to that player. Set the blue Treasure/Monster Die within reach of everyone.
(Optional) Tavern Deck Content
- Journey can be played without the Tavern Deck cards or the related Companion Tiles and components pictured. However, these additions are relatively straightforward to use.
Some or all expansion content may be used in any given game (see Tavern Deck, and Game Variants) to customize your gameplay experience.
- If you do choose to use the Tavern Deck, be sure to remove the purple solo mode cards. Of the remaining cards, select the ones you wish to use and place the five Companion Tiles and additional components within reach of all players.
First Player Selection & Starting Towns
Hand the red and white dice to the player who most recently visited an island. In a moment this player will begin the game as the first Active Player and then the Active Player will rotate clockwise around the table, throughout the game.
But first each player rolls one die (a D6) to determine their Starting Town Location, which may be different for everyone. Notice that certain towns are labeled (1-2, 3-4, or 5-6). Recall that during setup each player had placed a Town Token in the Towns area of their player board to indicate that one town has been visited - that's the starting town. To keep track during the game, players will add a Town Token to their board each time they visit a new town.
How to Play
About the "Active Player"
In Journey, players explore their maps simultaneously, adding the values of two dice together each move. However, the player who just rolled the dice - known as the Active Player - has an advantage. They alone have access to the value of the red Active Die, thereby giving them more flexibility ... at least for that turn. All other players only have access to the three white Travel Dice. Not to worry, the Active Player rotates each turn.
The Basic Game Loop
The basic game loop for Journey is simple:
- Roll: Roll all four dice. (Active Player only)
- Activate: Select two dice and Activate a Companion. (All Players)
- Travel: Travel exactly one space to an adjacent hex. (All Players)
Once all players have traveled, the Active Player hands the dice to the person on their left, who becomes the new Active Player.
Scoring Points and Winning the Game
Scoring occurs when players activate specific Companion spaces on the Player Board. Values used to activate Gem spaces score positively whilst those used for Monster spaces score negatively. Companions and scoring will be explained in detail shortly.
Play continues until someone visits every town on their map or crosses off their third Miss Roll - both of which will be explained in more detail. In either case play ends immediately and final scores are tallied (see Scoring).
1. Roll
Active Player Only: At the start of a turn the Active Player rolls all four dice and places the red Active Die in the slot on their player disc and the three white Travel Dice alongside, in view of all players. If all three Travel Dice come up the same value, all four dice are re-rolled.
2. Activate
All Players: Simultaneously, all players consider their options and select exactly two dice values, which are added together. Note that only the Active Player has access to the value on the red die. All other players must select values from the white Travel Dice, only.
Players use their chosen combined dice total to Activate a Companion (see Companion Reference) and each player's choice is driven by the type of hex they wish to travel to next ...
3. Travel
Players travel around their islands one hex at a time, forming Routes. A route is represented by drawing a line from one adjacent hex to the next. Moving from one hex to the next requires activating a Companion who can access that specific type of terrain (Mountains, Grasslands, Desert, Jungle, and Water).
For example, James moves south (1) from his starting town. To do so he must use either the Merchant or the Guide, because only these two companions have access to the Desert terrain. To activate, James must satisfy the numerical condition required of his chosen Companion, and only then can he move one hex.
From here, James always has two options. He can extend an existing route or he can start a new one.
Extending a Route: With his next move, James may choose to extend his route by traveling to any adjacent hex he has not already visited. In the example James continues south through the desert (2).
Starting a New Route: For turn (3), James abandons his progress south (for the moment) and instead chooses to start a new route. He activates the Coachman, who allows him to travel on Grassland, and starts a new northwest route from his starting town.
From here, James may extend either of his routes or he may start a new one from his starting town (or from any town he passes through). In the example, if James reaches the town shown on turn (4), he will now gain additional new route options on future turns (gold arrows).
Miss Rolls: If James cannot make a legal move (or chooses not to move), this is called a "Miss Roll". When any player takes their third Miss Roll, the game ends immediately (see Scoring).
Travel Rules Summary
The three golden rules of travel are:
- Players may only move one hex per turn.
- New Routes may only start from Towns. Routes may not fork at any other location.
- Players may never revisit a hex they have previously visited.
A player may choose not to move but only after fully completing at least two Companions.
Companion Reference
Introducing Companions: Each turn, to move from one hex to another, players enlist the help of one of five main Companions - the Coachman, the Adventurer, the Sailor, the Guide, or the Merchant. It is helpful to refer to the Player Board when reading this section.
Activating the Coachman
Terrains: Grassland, Mountain
Progress: Tracked using one D12 marker starting in the upper left-most corner.
Activation: Combined dice total must be equal to or greater than the preceding value.
The Coachman can only be used to travel across Grassland and Mountain terrains. His journey begins on the arrow and then follows the path of the dotted line, in order. While there is no numerical constraint the first time he is used, each subsequent use of the Coachman requires a total that is equal to or greater than the number before it.
But beware, thirsty traveler! The Coachman's progress is impeded by closed Taverns. These taverns must be opened and he must quench his thirst before progress can proceed (see Opening Taverns, below).
Opening Taverns
At the start of the game, the Coachman's progress is constrained. Closed taverns (denoted by a red 'x' on the player board) must be opened by visiting a tavern hex on the map. In order to open both taverns, two tavern hexes must be visited.
Once visited, place a cube over the 'x' to indicate that the tavern is now open for business. The Coachman may now pass through freely, subject to the usual numerical constraints.
Examples: In this example James is the Active Player and uses a Combined Dice Total of three to activate his Coachman for the first time, setting a marker to three and placing it in the first slot.
In a subsequent turn, James is not the Active Player. He uses a combined dice total of four to activate his Coachman, moving the marker to the next slot, and updating its value. In this illustration, a value of seven is used to pass through and because it happens to be a Monster space, incurs a scoring penalty of that value (seven). See Scoring.
Activating the Adventurer
Terrains: Jungle, Mountain
Progress: Tracked using one D12 marker starting at the base of the first mountain.
Activation: Combined dice total must be greater than (if ascending) or less than (if descending) the preceding value.
Note: A new mountain may be started with any value.
The Adventurer can only be used to travel across Jungle and Mountain terrains. His journey begins on the arrow at the base of the first mountain (of three) with any value. Each subsequent use of the Adventurer requires a value that is greater than (if ascending) or less than (if descending) the number before it.
Unlike the Coachman, who may travel by using the same value twice in a row, the Adventurer knows no such luxury. The exception is when starting a new mountain (see Starting a New Mountain, below).
Starting a New Mountain
Example: In this example James has previously used a value of four to begin the first mountain. Here he activates his Adventurer again using a seven, to ascend towards the peak one more space.
Tip: Start each mountain with a low value and summit with a high one, especially if the peak space rewards victory points.
Activating the Sailor
Terrain: Water, Sailboat
Progress: Tracked using one cube.
Activation: Requires doubles. No other numerical restrictions.
The Sailor can only be used to access the Water terrain and to crew the Sailboat. Her journey begins on the arrow at the top of her track and follows a southern course, in order.
In order to activate, the Sailor requires a value comprised of a doubles dice roll. There are no numerical restrictions between spaces, other than this. On the maps, the surrounding open ocean is not considered a Water hex. The Water hexes are clearly delineated.
Activating the Guide
Terrain: Desert, Jungle
Progress: Tracked using one cube.
Activation: Requires a value equal to or greater than the number shown above the space.
Your trusty Guide can only be used to travel across Desert or Jungle terrains. She follows a specific course, beginning on the arrowed space and zig-zagging down the dotted path. Each step of her journey is conquered individually, constrained by the requirement listed above the space. In general, the Guide requires values that are equal to or greater than the number shown.
Here a value of nine or more satisfies the requirement of this space, which happens to be a Gem space.
Scoring Reminder
For all Companions other than the Merchant (explained next), when a player places a cube or marker over a Gem space, they score points equal to the summed dice value used to reach that space. In the Guide example above, if the value used was a ten ... ten points are scored. A Gem space marked x2 doubles the amount. Similarly, Monster spaces deduct points in exactly the same way.
Scoring the Merchant
Important: Merchant scoring works differently than for all other companions.
Terrains: Grassland, Desert
Progress: Tracked using multiple cubes.
Activation: A value that matches either the column or row label of the selected space.
Tip: Utilizing a Monster space immediately triggers a Monster Roll. A Treasure Roll is rewarded upon completion of a full row or column (both can happen simultaneously).
Unlike the others, the Merchant's score is not determined by the combined dice total used to place a cube. Instead, points are gained by completing full rows or columns, thereby triggering a Treasure Roll. However, this inevitably requires placement of cubes on Monster spaces, each of which triggers a Monster Roll. In each case, these blue die (a D6) rolls are performed immediately after cube placement and the resulting score is added (or subtracted) from the Scoretrack unless a Shield or Chest token effect is first applied (see Shields and Chests, below).
Activating the Merchant
The Merchant can only be used to travel across Grassland and Desert terrains. A nomad at heart, the Merchant roams freely and may complete his journey in any order so long as he adheres to the rules of his trade.
Hint: Maximizing the Merchant for scoring will be an important part of your overall strategy. As such, interesting dynamics come into play as you both seek to score and to avoid Monsters.
To activate, the Merchant requires a value that matches either the column or row label of the selected space.
Example: In this catch-all example, James uses a value of four to simultaneously complete a full row, a full column, and incur a Monster hit. After placing his cube, he'll make three consecutive rolls using the blue die. Monster Rolls precede Treasure Rolls by convention. James rolls a five for his Monster Roll, followed by a four and then a one for his two Treasure Rolls. His net score for this turn is therefore zero (-5 + 4 + 1 = 0). Luckily, there are means to alter one's fate ... see Shields and Chests, below.
Merchant Continued - Shields and Chests
As noted, the Merchant plays an essential role among your traveling team. While his fate is more rooted in luck than his peers, he has two tools which help to mitigate that luck (or lack of it).
Across the islands of Journey, special hexes can be found. While often a little off the beaten path, it is foolish to ignore these detours (see Common Hex Locations, below). Relevant to the Merchant only, there are two locations of note:
Shields: When spent, used to re-roll any Treasure or Monster roll.
When a player journeys to a Shield hex, they immediately acquire and store a Shield Token, up to a total of four. The shield guards the Merchant from bad luck and can be used to re-roll a Treasure or Monster roll. Spend one token, and return it to the supply.
Chests: When spent, doubles the value of a Treasure roll.
When a player journeys to a Chest Hex, they immediately acquire and store a Chest Token, up to a total of four. To improve a Treasure Roll, spend one token to double the score for that roll.
Token Combos: On a given turn you may spend as many Shield Tokens as you have stored, without restriction. However, you may only double that value once per turn using a Chest Token.
Rules for Combining Tokens: On a single turn you may spend multiple Shield Tokens to re-roll your die and the best roll may be selected (rather than the last). In addition, you may use a single Chest Token in conjunction with your re-rolls. You may only use one Chest per turn.
Tip: You may assess the value of a Treasure Roll before deciding to spend a Chest Token.
Common Hex Locations
Throughout the islands of Journey there are several types of locations that appear on every map.
Towns are at the heart of the Wayfarer's journey. While it is not essential to visit every single one to win the game, visiting towns expeditiously need be an essential part of all players' strategy as each town visited is worth five points at the end of the game.
Taverns are visited to extend the range of the Coachman (see Coachman, above) and reveal added game elements when playing with the Tavern Deck (see Tavern Deck).
Shield and Chest hexes are visited in order to acquire the associated tokens that are so useful to the Merchant (described above). Visiting these hexes may take you off the most direct path to your destination, but ignore them at your peril. It is best to acquire these tools early.
The Sailboat is only available to the Sailor (see Sailor, above) and behaves like a hex. Crewing the Sailboat requires a "stop" on the Sailboat icon - it does not provide automatic passage. Reaching the destination shore requires another move with a Companion compatible with the destination hex type.
Scoring
Using the Scoretracker
Use one of your player cubes to track your score throughout the game, adding points each time you discover Gems or Chests, and deducting points when you encounter Monsters. This is referred to as your Scoretrack Value.
Scoring Note: You may never "go negative" on the Scoretrack. As such, you may not make a Monster roll using the Merchant until you have accumulated at least six victory points.
Reminder! Other than for the Merchant, whenever you activate a Companion using a space that contains a Gem or Monster icon, your Scoretrack Value goes up or down immediately by the combined dice value you used on that spot. A gem with a x2 on it, doubles the value used!
Likewise ensure the final value of all Monster Rolls and Treasure Rolls enacted as a result of the Merchant are recorded as the game progresses (see Merchant, above).
Don't grow a false sense of confidence if you are ahead nor despair if you are behind! Scores in Journey rise and fall throughout the game. Look carefully at the Player Board and plan ahead. Access to the most valuable rewards often requires battling through fierce Monsters first!
End Game and Final Scoring
The game ends immediately when any player visits the final town on their map or crosses off their third Miss Roll (see Travel, above). Using the scoresheet on the map, sum up final scores for each player as follows:
- 5 points for each Town visited.
- 3 points (additional) for each Town visited on a player's longest continuous route. This is the longest line on your map that connects towns without forking. In the rulebook's example, there are seven towns on that line, so score 7 * 3 = 21.
- The final Scoretrack value.
The player with the most victory points wins! In the event of a tie, the player who visited the most Towns wins. If there is still a tie, the players may rejoice in their shared victory!
Tavern Deck
Tavern Deck Overview
In the world of the Wayfarer, taverns are the main form of respite for intrepid travelers. A place to warm up, have a meal, and trade a story or two. Oftentimes complete strangers will cross paths in these watering holes only to wind up bound in their future travel as they depart in a similar direction and with similar goals.
The Tavern Deck Expansion adds additional variation to the Journey base game. Use of the deck is simple - whenever a player visits a Tavern on the map, they reveal two cards and keep one (discarding the unused card) ... one never knows who one may meet ...
Using the Tavern Deck
Locate the sixteen Tavern Deck cards, five Companion Tiles, and purple cubes and markers (see Game Setup). Shuffle the cards and place them in the center of the table, leaving space for a face-up discard pile - unused Tavern cards remain in the game.
Some Tavern Cards have an immediate effect, some will apply end-game bonuses, and some will require additional components which are collected by the player who holds that card.
Traveling Companions: If one of five Traveling Companions is drawn, take the matching Companion Tile and required cube(s) or D12 marker. Read the flavor text on the card and follow the instructions on the tile.
Benefactors: There are six Benefactors. Benefactors are like Traveling Companions but don't require a tile or additional components. If selected, place the card beside the Player Board.
Quests: There is one Quest Card for each terrain type. When selected, place a Quest Token on the associated hex. When later visited, immediately score the number of victory points indicated on the card.
Game Variants
Map 4: The Twins - Short-Form Game
Map 4: The Twins may be played in a short-form variation, if desired. For a quicker game, select one of the two smaller islands that comprise this map and ignore the other. All other rules remain the same. If a Quest is revealed that does not exist, select the alternate Tavern card.
Using the Fortune Tellers
Setup: For a slightly more strategic game, distribute a Fortune Teller to each player at the beginning of the game.
Use: Each player places this card adjacent to their player board and may use the Fortune Teller, up to three times, to add or subtract one from the dice total selected. Keep track by placing a cube on the card.
Playing with Storms
Setup: To play with the storms variation, locate the four Storm cards and shuffle them into the Tavern Deck at the start of the game.
Use: After a player reveals (and selects) a Storm card, all other players pass their map clockwise around the table. Receiving players then select and outline up to three adjacent hexes that match the terrain shown on the Storm card. These are now known as the "storm hexes."
The outlined hexes may contain Towns, Taverns, Statues, or any other icons - there are no restrictions. Once outlined, players return the newly marked maps to their original owners.
Players must now do their best to avoid encountering inclement weather lest they incur a three-point penalty for each storm hex traveled to! Adjust the Scoretrack accordingly.
Note: Similar to the rules for Monster spaces, a player's score may never be negative, so a player who chooses to visit a storm hex will need to have accumulated at least 3 points first!
Special Map Rules
Towns Collection Bonus (Map 1)
The first player to journey to all town hexes of the same terrain type immediately earns the corresponding collection bonus indicated in the map key (also pictured on the map).
There are four different bonuses to collect, but each one is only awarded once. That said, if multiple players achieve the same bonus on the same turn, all of those players earn the bonus.
Statues (Maps 2, 3, and 4)
Statues appear in various forms and details are outlined on Map 2: Ravine of the Damned. Regardless of map, the first player to visit all statues of one kind receives the higher collection bonus. All other players may still do the same but, if successful, are rewarded the lower value. For example, *10/5 indicates 10 points to the first visitor but only five points for all others.
High Peaks and Thickets (Map 3)
High Peaks and Thickets only appear on Map 3: Many Heights. These hexes are harder to traverse and require both of the following to be true: (1) use of the red, active die, and (2) activation of the specific companion pictured - namely, the Adventurer for high peaks, and the Guide for Thickets. The good news is that on Map 3 only: all players may use the active die value at any time.
Monster Hideouts (Map 4)
Monster Hideouts on Map 4: The Twins, adds yet another obstacle.
The first player to visit a Monster hex incurs no penalty. Upon arrival that player announces, aloud, the letter associated with that hideout. All other players note this location on their map with their marker.
On subsequent turns, any player who visits that hex is penalized and immediately takes a Monster Roll!
Solo Campaign
Solo Mode Designed by: James Emmerson
Overview
A Wayfarer's Tale: The Journey Begins may also be played as a solo campaign over the course of eight separate scenarios. These scenarios are best enjoyed in order, but you may skip around as you please.
During a solo scenario your journey begins on a specific map and your race is against the monsters which lurk on that island.
To begin a scenario, read the narrative (see Campaign Guide, below) and refer to the chart below. Locate the related map and grab a purple cube, which you will use to track your health. Setup instructions begin on the following page.
| Scenario | Map | Starting Health | Target Score | Tavern Deck Setup |
|---|---|---|---|---|
| 1 | 1 | 10 | 50 | 3 Solo Cards |
| 2 | 2 | 13 | 70 | 3 Solo Cards |
| 3 | 3 | 19 | 50 | 3 Solo Cards |
| 4 | 4 | 19 | 50 | 4 Solo Cards |
| 5 | 1 | 10 | 60 | 2 Solo Cards + The Mercenary |
Setup
The solo campaigns play similarly to the multi-player game with a few differences.
Aside from the standard setup items, the only special components that you need to play solo are the five purple solo mode cards and one purple cube.
Refer to the campaign table above. Notice that the first four scenarios require a subset (3 or 4) of the five solo campaign cards, as indicated. Randomly select that number of cards and shuffle them to form a face down solo-mode Tavern Deck. In later scenarios, form your deck the same way but include the Companion card noted. To play scenario eight, for example, you will form a four-card deck using three randomly selected solo cards and the Globetrotter card. Set all other Tavern Deck cards aside; they are not required for solo play.
Next, place one cube of your chosen player color on the green arrow as a score tracker. Use one purple cube to track Health and place that on the appropriate numbered space, according to the campaign table (Starting Health).
On some maps where you would otherwise place town cubes, use town tokens instead - you can "spend" these towns later, as will be explained. All other multiplayer game setup steps remain the same. Refer to the rulebook.
Important: The solo game only uses three dice for rolling. However, keep the third white die within reach - you may need it later.
Finally, locate the red Active Die and two white Travel Dice.
Solo Rules
When undertaking a solo campaign your goal is to achieve the objective outlined in the campaign guide before being killed by monsters.
Rolling and Selecting Dice Values
When playing solo, you always have access to all three dice values, which includes the red die. For each roll, select and sum two dice values to activate a Companion. Use of the red die, however, comes at a cost - see below. Note: If all dice rolled show the same value you may choose to re-roll them, if you wish.
Tracking Health
As noted in the Setup section, you begin each scenario by placing a health tracking cube on the value specified in the campaign table. For example, when playing scenario 1, place a purple cube on the number ten.
During the game, certain actions will require you to deduct one from your health. Those actions are as follows:
- Use of the Red Die. Each time you use the red die, deduct one health.
- Encountering Monsters. During solo play, any time you activate a Monster space on a Companion, you must deduct one health. This penalty is in addition to the ordinary Monster effect which reduces your in-game score appropriately. The same rule applies whenever a Monster Roll is triggered using the Merchant. If ever your health reaches zero, you lose the scenario!
Using Miss Rolls
In order to avoid a hit to your health, you may choose to mark a Miss Roll at any time. Instead of activating a Companion, ignore the current dice values, mark a Miss Roll, and take another turn. There are no restrictions regarding when you can or cannot do this, but three Miss Rolls will immediately end the game with a loss!
Visiting Taverns
In a solo game, visiting taverns will also form an important part of your strategy. Rules for taverns, as pertains to the Coachman, remain the same (see Coachman, above).
Unlike in a multiplayer game, whenever you visit a tavern, draw only one card from the tavern deck and resolve its effect immediately. All effects derived from taverns are positive ... you should try to take advantage of these respites as you travel.
Visiting and Spending Towns
As in the multiplayer game, track your number of towns visited by adding a town token to your player board each time you visit a new one. Unique to the solo adventure, however, is the ability to "spend towns" in three different ways, replacing them with your player cubes as you do so:
- Before rolling for your turn, you may spend one town to roll an additional white travel die (once per turn, only).
- After rolling, but before choosing your combined dice total, you may spend two towns to re-roll all dice (including the extra die if you have just spent a town on #1, above).
- After rolling, but before choosing your combined dice total, you may spend one town to increase or decrease one die value by 1 (you may repeat this multiple times per turn!).
End Game
Each scenario describes a target objective requiring a minimum scoretrack value and potentially other requirements. In order to win the scenario you must meet all of the objectives listed - assuming you do, move on to the next scenario. If you do not, repeat the scenario as many times as it takes to achieve victory!
Important Note: In solo mode, you do not score any bonus points for towns visited or for your longest continuous route. Nor are any collection bonuses earned. Your final score is entirely determined by your scoretrack value.
Campaign Guide
Scenario 1: The Journey Begins
Objective: Score 50 points and visit all towns.
It's been days of travel to reach the uncharted isles, but you're here. Pausing on the hilltop, you take a moment to soak it all in. The mountains and valleys stretch out in front of you; a new world just waiting to be discovered. It's time to write your own chapter, to wander these lands of uncertainty and take your place amongst your people. You gather up your strength, your provisions, and your trusty walking stick and set out into the unknown.
Scenario 2: A New Land
Objective: Score 70 points and visit all towns.
You've sailed through the night to reach the second of the isles. The landscape is becoming tougher here. Great ravines stretch out in front of you and the wind from the coast has brought with it a driving rain. It is no coincidence that the locals have named it 'The Ravine of the Damned'. Prepare to be tested.
Scenario 3: Eastwards
Objective: Score 50 points and visit all towns.
There is much still to be discovered beyond this great abyss, but the journey is starting to take its toll. You've been battling the driving rain for days and you're soaked through to the skin. You take refuge in a local tavern and plot a change of course. A warm fire and soft pillow begin to restore your spirits. It is time to set sail for new shores. You turn Eastwards. You're told the land here is treacherous, bordering on impassable at times. Or so say the locals, but they're exaggerating. They've underestimated you. You were made for the wilds. It'll take more than some cautionary tales to break your spirit. After all, you're well rested and the sun is shining on your back. There is no mountain too tall or jungle too thick. Nothing can stand in your way.
Scenario 4: Here Be Monsters
Objective: Score 50 points and visit all towns.
Special Rule: Whenever you visit a new Hideout Hex, perform a Monster Roll but do not penalize your health!
You've conquered the peaks and there is surely nothing now that can pose a danger to you. From your vantage point, upon the mountain, you can see two small islands nestled on the horizon. They are more than inviting.
As birds fly overhead, you can make out the waters lapping lazily upon the shores in the distance. They say monsters have overrun these isles; just a story to keep out unwanted visitors. In your mind's eye you can picture such a paradise of wonders. But it is best to keep the sword close, just in case. Who knows what might be lurking in the dark.
Scenario 5: Strength in Numbers
Objective: Score 60 points and visit all towns. Find and complete the Mercenary.
These lands are overrun with monsters! You've barely escaped with your life. You resolve to take more caution in the future. You hear whispers that a battle-hardened mercenary has ventured north. Maybe you could employ his services. After all, there is strength in numbers.
Scenario 6: The Recluse
Objective: Score 60 points and visit all towns and statues. Find and complete the Nomad.
Special Rule: After locating the Nomad in a tavern, you may no longer use Sailboats!
After much travel with the Mercenary, he has declared that it is time to part company. You watch his retreat with a touch of regret. Despite his dark and brooding appearance, he has proved to be a valuable companion with a sharp wit and a sharper sword. No matter, you're confident you can find a suitable replacement.
Word has reached you of a mysterious vagrant who wanders the desert alone. Perhaps he can steer you upon a safer path through this land.
Scenario 7: The Trickster
Objective: Score 60 points and visit all towns and statues. Find and complete the Charlatan.
Despite his unparalleled knowledge of the land, it seems the Nomad suffers from sea-sickness. As you prepare to sail to the next isle, there is no doubt that you must leave him behind. As you board for new shores a well-dressed gentleman sidles up to you, "If it's gold you're after there are none who know this land better than I. I can take you anywhere you wish to go ... for the right price, of course." He winks slyly at you. You cannot put your finger on it but something about his demeanour makes you hesitate. He shrugs, "Come and find me if you change your mind."
As you cross the seas your dreams are filled with thoughts of home. Images of your return ... laden with more than just stories to tell, but also of riches beyond your village's imagination. As morning comes, you find you have reached new shores, but the strange man is nowhere to be found.
Scenario 8: The Worldly Wise
Objective: Score 60 points and visit all towns and statues. Find and complete the Globetrotter.
Special Rule: Whenever you visit a new Hideout Hex, perform a Monster Roll but do not penalize your health!
Empty promises and danger. You knew there was something off about that Charlatan. Gold indeed! He led you straight into a monster camp! In your mind's eye you can see the evil creatures closing in around you but it will take more than that to finish you and your companions.
It seems the slippery devil didn't stick around to find out if you'd survive though. As you tend to your wounds in a nearby tavern, you overhear a conversation from a shadowed corner of the room. A hooded figure, face hidden from view, is having a heated exchange with a well-dressed townsman. "I've changed my mind; even safe passage isn't worth that price," reasons the townsman, "The payment is off."
As you watch on, the figure smartly knocks the stool from under the man, depriving him of his purse and leaving him sprawling. The figure casts back their hood to reveal the flowing hair of a beautiful woman. She strolls past you, tossing a coin through the air at the barman. "You ought to bar that thief, Bill," she calls over her shoulder. You finish your drink and follow her out.
Epilogue
Note: Read only after successfully beating Scenario 8!
You thank the heavens this lady crossed your path. In a land of swirling monsters, she has proved an invaluable companion. In fact, it is greater than that for in truth she almost feels like kin. She relishes the unknown, the path beyond, and as you prepare for the final journey home it seems as though your spirits have begun to intertwine. Who knows where this road will lead but it matters not, for after all, this life is not defined by our destination, but by our journey.
Journey Solo Rules v4.5 © Copyright 2025, Wayfarer Games, LLC