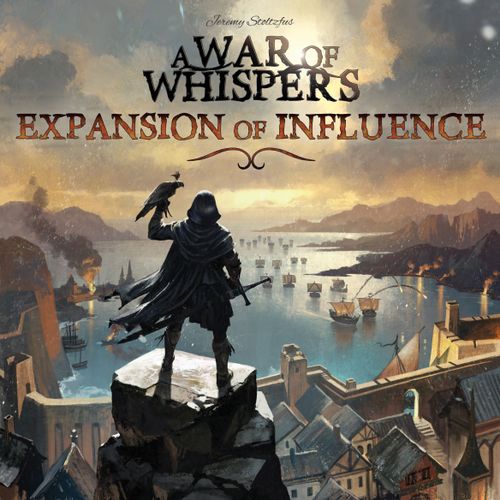
A War of Whispers: Expansion of Influence
A War of Whispers: Expansion of Influence Rulebook
Table of Contents
Table of Contents
Overview
A War of Whispers: Expansion of Influence introduces several elements to the game. The Orca Clan is a new island nation of raiders that will threaten coastlines across the map and disrupt the most well-laid plans. The Guilds offer new unique ways to use your agents. The Sparrow Underground adds a fifth player to the game. And there are alternate setup rules to allow nearly infinite replayability.
You may choose to exclude one or more of these modules for a more focused game or to ease into the new rules more slowly. If so, just skip over that section of the game board. The Guilds activate at the beginning of a round, before the Bear empire, and the Orca Clan activates at the end of a round, after the Horse empire.
Please note that to play with a fifth player, you must include both the Orca Clan and the Guilds in order to have enough agent placement options.
The Sparrow Underground
They flit from place to place, small and unseen. The everyday, the ordinary, background in a noisy city. Hidden in plain sight, never considered a threat. But a sparrow can recognize a sparrow. And a sparrow can tip a balanced scale.
The Sparrow Underground adds a fifth player to the game. It is played on the Sparrow Underground Player Board, which is listed in the components.
Source note: the rules document for this expansion does not print the Sparrow Underground's rules. Its pages contain only the module's flavour text, its name in the overview, and the Sparrow Underground Player Board as a component. The rules for playing the fifth player are therefore not reproduced here, and no rules have been added from elsewhere.
Components
- 1 Double-Sided Game Board
- 5 Loyalty Cards
- 1 Sparrow Underground Player Board
- 2 Promotion Tokens
- 1 Peace Token
- 5 Port Tokens
- 4 Upgrade Tokens
- 10 Bounty Tokens
- 3 Raid Tokens
- 5 Loyalty Tokens
- 9 Punchboard Agents
- 20 Wooden Orca Clan Banners (included to match the Standard Edition)
- Punchboard Cities, Forts, and Farms (included to match the Standard Edition)
- 20 Deluxe Orca Clan Banners (included to match the Collector's Edition)
- 9 Deluxe Agents (included to match the Collector's Edition)
- 2 Deluxe Forts (included to match the Collector's Edition)
- 2 Deluxe Farms (included to match the Collector's Edition)
Component note: the printed rules include the extra upgraded miniatures needed to account for the Orca Clan for those who already have the Collector's Edition or Miniatures Upgrade Pack, as well as punchboard versions for the whole board for those who do not have the miniatures.
Setup
-
Place the game board on the table with the cities and other icons showing face up. Experienced players may notice that the locations of some Banners, Cities, Farms, and Forts have changed. This is a deliberate decision to rebalance the nations and is recommended even without using the Orca Clan or the Guilds. However, if you prefer to play with the original layout, flip the game board over and see Scenarios, page 10.
-
Add all normal pieces to the board as described in the original rules, including the Orca Clan.
-
Place a Bounty Token on each Orca Clan region.
-
Place the three Raid Tokens as pictured.
-
Place the Peace Token, 5 Port Tokens, and 6 Bounty Tokens on the appropriate sections of the Guild. Place the 4 Upgrade Tokens in the order shown, so x4 is on top.
Updated Attack Icon
For better visual clarity of which actions add Banners or not, the attack icon no longer shows the banner icon next to it. Attacks still must be made with the active nation.
The Action Upgrade Tokens are placed in this order, from top to bottom: Add 4 Banners, Add 5 Banners, Make 2 consecutive attacks, and Draw 2 cards.
Gameplay
Starting Loyalties
Loyalty cards contain predefined loyalties for each player. This allows players to balance their initial faction allegiances to decrease the randomness or duplication that the base edition of War of Whispers provides. (You may optionally choose to use the base rules instead.)
There are 5 loyalty cards, one for each player. Each loyalty card contains 10 possible initial loyalty configurations (or "loyalty sets").
Before assigning loyalties at the beginning of the game, decide which listed loyalty set you'll be using (these are labeled Set 1 through Set 10).
Shuffle all loyalty cards together and deal 1 face down to each player. Return any remainder to the box without revealing them.
From there, each player secretly arranges their loyalties as defined by their card.
After loyalties are placed, all cards are returned to the box without revealing them.
More Agents
When using the Orca Clan and The Guilds, you will need to adjust the number of agents each player places during the Deploy Agents phase of Round 1. For all player counts, each player places 3 agents in Round 1. Placement during the Deploy Agents phase in subsequent rounds will match the rules of the base game.
Orca Clan
The Orca Clan module adds a sixth faction on an island off the side of the main map. This faction is unique in two ways: No players have any loyalty to this faction, and they can use "Raid Tokens" to attack shifting locations across the map. Adding the Orca Clan adds more spaces on the board for players to place agents and more options for threatening otherwise safe locations across the map.
The Orca Clan is just like any other empire on the board and any rules that apply to those empires apply to the Orca Clan as well. The Orca Clan is the last empire to act during each game round, before checking to discard cards.
Since no players have any loyalties to the Orca Clan, any Cities they hold at the end of the game score no points for any players. The Orca Clan is used as a bludgeon to foil your opponents' plans, not as a means to score points for yourself.
Raid Tokens
Unique to the Orca Clan is their ability to attack from any region, but only into regions containing a Raid marker. (Card abilities may not override this requirement.) This includes their 4 home regions, plus the 3 regions marked with Raid Tokens, which will move around the board as you play. Attacks must still be conducted with a single army per attack as described in the base game rules.
The Orca home regions may only be attacked by other empires by using ports (see page 8) or by using certain card abilities to gain a foothold. Once an occupying army controls a region, they can attack adjacent regions as normal. But due to the Raid markers, the Orca Clan can always attack back into their home territory.
Orca Council Actions
-
Attack (sword and Orca Clan icons): This action allows you to make an attack with the Orca Clan. After your attack, if the Orca Clan conquers and now controls the attacked region, you must move that Raid Token to a new region. It does not have to be adjacent, it may be anywhere on the map except their home region, a region with another Raid Token, or the region just conquered.
-
Raid Token and Banner icons (two options, separated by "/"): These actions allow you to do two things: First you'll move any Raid Token on the board to a new region (as described above), and then you'll place Banners, following standard rules for Banner placement.
-
Draw 1 card (card icon, x1): Draw 1 card from any faction deck.
The Guilds
The Guilds provide 6 new actions that you can perform using your agents. This allows for even more spaces to place your agents as well as opening up several new ways to manipulate and influence the game.
The Guild area of the board contains 6 "guild seats". When a player is placing an agent, they may choose to place it on a guild seat instead of a council position. This will give them access to the action listed for the chosen guild seat when gameplay reaches this point.
Unlike a faction council position, if no agents are present on a guild seat, its control is not delegated to the nearest agent on the right. Instead, if no agents are present, that guild seat is skipped this game round.
These spaces are not considered to be faction council positions and as such can't be targeted by cards that reference positions (such as the Lion empire's basic card action).
Guild Promotions
The Bounty Hunters Guild and the Scholars Guild have increased effects if your agent remains in those locations.
After one of these guild seats activates, place or flip the Promotion Token to the next tier.
If an agent vacates one of these Guild seats, remove the Promotion Token from the board (it will still be available for future promotions).
Ambassadors Guild
When activated, the controlling player places the Peace Token on any region. If the Peace Token is already on the board, it is moved to the newly selected region.
- The Peace Token: While a region contains the Peace Token, it cannot be the target of attacks.
Seafarers Guild
When activated, the controlling player places 1 Port in any region. If there are no Ports currently present on the board, the controller may instead place 1 Port in each of any 2 regions.
- Ports: When making an attack, all regions containing a Port are considered to be connected.
Commanders Guild
When activated, the controlling player places the next available Action Upgrade Token below the existing actions of any council position. This adds an additional action for that council position holder to choose from.
- Note: A council position may contain only 1 Action Upgrade Token.
Action Upgrade Tokens
- Add 4 Banners.
- Add 5 Banners.
- Make 2 consecutive attack actions. These attack actions can be made with different armies and target different regions. Orca Clan does not get to move a Raid Token.
- Draw 2 cards. Has no effect in Orca Clan.
Bounty Hunters Guild
When activated, the controlling player places a Bounty Token on any region. A region can never contain more than 1 Bounty Token. See Bounty Token rules below.
- Tier 1: Place 1 Bounty Token in any region without a bounty.
- Tier 2: Place 1 Bounty Token in any region without a bounty. You may also move 1 Bounty Token already on the board to any other region without a bounty.
- Tier 3: Place 1 Bounty Token in each of any 2 regions without bounties.
Bureaucrats Guild
When activated, the controlling player removes their agent currently holding the Bureaucrats Guild Seat from the game, and then removes any enemy agent from the game. The removed enemy agent is placed in the illustrated section of the Guild Board to show that player has already been targeted. Each player may only be targeted once per game, though any player may do the targeting more than once - losing an agent each time themselves.
Scholars Guild
- Tier 1: Move 1 of your other agents on the board to an empty council position.
- Tier 2: Swap 2 agents on the board. They can belong to you or an enemy. You may not swap into or out of the Guilds - you may swap two Guild agents, or two Council agents, but you may not swap a guild and a council agent.
- Tier 3: Swap this agent with any enemy agent.
- Note: This does not vacate the position which means that the enemy agent you are swapping with will start fully promoted.
Bounty Tokens
When you execute a successful attack (one that causes control to change) into a region containing a Bounty Token, you take the Bounty Token and place it on your Player Board. It is worth 1 additional point at the end of the game. Use the Bounty Tokens when playing with either or both of the Orca Clan and The Guilds modules.
- Each Orca Clan region contains a Bounty Token. This means that players who find a way to transport armies across the sea to the Orca Clan's home island have an opportunity to score bonus points at the end of the game.
- The Bounty Hunters Guild allows you to place Bounty Tokens on regions. Use these to set up scoring opportunities for yourself, or to entice other players to make attacks that benefit you!
Exposed Loyalty Penalty
During final scoring, each player deducts 1 point for each loyalty revealed during loyalty swaps. For instance, if a player swapped loyalties once during the game, they'll receive -2 points to their end game score since a swap requires you to reveal 2 loyalties.
Placing Ports and Raid Tokens
While thematically the Ports and Raid tokens allow travel over the seas, mechanically they may be placed on any region, even if it appears land-locked on the map.
Scenarios
The back side of the game board is printed without the icons for Banners, Cities, Forts, or Farms, to allow for a greater variety of setup states. Some alternate setups are shown here, followed by rules for drafting your own unique setup.
The scenarios are not perfectly balanced but provide new strategic challenges to experience.
The printed rules show these scenario setups as maps. Their piece positions appear only in the printed images and are not transcribed here:
- Original Map: the original board layout, with the icons for Banners, Cities, Forts, and Farms shown on the board (captioned as printed).
- Defensive Positions
- Famine
- Spiral into Madness
Draft Setup
Before placing anything on the board, each player assigns loyalties using the Loyalty cards.
Place all starting components listed below near each empire, around the edge of the board:
- Bear
- 1 City
- 4 Forts
- 2 Farms
- 9 Banners (in 3 groups of 3)
- Eagle
- 2 Cities
- 2 Forts
- 4 Farms
- 6 Banners (in 3 groups of 2)
- Elephant
- 2 Cities
- 3 Forts
- 2 Farms
- 4 Banners (in 2 groups of 2)
- Lion
- 3 Cities
- 2 Forts
- 3 Farms
- 6 Banners (in 3 groups of 2)
- Horse
- 4 Cities
- 2 Forts
- 2 Farms
Starting with the first player and going around the table clockwise once, each player selects 2 elements (a group of Banners as defined above counts as one element) and places them on the board within the home regions of their respective empires.
The two elements selected may be of the same or different empires, but you cannot place 2 elements in the same region on the same turn. You also may not place more than 2 elements (except for Banner groups) on the same region during the whole process. Banners placed must follow the Supply rules (Maximum of 4 Banners per region, or 6 if a Farm is present).
Then repeat this process but in reverse order (starting with the last player, then going counterclockwise back to the first player).
Continue this process of alternating forward and reverse drafts until all elements have been placed.
From this new starting board state, begin initial agent placement and continue play as normal.
Speed Drafting
For a faster setup, instead of 2 elements, place 1 element for each empire each turn. Some empires will be done before others.