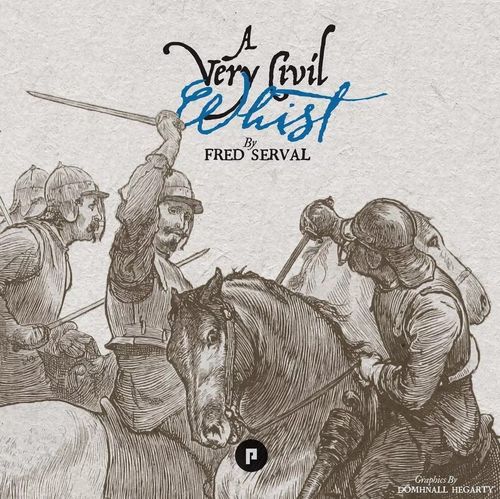
A Very Civil Whist
A Very Civil Whist Rulebook
Table of Contents
Table of Contents
Game Components
- 1 Rulebook
- 2 Player aids
- 1 Board
- One deck of 54 playing cards*, comprising four types of cards:
- Cards 1-3: Leader casualty cards
- Cards 4-9: Action cards
- Cards 10: Bonus Action cards
- Cards J-K: Event cards
- 8 wooden chess pieces:
- 4 Knights (for each War Track)
- 2 Rooks (for each Domestic Support Track)
- 1 Queen (for the Trump Track)
- 1 King (for the Round Track)
- Leader markers:
- 4 Parliament Leaders
- 4 Royalist Leaders
- Asset markers:
- 5 Parliament Assets
- 4 Royalist Assets
*This deck also includes two non-playable Jokers. This way, A Very Civil Whist deck of playing cards can be used to play any classic card game.
Note: the component list above reads "Cards J-K" for the Event cards. The Setup section specifies the 12 Event cards as the cards with Knave, Queen and King.
Setting up the Game
Markers
- Separate the Leader and Asset markers between Royalist (black stripe) and Parliament (red stripe).
- Place the starting Leaders (with *) by their respective player areas.
- Place the Stanley Asset and Cromwell Leader markers by the Side of the Domestic Support Tracks and place the Covenanters marker in London.
- Place all the other Asset markers by their respective player areas.
Cards
- Take the 24 Action cards (cards numbered 4-9), shuffle them and place them face-down on the Action card space.
- Take the 12 Event cards (cards with Knave, Queen and King), shuffle them and place them face-down on the Event card space.
- Take the 12 Leader Casualty cards (numbered 1-3), shuffle them and place them face-down on the Leader Casualty card space.
- Take the 4 Bonus Action cards (cards numbered 10). Place them face-up on the Bonus card space.
Pieces
- Place the Knights on the spaces indicated with * on the four War Tracks.
- Place the black Rook on the '5' space on the Royalist Domestic Support Track, and the red Rook on the '6' space on the Parliament Support Track. Place the Queen on any space on the Trump Track, and the King on the '1' space on the Round Track.
How to Win the Game
There are two victory conditions:
End of Round. If, at the end of a Round:
- a Side's Domestic Support marker is in a matching Victory Space, and
- the Fronts of at least 2 War Tracks are in a matching Victory Space that Side wins.
If both (or neither) Sides fulfil that condition, the game continues for another Round.
End of Game. If there is no End of Round winner after the end of Round 4, the Side with the most Fronts on War Tracks in matching Victory Spaces wins. If there is still a tie, the Side that won the last Trick wins the game.
Key Concepts
Playing Tricks in A Very Civil Whist
A Very Civil Whist is a trick-taking game. In a trick-taking game, a Side tries to win Tricks. In the case of this game, a Trick is a contest between a pair of cards, one played by each Side, that is won by one Side. The value of the card played (between 4 and 10) and its suit (Hearts, Spades, Diamonds, Clubs) determines who wins.
Prior to a card being played, one of the suits will have been chosen as the Trump Suit. Once the Trump Suit is determined, one Side starts a Trick - known as Leading - by playing a card. That card's suit is now the Leading Suit. The Leading Suit may also be the Trump Suit. The opposing Side must play a card of the same suit if they have one in their hand. If they do not, they can play any card. This type of trick-taking is known as 'must-follow.'
Once both cards are played, they are compared. The Side that played the highest value card of the Trump Suit wins. If no card of the Trump Suit is played, the highest card of the Leading Suit wins. In the case of a tie, the Side that is Leading the Trick wins.
Play note: A tie can occur as a result of certain Assets and Leaders that modify the value of the card(s) played into the Trick.
Example: Parliament attacks the Hearts Track. The Royalist must respond with a Hearts card from their hand if they have one. They play a lower value Hearts card, so Parliament wins the Trick.
In the same example, if the Royalist had no Hearts card in their hand, they could play any suit. They play a '4' Diamond. Though lower in value and not the Leading Suit, this wins the Trick as the highest value Trump suit card always wins. (The Trump Track illustration in the rulebook shows Diamonds as the Trump Suit for this example.)
The rulebook illustrates legal and illegal follow plays with two pairs of card images, marked with a check and a cross. The images are not reproduced here.
The War Tracks
There are four War Tracks in the game. These represent the main strategic theatres of the war. Each War Track corresponds to one of the four card suits.
- Hearts - representing the war in the North
- Spades - representing the war in the Midlands
- Diamonds - representing the war in the South
- Clubs - representing the diplomatic battle for Foreign Support
Each Track has six or seven spaces which are fought over by each Side: there is a Front (a Knight piece) on each Track that moves towards a Side's final Victory Space when a Side wins an attack in that suit. Hence, if a Front is moving towards a Side's Victory Space, this represents the war going in their favour on that Track.
Play note: A Side only advances the Front on a War Track if they win the Trick and they are attacking (i.e. Leading). If the defending Side wins the Trick, the Front remains where it is.
At each end of a War Track are one or two Victory Spaces. Victory Spaces are shaded in the colour of the Side that can gain Victory from them (e.g. Barnstable and Plymouth are shaded red, and so are Victory Spaces on the Diamonds Track for Parliament).
Each Track except the Diamonds Track contains a Bonus Space that grants a bonus to the Side of the corresponding colour if the Front enters that space (e.g. if the Front reaches R3 on the Spades, the Royalists gain the 10 of Spades Bonus Action card).
The Clubs Track is important as not only does it contain a Victory Space for each Side, but it determines which Side gets to choose the Trump Suit for the Round.
Example: The Front marker on the Hearts Track is at Newcastle. Parliament attacks the track and wins the Trick. The Front moves to Berwick, a Victory Space for Parliament on the Hearts Track. Parliament could later try to attack again to move the marker to Edinburgh, giving themselves a buffer for if the Royalists attacked back. If Parliament had lost the attack, the Front marker would have remained in Newcastle (and Parliament would have needed to make a Leader Casualty test).
The Domestic Support Tracks
Each Side has a Domestic Support Track. These represent support for that Side among the general population of England and Wales.
Each Track corresponds to two card suits:
- Spades & Clubs - Support for the Royalists
- Hearts & Diamonds - Support for Parliament
Each Track has five spaces. There is a Support marker (a Rook) on each Track. A Side can increase Domestic Support for its cause (move its Support marker up the Track) by playing a card of one of the two suits with a value higher than their current level of Support. This does not involve playing a Trick i.e. it cannot be contested by the other Side.
Play note: Parliament's Support can never be decreased, while the Royalist Support can only be decreased by the John Pym Event.
As with the War Tracks, at each end of a Domestic Support Track is one (for Royalist) or two (for Parliament) Victory Spaces, shaded in the colour of the Side, and each Track contains two (Royalist) or three (Parliament) Bonus Spaces.
Example: The Royalist plays the '9' Spades to boost Domestic Support. As this is a higher value than the current level (6), the Royalist marker moves up one space to 7. This is a Bonus Space on the track, meaning that the Royalist can add the Stanley Asset to their pool of available Assets. Because this card was played on a Domestic Support Track, it is not contested by Parliament.
The Round and Trump Tracks
The Round Track simply tracks (using the King piece) which of the four Rounds are being played. The Trump Track tracks which is the Trump Suit for the Round (using the Queen piece). The Trump Suit is decided in the Preparation Phase by the Side leading on the Foreign Support Track, but it can be changed by Assets during a Round.
Leaders
The Royalists begin the game with four Leaders, while the Parliament begins with three and may receive another one by reaching the '8' space on the Domestic Support Track.
Each Leader has an ability that can help a Side win an attack by providing a type of effect, like a bonus to the value of the card played. A Leader's ability is only used when Leading an attack. If the opposing (defending) Side has a Leader on the same track, that Leader's ability is not used.
(The rulebook's example Leader marker shows Essex, a starting Leader with a Casualty rating of 4 and the ability "No Trump".)
Leaders are placed at the end of the Preparation Phase in the boxes adjacent to the Hearts, Spades, and Diamonds Tracks. Leaders are not placed on the Clubs Track.
If a Side attacks one of these War Tracks and loses the Trick, they will need to test for a Leader Casualty. Each Leader has a Casualty rating (from 3 to 5). If the Leader fails the test, they are killed, maimed, captured, or humiliated in battle, and removed from the game. If the Leader survives the test, they can be placed on any valid track during the next Round's Preparation phase.
Play note: Parliament Leaders have higher Casualty ratings than Royalists i.e. they're more difficult to eliminate.
Events & Assets
Two Events are drawn at random at the start of each Preparation Phase. There are twelve possible Events in total, six for each Side. As there are only four Rounds and two Events per Round, not all Events will appear in a game. Each Event represents a historical personality or event from the conflict. Some Events occur immediately and must be fully resolved, while others may make an Asset available to a Side.
An Asset is a marker that is typically gained by a Side following an Event, though some are obtained from a Bonus Space on a track. When an Asset is obtained it is set aside to be played later in the game. Most Assets can be played as a reaction or to boost an attack. Some are played as an action. Once the Asset is played, it is removed from the game.
Note: the individual ability of each Leader, Asset and Event is printed on its own marker or card and is not listed in this rulebook. It is not transcribed here.
Bonus Action cards
The four '10' cards (the Bonus cards) become available to the relevant Side (Hearts and Diamonds for Parliament, Spades and Clubs for Royalists) when a Front or Support marker reaches the relevant Bonus Space. When this happens, the Side can claim that card. It is placed in their play area, to be added to their hand at the end of the next Preparation Phase. When a Side plays a Bonus card, it is placed in their play area instead of being discarded, to re-enter the hand at the end of the next Preparation Phase.
Once a Side claims a Bonus, it cannot be lost, except for the '10' Clubs card (if the Front on the Spades War Track reaches Dublin. In that case, the '10' Clubs card is immediately removed from the game, even if the Royalist Side did not claim it).
Example: During the Preparation Phase, players draw the Queen Henrietta Event card. The Royalist player moves the Foreign Support's Front marker from R2 to R3, thereby acquiring the '10' Spades. It will be added to Royalist player's hand at the end of the Preparation Phase.
How to Play the Game
1 – Preparation Phase
During this phase, Events will be resolved and both Sides will draft their hands by playing a series of Tricks.
This Phase is procedural, with the Sides working through the following steps in order:
- Create the Action deck (skip on Round 1)
- Return all Action cards to the Action deck and shuffle it. This includes any Action cards a Side has remaining in their hand from the previous Action Phase.
- Play note: Make sure that any claimed Bonus Action cards are not reshuffled into the Action deck, but are instead placed beside the board.
- Deal Action cards
- Deal 8 Action cards face-down to each player.
- Resolve two Events
- Draw and resolve, one at a time, two Event cards. Once resolved, each card drawn is removed from the game. If the Event makes an Asset available to a Side, they should place it by their play area.
- Determine the Trump Suit
- The Side leading on the Foreign Support Track (the Front marker on an R or P space) determines which suit will be the Trump Suit for the Round by placing the Queen piece on the relevant symbol on the Trump Track.
- Play four planning Tricks
- Draw the top two cards from the Action deck and reveal them face-up.
- The Side leading on the Foreign Support Track Leads the first Trick. The winning Side picks one of the two cards drawn and adds them to their hand, the losing Side takes the other. The cards added to the hand are available to play in later planning Tricks.
- The next two cards are revealed, and the other Side now Leads on the next Trick (not the winner of the Trick). This continues until there are no cards remaining in the Action deck (both Sides will have led on two Tricks).
2 – Action Phase
During this Phase, each Side alternates taking one of three possible actions, until one Side has no cards left in their hand, ending the Round. The Side leading on the Foreign Support Track takes the first action.
The three actions are: Attack a War Track, Increase Domestic Support, or Play an Asset.
- Attack a War Track
- The acting Side announces which Track it is targeting by playing a Trick. The played card must be of the same suit as the Track, unless:
- The attacking Side has no card of the Track's suit, in which case they can lead with a card of the Trump Suit, or
- A Leader (Manchester or Wilmot) allows a card of any suit to be played.
- Play note: This means that if a Side does not have cards of a Track's Suit, or the Trump Suit, they cannot attack that Track. If a Side only had cards remaining of a certain suit, they could only attack that corresponding Track, even if they were already in their final Victory Space on that Track. Passing is not allowed.
- The attacking Side may then commit an available Asset if desired.
- The defending Side then plays a card in response, and may also commit an Asset.
- If the attacking Side wins, they advance the Front marker one space towards their final Victory Space (if possible).
- If the attacking Side loses, the marker stays where it is, and the attacking Side checks for a Leader Casualty (if a Leader is present).
- Leader Casualty: Draw two cards from the Leader Casualty deck, if the combined value is higher than the Casualty rating printed on the marker, the Leader is removed from the game. Otherwise, there is no effect. Either way, return the two drawn cards to the Leader Casualty deck and shuffle it.
- The acting Side announces which Track it is targeting by playing a Trick. The played card must be of the same suit as the Track, unless:
- Increase Domestic Support
- The acting Side plays a card of a suit matching the colour of its Side and of a value higher than the number in the current box of its Domestic Support Track to advance their Support marker into the next space.
Optional Rule – Foreign Influence
Once per Preparation Phase, after revealing an Event card but before resolving it, the player leading on the Foreign Support Track may discard that Event by moving the Foreign Support marker one space closer to the opponent's Side.
Designer's Notes
Designing A Very Civil Whist was an exciting challenge given the unique design context. Created as a freebie for PunchedCon in Coventry, the game had to be produced quickly with minimal resources – a standard deck of cards and a few markers – while still offering an engaging experience.
The design is based on German Whist, a two-player variant from 19th century England. This classic structure allowed me to create a new type of card-driven system, where players draft their hand and take actions on the board. This two-step process adds depth and requires careful planning, reflecting the complex decisions faced by historical factions.
I was inspired by a desire to create historical games using traditional mechanics, my fascination with the dynamics of civil wars, and my interest in a novel card-driven wargame. German Whist's structure seemed well-suited to abstract the shifting loyalties and political struggles that impact kinetic warfare.
Events play a significant role in altering the flow of the game – each round begins with two random Events drawn from a deck consisting of notable figures and moments from the war. Leaders and Assets add further strategic options, with the former providing round-long benefits and latter acting as one-time-use bonuses.
The game also features asymmetric elements, with each faction having specific cards unlocked by meeting certain conditions. These powerful cards – such as the Parliament's New Model Army (10 of Hearts) or the Royalists' Irish support (10 of Clubs) – can shift the course of the war and are integral to each player's strategy. Leader Casualty checks at the end of failed attacks add uncertainty, emphasizing the risks of military engagements.
The project constraints pushed us to focus on simplicity and accessibility, resulting in a stripped-down game that serves as a quick filler or an introduction to the historical period. Despite these limitations, the tight timeline and production restrictions ultimately proved liberating, allowing us to experiment with creative solutions and make the most of available resources.
When A Very Civil Whist was picked up by PHALANX, Donal refined his already amazing work on the art, and the publisher's development team helped improve gameplay and balance, resulting in a more polished product.
The core question remains: How civil can we remain during a Civil War?
Origins of the English Civil War
Henry VIII's dramatic break from the Catholic Church in the 1530s sparked explosive religious change. The Church of England was born, but with it came deep divisions: Protestants and Catholics, Puritans and Conformists, all vying for influence. Elizabeth I attempted to impose a middle way, which satisfied no one entirely. While she excelled at keeping religious dissent in check, her death in 1603 ushered in the Stuarts, who were less adept at walking tightropes.
James I of England (and VI of Scotland), a staunch believer in the divine right of kings, regarded himself as God's representative on Earth. While James sought to strengthen royal authority, Parliament had other ideas. English legislators, emboldened by their growing control over taxation, began asserting themselves in ways that irked the king. Religious friction added fuel to the fire. James's refusal to satisfy Puritan demands for further reforms alienated one side, while his failure to lift restrictions on Catholics frustrated the other. The Gunpowder Plot of 1605 – a failed attempt by Catholic conspirators to blow up Parliament – cemented deep-seated Protestant suspicions of Catholic treachery, leaving James trapped in a religious minefield.
Charles I inherited his father's belief in absolutism but lacked James's ability to charm or cajole his way out of trouble. Charles's reign was marked by an unshakable faith in his divine mandate, a catastrophic lack of political judgment, and an almost allergic reaction to compromise. His personal rule from 1629 to 1640, during which he governed without Parliament, epitomized his disdain for constitutional checks on royal power. To fund his government, Charles resorted to increasingly unpopular methods, such as levying ship money. His close association with Archbishop William Laud, who championed high-church Anglicanism, alienated Puritans and other dissenters. Laud's insistence on liturgical uniformity culminated in the introduction of a new prayer book in Scotland, sparking the Bishops' Wars (1639, 1640). These conflicts were both militarily disastrous and financially ruinous for Charles, forcing him to recall Parliament.
When Charles summoned the Long Parliament in 1640, it was a showdown between two fundamentally opposed visions of governance. Parliament moved quickly to dismantle many of the king's prerogatives, abolishing controversial courts and passing the Triennial Act (1641) to ensure regular parliamentary sessions. For Charles, this was nothing short of a hostile takeover. When Charles attempted to arrest five leading members of Parliament in January 1642, the move backfired spectacularly. By the summer of 1642, both sides had raised armies, and England found itself plunged into a civil war that would redefine the balance of power between monarchy and Parliament.