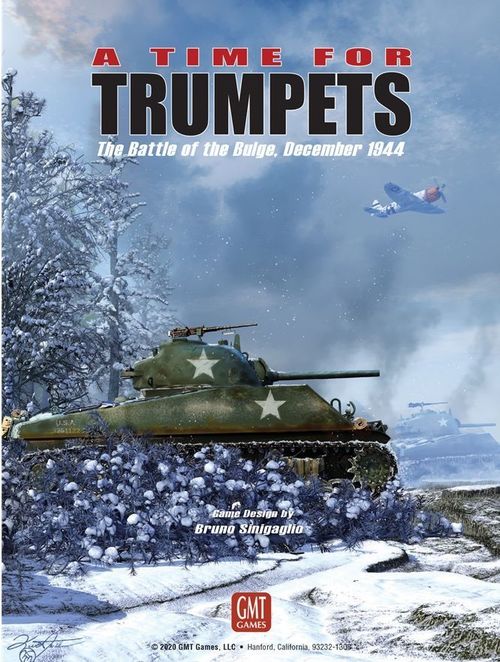
A Time for Trumpets: The Battle of the Bulge, December 1944
A Time for Trumpets: The Battle of the Bulge, December 1944 Rulebook
Table of Contents
Table of Contents
- Introduction
- Components List
- List of Rules
- Common Abbreviations
- 1.0 Combat Unit Graphic Keys
- 2.0 Combat Unit Characteristics
- Mutual Player Segments - Start of Turn: Sections 3.0 to 12.0
- 3.0 Turn Preparation Segment
- 4.0 Mutual HQ Freshness Determination
- 5.0 Mutual Aircraft Segment
- 6.0 Chains of Command
- 7.0 Mutual Command Segment
- 7.1 Command Basics
- 7.2 Comm Paths
- 7.3 Comm Paths and Enemy ZOC
- 7.4 Comm Path: Army HQ to Army Echelon Combat Units
- 7.5 Comm Path from Army HQ to Corps HQ
- 7.6 Comm Path: Corps HQ to Corps Echelon Combat Units
- 7.7 Comm Path from Corps HQ to Allied FAG HQ
- 7.8 Comm Path from FA Group HQ to Individual FA Battalions of the Group
- 7.9 Comm Path from Corps HQ to Div/Bde/KG HQ
- 7.10 Comm Path: Div/Bde/KG HQ to Subordinate Units
- 8.0 US Areas of Operation (AO)
- 9.0 Mutual Supply Segment
- 9.1 Allied Supply Sources
- 9.2 German Supply Sources
- 9.3 German Use of Captured Allied Supply Sources
- 9.4 Enemy Zones of Control Block Supply
- 9.5 When Supply Occurs
- 9.6 Supply Roads from Supply Source to HQ
- 9.7 Supply Paths from HQ to subordinate Combat Units
- 9.8 Supply Path: Army HQ to Army Echelon Combat Units
- 9.9 Supply Path: Corps HQ to Corps Echelon Combat Units
- 9.10 Volks Artillery Corps (VAK) and NW Brigades
- 10.0 US Supply By Air
- 11.0 German Fuel Shortage
- 12.0 American Supply Dumps
- Individual Player Segment Overview: Sections 13.0 to 17.0
- 13.0 HQ Activity Segment
- 13.1 HQ Activity Statuses
- 13.2 Subordinate HQ Activity Status & Autonomy
- 13.3 HQ Activity Status Notation on PD, MO and AF Turns
- 13.4 HQ Activity Status Notation on EV Turns
- 13.5 HQ Activity Basics
- 13.6 Units that need Rest - Forced to Counterattack (CA)
- 13.7 Units that need Rest - Forced to Refight an Engaged
- 14.0 Army HQ Activation
- 15.0 Corps HQ Activation
- 16.0 Division/Brigade/KG HQ Activations
- 17.0 Reaction Interlude before Combat [Advanced Game]
- Individual Player Segment Specifics: Sections 18.0 to 60.0
- 18.0 Orders Segment
- 19.0 Construct Defenses Segment
- 20.0 Fording Preparation Segment
- 21.0 Bridge Construction Segment
- 22.0 Bridge Demolition
- 23.0 Normal Unit Stacking
- 23.1 Headquarters Stacking
- 23.2 Penalties for HQ Over-stacking
- 23.3 Combat Units other than HQ
- 23.4 German Artillery Formation Substitutes [Optional]
- 23.5 Friendly Army Stacking and Restrictions
- 23.6 Friendly Corps Stacking and Restrictions
- 23.7 Friendly Division/Brigade Stacking Restrictions
- 23.8 Prohibited Entry Penalty
- 23.9 Prohibited Stacking Penalties
- 24.0 Special Unit Stacking
- 24.1 The 1SS Panzer Division Commands the 3FJ
- 24.2 The 116 Pz and the 560 VG Cooperate
- 24.3 KGP and the 150th Brigade
- 24.4 Fuhr Escort Brigade AAA
- 24.5 The US 4ID and 10AD
- 24.6 The US 101AB and 10CCB
- 24.7 Stacking Restriction for Allied Tank Battalions
- 24.8 Stacking Details for Allied Tank Battalions
- 25.0 Zones Of Control (ZOC)
- 25.1 ZOC Chart Specifics
- 25.2 When Enemy ZOC Blocks Command Path, Supply Path or Supply Road
- 25.3 ZOC Across Rivers and Streams
- 25.4 ZOC are Exerted into Hexes off the Map Edge
- 25.5 ZOC Interface
- 25.6 Zones of Control Inhibit Enemy Movement
- 25.7 Retreating into an Enemy ZOC
- 25.8 Advance After Combat Through Enemy ZOCs
- 26.0 German Army Boundaries
- 27.0 Reinforcements
- 28.0 Strategic Movement
- 29.0 Movement
- 30.0 Movement Across Water(s)
- 31.0 HQ Movement
- 32.0 Artillery Movement
- 33.0 Interdicted Forest Road Movement
- 34.0 Off Board Movement
- 35.0 Overrun During Movement - Day Turns
- 36.0 Overrun During Movement - Night Turns
- 37.0 Reaction Interlude before Combat
- 38.0 Leader Reaction Phase [Advanced Game]
- 39.0 Leaders [Advanced Game]
- 40.0 Tiger Panzer Scare
- 41.0 German Night Combat Advantage
- 42.0 Allied Cooperation and Limitations
- 43.0 Artillery Combat Basics
- 44.0 German Artillery Formation Substitute Units [Advanced Game]
- 45.0 German Nebelwerfer Operations
- 46.0 German Field Artillery (FA) Operations
- 47.0 Allied Field Artillery Operations
- 47.1 Resting/Exhausted FA Basics
- 47.2 British Division/Brigade and US Division FA
- 47.3 British Corps Artillery - 4AGRA and 5AGRA
- 47.4 US Corps Echelon Independent Artillery Battalions
- 47.5 US Army Echelon Independent Artillery Battalions
- 47.6 US Field Artillery Groups (FAG)
- 47.7 Allied Field Artillery Fire Basics when Attacking
- 47.8 Allied Field Artillery Fire Basics when Defending
- 47.9 Combined FA Fire Restrictions
- 48.0 Bombardment Shock [Advanced Game]
- 49.0 Terrain Effects on Ground Combat
- 50.0 Weapons Effects on Ground Combat
- 51.0 Ground Combat Procedure
- 52.0 Combat Results
- 52.1 Result is (AE) - Attacker Eliminated
- 52.2 Result is (DE) - Defender Eliminated
- 52.3 Result is (1•/) - Attacker AFV Step Loss
- 52.4 Result is (/1•) - Defender AFV Step Loss
- 52.5 Result is (1/)
- 52.6 Result is (/1)
- 52.7 HQ Combat Loss Procedure
- 52.8 German Step Loss Progression
- 52.9 Allied Step Loss Progression
- 52.10 (AR1/) or (AR2/) or (AR3/)
- 52.11 (/DR1) or (/DR2) or (/DR3) or (/DR4)
- 53.0 Enhanced AFV Combat [Advanced Game]
- 54.0 Retreat After Combat
- 55.0 Advance After Combat
- 56.0 Overrun During Advance After Combat
- 57.0 Blitzkrieg 44
- 58.0 End of Combat Segment Admin
- 59.0 Exploitation
- 60.0 Player End of Turn Segment
- Mutual Player Segment - End of Turn
- 61.0 Mutual End of Turn (EOT) Segment
- Examples of Play
- Strafe Attack
- Interception Example
- Example of HQ Activation Process: Army, Corps
- Bridge Construction
- Comm Path - Supply Path Examples
- Effects of ZOC on Movement and Supply
- Movement Examples - Army Boundary
- Movement Examples - River Crossing
- Movement Examples - Interdiction
- Movement Examples - Skorzeny Infiltration (94.1)
- Example: KGP Breakout - 16EV turn (95.0)
- Principles of Design
- Abbreviations
Introduction
Game Scale
Each game-turn represents approximately 6 hours of real time. Each map hex represents a distance of 1 mile across and an area of about one square mile. The units consist primarily of battalions and companies plus a minimal number of other sized units.
The Map
The map shows the Ardennes including portions of Germany, Luxembourg, Belgium, and France where the Battle of the Bulge was fought. The map illustrates the most prominent terrain features of this region. A grid of numbered hexagons (hexes) has been superimposed on the map as a means of regulating the movement and positioning of the playing pieces. Also located on the map is a Game Turn Record Track, Off-Board Movement Areas, German Bridge Holding Boxes and depictions of the Terrain Features. The types of Terrain found on the map and a description of each is provided in the following paragraphs.
Roads. There are two types of roads on the map: major and minor. Major roads are portrayed by a solid dark line and represent primary paved roads of various widths. Minor roads are portrayed by a dark broken line and represent secondary roads, which may be narrow paved roads, maintained gravel roads or dirt roads of significant historical impact. On secondary roads, AFV and truck mobile units do not move as efficiently as lighter tracked or cross-country rated vehicles.
Forest. The forest in the Ardennes was as it is today, managed by forest units. The trees were maintained in a geometric pattern and the growth of underbrush and saplings were curtailed. The management permitted systemized harvesting of wood and the forests possessed an abundance of logging trails. Originally, ATfT draft maps had two types of forest terrain, consisting of managed forest and rough-forest. For simplicity, the two types were distilled into Forest. Travel through Forest is slow and most vehicles are road bound. The terrain affords a defensive benefit for close combat, but trees become shrapnel when hit by HE from Field Artillery (FA) or Nebelwerfers (NW); therefore, Forest does not mitigate the effects of FA or NW.
Woods. Woods represents lightly wooded terrain with areas of cleared space and an abundance of thoroughfares; i.e., secondary roads, dirt roads, etc. The nature of terrain and the improvements allow fairly easy movement into and through the locale, while also providing a measure of concealment and a reduction of visibility during inclement weather. However, the terrain affords no defensive benefit for close combat, nor does it mitigate the effects of FA or NW.
Clear. Also known as good tank country, this terrain represents wide open spaces with few impediments to movement. It includes flat terrain or gently sloping hills and agricultural areas for farming or raising livestock. Naturally, the terrain affords no defensive benefit for close combat, nor does it mitigate the effects of FA or NW.
Broken. This type terrain is harder to negotiate than clear terrain or woods, but it is easier to negotiate than Forest. Due to its undulations and corresponding concealments, it also provides a defensive benefit for close combat while granting the occupants a measure of protection against Field Artillery and Nebelwerfer fire.
Marsh. Unpleasant terrain for man, machine or beast. This terrain represents areas of poor drainage.
Villages. Small settlements with limited infrastructure, but with enough to provide a measure of protection for a defender. The Ardennes, being inhabited for centuries, possessed hundreds, if not thousands of these villages and hamlets. The most significant and historically relevant are shown on the map.
Towns. These represent locations of greater importance than villages. They are not necessarily large, but are almost always in critical locations. Additionally, they represent a hub for supplies that were deposited throughout the Ardennes by the Red Ball Express, and as such they afford the Germans an opportunity to capture fuel when they are entered. These built-up areas double the strength of the defenders and also grant a measure of protection against Field Artillery and Nebelwerfer fire.
Cities. Urban areas at the north edge of the Ardennes. Large Allied supply dumps were concentrated in and around the urban areas of Liege, Verviers and Namur. These built-up areas triple the combat strength of the defenders and also grant a measure of protection against Field Artillery and Nebelwerfer fire.
Meuse River. The major impediment to German success. It flows northwards along hex-sides from Vireux (0636) on the west edge to Namur and then eastwards to Liege. Units may not cross the Meuse other than at bridges.
Other Rivers. All other rivers that are not the Meuse River. These also flow along hex-sides and were also impediments to German success. Vehicular units may not cross rivers other than at bridges and under certain conditions at river fords.
River Tunnel. The Lesse River passes underground naturally in 3035; hence the river is not an obstacle in that hex.
Streams. Not as wide or as deep as rivers, but during December they were formidable obstacles to movement. Like rivers, they flow along hex-sides. Under certain conditions some vehicular units may cross streams other than at bridges.
Lakes. There are five lakes on the northeast section of the map. Lake hex-sides are impassable except across a bridge. For example, see Lake Butgenbach and its four impassable lake hex-sides. Units across from each other on opposite sides of lakes are not adjacent.
Bridges. A bridge exists wherever a road crosses a river, a stream or a lake hex-side.
Schnee Eifel. The Schnee Eifel (Schneifel), or Snow Mountains, is a 46-hex area delineated by an unobtrusive white border around the area just above Prum. This area is subject to Snow Squalls until a high pressure weather system moves over the battlefield on 23Dec44.
Map Dimensions. The complete map measures 4-ft x 6-ft.
Single Map Scenarios. See 6PzA Scenarios 91.0 and 92.0.
Components List
A complete game of A Time for Trumpets includes:
- Five 22" x 34" maps
- Twelve counter sheets of 2304 die-cut playing pieces
- Two six-sided white dice (a red die facilitates some actions)
- One Rules of Play Booklet: sections 1.0 to 61.0
- One Scenario Booklet: sections 70.0 to 160.0
- One Play-aid Booklet
- An 11x17 Card with the Sequence of Play on one side and the Mutual Player Segment on the reverse
- An 11x17 Card with the Movement Segment on one side and Miscellaneous Charts on the reverse
- An 11x17 Card with the Ground Combat Procedure plus Artillery & Air Support Charts on both sides
- An 11x17 Card with the CRT and all other charts required to step through the Combat Segment
- Four Play-aid Cards for German Artillery Parks
- One Play-aid Card depicts the Chains of Command
List of Rules
There are three types of rules: Basic, Advanced and Optional. If a rule is not identified as Advanced, then the rule is Basic. The Advanced rules impart significant, historical facets to the game; they are intended to loosely drive the progress of the game by interjecting intelligence as it was known in 1944. By mutual consent, players should add advanced rules as they become familiar with the basic system. During the extensive playtesting of the game, the advanced rules were usually used. Optional rules are provided simply to facilitate ease of play---they are found in rule sections as applicable.
Rules sections: Combat Unit Descriptions (1.0 Combat Unit Graphic Keys, 2.0 Combat Unit Characteristics); Mutual Player Segments - Start of Turn (3.0 Turn Preparation Segment, 4.0 Mutual Fresh HQ Determination, 5.0 Mutual Aircraft Segment, 6.0 Chains of Command, 7.0 Mutual Command Segment, 8.0 US Areas of Operation (AO), 9.0 Mutual Supply Segment, 10.0 US Supply By Air, 11.0 German Fuel Shortage, 12.0 American Supply Dumps); Individual Player Segments - Overview (13.0 HQ Activity: Active or Resting, 14.0 Army HQ Activation Segment, 15.0 Corps HQ Activation Segment, 16.0 Division/Brigade HQ Activations, 17.0 Reaction Interlude before Combat); Individual Player Segments - Specific (18.0 Orders Segment, 19.0 Construct Defenses Segment, 20.0 Fording Preparation Segment, 21.0 Bridge Construction Segment, 22.0 Bridge Demolition Basics, 23.0 Normal Unit Stacking, 24.0 Special Unit Stacking, 25.0 Zone of Control (ZOC), 26.0 German Army Boundaries, 27.0 Reinforcements, 28.0 Strategic Movement, 29.0 Movement, 30.0 Movement Across Water(s), 31.0 HQ Movement, 32.0 Artillery Movement, 33.0 Interdicted Forest-Road Movement, 34.0 Off-Board Movement, 35.0 Overrun during Movement - Day Turns, 36.0 Overrun during Movement - Night Turns, 37.0 Reaction Interlude before Combat, 38.0 Leader Reaction Phase, 39.0 Leaders, 40.0 Panzer Scare, 41.0 German Night Combat Advantage, 42.0 Allied Cooperation and Limitations, 43.0 Artillery Combat Basics, 44.0 German Artillery Formation Substitute Units, 45.0 German Nebelwerfer Operations, 46.0 German Field Artillery Operations, 47.0 Allied Field Artillery Operations, 48.0 Bombardment Shock, 49.0 Terrain Effects on Ground Combat, 50.0 Weapons Effects on Ground Combat, 51.0 Ground Combat Procedure, 52.0 Combat Results, 53.0 Enhanced AFV Combat, 54.0 Retreat after Combat, 55.0 Advance after Combat, 56.0 Overrun during Advance after Combat, 57.0 Blitzkrieg 44, 58.0 End of Combat Segment Admin, 59.0 Exploitation, 60.0 Player End of Turn Segment); Mutual Player Segment - End of Turn (61.0 Mutual End of Turn (EOT) Segment).
Common Abbreviations
AF Afternoon Turn; CF Combat Factor; CP Command Post; DF Defense Factor; ER Effectiveness Rating; EV Evening Turn; FA Field Artillery; FJ Fallschirmjager; HQ Headquarters; KG Kampfgruppe; MF Movement Factor; MO Morning Turn; NW Nebelwerfer; PD Pre-Dawn Turn; PG Panzer Grenadier; PR Patton's Relief; PZ Panzer; VG Volksgrenadier.
Definition of "Control"
A combat unit controls the hex it occupies. A vacant hex is not controlled by either side.
Reference Formula
Sections numbered 1 through 61 are found in this Rules Booklet. Sections numbered 70 or higher are found in the Scenario Booklet.
1.0 Combat Unit Graphic Keys
1.1 Counter Graphic Features
a. Emblems. Usually, these are historical, formation accouterments found in the upper left corner of most units. b. NATO Box. A rectangle found in the center of Non-AFV counters with NATO symbol identifying the type of unit. c. Wheels. Three wheels below the NATO symbol box signify cross-country vehicles. Two wheels signify trucks. d. Range Circle. Found in the upper right corner of HQ and on the back side of artillery units. For the HQ, it shows Command Range. For the "In-Battery" side or back side of artillery units, it shows Firing Range. e. Banners. These are colored bars that cover the top third of every Corps HQ and Corps Echelon combat unit. f. Ribbons. Colored bars that are smaller than Banners, which are found above Armored Fighting Vehicles (AFV). g. Chevron. A shield shaped line that encircles an AFV to denote that it is a Company sized unit. h. Heavy AFV. A superscripted dot to the right of the combat factor indicates that the AFV is a Heavy AFV. Heavy AFV's include Panther, Tiger I, Tiger II, Jagdpanther or Jagdtiger. i. Reduction Bar. A light-colored rectangle in the center of the counter spanning the width of a counter denotes that the unit is on the reduced-strength side. j. An "In-Battery" or "Deployed" square. A centered, light colored square, that appears on the back side of artillery units to denote they are In-Battery; or for HQ to denote they are Deployed (tents erected, generators in use, etc.).
1.2 Army Color Distinction
Every Army is represented by a distinct color.
1.2.1 US 1st Army
a. The 1st US Army color is white. b. Army Echelon Non-AFV combat units display the 1st US Army color in the NATO box. c. Army Echelon AFV combat units display a 1st US Army color Ribbon above the AFV. d. The 1A HQ and all 1st Army units at Army Echelon have a white background around the ER. The ER, or effectiveness rating, is the number below the center of the NATO box. The ER is a subjective measure of training, experience, equipment, morale, etc. For simplification, it may be referred to as Morale. e. Every subordinate Corps, Divisional and Brigade unit in the US 1st Army has a white background around the ER.
1.2.2 US 3rd Army
The 3rd US Army color is orange. The rules are the same as those for the US 1st Army in 1.2.1 above, with the distinction that the Army color is orange rather than white.
1.2.3 German Armies
The rules are the same as those for the US 1st Army in 1.2.1 above, with the distinction that the German Armies each have their own specific color: pink for the 6th Panzer Army; light blue for the 5th Panzer Army; and yellow for the 7th Army.
1.3 Corps Color Distinction
Every Corps is represented by a distinct color.
1.3.1 US 5 Corps
a. A colored Banner appears on every Corps HQ and every Corps Echelon unit. The Banner for the US 5 Corps is red. b. The combat units of every Division or Brigade that is subordinate to the US 5 Corps HQ will have red on the counter. c. Every unit with a red Banner may stack with and support any other unit with red on the counter. d. Division or Brigade subordinates of the US 5 Corps that are not AFV have red in the NATO box. e. Division or Brigade subordinates of the US 5 Corps that are AFV have a red ribbon above the AFV.
1.3.2 Other Allied Corps
The rules are the same as those for the US 5Corps in 1.3.1 above, with the distinction that the other Allied Corps each have their own specific color. Allied Corps are identified by Arabian Numerals.
1.3.3 German Corps
The rules are the same as those for the US 5Corps in 1.3.1 above, with the distinction that the German Corps each have their own specific color. German Corps are identified by Roman Numerals.
1.4 Division and Brigade Distinctions
a. The combat units of every Division or Brigade have the color of the parent Corps on the counter. b. All Division/Brigade, Non-AFV combat units have the parent Corps color within the NATO box. c. All Division/Brigade, AFV combat units have the parent Corps color on a ribbon above the AFV. d. The Corps color does not segregate Divisions or Brigades. e. Divisions and Brigades are identified by the historical emblems that appear in the upper left corner of the counter.
2.0 Combat Unit Characteristics
2.1 Play-Aid Counters
There are a myriad of play-aid counters to assist in the play of the game, minimize record keeping and facilitate ease of play. Some of the play-aid counters are colored to signify that they represent specific German or specific Allied use. Although GMT has provided hundreds of these counters, players may sometimes encounter a shortage of certain types; when this occurs players are free to increase the number of play-aid counters with facsimiles.
2.2 Aircraft in the Ardennes
2.2.1 Aircraft Unit Size
The Air combat unit sizes are the Squadron for the US and the Staffel for the Germans. These formations were similar, were commanded by the same rank and usually included about 25 aircraft. For the purposes of this game, each unit will represent about 25 aircraft. The air units in the game are based on the number of sorties over the battlefield as estimated by Royce Thompson, OCMH.
2.2.2 Aircraft Unit Types
Many types of aircraft fought in the Battle of the Bulge, however, for simplicity, only the aircraft that were predominantly available are included. There are two primary designations of air combat units in the game: fighters and bombers. Fighters may intercept, strafe and support ground combat. Bombers may strafe and support ground combat. The aircraft are depicted below.
2.2.3 German Fighter and Bomber Aircraft
- Messerschmitt Jet Fighter: Me262A
- Focke-Wulf Fighter: FW190D9
- Junkers Medium Bomber: Ju88A4
2.2.4 American Fighter and Bomber Aircraft
- Republic Fighter: P47D Thunderbolt
- Martin Medium Bomber: B26G Marauder.
2.2.5 Aircraft Unit Capabilities
a. The first number below the aircraft is the Air-to-Air attack factor, which is 6 for an Me262. b. The second number below the aircraft, a parenthesized (7), is the Air-to-Air defense factor for an Me262. c. The third number below the aircraft, a 20 in white font, is the ground support combat factor for an Me262. d. The last number below the aircraft, a 1 in black font, is the ground support column shifts provided by an Me262. e. For an Me262, one column shift right applies for attack support or one column shift left applies for defense support.
2.3 Ground Combat Unit Sizes
Cardboard pieces or unit counters represent individual combat units that fought during the battle. The majority of the combat unit counters are ground combat units. There are also air combat units. Combat unit counters contain several pieces of information: nationality, size, type, combat strength, effectiveness rating (ER), movement factor (MF), combat unit identity, command designation and symbols denoting functional or combat characteristics. Further detail will be provided in succeeding sections of the rules. The nationalities of the combat units are denoted by the background color of the counters as follows:
- American Army units: GREEN
- British Army units: KHAKI
- German Wehrmacht: GREY
- German Waffen SS: BLACK
- German Fallschirmjager: BLUE
Most of the ground combat units in ATfT are battalion sized combat units. The battalion is generally homogeneous with regard to mission and functionality. Homogeneous, because an infantry battalion is comprised primarily of infantry companies, a tank battalion is comprised primarily of tank companies, etc. A battalion based game is designed with differentiation inherent to the system, whereas a regimental level game is designed with integration inherent to the system. For example, in a battalion level game, Kampfgruppe Peiper (KGP) will include two separate panzer battalions, a panzer grenadier battalion, an anti-aircraft (AA) battalion and an artillery battalion; whereas in a regimental level game, KGP will be comprised of one counter representing all the aforementioned units. The combat unit size is found above the box showing the NATO symbol that identifies the type of unit. The unit sizes are depicted by the following symbols:
- (no bar; dot) = Platoon
- I = Company
- II = Battalion
- III = Regiment
- X = Brigade
- XX = Division
- XXX = Corps
- XXXX = Army
2.4 Leaders
Leader attributes and characteristics are described in 39.0.
2.5 Ground Combat Unit Types
There are five primary designations of ground combat units as related to how the units participate in combat. See below.
- Headquarters (HQ) - section 2.6.
- Front Line Units - section 2.7.
- Combat Support Units - section 2.8.
- Artillery Combat Units - section 2.9.
- Optional German Artillery Substitutes - section 2.10.
2.6 Headquarter (HQ) Combat Units
Although HQ should not get involved in combat, they do have a combat capability, which is mainly for defense. Combat units fight with best efficiency when they are properly commanded by the appropriate Headquarters. The various HQ are depicted with the term HQ in the NATO box or to the right of the NATO box. The HQ for the Germans are described in rule 2.6.2. The HQ for the Americans and British are described in rules 2.6.3 and 2.6.4.
2.6.1 Headquarters Basics
The sections below provide an overview of Headquarters (HQ) and Command Posts (CP) and their subordinate formations.
2.6.1.1 The Various HQ and Echelon Levels
a. The German HQ include Army HQ, Corps HQ, Division HQ, Brigade HQ, Kampfgruppe (KG) HQ and Command Posts (CP). b. The US HQ include Army HQ, Corps HQ, Field Artillery Group HQ, Division HQ and Command Posts (CP). c. The British HQ include Corps HQ, Field Artillery Group HQ, Division HQ and Brigade HQ. d. An Army HQ commands a limited number of combat units at Army Echelon and a number of Corps HQ. e. A Corps HQ commands a limited number of combat units at Corps Echelon and a number of Division or Brigade HQ. f. A Division/Brigade HQ commands the combat units of the Division or Brigade, and sometimes a KG HQ or a CP.
2.6.1.2 Army HQ and Army Echelon Capabilities
a. Army Level assets do not usually lead attacks. Rather, Divisions and Brigades lead attacks. b. Army echelon assets usually do not attack by themselves, although they may. c. The Army level combat units assist Divisions or Brigades by adding punch or security.
2.6.1.3 Corps HQ and Corps Echelon Capabilities
a. Corps Level assets do not usually lead attacks. Rather, Divisions and Brigades lead attacks. b. Corps echelon assets usually do not attack by themselves, although they may. c. The Corps level combat units assist Divisions or Brigades by adding punch or security.
2.6.1.4 Division/Brigade HQ and Capabilities
a. Divisions and Brigades provide the primary offensive and defensive capabilities for an Army. b. The Battalions of Divisions and Brigades are sometimes dispersed based upon situations, particularly on 16Dec. c. When Dispersion occurs, Command Posts are used as they were historically, to extend lines of communication.
2.6.1.5 Common Attributes of HQ
a. The formation commanded by the HQ is identified to the left of the NATO box. b. The size of the formation commanded is on top of the NATO box. See 2.3 for formation sizes. c. On the front side of the counter the HQ is in March Order with wheels below the NATO box and a movement factor of 8 or 9. d. A superscript next to the MF is the cost to change mode from March Order to deployed mode, and vice versa. e. When the HQ is in March Order, the Command Range in the upper right circle is a reduced range. f. When HQ are deployed (i.e., when back-side up), there are no wheels below the NATO box and the MF is 0. g. When a HQ is back side up, a lightened square appears on the counter. h. The Command Range in the upper right circle is increased (doubled) when the HQ is deployed (not in March Order). i. Command Range is the distance in hexes a subordinate HQ or unit may be from the parent HQ and still be in command. j. The combat factor, or CF, is a parenthesized (1), indicating it contributes to defense only. k. Units with parenthesized combat factors may not attack. l. Important for Brigade units and Division units is the Formation Emblem in the upper left corner.
2.6.2 German Headquarters (HQ)
The following HQ are battalion sized units in the German Chain of Command.
a. Army HQ (xxxx). There are three German Army HQ. Depicted is the 7th Army HQ (front side and back side).
- The 7th Army HQ has a yellow background for the ER, or morale, which is 5.
- Correspondingly, all 7th Army combat units have a yellow background for the ER. b. Corps HQ (xxx). There are nine German Corps HQ. Depicted is the LXXXV Corps HQ (front side and back side).
- This HQ has a parent HQ or superior HQ, as indicated at the top of the counter---the "7A" at top center.
- All Corps HQ have a colored banner on the top third of the counter. Brown is the LXXXV Corps color.
- All German LXXXV Corps Echelon units have a brown banner on the top third of the counter.
- German Corps Echelon units have a white NATO box, while those of the U.S. and British are light yellow.
- All subordinate Division/Brigade, Non-AFV combat units of the LXXXV Corps have brown within the NATO box.
- All subordinate Division/Brigade, AFV combat units of the LXXXV Corps have a brown ribbon above the AFV.
- As noted previously in 2.6.2a, a yellow background for the ER indicates the unit is from the 7th Army.
- All other information on the counter is similar to that described in 2.6.1.5: Common Attributes of HQ. c. Brigade HQ (x). There are two German Brigade HQ. Depicted is the Fuhrer Escort Brigade HQ (front side and back side).
- This HQ has a parent HQ as indicated at the top of the counter---the LXVI Corps, at top center.
- The combat factor of 2 is not parenthesized, indicating that it may attack and advance after combat autonomously.
- Only two other HQ may attack---the Kampfgruppe Peiper (KGP) HQ and the Kampfgruppe Cochenhausen (KGC) HQ.
- In addition, the FE HQ, KGP HQ and KGC HQ are always in March Order regardless of what side is facing up.
- Note: The Fuhrer Escort HQ is also a Recon unit as shown in the NATO box. It is the only HQ that is also a Recon unit.
- All other information on the counter is similar to that described in 2.6.1.5: Common Attributes of HQ. d. Division HQ (xx). There are many German Division HQ. Depicted is the 12SS Division HQ (front side and back side).
2.6.3 US Headquarters
The following HQ are battalion sized units that reflect the Chain of Command.
a. Army HQ (xxxx). The rules for US Army HQ are the same as those for German Army HQ. Color coordination is noted on the respective Chain of Command Play-Aid Charts. b. Corps HQ (xxx). The rules for US Corps HQ are the same as those for German Corps HQ with one addition. The US Corps HQ commands a distinct type of HQ called a Field Artillery Group Headquarters. The Germans have no Field Artillery Group HQ. Color coordination is noted on the respective Chain of Command Play-Aid charts. c. Division HQ (xx). The rules for US Division HQ are the same as those for German Division HQ. Color coordination is noted on the respective Chain of Command Play-Aid chart. d. Field Artillery Group HQ (III). There are many US Field Artillery Group HQ. They are abbreviated as FAG HQ. Depicted is the 174 FA Group HQ (front side and back side).
- This HQ has a parent HQ or superior HQ, as indicated at the top of the counter - the "8C," or 8 Corps at top center.
- Important for US FA Group units is the emblem supplied in the upper left corner: spade, heart, club or diamond.
- A US FA Group HQ and its subordinate artillery battalions have the same emblem: spade, heart, club or diamond.
- The superscript "1" next to the MF is the cost to change mode to go into deployed mode or to go into March Order.
- The Effectiveness Rating, or ER, is 5.
- US FAG HQ may direct Time on Target missions (48.4).
- All other information on the counter is similar to that described in 2.6.1.5: Common Attributes of HQ. e. Divisional and Regimental Command Posts. Divisional and Regimental Command Posts function exactly like a Division or Regimental HQ. These are provided in order to extend lines of communication for the widely dispersed American units on 16 Dec 44 and for those entering as scattered reinforcements. Events will usually cause Regimental CP's to become superfluous as units are retreated, eliminated or conglomerated with their Division HQ. A typical CP is shown (28/109 Regimental Command Post, front and back).
- The CP above is for the 28ID/109 Regiment.
- The term DISP above the NATO box signifies that the battalions of the regiment are Dispersed.
2.6.4 British Headquarters
The following HQ are battalion sized units that reflect the Chain of Command.
a. British 30 Corps HQ (xxx). The rules are the same as those for German Corps HQ (2.6.2b). The British XXX Corps was commanded by the US 1st Army HQ. b. Brigade HQ (x). The rules for British Brigade HQ are the same as those for the German Brigade HQ (2.6.2c). c. Division HQ (xx). The rules for British Division HQ are the same as those for the German Division HQ (2.6.2d). d. Field Artillery Group HQ (III). The rules for British Field Artillery Group HQ are the same as those for the US FA Group HQ; however, the British FA Group HQ do not have an enhanced command function as do American FA Group HQ.
2.7 Front Line Units
The units described in rules 2.7.1 through 2.7.4 are classified as front line units. These type units are trained and equipped to lead attacks in order to capture territory and to stop enemy front line units from doing likewise.
2.7.1 Foot Infantry Type Front Line Combat Units
These move primarily on foot. They are depicted with a NATO symbol. A typical foot Infantry type unit is shown (the 82AB/325 Glider Infantry, Bn I, front side and back side).
a. Typical Foot Infantry.
- Important for Brigade units and Division units is the Formation Emblem in the upper left corner.
- The parent formation is to the left of the NATO box, the 82 Airborne Division.
- All 82 Airborne Division units will have the same emblem.
- The size of the unit is on top of the NATO box - II, which is the symbol for battalion.
- Further identification is to the right of the NATO box, 325 Regiment/Battalion I.
- Within the NATO box is the symbol for Glider Infantry.
- The color within the NATO box identifies this unit as belonging to the US 18 Corps.
- A white background for the ER indicates the unit is from the US 1st Army.
- US 18 Corps Echelon units may stack with and support subordinate units that have the US 18C teal color on the unit.
- US 1st Army Echelon units may stack with and support subordinate units that have the 1st Army white color for ER.
- There are no wheels below the NATO box - the unit moves on foot. The MF is 6.
- The back side shows the unit after it has suffered a step loss. The CF has been reduced from 4 to 2.
- When a unit suffers a step loss and flips so that it is backside up, a light colored bar is imposed across the width of the unit. b. Front Line foot infantry type units include: Infantry; Parachute Infantry (Fallschirmjager); Glider Infantry; Fusiliers (German light infantry / Bicycle Infantry).
2.7.2 Motorized Infantry and Motorized Engineer
Most of these units are best suited for travel on roads and are depicted by a NATO symbol with two wheels (truck) beneath the NATO box. Units with three wheels depicted beneath the NATO box indicate cross-country mobility.
a. Front Line motorized infantry type units include: Motorized Infantry: truck units with two wheels below the NATO box. Motorized Infantry: cross-country units with three wheels below the NATO box. Motorized Rangers (elite infantry): cross-country units with three wheels below the NATO box. b. Front Line motorized engineers: Motorized Engineers - may also be classified as Combat Support units.
2.7.3 Armored Cavalry, Infantry and Engineers
These units are equipped with lightly armored vehicles (i.e., halftracks, armored cars). They are depicted with an oval within the NATO box and three wheels beneath the NATO box.
a. Front Line Armored Infantry or Panzer Grenadiers: Three wheels below the NATO box and an oval within. b. Front Line Armored Cavalry or Armored Recon: Armored Cavalry or Armored Recon. c. Front Line Armored Engineers: Armored Engineers - may also be classified as Combat Support unit.
2.7.4 Armored Fighting Vehicle (AFV)
These units are fully tracked and represented by a silhouette. They are categorized as tanks, or panzers. Note that Assault Guns and Tank Destroyers (TD), which are also AFV, are not front line combat units, nor are they tanks or panzers - see 2.8.3.
a. Front Line German AFV type units include: Tiger II - Heavy Panzer; Tiger I - Heavy Panzer; Panther - Heavy Panzer; Mk IV - Medium Panzer. b. Front Line Allied AFV type units include: Sherman Medium Tank; Easy 8 Medium Tank; Stuart Light Tank; Firefly Medium Tank; Cromwell Medium Tank; Churchill Medium Tank; Comet Medium Tank.
2.8 Combat Support Units
The units described in rules 2.8.1 through 2.8.3 are classified as combat support units. These type units fought in close support of front line units, but they were not trained to spearhead attacks or hold the front line by themselves. When combat support units were used as front line units, they usually experienced heavier losses than front line units.
2.8.1 Anti-Tank (AT) and Heavy Anti-Tank
These units are towed or self-propelled and are depicted with two wheels or three wheels beneath the NATO box.
a. Combat Support - Heavy Anti-Tank unit:
- Gun based units include the size of the weapons at the top center of the counter - German "88mm."
- Further identification is to the right of the NATO box; the 667 Panzer Jager Battalion.
- Within the NATO box is the symbol for Anti-tank.
- The first number below the NATO box is the attack factor, which is a 6.
- The second number below the NATO box, which is a parenthesized 9, is the defense factor. b. Combat Support Anti-Tank units include: Anti Tank - truck towed. Anti Tank - cross-country towed. Heavy Anti Tank - truck towed. Heavy Anti Tank - cross-country towed. Note: Heavy Anti-Tank are 17-Pdr or 88mm.
2.8.2 Anti-Aircraft [AA] and Machine Gun [MG]
These units are towed or self-propelled and are depicted with two wheels or three wheels beneath the NATO box.
a. Combat Support - Self Propelled Anti Aircraft. The 489th was equipped with Multiple Gun Motor Carriage M16's sporting the M45 Quad-mount Browning 50-caliber MG. Known as the "Meatchopper" or "Krautmower." b. Combat Support AA and MG units include: Light Anti Aircraft - truck towed. Anti Aircraft Automatic Weapons (AW) - truck towed. Light Anti Aircraft - cross-country towed. Self Propelled Anti Aircraft. Heavy Anti Aircraft - truck towed. Heavy Anti Aircraft - cross-country towed. Machine Gun - truck mobile.
2.8.3 Armored Fighting Vehicle (AFV)
These units are fully tracked and represented by a silhouette. They are Allied tank destroyers, German Jagdpanzers (tank destroyers) and German assault guns (Sturmgeschutz, Sturmmorser Tiger, etc.).
a. German Combat Support AFV type units include: Jagdtiger - Heavy TD. Jagdpanther - Heavy TD. Jagdpanzer IV - Medium TD. Jagdpanzer 38, Hetzer - Medium TD. Waffentrager - Heavy TD. Sturmgeschutz - Medium assault gun - StuGIII or StuGIV. Abbreviated as StuG. Sturmmorser Tiger - Heavy assault gun - Sturm Tiger equipped with a 380mm rocket launcher. Sturm Panzer IV - Heavy assault gun - Brummbar. b. Allied Combat Support AFV type units include: Achilles, British Medium Tank Destroyer. M10, US Medium Tank Destroyer. M18, US Medium Tank Destroyer. M36, US Medium Tank Destroyer.
2.8.4 Combat Engineers
May also be used as front line combat units.
a. Allied Army and Corps Echelon Engineers. May perform all combat engineer functions including Bailey Bridge construction. b. Allied Division Engineers. May perform all combat engineer functions except Bailey Bridge construction. c. German Army Echelon Engineers. May perform all combat engineer functions including bridge construction. They total nine battalions: 207, 600, 62, 73, 253, 47/I, 47/II, 677 and Trng. d. German Division and Brigade Engineers. May perform all combat engineer functions except J or B Bridge construction.
2.8.5 German Bridge Engineers
These units are truck units and are depicted with two wheels beneath the NATO box. They are construction engineers, not combat engineers, and may only perform bridge construction. They total six battalions: 803, 999, 59, 655, 798 and 605.
2.8.6 German Bridges
These units are towed and are depicted with two wheels beneath the NATO box. They become immobile bridges when back-side up.
- German J-Class Tank Bridge - truck towed.
- German B-Class Truck Bridge - truck towed.
2.9 Artillery Combat Units
The units in 2.9.1 (Field Artillery) and 2.9.2 (Nebelwerfers) are usually classified as combat support units, but for this effort, they are classified separately as artillery. They are depicted with a NATO symbol and may be towed or self-propelled.
2.9.1 Field Artillery
This usually includes howitzers and guns; however, in WWII the US and Germany employed heavy mortars as Field Artillery for some formations, so mortars will sometimes be included as Field Artillery battalions rather than as integral heavy weapons.
a. Typical Field Artillery (26VG FA Bn II - horse-drawn, front side and back side).
- Gun based units include the size of the weapons at the top center of the counter; see 105mm Howitzer.
- Further identification is to the right of the NATO box, Battalion II.
- Within the NATO box is the symbol for Field Artillery and the color for the German XLVII Corps.
- The combat factor, or CF on the front side, is a parenthesized (1), indicating it contributes to defense only.
- The light blue background for the ER indicates the unit is from the German 5th Panzer Army.
- On the front side, the superscript "H" to the right of the movement factor denotes horse-drawn.
- When horse-drawn artillery changes mode from March Order to In-Battery, it must pay 2MF.
- The cost to change mode is not shown on the front of the counter for horse-drawn artillery - it is always 2MF.
- If the unit does not have 2MF remaining after it moves, it may not go Into Battery.
- The back side of the counter shows the artillery unit is "In-Battery" and ready to fire.
- When In-Battery, the Firing Range of 8 is provided in the upper right corner.
- When In-Battery, the Attack factor of 3 is provided as the first number below the NATO box.
- The defense factor is again displayed as a parenthesized (1).
- Note that field artillery units are One-Step units. When they suffer a step loss, they are eliminated.
- When In-Battery, the MF is zero (0), the superscript (H) is not displayed, but the superscript "2" is displayed.
- In order for this unit to change mode from In-Battery to March Order, it must pay 2MF.
- When the unit changes mode from In-Battery to March Order, it flips and has 4MF remaining of the 6MF shown. b. Field Artillery type units include: Artillery: horse-drawn. The MF has an "H" superscript. Artillery: truck towed. Artillery: cross-country towed. Artillery: self propelled or SPA. Mortar (4.2-in): cross-country units. Mortar (120mm): Note that all 120mm Mortars are horse-drawn and the MF has an "H" superscript.
2.9.2 Nebelwerfers
These artillery type units were rocket projectors of the 150mm, 210mm and 300mm versions. They were almost entirely fielded in Brigades at Corps echelon. Each Brigade was equipped with 612 to 798 firing tubes. These are depicted with a NATO symbol.
a. Typical Nebelwerfer (18NW Brigade/Battalion III - Truck towed, front side and back side).
- The unit has a brown banner on the top third of the counter indicating that it is an LXXXV Corps Echelon unit.
- The parent formation is to the left of the NATO box, the German 18NW Brigade.
- Gun based units include the size of the weapons at the top center of the counter - 210mm Rockets.
- Further identification is to the right of the NATO box, Battalion III.
- Within the NATO box is the symbol for Rocket or Nebelwerfer.
- The yellow background for the ER indicates the unit is from the German 7th Army.
- The movement factor is 4. The superscript next to the MF indicates the unit must pay 1MF to change mode.
- If the unit does not have 1MF remaining after it moves, it may not go Into Battery.
- When a counter is back-side up, a lightened square appears on the counter.
- The back side of the counter shows the NW unit is "In-Battery" and ready to fire.
- When In-Battery, the Firing Range of 5 is provided in the upper right corner.
- When In-Battery, the Attack factor of 6 is provided as the first number below the NATO box.
- The defense factor is again displayed as a parenthesized (1).
- Note that artillery type units are One-Step units. When they suffer a step loss, they are eliminated.
- When In-Battery, the movement factor is zero (0), but the superscript "1" is displayed.
- In order for this unit to change mode from In-Battery to March Order, it must pay 1MF.
- When the unit changes mode from In-Battery to March Order, it flips and has 3MF remaining of the 4MF shown. b. Nebelwerfer type units include: Nebelwerfer - truck towed. Nebelwerfer - cross-country towed.
2.10 German Artillery Formation Substitute Units (Optional)
These units are optional; see section 44.0. These substitute units serve to promote ease of play by reducing unit counter density on the map. An Artillery Substitute unit may be exchanged on the board for all of the battalions of the applicable formation. They are available for the 8 Volks Artillery Korps (VAK), the 8 NW Brigades and for each German Division or Brigade. German Artillery Park Cards are provided so as to maintain the FA and NW Battalions in an organized manner for use.
2.10.1 German Artillery Substitute units include:
- VAK Substitute: truck-drawn.
- NW Brigade Substitute: truck-drawn.
- Division Artillery Regiment Substitute: truck-drawn.
- Division Artillery Regiment Substitute: horse-drawn. The MF has an "H" superscript.
2.11 German Reduced Step Units
a. See the German SS Step Reduction Chart and the Wehrmacht Step Reduction Chart (in Play-aid Booklet). b. Most German Non-AFV combat units have two steps. The front side of the unit depicts the higher strength step. c. German combat units with two steps are eliminated when the second step is lost. d. German Non-AFV with a full strength of 6CF on the front side have a step remaining after the second step loss. e. All German Tiger I, Jagdpanther, and Panther AFV have two steps remaining after the second step loss. f. All German Tiger II and the Jagdtiger AFV have three steps remaining after the second step loss.
2.12 Allied Reduced Step Units
a. See the Allied Step Reduction Charts (in Play-aid Booklet). b. Most Allied Non-AFV combat units have two steps. The front side of the unit depicts the higher strength step. c. Allied combat units with two steps are eliminated when the second step is lost. d. Allied Non-AFV with a full strength of 6CF on the front side have a step remaining after the second step loss. e. All Allied Tank Destroyers and M5 Tank battalions have a step remaining after the second step loss. f. All U.S. and British Medium Tank Battalions have four steps remaining after the second step loss. g. Tank Steps, or Step Reduction counters, have the term Step on the counter.
2.13 Dispersed US Units in Forts
On the 16MO turn, many American battalions were dispersed as companies. Some of those companies occupied German West Wall Fortifications or long term defensive positions. Such defensive positions are referred to as Forts.
a. On the front side the units appear as one-Step combat units. On the back side the same two units appear as a Fort with combat factors reflecting the front side. The units begin the 16MO turn on their back sides or flipped sides, in Forts. b. Forts provide two column shifts left when attacked. c. A Fort with a 6 displayed bestows an ER of 6 on units within defending against an attack regardless of the printed ER of the units or anything that would lower the printed ER. d. Forts do not increase the ER of units attacking out of the Fort. e. If desired, the US player can flip a dispersed At-Start Company in a Fort to the front side and move it normally. f. If combat results in a Step Loss to a dispersed Company in a Fort, then one hit will eliminate the unit and the Fort. g. If combat results in a retreat for the defender, the Fort flips to the front side and the dispersed combat unit retreats normally. h. After a dispersed At-Start Company flips to the front side, it cannot flip back to the Fort side. i. Other US units in a hex with a Fort unit receive the benefits of the Fort as long as the Fort unit remains in the hex.
Mutual Player Segments - Start of Turn: Sections 3.0 to 12.0
3.0 Turn Preparation Segment
3.1 Game Turns
a. Each game turns begins with Mutual Player Segments (3.0 through 12.0). b. Then the German player activates and completes his turn (13.0 through 60.0). c. Then the Allied player activates and completes his turn (13.0 through 60.0). d. Each game turn ends with a Mutual End of Turn Segment (61.0). e. There are four turns per calendar day consisting approximate time periods as follows:
- A Pre-Dawn (PD) Turn for the time of day between Midnight and 0600 hours. This is a Night Turn.
- A Morning (MO) Turn for the time of day between 0600 hours and Noon. This is a Day Turn.
- An Afternoon (AF) Turn for the time of day between Noon and 1800 hours. This is a Day Turn.
- An Evening (EV) Turn for the time of day between 1800 hours and Midnight. This is a Night Turn.
3.2 Ground Conditions Determination
a. The ground conditions are noted or determined at the start of the German turn and apply for the entire map. b. Ground condition rolls are made on turns as directed on the Turn Record Track at the west edge of the map. c. Ground conditions are in effect until the end of the Allied turn. d. The Turn Record Track on the map denotes ground condition by color-coded rectangles at the bottom of the chart. e. When the rectangle at the bottom of the Turn legend is tinted light green, the ground is Firm. f. When the rectangle at the bottom of the Turn legend is tinted brown, the ground is Muddy. g. When the rectangle at the bottom of the Turn legend is tinted light blue, the ground is Frozen. h. When the rectangle at the bottom of the Turn legend is tinted white, the ground condition is Variable. i. When required, roll on the Variable Ground Conditions Table on Play-Aid Card 1A, Mutual Player Segment.
3.3 Atmospheric Conditions Determination
This design uses an unpredictable method in order to simulate the variable atmospheric (weather) conditions as experienced in the Ardennes in 1944. Therefore, weather conditions are disparately applied in each German Army Area of Operations (AO).
a. At the start of the German turn, weather conditions are determined simultaneously for each German Army AO. b. Weather condition rolls are made on turns as directed on the Turn Record Track at the west edge of the map. c. When required, roll on the Atmospheric Conditions Table on Play-Aid Card 1A, Mutual Player Segment. d. If the Turn Record Track does not direct a roll for weather, then the conditions are clear for all German Armies. e. The weather conditions noted at the start of the German turn remain in effect until the end of the Allied turn. f. Place Clear, Fog, Dense Fog or Snow Counters near each German Army HQ to remind players of the conditions.
3.3.1 Across the Meuse River
a. This area includes all hexes west or north of the Meuse River. b. Usually, this area does not come into play before the high atmospheric pressure system arrives on 23 Dec. c. Therefore, for simplicity, the atmospheric conditions across the Meuse River are always Clear.
3.3.2 The 6th Panzer Army AO
a. This area includes all hexes north of the 5PzA-6PzA Boundary. b. Note that the 5th Panzer - 6th Panzer Army Boundary includes a road net available for common use by both armies. c. When the atmospheric conditions for each army are different, the worst condition applies for the boundary road. d. Snow is the worst condition. Dense Fog is the next worse condition, followed by Fog and then Clear.
3.3.3 The 5th Panzer Army AO
a. This area includes all hexes between the 5PzA-6PzA Boundary and the 5PzA-7A Boundary. b. Note that the German Army Boundaries include road nets available for common use by the different German Armies. c. When atmospheric conditions for adjacent German Armies differ, the worst condition applies for the boundary road. d. Snow is the worst condition. Dense Fog is the next worse condition, followed by Fog and then Clear.
3.3.4 The 7th Army AO
a. This area includes all hexes south of the 5PzA-7A Boundary. b. Note that the 5th Panzer - 7th Army Boundary includes a road net available for common use by both armies. c. When atmospheric conditions for adjacent German Armies differ, the worst condition applies for the boundary road. d. Snow is the worst condition. Dense Fog is the next worse condition, followed by Fog and then Clear.
3.3.5 Schnee Eifel Snow Squalls
a. A section of the map known as the Schnee Eifel, or Snow Mountains, has a specific weather condition. b. The Schnee Eifel, or Schneifel, is identified by an unobtrusive white border around the area just above Prum. c. Place a Snow Squall counter in the Schnee Eifel on the 16MO turn. It remains until the start of the 23MO turn. d. Snow Squalls results are possible when a combat participant occupies a hex in the Schnee Eifel. e. The effect of snow squalls may be experienced when the attacker rolls the dice for ground combat resolution.
3.3.6 Snow Squalls in German Army Areas
a. Snow Squalls are also possible in each German Army Area on Campaign Game turns from 20PD to 22MO. See 104.2. b. Place a "Snow Squall" marker with the applicable German Army HQ when the condition is rolled.
4.0 Mutual HQ Freshness Determination
On the 18PD turn and each PD turn thereafter, determine if a HQ and its formation is Fresh, Fatigued or Exhausted.
4.1 Making the Determination
Use the HQ Freshness Determination Chart on Play-Aid Card 1A, Mutual Player Segments. Note that "Night Moves" markers have no effect on Freshness.
4.1.1 HQ is Fresh
a. On a PD turn, a HQ that has only a "Rested" marker is judged to be Fresh. Remove the marker. b. On a PD turn, a HQ with a "Fatigued" marker and two or more "Rested" markers is judged to be Fresh; see 4.2, below. c. On a PD turn, a HQ with an "Exhausted" marker is judged to be Fresh; see 4.3.
4.1.2 HQ is Fatigued
On a PD turn, a HQ without a "Rested," "Fatigued" or "Exhausted" marker is judged to be Fatigued. Add the marker.
4.1.3 HQ is Exhausted
On a PD turn, a HQ with "Fatigued" marker and less than two "Rested" markers is Exhausted; see 4.3.
4.2 Fatigue and Recovery
a. Freshness or Fatigue is always determined on a Predawn turn. b. When an HQ is Fatigued, every unit in the formation suffers a morale penalty. Place a "-1ER" marker on the HQ. c. When an HQ has a "Fatigued" marker, increased marker use is required to note any improvement in status. d. It takes two turns of Resting during one day in order to recover from Fatigue as described in (e) through (k) below. e. At the start of any turn, select Resting for the HQ with the "Fatigue" marker. Cover the HQ with a "Resting" marker. f. During the Mutual End of Turn Segment, the Resting HQ keeps the "Fatigued" marker and earns a "Rested" marker (61.1). g. At the start of another turn, select Resting for the HQ with the "Fatigued" and "Rested" markers; add a "Resting" marker. h. At the end of the second Resting turn, the Resting HQ earns a second "Rested" marker. i. It does not matter on what turns the "Rested" markers are earned, PD, MO, AF or EV. j. The HQ can even have selected a "Night Moves" turn, provided it earns two "Rested" markers before the next PD turn. k. On a PD turn, a HQ with a "Fatigued" marker and two "Rested" markers removes all markers. The HQ is considered Fresh.
4.3 Exhaustion and Recovery
a. On a Predawn turn, a HQ that has a "Fatigued" marker and less than two "Rested" markers becomes Exhausted. b. Remove all status markers and place an "Exhausted" marker. c. An Exhausted formation must "Rest" on every turn for the entire day. The ER of every unit in the formation is zero. d. An Exhausted HQ retains full movement capability. e. Exhausted units other than HQ may move up to half of their MF, or one hex, on each of the PD, MO, AF and EV turns. f. Exhausted units may not voluntarily attack. See sections 4.4 and 4.5 below for forced attack situations. g. Exhausted units defend normally with the reduced ER. h. On a PD turn, an HQ that starts with an "Exhausted" marker will have done nothing on the previous day. i. On that next PD turn, the "Exhausted" marker is removed. The HQ is now judged to be Fresh.
4.4 Exhausted Units Forced to Counterattack (CA)
a. A CA Combat Result poses a risk to a formation that is forced to rest on the next turn due to Exhaustion. b. Exhausted units subject to a Counterattack (CA) combat result must select Withdraw (52.12.1). c. Sometimes Withdraw is impossible, because the units are trapped by enemy units or enemy Zone of Control (52.12.3). d. If (c) above occurs and the trapped units are Exhausted, they are eliminated.
4.5 Exhausted Units Forced to Refight an Engaged (ENG)
a. Exhausted original attackers subject to repeating an Engaged combat must disengage in place or withdraw, if possible. See 52.13.2d, e and f. b. However, certain original attackers may not withdraw from an engagement. See 52.13.2a, b and c. c. When the original attackers in an Engaged combat are Exhausted and they must refight an Engaged combat in accordance with 52.13.4c or 52.13.5e, they are eliminated.
5.0 Mutual Aircraft Segment
5.1 Allied Strategic Bombing
a. Allied Strategic Bombing attacks occur on the 23MO, 23AF, 24MO, 24AF, 25MO, 25AF, 26MO and 26AF turns. b. Use the Allied Strategic Bombing Table on Play-Aid Card 1A, Mutual Player Segment. c. A "Rubble 2" marker is placed in the town attacked. If the town has a "Rubble 1" marker, it is flipped to "Rubble 2." d. A town with a "Rubble 2" marker receives no additional notation. e. Rubble markers are adjusted during the Mutual End of Turn Segment (61.2). f. Effects of Rubble are as follows:
- Infantry and horse-drawn arty pay 2 MF to enter rubble.
- All other units must pay 4 MF to enter a Rubble hex.
- A supply road may NOT be traced into a Rubble hex.
- A supply path from a HQ may be traced through Rubble.
5.2 Tactical Aircraft Available per Turn
As shown on the Turn Record Track on the map, the aircraft squadrons available are shown below.
| 17MO | 17AF | 18MO | 18AF | 23MO | 23AF | |
|---|---|---|---|---|---|---|
| Ger | 4 | 4 | 4 | 4 | 4 | 4 |
| US | 4 | 4 | 4 | 4 | 6 | 6 |
| 24MO | 24AF | 25MO | 25AF | 26MO | 26AF | |
|---|---|---|---|---|---|---|
| Ger | 4 | 4 | 4 | 4 | 4 | 0 |
| US | 14 | 14 | 12 | 12 | 12 | 12 |
5.3 Aircraft Determination
Players roll for each available squadron using the Tactical Aircraft Table on Play-Aid Card 1A, Mutual Player Segment.
5.4 German Aircraft Allocation
a. For the Campaign Game, the Germans must place one air with the 1SS Panzer Corps and one air with the XLVII Corps. The others may be allocated to any Corps desired. b. For the Army Scenarios, two air must be placed with the 1SS Corps, two with the XLVII Corps, and none with any other Corps. c. Allocate the aircraft by type secretly on paper and reveal the choices simultaneously placing them above each Corps HQ.
5.5 American Aircraft Allocation
a. The American allocates aircraft to Corps HQ. b. Allocate the aircraft secretly on paper and reveal them simultaneously placing them above each Corps HQ. c. American aircraft must be allocated equitably among the Corps HQ on the board as follows:
- On 17MO-17AF turns: 5C, 2 Air; US 8C, 2 Air.
- On 18MO-18AF turns: 5C, 1 Air; 8C, 2 Air; 18C, 1 Air.
- On 23MO-23AF turns: pick six Allied Corps - 1 Air each.
- On 24MO-24AF turns: For each Allied Corps, 2 Air.
- On 25MO-26AF turns: For five chosen Allied Corps, 2 Air each; for the other two Allied Corps, 1 Air each.
5.6 Aircraft Mission Overview
Air power revolves about the Corps HQ air liaison nodes. Although the employment of aircraft may have been more random in 1944, in a game it has to be structured.
a. Fighters or Bombers may be assigned to strafe/interdict missions during the Mutual Aircraft Segment. b. Fighters or Bombers may be assigned to provide ground combat support during a Combat Segment. c. Fighters may intercept strafe/interdict missions and/or ground combat support missions.
5.6.1 Mission Limits
Sorties in the Ardennes were limited by visibility, so hunting for targets of opportunity became the norm, thus leading to strafing and interceptions. Less frequent was ground combat support, but there were notable occurances.
a. Strafing/Interdiction. Aircraft assigned to this mission are committed to it for the entire game turn. b. Ground Combat Support. The aircraft assigned are spent after one mission and removed, whether aborted or not. c. Interception. Fighters may attempt multiple interceptions on a game turn, if not aborted, and if requirements are met. From a realism standpoint don't consider that it is the same squadron being committed repeatedly; rather, assume it is more fighters seeking a piece of the action in a hot spot. d. If a fighter switches from interception to ground support, it will then be spent and removed after the support mission.
5.6.2 Strafe/Interdict Missions
One of the best known air attacks during the Bulge was the prolonged strafing of KGP just short of the bridge at 6417, as the column moved from Cheneux to LaGleize. The bunker in which Peiper sought refuge during the attack is still there.
a. Strafe/Interdiction missions disrupt enemy movement. The Strafing occurs in the Mutual Air Segment; the interdiction occurs during subsequent enemy movement segments. b. Only one strafe/interdict mission may be assigned to a hex and such missions may not be assigned to adjacent hexes. c. After all Strafe Missions have been placed (5.7.2), strafing aircraft may be intercepted by enemy fighters (5.7.3 - 5.7.4). d. Only one Interception mission may be attempted against a specific enemy aircraft.
5.6.3 Interdiction of Enemy Movement
a. Strafing Aircraft that are not intercepted or aborted during the Mutual Aircraft Segment remain in place to produce the interdiction effect during later enemy movement segments. b. Strafing/Interdicting aircraft are removed during the Mutual End of Turn Segment (61.2).
5.6.4 Ground Combat Support
a. An aircraft at Corps HQ may support ground combat during a combat segment. Only one ground combat support mission may be assigned to a particular ground combat. b. After all combat support missions have been placed (5.9.1), the aircraft may be intercepted by enemy fighters (5.9.2).
5.6.5 Interception
Fighters may attempt multiple interceptions on a game turn as described in 5.6.1c.
5.7 Strafe/Interdiction Mission Details
Both players may send aircraft on Strafe/Interdiction Missions during the Mutual Air Segment using the following procedure.
5.7.1 Strafe Area
a. German and American Air: a strafing air unit must be placed within 20 hexes of the Corps HQ to which it was assigned. b. British Air: a strafing air unit may be placed anywhere west of the Ourthe River from Liege to Remagne. c. The hex chosen will be the center hex in the area strafed, which will consist of a seven hex area. For example, see the illustration of a Strafe Area following section 5.7.2.
5.7.2 Strafe Area Selection
Strafing aircraft are assigned in the following sequence: a. German assigns Bombers to Strafe Areas. b. Allied assigns Bombers to Strafe Areas. c. German assigns Fighters to Strafe Areas. d. Allied assigns Fighters to Strafe Areas. e. German assigns Jet Fighters to Strafe Areas.
5.7.3 Intercept Strafing Squadrons [Advanced Game]
a. Fighters may now intercept strafing squadrons. b. For German or US Interceptors, the interception must be within 20 hexes of the Corps HQ to which the interceptor is assigned. For Brit Interceptors, interception must be west of the Ourthe from Liege to Remagne. c. Interceptors are placed in accordance with the sequence following in (d), (e) and (f) below. d. German intercepts strafing squadrons with Fighters. e. American intercepts strafing squadrons with Fighters. f. German intercepts strafing squadrons with Jets (Me262).
5.7.4 Intercepting Strafing Squadrons - Resolution
a. Resolve 5.7.3d, if applicable. German intercepts strafing enemy aircraft with Fighters (FW190).
- The FW190 rolls two dice. Red for the intercepting FW190, white for strafing enemy aircraft.
- Add the red die to the FW190 Dogfight AF (3). Add the white die to the strafing enemy aircraft DF.
- If the FW190 total is greater than the enemy aircraft total, The strafing enemy aircraft aborts.
- The strafing enemy aircraft now rolls two dice. Red for the Enemy aircraft, white for the FW190.
- Add the red die to the strafing enemy aircraft AF. Add the white die to the FW190 DF.
- If the strafing enemy aircraft total is greater than the FW190 total, the FW190 fighter aborts.
- Both could abort. If so, they are removed from the board.
- If only the enemy unit aborts, the FW190 interceptor is returned to its Corps HQ.
- An Interceptor returned to Corps HQ is available for use later on the game turn for ground combat support or interception of enemy ground combat support.
- If only the FW190 aborts, the enemy air unit remains on Board and proceeds with the strafing/interdiction mission.
- If none abort, the FW190 is returned to the Corps HQ and the enemy air unit proceeds with the strafing mission. b. Resolve 5.7.3e, if applicable. The procedure is the same as that described in (a) above; replace the FW190 with a P47. c. Resolve 5.7.3f, if applicable. The procedure is the same as that described in (a) above; replace the FW190 with an Me262.
5.7.5 Strafe Attack - Mutual Aircraft Segment
a. After interception is resolved, the enemy ground combat units in the Strafe Area may be strafed. b. The Strafing player may choose not to attack every hex. c. German Bombers strafe, then American Bombers strafe. d. German Fighters strafe, then American Fighters strafe. e. German Jet Fighters strafe. f. Select first hex to be strafed. Each unit must be strafed. g. Use the Strafe Attack Table and the AA Return Fire Table on Play-Aid Card 1A, Mutual Player Segment. h. Each Strafe attack is resolved with the roll of a red and white die. Choose the first target. i. The red die resolves the strafe against the target using the Strafe Attack Table. j. The white die resolves return AA fire vs the aircraft using the AA Return Fire Table. k. Apply applicable drm for the strafe attack. Apply applicable drm for AA return fire vs the aircraft. l. Each AFV must be strafed, then non-HQ must be strafed. m. After all non-HQ are strafed, each HQ must be strafed. n. Repeat until all enemy occupied hexes in the Strafe Area are strafed, or until the attacker stops, or is Aborted. o. Artillery units In-Battery and deployed HQ that are Disrupted by a Strafe attack are flipped to March Order. See 29.3. p. See the Strafe example in the examples of play.
5.7.6 End of Strafe Attack Segment
a. After all Strafe Attacks are resolved, the Mutual Aircraft Segment is ended. b. Strafing Aircraft that are not intercepted or aborted remain on board until the Mutual EOT Segment (61.2).
5.8 Interdiction in a Strafe Area
a. Strafing aircraft remaining on board after the Mutual Air Segment subsequently interdict enemy movement during the following enemy movement segments. b. Enemy units must pay extra MF to enter interdicted hexes. c. See the Air Interdiction Chart on Play-Aid Card 2A. d. If the enemy unit does not possess sufficient MF, it may not enter the interdicted hex. e. Enemy vehicular units may attempt to avoid interdiction when moving along roads in forest hexes (33.0). f. Vehicular units include AFV, cross-country units, truck units (oo) and horse-drawn artillery (H) units.
5.9 Ground Combat Support
Both sides may send aircraft to provide ground combat support during friendly and enemy combat segments.
5.9.1 Aircraft Available for Combat Support
a. Aircraft at Corps HQ may provide ground combat support. b. An aircraft may support one ground combat per game turn after which it is spent and removed. c. German and American air combat support must be placed within 20 hexes of the Corps HQ to which it was assigned. d. British air combat support may be placed anywhere west of the Ourthe River from Liege to Remagne. e. The combat supported must include a ground combat unit from the Corps to which the aircraft was assigned.
5.9.2 Intercept Ground Support Mission [Advanced Game]
a. Players who have fighters at Corps HQ may choose to intercept enemy aircraft providing ground combat support. b. For German or US Interceptors, the interception must be within 20 hexes of the Corps HQ to which the interceptor is assigned. For Brit Interceptors, interception must be west of the Ourthe from Liege to Remagne. c. Interception must be of an enemy aircraft in combat against units of the Corps to which the fighter is assigned. d. Interceptors are placed in accordance with the sequence following in (e), (f) and (g) below. e. German intercepts ground combat support with Fighters. f. American intercepts ground combat support with Fighters. g. German intercepts ground combat support with Jets.
5.9.3 Interception Resolution
a. Resolve 5.9.2e, if applicable. The interception procedure is identical to that used against strafing aircraft in 5.7.4a. b. Resolve 5.9.2f, if applicable. The interception procedure is identical to that used against strafing aircraft in 5.7.4b. c. Resolve 5.9.2g, if applicable. The interception procedure is identical to that used against strafing aircraft in 5.7.4c.
5.9.4 Ground Combat Air Support Mechanics
a. Ground support is provided as air combat factors added to the attack and column shifts on the Combat Results Table. b. When ground combat occurs during dense fog or fog, the air combat factors are halved (round up) and the column shift is limited to a maximum of one. c. Add (+1) to the ground combat die roll for any AA unit(s) in a hex defending against an attack that has aircraft combat support.
6.0 Chains of Command
6.1 German Chain of Command Structure
a. The Germans have three separate Army Chains of Command. See the German Chain of Command Chart. b. The Play-aid Chart ~ German Chain of Command identifies the top-down command structure for each German Army. c. In addition, the chart depicts the ability of formations to stack with each other and support each other in combat. d. Specific formations are identified by color and are shown within boxes in the German Chain of Command Chart. e. Formations in boxes attached vertically may stack with each other and support each other. f. Formations in boxes attached on the same horizontal row may not stack, but they may pass through each other. g. Formations in boxes attached on the same horizontal row may attack the same hex. h. Formations in boxes on the same horizontal row, but not attached, may not stack together nor support each other. i. For example, the 18VG, 62VG and Fuhr Escort may not stack together (per f above), but they may move through each other (per f above) and attack the same hex (per g above). j. There are four special cases wherein German formations on the same horizontal row may stack. These are described in Section 24.0, Special Unit Stacking.
6.2 Allied Chain of Command Structure
a. The Allies have two separate Army Chains of Command. See the Allied Chain of Command Chart. b. The Play-aid Chart ~ Allied Chain of Command Chart identifies the Top-Down Command Structure for each US Army. c. The Allied Chain of Command Chart is arranged similar to that of the German Chain of Command Chart. d. There are two special cases wherein American formations on the same horizontal row may stack. These are described in Section 24.0, Special Unit Stacking.
6.2.1 The Chain of Command Relationships of a US FAG
a. The US Field Artillery Groups (FAG) are Corps Echelon assets. b. Each Field Artillery Group HQ commands the subordinate artillery battalions of the Field Artillery Group. c. A US FA Group HQ and its subordinate artillery battalions have a supplied emblem: spade, heart, club or diamond. d. American FA Group HQ have an enhanced command function due to the superior US Army Artillery Comm System. e. A US FA Group HQ may command more than just the subordinate artillery battalions of the Group. f. A US FA Group HQ may direct fire from the independent artillery battalions at Army Echelon. g. A US FA Group HQ may direct fire from the independent artillery battalions from the same Corps. h. A US FA Group HQ may direct fire from Divisional artillery battalions of the same Corps. i. A US FA Group HQ may direct fire from the artillery battalions of another FAG of the same Corps for Time on Target only. j. The capabilities of US FAG HQ are described in section 48.4.
7.0 Mutual Command Segment
a. In order to function properly, all HQ and units must be within the "Command Range" or "In Comm" with a higher HQ. b. The terms "In Command," and "In Communication," will be shortened to "In Comm." c. The terms "Out of Command" and "Out of Communication," will be abbreviated to "Out Comm." d. During this segment Comm Status is determined for all HQ and subordinate units and such Status remains unchanged until the next mutual command segment on the next turn. e. For Comm determinations for an entire Army, players may follow the Commo Check Summary in section 7.11 below.
7.1 Command Basics
a. An Army HQ has no superior on the board. All Army HQ are always "In Command." b. All other HQ that are not Army HQ must be able to trace Comm Paths to a superior HQ. c. In addition, all combat units that are not HQ must be able to trace Comm Paths to their parent HQ. d. A HQ other than an Army HQ is "In Comm," if it can trace a Comm Path from its parent HQ to the hex it occupies. e. A combat unit is "In Comm," if it can trace a Comm Path from its parent HQ to the hex it occupies. f. The length of a "Comm Path" in hexes equals the Command Range of the parent HQ. g. The Command Range of each HQ is shown in the upper right corner of the HQ. h. For deployed HQ (not in March Order), Command Range is doubled. Certain German HQ (3) are always in March Order.
7.2 Comm Paths
a. The length of a Comm Path, in hexes, is limited by the Command Range of the parent HQ. b. A "Comm Path" may be traced through any type of terrain, and across un-bridged rivers, streams or lakes. c. Cover an HQ that is "Out Comm" with an "Out Comm" marker. The entire formation is "Out Comm." d. When an entire formation is "Out Comm," only the formation HQ need be covered with an "Out Comm" marker. e. Units may become very distant from their HQ due to enemy action. In such cases, they may be "Attached" to a Division or Brigade HQ of the same nationality during the "Orders Segment" of a Predawn Turn (18.2).
7.3 Comm Paths and Enemy ZOC
a. Enemy ZOC's into a hex are negated by friendly units in the hex only for tracing Command. b. A Comm Path may begin or end in an enemy ZOC, but cannot cross a hex side in the ZOC of the same enemy unit unless that ZOC is negated by a friendly combat unit in the hex.
7.4 Comm Path: Army HQ to Army Echelon Combat Units
a. Combat units at Army Echelon are subordinate units that report directly to the Army HQ. b. An Army HQ is always "In Comm," however, the status of the Army level subordinates must be judged separately. c. Subordinates must be able to trace a path from their HQ that does not exceed the Command Range of their HQ - 2.6.1.5i. d. Cover individual units that are "Out Comm" with an "Out Comm" marker.
7.5 Comm Path from Army HQ to Corps HQ
a. Corps HQ are "In Comm," if they are within Command Range of their Army HQ. b. They must be able to trace a path from the Army HQ that does not exceed the Command Range of the Army HQ. c. Note that there are Comm Path alternatives for certain Allied HQ as provided in the scenario rules; e.g., see 106.13. d. Cover "Out Comm" Corps HQ with an "Out Comm" marker. e. When a Corps HQ is "Out Comm," all subordinate combat units, Divisions, etc., are "Out Comm."
7.6 Comm Path: Corps HQ to Corps Echelon Combat Units
a. Combat units at Corps Echelon are subordinate units that report directly to Corps HQ. b. If the Corps HQ is "In Comm," then the status of the subordinates must be judged separately. c. Subordinates must be able to trace a path from their HQ that does not exceed the Command Range of their HQ - 2.6.1.5i. d. Note that there are Comm Path alternatives for 8C Echelon units and British 30 Corps units as provided in the scenario rules. e. Cover individual units that are "Out Comm" with an "Out Comm" marker.
7.7 Comm Path from Corps HQ to Allied FAG HQ
a. Allied FA Group HQ and their subordinate FA Battalions are Corps Echelon assets. b. Allied FA Group HQ are "In Comm," if they are within Command Range of their Corps HQ. c. Cover Allied FA Group HQ that are "Out Comm" with an "Out Comm" marker. d. American FA Group HQ that are "Out Comm" may not coordinate the fire of any American FA units. e. If a FA Group HQ is "Out Comm," the subordinate FA Battalions of the FA Group are "Out Comm" and may not fire.
7.8 Comm Path from FA Group HQ to Individual FA Battalions of the Group
a. If the FA Group HQ is "In Comm," then the status of the subordinate FA Battalions must be judged separately. b. The FA Bn's of Allied FA Groups are "In Comm," if they are within Command Range of their FA Group HQ. c. Cover individual units that are "Out Comm" with an "Out Comm" marker. Such units may not fire.
7.9 Comm Path from Corps HQ to Div/Bde/KG HQ
a. Division and Brigade HQ are "In Comm," if they are within Command Range of their Corps HQ. b. Kampfgruppe HQ may trace Comm to Corps or Division HQ as described in the scenario rules. c. There are Comm Path alternatives for 8C subordinate HQ and British 30C subordinate HQ as provided in the scenario rules. d. Cover Division, Brigade and Kampfgruppe HQ that are "Out Comm" with an "Out Comm" marker. e. When a Division, Brigade or Kampfgruppe HQ is "Out Comm," all subordinate combat units are "Out Comm."
7.10 Comm Path: Div/Bde/KG HQ to Subordinate Units
a. If the Div, Bde or KG HQ is "In Comm," then the status of the subordinate combat units must be judged separately. b. Ground combat units are "In Comm," if they are within Command Range of their HQ. c. Note that there are Comm Path alternatives for 8C and British 30 corps subordinate units as provided in the scenario rules. d. Note also, that Division CP's act like a daisy chain to extend the Command Range of a Division HQ. e. Cover individual units that are "Out Comm" with an "Out Comm" marker.
7.11 Commo Check Summary
- 1st Check: An Army HQ is always "In Comm" - the Army HQ is left unmarked.
- 2nd Check: Determine the command status of each subordinate Army Echelon combat unit. (a) An Army Echelon combat unit "Out Comm" is covered with an "Out Comm" marker. (b) If the Army Echelon combat unit is "In Comm," the unit is left unmarked.
- 3rd Check: Determine the command status of each subordinate Corps HQ. (a) If the subordinate Corps HQ is "Out Comm," the unit is covered with "Out Comm" marker. (1) The entire Corps is "Out Comm." (2) Only the Corps HQ need be covered with an "Out Comm" marker.
- 4th Check: If the subordinate Corps HQ is "In Comm," go immediately to the 5th step below.
- 5th Check: When a Corps HQ is "In Comm:" (a) The Corps HQ is left unmarked. (b) Determine the command status of each subordinate Corps Echelon combat unit. (1) If Corps Echelon subordinate combat units are "Out Comm," cover them with "Out Comm" markers. (2) If Corps Echelon subordinate combat units are "In Comm," they are left unmarked. (c) Determine the command status of each subordinate Division/KG/Brigade HQ. (1) If the Division/Brigade/KG HQ is "Out Comm," the HQ is covered with an "Out Comm" marker. (2) The entire Div/Bde/KG is "Out Comm." (3) Only the Division/Brigade/KG HQ need be covered with an "Out Comm" marker.
- 6th Check: If the subordinate Division/Brigade/KG HQ is "In Comm," go immediately to the 7th step.
- 7th Check: When a Division/Brigade/KG HQ is "In Comm:" (a) The Division/Brigade/KG HQ is left unmarked. (b) Determine the command status of each subordinate combat unit. (1) If the subordinate combat unit is "Out Comm," the unit is covered with "Out Comm" marker. (2) If the subordinate combat unit is "In Comm," the unit is left unmarked.
7.12 Comm Path to German Steps
a. German SS Steps are commanded by the closest Division HQ in the 1SS Panzer Corps or 2SS Panzer Corps. b. German Wehrmacht Steps are commanded by the closest German Division or Brigade HQ. c. When two or more Division or Brigade HQ qualify as closest, it is the German players choice. d. German SS Steps may stack with any combat unit in the 1SS Panzer Corps or 2SS Panzer Corps. e. Wehrmacht Steps may stack with any German combat unit. f. A German Step may receive aircraft combat support from the German Corps HQ in its Chain of Command. g. A German Step may receive artillery support from the German Corps HQ in its Chain of Command. h. A German Step may receive arty support from the German Division or Brigade HQ with which it is "In Comm."
7.13 Comm Path to Allied Steps
a. American Steps are commanded by the closest US Division HQ. b. British Steps are commanded by the closest British Division or Brigade HQ. c. When two or more Division or Brigade HQ qualify as closest, it is the Allied player's choice. d. American Steps may stack with any US combat unit. British Steps may stack with any British combat unit. e. An American Step may receive aircraft combat support from the US Corps HQ in its Chain of Command. f. An American Step may receive artillery support from the US Corps HQ in its Chain of Command. g. An American Step may receive artillery support from a US Division HQ with which it is "In Comm." h. A British Step may receive aircraft combat support from the British 30 Corps HQ. i. A British Step may receive artillery support from the British 30 Corps HQ. j. A British Step may receive artillery support from a British Division HQ with which it is "In Comm."
7.14 Penalties for being "Out Comm"
a. The Orders Segment is affected (18.2, 18.3 and 18.4). b. Defensive Positions may not be constructed and Bridge Demolition may not be attempted. c. Engineers may not build bridges, dismantle bridges or ferry units across river fords. d. Artillery units may not fire. e. Units that are "Out Comm" may not receive artillery support or aircraft ground combat support. f. When an attack includes a unit that is Out Comm, there is a column shift left. g. When defenders in combat include a unit that is Out Comm, there is a column shift right.
8.0 US Areas of Operation (AO)
During the Bulge, Armies, Corps and Divisions were confined to respective areas of operation (AO). This wargame attempts to adhere to that concept. For the Germans, Army Boundaries are designed to keep units where they belong; see 26.0. For the Allies, the limits are more intricate and are found in the scenario rules.
a. Allied units may move out of their AO if not prohibited by scenario rule. Such units are immediately placed "Out Comm." b. Allied units forced to retreat out of their AO begin the next turn "Out Comm" and remain so until they begin a turn in their AO. c. Allied units may not voluntarily attack units not in their AO.
9.0 Mutual Supply Segment
a. Supply Status is primarily determined on Predawn turns for all HQ and all subordinate units. b. Out of Supply is abbreviated as "OOS." c. Command and Supply statuses are independent, although the trace for both is frequently identical. HQ and combat units may be: In Comm and In Supply; In Comm and OOS; Out Comm and In Supply; and Out Comm and OOS.
9.1 Allied Supply Sources
a. The Allies are supplied from map-edge roads A through R. b. The US 1st Army may also be supplied from any Liege City hex or from a Namur City hex. c. A US Supply by Air counter serves as a Supply Source for a limited number of units (10.0).
9.2 German Supply Sources
a. The 6th Panzer Army is supplied from map-edge roads lettered S through V and the towns of Schleiden and Stadkyll. b. The 5th Panzer Army is supplied from map-edge roads lettered V through Y, and the towns of Prum and Bitburg. c. The 7th Army is supplied from map-edge roads lettered Y and Z, the town of Bitburg and the village of Niederweiss.
9.3 German Use of Captured Allied Supply Sources
a. All German 6th Panzer Army HQ may be supplied from any Liege hex occupied by a German combat unit. b. All German 5th Panzer Army HQ may be supplied from any Namur hex occupied by a German combat unit.
9.4 Enemy Zones of Control Block Supply
a. Enemy Zones of Control block supply roads and supply paths. b. If an enemy unit exerts a ZOC into a hex---against any type of unit---then all supply through that hex is blocked. c. Enemy Zones of Control into a hex are not negated by friendly units in a hex. Supply paths cannot be traced through a hex in an enemy ZOC, even if that hex is occupied by a friendly unit. d. A Supply path may begin or end in an enemy ZOC, but cannot cross a hex-side in the ZOC of the same enemy unit.
9.5 When Supply Occurs
a. Supply status is determined during every Predawn turn beginning on the 17PD turn. b. German Fuel Shortages, which are independent of supply, begin on the 19PD turn (11.0). c. HQ and subordinate units that are "In Supply" during the Predawn turn are in supply for the rest of the day. d. HQ and/or subordinate units "Out of Supply" during the Predawn turn may establish supply later in the day. e. In order to attain "In Supply" status during the Supply Segment of a later turn, units must meet the requirements specified for receiving supply on the PD turn. They then will be "In Supply" until the next PD turn.
9.6 Supply Roads from Supply Source to HQ
a. Each HQ represents the supply points for its formation. b. Kampfgruppe, due to their smaller sizes, have better supply characteristics as described in the scenario rules. c. Supply is first traced by road from friendly supply source to each HQ on the board. d. The supply road from the supply source to the HQ may be an infinite length of road hexes. e. The supply road must begin at a friendly supply source and never leave interconnected roads, all the way to the HQ. f. German Supply roads may not usually be traced across German Army Boundaries; however, the XLVII HQ and its subordinate Division HQ may trace supply roads across the German 5PzA-7A Boundary (26.2.5). g. Supply roads may NOT be traced into a "Rubble" hex or across a river, stream or lake at a blown bridge. h. Place "Out of Supply" markers on HQ as required.
9.7 Supply Paths from HQ to subordinate Combat Units
a. If an HQ is "In Supply," then a Supply Path must be traced from the HQ to its subordinate combat units. b. The Supply Path from a HQ to a subordinate may not exceed the Command Range shown on the back side of the HQ. c. Note that the Command Range on the back side of a HQ is usually double the value on the front side of the HQ. d. A supply path from a HQ may be traced through any type of terrain and through Rubble. e. Note: A supply path may not be traced across an unbridged stream, lake, or river; however, a supply path may be traced across a river at a Ford. f. If the supply path is blocked by an enemy ZOC, or an unbridged river, stream or lake, then subordinate units are OOS. g. If the supply path is longer than the Command Range shown on the back side of the HQ, then subordinate units are OOS.
9.8 Supply Path: Army HQ to Army Echelon Combat Units
a. When an Army HQ is "Out of Supply," cover the HQ with an "OOS" marker. All Army Echelon combat units are OOS. b. When an Army HQ is covered with an "OOS" marker, the Army Echelon combat units need not be marked. c. If an Army HQ is "In Supply," the supply status of the Army Echelon combat units must be determined. d. A supply path must be traced from the HQ to each Army Echelon combat unit in accordance with 9.7. e. If individual Army Echelon combat units are "OOS," then cover them with "OOS" markers.
9.9 Supply Path: Corps HQ to Corps Echelon Combat Units
a. When a Corps HQ is "Out of Supply," cover the HQ with an "OOS" marker. All Corps Echelon combat units are OOS. b. When a Corps HQ is covered with an "OOS" marker, the Corps Echelon combat units need not be marked. c. If a Corps HQ is "In Supply," the supply status of the Corps Echelon combat units must be determined. d. A supply path must be traced from the HQ to each Corps Echelon combat unit in accordance with 9.7. e. If individual Corps Echelon combat units are "OOS," then cover them with "OOS" markers.
9.10 Volks Artillery Corps (VAK) and NW Brigades
a. VAK Battalions and NW Brigade Battalions are Corps Echelon combat units and are addressed in 9.9 above. b. The Supply Status of NW Brigade Bn's are noted individually, unless German Arty Formation Substitute units are used. c. The Supply Status of VAK Bn's are noted individually, unless German Arty Formation Substitute units are used. d. If German Arty Formation Substitute units are used (rule 44.0), Supply Status is traced to the Substitute unit. e. German Artillery Formation Substitute units are Corps Echelon units and supplied as addressed in 9.9.
9.11 Allied FA Group HQ and Subordinate FA Bn's
a. Allied Field Artillery Group HQ are autonomous with regard to the tracing of Supply Roads. b. When a FA Group HQ is "Out of Supply," cover the HQ with an "OOS" marker. The FAG artillery units are OOS. c. When a FA Group HQ is covered with an "OOS" marker, the FA Group artillery units need not be marked. d. If a FA Group HQ is "In Supply," the supply status of the FA Group artillery units must be determined. e. A supply path must be traced from the HQ to each FA Group artillery unit in accordance with 9.7. f. If individual FA Group artillery units are "OOS," then cover them with "OOS" markers.
9.12 Supply Path: Div/Bde/KG/CP HQ to Subordinate Units
a. When a Div/Bde/KG/CP HQ is "Out of Supply," cover the HQ with an "OOS" marker. All subordinate units are OOS. b. When a Div/Bde/KG/CP HQ is covered with an "OOS" marker, the subordinates need not be marked. c. If a Div/Bde/KG/CP HQ is "In Supply," the supply status of the subordinate combat units must be determined. d. A supply path must be traced from the HQ to each subordinate combat unit in accordance with 9.7. e. If individual subordinate combat units are "OOS," then cover them with "OOS" markers.
9.13 Supply Path to German Steps
a. A German Step must trace its supply path to the Division or Brigade HQ with which it is "In Comm." See 7.12. b. If the Division or Brigade HQ is OOS, then the German Step will be OOS.
9.14 Supply Path to Allied Steps
a. An Allied Step must trace its supply path to the Division or Brigade HQ with which it is "In Comm." b. If the Division or Brigade HQ is OOS, then the Allied Step will be OOS.
9.15 Effects of Being Out of Supply
a. The movement factor of HQ, horse-drawn artillery or foot units are not reduced, even if out of supply. b. AFV, truck units (oo) and cross-country units (ooo) only move up to half of their MF---rounded up. c. Defensive Positions may not be constructed. d. Engineers may not build bridges, dismantle bridges, ferry units across river fords or blow bridges. e. Artillery units that are OOS may not fire. f. Note, units that are OOS may receive artillery support and aircraft ground support, if they are "In Comm." g. Attacks that include attacking units that are OOS suffer a column shift left. h. When defenders in combat include a unit that is OOS, there is a column shift right. i. Note: "OOS" column shifts do not apply to "OOS" defenders occupying a Strong Point or Fort in a town or city.
9.16 Isolation
a. HQ and units that are "Out of Supply" may also be isolated. b. Isolation occurs when HQ and/or units that are "Out of Supply" cannot trace a path of any length, free from enemy units or ZOC to a friendly supply source. Cover them with "Isolated" markers. c. For Isolation as for Supply, enemy units and enemy ZOC block the path. Furthermore, enemy ZOC into a hex are not negated by friendly units in a hex. d. For Isolation effects see 18.1a, 31.1c, 54.1j and 60.5g.
10.0 US Supply By Air
a. Starting on 23MO, the Allies may choose one Corps, Div or Bde HQ per MO or AF turn to receive an air supply drop. b. Air Supply drops occur during the Supply Segment of the turn. Place an Air Supply unit in the hex of the HQ to be supplied. c. In order for air supply to occur, one aircraft must be expended from the Corps HQ in the chain of command of the HQ that is being supplied, which could be the Corps HQ itself. d. The Air Supplied HQ can supply 20 friendly combat units from any formation through the end of the EV turn.
11.0 German Fuel Shortage
a. German Panzer Divisions and Brigades face fuel shortages starting on the 19PD turn, even if they are "In Supply." b. Starting on the 19PD turn, and every turn thereafter, the German player rolls for fuel shortages for Panzer formations. c. Fuel Shortages are determined after the Mutual Command and Supply Segments are completed. d. Roll two dice on the German Fuel Shortage Table on Play-Aid Card 1A, Mutual Player Segment. e. The Panzer formation HQ is covered with a "Low Fuel" marker; however, the movement of the HQ itself is unaffected. f. German AFV, truck units and cross-county units with low fuel may move one hex. If Low Fuel occurs on the turn that a Panzer division enters the map, the formation will barely enter. g. Rather than move one hex, FA/NW units that are truck or cross-country units, may change mode from "In Battery" to "March Order" or vice versa. h. The low fuel movement reduction supersedes other movement reduction penalties. i. German AFV, truck units and cross-county units with low fuel are limited to a one hex advance after combat. j. A Fuel Shortage may be circumvented for a formation by immediately expending a captured fuel counter (12.4).
12.0 American Supply Dumps
12.1 Strategic Allied Supply Depots
a. The six hexes of Liege and the three hexes of Namur were Strategic Allied Supply Depots. b. German 6th PzA formation HQ that trace supply to a Liege hex do not suffer fuel shortages (9.3). c. German 5th PzA formation HQ that trace supply to a Namur hex do not suffer fuel shortages (9.3).
12.2 Capturing Fuel Throughout the Ardennes
a. A significant amount of fuel was amassed near towns and in depots north of the Ambleve-Warche Rivers. b. Also, the Red Ball Express deposited supply and fuel throughout the Ardennes before, during and after 16Dec44. c. See the US Fuel Dump Chart on Play-Aid Card 1A, Mutual Player Segment. d. The Germans may capture fuel in a village, city or town hex listed in the US Fuel Dump Chart.
12.3 Supply (Fuel) Dump Basics
a. Allied Fuel Dump hexes contain various units of fuel as shown in the US Fuel Dump Chart. b. The Germans may capture fuel in a supply dump hex when a German combat unit enters the hex. c. The Germans can only loot a supply dump hex for fuel once. Mark that hex with a German Cross. d. Place captured fuel counters in the hex in which they were captured. They do not count against stacking. e. On the turn after capture, a Fuel counter moves as a truck with with 8MF during the German movement segment. f. If German combat units accompanying a Fuel counter are forced to retreat, the Fuel counter retreats with them. g. Fuel counters may be recaptured by the Allies, if alone in a hex, when an Allied combat unit enters the hex. h. Fuel counters recaptured by Allied combat units are destroyed immediately when the Allied unit enters the hex.
12.3.1 Large Fuel Dumps
a. Significant US fuel dumps were located in or near Francorchamps, Samree, Eupen, Verviers, Malmedy and Stavelot. b. The US began evacuating fuel on 17 Dec, so the chance for fuel to be captured in these hexes decreases with time. c. When the Germans enter these hexes, the US Fuel Dump Chart is accessed to note how much fuel remains, if any.
12.3.2 Incidental Fuel Dumps
a. Spread throughout the Ardennes were Fuel dumps less significant than those mentioned above in 12.3.1. b. The Germans may capture one fuel unit whenever a German combat unit enters a town hex for the first time. c. This rule does not apply for the town of Vianden or the four German towns of Schleiden, Stadkyll, Prum or Bitburg. d. When a German combat unit first enters a town, roll two dice. On a roll of 2 or 3, one fuel unit is captured. e. On a roll higher than 3, no fuel is captured.
12.4 Captured Fuel
a. A Fuel counter may be expended to alleviate the fuel shortage for a Panzer formation for one turn. b. Alternatively, a Fuel counter can alleviate the fuel shortage for KGP, KGC or Fuhr Escort for one day. c. When a Fuel counter is expended for KGP, KGC or Fuhr Escort, there is no carry-over past the EV turn of that day. d. The Fuel counter must be "In Comm" with the HQ and then expended in order to alleviate the fuel shortage. e. Optionally, in lieu of (d) above, captured fuel may be stored in the SW corner and used by the Germans as needed.
Individual Player Segment Overview: Sections 13.0 to 17.0
a. After the mutual player segment is completed, play proceeds to German player operations. After German player operations are completed, play proceeds to Allied player operations. b. Sections 13.0 to 17.0 specify the process for activation of formations and also provide a general overview of individual player operations detailed in 18.0 to 60.0. c. Sections 18.0 to 60.0 provide detailed rules for individual player operations that may be performed after formations are activated per sections 13.0 to 17.0.
13.0 HQ Activity Segment
a. During the HQ Freshness Determination (4.0), players established if their formations were Fresh, Fatigued or Exhausted. Those determinations will affect HQ activity decisions made during this segment. b. The operational functionality of HQ and their subordinate combat units is dependent upon the Activity Status chosen. c. During this segment Active or Resting status is chosen.
13.1 HQ Activity Statuses
a. On the 16MO, 16AF and 16EV turns all combat units are Active; and on 17Dec turns no combat unit will be Fatigued. b. For turns after 16EV, HQ may choose Active or Resting. c. After the 17EV turn, it is possible for HQ and their subordinate combat units to be Active, but Fatigued. d. While Fatigued HQ may still be active, their subordinate combat units suffer a reduction in ER. e. After the 18EV turn, it is possible for HQ and their subordinate combat units to be Exhausted.
13.2 Subordinate HQ Activity Status & Autonomy
a. Subordinate Corps HQ need not reflect the same Activity Status as the parent Army HQ. Subordinate Div/Bde/KG HQ need not reflect the same Activity Status as the parent Corps HQ. b. A list of the autonomous formations that may be assigned an activity status is provided on page 48 of the Play-Aid Book.
13.3 HQ Activity Status Notation on PD, MO and AF Turns
a. On Pre-Dawn, Morning and Afternoon turns, the normal activity status is to be "Active." b. When Active Status is chosen on a PD, MO or AF turn, no marker is placed on the formation HQ. c. If the Status chosen is "Resting," then cover the HQ with a "Resting" marker. d. During the Mutual End of Turn Segment, a "Resting" marker is flipped to "Rested" (61.1). e. A "Rested" marker is retained until the Fresh HQ Determination Segment (4.0) of the next PD turn.
13.4 HQ Activity Status Notation on EV Turns
a. On Evening turns, the normal activity status is to be "Resting." b. Whenever Resting Status is chosen on a turn, cover the HQ with a "Resting" marker. c. During the Mutual End of Turn Segment, a "Resting" marker is flipped to Rested (61.1). d. If the HQ choses to be Active on an EV turn, then add a "Night Moves" marker to the HQ. e. The "Night Moves" marker is removed during the Mutual EOT Segment (61.2).
13.5 HQ Activity Basics
a. Exhausted units are out of action for a day (4.3, 4.4, 4.5). b. The capabilities of Resting units are limited per 13.5.1. c. The restrictions for Resting units are listed in 13.5.2. d. The capabilities of Active units are described in section 13.5.3. e. The capabilities of Fatigued units are the same as those of Active units, but with reduced ER.
13.5.1 Resting Unit Capabilities
a. Resting HQ retain full movement capability. b. Resting non-HQ units may move up to half their MF or one hex if they could legally enter the adjacent hex with full MF. c. Resting artillery units may change mode. d. Resting Division artillery units may fire in support of units of the same Division defending against attack. e. Resting Brigade artillery units may fire in support of units of the same Brigade defending against attack. f. Resting Kampfgruppe artillery units may fire in support of units of the same Kampfgruppe defending against attack.
13.5.2 Resting Unit Restrictions
a. Resting units may not construct Defensive Positions (19.0). b. Resting Engineers may not assist Fording Operations (20.0). c. Resting Engineers may not work on bridges (21.0). d. Resting engineers may not destroy bridges (22.0). e. Resting combat units may not attack. f. Resting artillery battalions may not fire in support of attacks. g. Resting Army Echelon and Corps Echelon artillery battalions may not fire in support of units attacking or defending.
13.5.3 Active Unit Capabilities
Assuming all other qualifying rule conditions are met, full combat capabilities are available. Specifically, all the actions that are prohibited in 13.5.2 a, b, c, d, e, f and g are available for active units. Also, movement is not curtailed as described in 13.5.1b.
13.6 Units that need Rest - Forced to Counterattack (CA)
a. A Counterattack result on the present turn may cause trouble for a formation that needs to rest on the next turn. b. The units subject to a CA could simply withdraw and the formation could choose Resting status without incident. c. However, sometimes units subject to a Counterattack result are trapped and cannot withdraw (52.12.3). d. When (c) above occurs, the HQ still has the option to choose Active or Resting, but with consequences. e. If Active status is chosen, the trapped units may fight the Counterattack normally, but the formation cannot rest. f. If Resting status is chosen, the trapped units are eliminated (see 52.12.3 for complete details).
13.7 Units that need Rest - Forced to Refight an Engaged
a. An Engaged result on the present turn may cause trouble for a formation that needs to rest on the next turn. b. Certain original attackers subject to repeating an Engaged combat could disengage in place or withdraw (52.13.2d, e and f). c. However, some original attackers may not withdraw from an engagement, but must re-fight the battle (52.13.2 a, b and c). e. When (c) above occurs, the HQ still has the option to choose Active or Resting, but with consequences. f. If Active status is chosen, the Engaged units may refight the Engaged battle, but the formation cannot rest. g. If Resting is chosen, units that could disengage in place or withdraw, may do either, and Rest. See 52.13.4. h. However, if Resting is chosen and there are Engaged units that may not withdraw (52.13.2 a, b and c), then such units are eliminated (52.13.4g).
14.0 Army HQ Activation
Activate an Army HQ. It will be Active or Resting, if not Exhausted. Follow the procedures in 13.3 or 13.4.
14.1 Army Echelon - Resting
a. When Resting is chosen on a turn, the Army HQ must be covered with a "Resting" marker. b. A "Resting" marker is flipped to Rested during the Mutual End of Turn segment (61.1).
14.2 Army Echelon - Active
a. When Active is chosen on a PD, MO or AF turn, no marker is placed upon the Army HQ. b. When Active is chosen on an EV turn, the Army HQ must be covered with a "Night Moves" marker. c. The respective actions available to Active Army Echelon combat units may be done in conjunction with the activation of any subordinate Corps HQ/Division HQ/Brigade HQ.
15.0 Corps HQ Activation
a. After an Army HQ and its Echelon have chosen Resting or Active, select a subordinate Corps HQ to activate. b. Activate a Corps HQ. It will be Active or Resting, if not Exhausted. Follow the procedures in 13.3 or 13.4. c. When the Corps HQ is activated, all of its subordinate Divisions and Brigade HQ are simultaneously activated. d. When the Corps is activated, the activated formations then perform all actions available as described in sections 18.0 through 60.0 to completion before another Corps and its subordinates are activated. e. Note that different Armies/Corps may be activated and played simultaneously, when multiple players are available.
15.1 Corps Echelon - Resting
a. When a German Corps HQ is activated, the Random Event for that Corps for the turn is rolled. b. When Resting is chosen on a turn, the Corps HQ must be covered with a "Resting" marker. c. A "Resting" marker is flipped to "Rested" during the Mutual End of Turn segment (61.1).
15.2 Corps Echelon - Active
a. When a German Corps HQ is activated, the Random Event for that Corps for the turn is rolled. b. When Active is chosen on an EV turn, the Corps HQ must be covered with a "Night Moves" marker. c. When the Corps HQ is activated, all of its subordinate Divisions and Brigade HQ are simultaneously activated. d. Subordinate Division and Brigade HQ need not choose the same activity status as the parent Corps HQ.
16.0 Division/Brigade/KG HQ Activations
a. The activation rules for Division/Brigade/KG HQ differ from those for Army HQ or Corps HQ. b. When a Corps HQ is activated, its subordinate Div/Bde/KG HQ are activated simultaneously. c. Choose activation status for each subordinate Division, Brigade and Kampfgruppe (when applicable). d. Activate each Div/Bde/Kampfgruppe HQ: Active or Resting, if not Exhausted. Follow the procedures in 13.3 or 13.4. e. Subordinate Div/Bde/Kampfgruppe HQ activity status is independent of the Corps HQ activity status.
16.1 Division/Brigade/Kampfgruppe - Resting
a. When Resting is chosen on a turn, the HQ must be covered with a "Resting" marker. b. A "Resting" marker is flipped to "Rested" during the Mutual End of Turn segment (61.1).
16.2 Division/Brigade/Kampfgruppe - Active
a. Subordinate combat units are "Active" when the Div/Bde/KG HQ chooses "Active." b. When Active is chosen on an EV turn, the HQ must be covered with a "Night Moves" marker.
17.0 Reaction Interlude before Combat [Advanced Game]
17.1 German Turn
a. Review: After a German Army HQ and its Echelon complete 14.0, a subordinate Corps HQ is activated. b. Further: When a German Corps HQ is activated, its Echelon and its subordinate Div/Bde/KG HQ are also activated. c. Eventually, an activated German Corps HQ and all combat units of the Corps will have finished movement. d. Then, prior to combat, Allied Leader Reaction occurs.
- Leader Reaction is an Advanced Game rule (38.0).
- The Allied Leader Reaction occurs after all units of an activated German Corps have completed movement.
- Each time an Activated German Corps finishes all movement, there can be an Allied Leader Reaction.
- An Allied Leader may only react once per German turn. It is flipped to the spent side.
- It is possible for more than one Allied Leader to react to the completed movement of a single German Corps. e. Afterwards, the activated German Corps proceeds to combat. f. For each German Army, the procedures in a through e above are repeated until all units of the Army have moved and fought.
17.2 Allied Turn
a. Review: After an Allied Army HQ and its Echelon complete 14.0, a subordinate Corps HQ is activated. b. Further: When an Allied Corps HQ is activated, its Echelon and its subordinate Div/Bde HQ are also activated. c. Eventually, an activated Allied Corps HQ and all combat units of the Corps will have finished movement. d. Then, prior to combat, German Leader Reaction occurs.
- Leader Reaction is an Advanced Game rule (38.0).
- The German Leader Reaction occurs after all units of an activated Allied Corps have completed movement.
- Each time an Activated Allied Corps finishes all movement, there can be a German Leader Reaction.
- A German Leader may only react once per Allied turn. It is flipped to the spent side.
- It is possible for more than one German Leader to react to the completed movement of a single Allied Corps. e. Afterwards, the activated Allied Corps proceeds to combat. f. For each Allied Army, the procedures in a through e above are repeated until all units of the Army have moved and fought.
Individual Player Segment Specifics: Sections 18.0 to 60.0
The German player and then the Allied player steps through sections 18 through 60 for each of his Corps until all units are spent.
a. After the mutual player segment is completed, play proceeds to German player operations: 18.0 to 59.0. After Exploitation (59.0) for the final German Corps that was activated is completed, the German End of Turn occurs (60.0). b. After the German End of Turn Segment is completed, play proceeds to Allied player operations: 18.0 to 59.0. After Exploitation (59.0) for the final Allied Corps that was activated is completed, the Allied End of Turn occurs (60.0). c. After the Allied End of Turn is completed, the Mutual Player End of Turn Segment occurs (61.0).
18.0 Orders Segment
Orders were primarily Division Staff admin functions that were completed before dawn and disseminated by courier in the form of Operations Orders with battle maps. Radio comm was usually not sufficient to transmit plans and orders.
18.1 Surrender Determination
a. Each isolated HQ with a printed ER less than 4 and each combat unit with a printed ER less than 4 rolls for surrender. See 9.16 for the definition of isolation. b. Surrender is possible on the 18PD turn and each turn thereafter. On a roll of 6, the HQ or combat unit surrenders.
18.2 Attachments - Predawn Turns Only
a. HQ and units of certain formations may be transferred by the OOB to other higher HQ. For example, the entire 8C is transferred from 1A to 3A per section 134.5. b. In addition, players may find it necessary to make attachments during the Orders Segment to alleviate Out Comm and/or OOS conditions for units acutely separated from their parent HQ. c. To qualify as acutely separated: Army Echelon units and Corps HQ must be 41 or more hexes from the Army HQ; Corps Echelon Units and Div/Bde HQ must be 31 or more hexes from the Corps HQ; and Div/Bde units must be 21 or more hexes from their HQ. d. In order for an attachment to occur, the acutely separated units must be within Command Range of a substitute HQ. e. For acutely separated non-HQ units, the substitute HQ must be any HQ of the same nationality. For acutely separated HQ units (and their subordinates), the substitute HQ must be a HQ of the same nationality of equal Echelon or of a higher Echelon. So, for example, you cannot attach a Corps HQ to a Div/Bde HQ. f. Attached units function as integral assets of the substitute HQ. g. Note that "Attached" markers are provided, but players will need to side note the status of the attachments.
18.3 Detachments and Reattachments - PD Turns Only
a. Detach units previously attached to a substitute HQ and return them to their original HQ during the Orders Segment. b. Army Echelon units and Corps HQ must detach from substitute HQ, if they begin a PD turn within 40 hexes of their Army HQ. Corps Echelon units and Div/Bde HQ must detach from substitute HQ, if they begin a PD turn within 20 hexes of their Corps HQ. Div/Bde units must detach from substitute HQ, if they begin a PD turn within 10 hexes of their Div/Bde HQ. In the aforementioned cases, detachment could cause the units to become Out Comm. c. The Attached units must be within Command Range of the substitute HQ in order for the Detachment to occur. d. Alternatively, the Attached units may be handed off to another substitute HQ. In order for this to occur, the units must be within Command Range of both HQ at the start of the Orders Segment.
18.4 Designation of Reserves [Advanced Game]
a. The rules below permit Division HQ, Brigade HQ and certain leaders to designate reserves. Add Reserve markers as applicable. b. Div/Bde HQ, "In Comm" and "In Supply" may designate reserves only during a Predawn turn. Certain leaders (39.0) may designate reserves during the Orders Segment of any turn. c. Exhausted Division/Brigade HQ cannot designate reserves, nor may Exhausted combat units be placed in reserve. d. To be placed in reserve units must be In Comm, In Supply and and not adjacent to an enemy unit; however, they may be Resting. e. Units in reserve and In Comm may be taken out of reserve at the start of a friendly movement segment. f. Units in reserve may not construct anything. g. Engineers in reserve may not place Prep Demo markers. h. If at any time a unit in reserve is adjacent to an enemy unit, remove the "Reserve" marker. Reserve status is ended. i. If a unit in reserve becomes disrupted, remove the "Reserve" marker. Reserve status is ended. See 29.3. j. Reserve status may be retained beyond the end of an EV Turn, as long as the units are In Comm, In Supply and not adjacent to an enemy combat unit at the start of the next PD turn. k. Units in reserve may conduct reserve movement as follows:
- When released by a Leader for up to half their MF (round up) during the Leader Reaction Phase (38.0).
- For re-positioning at up to half their MF (rounded up) during the Exploitation Segment (59.1).
- When released by a Leader for full MF Exploitation (59.2).
18.4.1 German Designation of Reserves
a. A maximum of three front line/combat support units per Division/Brigade may be designated as in "Reserve." b. Artillery units and HQ may not be placed in "Reserve."
18.4.2 Allied Designation of Reserves
a. A maximum of three front line combat units or tank destroyers per Division/Brigade may be designated as "In Reserve." b. Combat support units, artillery units and HQ may not be placed "In Reserve."
18.5 American Benefit of Reserves [Advanced Game]
a. US Divisions with three full strength battalions in Reserve immediately increase by 1 the ER of every unit in the Division. b. When a US Division places three units in Reserve, cover the Division HQ with a "+1ER" marker. c. A US Division with a "+1ER" marker retains it until it begins an Activation Segment (16.0) without three units in Reserve.
19.0 Construct Defenses Segment
a. The constructing combat units must be in Comm, in Supply and Active in order to begin construction. Units that have not been released may not construct defenses. b. Engineers already covered with "Construction" markers may not begin construction of defenses. c. Enemy combat units may not be adjacent to a hex in order for construction to begin in that hex. d. Units that begin construction of defenses during this segment are covered with "Construction" markers. e. Remove the "Construction" marker, if enemy combat units move adjacent before completion. f. Subsequent to this segment, units with "Construction" markers may not move, assist fording, conduct demo or attack. g. Construction is completed in the player EOT segment (60.2). h. After construction, any ground combat unit can occupy and maintain a constructed Improved Position or Strong point. i. The benefits of defensive features are listed in the Defensive Positions Play-Aid Chart on Play-Aid Card 4A. j. A defensive feature never improves the combat factor or the ER of units within the defensive feature when they attack. k. A defensive feature is removed immediately when the occupying defenders are retreated or eliminated, or when vacant during the player EOT Segment (60.2).
19.1 Construction of Improved Positions (ER5)
a. Improved Positions that display a 5 may be constructed in any hex by Front line combat units or combat support units in Comm, in Supply and Active. Artillery units and HQ may not perform such construction. b. Place an "IP" marker with a 5 displayed on the marker with the "Construction" side facing up. c. In addition to other benefits, a completed IP with a 5 displayed bestows an ER of 5 for units defending therein against an attack regardless of the printed ER of the units and any conditions that would lower the printed ER.
19.2 Construction of Improved Positions (ER6)
a. Improved Positions that display a 6 may be constructed in any hex by Engineers in Comm, in Supply and Active. b. Place an "IP" marker with a 6 displayed on the marker with the "Construction" side facing up. c. In addition to other benefits, a completed IP with a 6 displayed bestows an ER of 6 for units defending therein against an attack regardless of the printed ER of the units and any conditions that would lower the printed ER.
19.3 Construction of Strong Points (ER6)
a. Engineer combat units in Comm, in Supply and Active may begin construction of Strong Points (SP) in any hex. b. Construction must begin in a hex with an IP that displays a 6. c. Place an "SP" marker on the constructing units with the "Construction" side facing up. d. Remove the "IP" marker that displays the 6 when the Strong Point is completed. e. In addition to other benefits, a completed SP bestows an ER of 6 for units defending therein against an attack regardless of the printed ER of the units and any conditions that would lower the printed ER.
19.4 Construction of Road Blocks
a. Engineers in Comm, in Supply and Active may construct roadblocks in any road hex. Place a "Road Block" marker on the building Engineers with the "Construction" side facing up. b. When a roadblock occupied by at least one Front Line Step or AFV Step is attacked; the attackers may advance into the road block hex, but no farther, regardless of the combat result. c. If a roadblock is attacked at 5-1 odds or more, a front line or AFV defender must take a hit before dice are rolled to resolve combat. If any defenders remain, they suffer the results. d. If attacked when not occupied by at least one Front Line or AFV Step, then a road block is useless and attackers may advance fully.
19.5 Forts
a. At the start, many US combat units occupied German West Wall Fortifications or long term defenses. These strong positions are Forts. New Forts may not be constructed during the game. b. Many Forts are occupied by dispersed US Companies; see 2.13 for special rules governing these units. c. In addition to other benefits, a Fort with a 6 displayed bestows an ER of 6 for units defending against an attack regardless of the printed ER of the units or anything that would lower it. d. Twelve stand-alone "Fort" markers are occupied by US units in 8506, Monschau, 8609, 8610, 9015, 9116, 9117, 9119, 8920, 7937, 7738 and 7449. After the German 16MO turn, any US ground combat unit can occupy and maintain these Forts. e. All Forts are subject to section 19.0, i, j and k.
20.0 Fording Preparation Segment
a. Refer to rule section 30.2 for the details of Fording. b. The Fording costs are listed in the Crossing River at Fords Chart on Play-Aid Card 2A, Movement Segment. c. Combat units that wish to Ford a river may need Engineer assistance depending upon ground conditions. d. Assisting Engineers must begin this segment adjacent to the Ford in order to assist Fording in the movement segment. e. The Engineers must be in Comm, in Supply and Active in order to assist Fording operations. f. Mark engineers with "Eng Ferry" markers in this segment. g. Engineers already covered with "Construction" markers may not be covered with a "Ferry" marker. h. Subsequent to this segment, units with "Eng Ferry" markers may not move, blow bridges or attack. i. An Engineer may help one unit Ford the river during the movement segment, which could be the Engineer unit itself. j. "Ferry" markers are not removed until the Mutual End of Turn (EOT) Segment (61.2).
21.0 Bridge Construction Segment
21.1 Bridge Construction Basics
a. Bridges may be built at the site of a blown bridge, with the exception for a Germans bridge build at Gentigen (8253). b. Construction of German bridges is limited to those in the Order of Battle. The German player may dismantle certain bridges that were previously emplaced for use further west. c. German Bridge or Army Echelon Engineers may build J or B Bridges. Allied Army Echelon or Corps Echelon Engineers are required for Bailey Bridge construction. d. The constructing Engineers must be in Comm, in Supply and Active to begin work or continue work on a bridge. e. Engineers that began this segment with a defensive position "Construction" marker or with "Ferry" markers may not begin bridge construction. f. Engineers that begin construction of bridges during this segment are covered with "Begin Bridge" markers. Engineers that began already under bridge "Construction" markers may continue. g. It takes 2 construction turns for a German Bridge Engineer to make a bridge operational, while it takes 4 construction turns for a German Army Engineer to do likewise. h. It takes 2 construction turns for an Allied Army or Corps Engineer to make a Bailey Bridge operational. i. Divisional Engineers may not build bridges. j. Engineers that began this segment under bridge "Construction" markers may cancel the effort; remove the markers. k. Subsequent to this segment, units with "Construction" markers may not move, assist fording, perform demo or attack. l. If the Engineers are Resting or Exhausted, place a "Bridge Halt" marker on the bridge. The Engineers can resume construction, when they are again in Comm, in Supply and Active. m. Enemy combat units may be adjacent to bridges under construction, only if they are across the river. n. If enemy combat units that are not across a river move adjacent to bridges under construction, the bridge construction is ended. Remove the "Construction" marker.
21.2 German Bridge Construction Segment
21.2.1 German Bridge Construction Begins - 1st Turn
A Bridge or Army Engineer that starts in a blown bridge hex with a "B Bridge or J Bridge" may begin construction. Place a Begin Bridge marker on the German Bridge. Bridge Construction progress will be updated to "Const 1" in the Player EOT Segment (60.3).
21.2.2 German Continuing Bridge Construction - 2nd Turn
Construction may continue for bridges that start beneath a "Const 1" marker. The conditions of 21.1 must be met by an eligible Bridge or Army Engineer that starts in the hex. Construction progress will be updated to "Const 2" in the Player EOT Segment (60.3). Note that it only takes 2 construction turns for a German Bridge engineer to make a bridge operational.
21.2.3 German Continuing Bridge Construction - 3rd Turn
Construction may continue for bridges that start beneath a "Const 2" marker. The conditions of 21.1 must be met by an eligible Army Engineer that starts in the hex. Construction progress will be updated to "Const 3" in the Player EOT Segment (60.3).
21.2.4 German Continuing Bridge Construction - 4th Turn
Construction may continue for bridges that start beneath a "Const 3" marker. The conditions of 21.1 must be met by an eligible Army Engineer that starts in the hex. Construction progress will be updated to "Const 4" in the Player EOT Segment (60.3).
21.2.5 German Bridge and Army Echelon Engineer Integrity
a. Bridge construction begun by German Bridge Engineers must be completed by German Bridge Engineers. b. Bridge construction begun by Army Echelon Engineers must be continued and completed by Army Echelon Engineers.
21.3 Allied Bailey Bridge Construction
Construction of Bailey Bridges is unlimited. In fact, many Bailey Bridges were placed in the Ardennes simply for training.
21.3.1 Allied Bridge Construction Begins
An Army Echelon or Corps Echelon Engineer unit is required for bridge construction. An Army Echelon or Corps Engineer unit that starts in a blown bridge hex may begin construction. Place a Bailey Bridge under construction and "Begin Bridge" marker with the Engineer. Bridge construction progress will be updated to "Const 1" in the Player EOT Segment (60.3).
21.3.2 Allied Continuing Bridge Construction - 2nd Turn
Construction may continue for bridges covered by an "Const 1" marker. The conditions of 21.1 must be met by an eligible Army or Corps Engineer that starts in the hex. Construction progress will be updated to "Const 2" in the Player EOT Segment (60.3). Note that it only takes 2 construction turns for an Allied Army or Corps Engineer to make a Bailey Bridge operational.
21.4 Bridge Construction Completion
21.4.1 Player EOT Segment
a. A Bridge is completed in the Player EOT Segment (60.3), if the hex on the opposite side of the river is free of enemy combat units. b. If enemy units are not cleared, the bridge may remain ready to be completed indefinitely, as long as the constructing engineer does not leave the hex or perform any other action.
21.4.2 Advance After Combat
a. A Bridge may be completed during advance after combat. b. There must be a bridge ready to be completed as described in 21.4.1b. The advance after combat may include any attacking friendly units and the constructing engineer, subject to stacking.
21.5 German "J Bridge" and "B Bridge" Dismantling
a. Dismantling a bridge is the reverse of the process for bridge construction. During the EOT Segment (60.3), when the "Under Construction 1" marker is removed, the bridge becomes mobile. b. German Bridge Engineers will finish dismantling a constructed bridge in 2 turns. German Army Engineers will finish dismantling a constructed bridge in 4 turns. Flip a dismantled bridge to its mobile side. It may move on the following turn. c. Note that bridges constructed at Dasburg, Gemund, Vianden, Wallendorf or Echternach may not be dismantled.
21.6 German Bridge Engineers
a. These were combat support units trained to build bridges. b. They do not have an attack factor and may only defend. c. They do not provide a combat support drm in combat. d. They do possess a ZOC, but they are only one step units.
21.7 German Bridge Movement [Optional]
If the German wishes, he need not move his bridges and bridge engineers on the board. Instead, the bridges and bridge engineers may be held in the Holding Boxes in the SW corner of the map. When the German needs a bridge and bridge engineer, he selects the bridge and engineer from the applicable Army Holding Box and places them in a blown bridge hex for construction. The hex must be accessed by a road, unbroken from the east edge, and the road must always travel within the applicable Army Area.
21.8 Built Bridge Capacity
a. Any unit may cross a Bailey Bridge or a German J Bridge. b. The following may not cross a German B bridge:
- All AFV and all Self-Propelled Artillery.
- German Army Artillery (when motorized).
- Towed US 155G, 203G, 203H and 240H.
22.0 Bridge Demolition
Players may attempt to blow bridges during the Enemy Movement Segment, during enemy advance after combat, or during exploitation when an enemy unit is at the hex-side crossed by the bridge.
22.1 Bridge Demolition Basics
a. Bridges exist in every hex containing a road that crosses a river, stream or lake. b. A bridge may only be blown by an engineer that is adjacent to the hex-side crossed by the bridge. c. Engineers covered with "Construction" markers or "Ferry" markers may not blow bridges. d. Engineers "In Comm" and "In Supply" may blow bridges. e. Only one demo attempt may be made per bridge per enemy turn: during movement, advance after combat or exploitation. f. Multiple bridges in the same hex may be blown by one engineer unit on the same turn. g. Bridges may not be blown by the US player until the 18PD turn. h. A destroyed German B Bridge or J Bridge is eliminated. i. Place a "Blown Bridge" marker after demo. The hex becomes an un-bridged river hex. A supply road or supply path may be traced into a blown bridge hex, but not across the blown bridge. j. Bridge Demo may be attempted as follows:
- At the start of an enemy movement segment, when enemy units begin adjacent to the hex-side crossed by a particular bridge, friendly engineers may interrupt the start of the segment and attempt to blow the bridge.
- If (1) above does not occur, then once per enemy turn during movement, advance after combat or exploitation, when enemy units move adjacent to the hex-side crossed by a particular bridge, friendly engineers may immediately interrupt the enemy segment and attempt to blow the bridge.
- Use the Bridge Demo Table to blow bridges. k. Conditions that make bridge demo less successful are listed as dice roll modifiers beneath the Bridge Demo Table. Some of those drm are discussed below:
- If the engineers blowing the bridge do not have a "Prep Bridge Demo" marker, it is assumed they are placing the charges under fire; this is a +2 drm for Hasty Demo.
- An enemy Commando is at the crossing; this is a +1 drm. Accounts by US soldiers in Dec44 state that volunteers in US uniforms assisted placing the demo charges for the failed bridge demo at Stavelot---they believed the wires were cut.
- The enemy units adjacent to the bridge include a Heavy AFV; this is a +1 drm. The German doctrine for trying to stop bridge demo was to charge a Panther Tank across the bridge at maximum speed.
22.2 Prepared Bridge Demolition
a. Bridges may not be prepared for demo until the 17EV turn. b. Engineers In-Comm, In-Supply and Active and which start a turn adjacent to the hex-side crossed by the bridge, may place Prep Bridge Demo markers. c. Engineers already covered with "Construction" markers or "Ferry" markers may not prepare bridges for demolition. d. In order for the "Prep Bridge Demo" marker to be placed the enemy cannot be adjacent to the hex side crossed by the bridge. e. When all requirements are met, place "Prep Bridge Demo" markers on engineers that are in position to blow bridges. f. An engineer covered with a "Prep Bridge Demo" marker may not move during the movement segment. g. Bridge demo is resolved as described in 22.1j. h. A "Prep Bridge Demo" marker is removed when a demo is rolled or when the hex is no longer occupied by a qualified engineer. i. An engineer covered with a "Prep Bridge Demo" marker may not attack during the combat segment, but defends normally.
22.3 Hasty Bridge Demolition
a. Hasty demolitions are those conducted by engineers that do not have a "Prep Bridge Demo" marker. b. A +2 drm is applied to the demolition die roll when the engineer is not covered with a "Prep Bridge Demo" marker.
23.0 Normal Unit Stacking
a. Aircraft, German J Bridge, German B Bridge, Bailey Bridges and play aid markers do not count against stacking. b. Certain friendly stacking restrictions, when violated, cause units to be eliminated or Disrupted. c. Note that the improper stacking situations forced by retreats must be remedied in the next movement segment. d. A Combat Unit Stacking Chart is provided on Play-Aid Card 2B, Miscellaneous.
23.1 Headquarters Stacking
a. Headquarters do not affect the stacking of other combat units. b. Generally, one HQ per Echelon may occupy a hex without penalty; however, there are a few exceptions (24.0). c. Therefore, one hex will hold an Army HQ, a Corps HQ, A FAG HQ, a Division/Brigade HQ, and a KG HQ or CP. d. Conversely, two Army HQ, two Corps HQ, two FAG HQ, two Div/Bde HQ or two CP may not occupy the same hex.
23.2 Penalties for HQ Over-stacking
a. If, contrary to 23.1d, two HQ are in the same hex at the end of any segment or phase, they are both disrupted. The details of Disruption are provided in section 29.3. b. HQ are never eliminated for improper stacking.
23.3 Combat Units other than HQ
a. Non-HQ ground combat units include front line units, combat support units and artillery units. b. Non-HQ ground combat units do not affect stacking of HQ. c. The maximum number of non-HQ ground combat units that may occupy a hex in any combination at the end of any segment or phase is three per hex. If 4 or more non-HQ ground combat units occupy a hex at the end of any segment or phase, the owner must eliminate enough units to bring the total down to three.
23.4 German Artillery Formation Substitutes [Optional]
a. German Artillery Formation Substitute units are artillery type non-HQ ground combat units as described in 23.3 above. b. German Artillery Formation Substitute units represent all the FA or NW battalions of a formation. c. Only one German Artillery Formation Substitute unit may occupy a hex without penalty. d. Other single artillery battalions, combat support units and front line combat units may join one German Artillery Formation Substitute unit and stack up to 3 units per hex. e. If two or more German Arty Substitutes are in the same hex after any segment or phase, they are disrupted. f. The details of Disruption are provided in section 29.3.
23.5 Friendly Army Stacking and Restrictions
a. Battalions at Army Echelon may stack with all subordinate units of the same Army. b. Units of a friendly Army may not enter hexes with units of another friendly Army except as follows:
- They are using Strat Move.
- Units of the other friendly Army are using Strat Move.
23.6 Friendly Corps Stacking and Restrictions
a. Battalions at Corps Echelon may stack with subordinate Div/Bde or Kampfgruppe level units of the same Corps. b. Units of a friendly Corps may not enter hexes with units of another friendly Corps except as follows:
- They are using Strat Move.
- Units of the other friendly corps are using Strat Move.
23.7 Friendly Division/Brigade Stacking Restrictions
a. The combat units of Brigades and Divisions of the same Corps may pass through each other without penalty. b. However, units of different Brigades and Divisions of the same Corps may not end a segment or phase stacked together. c. Note: There are six special conditions that permit Divisions of the same Corps to stack together (24.0).
23.8 Prohibited Entry Penalty
When normal movement or retreat requirements involve units entering a hex occupied by friendly units with which they are not free to pass through, then all units in the hex are instantly disrupted. See Disruption details in 29.3.
23.9 Prohibited Stacking Penalties
a. If retreating units end retreats in hexes occupied by friendly units with which they are not free to stack, then all units in the hex are disrupted; see 29.3. b. Note, the worst penalty for failure to abide by the stacking rules is that of 23.3c - elimination of excess units.
24.0 Special Unit Stacking
24.1 The 1SS Panzer Division Commands the 3FJ
a. Starting on the 16AF turn, the 1SS Panzer Division HQ takes control of the 3FJ Division. They operate as one formation. b. All actions of these Divisions must be combined, including choice of Resting or Active Status. c. The subordinate units of each Division trace command and supply normally to their own respective HQ. d. The 3FJ does not suffer a movement penalty for low fuel, if the 1SS Panzer Division is so penalized.
24.1.1 KGP Commandeers a 3FJ Bn
See 6PzA Scenario rules in the scenario book. If KGP commandeers a 3FJ Battalion, it becomes an integral unit of KGP.
24.2 The 116 Pz and the 560 VG Cooperate
a. Starting on 16MO, the 116 Panzer Division and the 560 VG Division cooperate as one formation for the rest of the game. b. All actions of these Divisions must be combined, including choice of Resting or Active Status. c. The subordinate units of each Division trace command and supply normally to their own respective HQ. d. The 560VG does not suffer a movement penalty for low fuel, if the 116 Panzer Division is so penalized.
24.3 KGP and the 150th Brigade
a. Coordination was accomplished on 15Dec44 to insert components of the 150th Brigade into the KGP column. b. The units of KGP and the 150th Brigade may stack together and fight together without penalty. c. Units of the 150th Brigade may not stack freely with units of the 1SS Panzer Division that do not have the KGP ID. d. The Command, Supply and Activity Status functions of the KGP and the 150th Brigade remain separate.
24.4 Fuhr Escort Brigade AAA
The Fuhr Escort Brigade was graced with an inordinate equipage of anti-aircraft for the size of the formation.
a. The Fuhr Escort AA Companies stack for free, one per hex, when stacked with a Fuhr Escort Panzer unit. b. As long as a Fuhr Escort AA unit and a Fuhr Escort Panzer unit remained stacked, they count as one unit only. c. During advance after combat a Fuhr Escort AA Company may accompany a Fuhr Escort Panzer unit with which it is stacked.
24.5 The US 4ID and 10AD
a. The units of the US 4ID and the US 10AD may stack together and fight together without penalty. b. The Command, Supply and Activity Status functions of the US 4ID and US 10AD remain separate. c. These units may be found in the southeast corner of the map.
24.6 The US 101AB and 10CCB
a. The units of the 101AB and the US 10 CCB may stack together and fight together without penalty. b. The Command, Supply and Activity Status functions of the US 4ID and US 10CCB remain separate.
24.7 Stacking Restriction for Allied Tank Battalions
a. Allied Tank Battalions with a complete Unit ID on their counters may not stack together. b. An Allied Tank Bn with the complete unit identification represents at least 50 tanks and stacking for such is limited. c. Only one tank unit of such strength may be in a hex. d. Artillery units, combat support units and other front line combat units may join one Allied Tank Battalion that has the complete unit identification and stack up to 3 units per hex.
24.8 Stacking Details for Allied Tank Battalions
a. Two illustrations show US Tank Battalion 9AD/CCB/14 at full strength and with one hit. The battalion counter displays the complete unit identification; i.e., 9AD/CCB/14. The tank battalion shown cannot stack with another tank battalion displaying the complete unit identification. b. The following depict an Allied Easy 8 Tank Bn after 2, 3, 4 and 5 hits. Note, no unit identity is displayed; instead the unit displays the term "Step." The generic tank step-down units have sustained 2, 3, 4 or 5 hits. There are no stacking restrictions per section 24.7 for any Allied Tank units displaying the term "Step." c. Note that an Allied Tank Bn displaying the complete unit ID will never have less than 11CF. There are some tank units with specific unit ID, but without the Step designation; such units have less than 11CF, thus they are not subject to section 24.7.
25.0 Zones Of Control (ZOC)
See the ZOC Play-Aid Chart on Play-Aid Card 2A, which identifies when each type combat unit exerts a ZOC over enemy units in adjacent hexes.
25.1 ZOC Chart Specifics
a. Infantry and Engineers exert ZOC over all enemy combat units passing through every type of terrain. b. Arm Recon/Arm Cav exert ZOC over all enemy units passing through Clear, Woods, Broken, Frozen Marsh, Town or City. c. Arm Recon/Arm Cav never exert ZOC over enemy units passing through Marsh or Forest. d. AFV, Antitank and Heavy AA exert ZOC over all enemy units passing through Clear, Woods or Broken. e. AFV, Antitank and Heavy AA never exert ZOC over enemy units passing through any terrain other than (d) above. f. Light AA, AW and MG units never exert ZOC over enemy AFV. g. Light AA, AW and MG units only exert ZOC over enemy Non-AFV units passing through Clear, Woods or Broken. h. Artillery, NW and HQ never exert ZOC into an adjacent hex. i. All combat units exert a ZOC within the hex they occupy.
25.2 When Enemy ZOC Blocks Command Path, Supply Path or Supply Road
a. If a unit would exert a ZOC over any enemy unit in a hex, it blocks Comm Path, Supply Path or Supply Road in the hex. b. The presence of a friendly combat unit does not negate an enemy ZOC for the tracing of supply. c. However, enemy ZOC's are negated by friendly units for the tracing of Comm Path. d. Fog, Dense Fog, Snow and Night prevent exertion of ZOC over certain adjacent hexes. See notes beneath ZOC Chart. e. When no ZOC is exerted as described in (d) above, then Comm Path, Supply Path or Supply Road are not blocked.
25.3 ZOC Across Rivers and Streams
Zones of Control are exerted across Rivers and Streams, but not across the Meuse River or lake hex-sides.
25.4 ZOC are Exerted into Hexes off the Map Edge
a. Imaginary hexes off the board edge are always considered to be Clear terrain hexes. b. An infantry unit in Mersch, for example, exerts a ZOC into imaginary hexes 7463, 7564 and 7663. c. Enemy units cannot usually slip past units holding the board edge due to zones of control. d. However, it is possible for units to slip past units holding the board edge on Dense Fog or Snow turns.
25.5 ZOC Interface
The ZOC of both sides are simultaneously exerted in the same hex.
25.6 Zones of Control Inhibit Enemy Movement
a. Units entering an enemy ZOC that affects the moving unit must immediately stop movement. b. Units starting in the ZOC of an enemy unit may move directly into the ZOC of a different enemy unit, and then stop. c. Units may not move directly from one hex to another hex through the ZOC of the same enemy unit. d. A unit may move out of the ZOC of an enemy unit and re-enter the same unit's ZOC from another hex.
25.7 Retreating into an Enemy ZOC
a. See the Zone of Control Chart and 54.0 for retreat rules. b. A unit is eliminated if forced to retreat into hexes containing enemy ZOCs that affect the retreating unit. c. For example, assume a tank and an infantry unit are forced to retreat into the ZOC of a Light AA unit. The tank would be unaffected, but the infantry unit would be eliminated.
25.8 Advance After Combat Through Enemy ZOCs
a. The first hex of an advance after combat must be the defender's hex. See rule 55.0 for advance after combat rules. b. A combat unit advancing after combat may ignore an enemy ZOC in the first hex of the advance.
26.0 German Army Boundaries
There were significant tactical and administrative reasons why units did not cross lines of communication in World War II.
26.1 North Army Boundary: 6PzA - 5PzA
26.1.1 The 6PzA - 5PzA Boundary Road
a. The boundary is a road net running from east edge hex 9926 to Huy (hex 3407). The road net has highway signs (white dots) on the road denoting the boundary. Units of both armies may use the boundary road and attack enemy units on the boundary road. b. Units of the 6PzA may not move south of the boundary nor attack enemy units south of the boundary; however, see 26.1.4. c. Units of the 5PzA may not move north of the boundary nor attack enemy units north of the boundary. d. Units of the 5PzA may not enter a hex occupied by a unit of the 6PzA and vice versa. If the German does not plan well, units of both armies will get stuck in traffic jams on the road.
26.1.2 The 6PzA - 5PzA Restrictions
a. Units of the 5th Panzer Army may not enter a hex occupied by a unit of the 6th Panzer Army, and vice versa. b. However, units of the different armies may retreat into or through the units of the other Army, if necessary. c. In the case of (b) above, all the units involved are disrupted. d. The details of Disruption are provided in section 29.3.
26.1.3 Retreating Across the Boundary
a. Units forced to retreat into the area of operation of the other Army must begin the next turn "Out Comm." b. Units subject to (a) above must return to the Boundary using the fewest number of movement factors. c. If there are equivalent paths for such units, the owning player may choose from among them.
26.1.4 Violation of the Boundary by 6PzA
Units of the 6PzA violated the Army Boundary south of Andler on 17Dec resulting in an intervention by General Model.
a. SS units may cross the boundary with successful die rolls. For each unit that enters a hex south of the boundary, roll a die. If the roll is below the unit ER, it may continue, but it can move no more than 3 hexes past the boundary. SS units may attack units beyond the boundary or outflank units on the boundary. On future turns, the SS units may continue south of the boundary; however, they will be Out Comm. b. If the SS unit die roll is equal to or greater than the unit ER, the unit must stop. Also, on the next turn, the unit starts Out Comm and it must return to the boundary using the fewest MF. The German may choose from equivalent paths for the return. c. Alternatively, SS units may attack south of the boundary while on the boundary, but they must roll successfully per 26.1.4a, and a Model Intervention die roll will also be required. d. A KGP Panzer with a 3FJ Bn may not violate the boundary. e. Model Intervenes. After the 1st movement segment that SS units violate the boundary, roll a die for Model: on a 6, the boundary may never again be violated. For each new turn an SS unit violates the boundary add +1 to the Model die roll.
26.2 South Army Boundary: 5PzA - 7A
Geography of the Sure, Wiltz and Clerf Rivers. The Wiltz River flows east to join the Sure at 7251. The Clerf River flows south to join the Wiltz below Kautenbach. So, the hex side between 7148-7248 is the Clerf River, while the hexside between 7149-7248 is the Wiltz River. From the east edge to the Clerf River, 9949 to 7248, the 5PzA-7A Boundary is a road net. West of the Clerf between the river (7248) and Bastogne (5645), the boundary is the Wiltz River/Stream. From Bastogne (5645) west to Givet (1133), the 5PzA-7A Boundary is a road net.
26.2.1 5PzA - 7A Cooperation
West of the Wiltz River, 7149-7150-7151, the XLVII Corps of the 5PzA may freely operate south of the 5PzA-7A Boundary.
26.2.2 The 5PzA-7A Boundary East of the Clerf-Wiltz Rivers
a. The boundary is a road net running from the east edge to the Clerf-Wiltz Rivers at 7248. b. The road net contains highway signs (white dots) on the road denoting the boundary. c. East of the Clerf-Wiltz, units of the 5PzA may not move south of the boundary nor attack enemy units south of the boundary. d. East of the Clerf-Wiltz, units of the 7A may not move north of the boundary nor attack enemy units north of the boundary. e. Units of both armies may use the boundary road; however, care is required that congestion be avoided. f. If the German player does not plan well, units of both armies will get stuck in traffic jams on the road.
26.2.3 The 5PzA Crossing the Clerf River
a. Units of the XLVII Corps may cross the river from 7248 to 7148, into Kautenbach, but they may not cross from 7248 to 7149. b. After units of the 5PzA cross the Clerf River, they may move south of the 5PzA-7A Boundary, but see 26.2.5e.
26.2.4 The 7A Crossing the Wiltz River
a. Units of the 7A may cross the river from 7248 to 7149, but they may not cross from 7248 to 7148 into Kautenbach. b. After units of the 7A cross the Wiltz, they may not move north of the boundary or attack enemy units north of the boundary.
26.2.5 Fluid Boundary for XLVII Corps West of the Clerf-Wiltz
a. The boundary is fluid for the units of XLVII Corps after they cross the Clerf River, from the crossing of the Clerf to Givet. b. After units of the XLVII Corps cross the Clerf River, they may move south of the boundary and attack enemy units. c. Thus, west of the Clerf River, the XLVII HQ and its Division HQ may trace supply roads south of the boundary. d. When units of the XLVII Corps are south of the boundary, they are subject to the atmospheric conditions thereof. e. Although the XLVII Corps is free to operate south of the boundary, west of the Wiltz River, the restriction of 26.2.2c, east of the Clerf River, must be maintained. Therefore, 26.2.2c is elaborated as follows: When west of the Wiltz River, units of the XLVII Corps may not move east of the river system Wiltz-Sure-Alzette that flows from 7248 to the south edge of the map.
26.2.6 A Rigid Boundary for the 7th Army West of the Wiltz River
a. The boundary remains rigid for 7A units west of the Wiltz River. b. Units of the 7th Army may not move north of the Boundary nor attack enemy units north of the Boundary from 7149 to Givet.
26.2.7 The 5PzA-7A Boundary from Bastogne to Givet
a. At Bastogne, the boundary returns to a road-net that contains white dots within the road denoting the boundary. The 5PzA-7A Boundary Road then runs from Bastogne (5645) to Givet. b. Units of both armies may use the boundary road from Bastogne (5645) to Givet. c. Per 26.2.5, the Boundary is fluid for the 5PzA-XLVII Corps. d. Per 26.2.6, the Boundary is rigid for the 7A. e. Units of the 5th PzA that cross the Meuse River at Givet or to the north are free to move anywhere across the Meuse. f. Units of the 7th Army may not cross the Meuse River.
26.2.8 The 5PzA- 7A Unit Restrictions
a. Units of the 5th Panzer Army may not enter a hex occupied by a unit of the 7th Army, and vice versa. b. However, units of the different armies may retreat into or through the units of the other Army, if necessary. c. In the case of (b) above, all the units involved are disrupted. d. The details of Disruption are provided in section 29.3.
26.2.9 Boundary Violations
a. German 7A units forced to retreat north of the 5PzA - 7A Boundary must begin the next turn "Out Comm." b. Units subject to (a) above must return to the Boundary using the fewest number of movement factors. c. If there are equivalent paths for (b) above, the owning player may choose from among them.
27.0 Reinforcements
27.1 Basics
a. Reinforcements enter the game on the dates specified in the Scenario Order of Appearance (OOA) charts. b. Each reinforcement group has a letter code or hex coordinate indicating from which Entry Area it may initially enter the map. c. Reinforcements assigned to enter at a specific letter may enter at that letter or at any hex in between the letter. For example, if listed to enter at "A," they may enter at 9263, 9363 or 9563. d. Reinforcements assigned to enter at a specific hex coordinate must enter at that hex unless it is blocked by the enemy. See 27.5. e. Reinforcements may not enter from off-board directly into forest hexes, except along the path of a road; nor may they enter from off-board directly across a river or stream, except along a road. f. Reinforcements enter on a road at the road movement rate. g. Place all reinforcements that intend to enter this turn on the board edge adjacent to the hex they intend to enter. h. Unless prohibited, reinforcements may be withheld on the turn of entry in order to enter at adjacent areas. For example, rather than enter the 4ID/22, Bn II at Board Entry A on 17MO, the US player can move the unit into the adjacent B off-Board Box on 17MO. On 17AF, the unit may enter from the B off-Board Box. i. When specified in the scenario rules, certain reinforcements may only enter at specific roads or hexes. j. Reinforcing US infantry units entering from the map edge may always enter with a truck.
27.2 Reinforcing HQ and Activation Status
All HQ reinforcements enter "In Command" and "In Supply," and with a "Rested" marker.
27.3 Status of Subordinate Reinforcements (Non-HQ Units)
a. Subordinate reinforcements reflect the Activity Status of their parent HQ: Active, Resting or Exhausted. b. Reinforcements move when their parent HQ is activated. c. If the HQ is Resting, the reinforcements may move 1 hex or half of their MF as described in 14.1, 15.1 and 16.1. d. If the HQ is Active, the reinforcements may move normally as described in 14.2, 15.2 and 16.2. e. Remember that an Active formation may also be Fatigued. f. If the HQ is Exhausted, the reinforcements may move 1 hex or half of their MF as described in 4.3e.
27.4 When Reinforcements Move
Reinforcements move when their parent HQ is activated.
27.5 When Reinforcement Entry is Blocked or Impeded
a. Enemy units on the board edge may exert a ZOC into adjacent, imaginary off-board hexes that are not depicted. b. Reinforcements may not move through ZOC's exerted into off-board hexes that are not depicted. c. When all entry hexes are blocked by enemy units or ZOCs, reinforcements may enter adjacent to enemy units. d. Only whole hexes may be entered in case of (c) above. The restrictions of 27.1 and 27.5b may not be violated. e. Reinforcements must stop and move no farther, if the hex entered is in an enemy ZOC. f. Entry at southwest road hexes incur a movement penalty as indicated on the map edge. g. In some cases reinforcements may be delayed, so that they may enter in adjacent areas; see scenario rules.
28.0 Strategic Movement
a. Strategic Movement may be chosen for reinforcements entering the map. Specific parameters for Strat Move, if any, are provided on the reinforcement charts in the scenario rules. b. Certain units already on the map may use Strat Move as designated in the setup charts in the scenario rules. c. All movement occurs during the Movement Segment. d. See the Strategic Road Movement Chart on Play-Aid Card 2A, Movement Segment.
28.1 Strat Move Basics
a. Units using Strat Move may move on roads only. b. Units using Strat Move may not move adjacent to enemy ground combat units. Units lose their "Strat Move" marker, if enemy units move adjacent. c. German units Strat Move with their printed MF. d. American Infantry units Strat Move with 8MF. Place a generic truck counter at the head of the infantry column. Other than US Infantry, all other Allied units Strat Move with their printed MF. e. Non-reinforcement units that enter Strat Move per scenario rules may only do so if In Comm and In Supply. f. Units may leave Strat Mode Status before or after movement.
28.2 Unit Status
a. Units with "Strat Move" markers reflect the Activity Status of their parent HQ: Active, Resting or Exhausted. b. Reinforcements entering the map with "Strat Move" markers are automatically In Comm and In Supply. c. If units lose their "Strat Move" marker due to enemy activity, they are no longer automatically In Comm and In Supply.
28.3 Strat Move Markers
a. Reinforcements that will use Strategic Movement are covered with a "Strat Move" marker. b. Units starting the turn with a "Strat Move" marker may continue Strat Move. c. If US infantry reinforcements lose their "Strat Move" marker, they may still move with the truck until they reach the designated assembly location specified in the scenario rules. d. Truck counters are not limited by the counter mix. Truck facsimiles may be produced as required.
28.4 Strat Move Stacking
a. Units using Strat Movement may pass through friendly units of other formations; see 23.5b and 23.6b. b. Units with "Strat Move" markers may pass through hexes occupied by friendly units without "Strat Move" markers. c. Likewise, units using normal movement may pass through hexes occupied by friendly units with "Strat Move" markers. d. However, units with "Strat Move" markers may not end a segment or phase with friendly units devoid of such markers. e. If retreats cause Strat Movers to stack with units with which they are not free to stack, "Strat Move" markers are lost. f. Furthermore, when units stack with units with which they are not free to stack, all the units are Disrupted (23.8 and 23.9). g. The details of Disruption are provided in section 29.3.
29.0 Movement
a. Each ground unit has a Movement Factor (MF), or movement allowance, printed on the counter. b. The MF is the number of movement points that may be expended during the movement segment. c. Units are moved from hex to adjacent hex. A hex may never be skipped or jumped. d. As each unit enters a hex, the unit expends movement points from its Movement Factor (MF). e. During the movement segment, a player may move as many or as few units as desired. f. Unused movement points of a MF may not be accumulated nor may they be transferred to other units.
29.1 Movement Restrictions
a. A unit with full MF may not enter a hex if it does not have sufficient MF to expend in order to enter the hex. b. Engineers covered with a "Construction" marker, "Ferry" marker or a "Prep Bridge Demo" marker may not move. c. Units may not enter prohibited terrain. See the Off Road Movement Chart on Play-Aid Card 2A, Movement Segment. d. For the effect of enemy ZOC's on movement, see the ZOC Chart on Play-Aid Card 2A, Movement Segment. e. Also, specific rules regarding the effect of enemy ZOC's on movement are found in section 25.0. f. Usually, friendly combat units may not move through enemy ground units. There are two exceptions as listed below:
- US units may pass through German Commandos and vice versa; see 94.2.1.
- Skorzeny Infiltration (6PzA scenario-94.1) allows German 150th Brigade units to move through US combat units.
29.2 Movement Factor Reductions
29.2.1 Movement Factors Halved
a. Units that begin the Movement Segment with a Shocked or Disrupt marker may only move with half their MF. b. Units Resting or Exhausted may only move with half their MF. c. AFV, truck units (oo) and cross-country units (ooo) that are out of Supply may only move with half their MF. d. When the MF is halved for any reason, round fractions up. e. A unit's movement factor can never be halved more than once, even it is subject to multiple half-movement penalties. f. A unit suffering half-MF may always move one hex into an adjacent hex it could legally enter if it had full MF.
29.2.2 Low Fuel Reduction
a. The low fuel penalty for Panzer formation AFV, truck units and cross-country units is the worst reduction and supersedes all other movement reduction penalties. b. German AFV, truck and cross-county units may only move one hex and advance after combat is limited to one hex. c. Truck towed artillery can move only one hex; or, FA/NW units may change mode from In-Battery to March Order or vice versa. d. Essentially, the maximum and minimum move is one hex. A unit may enter an adjacent hex it could legally enter with full MF. e. German Infantry with inherent trucks may not dismount or remount trucks at the start of a movement segment. f. The movement factor of HQ, horse-drawn artillery or foot units are not affected by low fuel.
29.3 Disruption Penalty
a. When a unit is Disrupted, it receives a "Disrupt 1" marker. b. If the unit it already has a "Disrupt 1" marker, it is flipped to "Disrupt 2." If the unit already has a "Disrupt 2" marker, it cannot be penalized further. c. When Deployed HQ and In-Battery artillery units are disrupted they are flipped into March Order. d. Disrupted units are penalized as follows:
- Disrupted units may only move with half their MF.
- Units in Reserve lose Reserve status.
- Disrupted HQ and artillery units must remain in March Order until they are no longer disrupted. e. Disruption is reduced during the Mutual EOT Segment (61.2). f. A summary of Disruption causing events are as follows:
- As a result of a Strafe attack; see 5.7.5.
- When HQ units over-stack (23.2).
- When German Arty Formation Substitutes over-stack (23.4).
- When units attempt to avoid interdiction in forest (33.0j).
- When Allied front line units or AFV move next to German FA Formation Substitutes (44.1p); does not apply to NW.
- When In-Battery Artillery are required to retreat (54.0c).
- When deployed HQ are required to retreat (54.0d).
- When truck-infantry retreats per 54.3 receiving a Disrupt 2.
- When retreats cause friendly units to enter restricted friendly hexes (23.8, 26.1.2, 26.2.8, 28.4, 54.2k).
- When "Shock" markers convert to "Disrupt 1." See 61.2.
29.4 Terrain Effects for Off Road Movement
a. The Off Road Movement Chart identifies the types of terrain and the cost incurred when moving into a hex. b. Green font numerals display the cost incurred when the ground condition is Firm. c. Brown font numerals display a greater cost incurred for certain terrain when the ground condition is Mud. d. Blue font numerals display a lesser cost incurred for certain terrain when the ground condition is Frozen.
29.5 Road Movement
a. Road movement is accomplished by moving units along the path of a road through connected road hexes. See the Normal Road Movement Chart on Play-Aid Card 2A, Movement Segment. b. Road movement allows units to pass through terrain they are prohibited from entering when not on a road. In such cases the units may only enter and leave prohibited terrain along the path of a road. This also applies for retreats and advance after combat.
29.6 Traffic Jams - 16Dec Turns
a. As the offensive began, German vehicles disgorged from their hiding places and overwhelmed the limited road net. b. Therefore, road movement is beset by massive traffic jams that occurred behind the German front line on 16Dec44. c. Consult the Traffic Jam Chart on Play-Aid Card 2A, Movement Segment.
29.7 Dismounted Infantry Movement [Optional]
This rule addresses the ability of truck-mounted infantry to dismount their inherent trucks and move as foot infantry.
a. Truck-mounted infantry (but not Engineers) may dismount at the beginning of any segment or phase and move as foot infantry with 6MF; however, the units may not cross a river or stream, except at a bridge or Ford. b. During any segment or phase, if the first hex moved by truck-mounted infantry is at the truck movement rate, then movement for that entire segment or phase must be made as a truck unit. c. During any segment or phase, if the first hex moved by truck-mounted infantry is as a foot unit with 6MF, then movement for that entire segment or phase must be made as a foot unit. d. Truck-mounted infantry that begins any segment or phase in non-road forest terrain or non-road marsh terrain must move, retreat or advance after combat as foot infantry with 6MF.
30.0 Movement Across Water(s)
30.1 Un-bridged Rivers and Streams
a. Usually, only foot units may cross a stream or river, other than the Meuse, at a non-ford or non-bridge hex. b. The units must begin next to the river/stream and the first move must be to cross the river/stream hex-side. c. After crossing the river/stream, they may keep moving, if they have MF remaining to enter additional hexes. d. The Meuse River and Lakes may only be crossed on bridges.
30.2 River Fords
a. The River Fording costs are provided in the Crossing the River at Fords Chart on Play-Aid Card 2A, Movement Segment. The MF cost for Fording is in addition to the MF cost for entering the hex across the river. b. Infantry units can cross a river at any hex. Others units may only cross a river at a bridge or a ford. c. Certain combat units that wish to Ford a river may need Engineer assistance depending upon ground conditions. d. In order for Engineers to assist Fording, they must meet the prerequisites specified in section 20.0. e. An Engineer unit may help one unit Ford a river during movement, which could be the Engineer unit itself.
30.3 Bridge Bottlenecks [Advanced Game]
This advanced game rule injects realism into the process by which large formations intending to cross bridges cause traffic jams. The movement points to cross bridges found in the Bridge Crossing Chart on page 11 of the Play-Aid Book are based upon the rates at which US Divisions crossed captured bridges at Avranches during the Breakout.
a. Bridges exist wherever a road crosses a river, stream or lake. b. Units have been assigned a bridge crossing cost as provided in the Bridge Crossing Point Chart on page 11 of the Play-Aid Book. c. A maximum of 24 points may cross a bridge per turn. d. Players will need to track the crossing points with dice or other player provided play-aids in order to administer the process. e. All German AFV units are considered company-sized units. f. German Hetzers are Battalion-sized AFV units; however, for the implementation of this rule, Hetzers will be Company-sized. g. All US (Disp) AFV are company-sized AFV units. h. All Allied AFV Steps are company-sized AFV units. i. Other than the units described in (g) and (h) above, all other Allied AFV are considered battalion-sized AFV units.
31.0 HQ Movement
Other than the HQ listed in 31.3 below, all HQ have two modes of operation: March Order or Deployed.
31.1 HQ in March Order
a. When a HQ is in march order, wheels are displayed below the NATO box and the unit has a movement factor of 8 or 9. b. When in march order, a HQ always has full movement capability when it is eligible to move. c. Resting Status, Exhaustion, Command Status, Supply Status or Isolation have no effect on HQ movement. d. A superscript next to the MF is the cost to change mode from "March Order" to deployed mode, and vice versa. e. When the HQ is in march order, the Command Range in the upper right circle is at a reduced range.
31.2 HQ Deployed
a. When a HQ is Deployed, on its back-side, a lightened square appears on the counter. There are no wheels below the NATO box and its MF is 0. b. The Command Range in the upper-right circle is increased (doubled) when the HQ is deployed (not in march order). c. A superscript next to the MF is the cost to change mode from Deployed mode to March Order, and vice versa. d. When they intend to move, they flip to March Order and then subtract the MF necessary to change mode. After changing mode, the remaining MF are available for movement.
31.3 KGP HQ, KGC HQ and Fuhr Escort HQ
a. These HQ are always in march order, may attack, may advance after combat, and may stack freely. b. Also, the Fuhrer Escort HQ is a recon unit and the KGP HQ is an engineer unit as noted in the respective NATO box.
32.0 Artillery Movement
a. All artillery units have two modes of operation: March Order or Deployed (In-battery). b. German artillery consisted of conventional field artillery (FA) and Nebelwerfer rocket projectors (NW). c. Allied artillery predominantly consisted of conventional field artillery (FA).
32.1 Artillery in March Order
a. FA and NW are in March Order when the front-side is face-up and the MF is a greater than zero. b. When in March Order, the Range of the weapon is not shown at the upper right corner of the counter. c. When in March Order, FA and NW cannot shoot. In order to shoot, they must change mode to "In-Battery."
32.2 Changing Mode to "In-Battery"
a. Movement factors (MF) must be expended in order to change mode from March Order to In-Battery. b. A superscript next to the MF is the cost to change mode from March Order to In-Battery, and vice versa. c. When the superscript "H" is to the right of the movement factor it denotes horse-drawn. d. The cost to change mode for all horse-drawn artillery is 2MF. e. The unit must have sufficient MF remaining after movement in order to change from March Order to In-Battery. f. If the unit does not have sufficient MF remaining after movement, it may not change mode. g. FA and NW units that are In-Battery have a MF of 0. h. When In-Battery, the Range of the weapon is shown at the upper right corner of the counter. g. When "In-Battery," a light-colored square appears on the back side of FA or NW units to denote "In-Battery."
32.3 Changing Mode to "March Order"
a. Movement factors (MF) must be expended in order to change mode from In-Battery to March Order. b. A superscript next to the MF is the cost to change mode from March Order to In-Battery, and vice versa. c. When they intend to move, they flip to March Order and then subtract the MF necessary to change mode. d. After paying the cost to change mode, the remaining MF is the number of MF available for movement.
32.4 German Immobile Army Units
a. There are nine German Army Echelon arty units with 0 MF. b. These units cannot be moved except by Random Event. c. There is also one German anti-tank unit that can only be moved by Random Event---the 7A/501 PzJ.
33.0 Interdicted Forest Road Movement
a. Aircraft in a Strafe Area during enemy movement segment interdict enemy movement through the area. See 5.8. b. Enemy units entering an Interdicted hex must pay the added MF cost for each hex entered per the Air Interdiction Chart. c. Enemy vehicular units may attempt to avoid the interdiction and the added MF cost when using a forest-road. d. Vehicular units include AFV, truck units (oo), cross-country units (ooo) and horse-drawn artillery (H) units. e. In order to avoid interdiction the unit must stop before entering the first forest-road hex in the interdicted area. f. The unit must have enough MF to enter the first forest-road hex plus the interdiction cost (hex and/or bridge) before the avoid roll. g. Roll a die for each vehicular unit on the Avoid Interdiction Table on Play-Aid Card 2A, Movement Segment. h. If interdiction is avoided in the first forest-road hex, the unit does not pay the added MF cost to enter that first hex. i. In addition, it does not pay the added MF cost to enter any remaining forest-road hexes connected to the first hex. j. If interdiction is not avoided in the first forest-road hex, due to a Stop or Disrupt result, the unit enters that first hex and stops.
34.0 Off Board Movement
a. Allied units may leave the board via the north edge or the south edge, voluntarily or as a result of retreat. b. In the north, the units may leave via road entry hexes K through R, or via any hexes in between. c. In the south, the units may leave via road entry hexes A through G, or via any hexes in between. d. Units voluntarily leaving the board via a road hex must have sufficient MF to enter a connected road hex. e. Units voluntarily leaving the board into a non-road hex must have sufficient MF to enter a Clear terrain hex. f. A unit that leaves the board may return during a later friendly movement segment. g. A unit in an Off Board Movement Zone moves when its HQ is activated during the friendly movement segment.
34.1 Exiting the Board
a. Note the lettered board edge roads. All off board hexes and roads are at or in between circled letters. b. When a unit leaves the board, place it in the corresponding Allied Off Board Movement Zone in the map southwest corner. c. For example, if a unit leaves via hex 9563, 9462, 9363, 9262, 9163 or 9062, it is placed in the A Zone. d. Units that leave the board may stay off board in Off Board Movement Zones indefinitely.
34.2 Moving between Off Board Zones
a. Units that begin a movement segment in an Off Board Movement Zone may move to an adjacent Zone and stop. b. However, units may not move beyond an adjacent lettered Off Board Movement Zone. Players will need to keep a record. c. For example, if a unit exits the board from a C lettered hex into the Off Board Movement C Zone, it may not move farther than the adjacent Off Board B Zone or the adjacent Off Board D Zone. d. Scenario rules may also limit the ability of units to move to distant Off Board Movement Zones.
34.3 Returning to the Board
a. A unit may return from an Off Board Zone into a map hex that has the same letter as the Zone from whence it comes. b. For example, if a unit returns from Off Board Zone B, it may enter at 8062, at 8963, or any hex in between.
35.0 Overrun During Movement - Day Turns
Morning (MO) turns and Afternoon (AF) turns are Day Turns.
35.1 Overrun - Movement Segment of a Day Turn
Certain units may be overrun if the attacker achieves 10-1 odds.
a. A single HQ may be overrun in any hex. b. A one-step front line, combat support or artillery unit may be overrun in clear, woods or broken terrain hexes.
35.2 Conditions Prohibiting Overruns
The specific conditions that prevent Overruns are:
a. The hex is occupied by more than one step. b. The hex is occupied by a Heavy AFV of any strength. c. The hex is occupied by a German Artillery Formation substitute unit. See Advanced Game Rule 44.0. d. The hex is occupied by a front line combat unit and a roadblock. e. The hex is occupied by any AFV and a roadblock. f. The hex is occupied by an Engaged combat unit. g. The hex contains a village, strong point or a Fort. h. Attacking units that are needed to achieve the minimum requirements may not be attacking across a stream or river. i. It is a Fog, Dense Fog or Snow Turn.
35.3 Overrun Procedure
The procedure for overrun is as follows:
a. The attacking units must include infantry plus tanks (panzers). b. Note: Hetzers, Jagd IV, Jagdpanthers, Jagdtigers, StuG or tank destroyers do not qualify as tanks or panzers. c. The attackers must attain the required numerical odds ignoring possible column shifts for any reason. d. Combat support units can assist achieving the required odds as long as the requirement for tanks and infantry is met. e. Since overrun occurs during the movement segment, artillery and air units may not assist the attacker or the defender. f. Over-running units move next to the defender and stop. g. An over-running tank must have enough MF to enter the defenders hex as if there was no defender in the hex. h. If the overrun movement is along a road, the movement cost for the overrunning tank to enter the hex is 1MF. i. As soon as requirements are met, the defenders are eliminated and the over-running tank must advance into the hex. j. Place an Overrun counter in the hex. Any of the other attackers may advance into the hex subject to stacking limits. k. Movement ends for the units that attained the overrun. l. The eliminated unit remains in the hex until the end of the movement segment. It counts against stacking. m. Units yet to move during the movement segment may enter the overrun hex at the normal cost of movement plus 1MF. n. The non-overrunning units may exit the overrun hex in accordance with the rules of movement.
36.0 Overrun During Movement - Night Turns
Evening (EV) turns and Predawn (PD) turns are Night Turns.
36.1 Overrun on Night Turns by 1SS Pz, 2SS Pz and 2nd Pz
Units described in section 35.1 may be overrun during movement at night by the Panzer Divisions listed, if they achieve 10-1 odds.
36.2 Specific conditions that Prevent Overruns at Night
The conditions that prevent an overrun in section 35.2 also prevent an overrun at night.
36.3 Procedure for Overrun at Night
a. The procedures are the same as those described in 35.3 in addition to those listed below. b. KGP/1SS Panzer. In addition to the Panzer and Infantry, other units of the 1SS Panzer Division and a commandeered FJ Infantry Battalion of 3FJ Division may assist in the overrun. c. 2SS Panzer Division. In addition to the Panzer and Infantry, other units of the 2SS Panzer Division may assist in the overrun. d. 2nd Panzer Division. In addition to the Panzer and Infantry, other units of the 2nd Panzer Division may assist in the overrun.
37.0 Reaction Interlude before Combat
37.1 German Turn
a. When an activated German Corps has completed all movement, the Allied player is informed and the German turn is interrupted. b. Allied Leaders may now react to the movement of the activated German Corps. See 38.0 and 39.0 for details. c. After Enemy Leader Reactions to the activated German Corps are completed, German play resumes and the activated German Corps proceeds to combat, if applicable.
37.2 Allied Turn
a. When an activated Allied Corps has completed all movement, the German player is informed and the Allied turn is interrupted. b. German Leaders may now react to the movement of the activated Allied Corps. See 38.0 and 39.0 for details. c. After Enemy Leader Reactions to the activated Allied Corps are completed, Allied play resumes and the activated Allied Corps proceeds to combat, if applicable.
38.0 Leader Reaction Phase [Advanced Game]
See section 39.0 for complete rules for Leaders.
a. All leaders have the capability to perform Leader Reaction. b. The phase occurs within the enemy movement segment after an enemy Corps has completed movement (see 17.1 and 17.2). c. Since there are many Corps for each side, this phase could occur many times within the enemy movement segment. d. Leader Reaction is triggered if a unit of the activated enemy Corps moves next to a unit under the Leader's command.
38.1 Leader Reaction to move Reserves
a. Leader Reaction allows the Leader to move units in Reserve that belong to the formation to which the enemy moved adjacent. b. The Leaders Command Attribute shows the maximum number of units in Reserve that may be moved by the Reaction. c. The Combat units in reserve may move up to half of their MF (round up). Remove "Reserve" marker after movement. d. The units moved by Leader Reaction may make any legal move as long as all movement rules are applied. Units that are Resting may be moved by Leader Reaction and maintain Resting Status. e. The units In Reserve that are to be moved by Reaction must be In-Comm with their Division/Brigade HQ and they must be within the personal Command Range of the applicable Leader at the start of the Leader Reaction Segment. f. A Leader may release reserves using Leader Reaction only once per enemy turn. Flip the leader to his spent side. g. Leaders may move with half MF as the LAST action during the Reaction Phase when a Leader moves reserves.
38.2 Leader Reaction to move Himself Only
A Leader may move by himself in Leader Reaction and in such action is not Spent. Sole Leader Reaction may be triggered when enemy units move adjacent to a subordinate that is In-Comm during an enemy movement segment. In order for a Leader to react by himself only, he must be within the Command Range of the HQ of the unit to which the enemy moved adjacent.
39.0 Leaders [Advanced Game]
a. Spent leaders may not use an attribute. b. Some leaders may designate reserves during the friendly Orders Segment of any turn. This does not cause a leader to be Spent. c. All leaders may perform Leader Reaction (38.0) after enemy movement. This causes a leader to be Spent. d. All leaders may order "Hold at all Cost" during resolution of combat. This causes a leader to be Spent. e. Some leaders may release reserves for full MF in the friendly Exploitation segment. This causes a leader to be Spent. f. A leader is not spent due to normal movement, due to advance after combat or by lone leader movement during leader reaction.
39.1 Leader Attributes
a. The information to the left of the photo describes the formation that the leader can influence. b. The letter D to the right, allows a leader to designate reserves during the friendly Orders Segment of any turn. c. The letter R to the right, allows a leader to move reserves during the applicable Leader Reaction Phase. d. The letter H to the right, allows a leader to issue Hold Orders during the friendly or enemy Combat Segment. e. The letter E to the right, allows a leader to release reserves during the friendly Exploitation segment. f. Command Attribute: the first number below the photo. It indicates how many units or battles may be influenced. g. Range Attribute: the second number indicates the range to the unit(s) for which the leader may apply his attribute. h. Movement Attribute: the third number beneath the photo is the movement factor.
Example (Patton, 3A, with attributes D, R, H, E):
- 3A: Patton can exert influence over every unit in the 3rd Army.
- D: Patton can designate up to 3 units to be in reserve during the friendly Orders Segment.
- R: Patton can move up to 3 units in reserve during the Leader Reaction Phase.
- H: Patton can issue Hold at All Cost Orders for 3 battles during the friendly and/or enemy Combat Segment.
- E: Patton can release up to 3 units in reserve for movement during the friendly Exploitation Segment.
- The number 3 indicates that Patton may influence 3 units or battles per attribute.
- The number 6 indicates the Maximum range to units for which Patton he can apply his attribute.
- Movement Factor.
39.2 Leader Command
a. The leader's range is the comm path in hexes, from the leader unit to units commanded. The comm path may be traced through any type of terrain, but it may not be traced through an enemy ZOC unless the ZOC is occupied by a friendly unit. b. Leaders may move anywhere and they are not subject to Comm rules, Supply rules, Activity rules or Resting rules.
39.3 Leader Stacking, ZOC and Combat Capability
a. Leaders have no ZOC and do not count against stacking. Any number of friendly leaders may occupy a hex. b. Friendly leaders may join or pass through any friendly units without penalty. c. Leaders may not move next to enemy units or leaders unless they are moving with (or joining) a friendly combat unit. d. Leaders are immediately eliminated, if they are alone in a hex and an enemy combat unit enters the hex. e. Leader units may be selected to satisfy combat losses.
39.4 Leader Movement
a. Leaders always have full MF when they are eligible to move during their friendly movement segment. b. Leaders may move or retreat as cross-country or foot units, interchanging between the two at any time. c. Leaders may advance after combat when accompanying and remaining stacked with friendly units that advance.
39.5 Leader Designate Reserves (D)
a. Leaders with the "D" attribute may designate reserves during the Orders Segment of any turn. In so doing the leader is not Spent; however, a Spent leader cannot designate reserves. b. The units to be placed in reserve must be from a Division, Brigade or Kampfgruppe subordinate to the Leader. c. During the orders segment (18.4), an Army, Corps, Division, Brigade or Kampfgruppe commander with a "D" attribute may place subordinate units in reserve that start the segment within command range of the commander. d. The Leaders Command Attribute shows the maximum number of combat units that may be designated "In Reserve." e. Leaders may place themselves in Reserve free of charge. f. For German leaders, 18.4e through 18.4L, and 18.4.1 apply. g. For Allied leaders, 18.4e through 18.4L, and 18.4.2 apply.
39.6 Leader Reaction (R)
All leaders may perform Leader Reaction. A leader that uses Leader Reaction to move reserves is Spent and will not be able to issue "Hold at all Costs" orders during the enemy combat segment. A Leader that moves himself only by Leader reaction is not Spent. See section 38.0 for details.
39.7 Leader Orders Hold at all Costs (H)
a. All leaders have the capability to order "Hold at all Costs" for units in their Chain of Command. b. A leader may order "Hold at all Costs" for unsuccessful friendly attacks by one friendly Corps per friendly Combat Segment. Flip the leader to his spent side after he uses his H capability. c. A leader may order "Hold at all Costs" in response to attacks by one enemy Corps per enemy Combat Segment. Flip the leader to his spent side after he uses his H capability. d. The Leader Command Attribute shows the maximum number of battles for which the Leader may order "Hold at all Costs" during a combat segment. e. Any combat units that are not shocked may take combat losses rather than retreat. f. Combat units that are shocked and occupying a Strong Point or a Fort may take combat losses rather than retreat. g. Shocked units that participated in the combat, but not occupying a Strong Point or a Fort must still retreat. h. The units must be within command range of the leader in order to "Hold at all Costs." i. Units that participated in the combat, but that are not within the leader's command range must still retreat. j. If a player chooses to take the losses, the entire retreat obligation must be satisfied by step losses. For example, for a DR4 combat result, a total of four Steps must be eliminated. k. When taking losses, the number of hexes to be retreated may not be split between step losses and retreated hexes. l. If there are units that may hold and some that must retreat, the units that may hold must satisfy all the step losses.
39.8 Leader Release Reserves for Exploitation (E)
Leaders with Exploitation capability may release units in reserve to move up to their full MF during Exploitation. The Leader is then Spent. See section 59.0 for complete details.
40.0 Tiger Panzer Scare
Early during the Battle of the Bulge, American units were susceptible to rumors about the invincibility of the Tiger tank.
a. From the 16AF through 17EV turns, there is a column shift right for German attacks that include a Tiger tank. b. From the 16AF through 17EV turns, there is a column shift left for US attacks against hexes with a Tiger tank.
41.0 German Night Combat Advantage
a. Normally, there is a column shift in favor of the defender for night combat; however, for the 1SS Panzer Division/KGP, 2SS Panzer Division and 2nd Panzer Division it is the opposite. b. Out of necessity, the German Panzer Divisions became adept at night combat operations; however, this capability is limited to the 1SS Division/KGP, 2SS Panzer and 2nd Panzer Division. c. The 1SS and 2SS were well trained and had not been loaded with Luftwaffe and over-age replacements as had most of the other Panzer Divisions, while the 2nd Panzer Division retained a large cadre of veterans who had escaped to the West Wall after the Breakout and Pursuit. Furthermore, these three Panzer Divisions avoided commitment in the Nov and Dec battles. d. The requirements for the 1SS Panzer Division are as follows:
- At least one of the units is a front line unit of the 1SS.
- German Corps and/or Army artillery may assist.
- The 1SS may be assisted by units of the 3FJ. e. The requirements for the 2SS Panzer Division are as follows:
- At least one of the units is a front line unit of the 2SS.
- German Corps and/or Army artillery may assist.
- The 2SSD may not be assisted by another Division. f. The requirements for the 2nd Panzer Division are as follows:
- At least one of the combatants is a front line unit of the 2Pz.
- German Corps and/or Army artillery may assist.
- The 2Pz may not be assisted by another Division. g. For German Night Combat Superiority, see the Terrain Effects on Ground Combat Chart on Play-Aid Card 4A.
42.0 Allied Cooperation and Limitations
42.1 British Movement Restrictions
Only seven British combat units may cross the Meuse River: Field Marshall Montgomery, the 2nd Household Cavalry and the five combat units of the 29th Armor Brigade.
42.2 Stacking Restrictions
Monty can stack with any 1A unit. Also, per 23.5a, 1A Echelon units may stack with British 30C units. Other than the conditions described in the previous two sentences, British and U.S. units may not voluntarily stack together.
42.3 Combat Penalty
Due to the difficulty encountered in coordinating inter-Allied operations, one column shift benefiting the German player is applied on the CRT for any combat involving both American and British combat units.
42.4 Artillery and Aircraft
a. Allied artillery may only support combat involving at least one unit of its own nationality. b. Allied aircraft may support combat involving either nationality.
43.0 Artillery Combat Basics
a. German artillery consisted of conventional field artillery (FA) and Nebelwerfer rocket projectors (NW). b. Allied artillery predominantly consisted of conventional field artillery (FA).
43.1 German Artillery Ammunition Shortages
a. German Nebelwerfer (NW) units may fire only to support German units attacking Allied hexes. b. German Field Artillery (FA) may fire to support German units attacking or defending. c. Due to ammo shortages German FA units cannot fire both offensively and defensively on the same turn. d. A "Fired" marker is placed on a German FA Battalion or NW Battalion when it is designated to shoot. e. "Fired" markers on German NW and FA are not removed until the Mutual End of Turn Segment (61.2).
43.2 Range
a. The maximum number of hexes a FA or NW unit may shoot is its "Range." b. Range is shown at the upper right corner of the counter when the unit is In-Battery. c. Count Range from the firing hex to the target hex. Do not count the firing hex. d. Range is not affected by line-of-sight or terrain.
43.3 Enemy Proximity to NW
a. German Nebelwerfer units were not as vulnerable as conventional Field Artillery units. b. Nebelwerfers were lightweight, easily handled, highly mobile and could go in-battery and out-of-battery quickly. c. When Nebelwerfers are adjacent to enemy combat units, they may fire at those units to which they are adjacent.
43.4 Enemy Proximity to FA Units
a. Vulnerable FA units were deployed well behind the front line, so that enemy combat units could not attack them. b. German and Allied FA units may not fire when enemy combat units are adjacent, even if they start In-Battery. c. If the enemy units are attacked and retreated away from the FA units, the FA units are eligible to fire, if In-Battery.
43.5 Enemy Proximity to Allied FA Group HQ
a. Allied FA units that are subordinate to a FA Group HQ may fire, even if enemy units are next to the Group HQ. b. In order for the above to occur, the FA units must have been "In Comm" during the Mutual Command Segment. c. On the other hand, if the FA Group HQ is eliminated by overrun or by combat before the subordinate FA units are called upon to fire, then the subordinate FA units may not fire.
43.6 Effect of Fatigue or Exhaustion
a. Fatigued FA or NW units may fire, if basic requirements are met. Fatigue reduces ER, not capability. b. Exhausted FA or NW units may never fire.
43.7 Effect of Resting
43.7.1 Effect of Resting Status on Army Echelon Artillery
a. Resting German or US Army Echelon FA units may not fire. b. If a US 1A Echelon FA unit fires defensively on the German turn, place the "1A Fired" marker near the 1A HQ. The US 1A Echelon cannot chose Resting Status on the US turn. c. If a US 3A Echelon FA unit fires defensively on the German turn, place the "3A Fired" marker near the 3A HQ. The US 3A Echelon cannot chose Resting Status on the US turn.
43.7.2 Effect of Resting Status on Corps Echelon Artillery
a. Resting Corps Echelon FA or NW units may not fire. b. If a US Corps Echelon FA unit fires defensively on the German turn, place its "Corps Fired" marker near the HQ. That Corps Echelon cannot chose Resting Status on the US turn.
43.7.3 Effect of Resting for 422 Lux
If an 8C/422 FA Bn fires defensively on the German turn, place its "8C 422 Luxemburg Fired" marker near the 8C Lux HQ off the SE edge. The 8C HQ Lux and subordinates south of the Sure that may not choose "Resting" on the US turn. The Resting Status of the 8C HQ and subordinates north of the Sure are not affected.
43.7.4 Effect of Resting Status on a Division or Brigade Artillery
a. Resting Div/Bde FA/NW units may not fire offensively. b. Note Well: Resting Div or Bde Field Artillery may fire in support of units of the same Div or Bde defending against attack.
43.8 Combat Results and Artillery
a. FA and NW units are not subject to a negative combat result when they fire. They do not suffer hits nor do they retreat, etc. b. FA and NW units are subject to the combat result when they are attacked by adjacent enemy combat units. c. FA and NW units are vulnerable to overrun by enemy units advancing after combat (56.0).
44.0 German Artillery Formation Substitute Units [Advanced Game]
a. German Artillery Formation Substitutes are FA Regiment or NW Brigade sized units representing multiple battalions. They serve only to promote ease of play by reducing unit counter density. b. The Substitute unit must be placed on the board in lieu of the battalions of the applicable formation. c. In order for the substitute to be placed on board, all of the battalions of the formation must be within 5 hexes of each other, and all battalions must be In Comm and In Supply. d. German Artillery Formation Substitute units are available for the artillery regiments of each German Division, for the eight Volks Artillery Korps and for the eight NW Brigades.
44.1 German Artillery Formation Substitution
a. Artillery formation substitutes may be placed on board on 16MO. b. If used At Start, the Substitutes are placed in the hexes listed on the Artillery Park Cards. If there is no hex coordinate next to the substitute, then the substitute may not be placed at start. c. If the substitute is placed, remove the individual battalions from the map and place them on the German Artillery Park Cards. d. If not used until a later turn, the formation substitute must be placed in a hex occupied by one of the subordinate battalions during the Mutual EOT Segment (61.2). e. The substitute must be placed in March Order, if one or more of the individual battalions is in March Order. f. When artillery substitutes are front side up, the individual battalions are in March Order and substitute movement represents movement of the entire formation. g. When artillery substitutes are back side up, the individual battalions are In-Battery and ready to fire. h. When the individual battalions are returned to the board, place them within 5 hexes of the hex occupied by the substitute. i. Substitutes change mode as do the individual battalions. j. When In-Battery, the Combat Factor and the Range on the In-Battery side of the artillery substitute unit is an asterisk. See the Panzer Lehr Artillery substitute counter (illustrated). k. The asterisk requires examination of the battalions on the Artillery Park Cards in order to determine CF and Range. l. After a battalion shoots, rotate it in the arty formation box or cover it with a "Fired" marker. When all the battalions of the formation have fired, cover the substitute with a "Fired" marker. m. German Artillery Formation Substitute units can be attacked, but they cannot be overrun. n. When an Artillery Substitute unit suffers a step loss result on the CRT, the owner eliminates a battalion of his choice. o. When a German Artillery Substitute unit is eliminated, all the artillery battalions of that formation are eliminated. p. If an Allied front line combat unit or AFV moves adjacent to a German FA Substitute unit, the FA substitute unit disrupts and is placed in March Order (see 29.3 for details). Such an action and penalty does not apply to a NW substitute unit.
44.2 Typical German Artillery Formation Substitute Use
44.2.1 The Battalions of the German 7th NW Brigade Deployed
a. When the six battalions of the Brigade are deployed on the board, the German Artillery Substitute unit is not used. b. Depicted are the six battalions of the 7th NW Brigade (front side - battalions when mobile - in March Order; back side - battalions when In-Battery).
44.2.2 The Substitute of the German 7th NW Brigade Deployed
a. When the Brigade Substitute unit is deployed on the board, the individual battalions are removed from the board. b. The individual battalions are placed in their appropriate boxes on the German 5PzArmy Artillery Park Card. c. Depicted is the 7th NW Brigade Substitute unit in March Order and In-Battery. d. The term "ARTY" at the top of the Substitute unit identifies that the unit as representing an entire artillery formation. e. Front side - March Order: The unit has a parenthesized combat factor of 6, denoting defense only. f. Front side - March Order: The unit has a movement factor of 6. The superscript is the cost to change mode. g. Back side - In-Battery. The Substitute unit represents that all six battalions are ready to fire. h. Back side - In-Battery. The CF and the Range are represented by asterisks. i. When firing, the asterisk requires reference to each individual battalion in order to determine the CF and Range.
45.0 German Nebelwerfer Operations
German NW Brigades consisted of battalions with 150mm, 210mm and 300mm Rocket Projectors. There were also four SS NW battalions, one for each of the SS Panzer Divisions. All Nebelwerfer units are battalion sized units; however, unlike front line and combat support units they do not flip when they sustain a hit. They are eliminated when they take a hit on the CRT.
45.1 NW Brigade Basics
a. At least one NW Brigade was assigned to each of the German Corps on the map on 16Dec44. b. Two NW brigades, the 4NW Brigade and the 9NW brigade, were assigned to the 1SS Panzer Corps. c. In order for NW to fire, they must be In-Battery, In-Supply and In-Comm with the Corps HQ. d. In order for NW to fire at an Allied hex, a Div or Bde combat unit of the same Corps must be adjacent to the hex. e. A German NW Brigade may only assist one Division or Brigade per turn and the NW Brigade may only fire at one hex. The individual NW battalions may not fire at different hexes. f. Resting or Exhausted NW may not fire.
45.2 NW Brigades of Different Corps
The NW Brigades of different Corps may never participate in the same attack.
45.3 German SS Panzer Nebelwerfer Battalions
a. Each of the four SS Panzer Divisions has one NW battalion. b. These single NW battalions may fire at a hex by themselves or as an integral battalion of a NW Brigade. c. A unit of the respective SS Division must be adjacent to the enemy hex in order for the SS NW to fire at the hex.
45.4 The 4NW Brigade and 9NW Brigade
a. A German NW Brigade may only assist one Division at a time. b. When two or more Divisions of the 1SS Pz Corps attack the same hex, the 4NW Bde and 9NW Bde may combine fire. The 4NW Brigade supports one of the attacking Divisions and the 9NW Brigade supports a different attacking Division. This is the only situation wherein two NW Brigades may combine firepower.
45.5 Nebelwerfer Attack Support
a. German NW may only fire to support attacks. NW that are designated to fire are covered with "Fired" markers. b. "Fired" markers on German NW are not removed until the Mutual End of Turn Segment (61.2). c. Total the combat factors of the firing NW Battalions that are in range of the defender's hex. d. Modify the NW Combat Factors for the target hex as shown in the Nebelwerfer Attack Support Chart. e. For attacks, the modified NW CF are added to the FA CF and the CF of the adjacent units attacking the enemy hex. f. Calculate the combat odds using the total attack CF determined in (e) above.
46.0 German Field Artillery (FA) Operations
German Field Artillery consists of guns, howitzers, 120mm mortars and one battalion of 21cm Elefants. All Field Artillery (FA) units are battalion sized units; however, they do not flip when they sustain a hit---they are eliminated instead.
46.1 Resting/Exhausted FA Basics
a. Exhausted FA Battalions may not fire. b. Resting FA Battalions may not fire in support of attacks. c. Resting Div/Bde/KG Field Artillery may fire in support of units of the same Div/Bde/KG defending against attack.
46.2 German Division, Brigade and Kampfgruppe FA
a. FA Battalions with a Div/Bde/KG identification may fire in support of any combat unit of the same Div/Bde/KG. b. In order for Div/Bde/KG FA Battalions to fire, they must be In-Battery, In-Supply and In-Comm with their HQ. c. In order for a FA Bn of a Div/Bde/KG to fire at an enemy hex, a unit of the same Div/Bde/KG must be adjacent to the hex.
46.3 German Corps Echelon FA - VAK
a. Note, the VAK for the LXVI Corps consists of the FA of the 10SS Panzer Division and the 460th FA Battalion. b. In order for German Corps FA to fire, they must be In-Battery, In-Supply and In-Comm with the Corps HQ. c. In order for VAK artillery to fire at a hex, a combat unit of the same Corps must be adjacent to the hex. d. The artillery battalions of a German VAK are not limited to assist only one Div/Bde/KG on the same turn. e. Individual FA Battalions of a VAK may support different Div/Bde/KG of the same Corps on the same turn.
46.4 German Army Echelon FA
a. German FA Battalions with an Army designation may fire in support of any combat unit of the same Army. b. In order for Army FA Bn's to fire, they must be In-Battery, In-Supply and In-Comm with the Army HQ. c. In order for Army FA Battalions to shoot at an enemy hex, a combat unit of the Army must be adjacent to the hex.
46.5 German FA Attack Support Basics
a. When German Divisional, Corps and Army Field Artillery are designated to attack, cover the units with "Fired" markers. b. "Fired" markers on German FA are not removed until the Mutual End of Turn Segment (61.2). c. Total the combined combat factors of the firing FA Battalions that are in range of the Allied defender's hex. d. Modify the FA Combat Factors for the target hex as shown in the Field Artillery Attack Support Chart. e. For attacks, the modified FA CF are added to the NW CF and the CF of the adjacent units attacking the enemy hex. f. Calculate the combat odds using the total attack CF determined in (e) above.
46.6 German FA Defense Support Basics
a. German FA can provide defense support by adding Combat Factors to a German defenders hex. b. When German Divisional, Corps and Army FA are designated to assist defenders, cover the FA with "Fired" markers. c. "Fired" markers on German FA are not removed until the Mutual End of Turn Segment (61.2). d. The German defender's hex must be within range of the firing German FA. e. Total the combined combat factors of the firing FA that will add CF to the German defender's hex. f. Modify the FA Combat Factors added to the defense in accordance with the Field Artillery Defense Support Chart.
46.7 Combined FA Fire Restrictions
German FA from different Corps or different Armies may never combine fire.
46.8 German Combined FA Fire when Attacking
There are a number of ways German FA Battalions may cooperate when attacking an enemy hex; see below. Remember also that German NW may also participate in attacks with the FA Battalions.
46.8.1 Division, Corps and Army FA Combined
In order for this to occur a combat unit of the German Division must be adjacent to the enemy hex.
46.8.2 Multiple Division FA Fire Combined
A unit from each German Division must be adjacent to and attacking the enemy occupied hex.
46.8.3 Multiple Division FA Fire with Corps and Army FA
This can occur when two or more Divisions from the same German Corps attack the same enemy hex.
46.8.4 Multiple Division FA Fire, with Two VAK and Army FA
a. This can only occur when two or more Divisions from the 1SS Panzer Corps attack the same enemy hex. b. The FA Battalions of the 388 VAK supports one of the Divisions. c. The FA Battalions of the 402 VAK support a different Division. d. The CF of all FA Battalions are added together. e. Follow the procedures listed in 46.5 to determine the artillery CF to be added to the attack.
47.0 Allied Field Artillery Operations
Allied Field Artillery consisted of guns, howitzers and 4.2-inch mortars. All Field Artillery (FA) units are battalion sized units; however, they do not flip when they sustain a hit - they are eliminated instead. Players will note that there are no artillery substitute counters for US artillery formations. While the German artillery formations were simply sledgehammers of power, the US FA system was exceptionally flexible and reactive. As such, the Allied player must play his advantageous system, rather than rely upon easier mechanics of play.
47.1 Resting/Exhausted FA Basics
a. Exhausted FA Battalions may not fire. b. Resting FA Battalions may not fire in support of attacks. c. Resting Div/Bde Field Artillery may fire in support of units of the same Div/Bde defending against attack.
47.2 British Division/Brigade and US Division FA
a. FA Battalions with a Division/Brigade ID may fire in support of any combat unit of the same Division/Brigade. b. In order for Div/Bde FA Battalions to fire, they must be In-Battery, In-Supply and In-Comm with their HQ. c. In order for a Div/Bde FA Bn to shoot at an enemy hex, a combat unit of the Div/Bde must be adjacent to the hex.
47.3 British Corps Artillery - 4AGRA and 5AGRA
a. British 4AGRA and 5AGRA Battalions may fire in support of any combat unit of the British 30 Corps. b. In order for the FA of an AGRA to fire, they must be In-Battery, In-Supply and In-Comm with the AGRA HQ. c. In addition, the AGRA HQ must be In-Supply and In-Comm with British 30 Corps HQ, or In-Comm per scenario rules. d. In order for the battalions to fire at an enemy hex, a combat unit of the British 30 Corps must be adjacent to the hex. e. Individual FA Battalions of an AGRA may support any unit of the Corps as long as all requirements are met.
47.4 US Corps Echelon Independent Artillery Battalions
a. For an example of this classification of unit, see the 8C/58 Armored Field Artillery Battalion (illustrated). b. US FA Battalions with a Corps designation may fire in support of any US combat unit of the same Corps. c. In order for Corps FA Battalions to fire, they must be In-Battery, In-Supply and In-Comm with the Corps HQ. d. In order for Corps FA Battalions to fire at an enemy hex, a US unit of the same Corps must be adjacent to the hex.
47.5 US Army Echelon Independent Artillery Battalions
a. For an example of this classification of unit, see the 1A/86 Chemical Mortar Battalion (illustrated). b. American FA Battalions with an Army designation may fire in support of any US combat unit of the same Army. c. In order for Army FA Bn's to fire, they must be In-Battery, In-Supply and In-Comm with the Army HQ. d. In order for Army FA Battalions to shoot at an enemy hex, a US combat unit of the Army must be adjacent to the hex.
47.6 US Field Artillery Groups (FAG)
a. Note the 333 FA Group HQ (illustrated). Listed above the NATO box is the ID of the parent HQ, which is 8C or 8 Corps. b. The FA Battalions of a of the 333 FA Group may fire in support of any US combat unit of the same Corps. c. In order for the battalions of a FAG to fire, they must be In-Battery, In-Supply and In-Comm with the FAG HQ. d. Also, in order for battalions of a FAG to fire, the FA Group HQ must be In-Supply and In-Comm with the Corps HQ. e. In order for the battalions of a FAG to fire at an enemy hex, a US unit of the same Corps must be adjacent to the hex. f. The individual battalions of a FAG may support different Divisions or Corps Echelon combat units on the same turn. g. US Field Artillery Group HQ expertly coordinated Time on Target (ToT) Missions during the Battle of the Bulge. The procedures for US Time on Target Missions are provided in Advanced Game rule section 48.4.
47.7 Allied Field Artillery Fire Basics when Attacking
a. When Allied Divisional, Corps or Army FA units are used to assist an attack, cover the units with "Fired" markers. b. "Fired" markers placed on firing Allied FA Battalions are removed after each player end of turn segment (60.7). c. Total the combined combat factors of the firing FA Battalions that are in range of the defender's hex. d. Modify the FA Combat Factors for the target hex as shown in the Field Artillery Attack Support Chart. e. For attacks, the modified FA CF are added to the CF of the adjacent units attacking the enemy hex. f. Calculate the combat odds using the total attack CF determined in (e) above.
47.8 Allied Field Artillery Fire Basics when Defending
a. When Allied Field Artillery units are designated to assist defenders, cover the FA with "Fired" markers. b. "Fired" markers placed on firing Allied FA Battalions are removed after each player end of turn segment (60.7). c. The Allied defender's hex must be within range of the firing Allied FA. d. Total the combined combat factors of the firing FA that will add CF to the Allied defender's hex. e. Modify the FA Combat Factors added to the defense in accordance with the Field Artillery Attack Support Chart.
47.9 Combined FA Fire Restrictions
FA from different Corps or Armies may never combine fire.
48.0 Bombardment Shock [Advanced Game]
Artillery bombardment shock was an intended by-product of the wide-scale, massive, non-preregistered, concentrated artillery barrages that were employed by the Germans during the 1918 Offensives beginning with Operation Michael. The soldiers surviving the barrages were stunned into ineffectiveness allowing successful, follow-up ground attacks. In World War II, Bombardment Shock was not as prevalent, nor as massive; however, the American Artillery system firing Time on Target was likely to shock defenders in a finite area.
48.1 Bombardment Basics
a. Bombardment Shock of defenders in a hex is possible when the combat factors of NW and/or FA added to an attack meets the minimum threshold on the Bombardment Shock Table. b. Bombardment Shock of attackers in a hex is possible when the combat factors of FA applied against an attack meets the minimum threshold on the Bombardment Shock Table. c. A Shock Bombardment or Time on Target result applies to every unit in the hex including HQ. Leaders are not affected. d. Cover Aborted units with an "Abort" marker. The "Abort" markers are removed after combat is resolved. e. Cover Shocked units with a "Shock" marker. The marker remains until the Mutual End of Turn Segment. See 61.2. f. Shocked units move with half MF (round fractions up). g. Shocked units fight with half AF/DF (round fractions up). h. Shocked HQ and artillery units are flipped into March Order and remain so until they are no longer shocked or disrupted.
48.2 German Artillery Bombardment
Although the Germans had the ability to deliver massive artillery bombardments like those of WWI, they were limited in Dec44. The German method required time, planning and detailed execution; however, in Dec 1944 the Germans were hampered by low ammo and inadequate commo for their artillery formations.
48.2.1 German Attack Bombardment
a. Attack Bombardments are resolved on the Bombardment Shock Table - Firing at Defenders, when requirements are met. b. It is possible to Shock the defenders in addition to adding artillery attack factors to an Allied hex under attack. c. As NW are added to support an attack, add NW combat factors as modified by the Nebelwerfer Attack Support Chart. d. As FA are added to support an attack, add FA combat factors as modified by the Field Artillery Attack Support Chart. e. Determine if the combined modified NW and FA combat factors meet the minimum column total for Shock (36CF). If the minimum column or higher is attained, roll a die for coordination of the firing battalions. If the coordination die roll is successful (1-3), roll on the Bombardment Shock Table - Firing at Defenders for results. f. Use a die to denote ensuing drm achieved, if any, that will apply for the ensuing ground combat. g. Regardless of the roll for coordination or for the roll on the Bombardment Shock Table - Firing at Defenders, the combined modified NW and/or FA combat factors assigned to support the ground attack will still be added to that ground attack.
48.2.2 German Defensive Bombardment
a. Defensive Bombardments are resolved on the Bombardment Shock Table - Firing at Attackers, when applicable. b. It is possible to Abort or Shock the attackers in addition to adding artillery defense factors to a German hex under attack. c. An artillery defensive shock bombardment is directed at one specific hex occupied by attacking enemy units. The Allied attacker's hex must be within range of the firing German FA units. d. This tactic has the risk of providing less added CF support to the defense, but the potential defensive effect is greater. The decision to use the tactic must be stated before the coordination die roll. e. Nebelwerfers may not participate in defensive support. f. For participating Field Artillery, total the FA combat factors as modified by the Field Artillery Defense Support Chart. If the minimum column total (or higher) for Shock (36CF) is attained, roll a die for coordination of the firing battalions. g. If the coordination die roll fails (4-6), the Germans cannot roll on the Bombardment Shock Table - Firing at Attackers. Instead, one quarter of the modified FA combat factors are added to the defense of the hex under attack. h. If the coordination die roll is successful (1-3), roll two dice on the Bombardment Shock Table - Firing at Attackers and note the results. When an S or A result is rolled, a portion, (1/4), of the modified FA Combat Factors are also added to the defense of the hex to represent the peripheral effect of the bombardment on other participants in the attack.
48.3 British Artillery Bombardment
The rules for British Artillery Shock Bombardment are almost identical to those for the Germans (48.2), except they require a lesser threshold (31CF) in order to roll for Shock.
48.4 American Artillery Bombardment - Time on Target
a. A ToT Mission was a coordinated fire of many FA Bn's such that all the rounds reached the target instantaneously. b. This tactic was achieved despite fire from various caliber weapons located at different firing positions and ranges. c. A Time on Target Mission must be coordinated by a US Field Artillery Group (FAG) HQ. d. In order for a FA Group HQ to coordinate the mission, the FAG HQ must be In-Supply and In-Comm with its Corps HQ. e. A Time on Target Mission may be fired in support of any US combat unit of the same Corps.
48.4.1 Time on Target Specifics
a. The subordinate battalions of a FAG HQ coordinating a ToT mission may only fire in support of that ToT Mission. b. The FA Battalions of different FA Groups may combine fire for a ToT Mission. c. The following FA Battalions not from a Field Artillery Group may participate in ToT missions:
- US Army Echelon FA Battalions of the same US Army.
- US Corps Echelon Independent FA Bn's of the same Corps.
- Division FA Battalions of the same Corps.
- The FA Battalions above must be within Command Range of the FAG HQ coordinating the time on target mission.
- The FA Battalions above must be In-Battery, In-Supply and In-Comm with their own HQ.
48.4.2 Time on Target Attack Bombardment
a. ToT Attack Bombardments are resolved on the Bombardment Shock Table - Firing at Defenders, when applicable. b. It is possible to Shock the defenders in addition to adding arty attack factors to a German hex under attack. c. As FA are added to support an attack, total the FA combat factors as modified by the Field Artillery Attack Support Chart. d. If the minimum column or higher is attained, roll a die for coordination of the firing battalions. If the coordination die roll is successful (1-5), roll on the Bombardment Shock Table - Firing at Defenders and note the results. e. Use a die to denote ensuing drm achieved, if any, that will apply for the ensuing ground combat. f. Regardless of the roll for coordination or for the roll on the Bombardment Shock Table - Firing at Defenders; the FA combat factors assigned to support the ground attack will still be added to that ground attack.
48.4.3 Time on Target Defensive Bombardment
a. ToT Defensive Bombardments are resolved on the Bombardment Shock Table - Firing at Attackers, when applicable. b. It is possible to Abort or Shock the attackers in addition to adding arty defense factors to an Allied hex under attack. c. An artillery ToT defensive shock bombardment is directed at one specific hex occupied by attacking enemy units. The German attacker's hex must be within range of the firing Allied FA units. d. This tactic has the risk of providing less added CF support to the defense, but the potential defensive effect is greater. The decision to use the tactic must be stated before the coordination die roll. e. For participating Field Artillery, total the FA combat factors as modified by the Field Artillery Defense Support Chart. If the minimum column total (or higher) for Shock (26CF) is attained, roll a die for coordination of the firing battalions. f. If the coordination die roll fails (6), the Allies cannot roll on the Bombardment Shock Table - Firing at Attackers. Instead, one quarter of the modified FA combat factors are added to the defense of the hex under attack. g. If the coordination die roll is successful (1-3), roll two dice on the Bombardment Shock Table - Firing at Attackers and note the results. When an S or A result is rolled, a portion, (1/4), of the modified FA Combat Factors are also added to the defense of the hex to represent the peripheral effect of the bombardment on other participants in the attack.
49.0 Terrain Effects on Ground Combat
a. Consult the Terrain Effects Chart before resolving combat. b. Note Combat Factor modifiers, column shifts on the CRT and die roll modifiers.
50.0 Weapons Effects on Ground Combat
a. Consult the Weapons Effects Chart before resolving combat. b. Note Combat Factor modifiers, column shifts on the CRT and die roll modifiers. c. The weapons effects listed in the table are not affected by terrain.
51.0 Ground Combat Procedure
51.1 Basic Rules
a. Attacking: During a player's Combat Phase, the phasing player conducts attacks against enemy units adjacent to friendly units. In most cases combat against adjacent enemy units is optional. b. Field Artillery and Nebelwerfers may fire to provide assistance with the addition of combat factors. c. Restrictions: attacking units may not be used in more than one combat during the attacker's combat phase. A unit's combat factor may not be split. All defending units in the same hex must be combined into one defense strength.
51.2 Combat Sequence
a. The Combat Procedure is provided on Play-Aid Card 3A. b. Two Optional Steps, 6b and 6e, are included in the Combat Procedure on Play-Aid Card 3A. Both players must agree to the use of the Optional Steps, or they must be ignored. c. Optional Steps 6b and 6e limit the ability of attacking and defending players to perfectly account for enemy artillery units, which historically, would be more realistic.
51.3 Combat Charts and Tables
Players will note many possible Combat Column Shifts and Combat Die Roll Modifiers in the Artillery Charts, the Weapons Effects on Ground Combat Chart, the Effects of Defensive Positions on Ground Combat Chart and on the Terrain Effects on Ground Combat Chart. These effects are self-explanatory and are not reproduced in the rules.
52.0 Combat Results
52.1 Result is (AE) - Attacker Eliminated
All attacking units are eliminated.
52.2 Result is (DE) - Defender Eliminated
All defenders are eliminated. Attacker may advance one hex (55.0).
52.3 Result is (1•/) - Attacker AFV Step Loss
Step loss priorities are provided in sequence below. Go to the next priority when there is not a unit at the higher priority.
1st: An attacking front line AFV with the Highest Printed ER suffers one step loss, or hit. 2nd: An attacking combat support AFV with the Highest Printed ER suffers one step loss. 3rd: An attacking infantry unit with the highest Printed ER suffers one step loss. 4th: An attacking Non-AFV combat support unit with the highest Printed ER suffers one step loss.
Note: Whenever more than unit qualifies for the step loss, it is the owner's choice as to which unit takes the hit.
52.4 Result is (/1•) - Defender AFV Step Loss
Step loss priorities are provided in sequence below. Go to the next priority when there is not a unit at the higher priority.
1st: A defending AFV suffers one step loss, or hit. 2nd: A defending infantry unit suffers one step loss. 3rd: A Non-AFV combat support unit suffers one step loss. 4th: A defending artillery unit suffers one step loss. 5th: A defending HQ suffers one step loss.
Note: Whenever more than unit qualifies for the step loss, it is the owner's choice as to which unit takes the hit.
52.5 Result is (1/)
Step loss priorities are provided in sequence below. Go to the next priority when there is not a unit at the higher priority.
1st: An attacking front line combat unit with the highest Printed ER suffers one step loss. 2nd: An attacking combat support unit with the highest Printed ER suffers one step loss.
Note: Whenever more than unit qualifies for the step loss, it is the owner's choice as to which unit takes the hit.
52.6 Result is (/1)
Step loss priorities are provided in sequence below. Go to the next priority when there is not a unit at the higher priority.
1st: A defending front line combat unit suffers one step loss. 2nd: A defending combat support unit suffers one step loss. 3rd: A defending artillery unit suffers one step loss. 4th: A defending HQ suffers one step loss.
Note: Whenever more than unit qualifies for the step loss, it is the owner's choice as to which unit takes the hit.
52.7 HQ Combat Loss Procedure
When a HQ is eliminated, it is placed on the next turn of the turn record track with an "Out Comm" marker. On the next turn, during the reinforcement segment, the HQ with the "Out Comm" marker is placed with any combat unit of the formation it commands. When a HQ is "Out Comm," the formation is "Out Comm." On subsequent turns, the determination for Command Status proceeds normally.
52.8 German Step Loss Progression
a. See the German SS and Wehrmacht Step Reduction Charts. b. Most German Non-AFV combat units have two steps. The front side of the unit depicts the higher strength step. c. All German Non-Heavy AFV have two steps. The front side of the unit depicts the higher strength step. d. German combat units with two steps are eliminated when the second step is lost. e. German Non-AFV with a full strength of 6CF on the front side have a reduced Step after the second step loss. f. All German Tiger I, Jagdpanther, and Panther AFV have two reduced Steps after the second step loss. g. The German Tiger II and the Jagdtiger AFV have three reduced Steps after the second step loss.
52.9 Allied Step Loss Progression
a. See the Allied Step Reduction Charts. b. Most Allied Non-AFV combat units have two steps. The front side of the unit depicts the higher strength step. c. Allied combat units with two steps are eliminated when the second step is lost. d. Allied Non-AFV with a full strength of 6CF on the front side have a reduced Step after the second step loss. e. All US Tank Destroyers and all M5 Tank battalions have a reduced Step after the second step loss. f. All U.S. M4 Tank Bn's and all British Tank Bn's have four reduced Steps after the second step loss. The reduced Steps have the term Step above the AFV.
52.10 (AR1/) or (AR2/) or (AR3/)
a. Attacker must retreat the number of hexes indicated (54.0). b. Defender may not advance after combat.
52.11 (/DR1) or (/DR2) or (/DR3) or (/DR4)
a. Defender must retreat the number of hexes indicated (54.0). b. Attacker may advance after combat. See advance after combat rules, section 55.0.
52.12 (CA) - Counterattack
a. Cover the defender with a "CA" marker. b. Defenders occupying a Strong Point or Fort may ignore a CA. c. In his turn, the defender must Withdraw or Counterattack. The options are explained below in 52.12.1 to 52.12.4.
52.12.1 Withdraw
a. If the defender withdraws, the position must be completely vacated and no other friendly units may enter. b. Since no combat takes place, enemy units may not advance into the vacated hex.
52.12.2 Counterattack
a. All of the defending units in the original battle must attack at least one hex of the original attacker's hexes. b. Note that all of the original defenders must participate in the CA. If one withdraws, they all must withdraw. c. New units may move into the original hex to participate in the counterattack with all of the original defending units. d. In addition, other units may be brought up to participate in the counterattack from any adjacent hex.
52.12.3 Trapped Units subject to CA Result
a. Sometimes Withdraw is impossible because the units are trapped by enemy units or enemy ZOC. b. If all the trapped units have parenthesized combat factors, they are eliminated. c. If the trapped units are Exhausted, they are eliminated. d. If the trapped units are Resting, they are eliminated.
52.12.4 Units Subject to a CA Result - Attacked Again this Turn
a. A particular enemy hex cannot be attacked twice on the same turn by units of the same friendly Corps. b. However, the same enemy hex can be attacked on the same turn by units of a different friendly Corps. c. If units covered with a "CA" marker are attacked again on the same turn, the "CA" marker is removed before the die is rolled to resolve the later attack.
52.13 (Eng) - Engaged
a. Cover the attackers and defenders with "Engaged" markers to signify that the units are locked in combat. b. The basic rules for the original defenders in an Engaged battle are provided in 52.13.1. c. The basic rules for the original attackers in an Engaged battle are provided in 52.13.2. d. The possibilities that could occur following an Engaged Combat Result are listed in 52.13.3 through 52.13.7.
52.13.1 Original Defenders in an Engaged Battle
On their next turn, Engaged status affects the mobility of the original defenders as follows:
a. Infantry units may not withdraw from an Engaged battle. b. Engineer units may not withdraw from an Engaged battle. c. Antiaircraft units may not withdraw from an Engaged battle. d. Antitank units may not withdraw from an Engaged battle. e. Armored Cavalry/Recon may remain Engaged or withdraw. f. AFV may remain Engaged or withdraw. g. Artillery units in March Order may remain Engaged or withdraw. h. HQ in March Order may remain Engaged or withdraw. i. Artillery units In-Battery and HQ that are deployed may remain Engaged or change mode to March Order and withdraw.
52.13.2 Original Attackers in an Engaged Battle
On their next turn, Engaged status affects the mobility of the original attackers as follows:
a. Infantry and Engineer units must re-fight the original defenders that are still Engaged plus any reinforcements. b. Antiaircraft and Antitank units must re-fight the original defenders that are still Engaged plus any reinforcements. c. Armored Cavalry (Armored Recon) and AFV may re-fight, disengage in place or withdraw from an Engaged battle. d. Nebelwerfers may re-fight, disengage in place or withdraw from an Engaged battle. e. Three special German HQ (see 2.6.2f) may re-fight, disengage in place or withdraw from an Engaged battle. f. Field Artillery and HQ other than the three in (e) above may re-fight, disengage in place or withdraw from an Engaged battle.
52.13.3 All Defenders Withdraw from Engaged
a. If all the original defenders withdraw, the engagement ends. b. Remove the applicable "Engaged" markers from the original attackers and defenders.
52.13.4 Some or All of the Defenders Remain Engaged
a. If one or more of the original defenders chose to remain Engaged on their turn, the engagement continues. b. Applicable "Engaged" markers are retained. c. On their next turn, the original attackers that may not withdraw must re-fight the original defenders. d. On their next turn, the original attackers that may disengage in place or withdraw, may re-fight, disengage in place or withdraw. e. On the next turn, the original attacker may bring in reinforcements to re-fight an Engaged battle. f. The original attacker's reinforcements may join the attack from any hex adjacent to the original defender. g. There could also be consequences for the original attacker, if he chooses Resting Status on the next turn as described in section 13.7h. Each unit in Resting Status that cannot disengage, but which must re-fight the original defenders, is instead eliminated.
52.13.5 Defender Remains Engaged and is Reinforced
a. If one or more of the original defenders chose to remain Engaged on their turn, the engagement continues. b. Applicable "Engaged" markers are retained. c. The defender may move units into the Engaged defenders hex during movement to reinforce the engagement. d. Place the reinforcing units beneath the "Engaged" marker. They are now considered Engaged. e. On their next turn, the original attackers that may not withdraw must re-fight the original defenders and reinforcements. f. On their next turn, the original attackers that may disengage in place or withdraw may re-fight, disengage in place or withdraw. g. On the next turn, the original attacker may bring in reinforcements to re-fight an Engaged battle. h. The original attacker's reinforcements may join the attack from any hex adjacent to the original defender. i. On the next turn, there could also be consequences for the original attacker, as described in 52.13.4g above.
52.13.6 Defender Counterattacks
a. After the defender has finished movement on his next turn, he may counterattack the original Engaged attacker. b. At least one hex occupied by units of the original Engaged attacker must be attacked. c. Remove the applicable "Engaged" markers from the original attackers and defenders. d. Original defenders that may not withdraw from engagements must participate in the counterattack. e. Reinforcements may be brought in by the defender to assist the counterattack vs. the original Engaged attacker. f. The original defender's reinforcements may join the counterattack from any hex adjacent to the original attacker.
52.13.7 Units with an Engaged Result - Attacked Again this Turn
a. A particular enemy hex cannot be attacked twice on the same turn by units of the same friendly Corps. b. However, the same enemy hex can be attacked on the same turn by units of a different friendly Corps. c. If units covered with an "Engaged" marker are attacked again on the same turn, the "Engaged" marker is removed before the die is rolled to resolve the later attack.
53.0 Enhanced AFV Combat [Advanced Game]
For players who wish to incorporate the combat capabilities and survivability characteristics of the many types of tanks and tank destroyers that fought in the Ardennes, the advanced rules below provide a priority for the application of AFV step losses.
53.1 German Anti-Tank Superiority - (1•/) or (/1•)
a. Allied AFV Step Losses are increased on combat results of (1•/) or (/1•), when German participants include superior anti-tank guns. In such cases, Allied AFV incur two hits when the combat result is (1•/) or (/1•). The AFV hits are applied in accordance with the priorities listed in 52.3 and 52.4. b. The German units that were equipped with superior anti-tank weaponry include the following:
- German AA guns with "88mm" above the NATO box.
- German AT guns with "88mm" above the NATO box.
- Armored Fighting Vehicles: Panther, Jagdpanther, Tiger I, Tiger II, Jagdtiger and the 2SSK/410 PzJ.
53.2 German Heavy Armor Survivability - (1•/) or (/1•)
The AFV Step Loss priorities in 52.3 and 52.4 are superseded by 53.2.1 and 53.2.2 when this rule in in effect.
53.2.1 Result is (1•/) - Attacker AFV Step Loss
Step loss priorities are provided in sequence below. Go to the next priority when there is not a unit at the higher priority.
1st: An attacking front line German AFV with the highest ER suffers one step loss. However, if the AFV is heavy, it only takes a hit if the defender includes an M36, Easy 8, Firefly, Achilles, 90mm or 17-Pdr; if otherwise, proceed by priority. 2nd: A hit is suffered by any non-heavy AFV with the highest ER. 3rd: An attacking infantry unit with the highest ER suffers a hit. 4th: A combat support unit with the highest ER suffers a hit. No Loss: Occurs only if all attackers are Heavy AFV and there is no defending M36, Easy 8, Firefly, Achilles, 90mm or 17-Pdr.
Note: Whenever more than unit qualifies for the step loss, it is the owner's choice as to which unit takes the hit.
53.2.2 Result is (/1•) - Defender AFV Step Loss
Step loss priorities are provided in sequence below. Go to the next priority when there is not a unit at the higher priority.
1st: A defending AFV suffers one step loss, or hit. However, a heavy AFV takes a hit only if the attacker includes an M36, Easy 8, Firefly, Achilles, 90mm or 17-Pdr; if otherwise, proceed by priority. 2nd: A hit must be taken by any defending non-heavy AFV. 3rd: A defending infantry unit suffers a hit. 4th: A defending combat support unit suffers a hit. 5th: A defending artillery unit suffers a hit. 6th: A defending HQ suffers a hit. No Loss: Occurs only if all defenders are Heavy AFV and there is no attacking M36, Easy 8, Firefly, Achilles, 90mm or 17-Pdr.
Note: Whenever more than unit qualifies for the step loss, it is the owner's choice as to which unit takes the hit.
54.0 Retreat After Combat
a. Retreats due to combat will be for 1, 2, 3 or 4 hexes as specified in the combat result. All units defending in the battle must be retreated the exact number of hexes specified. b. In-Battery FA/NW that must retreat must flip to March Order, then retreat and become disrupted. See 29.3. c. Deployed HQ that must retreat must flip to March Order, then retreat and become disrupted. See 29.3.
54.1 Retreat Routes
a. Each unit's retreat route must traverse the fewest number of hexes to a supply road. If there is more than one path that qualifies, the owning player may choose from among them. b. After reaching a supply road, the retreat must continue along the road towards any friendly supply source. c. Units that start on a supply road must retreat along that road toward any friendly supply source. d. Units retreating along a supply road may change roads at an intersection. Switching roads at intersections may result in units not retreating fully away from the original position - this is legal. e. Following a winding supply road may also result in a unit not retreating fully away from its original position - this is legal. f. Upon reaching a board edge supply source, units must retreat off the board, if the retreat has yet to be completed. g. Units forced to retreat off the board may return (34.0). h. A unit that is isolated (9.16) at the moment of combat may be retreated in any direction by the owner.
54.2 Retreat Restrictions
a. A retreat route to a supply road must be free of enemy combat units, enemy ZOC and blocking terrain. b. After reaching a supply road, the road to a supply source must be free of enemy ZOC. An enemy ZOC exerted over any hex of a contiguous road disqualifies the road as a supply road. c. Enemy combat units exert ZOC over retreat routes and supply roads as described in the ZOC Chart and 25.0. d. Note that Fog, Dense Fog or Snow affects Zones of Control as described in the ZOC Chart and 25.0. e. Retreating units may not enter hexes occupied by enemy units or hexes in enemy ZOC. Enemy ZOC extend into hexes occupied by friendly units - the enemy ZOC are not negated in such hexes. f. No unit may retreat into the same hex twice. g. If the only legal retreat forces a hex to be over-stacked, units must be eliminated until stacking is legal. h. If retreats cause units to stack with units with which they are not free to stack, all the units are disrupted (23.8 and 23.9). i. The details of Disruption are provided in section 29.3. j. Units may retreat across a Ford only if they could have crossed the Ford during movement without Engineer help. k. Units may not retreat into hexes that they are prohibited from entering during movement. l. Units are eliminated, if they are unable to retreat the indicated number of hexes specified, or if they cannot retreat without violating any of the restrictions above.
54.3 Retreat Permissions
a. Retreat requirements may not dictate elimination of a unit, if there is an alternate retreat route available; however, the alternate retreat route may be chosen only if elimination would occur during the current combat segment. b. Foot units may always retreat across streams and rivers, other than the Meuse, regardless of where they begin the retreat. c. Retreating units may pick up friendly HQ during the retreat.
54.4 Retreat of Truck-Mounted Infantry (Optional)
This rule is included when the optional Dismounted Infantry Movement rule is incorporated. See section 29.7.
a. Truck-mounted infantry may dismount and retreat as foot infantry into or through non-road forest or non-road marsh terrain; however, they may not retreat across an un-bridged river or stream, and in such a case would still be eliminated. b. Truck-mounted infantry that survives a retreat due to use of this rule is covered with a Disrupt 2 marker. See 29.3 for details.
54.5 Retreat Survival (Optional)
All players must agree to use these rules.
54.5.1 Retreat Through Enemy Zone of Control
When the only legal retreat route available forces a unit to enter an enemy ZOC, the retreating unit is not elim, but takes a step loss instead. If the only legal retreat route forces a unit to enter multiple hexes in enemy ZOCs, the retreating unit takes a step loss for each enemy ZOC hex entered.
54.5.2 Retreat Through an Over-Stacked Hex
When a retreating unit is forced to stop in a hex that is over-stacked, the retreating unit may retreat another hex after taking a step loss.
55.0 Advance After Combat
a. If the defending player is eliminated or forced to retreat, the attacking player may advance after combat. The advance must be performed immediately before resolving another combat. b. If a die roll for a subsequent battle occurs before an attacker advances after combat, the advance opportunity is lost. c. The first hex of the advance must be a hex previously held by the defender(s). After entering the first hex, the advancing units may choose any legal path to continue the advance.
55.1 Advance After Combat Restrictions
a. FA, NW and most HQ may never advance after combat. b. Three HQ that may advance after combat: KGP, KGC and FE. c. Units may not advance after combat further than they could move during regular movement. This includes the increased cost to enter hexes due to interdicting enemy aircraft. d. An advancing unit may not enter or exit hexes that it is prohibited from entering or exiting during movement. e. FIRST HEX. Advancing units may ignore an enemy ZOC in the first hex of the advance---the defender's hex. f. NEXT HEX(es). Advancing units must stop upon entering an enemy ZOC after leaving the defender's original hex. g. The abilities of enemy units to exert a ZOC over advancing combat units are described in the ZOC Chart and 25.0. h. Units advance across rivers and streams only as they are able to cross them during movement (29.0, 30.0). i. Units that require engineer assistance to ford a river or stream cannot advance after combat via a Ford. j. The defender in an attack may never advance after combat.
55.2 Increased Length of Advance after Combat
a. Consult the Advance After Combat Chart for length of advances after combat. b. Most attacking units that are allowed to advance may do so at the Basic Advance Rate. c. Armored Infantry, Tanks or Panzers may advance at the Road Advance Rate. d. Armored Recon/Cav, US Rangers and the three Enhanced German HQ (2.6.2f) may advance at the Recon Advance Rate.
55.3 Advance Across Rivers and Streams
a. Foot units are the only units that can advance across unbridged river or streams at a non-ford or non-bridge hex. b. If foot units did not start the turn next to the river or stream, they may advance into the defender's hex and stop. c. If foot units begin next to the river or stream, they may continue moving after advancing into the defender's hex, if they have sufficient MF remaining to enter additional hexes.
55.4 Advance Across Fords
a. See Play-Aid Chart 2A, Crossing Rivers and Streams at Fords. b. A Unit that may cross a river or stream without Engineer assistance may advance after combat across a Ford, if the unit has sufficient MF available to pay the cost of fording.
56.0 Overrun During Advance After Combat
These rules allow unprotected artillery units and/or HQ to be overrun by AFV advancing after combat. Vulnerable artillery units and HQ were caught unaware when their front line counterparts failed to protect them.
56.1 Morning (MO) and Afternoon (AF) Turns
a. During Morning and Afternoon turns, any AFV advancing after Combat may overrun artillery units and/or HQ. b. The overrun hex must contain artillery and/or HQ units only. c. The overrunning AFV enters the defender's hex as if it was unoccupied. The AFV may use a road into the defender's hex. d. The over-running AFV must stop in the defender's hex and proceed no farther. The arty/HQ are eliminated immediately. e. The eliminated units present no impediment to other units that have yet to advance after combat; they may enter and exit the overrun hex per the rules of movement and advance after combat. f. Furthermore, another advancing AFV may advance through the original overrun hex and overrun other arty and/or HQ. g. Overrun during advance after combat is prohibited during Fog, Dense Fog or Snow Turns.
56.2 Predawn (PD) and Evening (EV) Turns
a. During Predawn and Evening turns, night superior panzers advancing after combat may overrun unprotected arty and/or HQ. b. Night superior panzers are those of KGP/1SS Panzer Division, 2SS Panzer Division and 2nd Panzer Division. See section 41.0. c. The rules for night overrun are the same as those listed in rule 56.1 above. Note well 56.1h.
57.0 Blitzkrieg 44
Panzer formations were ordered to bypass US defensive positions during the Ardennes Offensive; however, unlike 1940, Allied defenders were wary of the tactic. Still, Panzer units were sometimes able to pass through Allied units, especially at night or when it was foggy. Allied Armor formations also learned to use this tactic. The two types of attacks below attempt to recreate the possibility of bypassing enemy defensive positions in order to advance into the enemy's rear areas.
57.1 Ardennes 44 Blitz - Clear Day (MO and AF) Turns
a. This type of attack is a deceptive attack conducted during the regular combat phase (51.0) in order to slip past the enemy. b. Supplied German or Allied Front Line units (see 57.3a) may attempt to Blitz (advance) past enemy defenders rather than bludgeon them. The intention to use this tactic must be declared at the start of the process to resolve the attack. c. The attacking units must include at least one infantry and one front line panzer or tank. Combat Support units, including Tank Destroyers and Assault Guns, may participate in the attack, but they are not front line units and may not advance after combat. d. An attack of this sort may not be selected if re-fighting an Engaged battle and Shocked units may not participate. e. If the attacker includes a recon unit for this type attack, a drm of (-1) is applied. If the defender includes a recon unit against this type attack, a drm of (+1) is applied. f. In addition to (e), all applicable column shifts and drm apply. g. The final attack odds must be at 2-1 or greater. If air support, arty support, weapons effects or terrain effects reduce the odds below 2-1, then normal combat must occur. h. If the attack qualifies, the Blitzkrieg Attack Table is used. i. At least one attacking infantry type unit must remain adjacent to the defender's hex after the attack.
57.2 Tigers in the Mist 44 Blitz - Fog, Snow or Night
The Germans used deception during the Ardennes Offensive in attempts to overcome the US advantage in air and artillery. Many times during Fog and Night turns German mechanized columns merged with US columns and then opened fire on the unsuspecting Americans. Turnabout was fair play as US units learned the tactic and conducted their own ambushes.
a. This type attack may be attempted during Fog, Dense Fog, Snow or Night Turns or any combination thereof. It is a deceptive attack used during the regular combat phase (51.0) to slip by the enemy. b. Supplied German or Allied Front Line units (see 57.3a) may attempt to Blitz (advance) past enemy defenders rather than bludgeon them. The intention to use this tactic must be declared at the start of the process to resolve the attack. c. The attacking units must include at least one infantry and one front line panzer or tank. Combat Support units, including Tank Destroyers and Assault Guns, may participate in the attack, but they are not front line units and may not advance after combat. d. An attack of this sort may not be selected if re-fighting an Engaged battle and Shocked units may not participate. e. If the attacker does not commit arty to the attack, the defender may not commit arty support. If the attacker does not commit air support to the attack, the defender may not commit air support. f. If the attacker includes a recon unit for this type attack, a drm of (-2) is applied. If the defender includes a recon unit against this type attack, a drm of (+2) is applied. g. This type attack receives a Column Shift Right during Fog, Dense Fog, Snow or Night Turns or any combination thereof. h. In addition to (f & g), all applicable column shifts and drm apply. i. The final attack odds must be at 2-1 or greater. If air support, arty support, weapons effects or terrain effects reduce the odds below 2-1, then normal combat must occur. j. If the attack qualifies, the Blitzkrieg Attack Table is used. k. None of the attacking units need remain adjacent to the enemy defenders hex after the attack, although they may if desired.
57.3 Blitzkrieg 44 Advance Rules and Restrictions
a. An Ardennes 44 or a Tigers in the Mist attack allows the front line units listed below to advance after combat in any direction: KG Peiper HQ (2.6.2f); KG Coch. HQ (2.6.2f); Fuhr Escort HQ (2.6.2f); German Panzers (2.7.4a); Pz Grenadier (2.7.3a); Armored Eng (2.7.3c); Motorized Inf (2.7.2a); Motorized Rgr (2.7.2a); Motorized Eng (2.7.2b); Armored Inf (2.7.3a); Allied Tanks (2.7.4b); Arm Cav/Recon (2.7.3b). b. Combat support units, including tank destroyers and assault guns may not advance in these type attacks. c. Units advancing after combat during a Blitz attack may not cross a river other than at a bridge. c. Losses are not sustained by either side in Blitz type attacks and the defending units are never retreated. d. The advancing units may not advance into the ZOC of a unit defending in the attack and they must stop upon entering the first enemy ZOC affecting the advancing unit. Note that ZOC are affected by Fog, Night or Snow. See ZOC Chart and 25.0. e. A Blitz attack vs a unit that exerts no ZOC into an adjacent hex would allow advance into said adjacent hex and beyond. f. The advancing units may not overrun any original adjacent defending HQ/Arty units during a corresponding advance. g. Units advancing after a Blitz attack must still abide by all movement rules and advance after combat rules. h. A result of A1 or A2 on the Blitzkrieg Attack Table is a result of attacker retreat 1 or 2, respectively.
57.4 Increased Length of Advance after Combat
See rule section 55.2, which applies for the Ardennes 44 and Tigers in the Mist 44 attacks.
58.0 End of Combat Segment Admin
At the end of the Combat Segment for the Corps activated, the status of certain units and markers must be adjusted.
a. Remove "Attack" markers and "Abort" markers. b. Remove aircraft on ground combat support missions. c. Do not remove "Fired" markers from any firing battalion. d. Do not remove Allied Formation "Fired" markers. e. Do not remove applicable "CA" or "Engaged" markers. f. Do not remove "Shock" markers. g. Do not flip spent Leaders back to their front sides.
59.0 Exploitation
a. Reserves may be repositioned without Command by a Leader during the exploitation segment as described in 59.1. b. Reserves may be released by a Leader for full movement during the exploitation segment as described in 59.2 below.
59.1 Repositioning Reserves
a. During this segment, units in reserve may move up to half of their MF (rounded up) and retain reserve status. b. The units must be In Supply and In Comm with the Division HQ, Brigade HQ or a Leader. c. The units may not move adjacent to enemy units.
59.2 Exploitation Movement
a. During this segment, units in reserve may conduct exploitation. b. Exploitation occurs after all attacks are completed for the Corps that was activated. c. Exploitation occurs when a unit in reserve moves more than half of its movement factor in the Exploitation Segment. d. Also, Exploitation occurs when the unit moves adjacent to an enemy unit during the Exploitation Segment. e. The units in reserve must be In Comm and In Supply in order to Exploit. f. The reserves must be released by a Leader with "E" attribute that is in the chain of command of the reserves. g. The reserve units to be moved must be within command range of the leader possessing the "E" attribute. h. A Leader with the "E" attribute may be spent and still release the reserves. i. The Leaders Command Attribute shows the maximum number of units that the Leader may release for Exploitation. j. Combat units in reserve may be moved up to their full MF. No combat may be performed after the exploitation move. k. Remove "Reserve" markers after exploitation occurs. l. A Leader that releases reserves for Exploitation may also move full MF at the end of the Exploitation Segment, if he is not spent.
60.0 Player End of Turn Segment
60.1 German or Allied End of Turn
a. Segment occurs for the German player after the Exploitation Segment for the final German Corps that was activated. b. Segment occurs for the Allied player after the Exploitation Segment for the final Allied Corps that was activated.
60.2 Defensive Construction Completion Phase
a. Construction started during the Construct Defenses Segment (19.0) is completed during this phase. b. Enemy combat units may not be adjacent to the position and the constructing unit must still be in the hex. c. Flip Improved Positions, Strong Points and Road Blocks to their completed sides. d. Remove vacant Improved Positions, Strong Points, Road Blocks and Forts.
60.3 Bridge Construction Progress Phase
The following actions are executed for bridge construction that requires multiple turns for completion. Detailed rules are found in the scenarios for German Bridge construction on 16Dec. When a bridge is completed, it is flipped to the completed side.
60.3.1 German bridge construction progress by Army Engineers
a. If there is a "Begin Bridge" marker, change it to a "Construction 1" marker. b. If there is a "Construction 1" marker, and a "Halt Bridge Work" marker, the "Construction 1" marker remains. c. If there is a "Construction 1" marker, and no "Halt Bridge Work" marker, progress to a "Construction 2" marker. d. If there is a "Construction 2" marker, and a "Halt Bridge Work" marker, the "Construction 2" marker remains. e. If there is a "Construction 2" marker, and no "Halt Bridge Work" marker, progress to a "Construction 3" marker. f. If there is a "Construction 3" marker, and a "Halt Bridge Work" marker, the "Construction 3" marker remains. g. If there is a "Construction 3" marker, and no "Halt Bridge Work" marker, progress to a "Construction 4" marker. h. If the "Construction 4" marker placed in (g) above is in a hex with an Army Echelon Engineer, the bridge is completed, as long as the hex on the opposite side of the river is free of enemy combat units; see 21.4 for delayed completion.
60.3.2 German bridge construction progress by Bridge Engineers
a. If there is a "Begin Bridge" marker, change it to a "Construction 1" marker. b. If there is a "Construction 1" marker, and a "Halt Bridge Work" marker, the "Construction 1" marker remains. c. If there is a "Construction 1" marker, and no "Halt Bridge Work" marker, progress to a "Construction 2" marker. d. If the "Construction 2" marker placed in (c) above is in a hex with a Bridge Engineer, the bridge is completed, as long as the hex on the opposite side of the river is free of enemy combat units; see 21.4 for delayed completion.
60.3.3 Allied Bridge Progress by Corps or Army Engineers
a. If there is a "Begin Bridge" marker, change it to a Construction 1 marker. b. If there is a "Construction 1" marker, and a "Halt Bridge Work" marker, the "Construction 1" marker remains. c. If there is a "Construction 1" marker, and no "Halt Bridge Work" marker, progress to a "Construction 2" marker. d. Allied Army or Allied Corps Engineers with a "Construction 2" marker complete a Bailey Bridge, as long as the hex on the opposite side of the river is free of enemy combat units; see 21.4 for delayed completion.
60.4 German Bridge Construction Progress on 16Dec
Special rules concerning critical bridge construction over the Our River and Sauer River on the 16MO turn at Dasburg, Gemund, Vianden, Wallendorf and Echternach are provided in the 5th Panzer Army and 7th Army Scenario rules.
60.5 American Withdrawal of Divisional Artillery
The following arty withdrawal rules do not apply to US Divisions dispersed on the front on 16MO; i.e., 106ID, 28ID, 4ID and 9AD. The arty for the three Infantry Divisions may be attached to other Divisions per 18.2. The 9AD arty units are already 8 Corps assets.
a. Remove Divisional artillery battalions from American Divisions that have been wiped out. b. A wiped out Division is one that has no front line battalion that displays the specific unit identification. c. See section 24.8 for an example of a US Battalion that displays a specific unit identification. d. Step Reduction units never display a specific unit identification. They have the term "Step" on the counter. e. Engineers may be classified as front line units when desired. f. When withdrawal is required, remove them from the map. g. Isolated units may not be withdrawn. See 9.16.
60.6 Shock Recovery
"Shock" markers are retained through the German and Allied Player EOT Segments. Shock markers are replaced during the Mutual End of Turn Segment (61.2) with "Disrupt 1" markers.
60.7 Allied "Fired" Markers
"Fired" markers placed upon individual firing Allied FA units are removed after the German player end of turn segment and after the Allied player end of turn segment.
60.8 Allied Formation "Fired" Markers
a. Allied Army Formation "Fired" markers placed per 43.7.1 and Allied Corps Formation "Fired" markers placed per 43.7.2 are not removed until the Mutual End of Turn Segment (61.2). b. Allied Formation "Fired" markers do not prevent individual Allied FA units from firing on the Allied turn. The markers are retained to remind players that the formation may not rest.
60.9 German "Fired" Markers
Reminder: German "Fired" markers are not removed until the Mutual Player End of Turn Segment (61.2).
Mutual Player Segment - End of Turn
61.0 Mutual End of Turn (EOT) Segment
This segment begins after the Allied player's End of Turn Segment (60.1 through 60.7) is completed.
61.1 Rested HQ Designation Phase
a. Place a "Rested" marker on all HQ that are covered with a "Resting" marker. b. If the HQ has a "Fatigue" marker, it retains the "Fatigue" marker when it receives the "Rested" marker. c. It takes two turns of Resting during one day in order to recover from Fatigue as described in rule 4.2. d. An HQ with an "Exhausted" marker retains the marker until the next PD turn. See 4.3 for exhaustion recovery.
61.2 Adjust Markers and Remove Spent Aircraft
Actions a through f should be done in sequence. Actions g through p may be done simultaneously.
a. Remove "Disrupt 1" markers from all units. b. Flip "Disrupt 2" markers to "Disrupt 1" for all units. c. Convert all Shock markers to "Disrupt 1" markers. d. All Rubble markers stacked with Engineers are removed. e. "Rubble 1" markers are removed. f. "Rubble 2" markers flip to "Rubble 1." g. Remove "Ferry" markers from all engineer units. h. Remove all German Fired markers. i. Remove Allied Army Formation "Fired" markers placed in accordance with 43.7.1. j. Remove Allied Corps Formation "Fired" markers placed in accordance with 43.7.2. k. Remove all aircraft. l. Remove all "Low Fuel" markers. m. Flip all spent Leaders back to their front sides. n. Remove "Night Moves" markers if it is the end of an EV turn. o. Remove all "Reserve" markers if it is the end of an EV turn. p. Replace Artillery Substitute counters with the individual battalions of the formation or vice versa.
Examples of Play
Strafe Attack
- The Americans place a B26 in 7444 to strafe.
- The B26 is not intercepted and the strafe attacks proceed.
- The B26 can strafe 7444 and each adjacent hex.
- Note the lucrative arty target in 7345, but there is light AA in the hex and two heavy AA units adjacent.
- The B26 chooses to strafe 7545 first, which contains the 26VG artillery regiment and the 26VG Hetzer.
- The 26VG artillery regiment represents five artillery battalions and is a great target with no AA protection.
- The Hetzer AFV must be strafed first per section 5.7.5. A red and white die are rolled by the US player: a) The roll on the Strafe Attack Table vs the Hetzer: red die is a 3. The Hetzer acquires a disruption marker per 29.3. b) The roll on the AA Return Fire Table for the Hetzer firing at the strafing B26: white die 4; there is no drm vs a bomber; a roll of 4 yields No Effect.
- The 26VG artillery regiment is now strafed. A red and white die are rolled by the US player: a) The roll on the Strafe Attack Table vs the artillery: red die is a 4. The artillery unit acquires a disruption marker per 29.3 and is flipped into March Order. b) The artillery returns fire at the strafing B26. An unattainable roll of 7 is needed to Abort the aircraft.
- The US player must now choose another hex to Strafe or stop strafing.
- The US chooses to strafe 7443 with the important XLVII HQ and a Heavy AA Battalion.
- The Heavy AA unit must be strafed first per section 5.7.5. A red and white die are rolled by the US player: a) The roll on the Strafe Attack Table vs the Heavy AA unit: red die is a 2; add a +2 drm for Heavy AA in the target hex; a resultant 4 yields a Disrupt. The AA unit acquires a disruption marker per 29.3. b) The Heavy AA returns fire at the strafing B26: white die is a 1; add a +2 drm for Heavy AA in the target hex; a resultant 3 yields No Effect.
- The XLVII HQ is now strafed. A red and white die are rolled by the US player: a) The roll on the Strafe Attack Table vs the HQ: red die is a 2; add a +2 drm for Heavy AA in the target hex---the previous Disrupt vs the Heavy AA does not eliminate its AA capability; a resultant 4 Disrupts the HQ and flips it into March Order; see 29.3 for details. The Corps HQ in March Order has reduced Comm Range, which could place subordinate Echelon and Divisions "Out Comm." b) The HQ returns fire at the strafing B26: white die is a 4; add a +2 drm for Heavy AA in the target hex; a resultant 6 yields No Effect.
Interception Example
- The US places a B26 in 7444 to strafe (see Strafe Example).
- The Germans don't want their HQ and Artillery disrupted, so a jet Me262 intercepts the strafing B26.
- See 5.7.4: resolve German interception of B26 with Me262.
- The Me262 rolls two dice. A red (2) for the Me262 and a white (4) for the strafing B26.
- Add the red die (2) to the Me262 dogfight AF (6) to equal (8).
- Add white die (4) to US strafing aircraft DF (3) to equal (7).
- The Me262 AF total is greater than the B26 DF total; the US strafing B26 aborts and is removed.
- The US strafing B26 now rolls two dice. A red (6) for the US and a white (2) for the Me262.
- Add the red die (6) to the US strafing B26 AF (3) to equal (9).
- Add the white die (2) to the Me262 DF (7) to equal (9).
- The US B26 AF total is not greater than the Me262 DF total, so the Me262 does not abort.
- The Me262 is returned to XLVII Corps HQ.
- An interceptor returned to Corps HQ is available for use during combat segments later on this turn. It can intercept during the combat segments or provide ground combat support.
- The Me262 is best used as an interceptor.
Example of HQ Activation Process: Army, Corps
- Assume the German 5th Panzer Army HQ is activated in "Active" status on an MO turn.
a. Complete the procedures for Immediate Actions in the Sequence of Play; see 13.5.3.
- The 5th Panzer Army HQ is "In Comm" as are all Army HQ on every turn.
- Assume that all HQ and units in the 5th Panzer Army are in comm and in supply.
- Assume that no formations in the 5th Panzer Army are experiencing low fuel. b. Supportive Actions in the Sequence of Play may be conducted jointly with subordinate Corps; see 13.5.3.
- Active Army Echelon combat units may construct Defensive Positions.
- Active Army Echelon Engineers may place an "Eng Ferry" marker.
- Active Army Echelon Engineers may build or dismantle bridges. c) The Army HQ and its subordinate Army Echelon Combat Units have full movement and combat capability, but they may withhold these capabilities in order to move and fight in concert with an active Corps and its Divisions.
- The German player may now activate the LXVI Corps, the LVIII Corps or XLVII Corps.
- Assume the XLVII Corps is activated in "Active" status. a. When the German XLVII Corps HQ is activated, the Random Event for that Corps for the turn is rolled. b. When the XLVII Corps is activated, the 2nd Panzer, the 26VG and Panzer Lehr are also activated. c. Activation status must be chosen for each Division. d. Assume "Resting" is chosen for 2nd Panzer, "Active" is chosen for 26VG and "Active" is chosen for Panzer Lehr. e. The 2nd Panzer HQ is covered with a "Resting" marker. f. The "Active" 26VG and Lehr remain unmarked. If this was an EV turn, they would get a "Night Moves" marker.
- Active Corps and Division combat units may construct Defensive Positions.
- Active Division Engineers may place "Eng Ferry" or "Prep Bridge Demo" markers; Active Corps Engineers may do likewise, or build/dismantle bridges.
- All HQ move with full movement regardless of status.
- Active combat units of the XLVII Corps Echelon, 26VG and Panzer Lehr may move with full MF.
Bridge Construction
An example of bridge construction is not provided here, because bridge construction is fully scripted in the rules and in the scenario instructions. For bridge construction not affected by random events, see section 60.3. For bridge construction affected by random events on 16 Dec at Dasburg, Gemund, Vianden, Wallendorf and Echternach see scenario sections 75.2, 75.3 and 75.4 for a comprehensive explanation of bridge construction procedures.
Comm Path - Supply Path Examples
Yellow Dashed Line
- It is a Clear weather, day turn. Every US unit has a ZOC into the adjacent six hexes.
- Friendly units negate enemy ZOC for tracing Comm Path.
- Comm Path may be traced through the 1SS Eng in 6620.
- The 1SS-1/I in 6520 is In-Comm with the 1SS HQ in 6921.
- However, the 1SS-1/I is Out of Supply (OOS).
- Friendly units do negate enemy ZOC for tracing Supply Path.
Black Dashed Line
- It is a Clear weather, day turn. Every US unit has a ZOC into the adjacent six hexes.
- Comm path may be traced across rivers and through all types of terrain.
- The 1SS-1/II Infantry in 6421 and the 1SS Recon in 6124 are In-Comm with the 1SS HQ in 6921.
- However, both units are OOS. Supply Path cannot be traced across un-bridged rivers.
- Supply Path may be traced across rivers or streams at bridges or fords, but the only possible Supply Path across the intact bridge at Trois Ponts is blocked by the ZOC of US infantry units.
Red Dashed Line
- It is a Fog turn. No ZOC are exerted into adjacent Forest, Woods or Broken hexes.
- Comm Path may be traced to 1SS-1/I, 1SS-1/II and 1SS Recon. An intact bridge is not required.
- Supply Path may be traced across the intact bridge at Trois Ponts to 1SS-1/I, 1SS-1/II and 1SS Recon.
Effects of ZOC on Movement and Supply
Zone Of Control (ZOC) Chart. The ZOC Play-aid Chart identifies when each type combat unit exerts a ZOC over enemy units in adjacent hexes.
| Combat Unit | Into Clear | Into Woods | Into Broken | Into Marsh | Into Forest | Into Town | Into City |
|---|---|---|---|---|---|---|---|
| Infantry, Engineers | ZOC | ZOC | ZOC | ZOC | ZOC | ZOC | ZOC |
| Armored Recon, Cavalry | ZOC | ZOC | ZOC | No ZOC | No ZOC | ZOC | ZOC |
| AFV, Anti-Tank, Heavy AA | ZOC | ZOC | ZOC | No ZOC | No ZOC | No ZOC |
- Fog: No ZOC is exerted into Woods, Broken, Marsh or Forest during Fog turns.
- Dense Fog: No ZOC is exerted into an adjacent hex by any unit during Dense Fog turns (or by a unit in Dense Fog).
- Snow: No ZOC is exerted into an adjacent hex by any unit during Snow turns (or by a unit in Snow).
- Night: No ZOC is exerted into adjacent Marsh or Forest hex by any unit during Night turns.
- Note that Snow is a full turn effect and is not the same as Snow Squalls, which are combat effects.
For the following ZOC Examples, assume a Clear - Day turn.
- Blue Arrow. The 2Pz/304/I, foot, moves through 5843, 5744 and 5644 without hitting a US ZOC. The Team Desobry tank has a ZOC over five adjacent clear terrain hexes, but not into the town hex.
- The Orange Arrow below the Blue Arrow. This arrow indicates a viable supply path.
- Top Red Arrow. The MkIV Panzer that starts in 6343 can move through 6242 (no ZOC), then to 6143 and then into 6043 past the SPAA in 6243 without stopping---Light AA has no ZOC over AFV. Team Cherry stops it in 6043.
- Top Purple Arrow. The Motorized Infantry can move through 6242 without stopping (forest, no ZOC by AA), but the SPAA stops it with a ZOC into 6143.
- Upper Black Arrow. This arrow shows a viable supply path, which is stopped by the SPAA in 6243. If a unit exerts a ZOC over any type unit, it also stops a supply path - 25.2a.
- Bottom Red Arrow. The MkIV Panzer that starts in 6444 can move into 6345, then into 6244 and continue into 6144 past the SPAA (Light AA has no ZOC over AFV) in 6243 without stopping. Team Cherry stops it in 6144.
- Bottom Purple Arrow. The Motorized Infantry is stopped in 6244 by the SPAA in 6243.
- Lower Black Arrow. This arrow indicates a viable supply path, which is stopped by the SPAA in 6243. If a unit exerts a ZOC over any type unit, it also stops a supply path.
- Yellow Arrows. The Panther or the 26VG Infantry could move through 6046 past the Team OHara Tank in 5946 without stopping (forest, no ZOC), but the Armored Infantry in 5846 would stop either unit in 5947.
- The Orange Arrow below the Yellow Arrows. Indicates a viable supply path, which is stopped in 5947 by the Armored Infantry in 5846.
- If it was a Fog turn, no unit would exert a ZOC into woods, broken, forest or marsh.
- If it was a Dense Fog or Snow turn, no unit would exert a ZOC into any hex.
- If it was a Night turn, no unit would exert a ZOC into forest or marsh.
Movement Examples - Army Boundary
It is the beginning of the German 16MO turn. Dense Fog north of the Army Boundary. Clear south of the Army Boundary. Per 3.3.2c and 3.3.3c, the Dense Fog condition occurs along the Army Boundary Road.
- The US units north of the Boundary road have no ZOC over any hex on or north of the Boundary road.
- The US units south of the Boundary road have no ZOC over any hex of the Boundary road.
- The US units on the Boundary road exert No ZOC. They are in Dense Fog. See the ZOC Chart.
- In the example, the LXVI Corps is activated first and takes advantage of 3.3.2c.
- The 244 StuG and companions move to 9223 then 9124 then 9024. See red arrows.
- The 14Cav in Roth exerts ZOC into 9024 halting the StuG.
- The LXVI Corps units are careful not to end their turns in 9223 or 9124, lest they prevent 1SS corps units from using the road.
- The 1SS Corps units infiltrate between the US units - no ZOC on or north of the Boundary road. See blue arrows.
Resultant Situation: After the LXVI Corps and the 1SS Corps are finished moving the situation is as depicted in the original illustration.
Movement Examples - River Crossing
For this example use the Off-Road Movement Chart and the Crossing Rivers at Fords Chart on Play Aid Card 2A. The ground is Firm for river crossing examples. Use the green highlighted values in the Off-Road Movement Chart.
- Left Illustration-Red Arrow. It is a Clear - Day turn. The 26/77/ II, foot, in 7946 starts adjacent to the river and enters 7845. The cost to enter broken terrain is 2; the cost for foot infantry to cross an unbridged river is +2; so the total cost is 4MF. It started adjacent to the river, so it can keep going with 2MF remaining.
- Left Illustration-Red Arrow. For a Fog or Night turn, it would cost 5MF for 26/77/ II to move from 7946 to 7845.
- Left Illustration-Blue Arrow. It is a Clear - Day turn. The 26/77/ II, foot, in 7946 wants to cross at the Ford. It moves to 7846 for 1MF; then it crosses into 7747 at a 3MF cost, 2MF to enter broken terrain and +1MF to Ford. Foot infantry does not need assistance from an Engineer in order to Ford. The unit has 2MF remaining for further movement.
- Right Illustration-Purple Arrow. It is a Clear - Day turn. The 2Pz/304/ I, foot, in 7844 starts adjacent to the river and enters 7744. The cost to enter forest terrain is 3; the cost for foot infantry to cross an unbridged river is +2; so the total cost is 5MF. It started adjacent to the river, so it can keep going with 1MF remaining.
- Right Illustration-Purple Arrow. If it was a Fog or Night turn, it would cost 6MF for 2Pz/304/ I to move from 7844 to 7744.
- Left Illustration-Yellow Arrow. It is a Clear - Day turn. The Horse Drawn artillery in 7846 moves to 7747 via the Ford. The Horse Arty needs Engineer assistance in order to ford, which is provided by the 26 Eng in place across the Ford. The cost to move from 7846 to 7747 is 4MF; i.e., 2MF to enter broken terrain +2 to Ford. The unit has 2MF remaining for further movement, or it could spend the 2MF and go In-Battery.
- Right Illustration-Yellow Arrow. It is a Clear - Day turn. The Heavy AA in 7945 is a cross-country unit. It can Ford without Engineer assistance. It moves from 7945 to 7843 at a cost of 1MF using road movement. Then it crosses the Ford into 7743 at a cost of 6MF; i.e., 2MF to enter 7743 and +4 to cross the Ford. The unit has 1MF remaining.
- Right Illustration. It is a Clear - Day turn. The MkIV Panzers in 7843 cannot Ford the river into 7743, even with Engineer assistance. The MF cost to enter 7743, broken terrain, is 2MF with +7MF for crossing the Ford with Engineer assistance; i.e., 9MF total. Note that the AFV-Medium could Ford with Engineer assistance into clear terrain or woods at a total cost of 8MF.
- Right Illustration-Red Arrow. It is a Clear - Day turn. The 2Pz/2 Bn II in 7943 is a truck unit. It can just make it across the Ford into 7743. It moves from 7943 to 7843 via road at 1MF; 1/2MF + 1/2MF. An Engineer is adjacent to the Ford and can assist the truck unit. The MF cost to enter 7743, broken terrain, is 3MF with +4MF for crossing the Ford with Engineer assistance. The total MF expended on the turn is 8MF.
Movement Examples - Interdiction
Air Interdiction Chart (added cost to enter interdicted hex):
| Clear | Marsh | Woods | Broken | Town | City | Forest | Bridge | |
|---|---|---|---|---|---|---|---|---|
| Foot | +1 | +1 | +0 | +0 | +0 | +0 | +0 | +1 |
| Vehicle | +2 | +2 | +1 | +1 | +1 | +1 | +2* | +2 |
Vehicular units include Horse Drawn, Cross-Country, AFV and Trucks. The cost for crossing a bridge is in addition to the cost of entering terrain. * The type of units indicated may attempt to Avoid the Interdiction; see section 33.0. When roll to avoid is successful, interdicted bridge cost is also avoided.
Avoid Interdiction Table: Forest-Road Hexes (roll one die):
| Die Roll | 1 | 2 | 3 | 4 | 5 | 6 |
|---|---|---|---|---|---|---|
| Truck | Go | Go | Stop | Disrupt | Disrupt | Hit+Disrupt |
| AFV | Go | Go | Stop | Stop | Disrupt | Disrupt |
| Cross-Country | Go | Go | Go | Stop | Stop | Disrupt |
| Horse Drawn Arty (H) | Go | Go |
- Go: Interdiction avoided; proceed without paying Interdiction Cost.
- Stop: Interdiction not avoided; enter hex and then end movement.
- Disrupt: Enter hex, end movement, add Disrupt 1 marker, or flip Disrupt 1 to Disrupt 2. Units that have a Disrupt 2 marker are not further penalized.
For the following Interdiction Examples, assume a Clear - Day turn.
- The red route is the best route for the 560VG/1128, foot infantry. Interdiction has no effect on its move.
- The Panther Tank surveys the purple route. It moves from Houffalize to 6035 (1/2MF + 1MF), 6034 (1/2MF +2MF), 5935 (1/2MF +1MF), 5834 (1/2MF +1MF); 7MF expended. It cannot enter Wibrin.
- The Panther Tank surveys the red route. It moves from Houffalize to 6035 (1/2MF + 1MF), 5936 (1MF +2MF), 5835 (1MF +2MF); 7 1/2MF expended. It cannot enter 5736.
- The Panther Tank decides to Challenge the Interdiction on the red route. See 33.0. It moves from Houffalize to 6035 (1/2MF + 1MF); before entering 5936 it challenges the interdiction successfully for the first forest-road hex, so it pays only the 1MF road cost for that hex and every remaining forest-road hex connected to the first forest-road hex. Thus, 5936 (1MF), 5835 (1MF), 5736 (1MF; no interdiction there anyhow), 5635 (1MF) and finally into 5535 (1MF +1MF); 7 1/2MF expended.
- The recon unit surveys the purple route. It moves into Houffalize (1/2MF), then 6035 (1/2MF + 1MF), 6034 (1/2MF +2MF), 5935 (1/2MF +1MF), 5834 (1/2MF +1MF), and ends in Wibrin; 9MF expended.
- The recon unit surveys the red route. It moves into Houffalize (1/2MF), then 6035 (1/2MF + 1MF), 5936 (1/2MF +2MF), 5835 (1/2MF +2MF), 5736 (1/2MF); 7 1/2MF expended. It cannot enter 5635.
- Like the Panther tank, the recon unit could challenge the interdiction before entering the first forest-road hex.
- Von Manteuffel in 6138 moves as a cross-country unit to 6037 and 6036 (1/2MF and 1/2MF). As he leaves 6036 for 6035, he switches to foot wherein interdiction has no effect. He continues movement switching between cross-country and foot movement as desired. See 39.4.
Movement Examples - Skorzeny Infiltration (94.1)
Skorzeny Infiltration Table [6th Pz Army Scenario]. Roll two dice; on a 7 or less, Infiltration is successful.
| Turn Effects | drm |
|---|---|
| 16EV, 17PD | -2 |
| 17MO, 17AF | 0 |
| 17EV, 18PD | 0 |
| 18MO, 18AF | +2 |
| 18EV | +2 |
| Condition Effects | drm |
|---|---|
| Dense Fog | -2 |
| Fog | -1 |
| Forest Hex | -1 |
| Clear Hex | +1 |
| Move thru US units | +2 |
- Skorzeny 150th Brigade infiltration is possible on the 16EV through 18EV turns.
- The 150th Brigade HQ and its three combat units may attempt to ignore ZOC and/or pass through enemy hexes during movement or exploitation. They may infiltrate individually or as a stack. The Skorzeny leader may accompany the unit(s) freely.
- Prior to infiltration through a US ZOC or a US occupied hex, the infiltration plan must be declared. See the 6th Panzer Army Scenario for complete details.
- In order to infiltrate through a U.S.-occupied hex, there must be a vacant hex beyond and the infiltrator(s) must have sufficient MF available to reach the vacant hex.
- An unsuccessful die roll to pass through a U.S Zone of Control, or to pass through U.S.-occupied hex, or through a string of connected ... (the final bullet is cut off in the printed table; see the 6th Panzer Army Scenario for complete details).
- On the 16EV turn, Skorzeny, the 150th HQ, KG-X, KG-Y and KG-Z begin in 9318. Skorzeny must accompany a KG (94.1f).
- If the Skorzeny stack moves into Udenbreth and the US ZOC, it must immediately stop movement per 25.6a.
- Red arrow. Prior to the move into Udenbreth, Skorzeny declares an infiltration through the US ZOC and into 9118. a) The entire stack will attempt one dice roll to move through Udenbreth, a clear terrain hex, into 9118. b) The drm for the infiltration attempt are (-2) for the turn and (+1) for the attempt through clear terrain. c) Assume the attempt is successful. The entire stack is now in 9118 and movement continues.
- Blue Arrow. Then Skorzeny orders KG-X to move through the adjacent 99/393/II Infantry in 9017 and into 8917. When passing through one or more US units there must be an exit hex that can be reached with available MF. A roll for infiltration into each US occupied hex is required, but a roll is not required to enter the vacant exit hex. a) The drm for infiltration are (-2) for the turn, (-1) for the forest and (+2) for a move through US units. b) Assume success; KG-X spends 4MF to move through 9017 (forest move at night) and 1/2MF to enter 8917. c) KG-X ends its move in 8917. Although it has MF remaining, there ain't no place to go. d) If the infiltration roll was unsuccessful, KG-X ends its move in 9118.
- Yellow Arrow. Then Skorzeny orders KG-Y, the 150th HQ and himself to move to move through the adjacent 99/393/II Infantry in 9017 and into 8918. Since these units were going to a different vacant exit hex than KG-X, they could not resolve their infiltration simultaneously with that of KG-X. a) The drm for infiltration are (-2) for the turn, (-1) for the forest and (+2) for move through US units. b) Assume success; the stack spends 4MF to move through 9017 (forest move at night) and 1/2MF to enter 8918. c) The stack ends its move in 8918. Although it has MF remaining, it wishes to go no farther. d) If the infiltration roll was unsuccessful, the stack ends its move in 9118.
- Orange Arrow. Then Skorzeny orders KG-Z to follow him into 8918; however, KG-Z is a truck unit and cannot move into forest terrain other than along a road. In order for KG-Z to move to 8918, it must infiltrate through the US unit in 9117 (1MF) and then through the unit in 9017 (1MF) before entering 8918 (1MF). Both infiltration rolls must be successful before KG-Z enters 8918. If one of the rolls is unsuccessful, the infiltration fails and the unit is stuck in 9118. The drm for infiltration through each hex are (-2) for the turn, (-1) for the forest and (+2) for move through US units.
- Assume KG-Z bit off more than it could chew and is stopped in 9118. The final disposition of the Brigade is shown in the original illustration.
Example: KGP Breakout - 16EV turn (95.0)
- KGP was placed in Reserve by Peiper during the Orders Segment of the 16PD turn.
- The 1SS Panzer Corps has completed the Movement Segment for the 16PD turn.
- See Yellow Connectors. Players must now place Alert markers for American units that are on or north of the 5PzA-6PzA Boundary, south of the Warche River/Stream, and adjacent to German units of the 1SS Panzer Corps.
- See Blue Connectors. These are American units that are on or north of the 5PzA-6PzA Boundary and south of the Warche River/Stream that will be Surprised if any units of KGP move adjacent to them during the Exploitation Segment.
- See Purple underscore. The 99/394/II is unaffected by the KGP Breakout. It is north of the Warche River/Stream.
Disengaging from Engagement, etc.
Certain types of units may disengage from engagements. See for Example 52.13.2c; Armored Cavalry and AFV may re-fight, disengage in place, or withdraw from Engaged battles. Among such capabilities, they may disengage in place and attack another hex that is adjacent, or they may withdraw and attack another hex.
Example - Leader Reaction
Situation:
- The Fuhrer Escort Brigade rested on the 21PD turn and earned the Rested marker.
- Play has proceeded to the US 21AF turn and the US 18 Corps has just completed movement.
- It appears that the US will launch a strong attack vs the Mark IV Panzer unit in Petit-Han.
- Adding arty in view, the attack is 37-8, with 1R Shift (tanks unsupported) and (+1) for village; or 5-1(+1).
- The US 18 Corps movement involved new units moving next to units under Remer's command.
- If no new units had moved next to units under Remer's command, then Leader Reaction would not be triggered.
- Remer reacts: a) The FE Panzer Grenadiers reinforce the panzers in Petit-Han. Upper red arrow. b) The FE foot infantry crosses the Ourthe into Fronville (1MF + 2MF). Lower red arrow.
- The attack against Petit-Han would now be 37-14, no 1R Shift, (+1) for village; or 2-1(+1).
- More importantly, the move of the foot (blue arrow) across the river will now allow that unit to cross the stream into 4124 on the German 21EV turn allowing a pounding of the M5 tank with a good chance of securing a bridgehead.
- The Remer Leader is flipped to Spent. He cannot now issue "Hold at all Costs" orders during US combat.
Example - German Attack with FA and NW Support
For this example use the charts on Play Aid Card 3A and 3B.
- It is the German 17AF turn---a day turn.
- The 1SS Inf in 8122 (14CF), the 1SS Inf and StuG in 8222 (11CF) and the 3FJ Regiment in 8223 (12CF) are attacking the 168CE Eng and the 9CCB/27 Inf in 8123 (9CF). See the Ground Combat Procedure Chart. No aircraft are involved.
- See item 6a on the Ground Combat Procedure Chart. Adjacent German attackers total 37CF.
- See item 6c on the Ground Combat Procedure Chart. German NW and FA support is designated for the attack. a. The 1SS Div arty (13CF) and the 3FJ Div (16CF) arty provide support. b. The 1SS NW (6CF) provides support. c. The 9NW Bde (34CF) supports the 1SS Div attack; a NW Bde can assist only one Division and can fire at only one hex. d. The 4NW Bde (28CF) supports the 3FJ Division attack. e. The 402 FA Korps (19CF) supports the attack. A German FA Korps can split its fire support or shoot it all at one hex.
- The FA and NW fire is totaled. See the FA and NW Attack Support Charts. Firing into broken terrain halves NW fire and FA fire.
- The total all NW and FA fire is 116CF, halved to 58CF.
- See item 6f on the Ground Combat Procedure Chart. US FA support is designated against the attack. a. The 402 FA Group (20CF) provides defensive support. b. The 275 arty (4CF) provides defensive support.
- The defensive FA fire is totaled. See the FA Defense Support Chart. Firing at attackers occupying more than one hex halves the total. The total defensive FA fire is 24CF, halved to 12CF.
- The Germans surpass the threshold for Bombardment Shock. See the Bombardment Shock Table - Firing at Defenders. However, more than one formation is firing, so the Germans must roll for coordination. On a roll of 1-3, it all hits at once.
- The German Bombardment coordination is successful and the roll following on the Bombardment Shock Table is a 7. Defenders are Shocked and total arty CF (58) hits the defenders hex. The Shocked units suffer halved CF (9/2) down to 5CF and the Engineers lose their defensive effect in combat, i.e. they lose their +1 drm.
- See item 8 on the Ground Combat Procedure Chart. The attack is now 37+58 to 5+12, or 95-17; 5-1, reduced down to 4-1 for broken terrain.
- See item 9 through 14 on the Ground Combat Procedure Chart. There is no drm for ER - both with ER 5.
Example - US Time on Target
- The Americans moved all their 8C artillery just west of Bastogne with the intention of using it to hold the town for a turn or two. However, poor placement of the Light AA unit in 5446 allowed the Jadg Panther to move into 5546, because light AA does not exert a ZOC over AFV. Now the American must use his artillery judiciously in the hope that General McAuliffe and his subordinates might escape.
- The Germans have placed attack markers against each of the Bastogne town hexes.
- The Germans with a red bar above the unit (20CF) attack the US infantry in 5644. The German attack has no artillery support. The attack is 20-6 before the Americans add artillery. The US cannot afford a D2 result or the Germans will advance into 5544 and/or 5545 and further trap McAuliffe. The US 402 FA Group (red bar beneath the units) fires in support of the defender in 5644 adding 20CF, halved to 10CF---halved because the German attack comes from more than one hex. The final calculation is 20-16, or 1-1 with no drm. The best the Germans can do is roll a D1, which will result in a step loss to the defender when McAuliffe issues a "Hold at all Cost" order.
- The Germans with a purple bar above the unit (28CF) attack the US units in 5645. The Germans throw in the NW and FA in range: Lehr, 15NW, 766 VAK and 26VG, 85CF total, halved to 43CF - halved because the attack is against a town hex. The US 174 FA Group orders a Time on Target mission in support of hex 5645. The US arty units with a purple bar beneath them (52CF) fire to support the units in 5645 with the Time on Target directed against the attacking Jagd Panther. a. The Germans have a potential roll on the Bombardment Shock Table with 43CF against the defenders. More than one German artillery formation participates, so a coordination roll of 1-3 must be made in order for the roll to be made on the Bombardment Shock Table. If the 1-3 coordination roll is made, the roll on the Bombardment Shock Table follows. The best result would be Shock of the defenders with full CF added to the attack and a -1 drm. In any case, the full CF of 43CF will still be added to the attack. b. The Americans have a potential Time on Target roll on the Bombardment Shock Table with 52CF against one of the attacker hexes. More than one US artillery formation participates in the attack, so a coordination roll of 1-5 must be made in order for the roll to be made on the table. The US artillery radio net permits a call for support from many formations with a roll for success much better than that of the Germans. If the 1-5 coordination roll is made, the roll on the Bombardment Shock Table follows. The most important result would include Shock of the Jagd Panther, an 83% chance, which requires a one hex retreat and opens an escape route for McAuliffe et al.
Principles of Design
The following goals were established for the design of this game:
- Make the game easy to play, but still retain the capabilities of homogeneous battalions to perform their mission functions.
- Include all combat arms and as complete an Order of Battle as possible, along with an accurate Order of Appearance.
- Introduce combat air functions that require more consideration than usually required in a Battle of the Bulge game.
- Reproduce the flow of the battle with a game that provides an illusion of history, but with a chance to affect the outcome.
With regard to the first goal, the game was designed as a morph of the Bitter Woods game system and the 1977 Wacht Am Rhein game system. Playtesters with Bitter Woods and/or Wacht Am Rhein experience were able to jump into the game with a cursory reading of the rules, and after a turn or two of coaching, be able to competently play the game.
With regard to the second goal, many will appreciate the completeness of the order of battle, with all combat arms included. Due to the passage of time and the paucity of official German historical accounts, it will not be declared that the order of battle is perfect or without question; however, it is reasonable to claim that it is the most complete order of battle and order of appearance produced. We welcome others to use this order of battle as a guide to begin further research and perhaps make a better product. Another aspect to consider is the order of appearance---it is as important as the order of battle.
With regard to the third goal, some playtesters really liked the added capabilities of the combat aircraft and others, not so much. Regardless of preference, when the aircraft are over the battlefield, players will need to use their anti-aircraft as it was used historically in order to protect their headquarters and artillery, lest they become disrupted and less effective.
With regard to the fourth goal, it becomes apparent as one scours the official US Army history of the Bulge---plus every other volume on the subject and the OCMH Manuscripts---that the opponents knew little of what was happening on the other side of the front line during the last half of December, 1944. This environment must be designed into the game, such that movements and reactions are reasonably based upon what the commanders knew at the time, and not what the wargamer knows as history and not what the wargamer knows with his perfect intelligence of the situation on the game map.
With further regard to the last goal, it was possible to reproduce the ebb and flow of the battle after incorporating two design characteristics discussed below, atmospheric fog and fog of war, which enabled the attainment of a time line that somewhat reflects history.
Atmospheric Fog. Reduced zones of control or none at all---yow! American players are uneasy without zones of control; but, it works both ways, because it is difficult to eliminate retreat routes when there are no ZOCs. On the other hand, sometimes it was foggy and sometimes it was not. Worse, the atmospheric conditions were not uniform throughout the Ardennes---this was evident in the historical accounts. A British historian, the author of Steel and Snow, writes "The Ardennes has a quirky microclimate and conditions can vary rapidly over a few miles" and "even today, a visitor to the Ardennes may be struck by the region's quirky microclimate..."
The geography of the Ardennes is diverse for such a confined area. In the 6th Panzer Army Area, north of Malmedy, an elevated forest with poor drainage is encountered, the Hohes Venn. Just a few miles to the south, in the 5th Panzer Army Area, east of the Our River, there is the Schnee Eifel, or the Snow Mountains, where the US 106ID was trapped. There was fog and snow in the Schnee Eifel every day from 16Dec through 22Dec. In the center of the Ardennes is the open country leading to Bastogne, with different ground-air effects due to less forestation. Southeast of Bastogne in the 7th Army Area is "Little Switzerland," which generates its own weather patterns. Northwest, southwest and west of Bastogne the land again is heavily forested, but then again you breakout into more open country of the Famenne, also with different ground-air effects due to less forestation.
In summary, in order to include the first aspect of uncertainty mentioned above, Atmospheric Fog, the conditions will vary in different areas of the battlefield. For convenience, these areas coincide with the Army Boundaries. The atmospheric conditions can be different in each German Army Area, or they can be the same---one never knows.
Fog of War. The historical incidents reflecting the Fog of War are beyond counting. Players will encounter many of such fog of war concepts, because they have been written into the OOB. This was done in order to reproduce the lack of local intelligence on the battlefield in Dec 1944 and to circumvent the perfect intelligence inherent in wargames. For example, a recon detachment of the US 2nd Armored Division unexpectedly bumped into tanks of the 2nd Panzer Division at Haid, near Haversin, on 23Dec. Thus, the proximity of the 2AD became known to the Germans and this disclosure prompted MG Harmon to ignore 7 Corps plans, short circuit preparations and immediately go on the offensive. Scenario rules will explain why units must follow certain movement and deployment rules, despite the fact that the war gamer wants or needs to send them somewhere else. On the other hand, if an enemy war gamer is significantly outperforming the historical performance, there will be triggers that will allow his opponent to make decisions to alter the commands of his historical counterparts.
The Design of Uncertainty. So, by including fog of war concepts along with atmospheric fog concepts, we have designed a level of uncertainty into the game that mirrors the uncertainty of events in Dec44, while maintaining some semblance of the historical time lines. Participants will be constrained to a degree by what the commanders knew in 1944 and how they reacted to that knowledge---in this manner, perfect intelligence is imperfectly attenuated.
Abbreviations
Allied Army Abbreviations
1A US 1st Army; 3A US 3rd Army; 3C US 3rd Corps; 5C US 5th Corps; 7C US 7th Corps; 8C US 8th Corps; 12C US 12th Corps; 18C US 18th Corps; 30C British 30th Corps; AB Airborne Division; AD Armored Division; Bde Brigade; Bn Battalion; Co Company; CP Command Post; DISP Dispersed; Div Division; FA Field Artillery; FAG Field Artillery Group; Grp Group; HQ Headquarters; ID Infantry Division; I-R Intelligence and Recon; Lux Luxembourg; Nor Norwegian Americans; PR Patton's Relief; Rgr Rangers.
German Army Abbreviations
5PzA German 5th Panzer Army; 6PzA German 6th Panzer Army; 7A German 7th Army; 1SSD 1st SS Panzer Division; 1SSK 1st SS Panzer Corps; 2SSK 2nd SS Panzer Corps; LIII German LIII Corps; LVIII German LVIII Corps; LXVI German LXVI Corps; LXVII German LXVII Corps; LXXX German LXXX Corps; LXXXV German LXXXV Corps; XLVII German XLVII Corps; Bde Brigade; Bn Battalion; Div Division; Co Company; FA Field Artillery; FE Fuhrer Escort; FEB Fuhrer Escort Brigade; FGB Fuhrer Grenadier Brigade; FJ Fallschimjager; Fuhr Fuhrer; FUS Fusilier; HQ Headquarters; KG Kampfgruppe; KGC Kampfgruppe Cochenhausen; KGP Kampfgruppe Peiper; NW Neberlwerfer; PG Panzer Grenadier; Pz Panzer; PzJ Panzerjager; StM Sturm Morser; StG Sturmgeschutz; StPz Sturm Panzer; StuG Sturmgeschutz; VAK Volks Artillerie Korps; VDH Von Der Heydte; VG Volks Grenadier.
Counter Attribute Abbreviations
CF Combat Factor; DF Defense Factor; ER Effective Rating (morale); H Horse-drawn; MF Movement Factor.
Weapon Abbreviations
AA Anti Aircraft; AAA Anti Aircraft; AFV Armored Fighting Vehicle; Arty Artillery; AW Automatic Weapons; Btrs Batteries; CM Chemical Mortar; Comp Composite; G Gun; H Howitzer; Hvy Heavy; K Kanone (Gun); Lt Light; M Mortar; Med Medium; MG Machinegun; Pdr Pounder; SPA Self Propelled Artillery; TD Tank Destroyer.
Game Turn Abbreviations
AF Afternoon Turn; EV Evening Turn; MO Morning Turn; PD Pre-Dawn Turn.
Game Play Abbreviations
Adv Advance; AO Area of Operations; CA Counterattack; Comm Command or Communication; Const Construction; CRT Combat Results Table; DRM Die Roll Modifier; ENG "Engaged" - as a combat result; ENG Engineer - on Ferry counter; EOT End of Turn; IP Improved Position; OOA Order of Appearance; OOS Out of Supply; PREP Prepared; SP Strong Point; Strat Strategic; ToT Time on Target; US United States; ZOC Zone of Control.