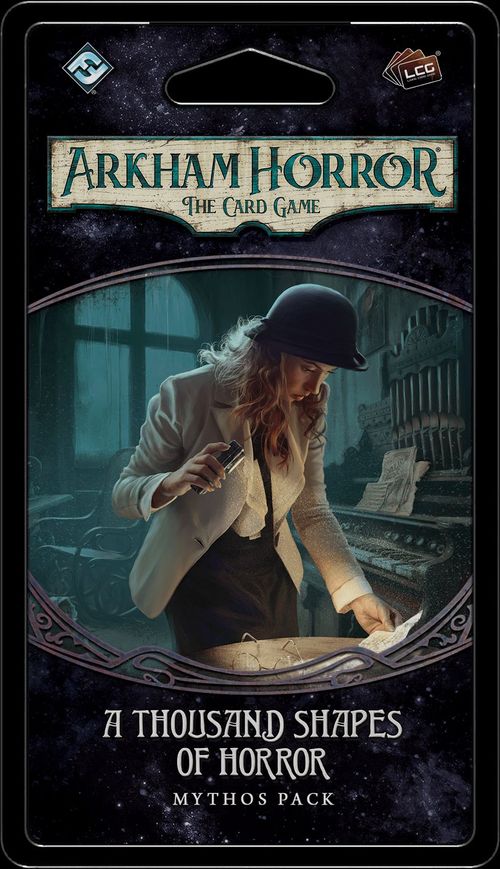
Arkham Horror: The Card Game – A Thousand Shapes of Horror: Mythos Pack
Arkham Horror: The Card Game – A Thousand Shapes of Horror: Mythos Pack Rulebook
Table of Contents
Table of Contents
Additional Rules and Clarifications
Alert
Each time an investigator fails a skill test while attempting to evade an enemy with the alert keyword, after applying all results for that skill test, that enemy performs an attack against the evading investigator. An enemy does not exhaust after performing an alert attack. This attack occurs whether the enemy is engaged with the evading investigator or not.
Story Cards
Story cards serve as an avenue for additional narrative and typically appear as the reverse side of another scenario card. When you are instructed to resolve a story card, simply read its story text and resolve its game text.
The Trial of Kaman-Thah
If you parleyed with Kaman-Thah, read the following:
"Your mind is strong," the guardian admits, "but are you ready to shed your concept of truth? Of reality? If so, alter your clothing." You protest out of confusion. "This is a land of wills," the priest continues. "If your resolve is truly trong [sic] enough, prove it to me." You close your eyes and imagine a different outfit, straining to recall its texture, its color, its smell. Each and every thread of fabric. When you open your eyes, you are wearing it.
"Good," Kaman-Thah says, stepping aside.
Add this card to the victory display.
If you defeated Kaman-Thah, read the following:
The priest entertains your silly notion of resistance for a few moments before his eyes turn fiery. He is completely unharmed. "You are fierce. But ferocity will only get you so far. You may pass, but heed me: Not all problems can be solved with violence."
Add this card to the victory display.
Swarming X
An enemy with the swarming X keyword is actually a pack of enemies operating in unison. After you put an enemy with the swarming X keyword into play, place the top X cards of your deck facedown underneath the enemy as swarm cards, without looking at them. The enemy they are underneath is called the "host enemy." Some scenario card effects may also instruct a player to add swarm cards to an enemy. This is done using the same process.
- If it is ever unclear which investigator should add swarm cards, the lead investigator does so.
- Each swarm card underneath the host enemy acts as a separate instance of that enemy for most purposes. Each swarm card has the same values and text as its host card. (For example, if an investigator is engaged with a host enemy with 2 swarm cards underneath it, that investigator is engaged with 3 enemies in total.)
- Each swarm card attacks separately when enemies attack during the enemy phase. Once the host enemy and all of its swarm cards have attacked during this step, exhaust all of them.
Scenario II–B: A Thousand Shapes of Horror
Intro 1: To stop the merging between the land of dreams and the waking world, you decide to force your way into the "Dreamlands"—as your new companion Randolph calls the dimension—in your physical body, instead of traveling there in your sleep. "While there are many dangers to this method of travel, I think it is better than the alternative," Randolph claims. "If we venture there in our sleep, we may become trapped like your companions, unable to wake." You agree: you can do little good trapped on the other side, especially if you aim to help your dreaming companions.
"Our first step is to find a key. Even in places where the Dreamlands borders the waking world, one cannot simply walk between them. I once possessed a key to the Gate of Dreams, but I lost it years ago and have been unable to find it since," he laments.
Check Campaign Log.
- If the black cat is at your side, proceed to Intro 2.
- Otherwise, skip to Intro 3.
Intro 2: The black cat, perched on a nearby park bench, glares at Randolph with narrow, disdainful eyes. "You lost the key to the Dreamlands?"
You share in the cat's skepticism. Randolph sighs and shakes his head. "Let me explain," he says to you. "It is not a physical key. It never was. The 'key' was the sense of wonder, fantasy, and creativity that sparked my imagination when I was young. These are things we do not value in maturity. It is only natural the key to these kinds of dreams should be lost with age."
"What foolishness!" the black cat scolds. "It is not 'maturity' to leave one's imagination behind. You have abandoned the best part of you. You are more a mewling kitten now than any child I have ever met."
"Perhaps you are right," Randolph agrees, downcast. "I forced myself to believe that earthly concerns were more important than juvenile fantasies of gilded spires, perfumed jungles, and twilight realms…and now I fear I shall never see such wonders again." He turns back toward you, his eyes full of regret. "And worse, I will be unable to guide you."
Skip to Intro 4.
Intro 3: You go through the usual motions: "When was the last time you saw it?" "Where was the last time you used it?" and the like.
Randolph sighs and shakes his head. "You do not understand. It is not a physical key. It never was. The key was the sense of wonder, fantasy, and creativity that sparked my imagination when I was young. These are things we do not value in maturity. It is only natural the key to these kinds of dreams should be lost with age."
Proceed to Intro 4.
Intro 4: You ask what might have turned Randolph's mind away from the fantastical and toward more practical concerns. He thinks for a brief time, mulling over the possibilities. Then, his eyes go wide as he realizes something important. "There was an incident many years ago. It was the last time I was involved with something supernatural—that is, before today," he explains. "I met a friend of mine—Joel Manton—in the graveyard next to the old abandoned house in the Merchant District. The one they call the Unnamable. I didn't want to believe that it was truly haunted, as the stories told, but in merely repeating the legend, I drew the creature's ire."
You ask of the creature, and Randolph closes his eyes as a violent shudder courses up his spine. "It cannot be described. All I know is that we barely survived. It was my fault Joel was hurt. From that day forth, I have had no desire to delve into the supernatural or the superstitious. Not because I did not believe, but because I was frightened. Is that why the key eludes me? Is that why I can no longer dream?" The realization hits him, clear as day. "I know where we have to go. That is where I lost the key. That must be where it can be regained!" he exclaims, wide-eyed.
As Randolph frantically tries to hail a taxicab, you realize where he means to go: to the house without a name, where the indescribable creature that still haunts his memory resides…
Setup
- Gather all cards from the following encounter sets: A Thousand Shapes of Horror, Creatures of the Underworld, Merging Realities, Chilling Cold, Ghouls, Locked Doors, and Rats. (The printed guide shows these sets by icon.)
- Put the following locations into play: Burial Ground, Front Porch, Upstairs Hallway, both Downstairs Doorways, and both Upstairs Doorways (see Suggested Location Placement below).
- Each investigator begins play at the Burial Ground.
- Set the following cards aside, out of play: the Attic location, the Unmarked Tomb location, all 6 Mysterious Stairs locations, all 4 Endless Descent treacheries, and The Silver Key story asset.
- Shuffle the remainder of the encounter cards to build the encounter deck.
Suggested Location Placement: the printed guide shows a placement diagram of the Upstairs Doorway, Upstairs Hallway, Downstairs Doorway, Front Porch, Burial Ground and Upstairs Doorway cards, with the Upstairs Hallway in the upper centre, the Front Porch and both Downstairs Doorways along the bottom row, and the Burial Ground below the Front Porch. The diagram is an image and is not reproduced as text.
The printed text of the Upstairs Hallway location reads: "A malodorous presence prevents you from venturing upstairs. You cannot enter the Upstairs Hallway."
Standalone Mode
If you are playing in Standalone Mode and do not wish to refer to any other setups or resolutions, you may use the information below when setting up and playing this scenario:
- Assemble the chaos bag using the following tokens: +1, 0, 0, –1, –1, –1, –2, –2, –3, –4, 2 Skull, 1 Cultist, 2 Elder Thing, 1 Tablet, and 1 Elder Sign. (The printed guide shows the symbol tokens as icons; they are named here after the standard chaos token symbols.)
- The black cat is not at your side.
DO NOT READ until the end of the scenario
- If no resolution was reached because each investigator was defeated: Proceed to Resolution 2.
Resolution 1: This place is nothing like the mystical forests, charming medieval villages, and majestic panoramas of which Virgil Gray wrote in his stories. No, far from it: this cold, bleak gulf eats away your hope and replaces it with a feeling of empty, meaningless dread. You ask Randolph if this is the way to your comatose companions. You almost hope that you are traveling in the wrong direction, so you can leave this awful place behind.
"I do not know," he replies, peering out one of the windows along the stairway. "We have traveled beyond the waking world, but this is the lower plane of the Dreamlands, known as the Underworld. It is an inhospitable place. Many of the creatures we have seen crossing over into our world come from this region. Perhaps our key knew this was our true destination?" Your guide examines the arcane key you found in the abandoned house, running his fingers over its arabesques as though recalling its shape, its weight, its texture. His eyes water with the depth of his loss.
You offer to hold the key for him, which yanks him from his private thoughts. "Ah. Yes, perhaps that would be best," he says, handing the delicate artifact to you. It is surprisingly heavy for something that, according to Randolph, is not real.
With Randolph and the Silver Key in tow, you continue your descent anew. The Underworld may or may not be where your companions are, but if the creatures invading the world of the waking are indeed from this place, then perhaps here you can find answers.
- In your Campaign Log, record Randolph survived the descent.
- In your Campaign Log, record the investigators possess the Silver Key. Any one investigator may choose to add The Silver Key (Key to the Gate of Dreams) to their deck. This card does not count toward that investigator's deck size.
- Each investigator earns experience equal to the Victory X value of each card in the victory display.
- Your body now walks within the slumbering Dreamlands. Add 1 Skull token to the chaos bag, for the remainder of the campaign.
- If you are playing The Web of Dreams as a four-part campaign, proceed to Scenario 3–B: Point of No Return.
- If you are playing The Dream-Quest and The Web of Dreams as an interconnected eight-part campaign…
- …and you have not yet played Scenario 2–A: The Search for Kadath, proceed to that scenario.
- …and you have already played Scenario 2–A: The Search for Kadath, proceed instead to Interlude II: The Oneironauts.
Resolution 2: Your last waking sensation is the rush of noxious, frigid air as you are knocked to the ground by the thrashing, monolithic abomination with no name. The wind is pulled out of your lungs. You cannot scream. You grasp desperately at the ground as the creature tears at your skin and tramples your bones. Somehow you wrench yourself free, escaping through the vortex of bitter, withering wind surrounding the creature. You hear the scrape of peeling plaster. Debris whips past your head. A loose brick hits your shoulder. You wonder if there will even be a building left to tremble at when this is all over.
- If the investigators "recovered a strange key," proceed to Resolution 3. Otherwise, skip to Resolution 4.
Resolution 3: You barely hear Randolph shouting to you over the maelstrom of ice-cold air that surrounds you. Despite all odds, you somehow reach him, the indescribable monstrosity hot on your heels. Randolph wrenches open your hand, grabs the key you found in the unnamed house, and clutches it tightly. He closes his eyes and whispers something inaudible. As the abominable torrent crashes into you, everything goes black.
When you awaken, you lie on a flat stone platform overlooking a steep, straight staircase that descends into unknown depths. Behind you, the stairway curls upward into a stone spire that ascends into a hazy mist. In both directions, the entirety of the cavern is dimly lit with grey phosphorescence. Randolph pulls you to your feet. "That was a close one," he admits. "I never wish to take a journey like that again." You ask where you are, and he bites his lip, looking out over the bleak, desolate scenery.
"This is the lower plane of the Dreamlands, known as the Underworld. It is an inhospitable place. Many of the creatures we have seen crossing over into our world come from this region. Perhaps our key knew this was our true destination? I think…I think it is gone now," your guide explains.
You are thunderstruck. Randolph grits his teeth at your reaction and looks away in shame. "Forget it. We no longer need it anyway. Let's go." His curt reply echoes off the stone steps. With Randolph leading the way, you continue your descent anew. The Underworld may or may not be where your companions are, but if the creatures invading the world of the waking are indeed from this place, then perhaps here you can find answers.
- In your Campaign Log, record Randolph survived the descent.
- Each investigator earns experience equal to the Victory X value of each card in the victory display.
- Your body now walks within the slumbering Dreamlands. Add 1 Skull token to the chaos bag, for the remainder of the campaign.
- If you are playing The Web of Dreams as a four-part campaign, proceed to Scenario 3–B: Point of No Return.
- If you are playing The Dream-Quest and The Web of Dreams as an interconnected eight-part campaign…
- …and you have not yet played Scenario 2–A: The Search for Kadath, proceed to that scenario.
- …and you have already played Scenario 2–A: The Search for Kadath, proceed instead to Interlude II: The Oneironauts.
Resolution 4: In the debris, you spot it: something glinting within the maelstrom of ice-cold air and dust, something that calls to you, whispers your name. You barely hear Randolph shouting as the indescribable monstrosity crashes into him. Despite all odds, you somehow reach the rubble that was once the attic of the house with no name. You realize now what that elusive glimmer was: the polished reflection of a bright silver key. "Use it!" Randolph screams between cries of agony. The abomination climbs atop his body. "Use it now, while you ca—"
The thing cuts Randolph's cry short as it envelops his body. You clutch the key tightly in your hand and shudder as you watch a thousand shapes of horror devour Randolph whole. You think of your companions, trapped somewhere in a perilous dream far from home, and the key's glow intensifies, swallowing you as completely as the creature swallowed Randolph. Everything goes white.
When you awaken, you lie on a flat stone platform overlooking a steep, straight staircase that descends into unknown depths. Behind you, the stairway curls upward into a stone spire that ascends into a hazy mist. In both directions, the entirety of the cavern is dimly lit with grey phosphorescence. You search for the Silver Key, but it has vanished. There is no sign of Randolph Carter.
It is clear you are no longer in the waking world. Perhaps the key transported your physical body into the Dreamlands, as Randolph claimed it could. But this place is nothing like the mystical forests, charming medieval villages, and majestic panoramas of which Virgil Gray wrote in his stories. No, far from it: this cold, bleak gulf eats away your hope and replaces it with a feeling of empty, meaningless dread. You peer once more up the countless steps behind you. It seems you have no choice now but to move on, deeper into this desolate and perilous realm.
- In your Campaign Log, record Randolph did not survive the descent. If an investigator's deck contains Randolph Carter (Chained to the Waking World) (The Dream-Eaters card #79), remove him from that deck for the remainder of the campaign.
- Each investigator earns experience equal to the Victory X value of each card in the victory display.
- If you are playing The Web of Dreams as a four-part campaign, proceed to Scenario 3–B: Point of No Return.
- If you are playing The Dream-Quest and The Web of Dreams as an interconnected eight-part campaign…
- …and you have not yet played Scenario 2–A: The Search for Kadath, proceed to that scenario.
- …and you have already played Scenario 2–A: The Search for Kadath, proceed instead to Interlude II: The Oneironauts.