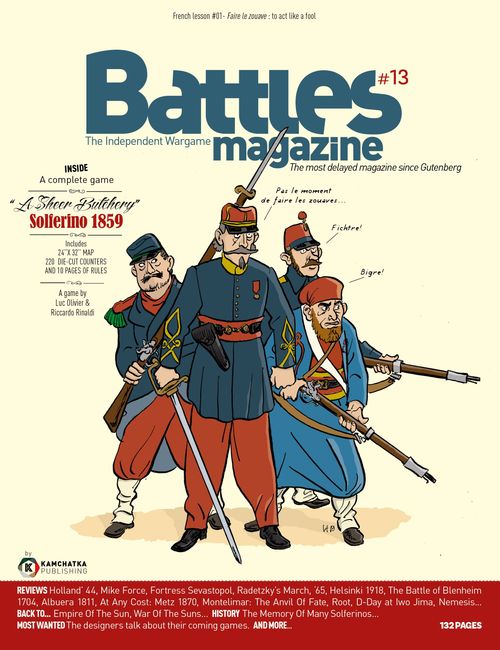
A Sheer Butchery: Solferino 1859
A Sheer Butchery: Solferino 1859 Rulebook
Table of Contents
Table of Contents
- 1. Introduction
- 2. Cohesion Tests
- 3. Stacking
- 4. Orientation
- 5. Zones of Control
- 6. Sequence of Play
- 7. Weather
- 8. Command Phase
- 9. Initiative Phase
- 10. Operations Phase
- 11. Rally
- 12. Special Capacities of Formation Commanders
- 13. The Battle of Solferino
- Combat Results Table
- Weather Table
- Terrain Effects Table
1. Introduction
1.1 Scale
One game turn is equivalent to 1 hour of real time. A hexagon represents about 600 metres. One level of elevation represents about 30 metres. The units are brigades (and sometimes detachments); 1 step loss represents between 500 to 600 men.
1.2 Counter Types
1.2.1 Commanders in Chief
- Napoleon III commands the French units. Victor Emmanuel commands the Piedmontese units. Franz Josef commands the Austrian units.
- The number on their counters is their Reaction Value.
1.2.2 Formation Commanders
These command corps (or divisions for the Piedmontese). Their counters have a Command Value and a Combat Bonus.
1.2.3 Combat Units
- The upper number is the Combat Value. The lower number (in red) is the Cohesion Value, which also represents the number of step losses a unit has.
- Cavalry units with a red Combat Value are heavy cavalry units. The third number on artillery units (in a black circle) indicates the unit's range in hexagons.
- Disorganised combat units are flipped onto their reverse side.
- Each combat unit has a coloured band to indicate its parent formation. Exception: detached units do not have a coloured band.
Note: the two Austrian armies have a slightly different background colour. This is purely for information, and has no effect on the game.
1.2.4 Formation Markers
- Formation markers are drawn at random, and allow the activation of formations.
- At the start of each turn, the players have available both the markers of those units already on the map, and those arriving as reinforcements that turn.
Note: The detached units are activated when the Det. Units Formation marker is drawn. (also: 10.1.3)
1.3 Fractions
All fractions are rounded down to the next whole number.
2. Cohesion Tests
- When a Cohesion Test is required the player rolls 1D6, and adds the Cohesion Value of the unit concerned, plus any possible modifiers. If the result is 6 or more, the test has been passed. If it is less than 6, the unit has failed the test.
- The modifiers for a Cohesion Test are:
- +1 if the unit is occupying terrain with a protection value of 2 or more (see TET.).
- +1 if the unit is stacked with its Formation Commander or its Commander in Chief
- -1 per step lost
- -1 if at least one enemy unit occupies one of the unit's flank hexes
- -1 if the unit is not in command
- -1 if the weather is "heat"
- -1 if the unit's formation is broken
- And for Rally Tests only:
- +1 if the unit is adjacent to its Formation Commander or its Commander in Chief
- -1 if the unit is in range of, and in the line of sight of, an enemy artillery unit
3. Stacking
- Units from the two different sides may not be in the same hex.
- A hex may contain no more than one infantry or one cavalry unit at a time. However a player may stack an infantry unit with an artillery unit, or a cavalry unit with an artillery unit, or stack two artillery units together.
- Stacking rules only apply at the end of a unit's movement (i.e. a unit may temporarily exceed stacking limits when passing through a hex that already contains friendly units).
- The Commander in Chief and Formation Commander counters do not count for stacking.
- In case of overstacking, slap your opponent.
4. Orientation
- Each combat unit must be oriented towards a hex side. The three hexes facing the unit are its front hexes; the three others are its flank hexes. Exception: a unit in a village or town does not need to be oriented. The six hexes that surround it are all front hexes.
- A unit may change orientation as often as desired and at any time while moving.
- A unit may change orientation by one hex side during an advance or retreat after combat.
- An artillery unit may change its orientation by one hex side before firing a barrage, but not before carrying out defensive fire.
5. Zones of Control
- Each combat unit (even disorganised) projects a Zone of Control (ZoC) into its front hexagons. Exception: a unit may not project a ZoC across a 'steep slope' hex side.
- A unit that moves into an enemy ZoC must stop its movement.
- A unit may not move directly from one enemy ZoC to another during its movement phase.
- Leaving an enemy ZoC costs half the movement points of a unit that is in command and not disorganised, and all the movement points of a unit that is out of command or disorganised.
- A disorganised cavalry unit may not enter an enemy ZoC. Other disorganised units may do so.
- A ZoC cuts lines of command (see 8.2 and 10.1.2) unless the hex is occupied by a friendly unit.
- A unit that retreats into an enemy ZoC after combat takes a step loss.
6. Sequence of Play
A - Weather Phase
B - Command Phase
- Move Commander(s) in Chief
- Check lines of command to Formation Commanders
- Move Despatch Riders
- Initiative
C - Operations Phase
Players activate their formations one after another, according to the following sequence:
- Activate the Formation Commander
- Check unit command status
- Artillery unit(s) barrage fire
- Move units (including artillery units that have fired)
- Combat.
The operations phase finishes when all the formation markers have been drawn.
D - Rally Phase
7. Weather
- The heat greatly influenced the battle. The game starts with 'Weather: Cool', and can move to 'Weather: Heat' or 'Thunderstorm'.
- From Turn 8 (12:00), one of the players rolls a die, adding 1 if the preceding turn was 'Weather: Heat' and reads the result on the weather table.
- Effects of a 'Weather: Heat' result: infantry units lose 1 movement point, cavalry units lose 2 movement points, and all Cohesion Tests suffer a penalty of -1.
- Effects of a 'Thunderstorm' result: the game stops immediately. Players then check the Victory Conditions.
8. Command Phase
8.1 Commanders in Chief Movement
- The Commanders in Chief present on the map may move (exception: see 13.1) beginning with Napoleon III, Victor Emmanuel, then Franz Josef. This is the only moment of the turn when they may move.
- To be able to move, a Commander in Chief must pass a reaction test. The player rolls a die and adds the Reaction Value of the Commander in Chief. If the result is 6 or more, he may move. Otherwise he remains where he is. Exception: if the Commander in Chief is in an enemy ZoC, he may move automatically without the need to undergo a reaction test.
- A Commander in Chief may move 8 cavalry movement points. He may not enter a hex adjacent to an enemy unit, unless the hex is occupied by a friendly unit.
8.2 Check Lines of Command to Formation Commanders
- To be able to direct a Formation Commander, the Commander in Chief must be able to trace a line of command of 8 cavalry movement points to him; 10 if the Commander in Chief is in a town.
- This line of command may not pass through an enemy ZoC unless the hex is occupied by a friendly unit.
- If a Formation Commander cannot be reached by a line of command, an 'OOC' (Out Of Command) marker is placed on his counter and his formation is deemed 'Out of Command'.
8.3 Despatch Rider
- Each Commander in Chief has a 'Despatch Rider' marker that is placed underneath his counter.
- If a Formation Commander cannot be reached by a line of command, the Commander in Chief can decide to send his Despatch Rider to him. The Despatch Rider may move 8 cavalry movement points and may not enter an enemy ZoC unless the hex is occupied by a friendly unit.
- The Despatch Rider finishes his movement whenever the player wishes, or when he has expended all his MPs, and may continue moving next turn during the Despatch Rider movement phase.
- When the Despatch Rider has reached the Formation Commander, the OOC marker is removed and the formation is deemed to be in command for that turn.
- The Despatch Rider may continue his movement if he still has MPs remaining, or he may wait until the following turn to continue moving. He must however return to his Commander in Chief before being used again.
- If an enemy unit enters a hex with a Despatch Rider in it, the Despatch Rider is immediately replaced below the Commander in Chief's counter.
9. Initiative Phase
- Each player rolls 1D6. The Franco-Piedmontese player adds 2 to his roll when Napoleon III is on the map. The player with the higher result wins the initiative for the turn.
- The player who has won the initiative chooses a Formation Marker from those available (see 1.2.4). This formation will act first during the operations phase. All the remaining markers are placed in an opaque container.
10. Operations Phase
- Formations act in turn. The first to act is the one chosen during the Initiative Phase. Once it has completed its operations, the players choose a formation marker at random from the opaque container, and activate their formations until there are no formation markers left.
- When a formation has been activated, the player follows the sequence outlined below:
Activation Phase
-
Activate Formation Commander
-
Check units' command status
-
Barrage fire by artillery units
-
Move units (including those artillery units that have fired)
-
Combat.
-
Once a formation has finished its activation, a new marker is drawn from the container, or players move to the Rally Phase if there are no markers remaining.
10.1 Leader Activation and checking Unit Command Status
10.1.1 Leader Activation
- If the Formation Commander is commanded by his Commander in Chief, he is automatically activated; move on to 10.1.2
- If the Formation Commander is under an 'OOC' marker, he must pass an activation test. The player rolls 1D6 and adds the commander's command value. If the result is 6 or more, the formation may act normally (10.1.2) and the OOC marker is removed from the commander. Otherwise the formation remains out of command, all its units are out of command (see 10.1.4), and the Formation Commander may not move during this movement phase.
10.1.2 Checking Unit Command Status
- A unit is in command if it can trace a command line of 6 cavalry MPs, not passing through an enemy ZoC unless that hex is occupied by a friendly unit, to its Formation Commander - providing the latter does not have an OOC marker.
- A unit that cannot trace this line is out of command.
10.1.3 Checking the Command Status of Detached Units
- Detached units do not have a Formation Commander.
- They are considered to be in command if they are in direct command of the Commander in Chief (see 10.1.4) or in command range (6 cavalry MPs) of a Formation Commander belonging to their own side that does not have an OOC marker.
10.1.4 Out of Command Units
- A Commander in Chief may directly command a number of units out of their own Formation Commander's command, equal to his reaction value (4 for Napoleon III, 1 for Victor Emmanuel, and 0 for Franz Josef). These units must be in command range of the Commander in Chief (8 cavalry MPs). These units are considered to be in command and act as such once their formation is activated.
- An out of command unit may not enter an enemy ZoC. It may only move (i) half of its movement potential, while (ii) trying to get closer to its Formation Commander; it may not move away from its Formation Commander. Exception: the second restriction does not apply to detached units.
- An out of command unit in an enemy ZoC may either attack with a -1 penalty, or use all its MPs to disengage.
10.2 Artillery Barrage Fire
Note: Artillery attached directly to brigades is included in the counters' values and is not otherwise represented. Only corps or army artillery units are represented.
- Artillery units have a range that extends 2 hexagons through their front hexes for Austrian units, or 3 hexes for French units, as indicated on the counter (number in black circle).
- Artillery units may only fire once per activation phase.
- An artillery unit may change its orientation by one hex side before barrage fire.
- Barrage fire may hit any hex within range and in its line of sight.
10.2.1 Line of Sight
- Town, village and wood hexes, and hexes containing a friendly or enemy unit, block lines of sight (LoS). They do not block it if the LoS only passes along the edge of such a hex, and if the adjacent hex is clear of any obstacle.
- This type of hex also blocks LoS in the same manner if it is situated on a lower level to the artillery unit but is on the same level as, and adjacent to, the target.
- LoS is blocked if it has to cross a hedge or a ridge hex side, but not if it runs along the hedge/ridge hex side.
- A level of elevation blocks LoS if it is:
- higher than that of the artillery unit and of the target.
- higher than that of the target and the same as that of the artillery unit.
- higher than that of the artillery unit and the same as that of the target.
- LoS is not blocked by a level of elevation if it passes along the hex side and if the adjacent hex is clear of any obstacle.
- LoS is never blocked if the artillery unit and the target are adjacent, even across a steep slope, a hedge or a ridge.
10.2.2 Barrage Fire Procedure
- Barrage fire may only target one unit. If the target hex contains more than one unit, the player must choose which one he is targeting.
- The player rolls 1D6 on the Combat Results Table as explained in 10.4.3 and applies the results in the same way. Exception: barrage fire cannot cause any retreat after combat (see 10.4.5).
10.3 Movement
- Commanders in Chief may move 8 cavalry MPs
- Formation Commanders may move 6 cavalry MPs.
- Cavalry units, 6 MPs, but only 3 MPs if they wish to attack (see 10.4.10).
- Infantry units 4 MPs.
- Artillery units 3 MPs.
- Units move one at a time, expending the number of MPs per hex as indicated on the Terrain Effects Table.
- A unit may ignore stacking restrictions while moving through a hex, so long as those restrictions are followed once the unit's movement has finished.
10.4 Combat
A formation's combats take place once all movement is completed. Combats are resolved in the order chosen by the attacker, following the sequence below:
- Declaration of all assaults
- Assault resolution:
- Defensive fire
- Attack
10.4.1 Assault Declaration
- Only infantry and cavalry units, along with Formation Commanders, may take part in an assault.
- A unit may only assault enemy units in its front hexes.
- An assault is never obligatory (i.e. a unit may have enemy units in its front hexes, yet not assault).
- If a unit assaults an enemy hex, all the enemy hexes in its front hexes must be assaulted during this activation, either by it or another unit from its formation.
- If an assault hex contains several units, the attacker chooses which unit he is attacking.
- A unit may assault several of its front hexes. The combats take place separately, with the owning player dividing his combat value between the different attacks (reminder: a unit can attack with a combat value of 0). If there is an advance after combat, it is only made once the unit has resolved all of its attacks.
- Several units may assault the same hex. In that case, the attacking player may, or may not, declare a coordinated assault (see 12.1). If not, each unit assaults separately and individually.
10.4.2 Assault Resolution
Assaults are resolved one by one, beginning with defensive combat, followed by the attack.
A - Defensive Combat
- Each assaulted unit may defend itself once per assault, following normal combat resolution (see 10.4.3) with the following distinctions:
- if the attacker is attacking through a flank hex, the defending unit's combat value is halved.
- if the defending unit is being assaulted by several units in a coordinated assault, it must divide its combat value between all the different assaulting units (reminder: a unit can fight with a combat value of 0)
- all the modifiers listed in the Combat Results Table are applied to the defensive combat, with one exception: the terrain value of the attacking unit is always considered to be 1.
- A unit that is assaulted by more than one unit in non-coordinated assaults, defends against each attack using its full (i.e. current) strength.
- The results of defensive combat are applied before resolving the attack.
B - Attack
- Those units that can still attack, attack.
- The results are applied.
10.4.3 Combat Procedure
- The attacker takes the combat value of his unit and divides it by the terrain value of the target unit's hex (reminder: for defensive combat, this value is always 1). He then adds or subtracts any possible column modifiers, as listed below the Combat Results Table. This figure gives the column to be used on the Combat Results Table.
- The player rolls 1D6, applies any possible die roll modifiers listed below the Combat Results Table and reads off the result on the table.
- The results are applied immediately.
10.4.4 Artillery and Defensive Combat
- An artillery unit on its own in a hex is automatically eliminated if the unit assaulting it survives defensive combat.
- Once per activation when resolving defensive combat (and once only), the combat value of an artillery unit may be added to that of a unit belonging to its formation that is being assaulted, if the artillery unit itself is not being assaulted. For this to happen the assaulting unit must be in range and in its LoS. The artillery unit may not change orientation before this defensive supporting fire.
10.4.5 Combat Results
- X: nothing happens and the war continues.
- T: the unit must undergo a cohesion test. If successful, nothing happens. If the test is failed, the unit is disorganised and suffers a D result.
- D: the unit is disorganised, and is flipped to its reverse side. The unit retreats one hex (see 10.4.6) unless the result was occasioned by an artillery barrage, or if the unit is in a town. If it was already disorganised, it remains disorganised, but also takes a step loss and the appropriate 'Loss' marker is placed on it (see 10.4.9).
- D+1: same result as above, with an extra step loss.
10.4.6 Retreat after Combat
- A unit that has to retreat automatically does so towards its own map edge; West for the French and the Piedmontese, and East for the Austrians.
- A unit that retreats into an enemy ZoC incurs a step loss.
- A unit may retreat through several hexes containing friendly units until it finds a hex that satisfies stacking restrictions. In that event all the units that were in the hexes traversed in this manner also become disorganised, if they were not already. If they were already disorganised there is no effect.
- A unit that cannot retreat incurs a step loss.
- An artillery unit stacked with a friendly unit that retreats is immediately eliminated (unless the enemy unit does not advance into the hex - see 12.2).
- Retreats are managed by the owning player, according to the following priorities:
- avoid enemy ZoCs
- retreat into terrain with the lowest MP costs.
- A unit may always change orientation by one hex side (and one only) following retreat after combat.
10.4.7 Advance after Combat
- When a defending unit retreats as a result of combat, one of the attacking units MUST advance into the vacant hex. Exception: Stand! (see 12.2).
- If several units took part in the attack (coordinated assault) and one of those units is a cavalry unit, that is the unit that must advance.
- A unit may always change orientation by one hex side (and one only) following advance after combat.
- A unit never advances after combat following defensive combat.
- An artillery unit never advances after combat.
- ZoC rules are ignored for advance after combat.
10.4.8 Retreat before Combat
- A unit may retreat one hex instead of performing defensive combat if it has as many or more MPs as the unit(s) that is/are attacking it.
- A unit that retreats and has the same, but not more MPs as the unit(s) attacking it, becomes disorganised, or incurs a step loss if it was already disorganised.
- A retreat cannot be made into an enemy ZoC.
- A unit that retreats may change orientation by one hex side.
- One of the attacking units may occupy the vacated hex, following the same rules as for advance after combat.
10.4.9 Step Losses
- A unit that incurs a step loss has the appropriate marker placed on it (-1 or -2).
- A unit that has incurred the same number of step losses as its cohesion value is eliminated.
- Each time a unit suffers a step loss, the 'Losses' marker for its formation is advanced one space to the right on the 'Losses Track'. When the marker arrives on the space corresponding to the number on the marker, it is flipped (it flips at 9) and placed in the 'Broken Formations' space. From its next activation onwards, until the end of the game, this formation will be in broken status (see 10.4.13).
Note: the losses of detached units are never tallied. These "formations" are never broken.
10.4.10 Cavalry and Combat
- A cavalry unit must get itself into order and charge in order to attack an enemy unit. Therefore it may only move 3 MPs if it wishes to attack.
- It defends as if it were an infantry unit.
- A cavalry unit always becomes disorganised after an attack, no matter the result. If the result of the defensive combat has already made it disorganised, it does not suffer an extra step loss. Exception: if the assaulted unit retreats before combat (see 10.4.8), the cavalry unit is not disorganised after its attack.
- A disorganised cavalry unit cannot assault. It defends as normal.
10.4.11 Commanders in Chief and Combat
- A Commander in Chief does not supply any combat bonus.
- A Commander in Chief always retreats if he is stacked with a unit that retreats before or after combat.
- A Commander in Chief may advance if he is stacked with a unit that advances after combat.
- A Commander in Chief is automatically eliminated if the unit(s) he is stacked with is/are eliminated.
- If, during the enemy's movement phase, the Commander in Chief is alone in a hex and adjacent to an enemy unit, he is immediately placed on the nearest friendly unit in terms of MPs.
- The death of a Commander in Chief can end the game or have consequences on the Victory Conditions (see 13.4).
10.4.12 Formation Commanders and Combat
- A Formation Commander stacked with a unit in defence or attack may add his combat bonus to the die roll.
- A Formation Commander may try to organise a coordinated assault (see 12.1).
- In both the above cases, the Formation Commander is considered to be participating in the combat.
- A Formation Commander does not supply his combat bonus to artillery fire.
- A Formation Commander always retreats if he is stacked with a unit that retreats before or after combat.
- A Formation Commander may advance if he is stacked with a unit that advances after combat.
- A Formation Commander is automatically eliminated if the unit(s) he is stacked with is/are eliminated.
- After a combat in which a Formation Commander has participated, the player rolls 2D6. On a roll of 12, the Formation Commander is eliminated.
- If an enemy unit enters the hex of a Formation Commander who is not stacked with a friendly infantry or cavalry unit, he is immediately eliminated.
- An eliminated Formation Commander's counter is immediately flipped to its 'Aide de Camp' side and it is placed on any unit of the formation that is still in play. The Aide de Camp becomes the new commander of the formation.
- An Aide de Camp does not supply any combat bonus, but in every other respect he keeps the special capacities of a Formation Commander (see 12).
- If an Aide de Camp is eliminated, the (same) counter is replaced on any unit of the formation that is still in play.
10.4.13 Broken Formations
- A formation's losses are carried over to the Losses Track. Once a formation has reached 50% losses (the figure on the Losses marker) the formation becomes broken.
- The units of a broken formation may not voluntarily enter a hex adjacent to an enemy unit.
- During their movement phase, the units of a broken formation must move towards their own map edge (West for the French and Piedmontese, East for the Austrians) or remain stationary if this is not possible.
- They must use their full movement allowance if possible
- The units of a broken formation suffer a supplementary penalty of -1 for their cohesion tests.
- The commander of a broken formation who fails his activation test may still move one hex.
11. Rally
- During the Rally Phase, a disorganised unit may try to reorganise itself (see modifiers p.2). It must undergo a cohesion test, remaining disorganised if it fails, or is flipped to its initial side if it passes.
- A rally test may not be attempted if the unit is in the ZoC of an organised enemy unit.
- Step losses may never be recovered.
12. Special Capacities of Formation Commanders
Formation commanders may use one of the following special capacities when they are activated.
12.1 Coordinated Assault
- If several units from the same formation are assaulting the same enemy hex, and if he is stacked with one of these units, the formation commander may attempt a coordinated assault. The player rolls 1D6, and adds the command value of the Formation Commander. If the result is 6 or more, the assault will be a coordinated assault. Otherwise, each unit assaults separately as normal.
- Faced with a coordinated assault, the defending unit must divide its combat value amongst all the units assaulting it (reminder: a unit can fight with a combat value of 0).
- The surviving units attack simultaneously, adding up their combat values.
12.2 Stand!
- A Formation Commander may prevent one (and only one) of his units in command from advancing after combat. To do this, the unit must undergo a cohesion test. If it passes the test, it remains where it is; if it fails, it advances into the vacated hex.
- The Formation Commander does not need to be either stacked with the unit in question or be adjacent to it.
12.3 Forced March
- A Formation Commander can order a forced march. All his units have 2 extra MPs. A unit that has used these 2 extra MPs must pass a cohesion test at the end of its movement, or become disorganised.
12.4 No Quarter!
- A Formation Commander may order one of his units in command to engage in a combat with no quarter when the assaults are being declared. The defensive combat and the attack are resolved with 2D6 instead of 1D6, using the higher roll to determine the result on the Combat Results Table.
- The Formation Commander does not need to be either stacked with the unit in question or be adjacent to it.
13. The Battle of Solferino
13.1 Special Rules
13.1.1 Commanders in Chief
- As indicated in the setup, Napoleon III does not enter the battlefield until 09.00, on Turn 5. Because of the precise orders given out before the battle, all the French Formation Commanders are still considered to be in command up to and including Turn 2; they have a die roll modifier of +2 for their activation tests in Turns 3 & 4.
- Victor Emmanuel is present on the map from the start of the game, as indicated in the setup, but may not move before 08.00, Turn 4.
- Franz Josef only enters the map at 10.00, Turn 6, and may as an exception move 10 cavalry MPs that turn (instead of 8). Before his arrival, all the Austrian formations are considered OOC and their commanders test for activation with a -1 penalty in Turns 1, 2 & 3, and as normal in Turns 4 & 5.
13.1.2 Arrival of Reinforcements
- To simulate a column moving by road, each unit entering the map as reinforcements after the first unit has entered, expends the cost of the first hex multiplied by the number of units that have already entered. Formations may therefore take more than one turn to enter the map.
- Formations arriving as reinforcements are considered OOC, and their commander must pass an activation roll before they can enter the map (disregard the Austrian penalty outlined in 11.1.1 [sic])
- If the Formation Commander fails his activation test, the formation cannot enter the map and must test again the following turn, with a +2 bonus. If the Formation Commander fails the new activation test, the formation may still not enter the map, but it will be able to do so on the following turn, as if it were in command.
13.2 Setup
13.2.1 Piedmontese Army
- Victor Emmanuel: 0221
- 1st Division:
- Commander Durando: 0518
- 1/1 Granatieri: 1016
- 2/1 Savoia: 0518
- Alessandria: 0817
- 2nd Division:
- Commander Fanti: 0620
- 1/2 Piemonte: 0822
- 2/2 Aosta: 0620
- Aosta: 0922
- 3rd Division:
- Commander Mollard: 0511
- 1/3 Cuneo: 0511
- 2/3 Pinerolo: 0215
- Monferrato: 0411
- 5th Division:
- Commander Cuchiarri: 0219
- 1/5 Casale: 0219
- 2/5 Acqui: 0319
- Saluzzo: 0320
13.2.1 French Army
- Ist Corps:
- Commander B. d'Hilliers: 1717
- 1/1 Dieu: 1918
- 2/1 d'Arlon: 1819
- 1/2 F. Douay: 1717
- 2/2 Negrier: 1617
- 1/3 Goze: 1421
- 2/3 Dumont: 1321
- A1: 1720
- A2: 1621
- IInd Corps:
- Commander Mac Mahon: 2118
- 1/1 Lefevbre: 1919
- 2/1 D. Douay: 1820
- 1/2 Gault: 2019
- 2/2 Castagny: 2118
- Cav de Vilaine: 2316
- A1: 1919
- A2: 1820
- IVth Corps:
- Commander Niel: 2721
- 1/1 C. Douay: 2720
- 2/1 Lenoble: 2721
- 1/2 de Capriol: 2722
- 2/2 de Charriere: arrives on Turn 1 through 2722
- 1/3 Saurin: arrives on Turn 1 through 2722
- 2/3 Richepance: arrives on Turn 1 through 2722
- Cav de Rochefort: 2719
13.2.3 Austrian Army
- Ist Corps:
- Commander Clam Gallas: 2507
- 1/1 Paszthory: 2507
- 2/1 Brunner: 2505
- 1/2 Hoditz: 2410
- 2/2 Reznicek: 2407
- Cav 12 Hussars: 2509
- A1: 2508
- A2: 2507
- IIIrd Corps:
- Commander Schwarzenberg: 3207
- 1/1 Pokorny: 3105
- 2/1 Dienstel: 3307
- 1/2 Wetzlar: 3107
- 2/2 Hartlung: 3106
- 3/2 Rosgen: 3207
- Cav 10 Hussars: 2807
- A1: 3207
- A2: 3206
- Vth Corps:
- Commander Stadion: 2111
- 1/1 Gaal: 1808
- 2/1 Puchner: 2013
- 3/1 Bils: 1914
- 1/2 Koller: 2010
- 2/2 Festetick: 2111
- Cav 12 Uhlans: 2213
- a/1 Bils: 2015
- b/1 Bils: 1714
13.3 Reinforcements
Turn 3 - 07:00 AM
- FRENCH: IIIrd Corps enters through 3522
- Commander Canrobert - 1/1 Doens - 2/1 Jannin - 1/2 Bataille - 2/2 Collineau - Art. 1
Turn 4 - 08:00 AM
- FRENCH: Garde Corps enters through 1623
- Commander St Jean D'Angely - 1/1 Niol - 2/1 Blanchard - 1/2 Maneque - 2/2 Picard - Art 1
- Detached Units enter through 1623: Cav Ga de Champeron - Cav Gb Cassaignolles - Cav Gc Marion
- PIEDMONTESE: Victor Emmanuel II may move
- AUSTRIANS: VIIth Corps enters through 3101
- Commander Zobel - 1/1 Wussin - 1/2 Gablentz - 2/1 Brandenstein - 2/2 Wallon - Art. 1
Turn 5 - 09:00 AM
- FRENCH: Napoleon III enters through 1623
- AUSTRIANS: XIth Corps enters through 3603
- Commander Veigl - 2/1 Greschke - 1/2 Baltin - 2/2 Dobrzensky - Cav 4 Uhlans.
Turn 6 - 10:00 AM
- AUSTRIANS: XIth Corps enters through 3603 [as printed]
- Franz Josef enters through 3101 with 10 cavalry MPs, as an exception.
13.4 Victory Conditions
13.4.1 Victory Points
- Locations marked in red on the map (Castiglione, Medole, Solferino, Pozzolengo, Cavriana, Rebecco and Guidizollo) are worth 1 Victory Point (VP) each for the controlling player. In a multi-hex location all the hexes must be under the player's control for this VP to count. A location is controlled if a friendly unit last occupied all its hexes, and if none of its hexes are in an enemy ZoC, with no friendly unit present.
- Each enemy formation that is broken counts for 1/2 VP.
- At the end of the game, each player calculates his VPs, and the lower score is subtracted from the higher score.
13.4.2 Levels of Victory
- 6 VPs: Major Victory
- from 3 to 5 VPs: Minor Victory
- 2 VPs or less: Draw.
- In addition, if Napoleon III or Franz Josef is killed, the game stops immediately and the result is a Major Victory for the opposing side.
- In addition, if Victor Emmanuel II is killed, the Franco-Piedmontese player drops one level of victory, or the Austrian player gains a level of victory.
Combat Results Table
Cross-reference the (modified) Combat Value column with the D6 roll.
| D6 | 0 or less | 1 | 2 | 3 | 4 | 5 | 6 | 7 | 8 |
|---|---|---|---|---|---|---|---|---|---|
| 1 | X | X | X | X | X | T | T | T | D |
| 2 | X | X | X | X | T | T | T | D | D |
| 3 | X |
Column Modifiers:
- -1 per step loss of the attacking unit(s)
- -1 if an enemy unit is higher than at least one of the attackers
- +1 if an enemy unit is lower than at least one of the attackers
- -1 if at least one unit is attacking or defending a ridge, hedge or water course
Terrain Values:
- Clear Level 0, 1 & 2: 1
- Woods, Village, Levels 3 & 4: 2
- Town: 3
- For defensive combat always 1
Die Roll Modifiers:
- +1 for every column higher than #8
- +1 if an artillery unit is adjacent to its target
- +1 if at least one of the cavalry units is heavy cavalry
- +X = bonus of Formation Commander participating in the combat (does not apply to artillery)
- -2 if at least one enemy unit occupies one of the attacking unit's flank hexes.
Defensive Combat Combat Value Modifier:
- Halved if at least one of the attacking units is attacking a flank hex of the defending unit.
Weather Table
| Turn | 1 | 2 | 3 | 4 | 5 | 6+ |
|---|---|---|---|---|---|---|
| Turn 8 | Cool | Cool | Cool | Cool | Cool | Heat |
| Turn 9 & 10 | Cool | Cool | Cool | Heat | Heat | Heat |
| Turn 11 | Cool | Cool | Heat | Heat | Heat | Thunderstorm |
| Turn 12 | Cool | Heat |
Die Roll Modifier: +1 if the weather in the preceding turn was 'Heat'.
Terrain Effects Table
| Terrain | Movement | Combat effect | Block LoS? | Value |
|---|---|---|---|---|
| Clear Level 0 | 1 MP | See Column Modifiers | No** | 1 |
| Clear Level 1 | 1 MP* | See Column Modifiers | No** | 1 |
| Clear Level 2 | 1 MP* | See Column Modifiers | No** | 1 |
| Clear Level 3 | 1 MP* | See Column Modifiers | No** | 2 |
| Clear Level 4 | 1 MP* | See Column Modifiers | No** |
* +1 MP to change level, up or down. ** See 10.2.1: Line of Sight.