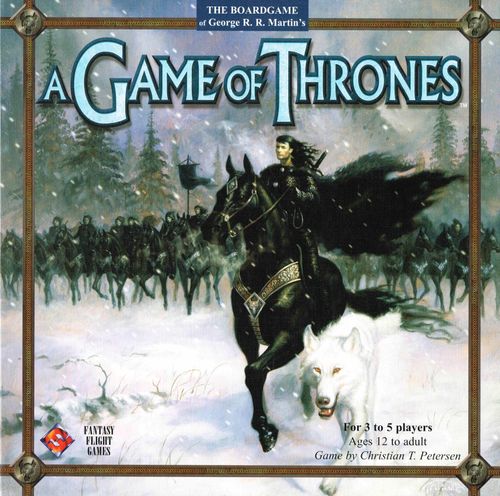
A Game of Thrones
A Game of Thrones Rulebook
Table of Contents
Table of Contents
Components
Enclosed in this box you will find the following components: 75 cardboard order counters (15 per house). 100 cardboard Power tokens (20 per house) 15 cardboard Influence tokens (3 per house)
The Iron Throne, Valyrian Steel Blade, and                   ly face down next to the game board.
Messenger Raven tokens.                                                                                                    b) Each player now
- Players now set up their starting units and tokens as receives 5 Power
                                                             instructed by their House Start Cards. This is done in the    tokens from the
                                                             following three steps:                                        Power Pool.
NOTE: Whenever
- Each player places his octagon-shaped Influence a player receives
                                                             tokens on his starting position on each of the three Areas    a Power token
                                                             of Influence.                                                 from the Power
Pool, he must
These three large cardboard tokens are awarded to the strongest player in each of the three Areas of Influence
(The Iron Throne, The Fiefdoms, and the King's Court). Example of Game Setup
These oversize tokens provide their owner with special powers in the game.
The Game Board
The main feature of the A GAME OF THRONES board game is the game board. The board is divided into several sections, the largest of which represents Westeros itself divided into a number of Land and Sea areas. The other sections of the board are: The Wildling Attack track, the three Areas of Influence, the Supply track, and the Game Turn track.
Game Setup
Before you start playing, follow these instructions to set up the game.
-
Unfold the board and place it centrally on a large table.
-
Place the Kings Landing, Eyrie, and Sunspear tokens on their respective areas on the board (these represent neutral forces in these areas).
-
Place the Wildling Attack token on the "0" space on
the Wildling Attack track in the north of Westeros.                  After drawing the Lannister Start Card (which          Area, position 5 in the Fiefdoms Influences area,
                                                                     indicates that the player will control that house),    and finally position 1 on the King’s Court
- Place the Turn Order token on "Turn 1" the Lannister player now reads the setup instruc- Influence Area. tions on that card.
The Lannister player also takes the Messenger
- Place all the Power tokens (for all the Houses) in a
Following the instructions, he does the following: Raven special token (since he starts at the top
large pile next to the game board. This pile of available position on the King’s Court). Power tokens is also called the Power Pool. First, he places a Footman and a Knight on
Lannisport, a single Footman on Stoney Sept, The Lannister player now places his House Cards,
- Each player now randomly draws a House Start Card and a Ship on the Golden Sound. 5 available Power, the Messenger Raven, and his
to determine which house he will control for the rest of                                                                    unused units in front of him and places the
the game.                                                            After his starting units are placed, the Lannister     Lannister Start Card back in the box (it is no
                                                                     player notes his starting positions on the Areas of    longer needed).
- Each player takes the 7 House Cards that correspond Influence and places his octagonal Influence
to his House. tokens on position 2 in the Iron Throne Influence House Lannister is now ready to start the game.
- Separate the three decks of Westeros Cards (each sep- arate deck is indicated by a roman numeral I, II, or III).
Shuffle each of the three decks and place them separate-
always take a Power token that represents his house (ie. The Westeros Phase is split into following steps:
a Stark player may never take a Lannister Power token).
Power tokens in a player’s possession are called avail-     1) Advance the Turn Order token
able power. Available power must be kept visible for all    2) Reveal the top card on each of the                          Armies
players to see (except when bidding).                       three Westeros decks                                           An army is defined as 2 or more of your units sharing
- Resolve the top card on deck I the same area. This also applies to two or more of your
- Each player now places his starting units (Footmen, 4) Resolve the top card on deck II Ships in the same Sea area (which also is called a fleet).
Knights, and Ships) in the areas indicated by his House     5) Resolve the top card on deck III
Start Card.                                                 6) Place the three resolved Westeros cards
on the bottom of their respective decks.
The game setup is now complete and the game is ready        7) Proceed to the Planning Phase
to commence.                                                                                                               • Note that Knights, even though they are stronger than
footmen, only count as one unit for purposes of Supply. The Westeros Cards There are three decks of Westeros Cards (I, II, and II).
The Turn Sequence During each Westeros Phase, the top cards of all three
- The more areas you control that contain Supply icons, the more supply you will have, and thus the ability to
The A GAME OF THRONES board game is played over             decks are revealed simultaneously and then resolved in         maintain more and larger Armies. Blackwater, for exam-
10 whole game turns, with each game turn separated into     order (starting with I). Players resolve cards by follow-      ple, provides you with two Supply icons, and may there-
three phases played in the following order:                 ing the instructions for each card as outlined below or on     fore be a contested location.
the back page of this rules sheet.
- The Westeros Phase (skipped on Game Turn 1)
- The Planning Phase The rules for each Westeros Card is summarized on the
- The Action Phase back page of this rules sheet. Four cards, however,
                                                            require a more detailed explanation. These cards are:          Controlling a Location
After the Action Phase on game turn 10, the game is         Supply, Mustering, Clash of Kings, and Wildling Attack.        A house is said to control a Land area when it has at
over and the player who controls the areas containing the   These cards are explaned below:                                least one Footman or Knight in the area, or has previous-
most cities and strongholds wins the game (explained in                                                                    ly established control (placed a Power token) in that
detail later).                                              Supply                                                         area. Rules for establishing control are found later in this
                                                                                                 Armies require an         rules set.
The Westeros Phase enormous amount of supplies: food, water,
The Westeros Phase represents special events and mun-                                            steel, horses, cloth-
dane activities in Westeros. This phase is skipped on the                                        ing, etc. Even in the
first turn, when play should proceed directly to the                                             modern day, it is a       To resolve the Supply Card in the Westeros Phase, each
Planning Phase.                                                                                  fact that an army can     player, in order of play, counts the number of Supply
                                                                                                 only be as large as its   icons in the areas that he controls and then adjusts the
                                                            supplies allow. Without adequate supply, an army will          Supply tokens on the Supply track to reflect his new
                                                            quickly deteriorate and its warriors scatter. In the A         Supply reality.
GAME OF THRONES board game, the Supply Track creates a relevance between a house's armies and its access to supplies.
Order of Play
The Supply icon The order of play is the order of houses as they are rep-
resented on the Iron Throne track in the Areas of Influence. The first (leftmost) house, starts, followed by the second (second from left) house, etc. The Supply track is located on the game board and indicates how many, and how large, the armies of each house may be. A player receives one step on the Supply Track for every Supply icon present in areas under his control. If a player has lost Supply icons on the board, it is possi-
                                                            Below every Supply step on the Supply track are a num-         ble that his armies on the board now exceed his Supply
                                                            ber of banners. These banners illustrate the number of         allowance. If you have more and/or larger armies than
                                                            armies that this level of supply allows. The number            your new supply allows, you must remove units from the
                                                            inside each banner represents the maximum number of            board until the number/size of your armies match your
                                                            units that this army may have.                                 allowed Supply (see example).
Important Note: Even though you may gain or lose
Example of change in Supply Supply icons on
the board during the Action Phase, change in Supply is only reflected on the Supply track when the Supply card is drawn and resolved during the Westeros Phase.
Mustering
Before the previous turn, House Lannister had a        Now that the Lannister Supply has dropped to 3         This card reflects the efforts of the great houses to call
Supply of 5, but last turn lost control of the         (after losing the two Supply to Greyjoy) he can no     upon their bannermen, train warriors, and build mighty
Riverrun and Seagard areas to the Greyjoy player       longer adequately supply some of his armies. As        ships. A Mustering card is resolved in the following
(each area contains a single Supply icon). During      indicated on the Supply track, a Supply of 3 allows    manner:
the next Westeros Phase, a Supply card is revealed.    you to field 4 armies with the sizes: 3,2,2,2. To
Lannister must now adjust his Supply from a value      conform to this new supply reality, Lannister          In Order of Play, each player musters all his new units
of 5 to a value of 3.                                  destroys one of his ships in the Golden Sound and      (Footmen, Knights, and Ships) using mustering points
Before the effects of declining Supply are resolved,   one of his Footmen from the army at Harrenhal.         from the Cities and Strongholds under his control.
Lannister fielded four Armies: a 4, 3, 2, and 2 as     His armies now look like this:
described below:                                                                                                       Stronghold
- One army of 2 Knights and 1 Footman (3) City
- One army of 2 Knights and 2 Footmen (at • One army of 2 Ships (2)
Harrenhal) (4) • One army of 2 Knights (2)
- One army of 3 Ships (in the Golden Sound) (3) • One army of 2 Footmen (2)
- One army of 2 Knights (at the Searoad
Marches) (2)                                           Thus, as a result of losing Supply, Lannister had to
One army of 2 Footmen (at Stoney Sept) (2)             destroy 2 units and cannot field larger armies until
                                                       he gains control over more Supply icons (and his       A Stronghold provides 2 mustering points.
House Lannister also controls several other areas      Supply token is adjusted during a future Westeros      A City provides 1 mustering point.
containing a single Footmen unit in each, but sin-     Phase Supply card).
gle units do not form an army and so do not count towards Supply limits (they are said to be “living of the land”).
The Units
There are three types of units in A GAME OF
THRONES: The FOOTMAN, the KNIGHT, and the Example of Mustering
SHIP. Each costs the following amount of mustering points:
Footman                                       1 Point
Knight                                        2 Points
Ship                                          1 Point
Upgrade a Footman to a Knight                 1 Point*
Footman Knight Ship
- A Footman already in play may be upgraded to a
Knight for 1 mustering point. Such an upgrade must take place in a City or Stronghold and uses the muster points of that City or Stronghold. A Footman located in an area without a City or Stronghold may not be upgraded.
New units are placed directly in the area of the                   A mustering card is revealed during a new               Riverrun, he uses one of his mustering points at
City/Stronghold that provided the mustering points.                Westeros Phase. The Lannister player (Supply of 3)      Riverrun to place another ship in the Golden Sound
Ships are placed in any Sea area adjacent to the area              is the first player in the order of play and now        (which is also adjacent to Riverrun), creating
containing the mustering City/Stronghold. If such a Sea            musters his new units.                                  another army (fleet) of 2 ships. He cannot use the 1
area is occupied by ships from another house, you may                                                                      remaining mustering point at Riverrun since he has
not muster a ship there.                                           For the 2 mustering points for Lannisport (which        met his Supply limits everywhere.
currently holds 1 Footman), he places 1 additional
After a player has completed all his mustering, the next           Footman at Lannisport (creating an army of 2            The Lannister player now has an army of 3
player in the order of play starts his mustering.                  Footmen), and one Ship in the Golden Sound,             Knights at Riverrun, an army of 2 Footmen at
                                                                   which was previously empty.                             Lannisport, an army of 1 Knight and 1 Footman at
VERY IMPORTANT NOTE: A player may never                                                                                    Harrenhal, and an army (fleet) of 2 ships outside
muster a new unit so that it creates an army that                  Turning his attention to Harrenhal, he uses its sin-    Lannisport. This satisfies the Lannister Supply
exceeds his Supply limit. If playing a new unit in any             gle mustering point to upgrade one of his two           limit, which at step 3 allows four armies of the
of your Cities/Strongholds will cause you to have                  Footmen here to a Knight (upgrading does not            sizes: 3,2,2,2. Lannister also has one Footman at
more, or larger, armies than allowed by the Supply                 affect the army size).                                  Stoney Sept, and one ship in the Sunset Sea, yet
track, you may not Muster that unit.                                                                                       these areas do not contain Cities or Strongholds,
                                                                   Since he already has an army of 3 Knights at            and thus do not muster.
- Remember that you must use a City/Stronghold's mus- tering points to create a new unit in that specific
City/Stronghold's area and not elsewhere. If you cannot create new units due to short Supply, those unused mus-
tering points are lost. Clash Of Kings
The Clash of Kings card reflects the dynamic change in
- Each house has 10 Footmen, 4 Knights, and 5 Ships. If power of the great houses. This card causes the positions
a player is using all the units of a particular type, he may                                                              on the 3 Areas of Influence (Iron Throne, Fiefdoms, and
not create additional units of this type. Units that are                                                                  King's Court) to be redistributed after player bid power
killed in battle, or removed from the board for any other                                                                 for position in each of the areas.
reason, become available for mustering once more. First remove all of the octagon Influence tokens from the 3 Influence Areas on the game board. Players must now
secretly bid their available power to retain positions of strongest position on
influence on the 3 tracks. The bidding is resolved one area at a time always starting with the Iron Throne track,
Bidding during Clash Of Kings the Fiefdoms
Influence track is
then proceeding to the Fiefdoms track, and finally the        During the resolution of this card, players will bid for     awarded the pow-
King’s Court track.                                           position on the three Areas of Influence. The below          erful Valyrian
                                                              process of bidding is the same for all three Influence       Steel Blade
See the “Bidding” sidebar for details of how to resolve       tracks.                                                      token.
each bidding process. Immediately before bidding for one of the three areas, players hide their total number of available power and
First bid: The Iron Throne                                    place the number of Power tokens that they wish to bid
Your house position on the Iron Throne influence track        into their palm, making a fist. Then, when all are ready,
abstractly represents the strength of your claim to be        players reveal their bid simultaneously by opening their
king as seen among the minor nobles, knights, and peo-        fists.
ple of Westeros. In the game, the Iron Throne Influence
track determines the Order of Play, and the highest bid-      The player with the highest bid places one of his octagon
der also gains control of the Iron Throne token after all     Influence tokens on the “1” position on the Influence
the bidding is resolved.                                      Track. The player with the second highest bid places his
Influence token on the “2” position, the third player on
The players now bid for the Iron Throne, and their position “3”, etc.
Influence tokens are placed in order of high bid. After all
tokens have been placed, the highest bidder (the player       After all Influence tokens have been placed on a single
in the 1 position on the track) wins the Iron Throne          area, the special token (Iron Throne, Valyrian Steel         A player with a higher position on the Fiefdoms
token and takes it from its previous owner.                   Blade, or the Messenger Raven) is awarded to the player      track will win ties in battle against players in lower
                                                              in the “1” position of the track.                            positions (see later for the rules of battle).
                                                              Important Note: After bidding has been resolved for          The players now bid for position on the Fiefdoms
                                                              one area, all bid Power tokens are placed back in the        Influence track. Their Influence tokens are placed in
                                                              Power Pool, and are thus no longer available power           order of high bid in the same fashion as the Iron Throne.
for the players. The highest bidder (the player in the '1' position on the
                                                              Ties in bidding are determined by the player who con-        track) wins the Valyrian Steel Blade token and takes it
                                                              trols the special Iron Throne token. The player who con-     from its previous owner.
trols this token may place the tying Influence tokens in
                                                              the order that he wishes (he must, however, place each       Remember that any ties in bidding are determined by the
                                                              token in the best position currently available to it).       player who controls the Iron Throne token.
Important Note: The Iron Throne token does not                Example of Bidding for an Influence Area:                    The player who controls the Valyrian Steel Blade token
change hands until all bidding for the Iron Throne is         A Clash of Kings card has been drawn during this turn’s      possesses a powerful weapon for battle. Once per game
over and all House Influence tokens have been                 Westeros Phase, and players have already finished bid-       turn, a player may use the Valyrian Steel Blade in a bat-
placed. Thus, the player previously controlling the           ding on the Iron Throne influence track (with House          tle (in which he participates as either attacker or defend-
Iron Throne token still breaks ties throughout this           Greyjoy winning the first place and the Iron Throne          er) to grant him a +1 combat strength bonus in any bat-
round of betting, even though he may clearly lose the         token). They now proceed to the Fiefdoms influence           tle. Battles are explained later in these rules.
Iron Throne token after the bidding is over and all           track. The players hide their available power, and secret-
the Influence tokens have been placed.                        ly place the number of Power tokens in their palms that      When the Fiefdoms track has been resolved, bidding
                                                              they wish to bid. The bid is revealed simultaneously as      moves on to the 'King's Court'. All Power tokens bid by
This large oversize token represents your strong claim        follows:                                                     the players for the Fiefdoms are returned to the Power
for the Iron Throne. A player controlling this token                    Lannister        4 power                           Pool.
decides the outcome of all ties that occur in the game,                 Baratheon        3 power
with the exception of ties in battle.                                   Stark            3 power
                                                                        Tyrell           2 power
                                                                        Greyjoy          0 power
Third Bid: The King’s Court
All Power tokens bid by the players for the Iron Throne                                                                    A house’s position on the King's Court represents its
are returned to the Power Pool.                                                                                            level of intrigue, spies, and secret communications. The
House Lannister claims the first spot, but Baratheon and
                                                              Stark are tied. Greyjoy (who currently controls the Iron     higher your position on the King’s Court, the more avail-
Second Bid: The Fiefdoms                                                                                                   able (and stronger) Order tokens your will have available
Throne token) decides that Baratheon will go on spot 2,
The Fiefdoms Influence track represents your efforts to to play during the Planning Phase of the game turn. In
and Stark on spot 3, Tyrell goes on spot 4, and finally
lead the minor nobles and bannermen of your lands. The addition, the top bidder receives the Messenger Raven
Greyjoy on spot 5. After all House Influence tokens
greater a position in the Fiefdoms track, the more poten- token, which allows you more flexibility during the
have been placed, House Lannister takes the Valyrian
tially powerful you will be in battle. In addition, the Planning Phase.
Steel Blade token.
Now, players bid for the King's Court. This bidding is        The Growing Threat                                             Wildling Victory
handled just like the bidding for the Iron Throne and the     On the top part of the game board, covering the icy            If the wildlings are victorious, marauding bands will
Fiefdoms tracks.                                              North, you will see the "Wildling Threat" track. This          wreak havoc throughout Westeros. Each player must
                                                              track represents the growing strength of the wildling          immediately remove 2 mustering points worth of units
Once the bidding is resolved, and all the house               hordes.                                                        (Knights, Footmen, or Ships) from the board to deal with
Influence tokens have been placed, the player in the first                                                                   this threat (Removing one Knight, which is worth 2 mus-
position takes the Messenger Raven from its previous                                                                         tering points, will satisfy this requirement). If the
owner.                                                                                                                       wildlings win, the one player who bid the least
                                                                                          The Wildling                       amount of power to the Nights Watch, must remove an
                                                                                          Threat token                       additional 2 points of mustering points (for a total of 4
points). If there is a tie for the least bid, the player who controls the Iron Throne token breaks the tie any way he chooses.
The stars on the King’s Court track represent how             Throughout all three decks of Westeros Cards, certain          Regardless of the outcome of the attack, the wildling
many special orders (order tokens marked with a               cards have the Wildling symbol (a wooly mammoth)               token is always returned to the "0" threat spot. The
star) you may use during the Planning Phase. For              printed upon them. Every time such a Westeros card is          wildlings will attack every time the Wildling Attack is
instance, if you are in the third position on the King's      drawn, before resolving it, immediately advance the            drawn during the Westeros Phase.
Court Track, you may use up to 2 of the special               Wildling Threat token one space. It is thus possible to
orders. The function of order tokens is explained             advance the Wildling Threat track up to three times dur-       Note: Due to the dangers of suddenly losing 4 mustering
later during these rules.                                     ing one Westeros Phase .                                       points to the wildlings, it is always wise to hold a few
Power tokens in reserve for this occasion.
The Messenger Raven may be used once per turn during          When the Wildling Attack card is revealed from deck III,
the Planning Phase to change one of your orders after all     the wildlings attack with all of their strength. It is now
orders have been revealed. It is a very powerful tool that    up to the players to prevent the wildlings from doing          End of the Westeros Phase.
allows you greater flexibility when placing your order        damage throughout the lands of Westeros.                       After the top card of each of the 3 Westeros decks has
tokens during the Planning Phase. The Planning Phase                                                                         been resolved, the Westeros Phase is over. Place the
and the orders tokens will be explained later.                The Wildling Attack card is resolved in the following          revealed cards on the bottom of each deck (so that the
                                                              way:                                                           top card of each deck is now a new face down card), and
All Power tokens bid by the players for the King's Court                                                                     play continues to the Planning Phase.
are returned to the Power Pool.                               1) The wildling attack strength is noted (0, 2, 4, 6, 8, 10,
The Planning Phase or 12) Wildling Attack
- Players now hide their available power, and secretly During this phase, players use their order tokens to give
                                                              place a number of Power tokens in their palm, making a         commands to their units on the board. The phase is con-
                                                              fist.                                                          ducted in the following steps:
- Players simultaneously reveal their bid. Add all the 1) All players assign orders (simultaneously)
                                                              power bid by all the players into a single number. This        2) All players reveal orders (simultaneously)
                                                              number is the strength of the Night’s Watch.                   3) Messenger Raven may be used
- If the strength of the Nights Watch equals or exceeds the wildling attack strength, the wildings are defeated
The Order Counters
This card represents an assault of Mance Rayder's hordes      and the Night’s Watch is victorious.                           Each house has a total of 15 round order tokens (marked
           of wildlings upon the great Wall in the north.                                                                    with the individual house symbol on the back side). 10
                        The Night’s Watch is protecting       5) If the wildling attack strength exceeds the strength of     of these orders may be used freely in every Planning
                            the Wall, but their strength      the Nights Watch, the wildlings are victorious.                Phase, and 5 special orders (marked by a star) may be
                                 will fail without the sup-                                                                  used only if a house has a high enough position on the
                                        port of the great     6) All Power tokens bid for the Night’s Watch by the           King’s Court Influence track.
                                                  houses.     players are discarded and placed back in the Power Pool.
The effects of the orders themselves are explained later. Night’s Watch Victory
                                                              If the Night’s Watch is successful, the wildling threat has    Why give orders?
                                                              been quelled for now. The player who bid the highest           The planning phase is perhaps the most important phase
                                                              amount of power (ties are decided by the player control-       in the A GAME OF THRONES board game. Here you
                                                              ling the Iron Throne) may immediately take back any            secretly assign all your units orders by placing one order
                                                              one used House Card character from his pile of used            token face down on each area you control that contains
                                                              House Cards (Characters are explained later).                  at least one unit (Knight, Footman, or Ship). This is a
phase where diplomacy, deduction, and a sudden strike
must be made. You may ask yourself the following questions: Where will the enemy attack? Can you trust the alliance that you made? Will you betray your ally and
march upon him? Land and Sea Areas
The map board is divided into many separate areas. Of
Important Rule: Though players may make promises                                                                           these areas, there are two types -- the Land area and the
(which are never binding) and seek alliances with           Support +1: This order allows its area to support an
Sea area. Land areas are completely surrounded by a
other houses, you may never show your order coun- adjacent battle with a +1 combat strength in addition to
white borders, and Sea areas (all in blue) are separated
ters to another player. Thus even the staunchest of its normal supporting strength.
by red borders -- except where they border a coastal
allies cannot be 100% sure of the good intentions of                                                                       Land area (where they are separated by the Land area’s
their partners.                                                                                                            white border).
Step One: Assign Orders                                                                                                    Ships can only move into and do battle in Sea areas
During this step, players simultaneously and secretly                                                                      (against other ships). Footmen and Knights can only
choose their orders and place them face-down (house                                                                        move into and do battle in Land areas (against other
symbol side up) on the board in areas containing their      Raid +1: This raid is doubly effective and can remove 2
Footmen and Knights).
units. To receive an order, an area must contain at least   adjacent enemy Support, Consolidate Power, and/or Raid
one unit (Footman, Knight, or Ship). Each area may only     order tokens when resolved. The normal Raid order only
receive only one order token, regardless of how many        allows you to remove one order.
units are in that area. The Action Phase
What order tokens can I place?                                                                                             It is during the Action Phase that the orders given during
Each house has 10 normal orders, 2 of each type: March                                                                     the Planning Phase are resolved. The Action Phase is
(a "0" and a "-1"), Raid, Support, Consolidate Power,                                                                      played by following these three steps:
and Defense (+1, +1). Each house also has one addition- Consolidate Power: This token does not have any speal order of each kind, but a slightly improved version
cial powers, but you may now consolidate power in three a) Resolve Raid Orders
printed with a star. You may use all 10 of the normal
areas rather than two. b) Resolve March Orders (and resulting battles)
orders during your Planning Phase, but you may only
- Resolve Consolidate Power Orders use as many special orders (marked with a star) as you
Note: A player cannot use more orders than he is providhave stars in your position on the King's Court Influence
ed. You thus cannot use more than 3 March orders, for Note that neither Support or Defense orders are resolved
track.
instance, and this only if you have access to the special in a step by themselves, these orders are only relevant
Example: House Lannister is in position 3 on the King's
March order. A player in the last (fifth) position on the during battle, see later.
Court Influence track. This allows the Lannister player King's Court can never place more than 2 of each order to use a total of 2 special order tokens during his next during the Planning Phase (since this position provides Planning Phase. These 2 tokens may be any of the 5 no stars). Also remember that you cannot assign more available special orders.
than one order per area, even if that area contains a large A) Resolve Raid Orders
army with many units. The Special Orders: Special rule: The Consolidate Power order may only
be placed on a Land Area. All other orders may be The Raid Order
placed on both Sea and Land areas.
Step 2: Reveal Orders.
                                                            After all players are finished placing orders, all the order   Players who placed Raid orders may now enact those
Defense +2: This order gives the area +2 defense, a +1      tokens are revealed. This is done by simultaneously flip-
improvement over the standard Defense order tokens.                                                                        raids. In order of play, each player may resolve one of
                                                            ping over all the order tokens so that they are now            his Raid tokens. In other words, the left-most house on
                                                            face up.                                                       the Iron Throne Influence Track may resolve one of his
Raid orders, followed by the second house who may
                                                            Step 3: The Messenger Raven                                    resolve one of his Raid orders, etc. Keep running
                                                            After all the orders have been revealed, the player con-       through the order of play left-to-right, with every house
                                                            trolling the Messenger Raven token (the player with the        executing one raid per cycle. When all raids are complet-
March +1: This order gives you a +1 to attack an adja-      top spot in the King's Court Influence Area) may use his       ed, play proceeds to Step B: Resolve March Orders.
cent enemy area. This is a huge improvement over the        Raven to replace one of his assigned orders with one of
standard "-1" and "0" March orders.                         his unused orders (but only a special order if he has any
                                                            unused stars left over from the Assign Orders step). The       Resolving Raid Orders
                                                            Messenger Raven can only be used once per turn.                The raid represents a command for your units to make a
disruptive incursion into enemy territory. It is a tactic that is used to foil your enemy's ability to support com-
bat elsewhere, disrupt his consolidation of power, or foil other raids ordered by your opponents.
Example of Raids To resolve a Raid, simply remove your Raid order from
the board, and simultaneously remove an opponent’s Raid, Support, or Consolidate Power order token from the board. The raided enemy order token must be in an area adjacent to your Raid order.
By raiding, you are effectively canceling your opponent's orders, leaving those raided areas without an order token. Note that by canceling an opponent’s Raid order with your Raid order, that enemy Raid order will not take effect this phase.
Important Rule: If you successfully raid (remove) an opponent’s Consolidate Power order, you are said to be pillaging. After pillaging, receive a free Power token from the Power Pool. This represents your loot from the successful Raid.
Special Rule: A Raid order placed on a Land area can never Raid an adjacent Sea area. In other words, a Land area may never raid a Sea area. A raid from the sea (by ships), however, can successfully raid both Land and Sea areas.
Note: A Raid order does not affect, and cannot target Defense or March orders. Also, you may decide to remove a Raid order without raiding (even though you may be able to). If there are no adjacent enemy Consolidate Power, Support, or Raid orders, your Raid order is removed with no effect.
The Action Phase has just begun, and players first    Reach from Blackwater -- Lannister removes his      After all the raids are resolved and removed from the
proceed to resolve Raid orders.                       Raid order at Blackwater, as well as the Tyrell     board, play moves on to the Resolve March Orders step.
The order of play is as follows: Greyjoy, Stark,      Raid order at the Reach.
Lannister, Baratheon, and Tyrell. Baratheon uses his Raid order at Harrenhal to
There are 5 Raid orders on the board. Lannister       remove the Lannister support order at Riverrun.
has a Raid order at Blackwater and in the Golden      He removes both tokens.
Sound. Greyjoy has a Raid order in the Sunset Sea.
Tyrell has a Raid order at the Reach. Baratheon       Since his one Raid order was removed by the first
has a Raid order at Harrenhal.                        Lannister Raid, House Tyrell has no Raid orders.
Play now goes back to the top of the turn order. Greyjoy resolves his Raid order first. He sees that
the Tyrell player has a Consolidate Power order at    Only Lannister has a Raid remainaing. Since the
Highgarden, and therefore decides to raid there.      Lannister Raid token in the Golden Sound is adja-
Greyjoy removes his Raid order from the Sunset        cent to no opponent Support, Consolidate, or Raid
Sea and Tyrell’s Consolidate Power order from         orders, that Raid order has no effect and is
Highgarden. Since he was pillaging, Greyjoy col-      removed from the board (Greyjoy’s adjacent Raid
lects one power from the Power Pool.                  order in the Sunset Sea was removed earlier to
raid Tyrell at Highgarden). Stark has no Raid orders, so Lannister goes next.
Lannister decides that the Tyrell Raid order at the   Play now proceed to the Resolve March Orders
Reach threatens the Lannister Support order at the    step.
Searoad Marches. Lannister therefore raids The
B) Resolve March Orders                                       Note: You can “stagger” movement by placing several          Thus, House Greyjoy, for example, with Ship units in the
                                                              March orders in a row. In this fashion, a unit can move      Ironman’s Bay, can move Knights and Footmen directly
                                                              more than one area in a turn. You accomplish this by         to Flint’s Finger, Greywater Watch, Seagard, or Riverrun
                                                              marching units into an area that contains another of your    from Pyke with a single March order. If Greyjoy had
                                                              March orders, and later (when resolving the second           another ship in the Sunset Sea, that same March could
                                                              March order) move the units in this area into a third area   move the units from Pyke to Highgarden, the Searoad
Marches, and/or Oldtown. These units simply move through the consecutive sea areas of Ironman’s Bay and the Sunset Sea -- both containing Greyjoy Ships. Marching is the means by which you move your units on the board and attack enemy areas. When an area has
                                                                    March Order Example                                    In other words, Ships, and consecutive Sea areas con-
been given a March order, you may elect to move all or                                                                     taining friendly ships, form a direct "bridge" for Knight
some of your units in that area. Units in an area may                                                                      and Footmen to move directly from a coastal area to
move to any one adjacent area, or they may split up and                                                                    another coastal area. It is possible, though very unlikely,
move to multiple adjacent areas. You may also leave                                                                        by using a chain of 5 ships in 5 Sea areas, to move units
some, or all, of the units in the original area.                                                                           directly from Flint's Finger to the Widow's Watch in one
march. Exception: A ship may never move into a Land area,
and a Footman or Knight unit may never move into                                                                           • Even though you may be using ship transport, a single
a Sea area.                                                                                                                March order may still only start one battle.
- Note that you may never use the ships of another house
Marches are resolved, one at a time, in the order of                                                                       for ship transport, even if that house will let you.
play, exactly as Raids were resolved. Thus, the first                                                                      • There is no limit to how many times you can use the
player in the order of play always executes his first one                                                                  same ships for sea transport in any given turn.
March order (if he has any), followed by one March                                                                         • Ship transport may not be used to consider map areas
order by the second player, then one March order by the                                                                    “adjacent” for purposes of raids or rupport (see rules for
third player, etc. This continues, cycling through the                                                                     support later).
order of play, with a player executing one March order                                                                     • Note that ships may participate in transport, or a trans-
at a time, until all the March orders have been resolved       Lannister has a (-1) March order at Lannisport              port chain, regardless of whether they have an assigned
and there are no longer any March order tokens on the          which contains 3 Footmen units. When it becomes             order, or what kind of order it is.
board.                                                         his turn to execute a March order, he chooses this
                                                               March order and moves one Footman into Stoney               The Golden Rule: You may never move (or retreat) a
                                                               Sept, one Footman to the Searoad Marches (which             unit so that it violates your current Army Supply limits
Executing a March                                              already contains a Lannister Footman, thus forming          (as indicated on the Supply track). Should you do so by
A player has up to 3 marches, including his special            an army of 2), and the remaining Footman unit               accident, you must immediately destroy enough units to
order (marked by a star). Each march has a combat              remains in Lannisport. Lannister has now completed          make your armies in Supply again.
strength modfier of either -1, 0, or +1. This number           the March and removed the March order.
indicates the attacking combat strength bonus (or penalty) should you march units from this area into a battle. Establishing Control
Here are the fundamental rules for a march:                                                                                If you leave a Land area with all of
                                                              (potentially containing your third March order). This        your Knights and Footmen, you lose
- In an area with a march order, you may move all, can be a difficult trick to accomplish, however, since a control of that area unless you
some, or none of your units there. The units may move         succesful enemy attack can remove any of the March           decide to establish control. To
together, separate and move into several adjacent areas,      orders in this chain of March orders, as explained later.    establish control over an area, sim-
and/or remain in the area.                                    Please note that an area still needs to contain one or       ply place an available Power token
- You may only move your units into an adjacent area more units to receive an order token during the Planning on the Land area that you just vacat-
(unless you use ship transport, see later). Phase. ed. This Power token represents your house’s dominance
over that area, and the token remains in the area until an enemy unit (Knight or Footman) succesfully moves there
- For each March order, you may only move units into Ship Transport (the token is removed after you lose a defending battle in
one area containing units of another house. You can           Ship transport is a very important aspect of the game,
still split your units and move them into several adjacent                                                                 the area). Marching into an area that only contains an
                                                              and allows Knights and Footmen (not other Ships) to          opponent’s Power token does not make for battle.
areas, but only one of those areas may contain units          take advantage of the sea to move long distances.
from another house. When you move one or more units                                                                        Simply place the token back in the Power Pool and
into an area that contains units from another house, you                                                                   move your units into the area. Power tokens do not aid a
                                                              Any two Land areas connected by a single or consecu-         defender in battle.
are starting a battle, which is resolved before the next      tive Sea areas ALL CONTAINING ONE OR MORE
March order. See the rules for battle later in these rules.   FRIENDLY SHIPS, is considered adjacent for purposes
Thus, you can only start one battle for every March                                                                        Exception: Each house’s starting area (the area that
                                                              of marching and retreating (retreats are explained later).   contains the printed house shield) in considered to be
order. under control of that house, until a) Enemy units are
who gathers the highest combat strength. Units in battle, supporting units, Defense orders, March orders, the Valyrian Steel Blade token, and the House Cards can all
Ship Transport Example influence the total combat strength of the attacker or
defender.
The base combat strength comes from the defending and attacking units. These are the combat strengths of various units:
                                                                                                                           Unit              Combat Strength
                                                                                                                           Footman           +1 combat strength point
                                                                                                                           Knight            +2 combat strength point
                                                                                                                           Ship              +1 combat strength point
Thus, an attacking army with 2 Knights and 1 Footman has a basic combat strength of 5 (4 points from the two Knights and 1 point from the single Footman).
In addition to the battling units, March and Defense orders present in the area will also influence the combat. The March order modifier only affects the attacker's combat strength, and the Defense order modifier will only affect the defender’s combat strength. These are the possible orders:
                                                                                                                           Order             Combat Strength
                                                                                                                           March (-1)        Attacker must subtract 1 strength point
       House Tyrell has two ships in the Sunset Sea, one      and thus any number of Tyrell units in Highgarden            March (0)         Attacker is not affected
       ship in the Redwyne Straights, and one ship in the     can, with a March order, move directly to Sunspear           March (+1)*       Attacker adds 1 strength point
       Summer Sea. All these Sea areas are consecutive,       (or any other coastal area adjacent to the ships).           Defense +1        Defender adds 1 strength point
                                                                                                                           Defense +2*       Defender adds 2 strength points
- These are both special orders, available only with suf- ficient position on the King's Court Influence track.
located in that area, or b) an opponent has established      ing the area you entered is considered the defender. The
control over the area (in which case the new Power           units in the embattled area are considered the attacking      Additional combat strength is gained from support,
token is placed over the house shield printed on the         and defending units (note that supporting units are not       House Cards, and the Valyrian Steel Blade token.
board).                                                      considered attackers or defenders).
A retreating army may not retreat into an area that con-     You can only initiate one battle for each March order,
tains an opponents Power token. You can never establish      and the March order token itself follows your units into      Step 1: Call for support
control over a Sea area.                                     the area that you are attacking.                              During the first step of combat, the attacker and defender
both call for support from adjacent areas. An adjacent
Battles are resolved by following these steps: area may only lend support if that area is showing a
Why establish control? Support order. See the sidebar for the rules of support Since you may need your Footmen and Knight units and an example of support in battle.
elsewhere, establishing control ensures that you control     1) Attacker and defender call for support
any Supply, Power, Cities, or Strongholds in that area.      2) Combat strength for both sides is announced
Since Power tokens are printed with the house symbols,       3) Both attacker and defender simultaneously play a           Step 2: Announce Combat Strength
it is easy to determine which house controls the area.       House Card                                                    Now both the attacker and defender count and announce
(Either its units or Power token are physically located in   4) The Valyrian Steel Blade may be played (once per           their total Combat strength up to this point. Include all
the area).                                                   game turn only)                                               combat strength from battling Units, Defense and March
- Battle resolution. Loser is determined, casualties order bonuses (or penalties), and support. are removed, and the losing player retreats any sur-
Battle                                                       viving units                                                  Step 3: Play House Cards
If you move one or more of your units into an area con-                                                                    Now each player secretly selects a House Card from his
taining units from another house, a battle will ensue once   What is Combat Strength?                                      hand of 7 unique House Cards and holds the card out in
you have completed all of your movement from that            Battles are resolved by comparing the combat strength         front of him. When both players are ready, the cards are
March order. If you move into such an area, you are con-     of the battling sides. The winner of a battle is the player   simultaneously revealed.
sidered the attacker, and the opponent currently occupy-
Rules of Support
The Support Order                                      Footman & 1 Knight), and Harrenhal (Baratheon, 1        from supporting units in Stoney Sept and Harrenhal).
                                                       Knight).                                                The battle now proceeds to playing House Cards.
                                                       Lannister announces that he is supporting from          Ships and Support
                                                       Stoney Sept (3 combat strength) and the Lannister       Ships may support a battle taking place in an adja-
                                                       player convinces the Baratheon player to support him    cent Land area (each supporting ship providing 1
                                                       from Harrenhal. The Baratheon player then               combat strength to the supported side). Land units
                                                       announces that he is supporting Lannister with his 2    (Knights and Footmen), however, may never pro-
A Support order is played because a player predicts    points from Harrenhal. Thus the Lannister player        vide support to a battle taking place in a Sea area.
that adjacent units will need support in combat        receives 5 points of supporting combat strength.
(offensive or defensive). When a combat takes place                                                            Important Note: Unlike marches (and retreats -- see
in an adjacent area, the player with a Support order   The Tyrell player announces that he receiving sup-      later) that can utilize Ship Transport, units cannot
may pledge his support for either the defender or      port from his own Knight at Kings Landing which         provide support via ship transport (i.e from a non-
attacker.                                              adds 2 combat strength to the attacker.                 adjacent area). Thus you should never place a
Support order on Dragonstone, The Arbor, or Pyke,
If the owner of a Support token pledges support, he    At this point in the battle Tyrell announces that he    since these land areas have no adjacent land areas to
adds the entire supporting area’s combat strength to   has 7 combat strength (4 for the attacking knights, 2   support, nor can Land units (Knights and Footmen)
that of the player he pledged the support. If a sup-   for the support from King’s Landing, and 1 from the     ever support a battle between Ships.
porting area, for example, contains one Knight and     +1 March order). Lannister announces that he has 6
one Footman, that area would add +3 combat             combat strength (1 for his defending footman and 5
strength in support (2 for the Knight and 1 for the Footman).
Support strength cannot be split, nor can a player pledge a partial support. A supporting player must contribute the full combat strength of an area, or none at all.
A player may freely support his own battles, but may also support another house in battle.
There is no limit to how many adjacent battles a single Support order may support. This makes the Support order a very powerful one. Note, however, that Support orders are especially vulnerable to enemy Raid orders, which can cancel your Support order, regardless of how large an army is in your area.
Example of Support: Tyrrell is marching an army of 2 knights from the Reach into Blackwater with a +1 March order. Blackwater contains 1 Lannister Footman that is showing a March -1 order (the defending March order will not affect the battle). The players now call for support. There are three support tokens in the areas adjacent to Blackwater: King’s Landing (Tyrell, 1 Knight), Stoney Sept (Lannister, 1
Designer Note: Though casualties were obviously
- Units in the battle inflicted on both sides of a medieval battle, actual loss-
- Orders (March or Defense orders bonuses/penalties) es were far less than those of modern battles. Typically,
- Support from adjacent areas far greater casualties were inflicted after a medieval
The House Cards • Any special ability modifications from the House Cards battle ended. A clever winning leader would press his
- The House Card combat strength bonus victory by outflanking, pursuing, and slaughtering the
- The Valyrian Steel Blade +1 ability broken enemy army as it retreated. In the A GAME OF
THRONES board game, each unit represents a large force of warriors, and even one or two casualties
Loser is determined should represent a stunning loss for the losing side.
The player with the LOWEST total combat strength is
                                                             the loser of the battle. If the two combat strength         Retreats
                                                             scores are tied, the player with the higher position on     After taking casualties, the losing army must retreat from
                                                             the Fiefdoms Influence track wins the battle.               the embattled area. If the loser was the attacking army,
all surviving units must retreat back into the area from
As a result of losing a battle, the losing player must: which they came.
Each player starts the game with a hand of seven specific
House Cards. These cards are used in battle, where each      a) Check for casualties                                     If the defender lost, the surviving defending units must
side (attacker and defender) must play one House Card        b) Retreat                                                  retreat using the following rules:
each.
- Checking for Casualties 1) All retreating units must retreat into the same area.
All House Cards have a printed combat strength (from 0       Only the losing player takes casualties in battle.
to 3) in the upper left hand corner. This combat strength                                                                2) Retreating units may only retreat into an empty adja-
will be added to your total combat strength after cards                                                                  cent area (i.e, containing no enemy units or Power
                                                                    Fortification Icon            Sword Icon
are revealed. Some cards have a special ability that may                                                                 tokens) or an adjacent area controlled by the same house.
trigger during or after the Combat, and other cards have                                                                 Important rule: Defending retreating units may never
one or more Sword and/or Fortification icons.                                                                            retreat into the area that the attacker came from.
- You may never retreat a unit into an area so that you thereby exceed your Supply limit. If necessary, retreat the units allowed within your Supply limits, and destroy the remaining units.
After the two House Cards are revealed, first resolve any Note that you are allowed to use ship transport to retreat
Casualties are determined in the following way: The
special ability that may apply. Then each player adds the your units (using the same ship transport rules as march-
winning player shows how many Sword icons was pres-
combat strength of his card to his total combat strength. ing).
ent on the house card he played in the battle. The losing player then shows how many Fortification icons are
 Step 4: The Valyrian Steel Blade                            present on the House Card he played in the battle.          After you have retreated your units into a legal adjacent
 If either the attacker or defender controls the Valyrian    The losing player must now remove one unit in the           area, lay them down on their side to signify that they are
 Steel Blade token, that may now be used. The player         embattled area (Footman, Knight, or Ship) for every         routed units.
 using the Valyrian Steel Blade simply adds +1 to his        Sword icon on the winning player’s House Card
 total combat strength. The Valyrian Steel Blade may only    minus the number of Fortification icons on                  Routed units have no combat strength. They still count
 be used once per game turn.                                 the losing players House Card.                                      towards a player’s Supply limit, but if a routed
unit is forced to retreat again in the same
 Step 5: Battle Resolution                                   Example: In a battle between Lannister and                                game turn, it is automatically destroyed.
 Now both sides combine their total combat strengths.        Tyrell, Lannister plays the Tywin Lannister                              Routed units may never be taken as casual-
 Below is a final summary of what may have contributed       House Card (2 Sword icons)                                              ties in battle. Routed units may not partici-
 to the final combat strength:                               and the Tyrell player plays                                             pate in a march, even if a March order token
                                                             Margaery Tyrell (one                                                   is resolved at their new location.
                                                             Fortification icon). If the                                            After all March orders have been resolved
                                                             Lannister player wins the bat-                                        for the turn, return all routed units to their
                                                             tle, the Tyrell player takes one                                     normal upright position.
casualty (two swords against
                                                             one fortification). If the Tyrell                                    Example: House Tyrell has just lost a battle
                                                             player wins the battle,                                              against Baratheon in the Kingswood. A surviv-
                                                             Lannister takes no casualties                                       ing Tyrell Knight unit retreats to Storm's End
                                                             since Margaery Tyrell does                                         (which contains another Tyrell Footman) and is
                                                             not show any Swords icons.                                  placed on its side to indicate that it is routed. Later that
same turn, House Baratheon attacks Storm's End with two Knight units transported by sea from Dragonstone.
The Tyrell player has a defending combat strenght of 1        and one additional power for the Power symbol on              After an area containing a neutral force has been entered,
for the Footman since the routed Knight unit provides no      Dragonstone.                                                  discard the neutral force token -- it will not return for the
combat strength. If House Tyrell loses the battle, the                                                                      rest of the game.
Knight -- since a routed unit may not retreat -- will be      After players have collected their Power tokens for their
automatically destroyed.                                      Consolidate Power orders, the Action Phase is over.           Example: A House Tyrell army seeks to enter Sunspear
                                                              Remove all remaining order tokens from the board, and         from Yronwood. Sunspear contains a neutral force of
Existing orders in a conquered area.                          a new turn begins (starting with the Westeros Phase).         strength 5 -- a strength that must be met or exceeded by
If an area is successfully taken by the attacker, remove                                                                    the Tyrell player in order for his march to be successful.
any Order token left behind in the area by the defender.      If this was the last turn (turn 10), the game is now over     The Tyrell army contains 1 Knight and 1 Footman and is
Also remove the attacking player’s expended March             and a winner is determined.                                   marching with a +1 order. Thus the marching army has
order.                                                                                                                      a strength of 4 (2 for the Knight, 1 for the Footman, and
Used House Card
Winning the Game 1 for the +1 March order). A single Tyrell ship in the
Summer Sea is showing a Support order -- which adds
The A GAME OF THRONES board game is won in another +1 to the strength of the Tyrell march for a total
Both the attacking and defending player now place the
either of the two following ways: of 5. The march is thus successful, and the Sunspear
used House Card face up by the board in a discard pile.
These used House Cards are considered discarded and token is removed from the game.
- At the end of turn 10, the player who controls the may not be used again until later. most areas containing Cities and Strongholds wins the game. If two players are tied for the greatest number of
Three and Four Player Games
After a player has played his 7th and last House Card in If you wish to play the A GAME OF THRONES board
areas containing Cities and Strongholds, the player with
battle, instead of discarding this card, he takes all the 6 game with 3 or 4 players, the following rules apply:
the highest placement on the Supply track wins the previously used cards back to his hand. His hand of game. If there is also a tie for highest supply, the player House Cards is now full again, and all the cards are
                                                              with the most available power wins the game. If there is      Three Player Game
available to be played in battle once more.                                                                                 House Greyjoy and House Tyrell are not available to
still a tie, the game ends in a draw. players. The starting units (Ships, Knights, and Footmen)
The game continues                                            b) If a House, at any time, controls seven areas contain-     for Greyjoy and Tyrell are set up as normal on the board,
After a battle has ended, the current March order is done     ing Cities and Strongholds, the game is immediately           and now represent neutral forces (like those of King's
and removed from the board. Continue to the next play-        over and that player is declared the winner.                  Landing, Sunspear, and The Eyrie) with a Footman rep-
er’s March order. If all March orders are resolved and                                                                      resenting 1 neutral strength, a Knight representing 2 neu-
removed from the board, continue to the Resolve Other Rules tral strength, and a Ship representing 1 neutral strength
Consolidate Power Orders step.                                                                                              (cumulative for areas containing multiple units). Do not
                                                              Neutral Forces (Kings Landing, The                            place Influence or Supply tokens on the Influence Areas
C) Resolve Consolidate Power                                  Eyrie, and Sunspear)
or Supply tracks for Greyjoy or Tyrell.
Orders In a three player game, an instant win requires 8
Cities/Strongholds, rather than the normal 7.
Four Player Game
House Greyjoy is not available to players. As with the 3 player game, set up the starting Greyjoy units which are
In this phase, players simultaneously collect power from                                                                    as neutral forces. In the 4 player game, an instant win
the areas in which they placed Consolidate Power order                                                                      still only requires 7 Cities/Strongholds.
tokens. If a Consolidate Power order was removed by a
raid, or was located on an area that was successfully         At the beginning of the game, special tokens are placed       Note: Houses not in the game will have no Influence
invaded by an enemy, that order is no longer in play and      on the areas of KING’S LANDING, THE EYRIE, and                token on any of the three Areas of Influence. This will
the owner will collect no power.                              SUNSPEAR. The number on each of these tokens repre-           leave some open positions at the beginning of the game.
                                                              sents the strength of its neutral forces, which will pre-     To fix this, simply move the other House Influence
To resolve this step, a player simply collects 1 Power        vent a casual march into the area.                            tokens towards the top, so that there is no gap between
token from the Power Pool for each Consolidate Power                                                                        houses. This may result in a new house taking posses-
order he has on the board, plus one Power token for           To successfully march into an area containing neutral         sion of the Valyrian Steel Blade at the beginning of the
every power symbol (the crown) printed on the board in        forces, a player must equal or exceed the neutral strength    game.
the area(s) containing his Consolidate Power order(s).        with the strength of his marching units and any adjacent
Example: A lone Footman has remained behind on
                                                              supporting areas (support from your own areas or from         Token Limits
                                                              any other willing house).                                     All the tokens and units in the game are limited to the
Dragonstone. The Baratheon player gives this area a
Consolidate Power order during the Planning Phase.                                                                          provided number. If a player has all his 20 Power tokens
                                                              Note that marching into a neutral area does not make a        as available power, for example, he cannot receive any
During the Action Phase, this order is neither removed        battle, and thus no cards are played. The March order
by invasion or a raid, and so, during the Resolve                                                                           more tokens from the Power Pool until he spends some
                                                              modifier (-1,0, or +1) however, is added/subtracted           of his available power.
Consolidate Power Orders step, the Baratheon player           to/from your marching strength.
collects 2 power for this order; 1 from the order itself,
The Islands The North
The area above Castle Black -- the North -- is not considered to be part of the game, and may not be entered by units.
Based on the A SONG OF ICE AND FIRE novels by George R.R. Martin Game Design: Christian T. Petersen Additional Design and Development: Kevin Wilson Managing Developer: Darrell D. Hardy Graphic Design: Scott Nicely Rules: Christian T. Petersen Final Editing: Greg Benage, Christian T. Petersen and Darrell D. Hardy Cover Illustration: JP Targete Interior Art: Anders Finer, Michael Erickson, Jacques Bredy, Thomas Denmark, Jason A. Note that DRAGONSTONE, PYKE, and THE ARBOR Engle, John Matson, Mark Evans, Roman V. are considered Land areas, and thus cannot be entered by ships. Due to their island nature, Footmen and Knights Papsuev, Cos Koniotis, Thomas
on these areas can only march elsewhere with the help of   Gianni, Alexander Petkov, Tim Truman, Jim
Ship Transport.                                            Pavelec, Sedone Thongvily
The Rivers Special Thanks to: Eric M. Lang, Tony Doepner,
Robert Vaughn, Daniel & Kat Abraham, Carl Keim, and Melinda M. Snodgrass.
Christian would like to thank George R.R
Martin (for his wonderful world, patience, and input), Kevin Wilson (for his excellent development work, prototypes, and great design suggestions), and Gretchen (for her patience, love, and support).
A Game Of Thrones The Board Game © George R.R. Martin 2003 © Fantasy Flight Publishing, Inc 2003. All rights reserved. No part of this product may be reproduced without permission from the publisher. A Song Of Ice and Fire © George R.R. Martin 2003. Used under license.
For questions, support, and updates, visit: www.FantasyFlightGames.com The borders of Land areas on the game board are identified by a surrounding white border. Some borders, however, are bright blue and represent large rivers. Rivers may not be crossed by marching units unless there is a river crossing (marked on the board with a bridge symbol) between the two areas. The only two river crossings on the board are found by The Twins, and in the area of Crackclaw Point.
The Westeros Cards
                        Winter is Coming                                                 Supply                                             Mustering
                        (Found in decks I, II, and III)                                  In Order of Play, players adjust their             In Order of Play, players muster new
                        Immediately shuffle this Westeros deck                           Supply token and reconcile their armies            units from their cities and strongholds.
                        and draw another card. Repeat if Winter                          until they meet the supply limit.                  New units must conform to a player’s
                        is Coming is drawn again.                                        (See detailed rules on page 4.)                    Supply limits.
(See detailed rules on pages 5 and 6)
                         Last Days of Summer                                             Clash of Kings                                     Game of Thrones
                         (Found in decks I, II, and III)                                 Remove all tokens from the Areas of                In the Order of Play, each player
                         Nothing happens, continue to the game.                          Influence. Players now bid available               collects one Power token from the
                                                                                         power for position on the Areas of                 Power Pool for every Power Icon
                                                                                         Influence.                                         (Crown) present in the areas that he
                                                                                         (See detailed rules on pages 6 and 7)              controls.
                         Sea of Storms                                                   Feast for Crows                                    Rains of Autumn
                         Players may not place Raid order                                Players may not place Consolidate                  Footmen do not provide combat
                         tokens during the Planning Phase of this                        Power order tokens during the Planning             strength to an adjacent battle while sup-
                         turn. The Resolve Raid Orders step of                           Phase of this turn. The Resolve                    porting this turn.
                         the Action Phase is skipped this turn.                          Consolidate Power Orders step of the
Action Phase is skipped this turn.
                         Storm of Swords                                                 Wildling Attack                                    The Mammoth Symbol
                         Players may not place Defense order                             The wildlings attack Westeros with the             Immediately after the three Westeros
                         tokens during the Planning Phase of this                        current strength (as indicated on the              cards are revealed at the beginning of
                         turn.                                                           Wildling Threat track). All players must           the Westeros Phase, advance the
                                                                                         bid power to bolster the Night’s Watch.            Wildling Threat token (on the Wildling
                                                                                         (See detailed rules on page 8.)                    Threat track on the board) one space for
each Mammoth symbol showing on the three cards.
The Orders
The Turn Sequence The Battle Sequence
- The Westeros Phase (skipped on Game Turn 1) 1) Participants call for support
March Order
- The Planning Phase 2) Participants announce current combat strength
- all players assign orders
- all orders are revealed 3) Participants simultaneously reveal a House Card
Consolidate Power Order
- Messenger Raven may be used
- Valyrian Steel Blade may be used (once per turn)
- The Action Phase
- resolve Raid orders 5) Loser is determined, casualties are removed, and
- resolve March orders (and resolve battles) loser retreats surviving units. Support Order
- resolve Consolidate Power orders
Defense Order
Stronghold City Supply Power
Raid Order