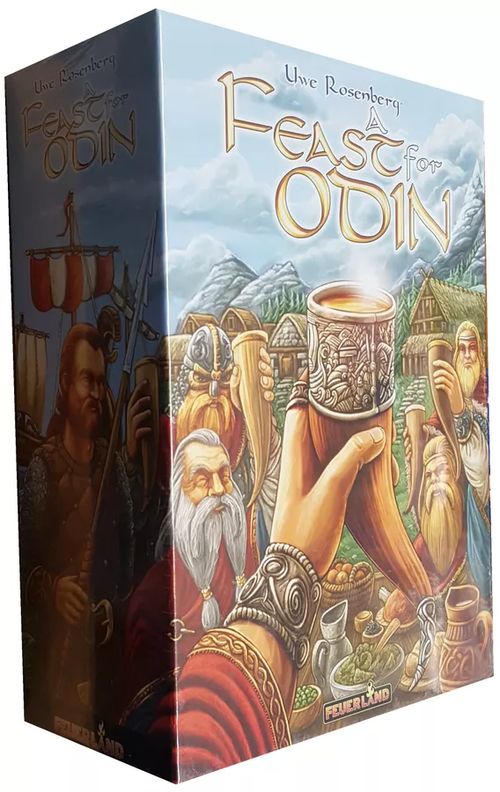
A Feast for Odin
310 questions players ask about A Feast for Odin, answered in plain words and graded by where the answer comes from. See also the full rulebook.
Updated 2026-10-25.
310 questions players ask about A Feast for Odin, answered in plain words and graded by where the answer comes from. See also the full rulebook.
Updated 2026-10-25.
The designer confirmed this on BGG, and several players point to the rulebook's occupation section.
No — your starting occupation begins in your hand. You still have to play it through an occupation action space or as the bonus on a 4-Viking (fourth-column) space before its effect works, exactly like any other occupation.
Occupations in your hand are hidden; only how many you hold is public. Weapon cards are kept face up and are open information. The setup line about keeping cards face up refers to the weapon cards, not your occupation hand.
One experienced player answered this; the rules mention no limit, but there is no official statement.
No — you can hold any number of weapon cards.
On the occupation cards. Where the rulebook says the weapon cards carry the letters, that is a misprint.
They are the C deck — some later printings left the C off by mistake. The letters only reflect how complex the card text is and have no effect on play.
Several experienced players agree; there is no official ruling.
You can play with any one deck, any two, or all three mixed. Whichever decks you use, shuffle them into a single draw pile; you never pick which deck to draw from. Keep the light brown starting occupations separate.
Yes, in newer printings. The revised base game (which includes Mini Expansions #1 and #2) has a reduced 1–2 player board on the back; use that side with two players. With the original single-sided board you can get the same effect by covering the spaces that were removed. The Norwegians board has separate sides for 1–2, 3 and 4 players.
There are two double-sided tiles: one imitates column 1 or 2 depending on its side, the other column 3 or 4. Choose the sides randomly at setup and leave them for the whole game; flipping them every round is only a house rule. The rectangular spaces are the ones you use. The tiles mainly help newer players, so experienced groups may leave them out.
The rulebook states this in its description of the extension tiles.
No — you can only imitate a space in the matching column that another player's Vikings already occupy this round. Spaces marked with the hand symbol cannot be imitated at all.
Seven. You set up 6 Vikings on the Thing Square and gain the 7th at the start of round 1, so you play round 1 with 7, round 2 with 8, and so on. This applies to solo and multiplayer alike.
The designer discussed turn order compensation on BGG, matching what players report from the rules.
No — in the base game everyone starts with identical items and there is no turn-order compensation. The designer considers the first-player edge small. Mini Expansion #2 adds a soft compensation by letting players pick their harvest resource token in reverse order.
Several experienced players agree; there is no official ruling.
The version with fewer silver (lower income) is the correct, current board. Players note the earlier version, with 5 income on top of its strong bonuses, was considered too powerful.
The designer confirmed on BGG that ships are unlimited and sheds are not, and players cite the rulebook's section on running out of components.
Ships, goods tiles, building resources and weapon cards are treated as unlimited — if they run out, use substitutes. Sheds, by contrast, are available only until the pieces in the box run out. Of the VP chips, the 2-VP chips are unlimited.
Several players agree, citing the rulebook's section on running out of components; there is no official ruling.
They are not a reward for taking a penalty. The back serves as a substitute or multiplier token for building resources if the supply of those pieces runs out.
Several experienced players agree, citing the rulebook's section on running out of components; there is no official ruling.
Take it from the face-up weapon discard pile if one is there. Otherwise search the draw pile for it and shuffle the draw pile afterwards. Taking a specific weapon does not cause the discard pile to be shuffled back in.
Several players agree, citing the rulebook's section on running out of components; there is no official ruling.
Shuffle the discard pile to form a new draw pile. Weapons are effectively unlimited, so if both piles are empty, players can swap sets of weapon cards for the 3-weapon tokens to free up cards.
The designer addressed this on BGG.
No — there is no trading between players in the rules. The designer says you are free to add it as a house rule but cautions that the game's scarcity is deliberate.
One experienced player answered this; there is no official statement.
It marks the current phase on the player aid as you work through each round.
No — orange and red goods (including animals) can only go into buildings (sheds, stone houses, long houses) and onto the banquet table at the feast. Your home board and exploration boards only take green, blue and grey tiles plus silver and ore, so upgrade orange and red goods first if you want them there.
The designer stated this rule directly on BGG.
Yes — the no-green-next-to-green rule applies to your home board and exploration boards, not inside buildings. In buildings green, blue, grey and silver may touch anything. The designer notes it rarely matters, since you seldom want green goods in a building.
Several experienced players agree, pointing to the rulebook's long house example; one player disputes it and there is no official ruling.
Yes — the only colour restrictions in buildings are that red may not touch red and orange may not touch orange orthogonally. Different colours, including red against orange, may touch. The symbols on the building are only reminders, and the rulebook's long house illustration shows red next to orange.
One experienced player answered this; there is no official statement.
Yes — if any part of one tile's side touches another tile's side, they are orthogonally adjacent for the colour restrictions. Corner-only contact is diagonal and allowed.
The designer answered this directly on BGG.
No — water is an unplaceable gap between land areas, so tiles on opposite sides do not touch. Only spaces whose edges actually meet count as adjacent.
The designer confirmed on BGG that lake spaces can never be covered.
Water, lake and mountain spaces on the islands cannot be covered, nor can spaces off the board edge or the support beams in long houses. They give nothing; they just get in the way. Some sit on an income diagonal — the last income value on some islands is an uncoverable lake — so that income can never be covered.
The designer said on BGG that the correction rule is not meant as an intentional option.
No — the Thing penalty for misplaced tiles only exists to repair accidental mistakes discovered too late to undo. Breaking placement rules on purpose is not allowed, and mistakes spotted in time must be corrected. If an unnoticed mistake is found, players take one penalty per green-to-green contact.
Yes — you may rotate and flip any goods or special tile, which mirrors asymmetric shapes such as the anvil, helmet, drinking horn and cloak pin. Special tiles show the same colour and icons on both sides for this reason.
Yes — although they look grey, special tiles count as blue for placement (they may touch each other and other blue tiles) and for any effect that refers to blue tiles. They can also be taken by raiding or pillaging using their sword value.
The designer and the publisher both explained this on BGG.
No — once a placement is final, goods tiles, silver and ore on your home board, exploration boards and the grids of your buildings stay there for the rest of the game. You may try out arrangements before committing, but as soon as the placement gives you any benefit (income, a bonus, a card effect) it is fixed. The only exception is the separate storage spaces on sheds and houses.
The designer stated on BGG that removing goods from these storage spaces is allowed.
Yes — the fenced storage spaces only matter at game end, where they reduce negative points. You may put goods there early as a reminder and take them back out whenever you need them. Tiles placed on a building's grid, especially ones that earned income or a bonus, stay fixed.
No — you may place a tile anywhere it fits, as long as you follow the colour rules and never cover an income space before everything to its left and below is covered. Tiles need not be connected, and you may cover isolated −1 spaces.
The publisher answered this on BGG, and the official errata/FAQ says the same.
Yes — tile placement may be simultaneous. You can lay out several tiles in one go and only the resulting layout must satisfy the placement and income rules, even if one of those tiles would be illegal on its own. A single tile may also cover an income space and the spaces below and to its left together.
Several experienced players agree; there is no official ruling.
No — gained goods sit in your supply beside your boards until you choose to place them, which you may do at any time. There is no penalty for holding tiles; the rulebook's advice to place large tiles before income is a strategy tip. Tiles in your supply can still be upgraded, while placed tiles are no longer part of your supply.
The rulebook's placement rules state this, and players agree.
Green tiles may not touch other green tiles orthogonally on your home board and islands, while blue tiles may touch anything. Blue tiles are therefore needed to fill the gaps between green ones. Blue tiles also show a sword value used for raiding and pillaging.
No — there is no such exchange. Shape is part of what a tile is worth, so plan which tiles you acquire.
The designer and the publisher both explained this rule on BGG.
Every space to its left in the same row, every space below it in the same column, and the whole area down and to the left between them. The light and dark green stripes on the home board show this area. Bonus spaces count as already covered. All the other spaces must be covered, either earlier or by the same placement.
The rulebook states this in the Income phase.
Just one — your income is the smallest income value on the diagonal that is still uncovered. Values are never added together, and tiles placed elsewhere do not raise it. Claimed exploration boards have their own income diagonals, and their income is added to your home board income.
The publisher confirmed the correction on BGG.
Zero. The early rulebook sentence saying you start with an income of 1 silver is a misprint corrected in the errata; the lowest visible income space at the start is 0.
No — once the 15 income space is legally covered, your income is 18. The 18 itself can never be covered, so the blank spaces near it are not needed for anything; they only give room for large tiles to fit and carry no points or bonus.
The publisher and the designer both confirmed this on BGG.
Yes — you may cover negative spaces anywhere, including above and to the right of your current income level, as long as you never cover an income space before everything below and to its left is covered. Ignoring home-board income and just covering negatives is a legitimate strategy.
The designer and the publisher both confirmed on BGG that only the pictures were wrong.
Some versions were. An early downloadable English rulebook (and some other printings, such as the Czech one) showed a picture with income spaces wrongly covered. The intended example covers top-right −1 spaces without covering income spaces whose lower-left area isn't filled; printed English rulebooks and the corrected download are right. The rule itself never changed.
The designer gave a worked example on BGG, and the rulebook says bonus spaces count as covered.
No — bonus spaces count as already covered for the income rule, so you can leave them open, claim the income beyond them, and also collect the bonus once it is surrounded. You may cover a bonus space with a tile if that helps a placement, but then you can never get that bonus.
The designer called the orthogonal-only reading a misunderstanding on BGG, and the rulebook describes surrounding all 8 spaces.
Yes — you must cover all spaces around the bonus, diagonals included: 8 in the open, fewer at a board edge. Covering only the four orthogonal neighbours is a common mistake. Spaces that can't be covered (water, mountains) are the only exceptions.
The publisher answered this directly on BGG.
No — unlike bonus spaces, income spaces are not treated as covered, so any income space next to a bonus must actually be covered to complete the surround. Because Income comes before Bonus, you can use that round's income silver to fill it in time.
The designer answered this on BGG.
No — every square of the bonus must stay uncovered and every space around it must be covered.
The designer confirmed this income puzzling on BGG.
Yes — placing goods and silver is an anytime action and Income comes before the Bonus phase, so silver just received can be placed to finish a surround and that bonus pays out in the same round. The rulebook mentions this as a tip for experienced players.
The designer ruled on this on BGG, consistent with the official errata.
No — all bonuses are collected together at a single moment. Anything you want to count must be placed before then, and goods received as bonuses can only help from the next round on. A stone or long house received as an island bonus in the second-to-last round is therefore only useful for points.
The rulebook's Bonus phase covers all surrounded bonus spaces, and players agree.
From all of them — every fully surrounded bonus on your home board, exploration boards and buildings pays out in the Bonus phase.
Several experienced players agree; there is no official ruling.
It is the rune stone — the blue 2×1 tile. Like other bonus spaces, surrounding it gives you a rune stone tile in each Bonus phase.
You get both.
The designer confirmed on BGG that the home-board income rules apply to exploration boards.
Yes — an island's income is the lowest uncovered value on its diagonal, and you may only cover an income space once every space to its left and below is covered. On islands that area need not be a neat square; it is every space in that row to the left and in that column below. Bonus spaces still count as covered, and silver may not be dropped onto an income space early.
Several experienced players agree, citing the appendix; there is no official ruling.
Yes — each diagonal is checked separately, and since the lower income space lies below the upper one in the same column, it has to be covered first. The English rulebook illustration of this is wrong; the corrected PDF shows it properly.
The publisher confirmed the correction on BGG.
Several experienced players agree; there is no official ruling.
You always collect the lowest income value still visible — but covering that next income space is only legal if its own requirement (everything below and to its left covered) is met. Otherwise the placement isn't allowed.
Several players agree, citing the appendix; there is no official ruling.
You get nothing for them. There is only one cloak pin (the L-shaped special tile) and only three stone houses, so if they are gone when the Bonus phase comes, that part of the bonus is lost. Since Newfoundland can only be taken late in the game, its bonuses usually pay out just once, in the second-to-last round.
The designer answered this on BGG, and it matches the rulebook.
Clockwise, starting with the start player. Playing in passing order instead is a house rule the designer has used in testing, not the base rule.
The rulebook describes this in the Actions phase.
Yes — players take turns placing Vikings on one action space at a time, going around until everyone has passed or run out of Vikings, so some players may take more turns than others. Most other phases can be done by everyone at once.
The rulebook states this in the Determine Start Player phase.
Whoever placed the very last Vikings in the Actions phase. It does not rotate, so the same player can stay start player for several rounds.
The designer confirmed on BGG that the home board shows each harvest in full.
Every one of them. A harvest of 1 gives peas, beans and flax; 1–2 adds grain; 1–3 adds cabbage; 1–4 adds fruit. You get one of each, with no choice involved; the small bag numbers on the orange tiles show which harvest each crop first appears in, and they are not points.
There is no eighth round. The long game ends after the Feast of round 7 (the short game after round 6), so the final round has no Bonus, mountain strip or later phases before scoring.
The rulebook states this in Phase 3, and players agree.
Every unclaimed exploration board that is not being turned this round — including boards turned in earlier rounds. The board being turned gets none (any silver on it returns to the supply) and starts collecting next time. Boards a player has claimed never receive silver.
Yes — still place 2 silver on each remaining unclaimed board. The player who claimed the board gets nothing extra; claimed boards are never paid.
Several experienced players agree; there is no official ruling.
The player who takes the board receives the silver on it. Once claimed, a board is yours for good and never flips, so goods placed on it stay put.
Several experienced players agree; there is no official ruling.
Your home board's round track shows, under each round's Viking, which exploration boards are turned that round.
The designer and the publisher both explained this on BGG, and it matches the rulebook.
No — each animal type does only one thing per breeding phase. If you have a pregnant animal of that type, it gives birth (flip it back and gain a new animal); only if none is pregnant and you have at least two does one become pregnant. So 3 sheep with 1 pregnant become 4 non-pregnant sheep, and each type normally breeds every other round, by design.
The designer confirmed this on BGG, and it follows the rulebook's per-type wording.
Yes — breeding is resolved separately for each animal type. With two or more non-pregnant cattle and two or more non-pregnant sheep, one of each becomes pregnant; a type with a pregnant animal gives birth independently of the others.
The publisher and the designer both confirmed this on BGG, and the corrected rulebook says one per pregnant tile.
Two — every pregnant animal flips back and produces one new animal. Early English rulebooks said you get only one, which was a translation error fixed in later printings. Normally only one animal per type can become pregnant, so this only happens through cards such as Breeder (79A).
No — at most one animal of each type becomes pregnant per breeding phase, however many you own beyond two.
Several experienced players agree; there is no official ruling.
No partner is needed — a pregnant animal gives birth on its own. Afterwards the mother and her offspring are two animals of that type and can breed normally in later rounds; each tile stands for a small herd.
The designer confirmed this on BGG.
No — the stable area is just storage, not a placement area. Animals there still breed and score, and you can take them out to upgrade them or serve them at the feast. An animal only becomes fixed once it is placed onto a grid such as a building or board.
They can be placed wherever red tiles are allowed (sheds and houses), but once placed they lose every animal function: they no longer breed, don't count for 'from' actions, and don't score their printed points. The English Crown is the only placed tile that still scores. Placing animals is rarely worth it compared with upgrading them.
The designer confirmed this on BGG.
Yes — animals are red tiles and follow the normal upgrade chain, so one upgrade turns a sheep or cow (pregnant or not) into the green tile of the same shape (a sheep becomes the 2×4 fur), and another makes it blue. This works while they sit in your stable, and the designer calls upgrading animals a core strategy.
No to both — an upgrade turns a sheep or cow (pregnant or not) straight into the green tile of its size. Upgrading can't make an animal pregnant; animals only become pregnant in the Animal Breeding phase or through a card that says so.
The publisher confirmed this on BGG.
Yes — a pregnant animal still counts as an animal of its type.
No — a 'from' action gives you the pictured good once if you own at least one such animal, no matter how many you have.
No — you either take a sheep for free or pay 1 silver for a cow.
The publisher and the designer both confirmed this on BGG.
Yes — animals are red tiles and can be served like any other red food, straight from your stable, following the usual rule that red may not touch red. It is rarely a good deal, since you give up their end-game points and upgrade potential.
The rulebook only says one tile of each 'type'; several experienced players agree that means the specific good, and there is no official ruling.
Per specific good. One tile of each kind of food may lie horizontally; further copies of that same food must be placed vertically. Different foods of the same colour can each be horizontal. There is no limit on how many copies you serve, as long as same-colour tiles don't touch.
The rulebook says one tile of each kind 'may' be horizontal, and players agree.
Yes — placing one tile of each kind horizontally is an allowance, not a requirement. You may place any food tile vertically.
The publisher and the designer both answered this on BGG.
No — you may only fill the open spaces between your emigrated ships and the Vikings still waiting on the table, and no tile may overhang or extend into blocked spaces. You can rotate tiles to make them fit; a repeated food has to be rotated anyway.
The rulebook's Feast rules state this.
Yes — silver may touch silver; only red next to red and orange next to orange is forbidden. Feeding with silver is legal, though usually wasteful. Ore cannot be served.
The rulebook's Feast rules state this.
For each space you can't or choose not to fill, take a Thing penalty tile worth −3 points at game end. There is no limit on how many you can take, and silver can always be used to fill spaces.
The designer described doing exactly this on BGG.
Yes — food is only served in the Feast phase. You may lay goods on the table earlier as a plan and move or take them back at any time until the feast is resolved.
The rulebook says only the served goods go back to the supply.
Everything served — food and silver alike — returns to the general supply at the end of the Feast phase. Food you didn't serve stays in your supply for later rounds; nothing spoils.
The publisher ruled on this on BGG, and the rulebook's Phase 11 text matches.
No — remove exactly one item, the leftmost, from each face-up strip. The last 2 silver stays until a later Phase 11 (or a player) takes it, and only a completely empty strip is discarded. Early English rule wording suggested otherwise and was corrected in the errata.
The publisher answered this on BGG, and it matches the rulebook.
Exactly one, every round. You first remove the leftmost item from each strip (discarding any strip that becomes empty), then turn up and fill one new strip, no matter how many were removed or how many are already out. The number of strips can therefore shrink or grow.
Several experienced players agree, and it follows from the Phase 11 rule; there is no official ruling.
No — an emptied strip is simply removed. New strips only appear in Phase 11, so for the rest of the round there may be as few as one strip on display.
Several experienced players agree; there is no official ruling.
No — with three strips revealed at setup and one added per round, the 8 strips run out before the last rounds of a 4-player long game. That's expected; you simply add no new strip once the pile is empty.
The designer confirmed this on BGG, and the rulebook states it.
No — you always take from the left end of a strip, following its arrow. Early takers mostly get wood; stone, ore and finally the 2 silver come later. With several strips you only choose which strip to take from.
Several experienced players agree; there is no official ruling.
Yes — each 2-silver counts as one item, both when you take from the strip and when Phase 11 removes the leftmost item. The silver on the strips is finite; the strip is removed once its last item is gone.
Several experienced players agree; there is no official ruling.
No — that space is not a mountain action. You take 1 wood per player in the game and 1 ore from the general supply; it doesn't matter what is left on the strips.
Players agree on reading the space's 'up to'; the designer only commented that the space was dropped in The Norwegians.
You take 2 from each strip that is available; the 'up to' covers having fewer than four. Four strips are not always out, since emptied strips are removed. The Norwegians action board drops this space.
The publisher ruled on Armed Fighter on BGG.
Yes — these work like a normal take-from-a-mountain-strip action, so you must take the leftmost item of a strip. If a card limits you to stone or ore and wood is leftmost on every strip, you get nothing.
Yes — you may skip any parts of a space you can't or don't want to do, and resolve the parts you do take in any order. What you can't do is occupy a space while doing nothing at all just to block it; you must use at least one of its effects.
The designer reversed his earlier ruling on BGG in 2022, and players cite the rulebook's wording that paying a cost is an effect.
Yes — paying a space's cost counts as using one of its effects, so as long as you meet its requirement (a knarr for Overseas Trading) you may pay and take nothing; the Ship's Cook appendix entry even mentions this case. The designer first ruled in 2020 that you must upgrade at least one tile, but in 2022 he acknowledged that the rules allow paying only. He still dislikes it as pure blocking, and The Danes may change it.
The designer said on BGG that the cost is a combined sum, so either part alone is allowed.
Yes — you pay the combined wood and stone cost and may take just the house (for example if your harbor is full) or just the ship (if no house of the kind you want is left).
The designer answered this on BGG.
No — an either/or space is a single action space, so once anyone occupies it, it is closed for both options for the rest of the round. Only a copy effect could let another player use it.
The rulebook ties each column to its number of Vikings, and players agree.
No — a space needs exactly 1, 2, 3 or 4 Vikings depending on its column. You can still end up with extra Vikings in a column legitimately, for example when a failed attempt returns some of them and you place again elsewhere.
The designer answered this on BGG.
Not while any Viking remains on it — a space is blocked as long as it is occupied, and failed hunts, snares and whaling always leave at least one Viking behind. If a card effect empties a space completely, anyone may use it again that round.
The designer confirmed this on BGG, and the rulebook says exchange spaces work once.
No — every action space is carried out once per placement, exactly as depicted: one exchange, one purchase, one ship for wood. Paying more never gets you more. Repeatable exchanges only come from occupation cards.
One experienced player answered this; there is no official statement.
Both. Costs shown together are combined; only costs separated by a slash are alternatives.
The designer and the publisher both confirmed this on BGG.
Yes — you may resolve the parts of an action in any order you like, but you can't stop halfway through one part to do something else.
Yes — if a card gives you a resource or ability immediately before the action, or you play an occupation first on a fourth-column space, you may use it to meet the space's requirement or pay its cost. You can also buy a needed ship just before, since that is an anytime action.
The designer confirmed this on BGG.
No — unless the card says otherwise, an action it grants is taken without placing any Vikings, even if the matching space is occupied. That's also why failing such an action returns no Vikings.
The publisher answered this on BGG.
Yes — imitating an action counts as taking that action, so 'each time' occupations for it apply.
The designer confirmed this on BGG.
Taking a third-column action also lets you draw an occupation card; taking a fourth-column action also lets you play one occupation from your hand. A third-column space does not let you play the card you drew — the designer says that would be too strong — except on the third-column space whose own action is playing occupations.
Your choice. If you play it before carrying out the action, its effect applies right away, including to that action (e.g. a discount on the long house you are building). Likewise, the draw on a third-column space can come first or last.
The publisher answered this on BGG.
No — an occupation only applies from the moment it is played. To have it apply to the action (e.g. a whaling bonus card), play it before resolving the action.
One experienced player answered this citing the rulebook pages; there is no official statement.
Only from specific action spaces: some give 1 silver for each occupation you take into your hand, and the space where you play a single occupation for 1 stone or ore pays 1 silver. There is no general silver bonus for playing occupations.
The designer confirmed on BGG that upgrades keep the shape, and the rulebook describes the colour order.
Into the tile of exactly the same shape and size in the next colour: orange → red → green → blue. For example, the 2×1 peas become mead, then oil, then the rune stone. The path is fixed by the tile's size (some occupations break this).
Yes — you may use only part of an action, so a double upgrade can lift a green tile one step to blue and the unused step is lost. Some players read the rulebook's description of this space (orange to green or red to blue) as the only options, but the publisher and the designer both allow single-step use.
Several experienced players agree, citing the rulebook's trading section; there is no official ruling.
Two tiles, one step each — they may be of the same or different kinds, but you can't upgrade the same tile twice (e.g. mead to oil to rune stone). How many steps a single tile can move is set by the number of arrows on the space.
The rulebook says green tiles already on a board may not be turned, and players agree.
No — upgrades and Overseas Trading only work on goods in your supply. Tiles on a board stay as placed, so you can't put green tiles side by side and then turn them blue. Animals in your stable count as in your supply and can be upgraded.
The rulebook describes Overseas Trading this way, and players agree.
Overseas Trading (which needs a knarr) only flips green goods to their blue side. You pay the space's silver cost once and flip as many green tiles as you like, as long as each is a different good (different shape); two identical tiles can't both be flipped. Orange and red goods can't be upgraded this way, and there is no limit of five tiles.
Several experienced players agree; there is no official ruling.
No — you must take an Overseas Trading space to flip green goods. You don't need one of every type; flipping many different goods at once is just the most efficient use of it.
Several experienced players agree; there is no official ruling.
No — nothing in the game lets you downgrade a tile; the back side is just a component shortcut. If you need a smaller contribution, overpay instead: use a larger tile, place food vertically, or use silver.
The publisher and the designer both confirmed this on BGG, matching the rulebook.
No — a ship is only a requirement. The same ship can be used for any number of different actions in a round, and you never track which ship did what. You normally lose a ship only by emigrating it (or through certain occupations).
The rulebook states the ship limits.
At most 3 whaling boats and 4 large ships (knarrs and longships combined). Emigrating a ship frees its berth, so you can acquire a new one afterwards.
The designer confirmed this on BGG.
At any time, even on other players' turns and without placing Vikings, as long as you have a free berth. A ship costs silver equal to its point value (whaling boat 3, knarr 5, longship 8), so buying one at game end gains nothing. Building ships with wood still requires an action space.
Several experienced players agree; there is no official ruling.
Yes — you may build several sheds, stone houses and long houses (limited only by the pieces in the box) and claim as many exploration boards as you can; each board exists only once.
The designer answered this on BGG.
No — each exploration board can only be taken from its own action space with the matching number of Vikings and ship. Only the 4-Viking 'any island' space in The Norwegians lets you take any board. The designer notes that allowing it would be a harmless house rule.
The rulebook states the emigration cost.
Silver equal to the current round number — 1 in round 1, 2 in round 2, up to 7 in the last round of the long game (6 in the short game). You may emigrate in any round. If a card grants you an emigration (e.g. Birka Settler), you still pay this cost unless the card says otherwise.
The designer confirmed this on BGG.
No — an emigrated ship goes on free banquet table space, filling from the left. Vikings still waiting there block it, and if there's no room for the ship, you can't emigrate.
Ore placed on a ship stays there for good — failing a whaling or pillaging attempt doesn't lose it, and you can't take it off at game end. When the ship emigrates, the ore goes back to the general supply. Only some occupations let you remove ore.
The publisher answered this on BGG.
Yes — the new knarr is emigrated within the same action and never needs a berth, so a full harbor doesn't stop you. You may also do just one of the two parts.
Several experienced players agree; there is no official ruling.
Emigration isn't tied to any island — the ship leaves your bay, is flipped, and placed on your banquet table from the left, where it reduces the food you must serve. The Vikings you placed are not lost but return at the end of the round as usual.
The rulebook describes the rolling procedure.
You roll one die up to three times in total, stopping whenever you like; each new roll replaces the previous result. Then you declare success or failure.
The designer confirmed on BGG that a result of 0 cannot be declined.
There's no target number. After automatic reductions (such as ore on whaling boats), you succeed by paying wood and/or matching weapon cards equal to the remaining result. A result of 0 or less is an automatic success and must be taken; any result above 0 may be declared a failure instead, even if you could pay.
The designer clarified the wording on BGG.
Yes — the 'or' in the hunting rules means 'and/or'. You may pay any mix of wood and the matching weapon cards, just as raiding lets you combine stone and swords. Using weapons first is usually better, since wood has other uses.
The designer clarified this on BGG.
No — weapons are never a prerequisite. They only modify the roll. Whaling needs a whaling boat and raiding/pillaging a longship, but you may take hunting and snare actions with no weapons at all; the appendix line suggesting snares are required is a summary taken out of context.
The publisher and the designer both confirmed this correction on BGG.
No — ore on whaling boats only lowers whaling rolls. The older English rulebook wording that applied it to hunting and snares was a translation error, corrected in later printings, and you don't use whaling boats for those actions at all.
Each whaling boat you use has one ore printed on it, which counts together with any ore pieces you have loaded onto those boats. For example, three boats carrying two extra ore reduce the roll by 5. Only whaling boats count, and the ore stays on the boats afterwards.
One experienced player answered this citing the rulebook; there is no official statement.
Yes — the major Whaling space lets you use one to three of your whaling boats; the smaller whaling space allows only one.
The designer and the publisher both explained this on BGG.
Only on failure: Vikings return from that same action space as shown by its return symbols — none from a 1-Viking space, one from a 2-Viking space, two from a 3- or 4-Viking space. You cannot pull Vikings off other spaces instead. You also get the consolation shown, such as 1 wood or stone plus a matching weapon. Successful attempts give nothing back.
Several experienced players agree; there is no official ruling.
No — you only spend weapons (and wood or stone) after you stop rolling, and only to succeed. If you declare failure you keep them and also take the consolation items.
The rulebook describes both actions.
Both need a longship and let you take one tile whose sword value your battle result reaches. Raiding uses the orange 8-sided die and ore on ships doesn't help; Pillaging uses the blue 12-sided die and adds the ore loaded on one longship. In both, each stone and long sword you spend adds +1.
The designer explained the symbol on BGG.
It means you add the ore of just one longship (at most +3). Raiding has no '1' because ore doesn't count there at all. Extra longships never give extra rolls or ore; each space is still taken once. Additional large ships are useful for emigration, the 2-longship plunder space and some occupations.
The rulebook says you take one tile with a sword value at or below your result.
You take exactly one tile — any available blue or grey tile with a sword value equal to or lower than your result. You can't split the result between tiles.
After. Your battle result is the roll plus the stone and swords you spend, and only a total of 5 or less fails automatically. You may also declare failure voluntarily to take the consolation 1 stone and 1 long sword.
One experienced player answered this citing the rulebook example; there is no official statement.
No — each stone and each sword independently adds 1 to your result.
It's the sword value — the battle result you need to take that tile by raiding or pillaging. It doesn't add to your strength once you own the tile and isn't worth points at game end. Silver prices and tongs symbols matter only for buying and crafting.
The designer worked through an example on BGG.
Only by raiding or pillaging with a battle result of 16 — it can't be bought or crafted. Combine your roll, the ore on the longship (when pillaging), and stone and swords to reach 16; for example a pillage roll of 10 plus 2 ore, 3 swords and 1 stone.
The designer confirmed this on BGG.
No — if you own two longships you simply take the depicted silver hoard tile; there's no roll and no weapons are needed.
Any time except in the middle of resolving an action. Ore has to be on the ship before you start rolling — you can't roll first and then add ore to turn a failure into a success.
Only tiles showing the tongs (forge) symbol. The crucifix counts as craftable even though it sits outside the tongs area of the special tile board (its tongs were a known misprint). The smaller crafting space reaches only the tiles in the small oval, while the 3-Viking space also reaches the craftable tiles on part of the large oval. The English rulebook line saying all special tiles can be crafted is wrong.
Yes — the missing forge symbol on the helmet's back is a printing error in older copies.
Several experienced players agree; there is no official ruling.
No to both — the ore is the whole cost and you take exactly one available tile with the tongs symbol, ignoring its silver and sword values. Silver prices only apply when buying with the Special Sale space, which allows up to two tiles.
The rulebook describes the Special Sale space.
With a knarr, up to two special tiles that show a silver price, paying those prices. That includes craftable tiles; only tiles without a price (like the English Crown) can't be bought. Special Sale is its own action space, not an Overseas Trading space.
Several experienced players agree, citing the rulebook's occupation section; there is no official ruling.
Played occupations stay face up in front of you for the rest of the game, and the colour says when the effect applies: yellow cards give a one-time effect when played (but still score their points), green cards give a one-time effect as soon as their condition is met, red cards trigger each time their condition occurs, and blue cards are anytime effects.
Several players agree, citing the appendix's 'any time and any number of times' wording; there is no official ruling.
Any number of times, at any moment before scoring — including in the middle of a main action. For example, Tanner can convert as many salt meat into hides as you like. Cards worded 'immediately before' or 'immediately after' an action are different: they apply only at that point.
Yes — you may play any occupation without using (or being able to use) its effect and still score its printed value. Anytime cards can be played now and used later.
One experienced player answered this; it follows from the rules, but there is no official statement.
No — an occupation does nothing until it is played, and cards still in your hand at game end score nothing.
No — you play them one after another in the order you choose, and each takes effect as it is played. So one card can trigger off or affect another you play later in the same action.
A 'house' is only a stone house or a long house — sheds (including Norwegians artisan sheds) are not houses. A 'house building' action also covers building sheds, but never building boats.
No — occupations only ever act on your own goods and pieces; nothing in the game lets you change another player's tiles.
Yes — with Adventurer you may take any face-up exploration board from that space instead of Shetland or the Faroe Islands. You still need a ship, but any type works, including a whaling boat.
The designer confirmed both points on BGG.
Yes — play it before taking the action and its resource arrives in time to use. The stone it gives also counts as received during a Viking action, so it triggers Stone Crusher (156B).
The designer answered this on BGG.
Yes — play the card before the action and it gives you the stone or ore for that action. Its wording simply signals that the resource arrives before the action.
One player answered this from the appendix wording; there is no official statement.
Yes — the Artist triggers whenever you use a crafting action space, however you came to use it.
The publisher confirmed this erratum on BGG.
For each — the English text is missing words. You receive 3 weapon cards and 1 silver for every game meat or whale meat in your feast.
The designer answered this on BGG.
No — you can't take Berserker's bonus for removing ore and then put ore back for the same raid or pillage. Ore may only be placed before an action starts, not during it.
No Vikings are needed — after Overseas Trading you simply take an emigration action. You still pay the normal emigration cost of silver equal to the round.
The publisher answered this on BGG.
No — emigrated ships are no longer your ships, so only the large ships in your bay count.
No — Overseas Trading flips all the chosen green goods as one step, and Bosporus Merchant's oil only arrives after that action is finished.
The publisher and the designer both addressed this on BGG.
No — it triggers whenever a new cattle tile enters your stable, whether bought or born from breeding. Flipping a cow you already own to its pregnant side doesn't count. (BGA triggering it only on births was a bug.)
The publisher answered this on BGG.
Yes — any action that results in you receiving stockfish triggers it, including an upgrade action.
The publisher answered this on BGG.
Yes — take the wood first, use Cooper to exchange 1 wood for a stockfish, then use the upgrade part of the same action on that stockfish.
One player compared the card translations; there is no official statement.
From any board, including your own. The German card and the appendix both say so; the English card's 'another player's' wording appears to be a translation error.
The designer answered this on BGG.
No — only the spaces in the crafting row are crafting actions. House building, ship building and slaughtering are not, even though they share the colour.
Several players agree; there is no official ruling.
Per house — 2 silver for each stone house and each long house you own. The parentheses only list which buildings count (sheds don't).
The designer gave his view on BGG but explicitly left a formal ruling to the publisher, and players are split.
Yes, by the designer's reading — the card only replaces the raid's outcome; it doesn't remove the space's longship requirement. Some players (and BGA at one point) allowed it without a longship, and the designer called that tolerable but left a formal ruling to the publisher.
The designer reasoned through this on BGG and concluded it is allowed.
Yes — if your Thing Square holds exactly 3 Vikings when the card enters play during that action, you get the 1 silver. The word 'becomes' is there so it can trigger more than once a round, not to exclude this case. Some players argue the count reached 3 before the card was in play, but the designer reads it in the player's favour.
One experienced player explained the card; there is no official statement.
Search the weapon deck for two of each weapon type you have none of, and one of each type you hold exactly one of. Types you already hold two or more of give nothing.
It triggers on itself, so you get 1 peas for the action you play it in (once per action, however many occupations you play). The peas arrive after the action, so you can't upgrade them on that same space.
Discard it and draw a replacement occupation. The same applies to any card that refers to an action space missing from the board you're using.
Several players agree; there is no official ruling.
Only a successful Hunting Game on the 2-Viking space. Failing, using the 3-Viking hunting space, or laying a snare gives no bonus.
The publisher corrected an earlier answer on BGG, and the designer treats going further as a house rule.
It works only on orange farm goods: for 1 silver you move one tile diagonally up-right in the goods boxes by up to two steps (e.g. beans to skin and bones), which may cross into another box. Two steps aren't required, so fruit — which has only one such step — becomes a cow and stops there; it can't jump straight to the green 3×4 tile. The publisher first said exactly two steps were needed but corrected himself.
One player quoted the appendix; there is no official statement.
No — it only triggers after the Harvest phase in rounds that actually have a harvest.
One player answered this; there is no official statement.
Yes — with Follower you take two actions that turn.
The designer confirmed this on BGG.
Yes — its mountain-strip good is taken immediately before the action, so you can take an ore (if it is the leftmost item on a strip) and spend it on that crafting space. The designer says that was the main idea of the card.
The publisher and the designer both answered this on BGG.
It replaces only the upgrade-one-good part, so you still take the mountain resource from that space, and using it is optional. It also works on The Norwegians' fifth-column upgrade space.
Several players agree, citing the appendix; there is no official ruling.
Refugee Helper discounts every emigration, including ones granted by occupations, so it stacks with Harbor Guard. Patron does not apply, because it only discounts action spaces costing 2 or more and a card-granted emigration is not an action space.
The publisher stated the intended timing on BGG.
Before — you draw the weapon as you take the action and may use it in that same action. It does not trigger when Steersman lets you use a knarr for a longship action, since you are still using a knarr, not a longship.
The designer confirmed this on BGG.
No — you just pay the card's cost and take the action(s), even if those spaces are occupied. That's why failing returns no Vikings.
The designer confirmed on BGG that it affects all die rolls.
It applies to every die roll, including raiding, pillaging and The Norwegians' Theft, and it's mandatory — so it actually hurts the actions where you want high rolls.
Yes to both — only spending wood disqualifies the bonus. You get the normal whaling reward plus cabbage, beans or peas for using exactly 1, 2 or 3 whaling boats.
The publisher ruled on this on BGG after checking with the designer, and the expansion designer agreed.
It triggers when the action itself gives you exactly 2 silver — including 2 silver taken from a mountain strip, even if the action also gives other goods. Silver from claiming an island or from an occupation (e.g. Milker) is a side effect and doesn't count. With Stone Crusher you may trigger Laborer first and then take Stone Crusher's extra silver.
The designer commented on the reach of this card on BGG.
A free first-column space directly above or below one of your Vikings in the first column; other translations make this adjacency explicit. The designer also allows 'jumping' a gap left by a space missing from the board, and players see no reason it can't reach an unused first-column imitation space.
The designer ruled on this combination on BGG.
Lone Wolf rewards using exactly one weapon card in total. With Melee Fighter, spears count as weapons alongside long swords (and you may mix them freely), so succeeding with a single sword or a single spear returns it — but a sword combined with spears returns nothing. Stone isn't a weapon card and doesn't matter.
One player answered this; there is no official statement.
No — it applies only to the raiding or pillaging action you are taking.
The designer and the publisher answered the two parts on BGG.
No — Middleman triggers immediately after the Weekly Market action, so its upgrade can't be used during the action to qualify for something within it. Anytime cards are different and can be used mid-action. Imitating a Weekly Market action does trigger Middleman.
The publisher answered this on BGG.
Yes, it applies to every space that takes building resources from mountain strips, including the single-strip ones. Its bonus mead, hide or chest comes from the general supply, not from a strip.
Yes — there is still time for anytime actions around it, so you can place other tiles, ore or silver before or after the Ore Boatman ore, before Income is calculated.
The publisher answered this on BGG.
No — the card lets you place up to 2 peas horizontally, but those two peas still may not touch. The word 'adjacent' in the appendix refers to the two spaces covered by a single pea tile.
One player compared translations; there is no official statement.
One of each pictured good when you discard a cow. The English appendix (which matches the Polish one) appears to be correct, and the Spanish 'one of' wording an error.
Several players agree; there is no official ruling.
No — it's a free bonus for playing the card, worded as an action only so it combines with cards like Stonecarver. All 4 items come from a single mountain strip.
Sheds yes, ships no. The Princess triggers on house-building actions, which include building a shed; building a boat never counts, even on a space that sits in the house-building row or offers house or boat.
Several players agree after comparing the German text; there is no official ruling.
For each — every time 1 ore or 2 silver is removed from a mountain strip in Phase 11, you get 1 or 2 silver respectively, possibly several times in that phase. The English 'and' is a translation issue.
No — Pyroman only lets you use the single Plundering space with 1 or 2 fewer Vikings. The space stays occupied, so there is no loop. The Italian appendix names the wrong space.
The designer confirmed the longship price on BGG, and players cite the appendix on rounding.
You keep the weapons; they only count toward the discount on a longship (base price 8 silver). The final cost is rounded down, not the discount — a cost of 5.5 becomes 5.
Players agree yes — the card lets you take a green tile with a sword value one lower than its blue side, and card text overrides the general rule that 5 or less fails automatically.
Right before each Overseas Trading action, you may upgrade one salt meat, game meat or whale meat (not sheep or cattle) from red to green. That green tile can then be flipped to blue in the Overseas Trading action itself.
No — the icons are decoration illustrating bonus symbols. The card text is what counts.
Steersman lets a knarr be used for longship actions, but it doesn't become a longship — so Miner (22A), Weapon Supplier (32A) and other cards that count longships ignore it. You may plunder using any two ships among your longships and knarrs.
The designer confirmed the timing on BGG, and players quote the appendix on 'exactly one'.
Immediately before the Income phase you may place exactly one wood or one stone in a shed for 1 silver, so it pays at most once per round. Because the silver arrives before Income and placing is an anytime action, you can place that silver to raise the same round's income.
Yes — any Viking action that gives you stone pays the extra silver once, including the consolation stone from a failed raid. Stone that another occupation gives you while you take a Viking action (e.g. 118C on a Weekly Market) also counts.
The publisher answered this on BGG.
A single extra tile, once: choose one good type of which you have exactly three in your supply and take a fourth. Stabled animals and goods already placed on boards don't count.
Yes — its thresholds mean 'at least', so 5 or more special tiles gives 3 silver.
When played it gives a one-time amount of silver based on player count. After that you get 1 extra silver each time you take the final 2-silver item from a strip — once per strip if one action empties several.
Several players agree, citing the appendix; there is no official ruling.
Each time exactly 1 or 2 of your Vikings move from the action board back to your Thing Square during a round — from a failed roll or a card effect — you get 1 silver. The normal end-of-round return doesn't count.
No to both. Animals only become pregnant in the breeding phase, and the designer ruled that the card can't make them pregnant despite its 'flip goods tiles' wording (some players and BGA read it literally). It also only affects goods in your supply, never placed tiles.
The publisher answered both questions on BGG.
Yes, you still get the occupation play on Plundering even with fewer Vikings there. But Warmonger can't reduce the placement on which you play it: you must place all 4 Vikings first to take the action that lets you play the card, and you get none back.
Several players agree, quoting the solo rules; there is no official ruling.
Place 5 Vikings of the first colour on the Thing Square and 5 of the second colour on the waiting space (6 in the short game), plus those on the round spaces. One Viking is left over and goes back in the box: one of the second colour in the long game, one of the first colour in the short game.
The rulebook's setup gives the number of strips by player count.
Two — every game with up to three players, including solo, starts with 2 strips; only 4-player games start with 3.
Several experienced players agree; there is no official ruling.
Not really — all pieces are yours. Each round you place one colour, and the other colour's Vikings simply block spaces. You still resolve harvest, income, feast and bonus for yourself every round.
The designer and the publisher both ruled on this on BGG.
No — only the colour you are using this round counts as your Vikings; treat the other colour as a separate player. Counting both would make such cards overpowered. The designer later said letting Ironsmith remove the other colour is an acceptable house rule, but not the rule.
Yes, they still flip on schedule and still accumulate 2 silver per round. Skipping Phase 3 just saves handling: instead of placing coins every round, you take the silver a board would have accumulated from the supply when you claim it (the appendix lists the amounts, or count rounds on your home board). Playing it out in full is fine too.
No — the last round's income counts only once. Either skip paying it out and write it in the Final Income box, or take it as silver (to spend at the last feast, on a card, or to cover spaces, especially −2 spaces) and leave Final Income blank. The English 'do not pay it out' wording is a mistranslation; recording it is just an optional shortcut, and the designer suggests simply paying it out.
The publisher and the designer both confirmed this on BGG.
Yes — you may take the final income as real silver and spend it in the final feast, on card effects, or place it to cover spaces before scoring. If you do, don't also record it as Final Income.
Several experienced players agree; there is no official ruling.
No — Final Income is only the income paid in the last round's Income phase. Placing more tiles or silver afterwards can't produce another income; the game ends before any further income or bonus.
The designer confirmed this on BGG, and the rulebook's scoring list includes silver.
Yes — each silver in your supply at game end is worth 1 point, the same as using it to cover a −1 space. Silver placed on your boards scores nothing itself; it only cancels negatives.
The publisher confirmed this for ore on BGG, and the rulebook's Final Scoring section describes these placements.
Yes — before scoring you may place leftover wood and stone on shed and house storage spaces and any remaining goods, silver and ore into your placement areas, following the normal rules.
The designer confirmed this on BGG, and the rulebook's scoring lists positive and negative points separately.
Yes — you always score each board's and building's full printed value, then separately subtract the negative points of its uncovered spaces. So it still pays to cover what you can.
The designer answered this on BGG, and it matches the rulebook's scoring list.
No — the number on a blue or special tile is its sword value for raiding, and the bag number on orange tiles shows which harvest it comes in. Goods only score by covering negative spaces. The exceptions are the English Crown (2 points) and sheep and cattle kept in your stable.
The rulebook's Final Scoring section lists ships and emigrations separately.
No — score only the side that is face up. A ship in your bay scores its ship value; an emigrated ship scores only its emigration value (18 for a knarr, 21 for a longship).
The designer answered this on BGG, matching the rulebook.
No — tied players share the victory. The expansion designer suggests an optional house rule: the player later in the starting turn order wins (or whoever held the start-player moose in the last round). The Danes adds an official turn-order tiebreaker.
By the setup rules: with 1–2 players use the four new Norwegian islands; with 3 players add two of the revised base islands (one A or B, one C or D); with 4 players add all four revised base islands. As an option you may always use all of them, plus the mini-expansion islands — the designer mostly playtested with all islands out. Boards are laid out side by side, not stacked; when a letter comes up, every untaken board with that letter turns.
They are rebalanced replacements for the original four islands, printed in the newer style that shows which exploration action and ship each needs. Only victory points changed: the Faroe Islands rise from 4 to 10, Bear Island from 12 to 16, and Baffin Island drops from 12 to 10; negative spaces are unchanged. Use them instead of the originals; they also work with the base game alone and the original action board. (An early preview gave the Faroes 8 points; the printed value is 10.)
The designer explained this on BGG.
Each Norwegian (and revised base) island shows an icon in its corner giving the exploration action — 1, 2 or 3 Vikings — and the ship required. Take it only from that space. The fourth-column 'any' space is the exception.
With a longship, it lets you take any face-up exploration board — 1-, 2- or 3-Viking islands and mini-expansion islands alike — but never the unrevealed back side of a board. It appears only on the 3–4 player side of the board. No other exploration space can take an island from a different category.
Only the islands the first-column 1-Viking exploration can take, such as Shetland, Faroe, Lofoten/Orkney, Isle of Man, Isle of Skye and Limerick. Placing a second Viking there only lets you play an occupation; it never opens 2- or 3-Viking islands. Adventurer (107B) still works there, since it keys on the ship symbol.
The designer answered this on BGG.
No — you may buy the whaling boat, explore a 1-Viking island with a ship you already have, or both. The payment is only for the boat. As always, you can't take the space and do nothing.
One experienced player answered this; there is no official statement.
You can only take islands that are currently face up, and you may skip the emigration part if you can't or don't want to pay. Your bay still holds at most 4 knarrs and longships.
The designer described the last-action column on BGG.
Its spaces are for your last Viking and are somewhat stronger than normal 1-Viking actions. You may place your last two Vikings there instead, in which case you also play an occupation, before or after the action as you choose. After placing there you are done for the round.
The designer stated the intended rule on BGG, while noting the English wording differs.
The designer says the intent is that it takes your last remaining Viking (or last two when playing an occupation), and the German rulebook reads that way. The English wording can be read as letting you place there early and then pass, forfeiting leftover Vikings; the designer says to play whichever you enjoy, but the intent is the last Viking.
Players reasoned this out from the iconography; there is no official ruling.
Players concluded yes — the fifth-column occupation bonus uses the same icon as the fourth column, so you can play the card before the action and it triggers on it. One reply questioned whether the space counts as already used.
The designer answered this on BGG, and the Norwegians rules return the tiles to the box.
No — the Norwegians action board has separate sides by player count, so the extension tiles go back in the box. The designer says you may add them back as a house rule, mainly to help newer players.
No — play still goes clockwise from the start player, who is the player who placed the last Viking the previous round. The designer suggests making your own passing-order markers if you want that.
Set it aside and use it as the strip revealed for the final round, at any player count — it is mainly needed in 4-player long games where the strips run out. Using it earlier, especially solo, is too strong. With The Danes it becomes the second-to-last-round strip.
The designer confirmed this on BGG.
Yes — each is a single action space and one placement gives both rewards (e.g. the market goods plus grain if you own a horse). The two row names remain because occupations refer to them, and the space counts for both.
The designer explained each space on BGG.
Where an animal is shown as a requirement ('from'), you only need to own it — at least one, unless a number such as 2/3 is printed — and you keep it; you get more only where the space says so. You give animals up only on spaces with a conversion arrow, such as slaughtering, and pregnant animals may be used. The pig-for-meat space, for instance, gives one meat and you keep the pig.
The designer described these spaces on BGG, matching the Norwegians rulebook.
Yes — that space (2 silver and 1 beans) gives any combination of two pigs or sheep. The 4-Viking space (3 silver and 1 grain) gives any two animals, and the 2-Viking space any one animal plus grain for 3 silver.
The designer confirmed this on BGG.
Yes — on the slaughter space both yield the same result, so the two animals are equal once slaughtered. They only differ when kept (a horse is worth more points) or upgraded.
The designer confirmed on BGG that each type gives only one new animal.
Pigs have no pregnant side: once you have at least two pigs, you gain one new pig in every breeding phase — faster than sheep and cattle — but only one, however many pigs you own.
Yes — the new tiles follow the normal upgrade chain: orange herbs become a red pig (a handy way to get a second pig for breeding), and a pig becomes the green antlers.
The designer confirmed this on BGG.
Yes — like any orange or red tile. You may use any orientation, including laying a pig on its back so it covers three spaces in a row; a second identical tile must be rotated as usual. Serving a pig can beat paying silver.
No — anything puzzled into a building or board loses its former function. An animal there no longer breeds, scores its points or counts for 'from' actions; a whaling boat placed in an artisan shed scores nothing and can't be used for whaling, exploring or emigrating. The English Crown is the only exception.
The designer confirmed this on BGG.
Only goods in the separate fenced (oval) storage spaces — such as mead on the Beekeeper or fish on the Icehouse. These only reduce negative points at game end and may be placed and removed freely; this used to be a house rule and is now official. Tiles puzzled onto the shed's grid stay put.
The designer described artisan shed setup on BGG.
Each player gets one artisan shed at setup (drafted from last player to first, or dealt randomly); unused ones go back in the box. It isn't yours until you build it with any shed-building action — you may build it instead of a normal shed — and you pick its side when you build it.
It lets you build a shed without paying wood — a normal shed or, as with any shed build, your own artisan shed instead.
Only your own, if it isn't built yet — whenever you may build a shed you may build your artisan shed instead. You can't take another player's or an unassigned artisan shed.
No — an unbuilt artisan shed isn't yours yet, so it scores nothing either way. (In the 6-round variant with the harvest mini-expansion it starts built and scores normally.)
Like any other income diagonal: you collect the lowest visible value, and an income space may be covered once everything left of and below it is covered. Fenced storage slots are not part of that grid, and a −2 space below and right of the income (as on the Pigsty) doesn't need covering. On the Cow Stall the cow is only needed for the milk bonus, not the silver income.
Yes — the boat space adjoins the bonus and the income spaces, so you must place a whaling boat there. You may move one from your harbor at any time, but once placed it stays for good, no longer counts as a ship and loses its 3 points.
The −2 space shows ore, so cover it with an ore. The bonus gives a sword specifically: when a particular weapon is pictured you get that weapon, while 'any weapon' is shown with the card back.
Several players agree; there is no official ruling.
No — it just shows beans as a harvest-1 good for consistency. The space is a −2 at game end unless covered.
The designer explained the −2 spaces on BGG.
Yes — like a −1 space, a −2 space is covered by a single silver, so it costs only 1 point if you have silver (2 if left open). That is what makes taking your final income as silver worthwhile.
You give up a whaling boat and take a small emigration tile worth 7 points that covers one banquet table space (a knarr or longship emigration covers two). It is available on a last-action space, on the 4-Viking emigration space, and on the 4-Viking 'pay 2 silver and explore' space; the tiles are unlimited and go on the new ship board's small-emigration area.
No — you emigrate a knarr or longship by paying silver equal to the round, and may additionally emigrate a whaling boat for free. Do either part or both, in any order.
No — only emigrating a knarr or longship counts for occupations that refer to emigration.
The Norwegians lowers the knarr space's cost to 1 wood. Occupation cards are not changed by the expansion, so Knarr Builder keeps its printed cost; the errata only clarifies interpretations.
One player answered this; there is no official statement.
No — the ore on the whaling boat is lost. Ore on a ship can only be taken back through occupation effects.
You need a knarr, roll the 8-sided die, and add spears, swords and bows to reach the sword value of a tile you take from the general supply — never from another player. Stone and longship ore don't count. Occupations that mention raiding or pillaging don't apply to Theft.
The designer confirmed this on BGG.
Yes — everything left of the bar on a hunting space is your consolation for failing; the elk hunt gives one of each pictured weapon, three in all. You never lose weapons by failing, since you only spend them to succeed.
On the renewed board (4-player side only) a failed hunt returns a Viking, and a success gives the green antlers instead of a fur. Cards that reference the space still work.
The designer confirmed this on BGG.
Yes — you may add as many eligible weapons as you like, in any combination, to adjust a roll.
The designer confirmed this on BGG.
As in the base game: you need two longships, there's no roll and no weapons or ore are used, and you take only the depicted silver hoard tile. As a 4-Viking space it also lets you play an occupation.
The designer confirmed this on BGG.
Only by buying it for 2 silver. It deliberately has no sword value and no forge symbol, so it can't be raided, plundered, stolen or crafted — keep it with the non-craftable tiles.
The designer answered this on BGG.
Any grey tile with a silver price, from either supply board — including craftable tiles. Tiles with no price, such as the English Crown and the altar, can't be bought. A tile's symbols tell you how it can be acquired: price to buy, tongs to craft, sword value to raid or pillage.
One player answered this; there is no official statement.
No — the restriction only applies to the Forging action(s); the normal crafting spaces can still be used.
No — each upgrade on that space must be applied to a different good. You choose the order, but you can't single-upgrade a tile and then double-upgrade the result.
Yes — when a space gives several things, resolve them in whatever order suits you.
The designer confirmed this on BGG.
Either — you choose the order. You may draw two and then play one of them, or play first (e.g. an anytime card such as Preceptor that changes how the draws work).
Whenever you could play an occupation, you may instead remove it from the game face down and take the highest VP chip still available — there are two 4-VP chips, six 3-VP chips and unlimited 2-VP chips. There's no other cost and no need to be able to use the card. Score the chips in the occupations row. The rule also works with the base game.
The designer endorsed this on BGG.
Yes — each play opportunity can be used to discard a card for a chip instead, so that space can turn up to four cards into chips. You may mix played and discarded cards in the same action.
No — the chip is only for discarding instead of playing when you could play a card. On that space the discard (from your hand, not your played cards) is the cost, so there's no chip.
The designer's expansion appendix says so.
Yes — the expansion appendix says 52A and 176B also apply when an occupation is discarded for a chip, and 99A's card may itself be discarded for a chip.
Eight: 52A Tutor, 107B Adventurer, 115B Princess, 125C Scribe, 150C Meat Buyer, 163A Farmhand, 170A Refugee Helper and 189B Seafarer — because their action spaces changed or they become too strong with many islands and artisan sheds. The list was printed in the Mini Expansion #2 rules but applies to The Norwegians even without it. A longer list of weak cards is only a suggested removal.
The designer's expansion appendix and BGG answers cover these cards.
Only where the card's text and picture allow it. Pigs and horses are red goods and animal types, so cards keyed to 'animal types' include them — Milker (10A) can give up to 4 milk and 4 silver, and 26C and 35A include them. Cards that picture or name only sheep and cattle, such as Skinner (157C) and Barbarian (158A), don't, and a card that excludes sheep and cattle (Storeman, 31C) doesn't gain pigs or horses (herbs, being orange, are fine).
A shed. Cards about sheds (such as Steward, 42B) work with artisan sheds, but cards about houses — stone houses and long houses only — don't, so Judge (101B) or Maid get nothing from them. Tiles placed on a shed have no function for card effects.
Discard it and draw a new occupation. This covers 109B, 110C and 163A when their space isn't on the board side in use, and always Meat Buyer (150C). The designer's earlier suggestions — treat such cards as blanks or discard them for a VP chip — were replaced by this rule in the final appendix.
Yes — if a space keeps its name, or only its picture or text changed, cards that refer to it still work. For Fur Merchant's alternative on the renewed space, you give up the 2 weapon cards instead of the upgrade.
No. 60C and 108C explicitly don't apply to the last-action column, and Weapons Warden is read as written — second column only. Ironsmith and Forest Blacksmith do work on the 2- and 3-Viking ore-exchange spaces.
The designer's expansion appendix says so.
No — the expansion appendix says both cards ignore the new goods tiles kept in the additional box. Players treat the harvest mini-expansion goods (like berries) the same way, though the designer calls a house rule harmless.
The designer's expansion appendix covers this.
No — receiving them as a bonus isn't a build action. The appendix says Shipowner (117A) and Spice Merchant (148C) don't apply, and Cottager doesn't trigger on the bonus house. For 179B the English and German appendix texts disagree, so that card is unsettled.
The designer gave these examples on BGG.
Yes — Peddler's 1-silver discount on animal purchases also covers the spaces that sell pigs and horses, and Patron reduces anything costing 2 or more silver by 1, including new costs such as the 2-silver knarr upgrade space.
The designer answered this on BGG.
No — the card was written for the base game, where the hunt gives a hide and game meat. Using it to get the antler version would make it too strong, so take the hide-and-meat result.
The designer answered this on BGG.
The game meat bonus needs only the six spaces around it on its side of the river. The income 2 needs all eight spaces to its left and below, including those across the river; the Norwegians rulebook example shows this. The same applies to Islay's separate left section.
The designer answered this on BGG.
The usual rule — to cover an income space, every space below it and to its left must be covered. Some Isle of Man income spaces have no spaces below them, so fewer need covering.
One of the new blue tiles from The Norwegians, shown in the board's top-left corner (the tool).
No — it's a leftover from the prototype with no rules meaning; the space works like the others in its row.
Several players agree; there is no official ruling.
Sail Patcher: once you have 3 large ships, add up your income from every source (home board, islands, artisan sheds) and compare the total with the card. Woodcutter checks each Viking action separately, so wood from different actions isn't added together.
One player answered this; there is no official statement.
No — only to whaling rolls.
The publisher answered this on BGG.
No — they are added on top of the existing exploration boards.
The designer answered this on BGG.
There is no fixed number. You may put out every island — which the designer considers normal — or limit them by player count (for example 4 islands solo or with 2–3 players and 8 with 4, drawn by letter). Tierra del Fuego has no letter and is simply added or left out by choice.
It never flips — it has no letter, and the day/night art is just art. Because it stays unclaimed and unturned, it receives 2 silver in every round silver is placed, so it can pile up a lot. It is taken with a longship from the 3-Viking exploration space.
Lofoten works like Shetland: it is explored from the first exploration space with 1 Viking and any ship, with no prerequisite. It turns over to Orkney on the round track's schedule (round 3 in the long game), and Orkney is still taken from the first exploration space.
The designer answered this on BGG.
Every space to the left of and below it, wherever those spaces are — not just a square block from the bottom-left corner. The English rule's 'all spaces in the square' is misleading here.
The designer explained the example on BGG.
Your income is the lowest uncovered value. Once the 2 is legally covered, the 3 is your income; you only need everything left of and below an income space to cover it, so to reach 4 you must first fill what the 3 requires.
Yes — a bonus needs every space around it covered (up to 8); for Lofoten's stone that means all 5 neighbours, including the diagonal across the thick line. Border lines don't separate spaces; only a real gap such as Limerick's river does.
Yes to both — it is modular, and its rules include setup with The Norwegians.
No — starting with your chosen artisan shed already built (or, without The Norwegians, choosing a dark brown occupation instead) is part of the 6-round short game setup only. The English rules layout makes it look general, which is a translation/layout error. In the 7-round game you may still choose your artisan shed instead of drawing randomly, but it isn't built for free.
The designer gave this order on BGG.
Choose the exploration boards; reveal mountain strips and the first harvest token, and draw two starting occupations; determine turn order; in 6-round games take the extra weapon and 3 silver; pick resource tokens; pick artisan sheds (built in the 6-round game); finally keep one starting occupation and discard the other.
The designer confirmed this on BGG.
The last player in turn order picks first, and the order runs backwards. This serves as the official turn-order compensation; the base game and The Norwegians have none.
The designer explained on BGG that the rule was published with this mini-expansion.
Yes, with Mini Expansion #2 — it made 'draw 2 starting occupations, keep 1' an official rule. The designer intended it for The Norwegians too, but it missed that rulebook, and many groups also use it in the base game.
All resource tokens are available to choose from, in multiplayer and solo (limiting the choice is a harmless house rule). In harvest rounds you receive what is on the orange side as part of your harvest; in rounds without a harvest you receive the brown side instead.
One token (two in the 6-round game) stays unused, so you don't know in advance how many real harvests you'll get — possibly fewer than in the base game, and no-harvest rounds can come in a row. Round 1 always has a harvest, and since the next token is revealed after each harvest you always see the coming round's harvest. Fixing the harvest count is a house rule; the randomness is intended.
Berries aren't regular harvest income — they come only from the resource/harvest tokens that show them. The expansion's Isle of Mull gives eggs (and Caithness, its back side, amber), not berries.
Officially no — The Norwegians' errata says Field Farmer doesn't apply to the new goods tiles, which covers berries. The designer says house-ruling it is harmless.
It's optional. The 8 banned cards were chosen for play with The Norwegians and the harvest mini-expansion — their spaces changed or they became too strong — and the list was simply printed with Mini Expansion #2. In the plain base game they are fine to keep, though some (like Princess) are strong there too. The longer 'recommended to remove' list is only a suggestion.