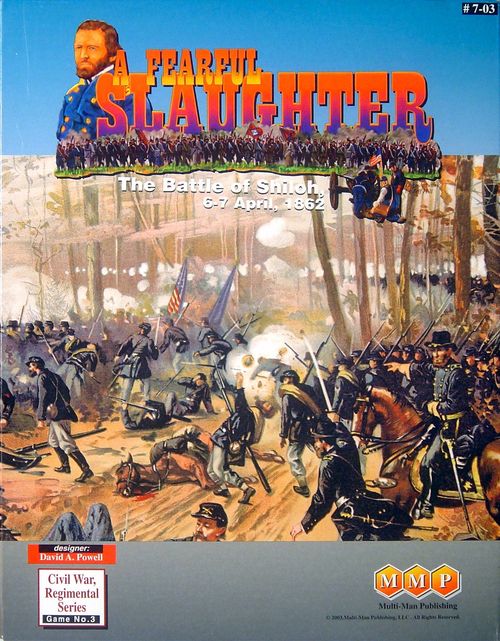
A Fearful Slaughter: The Battle of Shiloh
A Fearful Slaughter: The Battle of Shiloh Rulebook
Table of Contents
Table of Contents
- General Note on Terminology
- Sequence of Play
- 1.0 Terrain and Map Notes
- 2.0 General Special Rules
- 3.0 Union Special Rules
- 4.0 CSA Special Rules
- 5.0 Victory Conditions
- 6.0 Scenarios
- 6.1 Stuart's Brigade
- 6.2 "Take your damned Regiment back to Ohio!"
- 6.3 Prentiss Attacked
- 6.4 Opening attack
- 6.5 Hornet's Nest
- 6.6 The Final Drive
- 6.7 "No enemy nearer than Corinth"
- 6.8 "Lick 'em tomorrow"
- 6.9 "Water our horses in the Tennessee River"
- 6.10 What might have Been
- 6.11 The Shiloh that Was
- Shiloh Designer's Notes
- Shiloh Historical Notes
- Grant and Lew Wallace
- Death and Night
- Duplicate Regiments
- Stephens and Maney
- Bains' Battery, Viaden Mississippi Artillery
- I/1 Mo Arty/3/T Division
- The Unfortunate Colonel Raith
- W.H.L. Wallace
- Optional Confederate Forces
- Fort Donelson
- Island No. 10
- Army of the West
- Rating the Army Commanders
- A Common Unit on a Bad Day
- Union Random Events
- CSA Random Events Table
- Leader Seniority Lists
General Note on Terminology
There are three types of die/dice rolls required in A Fearful Slaughter. The first is a single die roll netting a result of 1–6 (indicated in the rules by the term dr). The second is two dice rolled and summed netting a result of 2–12 (indicated in the rules by the term DR). The final type is two dice read with the colored die as the "tens" and the white die as the "ones" netting a result of 11–66 (indicated in the rules by the term D66). Any modifiers applying to a dr are indicated by the term drm while modifiers to a DR are indicated by the term DRM. Players take care to note the correct type of die/dice roll required by the various rules sections, charts, and tables.
Exceptions to the rules are indicated in italics within brackets and are preceded by "EXC:". For example, [EXC: Informal Orders; 2.4b].
Examples of play or game mechanics are preceded by "EX:" and are indicated by slightly smaller text.
Sequence of Play
For the purposes of these rules, the Phasing Player is the player whose turn is in progress while the non-Phasing Player is the player whose turn is not in progress)
First Player Turn
Command Phase
- Order Issue
- Attack Stoppage Checks
- Initiative Determination
- Immediate Orders Attempts
- Informal Orders Attempts
- Standard Initiative Attempts
- Delay Reduction
- New Order Acceptance
- Random Event Determination
Movement and Close Combat Phase
- Straggler Recovery Marker placement
- Movement and Close Combat
- Ammo Resupply
Fire Combat Phase
- Non-Phasing Player Fire Combat
- Phasing Player Fire Combat
Rally Phase
- Straggler Recovery
- Rally
Second Player Turn
The Second Player repeats the above steps (now as the Phasing Player)
Game Turn End Phase
- Advance the Turn marker
1.0 Terrain and Map Notes
1.1 Slopes and Extreme Slopes
Three features represent elevation change in the game. The thin contour lines represent simple elevation changes and are not considered Slope hexsides. The thick contour lines are considered Slopes. Crossing one of the thick lines constitutes crossing a regular Slope hexside, while crossing two or more of the thick contour lines along a single hexside is considered crossing an Extreme Slope hexside. The contour lines are drawn to generally conform to the hexsides, but do not always cover the entire hexside. It will usually be obvious during the course of movement when contour lines are crossed, and how many apply to a given move. However, in the rare instance were ambiguity exists, a unit's movement can be assumed to follow a straight path from approximate hex center to approximate hex center. There is no additional effect (beyond Extreme Slope penalties; see the Terrain Effects Chart) for crossing more than two thick contour lines on a single hexside.
1.2 Slope Hexes
In addition to the more common hexside elevation, Slope and Extreme Slope features, there are Slope hexes. Slope hexes are included to more accurately reflect the effects of a steep hillside on moving troops, especially when moving laterally (i.e., across) the face of the hill. Slope hexes have no effect on line of sight. The presence of a Slope hex reflects only that there is a steep gradient in the hex and nothing specific about visibility.
1.3 Runs
Runs are small in-hex water features provided for historical reference and visual cues for determining terrain elevations. They have no effect on play.
1.4 Orchards
Any hex that containing ≥ one complete Orchard Tree Symbols is an Orchard hex. See CWB Series rule 19.3 for Orchard effects on LOS [EXC: the first (only) Orchard hex in any hex along a line of sight is ignored for purposes of LOS; the second and all subsequent Orchards affect LOS per CWB 19.3b–.c].
1.5 Fields and Fences
A Field hex is any hex containing either no Woods or Woods and a Fence. A hex with both Woods and a Fence is considered to be Clear terrain for movement purposes. The Woods within such a hex affects LOS normally. A hex containing Woods (with no Fence) is considered Forest for both movement and LOS. Fences themselves only exist to more clearly depict the boundary between the open field and surrounding trees. Fences have no effect on play.
EX: A unit moving from B40.24 to B39.25 must pay the MP cost for entering Woods while moving from B40.24 to B41.25 pays Clear MP cost.
1.6 Woods and Thickets
Thickets are Woods with more dense undergrowth. Units occupying a Thicket hex suffer a -1 shift when firing, and a -2 shift when checking morale. Note: the -1 shift for fire combat effects the firing unit, not the target.
Design Note: Shiloh was a well-farmed area, and the normal woods were typical open-range farming style trees. These stands of trees were fairly open with little undergrowth and relatively easy on troop movement. There were however, a number of areas where the undergrowth had dense, tangled thickets. These areas were much more difficult to move through and visibility was somewhat hindered.
1.7 Buildings
All buildings are included for historical reference only, and have no effects on play.
1.8 The Tennessee River
The Tennessee River is considered impassable to all units [EX: gunboats, Union units being ferried; see 1.10]. Partial river hexes are considered both land and river hexes for movement and combat (i.e., gunboats may enter riverbank hexes).
1.9 Swamp
Swamp hexes represent tangled thickets that, at the time of the battle, were compounded by the recent heavy rains. Most of the local creeks had overflowed their banks producing a combination of dense vegetation and standing water. Any unit attempting to exit a Swamp hex must first make a dr ≤ 4. On a dr ≥ 5, the unit(s) must end movement in the current hex. All units attempting to leave a Swamp hex in a single Movement Phase must make one combined dr.
1.10 The River Ferry
Union units (only) may cross the Tennessee River via river ferry. Unit(s) beginning Movement Phase in a River Ferry hex may spend their entire movement allowance and move to the other River Ferry hex. The normal stacking limit of a River Ferry hex is 24 strength points. The river ferry can transport troops in both directions in a single turn.
1.11 Camp Hexes
Camp hexes are set up hexes for Union units. The tent symbol in each Camp hex has a specific facing. All units associated with that Camp hex must be set up with this facing only. Otherwise, Camp hexes have no effect on play [EXC: random events; 4.6].
1.12 Map Assembly
There are two maps in the game. Map A is the north map and Map B is the south map. They match along the long axis, with a 1/2 inch overlap.
1.13 Fords
A ford exists in all stream hexes also containing a trail.
1.14 Indian Mounds
Indian Mounds are included for historical interest only and have no effect on play.
2.0 General Special Rules
2.1 Half-Regiments
2.1a Designation. Half-regiments are units with a state designation followed by "a" or "b"
EX: the 15 Michigan of the Army of the Tennessee has two counters: 15 Mich a and 15 Mich b.
2.1b Restrictions and Use. Half-regiments are treated as separate units for combat and morale purposes. Each unit has its own line on the regimental roster sheets, and is marked off separately on the brigade sheets when wrecked. The two units need not remain adjacent (but they must remain within command radius of their Brigade commander if they are not). Half-regiments (of the same unit) may always stack together, even in violation of normal stacking rules. No other unit may stack with the two units if doing so would violate normal stacking rules. Half-regiments may merge with each other. Half-regiments may only merge with their other halves, and only if stacked together at the beginning of the Movement Phase. Remove one unit and add its strength to the other unit. Units may not merge if it would increase the surviving unit's strength to more than the printed strength, or if either unit had enough stragglers so that the recovered total would be larger than the printed strength. Once merged, the units may not subsequently "split apart."
Design Note: A number of regiments were nearly full size at Shiloh—a rarity in Civil War Battles. Given their numbers, many would occupy two full hexes while in line formation. Rather than introduce extended lines into RSS, these units have been broken down into sub-units for ease of play.
2.2 Alternate Orders Types
In addition to the normal methods of command, there are two alternate sets of orders available to both players. The first are Immediate Orders (issued via special army commander initiative, and an exception to CWB 10.2.c), and the second are Informal Orders (issued via a form of brigade commander initiative). Attempting to issue either type of alternate order is considered the equivalent of an initiative attempt for the purposes of CWB 10.2.c.
2.2a Immediate Orders. Army commanders issue Immediate Orders using a modified form of initiative (CWB 10.2). Army commanders receive initiative on a dr less than or equal to their printed rating (anti-initiative is NA). A dr of 6 results in the possibility of a loose cannon—make a subsequent dr, a result of 1–3 results in a loose cannon, any other result is no effect. Army commanders may attempt this type of initiative (only) once per brigade commander currently in its hex.
An army commander receiving initiative may use it only to give an Immediate Order to any one brigade commander (pre-designated prior to the attempt). Immediate Orders can only be given to brigade commanders—all orders to corps and division commanders must come via the normal orders process.
An army commander may attempt Immediate Orders once per brigade commander in its hex per Command Phase (each brigade commander may be subject to only one attempt per Command Phase). Immediate Order attempts do not use command points and must be made before all other non-Immediate Order initiative attempts.
Immediate Orders are considered Brigade Goals and may not be conditional on other orders or circumstances (e.g., an order for Brigade A to attack when Brigade B attacks or moves is an invalid Immediate Order). Loose cannon results from Immediate Order attempts effect any one brigade in the hex (enemy player's choice if more than one is stacked with the army commander when the loose cannon result is rolled).
EX: Beauregard begins the Command Phase stacked with Gladden, Gibson and Pond (three of his brigade commanders). Beauregard attempts to issue an Immediate Order to Pond. The Immediate Order dr is a 6 (possibility of a loose cannon) with a subsequent dr of 5 (no loose cannon). Beauregard then attempts to issue an Immediate Order to Gibson. The Immediate Order dr is a 1 resulting in a successful Immediate Order. The CSA player writes a new Brigade Goal for Gibson (which is immediately accepted). Finally, Beauregard attempts an Immediate Order for Gladden. The Immediate Order dr is another 6. this time with a subsequent dr of 2 (resulting in a loose cannon). The Union player chooses Gibson as the loose cannon. Pond and Gladden are not affected by the loose cannon result.
2.2b Informal Orders. Any brigade commander beginning a Command Phase stacked with ≥ 1 unit from his brigade may attempt to issue an Informal Order. Brigade commanders may make only one Informal Orders attempt per unit per Command Phase, each unit must be checked separately and may only be subject to one Informal Orders attempt per Command Phase, and all Informal Orders attempts must be made before any standard initiative attempts (CWB 10.2). Informal Order attempts succeed only on a dr ≤ the leader's initiative rating (RSS 25.0).
If successful, mark the unit with an Informal Orders marker. So long as the unit does not expend movement points [EXC: on the turn it is assigned Informal Orders a unit may move the extent of its movement allowance (ignoring normal command radius restrictions), and units under Informal Orders may always use movement points to change formation], it ignores command radius, new orders applying to it's parent brigade, or any ECRs that the parent might be forced to make.
Any unit marked with Informal Orders expending movement points (other than on the turn it us marked with an Informal Orders marker; see above) loses its Informal Orders status (remove the Informal Orders marker) and all regular command and movement rules apply immediately [EXC: if assigned new Informal Orders].
EX: Ammen (with a leader rating of 2-3) begins the Command Phase stacked with 24 Ohio and 9 Ind. The Union player and desires to issue Informal Orders to both units. The Informal Orders dr's are 2 and 4 (for the 24 Ohio and 9 Ind respectively). The 24 Ohio is marked with an Informal Orders marker and the 9 Ind is not. 24 Ohio may now move its full movement allowance in the upcoming Movement Phase without being restricted by command radius. The 9 Ind does not receive Informal Orders this turn (though it may try again in a future turn if it begins the Command Phase stacked with Ammen) and must remain within command radius normally. 24 Ohio moves into a blocking position and changes formation to line. Once the 24 Ohio ends its movement for this turn, it may move not again and retain its Informal Orders status except to change formation (Remember, Morale Table and/or CC retreats do not expend movement points and therefore would not force removal of the Informal Orders marker). Ammen could ride to the 24 Ohio and issue another set of Informal Orders if desired (even if 24 Ohio is still under the previous Informal Orders marker).
2.3 Attack Stoppage
Attack stoppage checks are made for all orders groups individually. For example, if Sherman's Division of four brigades had three separate orders (such as a divisional order to attack with two brigades to re-capture Shiloh Church and two Brigade Goals to McDowell and Stuart to assault separate objectives), each turn, Sherman would have to make three separate attack stoppage checks—one for the division order, and one for each Brigade Goal.
Brigades check for attack stoppage as divisions of one brigade. Thus, a wrecked brigade checking for stoppage would roll on Table Three. Use the brigade commander's initiative rating for stoppage checks. All formations failing an attack stoppage check revert to no-orders status.
Design Note: In the CWB Series rules, a division under Divisional goals can revert to the Corps order voluntarily simply by moving back into command range of the Corps commander. This mechanic offers a loophole to players who find themselves hampered by the divisional orders at start, or who want to circumvent various divisional attack stoppages. In the RSS Series rules, a new section closes this loophole by more clearly defining no-orders status for these units. As noted above, now only units with valid orders to do so (or initiative) may rejoin an attack or let a divisional/brigade goal lapse. At Shiloh, this status applies equally to brigades that have failed stoppage checks or fulfilled orders conditions.
2.4 Withdrawal from EZOCs
Any unit that leaving an EZOC must check morale before it begins moving. A BL, SH, DG, or R result is marked appropriately, but it may not move except to retreat as required by the morale table [EXC: BL unit(s) may enter CC with one unit whose EZOC it occupied at the start of the Movement Phase].
Design Note: Withdrawing a formed unit under fire was a complex business, and all but beyond the skills of many of the raw troops and commanders at Shiloh. Retreating in the face of the enemy was likely to dissolve into chaos, and did so in several instances. This rule recreates the difficulties in conducting controlled retreats.
2.5 Rout and Stragglers
Any infantry or cavalry unit failing to rally (CWB 24.5) suffers an immediate 1 straggler loss.
2.6 Random Events
Too much of what occurs in a Civil War battle lies beyond the realm of predictability. At Shiloh this was especially true, given the raw nature of both the troops and the commanders. In order to introduce a number of these events to the game table in a suitably chaotic manner, a Random Events Table for each side is included on map A.
2.6a Checking for Random Events (RE). At the end of each friendly Command Phase, make a DR on the phasing side's Random Events Table (a DR ≥ 9 indicates a RE may occur—make a subsequent DR to determine which RE occurs). Apply any result(s) immediately. Since random events occur last in the Command Phase sequence—this means that although leader casualties will not affect attack stoppage rolls until next turn (they have all been made for the current turn), nothing can be done about a Random Event imposed attack stoppage until next turn (at the earliest).
2.6b Random Events and Scenarios. All scenarios use random events, though not all events will apply to all scenarios. If a RE is rolled that doesn't apply, treat that result as No Event.
2.6c Random Events and Leader Loss. When leader loss is called for by a Random Event Table, only leaders actually in play at the time of the event, brigade commanders ≤ 4 hexes from an enemy unit, division commanders ≤ 8 hexes from an enemy unit, and corps or army commanders anywhere on the map may be selected.
Design Note: some players will pursue personal vendettas against specific leaders when the any chance arises. In order to prevent this kind of assassination, we suggest that no single enemy leader may be targeted for a Random Event leader loss a second time until all currently eligible leaders have been targeted at least once. This does not imply that no leader can be targeted twice until ALL leaders on the board have been targeted once, only that of those currently exposed, all must have been selected as potential losses at least once.
2.6d Random Event Target Selection. Some Random Events call for a choice among attacking divisions, or among various leaders. In each case, randomly determine the final unit(s) affected. Any convenient means may be selected so long as each division/leader/etc. has an equal chance of being selected.
2.6e Attack Stoppage RE. RE Attack stoppage results have no effect on Defensive Orders or any order not yet accepted.
2.7 Breastworks
No units may build breastworks.
2.8 Surrender
Any DG or R unit completely surrounded by enemy units and/or EZOCs receiving a retreat result immediately surrenders. Mark off all remaining strength points as permanent losses. Friendly units negate enemy Zones of Control for this purpose. Surrendered units may not be recreated by recovering stragglers.
Design Note: The confusing nature of the battle combined with the relative inexperience of the men and their commanders resulted in a number of units being captured outright. Often the units simply did not realize that they were in danger and attempted to retire too late. Other times, men were too exhausted to fight on and lay down their arms. Later battles would show much more mature battlefield commanders and soldiers. Though the number of units surrendering en masse dropped to almost zero, the bloodshed did not—both sides were learning how to fight.
2.9 Camp Re-Supply
In addition to normal supply rules (RSS 28.4), units may attempt resupply in camp hexes. Units of both sides may use camp hexes for resupply. Any unit beginning a friendly Movement Phase in/adjacent-to a camp hex (not also containing an enemy unit) desiring to attempt resupply must make a dr. A result of 1 results in the Low/Out-of Ammo marker being removed. A result of 6 causes 1 straggler loss to the attempting unit. All other results are no effect. Each unit must be done separately, no unit may make more than one attempt per turn, and all attempts must be made before any unit making an attempt expends movement points. Resupply attempts may be done if either/both the unit and camp hex are in an EZOC.
3.0 Union Special Rules
3.1 Army Command
Grant is the overall Union commander. In scenarios where Grant is not (yet) in play, no Union division commander assumes command. In these cases, only individual initiative may be used to provide new orders or alter existing orders. No unit commander may use initiative to give orders to a unit or commander outside of his normal command span [EXC: Informal Orders; 2.2b]. If Grant arrives and is subsequently killed or wounded, the senior surviving division commander in play (see the officer seniority list) assumes command and may issue orders as an army commander.
3.2 Divisional Command
There are no Union Corps. Each division is considered a separate command and the army commander (normally Grant) issues orders directly to the division commander. Each division HQ is treated as a Corps HQ similar to RSS Rule 10.5b.
3.3 Attachments
3.3a Divisions. No division may be attached to another division.
3.3b Brigades. Up to one brigade of any division may be attached to another division. Brigades may be given Brigade Goals (RSS 10.5b).
3.3c Other Units. Combat units exist as part of three echelons; brigade, division, and army. Units may only be reassigned or detached as outlined below.
(a) Units assigned to a brigade may not be reassigned or given Brigade Goals. They may be given Informal Orders (2.2b).
(b) Units assigned to directly to a division (i.e., they have no brigade affiliation) trace command to their Division HQ. Divisional infantry regiments may be assigned to any brigade within their division. To do so, the units must begin a friendly Command Phase stacked with their division commander. From that point on, treat the regiment as a permanent part of that brigade (i.e., it traces command radius to the new brigade commander, etc.). Once assigned, such units may not later be reassigned. Artillery and Cavalry units may trace command to any brigade commander within their division, and need not be re-assigned to do so.
(c) Units with neither a brigade nor divisional affiliation may be assigned to any division. To do so, the units must begin a friendly Command Phase stacked with either the appropriate division commander or with the army commander. The army commander, if used, does not write any orders or expend Command Points to make this reassignment. Infantry assigned in this matter may not later be reassigned [EXC: to a brigade in the new division; see (b) above]. Artillery units may be freely reassigned as desired. If not currently assigned to any other unit, army troops are considered in command if they are within 6 hexes of A55.14. Army units tracing command to A55.14 are automatically considered to have a defensive order to defend Pittsburgh Landing.
(d) In all cases, the scenario special rules take precedence over the rules contained in (a)–(c).
3.4 Union Supply
The Army of the Tennessee has two supply wagons and one train. The Army of the Ohio has one supply wagon and one train. Any wagon or train may supply any unit of the appropriate army. In addition, the Pittsburgh Landing hex functions as a supply source for both Union armies.
3.5 Union Alert
The two Alert Schedules below indicate the units which become fully active (in game terms). In all scenarios using an historical CSA set up, use the Historical Alert Schedule. In scenarios allowing a free CSA set up, use the Optional Alert Schedule. Any unit not activated by the Alert Schedule is non-Alert [EXC: a non-Alert unit immediately becomes alert following resolution of any fire attack conducted against it, after defending in a close combat attack, or when it has LOS to any enemy unit within 2 hexes].
Historical Alert Schedule
| Turn | Unit(s) |
|---|---|
| At start | Powell/1/6/T |
| 6:15 a.m. | 21 Mo/1/6/T, 16 Iowa/6/T, 15 Mich/A Tenn |
| 6:30 a.m. | 1/6/T |
| 6:45 a.m. | 53 Ohio/3/5/T |
| 7:15 a.m. | 3/5/T, rest of 6/T |
| 7:30 a.m. | Remainder of 5/T |
| 8:00 a.m. | Any one division |
| 8:30 a.m. | Any one division |
| 9:00 a.m. | All remaining units |
Optional Alert Schedule
| Turn | Unit(s) |
|---|---|
| At Start | Any 1 Rgt of 6T |
| 6:15 a.m. | Any 3 Rgts |
| 6:30 a.m. | Any 1 Bde of 5/T or 6/T |
| 6:45 a.m. | Any 1 Rgt |
| 7:15 a.m. | Any 2 Bdes of 1/T, 5/T, and/or 6/T |
| 7:30 a.m. | Remainder of 5/T and 6/T |
| 8:00 a.m. | Any 1 Division |
| 8:30 a.m. | Any 1 Division |
| 9:00 a.m. | All remaining units |
All times listed are for April 6th.
3.5a Effects of being non-Alert.
(a) Non-Alert units must face the direction indicated by their camp symbol (i.e., facing must be the same direction as the tip of the tent).
(b) Non-Alerted units defend normally and can conduct defensive fire through frontal hexes.
(c) Non-Alert units may neither move nor change facing.
(d) Non-Alert units suffer an additional -6 column shift when checking morale when fired upon (note, this effect will occur only on the first fire attack—they will be Alert for any subsequent attacks).
Design Note: Despite a great many warning signs, the Union Army was strategically surprised at Shiloh. On the tactical level, this surprise had little effect, however. Instances of units simply being overrun by an unexpected enemy force were practically nonexistent. Most units had sufficient preparation to fall in and form up before the attack was upon them.
3.6 Gunboats
Gunboats have an unlimited movement allowance, may only move into or through river or riverbank hexes, and may attack enemy units via direct fire support (and also interdict straggler recovery; see below). A gunboat may fire at any unit in LOS as if it were an artillery battery [EXC: gunboats do not use ammunition, but are marked Low Ammo on any unmodified combat resolution DR of 11 or 12 during resolution of an attack using any portion of a gunboat's firepower; any gunboat receiving a second Low Ammo result is immediately removed from play]. Additionally, no enemy unit may recover stragglers if it is within 25 hexes of a gunboat (regardless of LOS). Gunboats never check morale, never suffer losses, and cannot be destroyed (though they may be removed if they run out of ammunition; see above). Any unit fired on by a gunboat receives an automatic -6 morale modifier applied to the ensuing morale check. A gunboat may conduct a close combat attack vs. an enemy unit in a riverbank hex by moving into that riverbank hex and following the normal Close Combat sequence [EXC: the gunboat does not check morale, the defending unit checks morale at -10, no CC Odds Table dr is required—the gunboat always wins].
Design Note: The seemingly invincible gunboats will have only a limited effect on play. Seldom indeed will the foolish CSA unit stray to the river bank while a gunboat is patrolling the river. In a practical sense, the gunboat rules serve to limit the freedom of movement of CSA units to prevent odd encircling movements along the river. Additionally, the Low Ammo procedure reflects the need for the gunboats to occasionally refill their stocks of ammunition.
3.7 Union Minor Variants
3.7a Wallace is on time. Lew Wallace and his division arrive when Grant expects them. At Noon, April 6th, the entire 3/T division arrives at either entry hex G or H (Union player's choice). At 11:00 a.m. April 6th, the Union player must write an order for the 3/T division. (Note that this order is written 1 hour before Wallace arrives.) This order is considered immediately accepted, costs no orders points, and applies only to 3/T. This option costs 6 VP.
Design Note: Wallace's march is one of the great controversies of the battle. Grant blamed Wallace for being late, Wallace claimed that he was only marching for the flank of the army where he thought he was needed. Whatever the truth, the end result was the loss of an entire division for the first day of fighting. This option assume that Grant's orders were more precise, and no time was lost counter-marching.
As a lower-cost alternative to this entry, the Union player may leave the entry of 3/T to chance. Beginning with the Noon, April 6th turn, make a D66. On a result of 64–66, The 3/T division enters play (randomly determine whether it enters at hex H or G). Upon arrival, the Union player must immediately write an order for 3/T, which is automatically accepted, costs no points, and applies only to 3/T. If the location is G, the Union player may instead choose to switch the arrival to entry area H, but with an automatic delay of 16 turns. This option costs only 3 VP.
Design Note: This alternative is really designed to preserve the uncertainty that Grant felt. He spent most of the day expecting Wallace momentarily. With a random entry, it is as likely that Wallace will arrive even later, so let the Union beware in using this option.
3.7b All of 3/T Arrives. When the 3/T division arrives, allow all the optional units to enter with their appropriate commands. The divisional troops enter with the HQ. This option costs 1 VP.
Design Note: Several units were left to guard Crump's Landing when Wallace marched. Wallace could have chosen to take his whole command, not wanting to leave such a small force exposed to capture.
3.7c Sherman wakes up. Accelerate the Union Alert Schedule. Use the Optional Alert Schedule (regardless of CSA setup) and Double the number of units alerted each turn. This option costs 10 VP.
EX: On the 6:15 a.m. turn, three regiments would normally be alerted. Using this option, six regiments would be alerted. At 7:30 a.m., in addition to the rest of 5/T and 6/T, any one additional division can be alerted, and at 8:00 a.m., any two divisions can be alerted.
Design Note: Sherman came under heavy criticism for his inadequate preparations. He refused to accept early reports that the enemy was near until he finally was fired upon himself. Once engaged, of course, he did an outstanding job. The army could have been prepared much sooner to meet the Rebel advance, had he heeded the warning signs available.
3.7d Buell Brings it All. When Buell arrives, the rest of the Army of Ohio optional forces arrive with him. 15/6/O Brigade arrives with Wood at 2:00 p.m. April 7th. 1/O Division arrives at 6:00 a.m. April 7th. 3/O Division arrives at 8:00 a.m. April 7th. The Union player may choose to bring on part or all of each Division. Each optional brigade of the Army costs 2 VP. Division leader, division HQ, and troops for 1/O and 3/O enter at no additional VP cost when at least one brigade of their division enters play.
Design Note: A large number of Buell's troops were either acting as rear area garrisons or were simply unable to reach the field in time. The seven additional brigades this option brings are a powerful force, mitigated by the fact that they arrive on the 7th.
3.7e Night or Buell. Ignore the historical entry times for all Army of Ohio units except Buell and the Army of Ohio HQ. Instead, at the start of each friendly Command Phase, the Union player makes a DR on the following table. A result within the range indicated allows the Army of Ohio to enter. Beginning with next hour turn, any one division of the Army of Ohio is available for entry. Each turn thereafter, the Union player may land up to 24 strength points of Army of Ohio troops at Pittsburgh Landing. Each hour turn thereafter, one additional division of the Army of Ohio is available for landing (the 24 strength point per turn limit still applies). Units in excess of the limit are held off-map until they can enter.
| Time | D66 |
|---|---|
| Before 3:00 p.m. April 6th | 66 |
| 3:00 p.m. to 7:45 p.m. April 6th | 65–66 |
| 8:00 p.m. to Midnight, April 6th | 64–66 |
| Any turn on April 7th | 61–66 |
Orders:
The first arriving division is ordered to move to A55.14 and defend within 8 hexes of that hex. All other divisions are to report to army HQ and await further orders.
This option costs a variable number of VPs, depending on when exactly the Army of Ohio arrives. For each hour (or portion thereof) earlier than 5:00 p.m. the army arrives, the CSA player receives 2 VP. For each hour (or portion thereof) after 10:00 p.m. that the army arrives, the Union player receives 1 VP. Note, this option can be combined with 2.7d above, paying the appropriate costs to each side as required.
EX: If the army of Ohio arrived at 1:15 p.m. April 6th, this would give the CSA player 8 VP, for being 3 hours and 45 minutes early. If the Army arrives at 4:45, this would still give the CSA player 2 VP, for being part of an hour early.
Design Note: Buell's advance was delayed by many factors, not the least of which was the bridging of the rain-swollen Duck River. By April 5th the lead elements of the army had made finally made contact with Grant near Savannah. Nonetheless, the overall timing was still very iffy. For example, had Johnston managed a better march from Corinth, they might have attacked a day early. That would have likely meant no Buell at Shiloh.
4.0 CSA Special Rules
4.1 On-Map Army Command
Beauregard is the overall CSA commander [EXC: if Beauregard is not in play, Johnston is the army commander]. Whenever both Johnston and Beauregard are in play, Johnston may issues orders only by Army Commander Initiative (2.2). If Beauregard is killed or wounded, Johnston immediately assumes command of the army.
4.2 Johnston
Johnston has two ratings. The first rating is used for all orders functions, including Army Commander Initiative. The second rating is used for any morale modifiers and rout recovery rolls. At the beginning of any CSA Movement Phase, the CSA player may declare Johnston to be Leading a Charge. For the duration of the CSA turn, Johnston may use his morale bonus on any unit(s) in or adjacent to his hex. Once a this bonus is declared ≥ 1 CSA unit/stack must move adjacent to an enemy unit. Any unit receiving Johnston's Leading a Charge morale bonus subjected to enemy fire must make check for Leader Loss (CWB 25.4) for Johnston even if Johnston is not in the hex and regardless of whether or not casualties were sustained.
4.3 Unit Attachment
4.3a Divisions. No division may be attached to another corps.
4.3b Brigades. No brigade may be attached to another division or corps. Brigades may be given Brigade Goals.
4.3c Army Troops. Army troops may be assigned to divisions and brigades as described in 2.3c, may be given Informal Orders, or may be given orders directly by the army commander. If not currently assigned to any higher unit, they may not move.
4.4 CSA Movement Restrictions
No CSA infantry unit may enter column or use road movement before 9:00 a.m. on 6 April. No CSA Cavalry unit may move adjacent to or fire on any non-alerted Union unit.
4.5 The S/2/1 Brigade
S/2/1 Brigade has two commanders. When the Brigade enters play, Stephens is in command, and acts in all ways as a normal brigade commander. He remains in command of S/2/1 until he either a) becomes a casualty or b) Maney arrives and moves within command radius of the brigade. If Stephens becomes a casualty before Maney arrives, he is replaced with a normal repl leader (who is then removed when Maney arrives and moves within command radius of the division). Once Maney arrives, Stephens relinquishes command of the brigade, but remains in play and can use his leader rating for all morale benefits for any unit in the brigade with which he is stacked.
4.6 CSA Minor Variants
4.6a No Movement Restrictions. Delete rule 4.4. This option costs 5 VP.
Design Note: This option assumes that the CSA did a much better job of scouting the Union positions and the local road network. This option tends to lead to a great deal more Union troops being surprised in their camps (i.e., non-Alert).
4.6b Free CSA Deployment. The CSA Player may set up his starting units anywhere southwest of the line B6.13–B13.01 line (inclusive). The historical setup for Scenario 6.9 provides the exact line (hex by hex). Units may be in any formation, but are still subject to the restrictions of 4.4 [EXC: if also using option 4.6a]. This option costs 6 VP.
Design Note: Most experts agree that the initial CSA troop deployments greatly exacerbated tactical confusion and all but guaranteed that unit cohesion would be lost when the line advanced. This option allows players more freedom to use deep columns and better tactical control for effective corps orders implementation.
4.6c Fort Donelson Garrison. Beginning with the 8:00 a.m. 6 April turn, the CSA player must make a DR at the start of every Command Phase. On a DR ≥ 10, all units of F Corps may enter at entry area A on the next CSA Movement Phase. F Corps enters with orders to report to the Army HQ and await further orders (alternatively, the Rebel Player may choose to enter F Corps at 1:00 P.M. April 6th). Some, none, or all of F Corps may enter once activated by the above DR. Each Brigade entering play costs 2 VP [EXC: 1/F/F and 2/F/F cost 1 VP each]. The CSA Player may replace Floyd with Buckner by paying an additional 3 VP. If this change in leaders is conducted, Wharton commands Floyd's division while Buckner would command both the Corps and his division.
Design Note: These units represent the remaining troops of the Ft. Donelson garrison. Had the aftermath of Ft. Donelson been less extreme, these units could have easily been reorganized in time for use at Shiloh.
4.6d Army of the West. Beginning with the 1:00 p.m. 6 April turn, the CSA player must make a DR at the start of every Command Phase. On a DR ≥ 10, The Army of the West enters on the next CSA Movement Phase. The Army of the West enters with orders to move to the Army HQ and await further orders. Alternatively, the Army of the West enters automatically on the 6:00 p.m. 6 April turn. Some, none, or all of the Army may enter once activated by the above DR. Each Brigade that enters play costs 2 VP [EXC: Pike's brigade costs 1 VP]. The Army of the West is considered a Corps for all purposes, not an army, and Van Dorn does not function like an army commander in any way.
Design Note: This is perhaps the most speculated 'what-if' of Shiloh. Van Dorn's self-styled Army of the West could have appeared on the field had a great number of circumstances gone exactly right.
4.6e Island #10 Abandoned. Beginning with the 6:00 a.m. 6 April turn, the CSA player must make a DR at the start of every Command Phase. On a DR ≥ 10, McCown's Division (M Division) enters play on the next CSA Movement Phase. McCown's Division enters with orders to move to the Army HQ and await further orders. Alternatively, McCown's Division enters automatically on the 10:00 a.m. 6 April turn. Some, none, or all of the division may enter once activated by the above DR. Each Brigade that enters play costs 2 VP.
Design Note: Island Number 10 was near New Madrid, Missouri. Fort Pillow was some 40 miles north of Memphis on the Mississippi River. Both of these outposts held garrisons that could have made it to the battle had they been called upon while the army was preparing to move.
5.0 Victory Conditions
Unless specified by the specific scenario information, use the schedule of VP awards below.
Each player totals his victory points for enemy losses, captured terrain, enemy wrecked formations, and special awards for lost batteries, leaders, or wrecked cavalry units. Subtract the CSA total from the Union total to produce the final VP Tally (which may be a negative number). Consult the victory conditions for the specific scenario to determine the level of victory.
All losses are cumulative. For scenarios that start after the beginning of the battle, pre-scenario losses are listed as well as any wrecked units. All of these losses count for victory, and should be added into the total losses for the scenario.
5.1 Terrain Capture VP
In order to claim VP for a hex, the player must have been the last side to occupy the hex with a non-Routed combat unit (leaders and supply trains/wagon are not considered combat units). Control of a field is defined as having no non-Routed enemy combat unit(s) in any hex(es) of the field, while ≥ 1 one friendly non-Routed combat unit occupies a hex of the field. Control VP are determined only at scenario end unless specified otherwise. In scenarios only using one map, only VP hexes for the map in play are considered.
| Hex: | CSA Award | Union Award |
|---|---|---|
| A4.02 | 2 | 1 |
| A27.11 | 1 | 1 |
| A36.22 | 2 | 5 |
| A41.12 | 1 | 3 |
| A46.14 | 1 | 3 |
| A50.13 | 3 | 10 |
| A56.12 | 5 | 15 |
| A43.05 | 2 | 2 |
| B5.01 | 5 | 0 |
| B12.18 | 1 | 0 |
| B19.29 | 2 | 1 |
| B22.32 | 3 | 2 |
| B31.05 | 5 | |
| B35.25 | 1 | 1 |
| B35.33 | 2 | 1 |
| B38.30 | 1 | 1 |
| B42.26 | 1 | 1 |
| B44.27 | 1 | 1 |
| B48.22 | 1 | 1 |
5.2 Casualty VP
Each side receives victory points for losses inflicted on the enemy. Each loss should be recorded on the track with the markers provided. In scenarios that start with Previous losses, record those losses on the track before play begins. Only permanent losses count for VPs, not stragglers. VPs are awarded as shown below, with Union VPs awarded for CSA losses and vice versa. Each enemy battery eliminated is worth 1/2 VP.
| VP Award | CSA Losses† | Union Losses |
|---|---|---|
| 0 | 0–40 | 0–50 |
| 1 | 41–75 | 51–85 |
| 3 | 76–105 | 86–120 |
| 6 | 106–140 | 121–160 |
| 9 | 141–165 | 161–190 |
| 12 | 166–180 | 191–225 |
| 16 | 181–205 | 226–260 |
| 20 | 206–235 | 261–300 |
| 24 | 236–260 | 301–335 |
| 28 | 261–285 | 336–370 |
| 32 | 286–320 | 371–405 |
| 36 | 321–350 | 406–440 |
| 41 | ≥351 | ≥441 |
† If the CSA player enters ≥ 72 Optional units, use the Union Losses column to determine VP awards for CSA losses.
5.3 Wrecked Formation VP
Wrecked brigades, divisions, and corps result in VP for the enemy. Each wrecked brigade and each wrecked cavalry unit (regardless of size) is worth 1 VP to the enemy. For the purposes of wrecked status determination, stragglers and permanent casualties count. In addition, the CSA player receives VP for wrecked Union divisions and the Union player receives VP for wrecked CSA corps and divisions based on the following table.
CSA VP for Wrecked Divisions: 1 Tenn - 2 VP, 2 Tenn - 2 VP, 3 Tenn - 2 VP, 4 Tenn - 2 VP, 5 Tenn - 2 VP, 6 Tenn - 1 VP, 1 Ohio - 2 VP, 2 Ohio - 2 VP, 3 Ohio - 2 VP, 4 Ohio - 2 VP, 5 Ohio - 1 VP, 6 Ohio - 1 VP
Union VP Wrecked Corps or Divisions: 1 Corps - 3 VP, 2 Corps - 4 VP, 3 Corps - 1 VP, Res Corps - 1 VP, West - 4 VP, F Corps - 4 VP, M Division - 1 VP
6.0 Scenarios
A setup designation of IO indicates that all noted units begin the scenario marked with an Informal Orders marker (2.2b).
6.1 Stuart's Brigade
One of Sherman's Brigades fought a lonely battle, far from the rest of the division. Separated from their parent command by Prentiss' men, the three regiments of Stuart's Brigade made a desperate stand south of the Peach Orchard, and ever afterward felt they had saved the army from destruction. This is an ideal introductory scenario.
General Information Map Area: Map B, south of XX.25 and east of 46.XX First Turn: 11:30 a.m. Last Turn: 1:00 p.m. Total Turns: 7 First Player: CSA
Union Information Set Up:
2/5/T Brigade 54 Ohio—B56.16 Stuart, 55 Ill—B51.20 71 Ohio—B49.21
Orders: 2/5/T is to defend the Larkin Bell Field and prevent a Confederate advance up the Hamburg Road.
Artillery Ammunition: Unlimited
Previous Losses: None
Wrecked Regiments: None
Eliminated Units: None
Reinforcements: None
CSA Information Set Up:
C/2/2, Girardey Bty/J/2/2—w/i 2 of B52.12 7 Miss (8), 9 Miss (6), 10 Miss (5)
Orders: Chalmers' Brigade is to capture the Larkin Bell field and destroy Stuart's Brigade. Girardey is attached to C/2/2.
Artillery Ammunition: Unlimited
Previous Losses: 7 Miss - 1 SP, 1 Straggler, 9 Miss - 1 SP, 1 straggler, 10 Miss - 1 SP, 1 straggler
Wrecked Regiments: None
Eliminated Units: None
Reinforcements: None.
Victory Conditions: The side with the most VP at game end is the winner. VP are determined by the following schedule (only).
1 VP per wrecked enemy regiment 3 VP per wrecked enemy brigade 3 VP for Larkin Bell Field
6.2 "Take your damned Regiment back to Ohio!"
Despite Sherman's feeling that no attack was forthcoming, the Rebel approach was not entirely unexpected. A number of units sent out patrols. The fighting began quite early as a skirmishes between small bodies of troops broke out up and down the line. This scenario covers those initial clashes and the first significant attack on Sherman's line. The fighting was very fragmented. Consequently, some units that were present only for a short time are omitted due to either the transitory nature of their presence or the fact that they were not committed to fighting in this sector. Also, McClernand's portion of this fight carried on into the early afternoon and onto map A, well beyond the scope of this scenario.
General Information Map Area: Map B, west of the 32.XX hex row First Turn: 6:00 a.m. April 6th Last Turn: 11:00 a.m. April 6th Total Turns: 21 First Player: CSA
Union Information Set Up:
1/T E, 2 Ill Bty—B22.32
3/1/T 17 Ill—B24.31 29 Ill—B26.30 Raith, 43 Ill—B28.29 49 Ill—B30.28
Sherman, 5 Tenn HQ—B22.30 Thieleman Cav—B23.31 2,3,4 Ill Cav—B27.26 6 Ind Bty—B11.32 B, 1 Ill Bty—B23.30 E 1 Ill Bty—B22.26
1/5/T McDowell—B13.33 6 Iowa a,b —B8.32 46 Ohio a,b—B10.32 40 Ill—B13.31
3/5/T 77 Ohio a, b, Hildebrand—B20.28 53 Ohio a,b—B22.23 57 Ohio—B24.26
4/5/T 48 Ohio, Buckland—B17.30 70 Ohio a,b—B19.30 72 Ohio a,b—B16.30
1/6/T Peabody, 25 Mo—B29.22 12 Mich—B30.20 21 Mo—B31.20 Powell—B16.14
Orders: Powell/1/6/T has a Regimental Goal to defend the road from B17.14 to B29.22.. 1/6/T has orders to defend the line of it's camps. 1/1/T, once active, has orders to support Sherman's Division. Once the rest of 1 Tenn arrives, it joins the division. 5 Tenn, once active, has orders to defend in place.
Alerted Units: At Start—Powell/1/6/T 6:15 a.m.—21 Mo/1/6/T 6:30 a.m.—1/6/T 6:45 a.m.—53 Ohio/3/5/T 7:15 a.m.—3/5/T 7:30 a.m.—rest of 5 Tenn Division 8:00 a.m.—1 Tenn Division All reinforcements arrive alerted.
Artillery Ammunition: 75
Previous Losses: None.
Wrecked Regiments: None
Eliminated Units: None
Reinforcements:
| Hex | Time | Units |
|---|---|---|
| B25.35 | 8:00 a.m. | McClernand, 1 Tenn HQ, 2/1/T, D 1 Ill, 14 Ohio Bty |
| B25.35 | 8:15 a.m. | 1/1/T, D 2 Ill Bty |
Orders: 1 Tenn Division has orders to defend the line of the Hamburg-Purdy Road.
CSA Information Set Up:
Johnston, Beauregard, A Miss HQ and Supply—B5.01 Hardee, 3 Corps HQ and Supply—B10.06
C/H/3 2 Tenn—B6.13 24 Tenn—B7.13 Cleburne, 15 Ark—B8.12 5 Tenn, 6 Miss—B9.12 23 Tenn—B10.11 Trigg Bty—B7.12 Hindman, Calvert Bty -B8.11 Hubbard Bty—B9.11
W/H/3 27 Tenn, 16 Ala—B11.11 Wood, 44 Tenn, 8 Ark—B11.10 9 Ark Bn, 55 Tenn—B12.09 3 Miss Bn—B13.13 Ga Dragoons, Harper Bty—B11.07
S/H/3 7 Ark a,b—B13.09 Shaver, 2 Ark—B13.08 Swett Bty, Miller Bty—B12.07 6 Ark—B14.07 3 CSA—B14.06 Bragg, 2 Corps HQ and Supply—B7.03
P/1/2 38 Tenn a,b—B2.11 16 La, Orleans Gd—B3.11 Pond, Ketchum Bty, Jenkins Cav—B3.10 18 La—B4.10 Crescent a,b—B4.09
A/1/2 17 La, Conf Gd—B5.09 Ruggles, Washington Bty—B5.08 Anderson, 20 La—B6.08 9 Texas, 1 Fl Bn—B6.07
Orders: 3 Corps is to capture Lost, Review, and Woolf Fields. C/H/3 has a Brigade Goal to capture Shiloh Church 2 Corps is to capture Woolf and Review Fields. P/1/2 has a Brigade Goal to capture Ben Howell Field
Artillery Ammunition: 60
Previous losses: None.
Wrecked Regiments: None
Eliminated Units: None
Reinforcements:
| Area | Time | Units |
|---|---|---|
| A | 6:30 a.m. | R/1/1 Brigade |
| A | 7:00 a.m. | J/2/1 Brigade |
Orders: R/1/1 has a Brigade Goal to capture Lost and Review Fields. J/2/1 has a Brigade Goal to capture Shiloh Church, then advance and capture Woolf Field.
Victory Conditions The side with the most VP at game end is the winner. VP are determined by the following schedule (only).
1 VP per wrecked enemy brigade 2 VP each for Lost Field, Review Field, and Shiloh Church.
6.3 Prentiss Attacked
Prentiss' initial position in Spain Field was the brunt of several heavy attacks. He was finally dislodged around 9:00 a.m. The remnants of his command fell back to the Sunken Road.
General Information Map Area: Map B, east of the 22.XX hexrow, west of the 42.XX hexrow, and south of the Hamburg Purdy Road. First Turn: 7:30 a.m. April 6th Last Turn: 10:00 a.m. April 6th Total Turns: 11 First Player: CSA
Union Information Set Up:
6T HQ—B38.20 Prentiss, 1 Minn Bty—B34.17 5 Ohio Bty—B35.17
1/6/T 25 Mo—B27.21 Peabody, Powell (6)—B28.20 12 Mich—B29.20 21 Mo (10)—B30.19 16 Wisc a—B32.15 16 Wisc b—B33.15
2/6/T Miller, 18 Mo—B35.15 61 Ill—B36.15 18 Wisc a—B37.16 18 Wisc b—B38.16 15 Mich a/ATenn (out of ammo)—B37.19 15 Mich b/ATenn (out of ammo)—B36.19
Orders: 6/T has orders to defend in place. 15 Mich is attached to 6/T
Special Rules: All Union units begin the scenario Alerted. Union units may exit the map by crossing the Hamburg-Purdy Road. Any unit that does so is removed from play and is not considered eliminated for VP purposes.
Artillery Ammunition: Unlimited. the 15 Mich a & b can resupply on any turn that the Union player rolls a 1 or 2 on one die. No other unit can resupply.
Previous losses: Powell - 1 SP, 1 straggler, 21 Mo - 1SP, 1 straggler.
Wrecked Regiments: None
Eliminated Units: None
Reinforcements: None.
CSA Information Set Up:
W/H/3 27 Tenn, 16 Ala—B22.17 Wood, 9 Ark Bn, 44 Tenn, 8 Ark—B23.17 3 Miss Bn (4), 55 Tenn—B24.16
S/H/3 7 Ark a(6), 7 Ark b—B27.17 Shaver, 2 Ark—B28.16 6 Ark (8), 3 Conf—B29.16 G/2/2 26 Ala, 1 La—B28.12 Gladden, 22 Ala, 25 Ala—B29.12 21 Ala—B30.11 Robertson Bty—B27.10
C/2/2 5 Miss, 52 Tenn—B31.09 Chalmers, 10 Miss, 9 Miss—B32.08 Withers, 7 Miss—B33.09 Gage Bty—B30.06
Orders: W/H/3 has a Brigade Goal to clear the road defended by 1/6/T and capture Lost Field. S/H/3 has a Brigade Goal to capture Barnes Field. 2/2 has a Divisional Goal to capture Spain Field, the ridge east of Spain field, and advance to the Hamburg-Purdy Road.
Artillery Ammunition: Unlimited
Previous losses: 3 Miss/W/H/3 - 1 SP, 1 straggler, 7 Ark a/S/H/3 - 1 straggler, 6 Ark - 1 SP, 1 Straggler.
Wrecked Regiments: None
Eliminated Units: None
Reinforcements: None
Victory Conditions The side with the most VP at game end is the winner. VP are determined by the following schedule (only).
1 VP per wrecked enemy brigade. 1 VP for Spain Field. 2 VP each for Lost Field and Barnes Field.
6.4 Opening attack
This scenario covers the entire initial Rebel attack, from first light through about noon on 6 April.
General Information Map Area: Map B. First Turn: 6:00 a.m. April 6th Last Turn: Noon, April 6th Total Turns: 25 First Player: CSA
Union Information Set Up:
1/T E, 2 Ill Bty—B22.32
3/1/T 17 Ill—B24.31 29 Ill—B26.30 Raith, 43 Ill—B28.29 49 Ill—B30.28 Sherman, 5 Tenn HQ—B22.30 Thieleman Cav—B23.31 2,3,4 Ill Cav—B27.26 6 Ind Bty—B11.32 B, 1 Ill Bty—B23.30 E 1 Ill Bty—B22.26
1/5/T McDowell—B13.33 6 Iowa a,b —B8.32 46 Ohio a,b—B10.32 40 Ill—B13.31
2/5/T Stuart—B51.22 55 Ill—B51.20 54 Ohio—B49.22 71 Ohio—B47.21
3/5/T 77 Ohio a, b, Hildebrand—B20.28 53 Ohio a,b—B22.23 57 Ohio—B24.26
4/5/T 48 Ohio, Buckland—B17.30 70 Ohio a,b—B19.30 72 Ohio a,b—B16.30 Prentiss, 6 Tenn HQ—B38.20 1/2 Ill Cav—B41.22 5th Ohio Bty—B36.19 1 Minn Bty—B37.20
1/6/T Peabody, 25 Mo—B29.22 12 Mich—B30.20 21 Mo—B32.19 16 Wisc a,b—B34.19 Powell—B16.14
2/6/T Miller, 18 Mo—B35.18 61 Ill—B37.18 18 Wisc a,b—B39.18
Orders: Powell/1/6/T has a Regimental Goal to defend the approach to 1/6/T's camps, delaying the enemy advance as much as possible while avoiding destruction. 12 Mich/1/6/T has a Regimental Goal to join Powell/1/6/T and then to delay the enemy advance as much as possible while avoiding destruction. 5 Tenn, once active, has orders to defend in place. 2/5/T has a Brigade Goal to defend the Union left flank and prevent the Confederates from outflanking the Sunken Road/Peach Orchard line to the east. 6 Tenn, once active, has orders to defend in place.
Alerted Units: At start—Powell/1/6/T 6:15 a.m.—21 Mo/1/6/T 6:30 a.m.—1/6/T 6:45 a.m.—53 Ohio/3/5/T 7:15 a.m.—3/5/T, rest of 6/T 7:30 a.m.—rest of 5/T 8:00 a.m.—All remaining units
Artillery Ammunition: 100
Previous losses: None.
Wrecked Regiments: None
Eliminated Units: None
Reinforcements:
| Hex | Time | Units |
|---|---|---|
| B39.35 | 6:30 a.m. | 15 Mich a,b/A Tenn - out of ammo |
| B25.35 | 8:00 a.m. | McClernand, 1 Tenn HQ, 2/1/T, D 1 Ill, 14 Ohio Bty |
| B25.35 | 8:15 a.m. | 1/1/T, D 2 Ill Bty |
| B39.35 | 9:00 a.m. | 1/4/T, 23 Mo/6/T |
| B44.35 | 9:15 a.m. | 4/T (less 1/4/T, Cav/4/T) |
| B44.35 | 10:15 a.m. | McArthur, 9 Ill, 12 Ill/2/2/T, A 1 Ill Bty/2/T |
| B39.35 | 10:30 a.m. | rest of 2/T (except cav and rest of 2/2/T) |
Orders: 15 Mich is to join 6 Tenn Division. 1 Tenn Division is to defend the line of the Hamburg-Purdy Road. 1/4/T is to join 1 Tenn Division. 23 Mo/6/T is to join 6 Tenn Division. 4 Tenn Division is to defend the Sarah Bell Field. 2/2/T has a Brigade Goal to support Stuart and 2/5/T 2 Tenn Division is to defend the Sunken Road and Duncan Field.
CSA Information Set Up:
Johnston, Beauregard, A Miss HQ and Supply—B5.01 Hardee, 3 Corps HQ and Supply—B10.06
C/H/3 2 Tenn—B6.13 24 Tenn—B7.13 Cleburne, 15 Ark—B8.12 5 Tenn, 6 Miss—B9.12 23 Tenn—B10.11 Trigg Bty—B7.12 Hindman, Calvert Bty -B8.11 Hubbard Bty—B9.11
W/H/3 27 Tenn, 16 Ala—B11.11 Wood, 44 Tenn, 8 Ark—B11.10 9 Ark Bn, 55 Tenn—B12.09 3 Miss Bn—B13.13 Ga Dragoons, Harper Bty—B11.07
S/H/3 7 Ark a,b—B13.09 Shaver, 2 Ark—B13.08 Swett Bty, Miller Bty—B12.07 6 Ark—B14.07 3 CSA—B14.06
G/2/2 1 La—B15.06 26 Ala—B15.05 Gladden, 25 Ala—B16.04 22 Ala- B16.03 Robertson Bty—B15.03 21 Ala—B17.03 Bragg, 2 Corps HQ and Supply—B7.03
P/1/2 38 Tenn a,b—B2.11 16 La, Orleans Gd—B3.11 Pond, Ketchum Bty, Jenkins Cav—B3.10 18 La—B4.10 Crescent a,b—B4.09
A/1/2 17 La, Conf Gd—B5.09 Ruggles, Washington Bty—B5.08 Anderson, 20 La—B6.08 9 Texas, 1 Fl Bn—B6.07
G/1/2 1 Ark a,b—B7.07 19 La,—B7.06 Gibson, 4 La—B8.06 13 La a,b—B8.05
J/2/2 Girardey Bty—B8.04 Clinton Cav/2/2—B7.04 17 Ala—B9.05 Jackson, 2 Texas—B9.04 18 Ala—B10.03 19 Ala—B11.03
C/2/2 Withers, Gage Bty—B10.02 Chalmers, 52 Tenn, 5 Miss—B11.02 9 Miss, 10 Miss—B12.01 7 Miss—B13.01
Orders: C/H/3 has a Brigade Goal to capture Shiloh Church 3 Corps is to capture Lost, Review, and Woolf Fields. Withers/2 Corps has a Divisional Goal to capture Spain, Barnes, and Davis Fields. G/2/2 has a Brigade Goal to capture Spain, Barnes, and Davis Fields. P/1/2 has a Brigade Goal to capture Ben Howell Field Ruggles/2 Corps has a Divisional Goal to capture Woolf and Review Fields. 2 Corps is to accompany one of the above divisions. That order then becomes the Corps order. all other 2 Corps units with separate goals continue on those goals.
Artillery Ammunition: 100
Previous Losses: None
Wrecked Regiments: None
Eliminated Units: None
Reinforcements: As per the CSA Reinforcement Schedule.
Victory:
| Union Massive | 15 or more VPs |
| Union Major | 8 to 14 VPs |
| Union Minor | 3 to 7 VPs |
| Draw | -2 to 2 VPs |
| CSA Minor | -7 to -3 VPs |
| CSA Major | -14 to -8 VPs |
| CSA Massive | -15 or less VPs |
Historically, the Scenario was a draw, with 1 VP.
6.5 Hornet's Nest
By midday, Union resistance in the center and right solidified along the Sunken Road, stretching between the Peach Orchard and Duncan Field. Here men of three Federal divisions - Prentiss' 6th, W.H.L. Wallace's 2nd, and Hurlbut's 4th - formed a solid line that became known ever after as the Hornet's Nest. The position held out until almost 6:00 p.m., finally falling to repeated Rebel attacks and in the face of heavy odds.
General Information Map Area: Both First Turn: 11:00 a.m. April 6th Last Turn: 6:00 p.m. April 6th Total Game Length: 29 Turns First Player: CSA
Union Information Set Up:
Grant, ATenn HQ—A41.12 A Tenn Supply Train—A55.14 A Tenn Supply Wagon—A55.13 A Tenn supply wagon—B44.31 8 Ohio Bty—A57.09 F 2 Ill Bty—A55.12 H 1 Ill Bty—A54.12 B 2 Ill Bty—A52.12 I 1 Ill Bty—A38.17 IO—15 Mich a (5), 15 Mich b—w/i 3 of A55.14
1/T 1 Tenn HQ—A27.10 C&S Ill Cav, 1/4 Ill Cav—A26.10 D 1 Ill Bty(3), D 2 Ill Bty(2)—A26.09 E 2 Ill Bty(2)—B29.11 14 Ohio Bty—eliminated
1/1/T McClernand, Hare, 13 Iowa a(5) 13 Iowa b(5)—A26.05 18 Ill(3) 11 Iowa a(2) 11 Iowa b(4)—A27.06 IO—8 Ill(7)—A36.01
2/1/T Marsh, 45 Ill(5) 48 Ill(7)—A29.04 20 Ill(6) 11 Ill(3)—A28.04
3/1/T Repl leader, 49 Ill(6) 29 Ill(3) 17 Ill(4) 43 Ill(2)—A27.05
2/T W. Wallace, 2 Tenn HQ—A39.01 A&B 2 Ill Cav, US Cav—w/i 1 of A39.01
1/2/T Tuttle, 12 Iowa, D 1 Mo Bty—B37.31 7 Iowa—B37.32 2 Iowa, K 1 Mo Bty—B36.32 14 Iowa—B38.30
2/2/T McArthur, 9 Ill—B47.25 12 Ill, A 1 Ill Bty—B46.25 13 Mo—A24.07 IO—14 Mo, 81 Ohio—w/i 1 of A36.28
3/2/T 8 Iowa a, H 1 Mo Bty—B38.29 8 Iowa b—B39.30 Sweeny, 58 Ill—B35.33 7 Ill—B35.34 52 Ill a & b—B37.34 57 Ill a & b—B38.33 50 Ill—B48.24
4/T Hurlbut, 4 Tenn HQ—B44.27 5 Ohio Cav—B45.26
1/4/T Williams, 28 Ill—B43.24 32 Ill, C 1 Mo Bty—B44.23 3 Iowa—B45.24 41 Ill, 2 Mich Bty—B42.23
2/4/T Veatch, 46 Ill(6) 25 Ind(3)—A29.05 14 Ill(8) 15 Ill(4)—A30.04
3/4/T 17 Ky, 25 Ky—B41.24 Lauman, 44 Ind, 13 Ohio Bty—B41.25 31 Ind—B41.26
5/T 5 Tenn HQ—A30.11 Thieleman, 2&3/4 Ill Cav—w/i 1 of A30.14 B 1 Ill Bty—A27.10 IO—6 Ind Bty(1)—w/i 1 of A55.14
1/5/T McDowell, 46 Ohio a & b—A24.06 6 Iowa a & b—A23.07 40 Ill(6)—A24.07
2/5/T Stuart, 55 Ill—B53.20 54 Ohio—B54.19 71 Ohio—B51.21
4/5/T Sherman, Buckland, 48 Ohio(6) 72 Ohio a(1)—A25.06 IO—70 Ohio a(6) 70 Ohio b(4)—A28.11 all other units of 5/T not listed are eliminated.
6/T Prentiss, 6 Tenn HQ—B40.29 11 Ill Cav—A43.05 15 Iowa a & b—A30.08 16 Iowa a & b—A29.09 23 Mo, 5 Ohio Bty(4)—B40.27
1/6/T Repl leader, 12 Mich(7)—B38.28 21 Mo(1) 1 Minn Bty(4)—B38.30 25 Mo (3)—B39.28
2/6/T Miller, 18 Wisc a(2) 18 Mo(2)—B39.28 61 Ill(1)—B38.32
Orders: All units marked IO have informal orders. 1/T is ordered to counter-attack to recapture Shiloh Church 2/T is ordered to defend the Sunken Road line 2/2/T has a Brigade Goal to defend the Union flank near the Peach Orchard. 13 Mo/2/2/T is attached to 1/5/T 8 Iowa a & b/3/2/T are attached to 1-2-T 4/T is ordered to defend the Sunken Road line and the Sarah Bell Field 5/T is ordered to counter-attack to recapture Shiloh Church. 2/5/T has a Brigade Goal to defend Larkin Bell Field and the Union flank. 6/T is ordered to defend the Sunken Road line. 15 Iowa a & b, 16 Iowa a & b, have orders to defend Jones Field.
Artillery Ammunition: 75
Previous Losses: 66
Wrecked Regiments: 1/1/T - 2, 3/1/T - 3, 2/4/T - 2, 1/5/T - 1, 3/5/T - 5, 4/5/T - 4 1/6/T - 5, 2/6/T - 4
Eliminated Units: All units of 6/T not initially set up on map
Reinforcements: As per the Union Reinforcement Schedule.
CSA Information Set-up:
Beauregard, A Miss HQ and Supply—B15.19 Johnston—B35.20 Polk, 1 Corps HQ—B20.29 1 Corps Supply, Misc Cav/1 Corps—B19.29
1/I Stewart—B26.32 (Clark is wounded)
R/1/1 13 Tenn(7) Bankhead Bty(4)—B31.34 Russell, 11 LA(6) 22 Tenn a(5) 22 Tenn b(4)—B30.33 12 Tenn a(5) 12 Tenn b(5)—B29.33
S/1/1 13 Ark, Stanford Bty—B26.32 Repl Leader, 5 Tenn a and b—B25.33 4 Tenn a(5) 4 Tenn b(4)—B24.32 33 Tenn(11)—B24.33
J/2/1 Repl Leader, 15 Tenn(6) 154 Tenn a(3) 154 Tenn b(2)—B28.32 Blythe Tenn(4) 2 Tenn(2) Polk Bty(4)—B27.33
S/2/1 Cheatham, Stephens, 9 Tenn, Smith Bty—B35.27 7 Ky—B34.27 6 Tenn—B36.26 1 Miss Cav/1 Corps—B35.25 Brewer Cav/1 Corps—B27.31 2 Corps Bragg, 2 Corps HQ and Supply—B35.19 1/2 Ruggles—B23.34
A/1/2 Anderson, 17 LA(4) 1 Fl Bn(1)—B22.33 20 LA(4) 9 Texas(1) Washington Bty—B23.34 Conf Gds Bn—eliminated
G/1/2 All units w/i 1 hex of B33.23
P/1/2 IO—38 Tenn a & b—A5.01 IO—Crescent a & b—A6.01 16 LA—A17.04 Pond, 18 LA—A18.03 Orleans Gd, Ketchum Bty—A19.03
2/2 C/2/2 Gage Bty—B52.12 Withers, 52 Tenn—B54.16 Chalmers, 5 Miss, 10 Miss(5)—B55.16 7 Miss(7), 9 Miss(6)—B56.15
G/2/2 (note, unit formed in square formation, set up facing all directions) 25 Ala(3)—B37.20 Repl Leader, 22 Ala(6) Robertson Bty—B38.20 21 Ala(4)—B39.20 26 Ala(2) 1 La(2)—B38.19
J/2/2 2 Texas—B50.16 19 Ala—B51.15 Jackson, 18 Ala—B52.15 17 Ala—B53.15 Girardey Bty—B51.12
3 Corps Hardee, 3 Corps HQ and Supply—B30.28 Hindman wounded, no repl.
C/H/3 5 Tenn(4) 23 Tenn(6) Hubbard Bty—B25.27 Cleburne, 24 Tenn(8) Calvert Bty—B26.25 15 Ark(6) Trigg Bty—B26.26 6 Miss, 2 Tenn—eliminated
S/H/3 7 Ark a(4) 7 Ark b(4) B29.31 Shaver, 2 Ark(5) 6 Ark(7)—B30.30 IO—3 Conf(3)—B36.19 Miller Bty—B31.28 Swett Bty—B31.29
W/H/3 Repl leader, 27 Tenn(3) 3 Miss Bn(3)—B27.30 44 Tenn(2) 9 Ark Bn(1) 8 Ark(3) —B28.29 16 Ala(4) 55 Tenn(2)—B31.30 Harper Bty—B31.27 Res Corps Breckinridge, Res Corps HQ—B39.17 Res Corps Supply—B34.16
B/Res 9 Ark—B41.18 Hudson Bty, Watson Bty—B41.17 Bowen, 10 Ark, 2 Conf—B42.17 1 Mo—B43.17
S/Res 22 Miss, 28 Tenn—B36.16 Statham, 15 Miss, 20 Tenn—B37.16 45 Tenn, 19 Tenn—B38.15 Rutledge Bty—B36.15 McClung Bty/A Tenn—B35.15
T/Res 4 Ky—B18.34 Trabue, 6 Ky, 31 Ala—B19.34 5 Ky, 4 Ala Bn—B20.33 3 Ky, Crews Bn—B21.33 Cobb Bty—B23.33 Byrne Bty—B21.32 Morgan Cav—B21.31
Assorted Cav units IO—Jenkins/1/2, Clanton/2/2, Adams/A Tenn, Ga Dragoons/W/H/3—w/i 1 hex of B58.08 IO—Wharton a & b/A Tenn—B13.33
Orders: All units marked IO have informal orders. 1 Corps has orders to attack and capture Jones Field with 1/1 Corps Division. 2/1 Corps has no orders. J/2/1 is attached to 1/1 Corps 2 Corps has no orders. 1/2 Corps has a Divisional Goal to defend Woolf Field, Ben Howell Field, and Shiloh Church. 2/2 has a Divisional Goal to attack and capture Larkin Bell Field. G/2/2 has no orders, and is not part of 2/2 attack, above. 3 Corps has no orders. Res Corps has orders to attack and capture Sarah Bell Field, and Peach Orchard. T/Res Corps has a Brigade Goal to defend Woolf and Ben Howell Fields, and Shiloh Church.
Artillery Ammunition: 70
Previous Losses: 76
Wrecked Regiments: R/1/1 - 1, S/1/1 - 1, J/2/1 - 4, A/1/2 - 4, G/2/2 - 4, S/1/3 - 2 C/1/3 - 3, W/1/3 - 6
Eliminated Units: None
Reinforcements: As per the CSA Reinforcement Schedule.
Victory:
| Union Massive | 18 or more VPs |
| Union Major | 12 to 17 VPs |
| Union Minor | 6 to 11 VPs |
| Draw | -5 to 5 VPs |
| CSA Minor | -11 to -6 VPs |
| CSA Major | -17 to -12 VPs |
| CSA Massive | -18 or less VPs |
Historically the scenario was a draw, with -3 VPs.
6.6 The Final Drive
Beauregard's order to halt and not make the final attack on Grant's battered forces has been both hailed as the only realistic choice, and reviled as the fatal decision that doomed the South's independence. This scenario examines that question directly: could Grant have been driven into the Tennessee River? When the fighting stopped, the situation was very confused. No brigade was intact, and many regiments had drifted to the rear or to find a campsite. After the war, the myth sprang up that one more determined push would have finished the fight. Here the CSA player has a chance to try that final, determined push - everyone gripped with the same urgency, in an all or nothing final drive on the landing.
General Information Map Area: Both First Turn: 5:00 p.m. April 6th Last Turn: 8:00 p.m. April 6th Total Game Length: 11 Turns First Player: CSA
Union Information Set Up:
Grant, A Tenn HQ, Buell, A Ohio HQ—A48.15 8 Ohio Bty—A57.09
1/Tenn McClernand, 1 Tenn HQ, 1/4 Ill Cav, C&S Ill Cav—A42.19 D 1 Ill Bty(3)—A41.19
1/1/T Hare, 8 Ill(5) 18 Ill(1) 11 Iowa b(2)—A46.13 13 Iowa a(3) 13 Iowa b(4) H 1 Mo Bty/2 Tenn—A47.13
2/1/T Marsh, 45 Ill(3) 48 Ill(1)—A37.19
3/1/T Repl ldr, 49 Ill(6)—A41.15 17 Ill(4)—A42.14 43 Ill(1) 46 Ill/2/4/T(4)—A43.15 29 Ill(1) B 2 Ill Bty/A Tenn—A50.12
2/Tenn W. Wallace, 2 Tenn HQ—eliminated. US Cav—A36.23 A&B 2 Ill Cav—A36.21
1/2/T Tuttle, 2 Iowa(7) 7 Iowa(5) 3 Iowa/1/4/T(1)—A45.14
2/2/T McArthur, 13 Mo(3) 9 Ill(2) A 1 Ill Bty(1) —A44.14 81 Ohio(7)—A37.18 14 Mo, I 1 Ill Bty/A Tenn—A38.17 12 Ill(3)—A40.18
3/2/T Repl ldr, 7 Ill(7) D 2 Ill Bty/1 Tenn(1) K 1 Mo Bty—A54.11 50 Ill(6) H 1 Ill Bty/A Tenn—A55.12 57 Ill a(2) 57 Ill b(3)—A51.12 52 Ill a(2) 52 Ill b(3)—A51.14
4/Tenn Hurlbut, 4 Tenn HQ—A55.14 5 Ohio Cav, 2 Mich Bty(1)—A54.14
1/4/T Repl ldr, 28 Ill(1) 41 Ill(4) 32 Ill(4) 15 Ill/2/4/T(1) E 2 Ill Bty/1 Tenn(2)—A48.12
2/4/T Veatch, 14 Ill(4) C 1 Mo Bty(2)—A53.12
3/4/T Lauman, 31 Ind(5) 44 Ind(1) 25 Ky(2) D 1 Mo Bty/2 Tenn(2)—A49.13
5/Tenn Sherman, 5 Tenn HQ—A44.16 Thielemann Cav, 4 Ill Cav—A45.17
1/5/T Repl ldr, 46 Ohio a(2) 46 Ohio b(3) 6 Iowa a(2) 6 Iowa b(1) 40 Ill(2)—A52.12
2/5/T Repl ldr, 54 Ohio(1) 11 Iowa a/1/1/T(1)—A56.12
3/5/T Hildebrand, 53 Ohio a(3) 70 Ohio a/4/5/T(4) A 1 Ill Bty/A Tenn—A40.15
4/5/T Buckland, 48 Ohio(6) 72 Ohio a(1) B 1 Ill Bty—A38.16 70 Ohio b(6) 6 Ind Bty(1)—A39.16
6/Tenn Prentiss, 6 Tenn HQ—eliminated 16 Iowa a(2) 16 Iowa b(4)—A41.17 5 Ohio Bty(3)—A47.15 11 Ill Cav—A50.16 15 Iowa a(1) 15 Iowa b(2)—A57.14 1 Minn Bty(4)—A57.10
4/Ohio Nelson, 4 Ohio HQ—A57.12
10/4/O Ammen, 9 Ind, 6 Ohio—A58.11 36 Ohio, F 2 Ill Bty/A Tenn—A56.11 24 Ohio—A61.11
Gunboat Tyler—any hex of the Tennessee River A Tenn Supply Train, 2x A Tenn Supply Wagons—w/i 3 hexes any Union unit.
Orders: There are no regular orders. Instead, every Federal unit is considered to have an order to defend Pittsburgh Landing and the final Union line. All units are considered in command if they remain north of the Axx.10 hexrow, and east of the line defined by Tilghman's Branch and Owl Creek.
Note: By this time, formal command had collapsed. Men were rallied on a scratched-together line. Grant and his remaining division commanders assembled, readied for one last stand. The proximity of the Landing itself aided this line; both formed troops and stragglers instinctively drifted there, and everyone understood the importance of holding it. Hence, every soldier in that final line, from Grant down to the rear-rank privates, knew what the orders were implicitly, without needing a great deal of direction beyond a hastily barked command to "stop here, and face that way!"
Artillery Ammunition: 40
Previous Losses: 208
Wrecked Regiments: 1/1/T - 5, 2/1/T - 4, 3/1/T - 4, 1/2/T - 2, 2/2/T - 2, 3/2/T - 8, 1/4/T - 4, 2/4/T - 4, 3/4/T - 4, 1/5/T - 5, 2/5/T - 3, 3/5/T - 5, 4/5/T - 4, 1/6/T - 6, 2/6/T -4, U/6/T - 5
Eliminated Units: None
Reinforcements: As per the Union Reinforcement Schedule between 5:00 p.m. and 8:00 p.m.
CSA Information Set Up:
Beauregard, A Miss HQ and Supply—B22.30 McClung Bty—A50.01 Adams Cav—B38.30 Wharton a Cav—A34.09 Wharton b Cav—A34.08 Polk, 1 Corps HQ and Supply, Misc Cav—B35.33 Brewer Cav—A33.10 1 Miss Cav—A43.05
1/1 Clark wounded, Stewart commands division
R/1/1 Russell, 22 Tenn a(4) 22 Tenn b(3)—A26.05 12 Tenn a(4) 12 Tenn b(3)—A26.04 13 Tenn(6)—A26.06 11 LA(4)—B22.23 Bankhead Bty—A25.03
S/1/1 Repl Ldr, 33 Tenn(7), 4 Tenn a(3) 4 Tenn b(2)—A30.08 5 Tenn a(4) 5 Tenn b(4)—A26.03 13 Ark(3)—B22.23 Stanford Bty(2)—A52.04
2/2 Cheatham—w/i 4 of B7.04
J/2/1 Repl Ldr, 15 Tenn(4) 154 Tenn a(2) 154 Tenn b(1)—w/i 4 of B8.04 Polk Bty(4)—B21.24 Blythe Miss(2)—B17.28
S/2/1 Stephens, 6 Tenn(4) 9 Tenn(6)—w/i 1 of B7.04 Maney, Smith Bty(3)—B48.27 7 Ky(4)—B47.28
Bragg, 2 Corps HQ and Supply—A41.02
1/2 Ruggles, Washington Bty/A/1/2- A44.03 Jenkins Cav—A44.01
A/1/2 Anderson, 17 LA(1) 9 Texas(1)—A46.06 20 La(2)—A45.07
G/1/2 Gibson, 4 LA(5) Ketchum Bty—B33.23 13 LA a(4) 13 LA b(2) —B33.24 1 Ark a(2) 1 Ark b(3)—B34.23 19 LA(1)—B20.08
P/1/2 Pond, 16 LA(3) 18 LA(2) A34.12 Orleans Gd(2)—A34.11 Crescent a(4) Crescent b(4)—A40.04 38 Tenn a(3) 38 Tenn b(4)—A41.04
2/2 Withers, Gerardy Bty/J/2/2—A50.05 Clanton Cav—A56.01
C/2/2 Chalmers, 7 Miss(3) 9 Miss(4)—A53.06 Gage Bty—A53.05 5 Miss(5)—A54.05 10 Miss(2)—A56.02
G/2/2 Repl Ldr, 22 Ala(4) 1 LA(1)—A47.06 21 Ala(3)—B44.26 Robertson Bty—B45.26 25 Ala(2)—B46.25
J/2//2 Jackson, 17 Ala(5)—A51.06 19 Ala(4)—A50.06 18 Ala(4)—B49.22
Hardee, 3 Corps HQ and Supply—B22.32
C/H/3 Cleburne, 5 Tenn(1) 24 Tenn(8) 15 Ark(4) Hubbard, Trigg, Calvert Btys—w/i 1 A37.08 23 Tenn(6) 6 Miss(1)—w/i 1 B5.02
S/H/3 Shaver, 2 Ark(2) 6 Ark(4) 7 Ark a(1) 7 Ark b(2) Miller, Swett Btys—w/i 1 B31.28
W/H/3 Wood, 27 Tenn(3) 9 Ark Bn(1) 8 Ark(3) Harper, Ga Dragoons—w/i 1 A39.01 16 Ala(4) 3 Miss Bn(3)—w/i 1 B6.01
Breckinridge, Res Corps HQ—A50.02
B/Res Repl Ldr, 1 Mo(5) 9 Ark(1) 10 Ark(2) Watson, Hudson Btys—w/i 1 A51.03
S/Res Statham, 15 Miss(1) 22 Miss(4) 19 Tenn(2) 28 Tenn(2) 45 Tenn(1) Rutledge Bty—w/i 1 A48.02 1 Tenn Cav a(4) 1 Tenn Cav b—B44.30
T/Res Trabue, 31 Ala(3) 4 Ky(4) 5 Ky(2) 6 Ky(2) Morgan Cav, Crews Bn(1)—w/i 1 A54.03 3 Ky(5) Byrne Bty, 4 Ala Bn(2)—B24.31
Orders: 2 Corps (except P/1/2) has orders to attack and capture Pittsburgh Landing Res Corps has orders to attack and capture Pittsburgh Landing. No other units have any orders. Alternate Orders: All units on the map have orders to attack and capture Pittsburgh Landing.
Artillery Ammunition: 25
Previous Losses: 173
Wrecked Regiments: R/1/1 - 5, S/1/1 - 3, J/2/1 - 5, S/2/1 - 3, G/1/2 - 5, A/1/2 - 5, P/1/2 - 4, G/2/2 - 5, C/2/2 - 4, J/2/2 - 4, S/1/3 - 5, C/1/3 - 5, W/1/3 - 6, T/Res - 6, B/Res - 4, S/Res - 6.
Eliminated Units: None
Reinforcements: As per the CSA Reinforcement Schedule
Victory Conditions:
| Union Massive | 18 or more VPs |
| Union Major | 12 to 17 VPs |
| Union Minor | 6 to 11 VPs |
| Draw | -5 to 5 VPs |
| CSA Minor | -11 to -6 VPs |
| CSA Major | -17 to -12 VPs |
| CSA Massive | -18 or less VPs |
Historically the scenario was a draw, with -3 VPs.
6.7 "No enemy nearer than Corinth"
Titled by another quote Sherman would live to regret, this scenario examines the entire first day's fighting.
General Information Map Area: Both First Turn: 6:00 a.m. April 6th Last Turn: 7:00 p.m. April 6th Total Game Length: 53 Turns First Player: CSA
Union Information All Union information is the same as in Scenario 6.9, except that only those reinforcements scheduled to enter before 7:00 p.m. April 6th enter play.
CSA Information All CSA information is the same as in Scenario 6.9, except that only those reinforcements scheduled to enter before 7:00 p.m. April 6th enter play.
Victory Conditions:
| Union Massive | 18 or more VPs |
| Union Major | 12 to 17 VPs |
| Union Minor | 6 to 11 VPs |
| Draw | -5 to 5 VPs |
| CSA Minor | -11 to -6 VPs |
| CSA Major | -17 to -12 VPs |
| CSA Massive | -18 or less VPs |
Historically the scenario was a draw, with -3 VPs.
6.8 "Lick 'em tomorrow"
Grant's failure to take even rudimentary precautions against an attack must be considered one of the larger mistakes of his military career, but the resultant disaster did allow one of his greatest attributes as a commander to shine through: his iron will. Where many might have given up, Grant joined with Buell in counter-attacking on the 7th, driving the enemy off the field.
General Information Map Area: Both First Turn: 5:00 a.m. April 7th Last Turn: 6:00 p.m. April 7th Total Game Length: 53 turns First Player: Union
Union Information Set Up:
Grant, A Tenn HQ—A48.15 A Tenn supply train, 2xA Tenn supply wagons—w/i 1 of A49.16 14 Wi a & b—A44.09 15 Mich a(7) 15 Mich b—A54.14 B 2 Ill Bty—A50.12 H 1 Ill Bty—A55.12 F 2 Ill Bty—A56.11 8 Ohio Bty—A57.09
McClernand, 1 Tenn HQ—A46.16 C&S Ill Cav, 1/4 Ill Cav—w/i 1 of A46.16 E 2 Ill Bty(2)—A48.12 D 1 Ill Bty(3)—A41.19 D 2 Ill Bty(2)—A54.11
1/1/T 8 Ill (8)—A45.15 Hare, 11 Iowa a(5) 11 Iowa b(5)—A46.14 18 Ill(6)—A47.14 13 Iowa a(5) 13 Iowa b(5)—A48.13
2/1/T Marsh, 45 Ill(6) 48 Ill(5)—A44.15 11 Ill(2) 20 Ill(5)—A43.16
3/1/T Repl ldr, 17 Ill(5) 29 Ill(3)—A44.17 49 Ill(7) 43 Ill(4)—A45.17
2 Tenn—all units w/i 5 of A46.22 W.H.L. Wallace is dead, 12 Iowa is eliminated. A 1 Ill Bty(3) H 1 Mo Bty(3)
1/2/T—2 Iowa(9) 7 Iowa(6) 14 Iowa(4)
2/2/T—9 Ill(5) 12 Ill(6) 13 Mo(7) 81 Ohio(8)
3/2/T—Repl ldr, 7 Ill(10) 8 Iowa a(3) 8 Iowa b(2) 50 Ill(10) 52 Ill a(5) 52 Ill b(6), 57 Ill a(5) 57 Ill b(5) 58 Ill(4)
L. Wallace, 3 Tenn HQ—A37.22 3/11 Ill Cav—A35.27 3/5 Ohio Cav—A35.26
1/3/T Smith, 11 Ind a & b—A37.19 8 Mo a & b, 9th Ind Lt Bty—A37.18 24 Ind a & b—A38.18
2/3/T Thayer, 23 Ind a & b—A37.20 68 Ohio a & b—A36.20 58 Ohio a & b—A37.21 1 Neb—A38.20
3/3/T Whittlesey, 20 Ohio—A37.23 76 Ohio a & b, I 1 Mo Bty—A35.23 56 Ohio a & b—A36.21 78 Ohio a & b—A36.22
Hurlbut, 4 Tenn HQ—A51.15 5 Ohio Cav, 2 Mich Bty(1) C 1 Mo Bty(2)—w/i 1 of A51.15
1/4/T repl ldr, 3 Iowa(6) 32 Ill(8)—A49.14 28 Ill(6) 41 Ill(8)—A50.13
2/4/T Veatch, 15 Ill(6) 14 Ill(8)—A51.13 46 Ill(8) 25 Ind(5)—A52.13
3/4/T Lauman, 44 Ind(6) 25 Ky(3)—A53.13 31 Ind(9) 17 Ky(3)—A54.12
Sherman, 5 Tenn HQ—A41.16 Thielemann Cav, 4 Ill Cav—w/i 1 of A41.16
1/5/T Repl ldr, 46 Ohio a(4) 46 Ohio b(5) 6 Ind Bty(1)—A39.16 40 Ill(6)—A40.18 6 Iowa a(5) 6 Iowa b(4)—A40.19
2/5/T repl ldr, 55 Ill(4) 71 Ohio(5) B 1 Ill Bty—A38.16 54 Ohio(6) I 1 Ill Bty/A Tenn—A38.17
3/5/T Hildebrand, 53 Ohio a(6) 53 Ohio b(5)—A41.16 57 Ohio(6)—A41.17 77 Ohio a(5) 77 Ohio b(4)—A42.17
4/5/T Buckland, 70 Ohio a(8)—A39.14 70 Ohio b(7)—A39.13 48 Ohio(10)—A39.15 72 Ohio a(4) 72 Ohio b(3)—A40.12
6 Tenn—all units w/i 5 of A52.18 All leaders are Repl leaders. 1 Minn Bty(4) 5 Ohio Bty(3) 15 Iowa a(6) 15 Iowa b(6) 16 Iowa a(6) 16 Iowa b(7) 23 Mo(1) 1/6/T—21 Mo(6) 25 Mo(5) 12 Mich(9) Powell(6) 16 Wi a(8) 16 Wi b(6) 2/6/T—18 Wi a(5) 18 Wi b(4) 18 Mo(6) 61 Ill(6)
Buell, A Ohio HQ and Supply—A55.13 Nelson, 4 Ohio HQ—A52.10 10/4/O—w/i 1 of A54.09 19/4/O—w/i 1 of A49.10 22/4/O—w/i 1 of A51.09
Crittenden, 5 Ohio HQ—A47.11 G 1 Ohio Bty, H&M 4 US Bty—w/i 1 of A47.11 11/5/O—w/i 1 of A46.10 14/5/O—w/i 1 of A45.09
Gunboats Lexington, Tyler—any hex of the Tennessee River.
Orders: 1 Tenn has orders to defend in place. 2 Tenn has no orders. 3 Tenn has orders to attack and capture Glover and Jones Fields. 4 Tenn has orders to defend Pittsburgh Landing. 5 Tenn has orders to attack and capture Cavalry and Jones Fields. 6 Tenn has no orders. 4 Ohio has orders to attack and capture the Sarah Bell Field. 5 Ohio has orders to attack and capture Davis Field.
Artillery Ammunition: 75.
Previous Losses: 208.
Wrecked Regiments: 2/1/T-1, 3/1/T-2, 1/2/T-2, 2/2/T-1, 3/2/T-3, 2/4/T-1, 2/5/T-2, 4/5/T-1, -/6/T-1, 1/6/T-1.
Eliminated Units: 14 Ohio Bty/1 Tenn, 12 Iowa/1/2/T, 13 Ohio Bty/4 Tenn, E 1 Ill Bty/5 Tenn.
Reinforcements: Per the Union Reinforcement Schedule
CSA Information Set Up:
R/1/1 Russell, 22 Tenn a(7) 22 Tenn b(7)—A27.11 12 Tenn a(6) 12 Tenn b(6)—A27.12 Cheatham, 13 Tenn(9)—A26.11
S/1/1 Stewart, 13 Ark(4)—B38.26 5 Tenn a(6) 5 Tenn b(6)—B41.24 4 Tenn a(6) Gerardey Bty/J/2/2—A27.06 4 Tenn b(6)—A26.05 33 Tenn(9)—A26.10
J/2/1 Repl ldr, 2 Tenn(5)—B42.23 Blythe Bn(4)—B43.23 154 Tenn a(5) 154 Tenn b(4)—B44.23 15 Tenn(7)—B39.25
S/2/1 Maney, 9 Tenn(8) 1 Tenn Bn(2) McClung Bty/A Tenn—B40.28 Stephens, 6 Tenn(7)—A27.13
A/1/2 Anderson, 20 La(7) 9 Texas(4)—A31.03 1 Fl Bn(3) Conf Gds(1)—A31.02 17 La(5) 11 La/R/1/1(7)—A31.01
G/1/2 4 La(8)—A29.04 Gibson, 1 Ark a(5) 1 Ark b(5)—A30.03 Ruggles, 13 La a(5) 13 La b(4)—A30.02 19 La(4) Washington Bty/A1/2—A37.25
P/1/2 16 La(5) 18 La(6)—A29.17 Pond, 38 Tenn a(6) 38 Tenn b(6)—A30,16 Orleans Gd(4)—A30.15 Ketchum Bty—A30.14 Crescent a(6) Crescent b(6)—A36.20
C/2/2 Chalmers, 7 Miss(7)—B52.21 9 Miss(6) 10 Miss(5)—B51.22 5 Miss(7) 52 Tenn(2)—B50.21
G/2/2 Repl ldr, 21 Ala(7)—B49.22 26 Ala(3) Robertson Bty—B48.22 25 Ala(5)—B38.24 1 La(5) 22 Ala(6)—A26.13
J/2/2 19 Ala(7)—B47.23 2 Texas(2)—B46.22
C/H/3 2 Tenn(4) Bankhead Bty/R/1/1—B38.27 Cleburne, 15 Ark(7)—A27.05 23 Tenn(9)—A28.04 24 Tenn(8) 5 Tenn(5)—A28.05
S/H/3 Shaver, 6 Ark(8) Smith Bty/S/2/1(3)—A27.07 7 Ark a(5) 7 Ark b(4)—A27.08 2 Ark(7)—A26.07
W/H/3 Wood, 44 Tenn(2) 16 Ala(6)—A27.09 9 Ark Bn(2) 27 Tenn(5) 8 Ark(5)—A27.10 Harper Bty—B38.28
B/Res 10 Ark(5) 2 Conf(2)—B37.31 repl ldr, 9 Ark(5) Hudson Bty—B38.30 1 Mo(8)—B38.29
S/Res 15 Miss(4) 20 Tenn(3) Stanford Bty/S/1/1(2)—B34.31 Statham, 19 Tenn(5) 22 Miss(6)—B35.31 45 Tenn(4) 28 Tenn(4)—B36.31
T/Res 3 Ky(6) 31 Ala(5)—A32.01 4 Ky(7)—A33.01 Trabue, 5 Ky(5) 6 Ky(6)—B33.34 4 Ala Bn, Crews Bn(3) Byrne Bty—B33.33
Higher commands Withers, Clinton Cav/2/2—B41.22 Hardee, 3 Corps HQ and supply—B36.19 Breckinridge, Res Corps HQ—B34.26 Polk, 1 Corps HQ and supply—A25.01 Bragg, 2 Corps HQ and supply—A23.08 Beauregard, A Miss HQ and Supply—B19.29
Set up south of Bxx.25, west of B25.xx: Wharton a(7) Wharton b, Adams Miss Cav of A Miss; 1 Miss Cav, Brewer Cav, Misc Cav of 1 Corps; Polk Bty/J/2/1(4) 7 Ky/S/2/1(7) Jenkins Cav/2 Corps, Gage Bty/C/2/2, 18 Ala/J/2/2(8) Calvert, Hubbard, Trigg Btys and 6 Miss(3) of C/H/3; Swett and Miller Btys, 3 Conf(4) of S/H/3 3 Miss Bn(5) 55 Tenn(4) Ga Dragoons of W/H/3 Watson Bty/B/Res, Rutledge Bty, 1 Tenn Cav a(6) 1 Tenn Cav b/S/Res Morgan Cav/T Res
Orders: Note: Confederate tactical organization had all but collapsed by the second day. The above set-up reflects the Rebel line as it was formed early in the morning, but at the start of this scenario, it was still assembling. Unit commanders mostly gave up on divisional and corps control, settling for simply cobbling together a line. As such, any orders for the units are an approximation, at best.
All units may trace radius to any brigade commander. Each corps leader has a sector of the line, and units within that sector can be considered 'in command' while there.
1 Corps: Duncan Field to Jones-Sowell Field 2 Corps: Glover, Jones, Sowell, and Crescent Fields. 3 Corps: Sarah Bell Field, Larkin Bell Field, Davis Field, and the Peach Orchard. Res Corps: Davis to Duncan Fields, including the Sunken Road.
No CSA unit may move for the first four turns, except for those units in Glover or Jones Fields. Units in the free-set up zone may move towards the battle line, and join any part of it.
Artillery Ammunition: 50
Previous losses: 173
Wrecked Regiments: S/2/1-1, A/1/2-1, G/2/2-2, C/2/2-1, J/2/2-1, C/H/3-1, W/H/3-2, B/Res-1, S/Res-1.
Eliminated Units: Cobb Bty/T/Res, 17 Ala/J/2/2
Reinforcements: Per the CSA Reinforcement Schedule
Victory Conditions:
| Union Massive | 51 or more VPs |
| Union Major | 35 to 50 VPs |
| Union Minor | 20 to 34 VPs |
| Draw | 5 to 19 VPs |
| CSA Minor | -10 to 4 VPs |
| CSA Major | -20 to -11 VPs |
| CSA Massive | -21 or less VPs |
Historically the scenario was a Union Major Victory, with 43 VPs.
Design Note: The victory conditions for scenarios covering April 6th are much different from those covering both days. Simply put, the Union reinforcements dramatically tilt the balance, and it is highly unlikely that the Confederates can hang onto much—if any—of the field. Historically, the Union army pretty much swept the map on the 7th, with all Confederate forces exiting to go back to Corinth to avoid destruction. Hence, victory conditions for the Confederates in any full two day game will reflect how well they can hang on in spite of this massive Federal force, and do not really measure how well they do on the 6th.
Also, players may debate how 'major' the Federal victory was. I think that it was substantial, though the fruits of that victory were thrown away by the combined uncertainty of Halleck, Buell, and Grant. The Federals were so stunned that the Rebels even attacked that they immediately became paranoid about a repeat. Tactically, however, the Confederate army had been badly mauled and lost all cohesion in the immediate aftermath of Shiloh, while the Federals had several organized divisions at their command with which to pursue. I have tried to judge the immediate effects of the battle on each army, not the way in which the campaign was conducted after Shiloh.
6.9 "Water our horses in the Tennessee River"
The Battle of Shiloh, 6–7 April, 1862
General Information Map Area: Both First Turn: 6:00 a.m. April 6th Last Turn: 6:00 p.m. April 7th Total Game Length: 125 turns First Player: CSA
Union Information Set up:
McClernand, 1 Tenn HQ —A27.01 C&S Cav/1T—A27.02 1/4 Ill Cav/1T—A35.09 E, 2 Ill Bty—B22.32 D, 1 Ill Bty—A25.05 D, 2 Ill Bty—A27.12 14 Ohio Bty—A25.06
1/1/T Hare, 11 Iowa a,b—A30.08 13 Iowa a,b—A30.10 18 Ill—A30.12 8 Ill—A30.14
2/1/T 45 Ill—A25.01 48 Ill—A26.03 20 Ill—A26.05 Marsh, 11 Ill—A27.08
3/1/T 17 Ill—B24.31 29 Ill—B26.30 Raith, 43 Ill—B28.29 49 Ill—B30.28
W. Wallace, 2 Tenn HQ—A53.13 U S Cav/2/T—A35.22 A&B/2 Ill Cav/2/T—A41.19 A, 1 Ill Bty—A42.15 H, 1 Mo Bty—A56.18 D, 1 Mo Bty—A51.13 K, 1 Mo Bty—A52.10
1/2/T Tuttle, 2 Iowa—A45.15 14 Iowa—A47.15 7 Iowa—A49.16 12 Iowa—A52.18
2/2/T McArthur—A39.16 14 Mo—A38.17 13 Mo—A37.19 9 Ill—A40.16 12 Ill—A40.18 81 Ohio—A47.09
3/2/T Sweeny, 52 Ill a,b —A44.15 7 Ill—A48.17 8 Iowa a,b—A44.19 57 Ill a,b—A44.21 50 Ill—A44.23 58 Ill—A42.23
Hurlbut, 4 Tenn HQ —A44.02 5 Ohio Cav—B46.28 C, 1 Mo Bty—A51.02 2 Mich Bty—A41.08 13 Ohio Bty—B45.32
1/4/T Williams, 3 Iowa—A41.04 41 Ill—A42.02 32 Ill—A44.01 28 Ill—B44.33
2/4/T Veatch, 25 Ind—A44.12 14 Ill—A38.11 15 Ill—A37.08 46 Ill—A42.11
3/4/T Lauman—A47.02 31 Ind—A45.03 44 Ind—A46.02 17 Ky—A48.02 25 Ky—A49.02
Sherman, 5 Tenn HQ—B22.30 Thieleman Cav—B23.31 2,3,4 Ill Cav—B27.26 6 Ind Bty—B11.32 B, 1 Ill Bty—B23.30 E 1 Ill Bty—B22.26
1/5/T McDowell—B13.33 6 Iowa a,b —B8.32 46 Ohio a,b—B10.32 40 Ill—B13.31
2/5/T Stuart—B51.22 55 Ill—B51.20 54 Ohio—B49.22 71 Ohio—B47.21
3/5/T 77 Ohio a, b, Hildebrand—B20.28 53 Ohio a,b—B22.23 57 Ohio—B24.26
4/5/T 48 Ohio, Buckland—B17.30 70 Ohio a,b—B19.30 72 Ohio a,b—B16.30
Prentiss, 6 Tenn HQ—B38.20 1/2 Ill Cav—B41.22 5th Ohio Bty—B36.19 1 Minn Bty—B37.20 16 Iowa a,b, out of ammo—A49.13
1/6/T Peabody, 25 Mo—B29.22 12 Mich—B30.20 21 Mo—B32.19 16 Wisc a,b—B34.19 Powell—B16.14
2/6/T Miller, 18 Mo—B35.18 61 Ill—B37.18 18 Wisc a,b—B39.18
Army troops A Tenn Supply Train, 2x A Tenn wagons—A55.14 B, 2 Ill Bty—A52.12 H, 1 Ill Bty—A54.12 F, 2 Ill Bty—A55.12 8 Ohio Bty—A57.09 15 Mich a,b—A56.11
Orders: Powell/1/6/T has a regimental goal to defend the approach to 1/6/T's camps, delaying the enemy advance as much as possible while avoiding destruction. 12 Mich/1/6/T has a regimental goal to join Powell/1/6/T and then to delay the enemy advance as much as possible while avoiding destruction. 1Tenn, once active, has orders to support Sherman's Division. 2 Tenn, once active, has orders to move to the Sunken Road and defend that line 4 Tenn, once active, has orders to support Prentiss' Division 5 Tenn, once active, has orders to defend in place. 2/5/T has a brigade goal to defend the Union left flank and prevent the Confederates from outflanking the Sunken Road/Peach Orchard line to the east. 6 Tenn, once active, has orders to defend in place. 16 Iowa has orders to move to join 6/T. It may resupply. 15 Michigan has orders to join 6/T. Other Army Troops have no orders
Artillery Ammunition: 150
Previous Losses: none
Wrecked Regiments: None
Eliminated Units: None
Reinforcements: Per the Union Reinforcement Schedule
CSA Information Set Up:
Johnston, Beauregard, A Miss HQ and Supply—B5.01 Hardee, 3 Corps HQ and Supply—B10.06
C/H/3 2 Tenn—B6.13 24 Tenn—B7.13 Cleburne, 15 Ark—B8.12 5 Tenn, 6 Miss—B9.12 23 Tenn—B10.11 Trigg Bty—B7.12 Hindman, Calvert Bty -B8.11 Hubbard Bty—B9.11
W/H/3 27 Tenn, 16 Ala—B11.11 Wood, 44 Tenn, 8 Ark—B11.10 9 Ark Bn, 55 Tenn—B12.09 3 Miss Bn—B13.13 Ga Dragoons, Harper Bty—B11.07
S/H/3 7 Ark a,b—B13.09 Shaver, 2 Ark—B13.08 Swett Bty, Miller Bty—B12.07 6 Ark—B14.07 3 CSA—B14.06
G/2/2 1 La—B15.06 26 Ala—B15.05 Gladden, 25 Ala—B16.04 22 Ala- B16.03 Robertson Bty—B15.03 21 Ala—B17.03
Bragg, 2 Corps HQ and Supply—B7.03
P/1/2 38 Tenn a,b—B2.11 16 La, Orleans Gd—B3.11 Pond, Ketchum Bty, Jenkins Cav—B3.10 18 La—B4.10 Crescent a,b—B4.09
A/1/2 17 La, Conf Gd—B5.09 Ruggles, Washington Bty—B5.08 Anderson, 20 La—B6.08 9 Texas, 1 Fl Bn—B6.07
G/1/2 1 Ark a,b—B7.07 19 La,—B7.06 Gibson, 4 La—B8.06 13 La a,b—B8.05
J/2/2 Girardey Bty—B8.04 Clinton Cav/2/2—B7.04 17 Ala—B9.05 Jackson, 2 Texas—B9.04 18 Ala—B10.03 19 Ala—B11.03
C/2/2 Withers, Gage Bty—B10.02 Chalmers, 52 Tenn, 5 Miss—B11.02 9 Miss, 10 Miss—B12.01 7 Miss—B13.01
Orders:
C/H/3 - Brigade Goal to capture Shiloh Church 3 Corps - capture Lost, Review, and Woolf Fields. Withers/2 Corps - Divisional Goal to capture Spain, Barnes, and Davis Fields. G/2/2 - Brigade Goal to capture Spain, Barnes, and Davis Fields. P/1/2 - Brigade Goal to capture Ben Howell Field Ruggles/2 Corps - Divisional Goal to capture Woolf and Review Fields. 2 Corps - accompany one of the above divisions. That order then becomes the Corps order. all other 2 Corps units with separate goals continue on those goals.
Each order must roll separately for attack stoppage.
Design Note: Despite having been there for two days, and having monitored the Union camps for a month, the Confederates lacked both good maps and a detailed sense of how the Union camps were laid out. The actual attack orders were very vague —merely to attack, capture Pittsburgh landing, and drive the enemy into the river. In practical terms, this meant that the Rebel troops needed constant correction and redirection once actual contact was made. Hence, the orders given here are fragmentary and limited in nature.
Artillery Ammunition: 150
Previous Losses: None
Wrecked Regiments: None
Eliminated Units: None
Reinforcements:
April 6
| Time | Area | Orders | Units |
|---|---|---|---|
| 6:00 a.m. | A | * | M Division |
| 7:00 a.m | A | 1 | Cheatham, J/2/1, 1 Miss Cav |
| 7:15 a.m. | A | 1 | S/2/1(less Maney, 1 Tenn Bn) |
| 7:45 a.m. | A | 1 | 2/2 Corps |
| 9:00 a.m. | A | 2 | Breckinridge, Res Corps HQ, T/Res |
| 9:15 a.m. | A | 3 | B/Res, McClung Bty/A Miss |
| 9:30 a.m. | A | 1 | S/Res (less 19 Tenn) |
| 10:00 a.m. | A | * | F Corps |
| 1:00 p.m. | C | 4 | Adams Miss Cav |
| 1:00 p.m. | A | * | Army of the West |
| 1:30 p.m. | H | 5 | Wharton a & b Cav |
| 2:00 p.m. | B | 6 | 1 Tenn a & b Cav, 19 Tenn/S/Res, Maney, 1 Tenn Bn/S/2/1 |
7 April
| Time | Area | Orders | Units |
|---|---|---|---|
| 6:00 a.m. | A | 7 | 47 Tenn a & b |
Orders: * M Division, F Corps, and Army of the West are all optional troops. Times listed are when the CSA Player begins rolling for entry. See Rules 3.6c, 3.6d, and 3.6e for full details on arrival times and costs. All units have orders to move to the Army HQ and await further orders.
- Move to join Corps
- Res Corps has orders to move to B12.08, halt, and await further orders.
- Move to join Corps. McClung is attached to Res Corps.
- Adams Cav is ordered to move to B55.18 and await further orders.
- Wharton's Cav is ordered to move to A6.01 and await further orders
- 19 Tenn/S/2/1 is ordered to join it's brigade. 1 Tenn Cav is ordered to march down the Bark Road, up the Hamburg Rd to B49.22 and await further orders. Maney and 1 Tenn Bn are ordered to rejoin S/2/1.
- 47 Tenn is ordered to move to the Army HQ and await further orders. Once there, it may be re-assigned to any brigade.
Victory Conditions:
| Union Massive | 51 or more VPs |
| Union Major | 35 to 50 VPs |
| Union Minor | 20 to 34 VPs |
| Draw | 5 to 19 VPs |
| CSA Minor | -10 to 4 VPs |
| CSA Major | -20 to -11 VPs |
| CSA Massive | -21 or less VPs |
Historically the scenario was a Union Major Victory, with 43 VPs.
6.10 What might have Been
A Fearful Slaughter contains many options, including free deployment, extra troops, and variable reinforcements. Undoubtedly players will want to experiment with these options on their own. Incorporating many of the major changes, however, can lead to some significant modifications to existing set-ups and reinforcements. Here, we have tried to incorporate most of those changes already, so as not to burden the players unduly - jump right in. This scenario is primarily an alternative Confederate deployment and incorporates several of the more intriguing options. Be forewarned that this scenario strongly favors the Confederates.
General Information Map Area: Both First Turn: 6:00 a.m. April 6th Last Turn: 6:00 p.m. April 7th Total Game Length: 125 turns First Player: CSA Special Rule: The Confederate movement restrictions of 3.4 are NA.
Union Information: All Union information is the same as for Scenario 6.9.
CSA Information Set Up:
Johnston, Beauregard, A Miss HQ and Supply—B5.01 Polk 1 Corps HQ and Supply, Misc and Brewer Cav— w/i 1 of B9.01
Clark, R/1/1—w/i 1 of B15.02
S/1/1—w/i 1 of B12.01
Bragg, 2 Corps HQ and Supply—B7.04 Ruggles, Jenkins Cav—B12.08
A/1/2—w/i 1 of B12.08
G/1/2—w/i 1 of B10.06
P/1/2—w/i 1 of B8.04
Hardee, 3 Corps HQ—B5.08 3 Corps Supply—B6.01
Hindman, C/H/3—w/i 2 of B6.10
S/H/3—w/i 1 of B5.08
W/H/3—w/i 1 of B3.05
Orders: 1 Corps—Advance via the Bark Road to the Eastern Corinth Road, and attack to capture the Spain, Barnes, Davis, and Sarah Bell Fields. 2 Corps - Attack up the Corinth Road to capture the Rea, Lost, Review, and Duncan Fields. 3 Corps - Advance through the Fraley and Widow Howell Fields to capture Shiloh Church, Ben Howell Field, and Woolf Field.
Artillery Ammunition: 150
Previous Losses: None
Wrecked Regiments: None
Eliminated Units: None
Reinforcements: Per the CSA Reinforcement Schedule
Victory Conditions:
| Union Massive | 51 or more VPs |
| Union Major | 35 to 50 VPs |
| Union Minor | 20 to 34 VPs |
| Draw | 5 to 19 VPs |
| CSA Minor | -10 to 4 VPs |
| CSA Major | -20 to -11 VPs |
| CSA Massive | -21 or less VPs |
Historically the scenario was a Union Major Victory, with 43 VPs.
Design Note: Alternatively, players can choose to simply recreate the First Day's fight using this situation. Use the time limits and victory conditions of Scenario 6.7. Also, players may elect to give the Union player a 15 VP handicap when using this scenario, to offset the advantages the Confederate forces have here.
6.11 The Shiloh that Was
This scenario is the most historically accurate possible—thus it sacrifices a great deal of player control as a result. Players undertaking this scenario are advised to do so with the understanding that a number of special rules limit player control and introduce chaos into the mix on a much larger scale than in any of the other scenarios.
General Information Map Area: Both First Turn: 6:00 a.m. April 6th Last Turn: 6:00 p.m. April 7th Total Game Length: 125 turns First Player: CSA Scenario Special Rules: The following rules apply to both sides.
6.11a. Contiguous Command. In clear hexes, trace brigade command radius normally. In woods and thickets, however, all units are within command radius of their Brigade commander only if they are stacked with him, adjacent to the his hex, or adjacent to a another unit who is adjacent to his hex. In other words, a brigade's command radius can only be traced through contiguous occupied hexes.
Note: it is not necessary for all hexes to be occupied by units of the same brigade, an exception to the series rule that allows command radius to be traced into but not through a hex containing units of other brigades.
6.11b. Regiments and Command Control. Regiments within brigade command radius may move normally with their command. Regiments that are not within command radius of their normal Brigade commander but are within command radius of another Brigade commander automatically attach themselves to that brigade. Such attachment lasts until the unit is no longer within command radius of that Brigade commander (at which point the unit must attempt to rejoin its unit unless it is within command radius of another Brigade commander—in which case it attaches itself to that Brigade commander). Regiments not within command radius of their Brigade commander that are within radius of ≥ 2 other Brigade commanders, attach to one of the commanders at random. In all cases, if the unit is within command radius of its Brigade Commander, regardless of the presence of other Brigade Commanders, it must stay with its unit (unless detached via normal orders methods)
6.11c. Regiments out of Command. Regiments not within command radius of any Brigade Commander have their movement restricted. Such units may only move if a) they begin their movement stacked with a friendly leader, or b) their movement is directed by a Random Event.
6.11d Retreats. The enemy player controls all retreats. Units that are forced to retreat must do so in as straight a line as possible, even if it means retreating through other friendly units. Other units may NOT displace to avoid retreating units, instead they must remain in the hex and adopt the morale state of the retreating unit.
6.11e Random Events. RE possibility occurs on a DR of ≥ 6 (instead of ≥ 9 normally). On a RE DR ≥ 6, make a subsequent DR on the RE Table and implement the results.
Union Information: All Union Information is the same as for Scenario 6.9
CSA Information: All CSA Information is the same as for Scenario 6.9
Victory Conditions: Players can choose to play either the first day or both days using this scenario. If playing only April 6th, use the victory conditions found in Scenario 6.7. If playing out both days, use the victory conditions in Scenario 6.9.
Shiloh Designer's Notes
Half-regiments
Shiloh was an early-war battle, and a large number of units were larger than the norm for later ACW engagements. Some regiments were so new they were nearly full strength, and would take up two full hexes if deployed in line. It became impossible to recreate historic frontages without either using extended lines or going to half-regiments (we hesitate to call them battalions because there was no formal designation as such.) Extended lines always created some problems in the CWB, and there is actually some historical justification for using separate counters instead: in a number of instances, the regiments detached companies on independent missions or to fight elsewhere, creating in effect a two-battalion unit. Even when in a single line, the Lt. Col. often took command of the other end of the formation, because it was too long for one man to control. Finally, the newness of these units meant they lacked a certain drill proficiency, and some of the more complicated evolutions that extended lines typically represent were beyond these units.
Powell and the Patrols
Essentially, we decided not to include the various Union pickets in the historical game. They remain an option to counter Free Confederate Set-up Scenarios. However, Powell and Moore's skirmishes were larger than that of mere pickets. Powell's patrol amounted to some 350 men in several companies of the 12th Michigan and 25th Missouri, while Moore's advance included the remainder of the 12th Michigan. All told, this force represented an advance guard of almost 1000 men, too large to simply dismiss as pickets. Besides, they had a significant delaying effect on the Confederate advance in that sector.
We decided to make Powell a permanent counter, and reduce the 12th Michigan and 25th Missouri appropriately. This proved a more realistic solution than creating a system of detachments to handle the situation. Powell, the man who discovered the enemy force and may well have saved the Union army from total surprise, deserves at least the recognition of his name on the counter, all the more so given the fact that he was a casualty of the battle. As far as I know, he is no relation.
Immediate Orders
Players may question the methods by which the normal orders process is bypassed in this game. Simply put, Shiloh was a very unusual battle, and senior commanders intervened directly in the lower echelon command quite a bit. Army commander initiative and immediate orders are both methods whereby a player can intervene immediately in a crisis situation, albeit at the cost of fragmenting his own command structure. Beware of using this rule too liberally, as it can have real consequences later in the game, when you are trying to manage some sort of larger effort. The random events table will impose some of these things on you anyway, some good, some bad. Adding to the problem can backfire.
This does not mean that we are abandoning the traditional orders structure found in the CWB and RSS - far from it. It does mean that we try and recreate the historical conditions of the battle, including both the positive and negative aspects of this kind of command. One of the biggest effects will simply be that the more brigade goals you create, the more stoppage die rolls you have to make, creating an overall disjointed effect. This can be very frustrating, especially either early on in the game, where a bad die roll can really screw up the opening attacks, or late in the day, when you are massing for that final drive and the troops just don't seem to want to keep going.
Grant benefits the most from these rules, because he has the best rating. However, it will be his army that is the most mauled by the end of the day, mitigating his 2/3 chance of success. Also remember that any commander has a chance of loose cannon, which is not meant to indicate poor judgment so much as simply reflect how hard it was on the field to figure out what was happening.
The immediate orders really exist for to recreate those dramatic stands that occurred repeatedly. The image of some desperate brigadier impassionedly telling some regimental commander to "hold at all costs" is too good to pass up, and too important in the actual battle to ignore. The postwar regimental literature is full of florid descriptions of desperate, lonely stands that 'saved' the Union army, only to go unrecognized in the aftermath. While doubtless a great deal of hyperbole can be found in these war stories, there is also a lot of truth. To steal a phrase, April 6th was a day that needed a great deal of saving for the Federals.
Note that the Rebel army has two army commanders, and that the only way Johnston can issue orders is via initiative, at least as long as Beauregard remains in action. This might seem odd at first (given that Johnston was actually in command), but it reflects the choices Johnston himself made. He chose to roam the field at will, providing direct inspiration and personal attention at moments of crisis. Beauregard was to remain at HQ and direct the flow or reinforcements forward—in effect acting as the army commander in game terms.
Confederate Movement Restrictions
At first glance, this rule seems very arbitrary. In fact, it recreates an important aspect of the Rebel attack: the lack of adequate recon. Despite having been in the vicinity for two days, the Rebels still had only a vague idea of where the Union camps were. The plan called for the Army to advance in a series of supporting lines. Of course this fell apart once the movement started, but the Rebels tried very hard to maintain alignment and proper distance for the first few hours of the battle.
Similarly, the Confederate cavalry is prohibited from attacking un-alerted Union units at all. This prohibition does not have a direct historical precedent. It is designer meddling, pure and simple, to come up with an easy way of preventing wholly ahistorical cavalry 'commando' raids on unsuspecting Federals. Historically, almost all the cavalry were assigned flank guard duties to make sure the Rebels weren't surprised in turn. What few mounted troops that entered the actual fight tended to roam around fairly aimlessly behind the attacking infantry, looking for something to charge. They did, in fact, manage several charges, but all in the afternoon, well after the Federals were fully alerted.
Gunboats
In all honesty, a simple one line rule could probably take care of the gunboats' historical impact. The prevention of straggler recovery within 20 hexes is sufficient to send the Rebels back to historically respectful distances from the landing. The direct fire stuff is merely window dressing, but will have one potential benefit - it guarantees that the Rebels will not be able to block the landing directly. Not including the gunboats was not really considered, however - both designers are too much enamored of "big iron" not to put them in. One simplification was the reduction of the gunboat armament to one type of cannon, simply called a Naval Gun (NG) on the chart. In reality, each boat carried a mix of rifles and smoothbores.
Technically, field artillery might have gotten lucky and damaged a gunboat in a duel. In practical terms, the gunboats were so intimidating that the very few attempts in this part of the war by field guns to fight naval cannon were soon ended by a few shots from the gunboats.
Swamps and Thickets:
I was lucky enough to find a whole masters thesis devoted to nothing but the terrain effects at Shiloh. That work led to the terrain rules for these two types that you see now. Normally the streams were also tangles of vines and small trees anyway, but the addition of floodwaters really complicated crossing these usually small trickles. The most famous example of swamps effecting the battle is of course Cleburne's unfortunate foray into them around the Shiloh Branch. After some pondering of how to best recreate the unique impact of the swamps, we followed the lead of the guys at XTR: we borrowed the idea for rolling to exit such hexes from their game on Shiloh of several years ago.
In two spots, dense thickets of vegetation hindered the attack without any attendant water - these are the Thicket hexes in the game. All the research indicates that these two areas - around Woolf Field and along the Sunken Road - were the only sites where such tangled growth was significant enough to really effect the fight. We don't know why for sure: one possible reason is that these areas were recent clear-cuts or abandoned fields, and the re-growth was particularly fierce. In any case, they posed significant problems for troops trying to cross them.
Otherwise, the woods were remarkably clear. A number of artillery units managed to gain limited line of sight at targets 1000 yards or more away. The Federals in the camps of Stuart's Brigade could see the Confederate Flags of the regiments overrunning Prentiss' camps, also several hundred yards distant through forested areas. The trees were just budding out, and the lack of ground cover from open range farming made for quite surprising lines of sight in some places.
The Historical Scenario
Shiloh was a battle of rank amateurs. Despite the presence of an entire Rebel army on their front for almost 24 hours before the attack, the Federals were surprised when that attack came. For their part, the Rebels advanced with only the sketchiest notion of the actual Federal deployment. Once the battle commenced, virtually every brigade in both armies fragmented, with units joining other commands, leaving the field for ammo or to escort prisoners, massive straggling, and general confusion. A number of brigade commanders lost track of their commands, and at least one, Jackson, did not rejoin his men until Tuesday back in Corinth, having become totally lost by Sunday afternoon.
It became clear early on that any effort to fully capture this chaos would simply prevent the average gamer from exercising any control over his army, reducing him to being little more than a middleman for a long series of random event rolls. However, It has been my intention all along to recreate the historical battles as much as possible in the RSS, and Shiloh is no exception. Boyd and I both feel that the history is an important aspect of these projects, and should not be shorted.
Hence the historical scenario. In it we placed all the special rules and modified random results that we felt necessary to recreate the historical mess. If you play it, you will clearly see the progressive splintering of each side's army, and the loss of control. We urge you not to think of it as a competitive game, but instead a group historical exercise which can be enjoyed for the unfolding picture it paints.
Withdrawal
One of the things brought out in the early testing was that the Union testers were effectively conducting a phased withdrawal each turn - they would fall back into woods, just far enough to minimize losses and exposure to enemy fire. In effect, they were trading space for time, and creating a significant disparity in losses. Good gaming, yes, but poor history. Too many regiments were too green, to big, or too poorly led to manage this kind of tactical finesse - instead, they formed lines and blazed away until one side or the other cracked. Hence the morale check. Even a BL or Shaken will halt a unit in it's tracks, and likely cause real problems for a player attempting to avoid flanking issues while trying this tactic.
I like the effect so much that I am going to try it out in all the RSS games, with the only difference being in the later games, a SH or BL unit may still move normally, adopting the morale state at the end of the move. This variation reflects the greater flexibility of veteran troops. I hope others will try it.
The Morale Ratings
One of the first things that players will note upon examining the counter sheet for the first time is that there are a wider variety of unit morale ratings than have been the case in the prior two games in the series. Both This Hollowed Ground and This Terrible Sound pitted experienced Armies against each other. At Shiloh both armies, but especially the Confederate forces were fighting in their first major action.
We decided that command range requirements, combined with tough terrain would produce the appropriate amount of confusion when brigades were committed to action. When you commit your green brigades to combat you will quickly discover that some regiments will hold up well under fire, some will cut and run virtually at the first shot, while others will merely falter. What to do with the brigade commander? Continue the now fragmented attack leading from the front while many if not the majority of the regiments in the brigade suffer in the rear out of command control? Or halt the momentum of the attack to reform the brigade—risking an attack stoppage? In any event things will not be nearly so predicable as with more experienced forces. The goal is to reduce uniformity of player control.
Shiloh Historical Notes
As in the two previous games in the RSS, the basic outlines of the Shiloh story have been told many times. Rather than repeat a basic overview again, we have elected to focus on several short stories, if you will: some of the more fascinating aspects of the campaign that deserve highlighting.
Grant and Lew Wallace
Grant probably wrecked Lew Wallace's military career after Shiloh. Wallace's failure to reach the field early in the fight became, by extension, the reason Grant gave for all of the reverses suffered on April 6th. After the battle, Wallace was not court-martialed, but was instead had his command re-organized out from under him. He commanded rear areas or was left with no command for almost two years.
This was a hard fate for a man who's star had risen so dramatically in the first year of the war. An Indiana state senator with both Mexican War and militia experience, Wallace was appointed the State Adjutant General at the outbreak of war. He proved an excellent administrator, more than filling the state's quota under Lincoln's first call for troops. He then resigned to take command of the 11th Indiana Zouaves, determined this time to make it to the front. (Hostilities ceased before he saw action in the Mexican War.) He quickly rose to brigade and division command, experienced combat in West Virginia and at Fort Donelson, and by March, 1862, was the youngest Major General in the Union army.
On April 6th, Wallace's division was not with the rest of the army. Instead, it was several miles downstream, at Crump's Landing, detached from the main body. Wallace, worried about the isolated nature of his command, arranged to familiarize himself with the roads between Crump's and Pittsburgh Landings, ensuring a rapid response if trouble arose. He also greatly improved one of the roads, which ran close to the river and was often swampy and impassable. Once properly prepared, there were two main routes by which Wallace could join the army or vice-versa: the River Road and the Shunpike. The latter route took Wallace not to the landing, but to Sherman's position at the Southeast corner of the army's camps.
When Grant sailed past Crump's Landing on the way to the battle on the 6th, he briefly conferred with Wallace about the distant sounds of battle. Both agreed it was a general engagement, and then Grant steamed on, leaving Wallace with orders to "hold himself in readiness" to march. Grant would send more specifics as to destination once he arrived at Pittsburgh Landing and assessed the situation.
What followed was a classic misunderstanding. Once he arrived at the battle, Grant verbally ordered an aide to return to Crump's Landing and bring up Wallace. The aide, fearing he might not correctly relay Grant's wishes, asked for and got a written note from Rawlins, Grant's Chief of staff, directing Wallace to come up to the right of the army and form on it. With that hasty note, Baxter, the courier, took boat downstream.
At 11:30, Baxter arrived at Wallace's HQ. There, Wallace interpreted the order to mean he should join Sherman, who was the right of the army. The order did not specify either a route or a clear destination: Wallace was not ordered to Pittsburgh Landing. Hence, Wallace chose to march on the Shunpike, then to the Purdy Road, and join Sherman's extreme right flank near Shiloh Church.
Wallace's next action, however, was somewhat curious. Despite the urgency of the order and the clear sounds of battle heard upriver, Wallace first let his men eat, incurring another half hour delay. There a second courier from Grant arrived, a cavalry lieutenant who had ridden up the River Road, sent by Grant shortly after Baxter was dispatched. This courier found Wallace's men eating, and came away with the impression that Wallace refused to move without written orders, a charge Wallace always denied. Since Wallace already had written orders at this time, it seems likely that the Lieutenant was mistaken, and interpreted Wallace's decision to let the men eat first as a refusal to march. While not true, it was the impression conveyed back to Grant when the Lieutenant returned to Shiloh.
About noon, Wallace marched out via the Shunpike. At the same time, Grant sent another aide, Captain Rowley, to insist Wallace come up and provide the written orders if necessary. Mystified, Rowley and a small escort rode the length of the River Road to Crump's Landing without finding Wallace. Finally, they overtook the division on the Shunpike at about 2:00 p.m. Wallace had halted the men for a rest.
Rowley was able to convey to Wallace the extent of the problem. Sherman was driven back, and the whole army was in danger of being pushed into the river. Wallace had to come to Pittsburgh Landing immediately. There was nothing to do but retrace steps back to Crump's Landing, and then march down the River Road, a trip of about 6 miles from where Wallace was currently halted.
In another bad decision, Wallace decided that instead of merely turning the whole column about in place, he needed to counter-march so that the head of his command would remain in front. Given that the length of the column was about three miles, this turned out to be a time consuming choice. Rowley fairly seethed at the delays, and even Wallace admitted later that the process was exceedingly slow.
All told, it was nearly 7:00 p.m. when Wallace's men finally crossed Snake Creek. They halted after crossing the creek, taking up positions along Grant's final line. They saw no fighting on April 6th, though they did advance at dawn on the 7th, fighting most of the 2nd day.
Grant, who had come under intense criticism for Shiloh, blamed Wallace for many things. The general tardiness and the confusion over the written orders became, in Grant's mind, intentional failures of leadership from Wallace, rather than the kind of typical command confusion that they more likely were. Certainly Wallace hurt himself with the decision to counter-march and the lack overall lack of haste.
Fate intervened to give Wallace one last chance at glory, when he defended Washington at the battle of the Monacacy in 1864. With half the force of the attacking Rebels, Wallace gamely defended the line of the Monacacy River for most of a day, buying time for Grant's reinforcements from Virginia to arrive in Washington DC and finally secure the capital from Rebel attack. This feat partially redeemed him, but Wallace never really recovered from Shiloh.
And, of course, Wallace wrote Ben Hur, A story of the Christ, providing him with fame of a more lasting kind.
Death and Night
"Death and Night." This phrase, inscribed on the Daughters of the Confederacy Monument put up to the Confederate Soldiers at Shiloh, sums up the classic romantic illusion so cherished by Southerners in the memorial period: that Sidney Johnston, had he only lived, would have carried the day and driven Grant into the river. His fall triggered the confusion that led, ultimately, to the delay that doomed the South: Grant survived the night, Buell arrived, and the war went on.
Did the South come that close? Modern scholarship and a more dispassionate look at the facts suggests otherwise. The Confederate officers had largely lost control of their men as an organized force by the time Johnston fell, and it is unlikely that had he survived, he would have had any better grasp of the situation than the nearest Brigadier did. A number of units had actually left the field by late afternoon, either marching off when they ran out of ammunition, or sent back escorting prisoners, or simply deciding that they had done enough and it was time to camp for the evening.
Grant's final line was well braced with cannon, had a number of fresh troops up - namely a brigade from Buell and Wallace's tardy command - and was imbued with a sense of all or nothing on that river bank that night.
By contrast, when Beauregard called off the last attack, his men were widely scattered, he had only two brigades that were in any immediate condition to attack, and more importantly, close enough to mount an attack quickly, and he had almost no sense of where any of his men were. Bragg, Polk, and Hardee - the three ranking commanders on the front lines - all had little or no knowledge of where the bulk of their commands were either. This condition was created by the confused and vicious fighting of the day, not by Johnston's fall, and had he not been shot it would not have changed the dispositions of the troops. Simply setting up the scenario for the final attack should soon convince most gamers of the impossibility of Southern success here: die-hards should be won over after the first few turns. Regardless of Johnston's circumstances, the South's bolt was shot, and Grant's men were unlikely to be driven into the river.
Duplicate Regiments
As usual in the Confederate order of battle, there are a number of duplicate regiments. These are not mistakes - all these units did exist, and with the numbers shown here. There are two 15th Arkansas Regiments in the battle, one with Cleburne (his own regiment before elevation to brigade command) and one under Col. Gee in Pillow's Division of the Fort Donelson troops. There are also two 55th Tennessee regiments, one raised by Brown (surrendered at Island No. 10) and one raised by McKoin, found in Wood's Brigade, Hardee's Corps.
Stephens and Maney
In all the official reports, and in Reed's detailed study for the Park at the turn of the century, the Second Brigade, Second Division of First Corps is called "Stephens" after it's commander. In fact, Stephens was not the commander, Col. Maney was. At 6:30 a.m. on the 6th, Maney was sent to guard Lick Creek, and Stephens took command of the rest of the brigade as next ranking Colonel. Maney rejoined his brigade at about 2:30 p.m., and remained in command for the rest of the battle.
The game accurately portrays this command shuffle. However, the official designation of the brigade remains S/2/1, because every official report calls it that, and to do otherwise would confuse the historically minded trying to follow the actual battle on the game-map. Additionally, Stephens turned out to be a pretty good officer. When Maney arrives, the Confederate player ends up with two good commanders for this brigade (assuming neither has been lost) which translates into a small morale bonus - consider it a gift of fate.
Bains' Battery, Viaden Mississippi Artillery
This battery is listed in all the OOB records as present at Shiloh, attached to Gibson's Brigade, 1st Division of 2nd Corps. In fact, it was not yet fit for field service and remained behind at Corinth. One section of two guns did serve with Stanford's Battery, probably the two 12 pound howitzers.
I/1 Mo Arty/3/T Division
Also known as Buell's independent Mo Bty, this unit actually contained 6 guns, but left one behind at Crump's landing on April 6th. The optional unit includes the extra gun.
The Unfortunate Colonel Raith
Raith was a last-minute replacement of another temporary acting brigade commander, Col. Reardon, who was in turn replacing the absent Colonel Ross. Reardon was supposed to be commanding the Brigade (or more properly he was the temporary acting commander as senior remaining Col. in the brigade, commanding the 29th Illinois Regiment) but chose to inform the brigade of his "ill-health" the morning of the battle—after gunfire was clearly audible, and the enemy was within a few hundred yards of the brigade. Seniority put Raith in charge as the battle was developing that morning. Mind you at no time did Reardon tell Raith he was in charge. This piece of cheerful news came from the Brigade Adjutant whilst Reardon headed for the landing and points north never to be seen nor heard from again.
The whole command apparatus of this brigade did quite poorly. Essentially Raith wandered about the battlefield out of touch of the Brigade Adjutant (who was sent on a task better suited for an orderly- oops there weren't any of those around since Reardon's abrupt departure had left the brigade HQ unclear on who was in charge) and the rest of the brigade for some time after he had been hurriedly informed he was in command.
When Raith did finally show up for the war in the vicinity of Waterhouse's battery the brigade had been in action holding there for some time on their own. Raith chose to lead his brigade from the front, and of course was killed quite gruesomely: appliqued to the front of his troops. The entire brigade promptly ran at the sight of the red mist (see Sherman's report), resulting in Waterhouse's battery losing three guns.
W.H.L. Wallace
You will note that the 2nd Division of the Army of the Tennessee under a decidedly average Brigadier General William H.L. Wallace have particularly strong brigade commanders. The recently promoted General Wallace was grotesquely wounded in the battle (head wounds in the mid-19th century were usually fatal) and we credit his Brigade commanders with successfully helping to shore up the Union center at a critical time. Their actions bought precious time along the right of the Hornet's Nest. The unfortunate General Wallace was recovered, still alive, after the battle, but died in his wife's arms some few days later.
Optional Confederate Forces
The optional troops come from three major groups: the men lost at Fort Donelson who should have been withdrawn, the smaller force surrendered at Island No. 10 who also should have been withdrawn, and whom Beauregard actually did intend to withdraw before disaster struck, and finally Earl Van Dorn's composite Army of the West
Fort Donelson
The troops at Donelson represented more than 15,000 men lost to Johnston at a critical phase of the war. The only reason the garrison did not get out was the failure of nerve of the top commanders, Buckner no less than the others. Floyd and Pillow earned the greater notoriety for fleeing, but it was Buckner's pessimism and refusal to listen to Forrest that made surrender inevitable. Here it is assumed that the garrison followed Forrest and escaped that night in February, giving Johnston an extra army corps at Shiloh. Minus the black mark gained by leaving their men in the lurch at Donelson, however, Floyd and Pillow doubtless would have retained command, decreasing the relative value of this force. As a final tidbit, the option to place Buckner in command, ditching Floyd, is tossed in as a sop to those players who cannot bear to have Floyd and Pillow in charge of anything.
Island No. 10
In March, three brigades of men were left to garrison the Mississippi River north of Memphis. At Island Number 10 and New Madrid, John P. McCown had command of the equal of two brigades of infantry, a number of cavalry, and a large force of heavy artillerymen manning the river batteries. One additional brigade was downstream at Fort Pillow. This was about half the garrison that was present in late February, but the rest of the men had gone to join Johnston at Corinth.
Beauregard clearly recognized that the remaining force was too small to effectively defend the position, but too large to risk as a delaying force. Beauregard ordered the garrison abandoned in late March, but the movement was too slow and another 5-7000 troops were captured by the Federals. Here it is assumed they got away promptly.
Army of the West
Originally, Albert Sidney Johnston asked Earl Van Dorn, the newly appointed commander of the Trans-Mississippi, to join his forces at Corinth. Van Dorn, ever aggressive, had already embarked on one of the most rash offensive moves of the war: he took his polyglot of Arkansans, Texans, and Missouri State Troops back to northwest Arkansas to fight the battle of Elkhorn Tavern. Deep in the remote wilderness of the Boston Mountains, Van Dorn would not have been able to reach Johnston in time for Shiloh unless he moved right away, abandoning any offensive notions west of the Mississippi.
The entire premise for this option is that Elkhorn Tavern was never fought, and Van Dorn instead joined Johnston. This larger assumption requires several smaller ones: that McCulloch and McIntosh are not killed, that the Missouri State Guard under Price would have been willing to leave Arkansas - and by extension abandon their home state - to swear into Confederate service and fight east of the River, and that Van Dorn would re-organize his army more efficiently than he did for Elkhorn Tavern. In fact, the army you see in the game requires some supposition: a couple of the brigades existed only fleetingly; and at least two - Mill's 3/M/W and Pike's Indians- never actually crossed the Mississippi at all. It is highly unlikely that the Indians would have ever come east, but they are included for local color. Moreover, many of the units did not yet have regimental designations in March, 1862. Most instead were named for commanders, and some never had a formal existence. By June, the Army structure stabilized and all units were either assigned regimental numbers or merged into proper commands. We have taken the small liberty of simply backdating that reorganization by a few months. More sources were used to follow the obscure threads of this particular conundrum than any other single aspect of the game.
One final note on the Army of the West: Ben McCulloch never reached the rank of Major General, since his death at Elkhorn Tavern precluded any further chance of promotion. However, he was the second ranked brigadier in the entire Confederate army upon his appointment, and had he lived to cross the Mississippi he would have almost certainly been elevated. Since the options presented here postulate no fight at Elkhorn, we have given him his long overdue promotion. In the game he is rated as per his reputation: likely that was inflated in real life a bit, but every game needs a few larger than life characters.
Rating the Army Commanders
Shiloh was a very poorly controlled battle to say the least. The Secessionists opted for an initial plan that was unintentionally farcical in it's impracticality. Given the terrain and the experience level of the commanders and troops, there was simply no way that Beauregard's plan had any hope of succeeding as planned. That Johnston either didn't recognize the unrealistic nature of Beauregard's scheme or didn't choose to alter it is certainly no endorsement of Johnston as a army commander. The special rules on Johnston reflect what the designers perceive to be his main attribute- during the battle he acted in effect as an excellent brigade commander with army command authority. Once the battle was joined there is no hint of overall control and guidance from Johnston.
Beauregard's rating is due primarily to his lack of ability to control his army. His confusion and the lack of control over Bragg during the first day is well known but also quite understandable. His absolute failure to even make a feeble attempt at reorganization of the army over night before the second day of battle is virtually indefensible. When dawn broke on the 7th of April 1862 the Union Army under Grant was able to conduct cohesive operations and the Secessionist Army under Beauregard was capable only of flight.
I believe that Shiloh was Grant's (and probably Buell's also) finest hour. His mistakes were many, but in this battle they are confined to the opening set up. The Union Army is surprised and not well deployed to receive an attack. Once he arrived on the battlefield Grant was in his element. The defensive line he constructed to defend the landing was extremely strong and given the terrain, was as close to secure a position that could be constructed. Finally, during the night while the Southern commanders milled about in confusion and indifference, Grant and Buell maintained control of their troops and reorganized. At dawn, Buell attacked shortly followed by Grant and the Southerners were swept from the field in defeat.
A Common Unit on a Bad Day
Finally we would like to relate the tale of Captain James P. Timony commanding battery D of the 2nd Illinois Light Artillery. The battery was assigned to the First Division, 1st Brigade, Army of the Tennessee. To quote the report of Ezra Taylor Chief of the Artillery for Sherman's Division...
"In order to do justice to all I cannot close this report without mentioning the batter [sic] commanded by Captain Timony, who were put in battery under my direction on Sunday, the 6th, under the most terrific fire, perhaps, that occurred at any point or at any time during the fight. This occurred at the same point on the field, in front of General McClernand's headquarters, where the enemy had a full sweep of the field in front with his batteries and a galling fire of musketry on our left. To say that they fought bravely till their horses were literally piled up, creating a barrier to the retreat of their guns, is a simple statement of facts, and I doubt not the general commanding the First Division will give to them the credit due them. Such bravery cannot but obtain its reward."
On the first day of battle battery D/ 2nd Illinois Lt Artillery suffered 25 casualties and lost 53 horses as well as four out of six guns and five out of six caissons. The brave Illinois captain and his battery as well as thousands like him were the reason that General Johnston's Army was prevented from watering its horses in the Tennessee.
Union Random Events
Union Player makes a DR as the last step of each Command Phase. On a DR of 2–8, there is no effect. On a DR of ≥ 9, the Union Player makes a subsequent DR on the table below.
| DR | Result |
|---|---|
| 2 | Army Leader Loss Check |
| 3 | Consult Leader Table |
| 4 | Consult Leader Table |
| 5 | Brigade Attack Stoppage |
| 6 | Consult Unit Table |
| 7 | Friendly Fire |
| 8 | Orders delay |
| 9 | Brigade Collapse |
| 10 | Consult Leader Table |
| 11 | Immediate order acceptance |
| 12 | Divisional Attack Stoppage |
Results Explanations:
1. Army Leader Loss Check Union Player makes a dr. On a result of 1–3 Grant effected, and 4–6 Buell effected. After determining who is at risk, the Union Player makes a subsequent dr. On a result of 1–2, the general is unhorsed (remove the general for 4 turns. He reappears at his HQ. 3–5 the general is wounded, remove from play. 6 - the general is killed. If only one General is on the map, he is the effected leader. If neither General is yet in play, ignore this result.
2. Consult Leader Table The player immediately rolls again and refers to the Leader Table, below. Roll two dice, reading them as an 11-66 result. All events are implemented immediately.
3. Brigade Attack Stoppage Any one attack order immediately stops. This event applies to all attack orders currently in effect, but affects only one brigade subject to those orders (determine which brigade under the selected attack order is affected randomly). If there is more than one attack order currently accepted, choose the effected order randomly. Defensive orders are never affected by this result.
4. Consult Unit Table The player immediately rolls again and refers to the Unit Table, below. Roll two dice, reading them as an 11-66 Result. All events are implemented immediately.
5. Friendly Fire The Rebel player chooses one Union unit, adjacent to at least one other Union unit and within 4 hexes of any Rebel unit, to suffer a fire attack. The fire is automatically resolved on the 4-6 column of the Fire Combat Table, and any low ammo rolls are ignored. Stragglers and morale are checked as if it were a flank attack
6. Orders delay Any one order of those currently in transit or in delay has its delay status increased by one. For example, an order currently in D5 status would be increased to D6. An order still in transit, and not yet rolled for on the acceptance table has its status automatically effected once that status is rolled. In this case, a D6 order would become Dt, and an "A" result would become a D4. If no orders are currently in transit or in delay, ignore this result.
7. Brigade Collapse All in-command units of one brigade (determined randomly from those brigades with ≥ 1 unit that has been subjected to small arms fire, currently has in-command units, and is ≤ 5 hexes from a non-routed enemy unit—if no such brigades exist, treat this result as no effect) immediately retreat 6 hexes. Each unit checks morale at the end of its retreat (implement results, including additional retreats if any immediately) before the next unit of the brigade retreats. Order status of the selected brigade is immaterial, but any orders accepted or in a delay status for this brigade are cancelled.
8. Immediate order acceptance Any one order currently in delay or in transit is immediately accepted. No further waiting or rolling is required. If no orders are currently in transit or in delay, ignore this result.
9. Divisional Attack Stoppage Any one divisional attack order immediately stops. If no Divisional attack orders are in effect, stop a brigade order. If no attack orders are in effect, ignore result.
Leader Table (D66) 11-16 - Check for Divisional Commander loss 21-36 - Check for Brigade Commander loss 41-63 - No result 64-66 - Return one wounded (not killed) leader of player's choice.
Explanations:
1. Check for divisional commander loss: Rebel player chooses two eligible division commanders, the Union player chooses one. From these three, randomly select the effected leader. Make a dr. On a dr of 1-2 no effect, 3-4 wounded, 5-6 killed. Ignore replacement leaders for this process. Replacement commanders are not eligible for further loss via these tables.
2. Check for brigade commander loss: Rebel player chooses two eligible brigade commanders, the Union player chooses one. From these, randomly select the effected leader. Make a dr. On a dr of 1–2 no effect, 3–4 wounded, 5–6 Killed. Ignore replacement leaders for this process.
3. Returning Leader: Any one leader that has been wounded may be returned to play immediately, with any friendly unit. This event may be used to return an army Leader, but only ONCE per game.
Unit Table (D66) 11–15 Artillery Rout 16–23 Save Yourselves! 24–33 Back to the Landing 34–43 Sound of the guns 44–52 Line of Sight 53–61 Owning player random movement 62–66 Enemy player random movement.
Explanations:
1. Artillery Rout: Any one D or E morale artillery unit is immediately eliminated from play. This event may occur no more than twice per day.
2. Save Yourselves: Make a dr. On a dr of 1–3, the owning player chooses; on 4–6 the enemy player chooses. Choose one Union unit within 4 hexes of an enemy unit which immediately routs, loses 4 stragglers, and retreats 6 hexes. No other units stacked with this unit are effected, and this unit may rout through other units without any additional effect.
3. Back to the Landing: All in-play units of any one Union brigade that has taken fire last turn must make an immediate straggler check on the "1" straggler table.
4. Sound of the Guns: The Union player gets to write one order for any one brigade in play. He may choose either a Union or a Confederate Brigade. The order must direct the brigade to march towards a specific hex or field within 20 hexes, and then attack (if Confederate) or defend (if Union) the location. The hex chosen must be one where small-arms combat happened within the last two turns, as either a target or firing hex. If more than one hex or field satisfies the above requirement, the Union player can choose which hex or field he wants.
5. Line of Sight: The Union player can fire a battery out to any effective range, determining LOS normally, except ignoring trees. For example, a unit in B49.21 could fire on a unit at B47.15 as if the LOS were clear. Terrain elevations still block LOS, only woods and thickets are ignored.
6. Owning Player Random Movement: When rolled, the Union player may move two of his regiments anywhere on the board up to 3 hexes. They do not have to remain within command radius, and may remain outside command radius for the turn. They may move adjacent to enemy units, but not through hexes occupied by enemy units.
7. Enemy player random movement: Same as above, except that the Confederate player gets to move those two regiments.
CSA Random Events Table
CSA Player makes a DR as the last step of each Command Phase. On a DR of 2–8, there is no effect. On a DR of ≥ 9, the Union Player makes a subsequent DR on the table below.
| DR | Result |
|---|---|
| 2 | Consult Leader Table |
| 3 | Army Leader Loss Check |
| 4 | Consult Leader Table |
| 5 | Brigade Attack Stoppage |
| 6 | Consult Unit Table |
| 7 | Friendly Fire |
| 8 | Orders delay |
| 9 | Brigade Collapse |
| 10 | Consult Leader Table |
| 11 | Immediate order acceptance |
| 12 | Corps Attack stoppage |
Results Explanations
1. Consult Leader Table The player immediately rolls again and refers to the Leader Table, below. Make a D66. All events are implemented immediately.
2. Army Leader Loss Check Make a dr. On a dr of 1–3 Johnston effected, 4–6 Beauregard effected. After determining who is at risk, roll one die again: 1–2 the general is unhorsed, remove the general for 4 turns. He reappears at his HQ. 3–5 the general is wounded, remove from play. 6 - the general is killed. If only one General is on the map, he is the effected leader. If neither General is yet in play, ignore this result.
3. Brigade Attack Stoppage Any one attack order immediately stops. This event applies to all attack orders currently in effect, but affects only one brigade subject to those orders (determine which brigade under the selected attack order is affected randomly). If there is more than one attack order currently accepted, choose the effected order randomly. Defensive orders are never affected by this result.
4. Consult Unit Table The player immediately rolls again and refers to the Unit Table, below. Make a D66. All events are implemented immediately.
5. Friendly Fire The Union player chooses one Rebel unit, adjacent to at least one other Rebel unit and within 4 hexes of any Union unit, to suffer a fire attack. The fire is automatically resolved on the 4–6 column of the Fire Combat Table, and any low ammo rolls are ignored. Stragglers and morale are checked as if it were a flank attack
6. Orders Delay Any one order of those currently in transit or in delay has its delay status increased by one. For example, an order currently in D5 status would be increased to D6. An order still in transit, and not yet rolled for on the acceptance table has its status automatically effected once that status is rolled. In this case, a D6 order would become Dt, and an "A" result would become a D4. If no orders are currently in transit or in delay, ignore this result.
7. Brigade Collapse All in-command units of one brigade (determined randomly from those brigades with ≥ 1 unit that has been subjected to small arms fire, currently has in-command units, and is ≤ 5 hexes from a non-routed enemy unit—if no such brigades exist, treat this result as no effect) immediately retreat 6 hexes. Each unit checks morale at the end of its retreat (implement results, including additional retreats if any immediately) before the next unit of the brigade retreats. Order status of the selected brigade is immaterial, but any orders accepted or in a delay status for this brigade are cancelled.
8. Immediate Order Acceptance Any one order currently in delay or in transit is immediately accepted. No further waiting or rolling is required. If no orders are currently in transit or in delay, ignore this result.
9. Corps Attack Stoppage Any one Corps attack order immediately stops. If no Corps attack orders are in effect, stop any one attack order. If no attack orders are in effect, ignore result.
Leader Table (D66) 11–16 - Check for Divisional Commander loss 21–36 - Check for Brigade Commander loss 41–63 - No result 64–66 - Return one wounded (not killed) leader of player's choice.
Explanations:
1. Check for Divisional commander loss: Rebel player chooses two eligible division commanders, the Union player chooses one. From these three, randomly select the effected leader. Make a dr. On a dr of 1–2 no effect, 3–4 wounded, 5–6 killed. Ignore replacement leaders for this process. Replacement commanders are not eligible for further loss via these tables.
2. Check for Brigade commander loss: Rebel player chooses two eligible brigade commanders, the Union player chooses one. From these, randomly select the effected leader. Make a dr. On a dr of 1–2 no effect, 3–4 wounded, 5–6 Killed. Ignore replacement leaders for this process.
3. Returning Leader: Any one leader that has been wounded may be returned to play immediately, with any friendly unit. This event may be used to return an army Leader, but only ONCE per game.
Unit Table (D66) 11–15 Off the Field 16–23 Save Yourselves! 24–33 Looting 34–43 Sound of the guns 44–52 Line of Sight 53–61 Owning player random movement 62–66 Enemy player random movement.
Explanations:
1. Off the Field: Any one infantry unit is ordered to leave the field, either in search of ammo, escorting prisoners, or in extreme cases, disgrace. In any case, the unit is removed from play, does not return, and counts as a wrecked unit for all purposes.
2. Save Yourselves: Make a dr. On 1–3, the owning player chooses; on 4–6 the enemy player chooses. Choose one Confederate unit within 4 hexes of an enemy unit which immediately routs, loses 4 stragglers, and retreats 6 hexes. No other units stacked with this unit are effected, and this unit may rout through other units without any additional effect.
3. Looting: All in-play units of any one Confederate brigade that is within 4 hexes of a Union camp hex must make an immediate straggler check on the "1" straggler table.
4. Sound of the Guns: The Confederate player gets to write one order for any one brigade in play. He may choose either a Union or a Confederate Brigade. The order must direct the brigade to march towards a specific hex or field within 20 hexes, and then attack (if Confederate) or defend (if Union) the location. The hex chosen must be one where small-arms combat happened within the last two turns, as either a target or firing hex. If more than one hex or field satisfies the above requirement, the Confederate player can choose which hex or field he wants.
5. Line of Sight: The Confederate player can fire a battery out to any effective range, determining LOS normally, except ignoring trees. For example, a unit in B49.21 could fire on a unit at B47.15 as if the LOS were clear. Terrain elevations still block LOS, only woods and thickets are ignored.
6. Owning Player Random Movement: When rolled, the Confederate player may move two of his regiments anywhere on the board up to 3 hexes. They do not have to remain within command radius, and may remain outside command radius for the turn. They may move adjacent to enemy units, but not through hexes occupied by enemy units.
7. Enemy player random movement: Same as above, except that the Union player gets to move those two regiments.
Leader Seniority Lists
Union
| Army of the Tennessee | Army of the Ohio |
|---|---|
| Grant | Buell |
| McClernand | Mitchell |
| Lew Wallace | Thomas |
| Sherman | McCook |
| Hurlbut | Nelson |
| Prentiss | Crittenden |
| WHL Wallace | Wood |
| McArthur | Schoepf |
| Lauman | Rousseau |
| Boyle | |
| Garfield | |
| Fry |
Note: Each Union Army has a separate seniority order—leaders from one army never replace leaders from the other.
CSA Army of Mississippi
| Johnston | Pillow | Chalmers |
| Beauregard | Ruggles | Hogg |
| Polk | Gladden | Cleburne |
| Bragg | Buckner | Rust |
| Van Dorn | Hindman | Walker |
| Hardee | McCown | Maury |
| Price | Stewart | Villepigue |
| Jones | Breckinridge | Bowen |
| McCulloch | Wood | Roane |
| Clark | Jackson | Little |
| Floyd | Johnson | Pike |
| Cheatham | McIntosh | |
| Withers | Anderson |