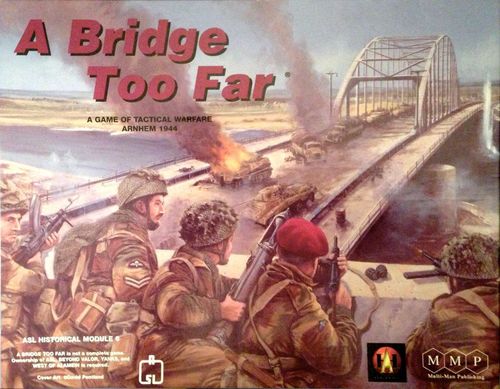
A Bridge Too Far: ASL Historical Module 6
A Bridge Too Far: ASL Historical Module 6 Rulebook
Table of Contents
Table of Contents
- Order of Presentation
- R. Special Rules
- R1. The Arnhem Bridge
- R2. The Ramp
- R3. Factories
- R4. The Cellars
- R5. The Blockhouse
- R6. Unit Replacement
- R7. Wide City Boulevards
- R8. Partial Orchards
- R9. A Bridge Too Far Campaign Games
- R9 (cont.). Refit Phase
- RG. A Bridge Too Far Reinforcement Groups
- CG. A Bridge Too Far Campaign Games
- Footnotes (ABtF)
- Appendix A: Use of Optional Black German Counters
Order of Presentation
- Arnhem Bridge
- The Ramp
- Factories
- Cellars
- The Blockhouse
- Unit Replacement
- Wide City Boulevards
- Partial Orchards 9.-9.5 ABtF Campaign Games 9.6 ABtF Refit Phase RG ABtF Reinforcement Groups CG ABtF Campaign Games Footnotes ABtF Footnotes Appendix A Use of Black Counters
R. Special Rules
R.1 ROAD-NEGATING TERRAIN (B3.4; B24.121): Infantry may not claim the extra-MF road bonus during a MPh in which they expend extra MF to derive the protection of shellholes-nor may they claim it if they choose the non-Open Ground cover of an Orchard in preference to the Open Ground of a road. A road covered by rubble is treated as non-existent [EXC: for Street Fighting purposes (A11.8); if Cleared (B24.71)]. Therefore, Dash (A4.63), road bonus (B3.4) and the ½-MP road rate are not allowed in a road hex covered by rubble.
R.2 WALL ADVANTAGE AND FORTIFIED BUILDINGS (B9.32; B23.93): A Gun in a Fortified Building Location may never claim Wall Advantage. Its manning Infantry could claim it only by first dropping possession of the Gun. Such a Gun can, however, have a LOS to nonadjacent same-level Locations over the wall hexside(s).
R.3 FACTORY MOVEMENT (B23.742): A vehicle that changes its VCA in any Factory Location is subject to Bog. A vehicle that becomes immobile in a Vehicular-Sized Entrance (3.2; B23.742) does not negate Entrance benefits. Any unit may use the Open Ground entrance benefits of a Vehicular-Sized Entrance-but only when entering it from outside that Factory. Such use of OG entrance benefits does not negate that hex's Factory TEM.
R.3A FACTORY TEM/HINDRANCE (B23.741): Normal building TEM (usually +3) applies to Indirect Fire vs a non-Rooftop Factory Location. The extra +1 TEM for a Fortified Factory Location does not apply vs Indirect Fire. For Sniper Target Selection (A14.21) a unit in a stone Factory is considered to have a +3 TEM (+4 TEM if Fortified). Factory Hindrance is half-Level LOS Hindrance.
R.3B FACTORY ROOFTOP ACCESS POINTS (B23.742; B23.8): Aside from Scaling (B23.424), a Factory Rooftop can be reached from ground level only via a non-rubbled Factory Rooftop Access Point; i.e. a printed stairwell or a Location of the Factory that contains a road hexside. A Factory that contains neither of these Rooftop Access Points must have at least one such point designated by SSR if its Rooftop is to be usable. The ground and Rooftop Levels of a Factory Rooftop Access Point hex are ADJACENT; intermediate vertical Levels do not exist [EXC: for MF-expenditure, LOF and Residual-FP purposes; R.3C]. Infantry expend two MF to ascend to the Rooftop and vice versa.
R.3C ATTACK EFFECTS (B23.8): Infantry changing Levels via a Factory Rooftop Access Point may be attacked at ground level (if descending) and/or Rooftop Level (if ascending) in the normal manner. However, they may also be attacked at the first-Level "quasi-Location" of that hex by a unit that has LOS to that quasi-Location. Such a quasi-Location is not considered Open Ground, but such an attack vs it receives no TEM [EXC: non-Fortified building TEM applies if firing from outside the Factory] or Factory Hindrance DRM. The target is assumed to expend one MF per Level changed; if pinned or broken while at that quasi-Location it reverts to the Level it was attempting to leave (and may be attacked by any Residual FP at that Level as it re-enters it). The Residual FP left by an attack vs such a quasi-Location remains at that Level (place the Residual FP counter on the appropriate Level counter) to attack each unit subsequently entering that Level in that hex during the same MPh. A unit at Rooftop Level in a Factory Rooftop Access Point hex being attacked by a same-hex, ground-level unit receives the Height Advantage +1 TEM (B23.81), while the ground-level unit receives Factory TEM (and no additional TEM for a Fortified Building Location) if attacked by that Rooftop unit. Both units may use PBF (since they are ADJACENT; A7.21).
R.4 ROOFTOPS (B23.82): A Rooftop Location is Concealment Terrain only for setup purposes. Once the first RPh has been completed, B23.82 comes into effect. A Rooftop Location is not considered a building Location for rout, rally, and/or Victory purposes. A Gun may never be Emplaced (C11.2) on a Rooftop.
R.5 ENTRENCHMENTS (B27.): A trench may not occupy the same Location as a foxhole.
R1. The Arnhem Bridge
- THE ARNHEM BRIDGE [fn 1]
1.1 The Arnhem Bridge is represented by the contiguous row of hexes R15-R23 (inclusive). Each such hex contains a Level 1 Location as well as a Level 0 Location. Unless noted otherwise, Arnhem Bridge hexes are treated as two lane stone bridge hexes (B6.1-.43) [EXC: Arnhem Bridge hexes may not be destroyed or damaged during play; MP penalties and VCA limitations of B6.43 are NA while on (not beneath) the Bridge/Ramp; Arnhem Bridge hexes are Inherent Terrain (B.6); units occupying Level 1 Locations in an Arnhem Bridge hex have no LOS to any units occupying Level 0 Locations in Arnhem Bridge hexes]. Arnhem Bridge hexes may be Scaled (B23.424) by British Commando units.
1.11 The Pillar artwork (EX: R18/R19/Q19 vertex) has been added for aesthetic purposes and only serves to denote those hexsides which are rowhouse hexsides (1.12, B27.31). The Pillars have no other game effects.
1.12 Hexsides containing Pillar artwork on each end (EX: R17/R18) contain rowhouse hexsides (B23.71) which extend the entire length of the hexside, thus bypass movement (B23.71) is not possible around the vertex while moving beneath the bridge. Infantry bypass movement in hexes adjacent to the bridge is not affected by these rowhouse hexsides in any way. These rowhouse hexsides may not be breached (B23.711) nor are they affected by rubble in either/both hexes sharing the hexside.
EX: The 6-4-8 in R18 cannot directly enter hex R17 (as illustrated by the red arrows) without first moving through hexes Q18 or S18. Bypass movement "around" the R17/R18/Q18 and R17/R18/S18 vertices is possible but only by doing so "in" hexes Q18 or S18 (as illustrated by the blue arrows in Q18). In this case, the 6-4-8 would be considered to be moving in Q18 for all purposes (minefield attack, Residual FP/Fire Lane, defensive fire, etc.) and LOS would be drawn to the appropriate bypass vertices. Note that the rowhouse hexside R17/R18 blocks LOS between the 6-4-8 in R18 and the 5-4-8 in Q17.
1.13 Hexsides Q15/R15 and S15/R15 are hillside walls (F10) and Cliffs (B11) [EXC: these hexsides may be crossed only via Scaling (B23.424)].
1.2 Level 1 Locations in Arnhem Bridge hexes are wide city boulevards (B7) [EXC: -1 TEM of B7.3 is NA vs same or lower-elevation fire if the target otherwise qualifies for Bridge TEM; B6.31]. Hex R23 is considered to be a Level 2 terrain feature for the purposes of E1.7 (Night LV modifier). Any unit entering hex R23 from off map is considered to have spent ≥ 4 MP in LOS of any viewing unit (assuming LOS exists at all).
1.21 PBF and Case L TH DRM are NA vs targets occupying Level 1 Locations in Arnhem Bridge hexes from fire originating from any lower elevation.
1.22 While occupying Level 1 Locations in Arnhem Bridge hexes which are also adjacent to ≥ 1 Level 1 building Location. OT AFV are always considered vulnerable (A7.211) to PBF small arms fire provided all firing unit(s) occupy adjacent building (or rooftop) Locations ≥ Level 1. Additionally, the normal CE DRM is reduced by 1 (to a minimum of +1) for such fire. [fn 3]
EX: A German SPW 250/1 HT, with a 3-4-8 HS as a Passenger, moves on the bridge, entering hex R17. The PRC are BU. A British 6-4-8 at Level 1 in hex Q17 fires at the SPW 250/1. Since the HT occupies a Level 1 Location adjacent to a Level 1 building Location, the special provisions of 1.22 apply. Thus the PRC are vulnerable to fire even though they are BU. Additionally, since the CE DRM is reduced (by 1.22), the HT is considered unarmored (D5.311) to this fire.
1.3 Ground-level Locations in Arnhem Bridge hexes are one level Hindrances with a +1 TEM. These Locations are Inherent Terrain (B.6) and Concealment Terrain. Unless using the road hex (e.g., entering R15 from S16), Infantry enters such Locations at a cost of 2 MF. Tracked vehicles do so at a cost of 3 MP, and non-tracked vehicles do so at a cost of 5 MP [EXC to all: all units pay normal MF/MP costs for rubble Locations beneath the bridge]. These Locations are not Burnable (B25.1).
1.31 Falling rubble (B24.12) can exist beneath the Bridge. Contrary to B24.121, falling rubble has no effect on the Bridge itself. Such rubble exists at ground level only. Falling rubble does not negate the Hindrance/Concealment-Terrain status of any ground-level Locations beneath the Arnhem Bridge.
EX: See the 1.22 example. The German player successfully places a DC in the ground-level Location of hex Q17. The Original Resolution DR is a 3 resulting in possible rubble Creation (B24.11). A subsequent dr of 1 places a stone rubble counter at ground level in Q17 and allows for the possibility of falling rubble (B24.12). The falling rubble Final colored dr is a 7 (white dr of 2), causing rubble to fall into hex R16. This falling rubble is placed at ground level (i.e., beneath the bridge). This rubble blocks LOS from Q16 to the ground level of T16, affects COT and Bog, but has no effect on the Level 1 Location of R16 or on the +1 Hindrance for LOS from Q16 to Level 1 of T16.
1.4 PEDESTRIAN ACCESS POINTS: [fn 2] Units in R20 can move/advance to/from Level 1 as if using a stairwell (though no LOS exists; 1.1); B23.4.
R2. The Ramp
- THE RAMP [fn 4]
2.1 The Ramp consists of the contiguous row of hexes R5-R14. The Ramp varies in height from Level 0 (R5 and R6) to Level 1 (R11-R14). Hexes R7-R10 are equivalent to Hillocks (F6.4 - 6.53) for purposes of LOS/LOF, elevation and MF/MP costs [EXC: Road MF/MP costs apply when crossing road hexsides in these hexes]. The Hillock effects begin with the artwork in hex R7 (i.e. hexside R6/R7 is at Level 0) and extend to the R10/R11 hexside (inclusive) (i.e., the R10/R11 hex side is a hillock hexside; the Crest Line for hex R11 is considered to lie at south edge of the R10/R11 hexside).
2.2 LOS: Units on the Ramp have no LOS to any Locations under the bridge. In season Orchards are an LOS obstacle between a unit on a Hillock and a unit at ground level (or ≥ Level one). Units in Bridge/Ramp Locations are treated as being at the same level as one another for all LOS between them.
2.3 MF/MP: Normal road MF/MP costs apply to movement along the ramp and/or bridge provided the units cross road hexsides. Additional MF/MP costs for changing elevations (A4.133, C10.4) are NA while crossing road hexsides on the Ramp and/or Arnhem Bridge.
2.4 All hexes of the Ramp are wide city boulevards (B7).
R3. Factories
- FACTORIES [fn 5]
3.1 Each building on the A Bridge Too Far map that has ≥ 1 road entering it is a Factory. Normal Factory (B23.74) rules apply to all ABtF Factories except as amended below.
EX: Building EE20 is a Factory due to having a road enter it in hex FF20. Building GG15 is a Factory due to having a road enter it in hexes HH14 and FF14.
3.2 VEHICULAR-SIZED ENTRANCE: A non-rubbled ABtF Factory Location that has a road entering it (EX: FF11) is considered a Vehicular-Sized Entrance (B23.742; see also R.3-R.3C).
3.3 FACTORY INTERIOR WALLS: A thick black bar covering a hexside (EX: EE11) or partial hexside (EX: BB17) in the interior of some ABtF Factories represents a massive interior wall similar to the black-bar hexsides of a Rowhouse (B23.71). It is considered to extend from the Base Level of the Location to the underside of the roof (even if, because of rubble, the roof itself does not exist).
EX: The Factory Interior Walls of a 1½-Level Factory are 1½ Levels high.
3.31 LOS: The black-bar depiction as well as the hexside itself (inclusive of vertices) lying within the building depiction, represents the Factory Interior Wall and blocks all LOS along/through it unless the viewing/viewed unit is at a Level ≥ the top of the Factory Interior Wall [EXC: Breach, 3.33; if rubbled, 3.34].
3.311 FACTORY NVR: In a Night scenario, a (non-rooftop) unit in a Factory tracing its LOS completely within that Factory building's depiction always has its NVR to Locations of that building limited to the first Location its LOS enters.
3.32 MOVEMENT: A ground-level unit may move/rout/advance/Withdraw-from-Melee across a Factory Interior Wall only via "bypass" (as per B23.71) along an exterior vertex (i.e. one "outside" the Factory building depiction) or via a Breach (3.33).
3.33 BREACH: A Factory Interior Wall, even if part of a Fortified Building Location, may be Breached by a DC as per B23.711, or by any AFV using the mechanics of B9.541.
3.331 EFFECTS: Once a Factory Interior Wall has been Breached, that hexside's effects remain unchanged except as follows:
- units may move/rout/advance/Withdraw-from-Melee and same-level (only) LOS may be drawn, across it as if it were a wall (exclusive of its vertices, whose status remains unchanged by the breach);
- the Inherent FP (only) of a unit/FG firing through such a Breached hexside is halved as Area Fire if the total US# of the unit(s) currently firing (a Leader directing fire through a Breach does not add his US# for this calculation) is ≥ 3; only one Gun (whether vehicular or not) per Location may fire through such a Breached hexside per Game Turn;
- such a Breached hexside may be crossed only if the total US# of all units that have crossed it during the current phase, plus the US# of the unit currently wishing to cross it, is ≤ 5.
3.332 OB/CG SCENARIO PURCHASE: [fn 6] The British player may purchase Breaches using available FPP during the RePh. Such Breaches (or ones listed as part of the British initial OB during ABtF scenarios) may be set up in Front Line Locations, including Rowhouse hexsides, are secretly recorded, and are revealed as if they were tunnels (B8.61).
3.34 RUBBLE: Rubble has no effect on a Factory Interior Wall black bar unless both hexes sharing the hexside are rubbled, in which case the Factory Interior Wall ceases to exist along that hexside.
3.4 GUNS: All categories (C2.2) of Guns may set up in an ABtF Factory. A Gun may enter/exit an ABtF Factory via a Vehicular-Sized Entrance (using the Entrance's movement benefits) or via another non-Interior hex of that Factory [EXC: B23.93]. However, entry/exit via a non-Vehicular-Sized Entrance is allowed only if being pushed (C10.3), in which case both normal building-entry Infantry MF costs and that Factory hex's TEM apply as Manhandling DRM, even if exiting that Factory.
R4. The Cellars
- CELLARS [fn 7]
4.1 All multi-hex, non-Factory buildings depicted on the ABtF map contain a Cellar Location beneath their ground-level Location (i.e., at building Level -1). A Cellar Location is considered the equivalent of another non-rooftop building Location in that hex (even for falling rubble [B24.12] and Victory Condition purposes) except as specified otherwise. The Cellar Level is ignored when determining the Base Level of a building hex.
4.11 TEM: Cellar Locations have a TEM of +3. Cellar Locations may be Fortified. Cellar Locations are ignored for the purposes of B23.912 (i.e., the Cellar need not be fortified to fortify the ground-level Location).
4.12 STACKING: A Cellar Location has a normal stacking limit (A5.1) of two squad-equivalents (A5.5) plus up to four SMC. Overstacking may occur [EXC: NA during setup (A5.1); see also 9.6214], but no unbroken, armed unit/stack may enter an already overstacked Cellar Location if its entry would increase the squad-equivalency therein.
4.2 ENTRY: Only Infantry/SW may set-up-in/enter a Cellar, and their presence therein is indicated by placing them beneath a Cellar counter. Infantry may enter/exit the Cellar level only via a Stairwell or a "connecting" Trench. Infantry already in a Cellar may directly enter an adjacent Cellar Location only if the two hexes involved share a common non-Rowhouse [EXC: unless Breached; B23.711] building hexside.
4.21 All Trench "connections" (see ABTF CG SSR 17) "open into" the Cellar Level if it exists in that hex [EXC: if the ground level above the Cellar has been rubbled; 4.6]; otherwise Trench rules apply unchanged.
4.3 LOS: Infantry in a Cellar tracing LOS outside of their building to a non-ADJACENT Location do so as if entrenched at ground level (B9.21), and trace LOS to an ADJACENT Location in the normal manner (B23.25, B8.2). There is no LOS between adjacent Cellar Locations across a Rowhouse black bar hex side [EXC: if Breached; B23.711]. For the purposes of Height Advantage TEM (B10.31) and Night LV (E1.7) applicability, Cellar Locations are considered to be at Level 0.
4.4 FIRE EFFECTS: The Inherent FP of a unit/FG in a Cellar is halved as Area Fire if the LOF leaves their building's depiction and is not traced to an ADJACENT Cellar Location, and the US# of the unit(s) currently using such Inherent FP is ≥ 3 (A Leader directing fire from a Cellar Location does not add his US# for this calculation). Otherwise, a Cellar Location has no effect on the use of SW/Inherent-FP other than those normally caused by being fired from within a building. A DC may be Thrown from a Cellar Location only to an ADJACENT Location.
4.41 SMOKE: SMOKE at ground level in a Cellar hex affects different-level fire to/from the Cellar Location normally. The extra +1 Hindrance for outgoing fire (A24.8) is NA and fire between ADJACENT Cellar Locations is unaffected.
4.5 BLAZE SPREAD: A Blaze may spread to/from a Cellar Location only from/to an ADJACENT Location.
4.6 RUBBLE: A Cellar Location can be rubbled like any other building Location. If a Cellar Location is rubbled, it and all other building Locations in the hex cease to exist and the appropriate rubble counter is placed at ground level in that hex. All occupants and weapons are eliminated, as is its Fortified Building status (if any), and an AFV can no longer fall into it (4.62, B24.4). If the ground-level Location above a Cellar is rubbled, the appropriate rubble counter is placed at ground level on top of a Cellar counter. The Cellar Location beneath such still exists but all LOS out of that Location across a non-building hex side is blocked. Trenches no longer "connect" to a Cellar Location if the ground-level Location above it has been rubbled.
4.61 Stairwell: A stairwell between the Cellar level and ground level is affected in the normal manner if that ground-level Location is rubbled (B24.4).
4.62 COLLAPSE: The B23.41 cellar rules apply unchanged to a Cellar [EXC: an AFV falls into a Cellar if the Original colored dr of the Bog Check is ≥ 5]. If the crew of such an AFV survives, it may immediately attempt to Scrounge the AFV and the crew is then placed in the Cellar Location instead of at ground level (even if its placement would cause the Cellar Location to be overstacked). In all cases the AFV is eliminated and leaves no wreck. Each Infantry unit in such a Cellar Location must take an immediate NMC; if it fails this NMC a dr (Δ) must then be made for each SW it possesses; a 6 eliminates that SW and 4-5 malfunctions it.]. The removal of an AFV for falling into a cellar in a single hex building does not create a Cellar in that hex.
4.7 ENCIRCLEMENT: The principles of A7.72 (Upper Level Encirclement) do not apply to Cellar Locations; i.e., a unit in a Cellar is not Encircled merely by having no exit to ground level.
R5. The Blockhouse
- THE BLOCKHOUSE [fn 8]
5.1 Hex R21 ordinarily contains a Blockhouse counter at Level 1. The Blockhouse is the equivalent of a standard 2+5+7 Pillbox except as indicated. The Blockhouse has a 360° CA. Units in the Blockhouse have LOS to lower elevations only through the R21/R20, R21/Q21 and R21/Q22 hexsides. Units in the Blockhouse have LOS to units in the same hex. The Blockhouse is considered a valid Friendly Setup Area to the side which Controls it (see 9.6052). This pillbox and its contents would never be automatically HIP (though HIP for its contents could be purchased during a CG Scenario via FPP).
5.2 RUBBLE: If destroyed (B30.92), replace the Blockhouse counter with a stone rubble counter at Level 1 in hex R21. Such rubble exists only on the Bridge (i.e., at Level 1) and does not "fall" to ground level. Falling rubble (B24.12-.121) from the Blockhouse is NA. Once this rubble is placed, the Level 1 Location in hex R21 is considered fallen rubble for all purposes [EXC: 5.21 Movement Effects] and no hexside of the Level I Location of R21 is considered a Road hexside until cleared. Rubble from the destroyed Blockhouse is a half-level obstacle to any LOS/LOF which lies within the bridge artwork in hex R21 and may be cleared (B24.71) with an additional cumulative -1 DRM. Once a TB exists across the R20/R21 and R21/R22 hexsides, remove the rubble counter completely. From that point on, hex R21 is considered a normal Arnhem Bridge hex (i.e., the Blockhouse no longer exists) [EXC: Movement effects; 5.21].
EX: Assuming rubble from the Blockhouse is in hex R21, a unit on the roof in hex Q20 has clear LOS to a unit on the bridge in hex R22, since the unit can see "over" the rubble. However, the same unit on Level 1 in Q20 would not have LOS to the Level 1 Location of hex R22 since the LOS crosses through the bridge artwork in hex R21. Thus the rubble serves as a half-level LOS obstacle.
5.21 MOVEMENT: Once rubble has been placed on the bridge from the destruction of the Blockhouse (even if subsequently cleared), Infantry units may enter the Level 1 Location of R21 at a cost of 2 MF [EXC: rubble has no additional effect on units Scaling any vertex of hex R21; B23.424]. Fully tracked vehicles enter at a cost of 3 MP while other vehicles pay ½ of their printed MP Allotment. The D2.11 and D3.51 doubling for TCA/VCA changes are NA and no Bog Checks are required for movement or VCA changes.
5.22 Hidden mines may be placed at Level 1 in hex R21 while rubble exists from the destroyed Blockhouse. Should the rubble be cleared (5.2) while there are hidden mines, place a Known Minefield counter Mines of the appropriate type and strength in the Level 1 Location of R21. Such mines are then treated as Known (F.7) for all purposes [EXC: Dummy minefields are NA; F.7B].
5.3 TEM: The CA TEM of the Blockhouse applies to all Direct Fire attacks [EXC: FT, AP Ammunition; B30.35]. Indirect Fire attacks use the NCA TEM. Once destroyed, normal stone rubble TEM applies until cleared.
EX: A German 150mm FFE scores a CH (C3.7) vs the Blockhouse. Since the OBA is ≥ 100mm, the Blockhouse is eliminated (B30.92). A stone rubble counter is placed in hex R21. This rubble exists only "on" the bridge (not under it). Assuming the British player Controlled the Location at the end of the CG Scenario, he could set up hidden mines (if otherwise allowed by RePh Setup restrictions) at Level 1 in hex R21. Clearing the rubble is possible as normal except that a cumulative -1 DRM applies and only a single successful clearance attempt is required to completely remove the rubble counter (B24.71). Should the rubble be cleared, any mines previously set up in the bridge Location of R21 are immediately placed onboard as a Known minefield. From the point of clearance on, R21 is considered a standard Arnhem Bridge hex and the Blockhouse, except for movement effects (5.21), is considered to have never existed.
R6. Unit Replacement
- UNIT REPLACEMENT [fn 9]
6.1 Due to the unique unit structure and experience levels of the troops that fought in Arnhem, special unit replacement applies for MMC of both sides. A19 is modified as follows for all non-crew MMC. Assault Engineer (H1.22) ELR is always 5 [EXC: E1.22] and their Morale Number is always considered underlined.
6.2 SS UNIT REPLACEMENT: The progression for all SS MMC subject to Replacement is shown below. The Morale Number of SS MMC is never considered underlined for any purpose [EXC: Assault Engineers; 6.1]. All German non-crew MMC that Battle Harden follow the reverse of this order.
6.21 SS 4-4-7s/2-3-7s are considered Elite (A1.25). Any SS MMC Replaced with a conscript MMC is considered Inexperienced (A19.3) for all purposes and is no longer considered SS (A25.11). All German 4-3-6s/2-2-6s become SS 4-4-7s/2-3-7s when they Battle Harden.
6.3 BRITISH UNIT REPLACEMENT: All British MMC are considered to have an underlined Morale Number (A1.23) until such time that the British ELR drops below 5 [EXC: Assault Engineers; 6.1]. During any scenario (or portion thereof) in which the British ELR is not 5, treat all non-crew British MMC [EXC: Assault Engineers; 6.1] as having a non-underlined Morale Number and apply the illustrated progression to British MMC subject to Replacement. British 4-4-7s/2-3-7s which Battle Harden always improve to 4-5-8s/2-4-8s (which Replace normally).
6.31 COMMANDO REPLACEMENT: British Commando MMC (9.617; H1.24) which suffer Replacement while the British ELR is < 5 (i.e., Replaced by a 4-4-7/2-3-7) are no longer considered Commando for any purpose (even if subsequently subject to a Battle Harden result).
EX: A German stack consisting of a 9-1, a 4-4-7, and a 4-3-6 is fired on by a British 6-4-8 and 4-4-7 resulting in a 1MC. The German ELR is 2. The 9-1 passes the 1MC with a DR of 5. The 4-4-7 fails its 1MC with an original DR of 11 and is Replaced with a broken 4-3-6. This 4-3-6 is no longer considered to be an SS squad. The remaining 4-3-6 rolls an original 2 DR and thus is subject to HOB. The 4-3-6 HOB DRM is +1 for being inexperienced. The final HOB DR is an 8 resulting in the 4-3-6 Battle Hardening to a 4-4-7 SS MMC. Note that the resultant 4-4-7 is now an SS squad (even if it was not so originally).
The German return fire results in a 3MC. The British ELR is 4. The 6-4-8 fails with an Original 11 MC DR. The 6-4-8 is Replaced with a broken 4-4-7 (had the 6-4-8 been an Assault Engineer squad, or had the British ELR been 5, it would instead have been Replaced by two 3-3-8 HSs). The original MC DR for the 4-4-7 is a 2, resulting in HOB. The 4-4-7 Battle Hardens and is replaced with a 4-5-8.
R7. Wide City Boulevards
- WIDE CITY BOULEVARDS [fn 10]
7.1 Any road hex containing a slightly enlarged, black center dot (EX: F12) is a wide city boulevard (B7). All rules for wide city boulevards apply unchanged in these hexes. Street Fighting (A11.8) and Dash (A4.63) are NA "across" a wide city boulevard.
R8. Partial Orchards
- PARTIAL ORCHARDS
8.1 Partial Orchards allow for tree-lined roads (akin to B14.6) to exist, but with the trees generally on only one side of the road. Any whole hex containing only two round, green orchard symbols is a Partial Orchard hex. Hex M15 is an example of a Partial Orchard hex. All rules pertaining to Orchards apply to Partial Orchards unless otherwise stated.
8.2 LOS: The orchard obstacle/hindrance of a Partial Orchard hex is not Inherent Terrain. A Partial Orchard's effect on LOS/LOF is determined by which of the Partial Orchard's hexsides/vertices are crossed by that LOS/LOF. The three contiguous hexsides closest to the hex's orchard symbols (including the two vertices joining them together) are termed Orchard Hexsides; the three hexsides farthest from the hex's orchard symbols (including their four vertices) are termed Open Ground Hexsides. If a LOS crosses one or more of the Partial Orchard hex's Orchard Hexsides, that hex is treated as an orchard hex; for LOS crossing only one or more Open Ground Hexsides, that hex is treated as an Open Ground hex.
8.21 Since Partial Orchard hexes are not Inherent Terrain, the orchard obstacle/hindrance in them is treated as Inherent Terrain for LOS along a hexside that is common to two Partial Orchard hexes only if that hexside is an Orchard Hexside for both of those hexes.
8.3 MOVEMENT: For movement purposes when entering a Partial Orchard hex, units are considered to be entering an Orchard hex if they cross an Orchard Hexside, and entering an Open Ground hex if they cross an Open Ground hexside [EXC: OBA, Residual FP and TPBF are resolved as though any target was entering an Open Ground hex regardless of hexside crossed].
8.31 RIDERS: AFV Riders may only enter/exit a Partial Orchard hex across an Open Ground hexside [EXC: if crossing a road hexside; D6.21].
8.4 Partial Orchard hexes are not considered Concealment Terrain for any purpose.
R9. A Bridge Too Far Campaign Games
9. A Bridge Too Far Campaign Games Refit Phase Rules
9.1 INTRODUCTION: A Bridge Too Far Campaign Games offer two or more players a series of interrelated scenarios pertaining to the 2nd Parachute Battalion's grim struggle during September of 1944 in the area surrounding the main road bridge in Arnhem, Holland. Up to four scenarios may be played per "day" with CG Victory determined only at CG end [EXC: Sudden Death Victory; 9.6212] by how well the players fared during this variable number of scenarios.
9.11 BETWEEN SCENARIOS: Between Campaign Game (CG) Scenarios, players make use of a special CG phase called the Refit Phase (RePh), wherein each side takes stock of what has happened and prepares for further combat in the next CG Scenario. In the RePh, the players may receive reinforcements, while they may also purchase Reinforcement Groups (RG) using Campaign Purchase Points (CPP). Reinforcement Groups in the form of infantry platoons (and sections), AFV platoons, OBA modules, and gun batteries-to name a few-may be selected by the players.
9.12 CASUALTIES: Casualties suffered in a CG-Scenario/its-subsequent-RePh must be placed aside since their Casualty VP (A26.2) total is used to determine a DRM for ELR Loss/Gain (and possibly CG Victory Conditions). The Casualty VP value of a unit unable to be removed (e.g., wrecked AFV) should be noted on scrap paper.
9.13 TEAM PLAY: The CGs herein 9.51-.53) are easily adapted-indeed, recommended-for team play (EX: one player commands all of the British forces and the others command the various German KG elements, etc.). If desired, an overall commander may determine which RG his subordinate players will receive, assigning each to the one who requires it most.
9.14 CG ROSTER & RG PURCHASE RECORD: The enclosed printed copies of the "CG Roster" and "RG Purchase Record" should be photocopied and used by CG players to record important CG information. See RePh step 9.617 for information on updating the CG Roster; see 9.618 for specifics on the RG Purchase Record.
9.15 CHAPTER R DIVIDER: The Chapter R divider provides a handy reference for Block Locations and designations. Additionally, holding boxes are provided for Retained units of both sides as well as a casualty box for the British Walking Wounded.
9.2 DEFINITIONS & ABBREVIATIONS: The following glossary explains abbreviations and important terms used frequently in ABtF Campaign Games.
ABtF: A Bridge Too Far ASL Module.
Block: All Locations contained entirely within a series of adjacent map-edge/riverbank hexes and/or road hexes sharing a road hex side. The Chapter R Divider contains a reduced size map indicating the various Blocks and their boundaries. Players are encouraged to refer to this diagram when determining Setup Areas during the RePh 9.605).
Campaign Exhaustion DRM: Abstract DRM 9.6162) for RG Strength 9.6181), ELR Loss/Gain 9.6202), and British Ammunition Shortage 9.6201) determination.
CG : Campaign Game
CG Date: Each CG Date consists of the calendar date plus a Dawn (AM), Afternoon (PM), Evening (Eve), or Night (N) reference (e.g., "18 Eve"). One CG Scenario may be played per CG Date-hence up to four CG scenarios may be played per calendar day: one at dawn (AM), one in the afternoon (PM), one in the early evening (Eve) and one at night (N).
CG End: The CG Scenario End (see CG Scenario End definition below) that occurs on the final CG Date listed in 9.51-.53 for that CG is also the CG End (i.e., is the end of the CO). If one side concedes CG victory, the CG Scenario End that occurs at the conclusion of the final CG Scenario played in that CG is also the CG End. CG Victory is determined at CG End unless already decided by Sudden Death Victory 9.6212).
CG Night Scenario: Any CG Scenario taking place on a CG Date with an "N" in the CG Date (EX: 19N).
CG Roster: The sheet used to record information for each CG Date. One line is filled out for each CG Date. Players are urged to photocopy the facsimile provided herein.
CG Scenario End: Occurs when both the CG scenario being played and the ensuing RePh step 9.603 have been completed.
CPP (Campaign Purchase Points): Used to buy RG in RePh step 9.617.
Depleted: A RG not received at Full Strength.
Eliminated: Units/Equipment "Eliminated" in a CG are removed from that side's OB.
Enemy Setup Area: All Locations in ≥ 1 enemy Controlled Block(s) (see also 5.1).
Enterable: A hex/Location that the unit in question could enter (disregarding its occupation by a Fortification/enemy-unit) during a hypothetical MPh/APh. If defined in relation to a Setup/Entry Area (or to a "path" of hexes drawn to/from/between such), the hex/Location must be Enterable along that path. Terrain-Blaze Locations and river Locations are not considered Enterable.
Entry Area: Each map-edge hex that contains a large arrow with a red, grey, grey and black, or black background color, plus each map edge hex within four hexes of that hex [EXC: KG Graebner's Entry Area is limited to hex R23].
Equipment: Any (non-inherent) SW/Gun/Vehicle/Daisy-Chain that can be part of a side's OB. Any counter that can be Portaged/driven/Manhandled about on the map.
Escape: The process 9.6054) by which a unit attempts to leave an Isolated area 9.6053).
FPP (Fortification Purchase Points): Used to purchase Fortifications in RePh step 9.619.
Friendly Setup Area: All Locations in ≥ 1 friendly Controlled Block(s) (see also 5.1).
Front Line Location: Any road hex adjacent to both a Friendly Setup Area and an Enemy Setup Area, or any Location in a Friendly Setup Area adjacent to one/more Front Line road hexes [EXC: the Blockhouse (or the resultant rubble if destroyed; 5.2) is never considered a Front Line Location].
Full Strength: A RG received in toto.
Initial Scenario: The first scenario of a CG (see 9.5). A CG's Initial Scenario gives each side's setup/entry restrictions, starting OB (including certain predetermined RG and a pool of CPP to spend on additional RG), and any SSR applicable only to that Initial Scenario.
Idle Date: A CG Date in which both sides have picked an Idle chit (meaning that no scenario is played); 9.62132.
Kampfgruppe (KG): A German unit organization. There are four German KGs in ABtF: Harder (H), Knaust (K), Brinkmann (B), and Graebner (G).
OB (Order Of Battle): All the units, Equipment and Fortifications of a side that are eligible to participate in the next CG Scenario. Includes all Retained units and Equipment, plus all RG purchased since the last CG Scenario.
Pltn (platoon): A CG Infantry or AFV RG organization type.
RePh (Refit Phase): The series of steps performed between CG Scenarios. All Chapter R rules beginning with "9.6" are ABtF CG RePh rules/steps.
Retained: All units/Equipment in a side's OB that are available for on-map/off-map setup in the next CG scenario; i.e., all that remain available from the last CG scenario, all RG purchased since the last CG Scenario but prior to the current CG Scenario, and all CG designated reinforcements (including Walking Wounded; SSR CG 19).
RG (Reinforcement Group): Usually a number of units/Equipment purchased, as a group, for use in the CG as additions to a side's OB. Also includes FPP, SAN increase, OBA, Pre-Registration, and Offboard Observers.
RG Purchase Record: The sheet used to record the units-in/information-for each CG RG type. One line is filled out for each RG purchased. Players are urged to photocopy the facsimile provided herein.
Sect (Section): A CG RG organization type.
Setup Area: Each Location within a Block Controlled by a side. Road hexes [EXC: The Blockhouse; 5.1] and Uncontrolled Territory are never considered part of a Setup Area though some units may be permitted (or required; 9.6053) to set up in such Locations; 9.6214.
Shift: The RePh process by which a Retained unit attempts to transfer from its current Setup Area to another Friendly Setup Area or Eligible Entry Area; 9.613.
Strategic Location: Each (non-rooftop) building/rubble/Entrenchment Location and each Location that is occupied by an unhooked, non-malfunctioned, unlimbered Gun, is a Strategic Location. If an unhooked, non-malfunctioned, unlimbered Gun is used to declare a Location as a Strategic Location (when that Location would not otherwise be so), that Gun (owner's choice if more than one is present) must be manned by a (fully qualified; A21.13) crew and must set up in that Location for the next CG Scenario. Strategic Location Control is important for Block Control and Setup Area determination 9.605).
Strength: An Infantry RG is received either at Full or Depleted Strength.
Uncontrolled Territory: All Locations not contained within a Friendly or Enemy Setup Area.
Weapon: Any SW/Gun/Vehicular-armament/Daisy-Chain using the IFT/TH table(s) to cause damage to the opponent.
9.3 THE CG SCENARIOS: The parameters of the Initial Scenario for each CG are given in 9.51-9.53. Additional scenarios for that CG are generated in a special between-CG Scenario sequence called the Refit Phase (RePh); 9.6. The CG continues until the specific CG Victory Conditions are fulfilled by one side or the completion of the last CG Scenario of that CG, whichever comes first. The "start lines" (or, Setup Areas, to use the game term) in a CG scenario are determined by Locations Controlled by both sides at the end of the last-completed CG Scenario (thus determining the Blocks they Control during the RePh).
9.31 CG BALANCE PROVISIONS: Should each player wish to play the same side (A26.5) the following Balance is used:
German: Each German Personnel counter possessing a FT/DC or manning a Gun is Fanatic.
British: Each British Infantry unit in a Fortified Building Location is Fanatic.
9.4 CAMPAIGN GAME SPECIAL RULES: All ABtF CG SSR below apply in all CG scenarios.
CG1. MAP: The entire ABtF map is used in all CG Scenarios.
CG2. ABtF SSR: All ABtF SSR are in effect except as amended below.
CG3. WEATHER: EC, Weather, and Wind Force (and direction, if necessary) for each CG Scenario are determined in RePh step 9.6216 [EXC: for each Initial Scenario they are listed in that scenario's specific SSR].
CG4. GAME END: The Turn Record Chart for all CG scenarios is located in the river portion of the ABtF map (the southwest corner). All CG Scenarios have a variable game length. At the end of Game Turn 5, and at the end of each Game Turn thereafter, the British player makes a Game End dr: if it is ≤ the circled number in the current turn's box on the ABtF CG Turn Record Chart, the scenario ends immediately (e.g., at the end of Game Turn 6 a day scenario will end on a Game End dr of ≤ 3). There is a +2 drm to this dr during CG Night Scenarios. Additionally, a CG Scenario ends immediately if both the ATTACKER and DEFENDER agree to end the scenario.
CG5. GUNS: A Gun set up in a Pillbox or Fortified Building Location may never be moved during the course of that CG [EXC: if dm/Eliminated]. Such a Gun, once revealed, may never again set up hidden, but may be set up concealed. Otherwise, provided it sets up within a Friendly Setup Area, an Emplaced Gun (only) may set up hidden (at no cost in FPP) in CG Scenarios. Each non-vehicular Gun that ended the last CG scenario on-map must set up within three hexes of the Location in which it ended that scenario [EXC: within two hexes if it sets up in Uncontrolled Territory; 9.6214] unless it meets one or more of the following criteria (in which case it may set up in any enterable Location in a Friendly Setup Area):
- If it is a dm MTR
- If it begins the CG Scenario hooked up to a Mobile vehicle
- If an Idle Date has been generated since the last CG Scenario played
Each Gun in a Setup Area that contains Personnel may be set up (un)hooked/(un)limbered/(non-)dm unless otherwise prohibited.
EX: Assuming Block H was under friendly Control, a Gun which ended a CG Scenario in O5 could set up anywhere within Block H which was also within three hexes of O5. The Gun could also set up in the hexes marked with a blue "X" (provided the hexes were Uncontrolled Territory). Note: should the Gun set up in any of these hexes, it could not do so using HIP since none of these hexes are within a Friendly Setup Area. The Gun could not set up in the hexes marked with a red "X" as it could not be Emplaced in these hexes (see 9.6214). A mobile vehicle in O5 could also set up in hexes marked with a red "X".
CG6. OBA: The Germans are limited to using a maximum of two OBA modules per CG Scenario. The British are limited to three OBA modules per calendar day (i.e., no more than a total of 3 modules over the 4 CG Dates of a calendar day) with no more than 1 module per scenario. "Usage" of a module is defined as having a radio, field phone, or Offboard Observer in play at any time during a CG Scenario. A radio/field-phone counter (and its associated OBA module) is immediately Eliminated when its OBA is exhausted, or in the RePh if its OBA was "used" as per SSR CG 10 in the previous scenario. On an OBA RGs CG Date of purchase, its radio or field phone is placed with Personnel in any Friendly Setup/Entry Area [EXC: field phones may be used only by the German player, and only if they set up on-map]. Each field phone's Security Area (C1.23) must comprise Enterable (by Infantry) Locations that are not within an Enemy Setup Area, and must be drawn to a Friendly Entry Area. A new Security Area may be recorded for each CG Scenario. If no legal Security Area can be traced during setup, that field phone is Eliminated but the player may immediately add a new radio or field phone (for the Eliminated phone's OBA module) to some other Friendly Setup (or, for the radio, Eligible Entry) Area.
CG7. TERRAIN CHANGES: During the course of the same CG, alterations of printed mapsheet terrain are bound to occur, all of which become "permanent" (barring subsequent Clearance/Removal if applicable). All counters for Fortifications, rubble, Breaches, TB, shellholes and wrecks are left on-map from scenario to scenario. Any terrain Blaze at scenario end is resolved as per RePh 9.609. A wreck in a non-building terrain Blaze is not removed from play; instead, it remains on-map (still treated as a LOS Hindrance) and in step 9.6095 of the next RePh will become a Burnt-out Wreck (see ABtF CG SSR 14).
CG8. SNIPERS: Due to the widespread sniper activity, each side must place two Sniper counters on the map at the start of each CG Scenario. Both friendly Snipers must set up as per the first two sentences of A14.2, with ≥ 12 hexes between them (or as far apart as possible if they cannot set up 12 hexes apart). When a Sniper attack can occur, make a dr to randomly determine which one actually attacks (assign numbers so that each has an equal chance). This procedure is also used when resolving Civilian Interrogation (see SSR ABtF 7). The SAN is never altered by the presence of two friendly Snipers in play simultaneously. Any result (e.g., Pin) affecting a Sniper counter affects both friendly Snipers simultaneously.
CG9. REINFORCEMENTS: All Infantry/AFV RG purchased for the current CG Scenario [EXC: those allowed to set up on map], as well as all units currently Retained off-map, must enter on/after Turn 1 [EXC: CG Night Scenarios; SSR CG 24] during the first non-Idle CG Date following their purchase (or, for units that are Retained off map, the CG-Scenario/RePh during which they exited the map). Some, all or none (including individual RG units) may enter on each turn but any failing to do so prior to the end of the CG Scenario are considered Eliminated with full CVP awarded. [fn 11]
BRITISH INFANTRY/AFV RG: Enter at any red Entry Area (centered on hexes A6 and A18).
GERMAN INFANTRY/AFV RG: RGs from KG Harder enter at any grey entry area (centered on hexes A5 and A17), RGs from KG Knaust enter at any grey and black entry area (centered on hexes F0, M1, V0, and GG1), RGs from KG Brinkmann enter at any black entry area (centered on hexes JJ4, JJ15, and JJ20). Units of KG Graebner enter from the south edge on Hex R23 (only).
CG10. RETAINED RG: Each purchased RG, or part thereof (including any Pre-Registered-hex[es]/Offboard Observer assigned to an OBA RG), is Retained until Eliminated/Recalled in a CG Scenario or its subsequent RePh. For purposes of this rule, an OBA RG is considered "used" if ≥ one FFE:1 counter from that module was placed during the last scenario. A Retained OBA module's Draw Pile (C1.211) is restored to the number of red and black chits it had at the start of the previous scenario, and its radio or field phone is restored if it was Eliminated. During the RePh, each radio/field-phone may be freely relocated within its present Setup Area, or Shifted 9.613), and each Pre-Registered hex of a Retained OBA module may have its hex coordinate changed to that of a legal new hex.
CG11. MAP EXIT: No units may exit the map during play [EXC: Recall (SSR ABtF 15); German Guards (A20.5) may exit with their prisoners along the north, east, west map edges, or at hex R23 and are Retained in any Entry Area on that map edge].
CG12. CONCEALMENT: The following CG SSR replaces SSR ABtF 1. All Infantry (and their possessed Weapon[s]) setting up in Concealment Terrain may do so concealed, regardless of LOS. Such concealment need not be purchased; i.e., they are placed freely. Otherwise, A12.12 and A12.34 apply. The side setting up first may conceal all eligible units before the other side views its setup; likewise, the side setting up second may conceal all eligible units before his opponent views that setup. Concealment counters purchased in the RePh 9.619) are intended for use as Dummies.
CG13. MISCELLANEOUS: A ⅝" counter set up beneath a Trench counter (as per B27.51) may never be removed from below that counter unless dm [EXC: if Eliminated]. Exchange of Fortified Locations for tunnels is NA.
CG14. SELF RALLY: Each side may attempt to Self Rally two (not just one) non-Disrupted, broken MMC provided (as per A18.11) both attempts are carried out before other friendly MMC Rally attempts.
CG15. OPTIONAL VEHICULAR EQUIPMENT: All desired optional armament (e.g., AAMG, Sz) must be rolled for individually (H1.41). Consult the applicable Vehicle Note(s). If so equipped, no additional CPP cost is assessed.
CG16. WEAPON REMOVAL: A Retained/Purchased vehicle may begin (i.e.. setup/enter) a CG Scenario with any/all eligible armament Removed (D6.631).
CG17. BRITISH AMMUNITION SHORTAGE: The British suffer an increasing shortage of ammunition. The starting level of shortage is designated by SSR. The levels and penalties are shown in the chart below. These penalties apply only to British Retained/Purchased SW/Guns excluding all radio, DC/FT, and captured equipment and are cumulative with A21-21.22 as applicable.
AMMUNITION SHORTAGE CHART
AMMUNITION SHORTAGE CHART
| Level | Original DR for ELR Loss | Unit Substitution (A19.131) B#† | ELR Loss DRM (9.6202) |
|---|---|---|---|
| One | 12 | 0 | +1 |
| Two | 12 | -1 | +2 |
| Three | ≥ 11 | -1 | +3 |
| Four | ≥ 11 | -2* | +4 |
| Five | ≥ 10 | ** | +5 |
† SW/Vehicle/Gun B#s reduced by the indicated amount per A19.131
* No British SW/Gun repair attempts may be made during the CG Scenario (but may be done normally in the RePh). British may not use Intensive or Sustained Fire [EXC: OVR Prevention] FPF; C5.64, A8.311. ATMM Check dr (see ABtF CG SSR 6) receive an additional +1 drm.
** All SW/Guns automatically malfunction after their first use. No British SW/Gun repair attempts may be made during the CG Scenario (but may be done normally in the RePh). British may not use Intensive or Sustained Fire [EXC: OVR Prevention/FPF; C5.64, A8.31]. ATMM Check dr (see ABtF CG SSR 6) receive an additional +2 drm.
EX: Assume Ammunition Shortage Level Two is in effect. A British PIAT will malfunction on an original TH DR of 9 and be permanently removed on an original TH DR of ≥ 10 (A.11). A British 6pdr AT Gun has a circled B# of 11 and will likewise be permanently removed an on original TH DR of 12(A.11). A captured German DC would malfunction on an original 10-12 (A21.11) but is not otherwise subject to the CG 17 penalties.
CG18. STATUS MARKERS: During its Setup, each side may opt to secretly record the BU, CE, TCA, Bogged, immobilized, Abandoned, malfunctioned, and/or disabled status of its vehicles/Guns in lieu of placing the appropriate marker(s) on them. Place the actual marker(s) when the piece is non-concealed and within 16 hexes of any enemy ground unit which has LOS to it.
CG19. WALKING WOUNDED (WW) MMC: [fn 12] Each RePh, the British Walking player may replace a portion of Eliminated British MMC with Walking Wounded MMC. During play, each British MMC, regardless of type [EXC; WW MMC], removed due to "Double Break" (A10.3), Casualty MC (A10.31), or Fate (A10.64) should be placed in the WW box on the Chapter R Divider. In RePh step 9.6102, for each squad-equivalent (FRD) in the WW box, the British player receives one 4-4-7 MMC in any Friendly Setup Area(s) (unused MMC are discarded and may not be accumulated from one CG Date to the next). Each such 4-4-7 should be marked with a "Walking Wounded" counter to reflect its status. A WW MMC has a 3 MF allotment which cannot be increased for any reason, including while Routing or Berserk [EXC; while being carried by any form of conveyance], its IPC is reduced to 2, and it receives a +1 DRM for all CC attacks it makes while all CC attacks made against it receive a -1 DRM. Under no circumstances may a WW MMC become unwounded. A HS created from a WW squad is marked with a Walking Wounded MMC counter and suffers all the penalties associated with that status. A SMC created by a WW MMC is not considered WW. Two WW HS may Recombine into a WW squad per A1.32. If a non-Wounded HS and aWW HS Recombine, the resulting squad is considered WW and is marked as such. HoB (A15) and Substitution (A19) are handled normally for WW MMC (see also 6.3). WW effects are cumulative with Ammunition Shortage (CG SSR 17) and Water Shortage (CG SSR 21). WW Morale Numbers are never considered underlined (A1.23).
EX: The British player has two 6-4-8s, a 4-5-8, a 2-4-8, and two 3-3-s in the WW box during the RePh. He may now place four 4-4-7s, each marked with a WW counter, in any Friendly Setup Area(s). The remaining HS in the WW Box is removed from play (no CVP are awarded when this MMC is "discarded" as its CVP was tallied during play).
CG20. DAWN/DUSK: A +1 LV Hindrance applies to all non-CC attacks for the first three Game Turns of any Dawn (AM) CG Date and during Turns 4-7 (as applicable) of any Evening (Eve) CG Date.
CG21. BRITISH WATER SHORTAGES: [fn 13] The British troops suffered a critical shortage of fresh drinking water. Beginning on the 20AM CG Date and each CG Date thereafter, the following restrictions apply to all British Personnel units [EXC: during any CG Scenario in which rainfall occurs (E3.51) for 3 or more consecutive Player Turns, Water Shortage restrictions are removed for the remainder of that CG Scenario and the immediately following CG Date (only); if an Idle CG Date is generated during RePh Step 9.62132 for this CG Date, the Water Shortage Penalties resume with the next non-idle CG Date]: no units may use Double Time movement and all Personnel have their Broken Morale Level reduced by one.
CG22. GERMAN ATTACK COORDINATION: [fn 14] Each CG Date, the German player may purchase no more than one "I" type RG and one "A" type RG from any single KG unless he has purchased a minimum of one "I" type RG and one "A" type RG from ≥ 3 of his 4 available KGs [EXC; if any KG has reached its CG Maximum for all I and/or A type RGs, that RG type may be ignored for purposes of this rule (i.e. consider it to have met the minimum purchase requirements for the now unavailable type(s))]. Gun and General RGs ("G," "a," "M," and "T" types) may always be purchased (up to the CG Scenario and CG Maximums) regardless of the KG Purchase status.
EX: The German player has 38 CPP available. He elects to purchase nothing for KG Graebner; an I1 RG (5 CPP) and an A3 RG (7 CPP) for KG Knaust; an 12RG (7 CPP) and an A4 RG (5 CPP for KG Brinkmann; and an I6 RG (3 CPP), an I7 RG (4 CPP) and an A5 RG (4 CPP) for KG Harder; for a grand total of 35 CPP. Had he elected not to purchase either of the RGs from KG Knaust or Brinkmann, he would have been unable to purchase the second "I" type RG for KG Harder.
EX: The German player has 36 CPP available. He elects to purchase nothing for KG Graebner For KG Knaust, he purchases an I1 RG (5 CPP) and an A4 RG (5 CPP). For KG Brinkmann he purchases an I2 RG (7 CPP) and an A3 RG (7 CPP). KG Harder has no I Type RG remaining (having all been purchased in prior CG Dates) so the German player elects to purchase an A6 RG (4 CPP) and thus fulfills the Attack Coordination Requirement. The German player is free to expend the remaining CPP on KGs as he sees fit.
CG23. BRITISH FANATICISM: Immediately prior to setup for the 18AM CG Date, the British player must secretly designate one multi-hex building he currently Controls as the British Headquarters. To be eligible for use as the Headquarters, ≥ 1 Location of this building (including Rooftop Locations) must have LOS to ≥ one Level 1 Location on/between RI5 and R23. All British Infantry is Fanatic (A10.8) while in this building. This SSR supersedes ABtF CG SSR 8 (i.e., British units may be Fanatic in building S11 if the British player so selects that building, but are not automatically so). The identity of the British Headquarters is immediately revealed when any unit uses the Fanaticism benefit gained by this SSR.
CG24. CG NIGHT SCENARIOS: The NVR of a CG Night scenario (identified by an "N" in the CG Date) is determined in RePh step 9.6214. The side(s) selecting the Attack Chit in a night scenario is considered the Scenario Attacker (E1.4; despite usually having units available to set up on-map); a side selecting an Idle chit is the Scenario Defender (E1.2). The Scenario Defender in a CG Night Scenario has automatic Freedom of Movement (following any enemy attack other than a successful Ambush; E1.21) for his two best Leaders. Scenario Attacker(s) units use Cloaking (E1.4-.43), even if they set up on-map [EXC: if < 1 squad-equivalent is available in any particular Setup Area or Entry Area, the units within this Area receive no Cloaking counters (but may set-up/enter concealed if otherwise eligible)]. Cloaking counter HIP is NA. Each Friendly Setup Area is considered separately for the purposes of Scenario Defender HIP (E1.2) and Cloaking (E1.4). On map Cloaked SW need not be dm. German Scenario Defender reinforcements Purchased/Retained-off-map may enter at an Eligible Entry Area only following reinforcement dr < the current Game Turn number (one dr, made during step 1.11A in the RPh, applies to all RG/Units, regardless of Entry Area; units "freed" by this dr may enter on/after the current turn), or automatically once any Scenario Defender unit has been attacked by other than OBA/Sniper or has seen a Known enemy unit. All such reinforcements have automatic Freedom of Movement (E1.21). A reinforcing vehicle with a radio releases other friendly on map vehicle(s) as per E1.21.
9.5 INITIAL SCENARIO: First select one of the CGs listed below. Included there is the information needed to play that CG's Initial Scenario. For the Initial Scenario, players begin with RePh step 9.617 (Purchase Reinforcement Groups) and complete RePh steps 9.617-9.621 (i.e., all steps preceded by a "†" in the RePh Sequence listing; 9.6). For each Initial Scenario, the actual Strength of each OB-given and purchased (RePh step 9.617) RG must still be determined normally (RePh step 9.6181). Leaders received, if any, are determined in RePh steps 9.6183. In the Initial Scenario of CGs I and III, the Germans set up first and the British move first. Further-more, in these CGs the British player is assumed to have selected an "Attack" Initiative chit and the German player an "Idle" chit (9.62132) for purposes of 9.620. In the Initial Scenario of CG II, the British set up first and the Germans move first. The German player is assumed to have selected an "Attack" Initiative chit and the British player an "Idle" chit (9.62132) for purposes of 9.620. Some Strategic Locations (and Blocks) may be identified as either British Controlled, German Controlled, or Uncontrolled at CG Start. If not otherwise designated, all Locations outside the initial setup areas designated by the Initial Scenario are not Controlled by either side.
R9 (cont.). Refit Phase
9.6 Refit Phase
The following steps (9.601-.62164) are performed simultaneously by each side during the RePh, which occurs after each CG Scenario. Each step (and sub-step) must be carried out in the numbered/lettered order given; those not applicable to the current situation may be omitted (e.g., if there are no Flames/Blazes on the map, skip RePh step 9.609). Those steps listed below preceded by a "†" are the only steps to be completed before setting up to play a CG Initial Scenario. Those preceded by a "+" are the only steps necessary to achieve CG Scenario End after the last Player Turn CCPh.
RePh Sequence
+9.601 Conclusion of Melee +9.602 Marker Removal +9.603 Rally and Unloading 9.604 Encirclement, Minefields, Bog, and Shock 9.605 Setup Area Determination 9.606 Encircled-Marker Removal 9.607 Equipment Possession and Hidden Fortifications 9.608 Prisoners 9.609 Extinguishing Flames and Blazes 9.610 Wounded Leaders and Walking Wounded MMC 9.611 Recombining and Battle Hardening 9.612 New CG Date and SAN Adjustment 9.613 Shift 9.614 Equipment Repair and Replenishment 9.615 OB-Given Reinforcements 9.616 CPP Replenishment †9.617 Purchasing Reinforcement Groups †9.618 RG Strength, Weapons, Leaders, and Composition †9.619 Purchasing Fortifications †9.620 Ammunition Shortage and ELR Loss/Gain Determination †9.621 Scenario Commencement
9.601 CONCLUSION OF MELEE: First, each unit currently on a Climb marker must be placed in either the Location it was attempting to reach or the Location it left when it began to climb, at the owner's choice. If the Location the unit is placed in contains an enemy unit(s), mark them all with a Melee counter. All opposing units in the same Locations are now assumed to be in Melee, and must undergo an (unlimited) number of Melee rounds until no more CC attacks can be made. Such units are free to perform any/all normal CCPh activities associated with Melee (i.e., attack, Capture, Withdrawal, etc.). Consider the side that moved first in that scenario to be the ATTACKER. Following the conclusion of the first round of RePh Melee in a Location, each still-concealed unit therein is revealed, each pinned unit therein becomes unpinned, each CX counter is removed, each vehicle currently in Motion therein has its Motion counter removed, and each Stun counter on a vehicle therein is flipped over to its "+ 1" side (the vehicle is still subject to Recall, if applicable, and may be marked as CE if so desired).
9.6011 ORDER OF RESOLUTION: Resolve all Melees in alphanumeric sequence (e.g., A1, then B16, then B17, then C19, etc.).
9.602 MARKER REMOVAL: All hidden/Cloaked units, Entrenchments and Equipment are placed on-map in their present Location [EXC: still-hidden Observers, Emplaced Guns, and Fortifications other than Entrenchments, need not be revealed provided they set up in their current Location for the next CG scenario; such units/Fortifications may set up HIP for the next CG Scenario at no cost in FPP]. All markers/counters listed below are removed from the map at this time (Right of Inspection does not apply to revealed stacks):
a. SR and FFE counters b. SMOKE counters, Sniper counters c. Acquired counters d. DM, Disrupted, Fanatic, Berserk, Wall Advantage, HD markers, Dummy Stacks, Dummy Cloaking Counters, and "?" e. CX, Motion, CE, BU, and Labor markers
9.603 RALLY AND UNLOADING: All currently broken units of both sides automatically rally, even if Disrupted. No DR are made. All Passenger/Rider Personnel and Equipment are then unloaded/unhooked into their vehicle's Location (a unit unloading into an A-P minefield is not immediately attacked, but 9.6042 will apply). When step 9.603 has been completed, CG Scenario End has occurred. Each player should note the final CVP tally from the scenario just completed (and should also note those CVP gained/lost during the RePh) for CG Victory Determination (9.51) and ELR Loss/Gain (9.6202).
9.604 ENCIRCLEMENT, MINEFIELDS, BOG, AND SHOCK
9.6041 ENCIRCLEMENT: Each Encircled unit [EXC: prisoner] must take a separate lTC (Leadership DRM may apply if present and at owner's choice). If it passes its ITC, it remains in the present Location (Encircled markers are not removed until 9.606). Failing the ITC results in the unit's immediate Elimination [EXC: Encircled Vulnerable PRC of an immobile vehicle are Eliminated, leaving the vehicle Abandoned]. CVP are awarded normally. British units failing this TC are not placed in the Walking Wounded Box. Each prisoner that an Eliminated Encircled unit was Guarding must, if possible, be claimed by another unit in that Location friendly to the Eliminated unit. If the prisoner is not claimed, it is considered Rearmed (A20.551) and may automatically possess any Equipment dropped by its Eliminated Guard. Otherwise, any Equipment that an Eliminated Encircled unit possessed is left in the Location unpossessed.
9.6042 MINEFIELDS: Each Mobile vehicle (and its Vulnerable Inherent crew, if required; B28.43) in any type of minefield undergoes the appropriate type(s) of mine attack(s), fully resolved in the normal manner, as if it is attempting to exit the minefield Location [EXC: if the Inherent crew of such a vehicle breaks, it is unloaded in Good Order into the minefield's Location]. Each Infantry unit in an A-P minefield hex (including a previously Inherent crew that just unloaded due to a minefield attack) Must take a NTC (Leadership DRM can apply); failure of the TC causes Casualty Reduction. [EXC to both: A unit theoretically able to exit the minefield hex without being attacked by the mines and without having to enter a minefield/enemy-Controlled Location need not take the NTC.] In all cases, each surviving unit must remain in its respective Location in that minefield hex until its Setup Area is determined in 9.605. CVP for eliminated units are awarded normally.
9.6043 BOG: Each non-Abandoned, Bogged/Mired vehicle must undergo consecutive Bog Removal attempts (D8.3) until it is either unbogged or immobilized (MP expenditure is immaterial). For a British Jeep(a), or if German Vehicle Note L applies to the vehicle, one squad-equivalent (as explained in the Note) in its Setup Area may be used to claim the -2 (-1 per crew or HS) drm to the colored dr of its Bog Removal DR.
9.6044 SHOCK/UK: Each Shocked/UK AFV must undergo consecutive recuperation attempts (C7.42) until either the marker is removed or the AFV is Eliminated. CVP are awarded normally.
9.605 SETUP AREA DETERMINATION: [fn 15] Each side now determines its Setup Area(s) for the next CG Scenario. Setup areas are determined by Control of city blocks. Each side may at any time during/after a CG Scenario place a friendly Location Control marker (supplied in the ABtF counter mix) in a Strategic Location that it currently Controls, especially if that Location's Control might become disputed at some later point. Additionally, during this RePh step (only) Block Control Markers are placed in any convenient area of the map to indicate that a side Controls that Block. Once Control of a Block is gained, by simultaneously Controlling all Strategic Locations within that Block during this step of the RePh, a side retains Control until such time as the opposing side has simultaneous Control of all Strategic Locations within the Block during this step of the RePh. Some Blocks may contain no Strategic Locations. These Blocks are never Controlled. However, Strategic Locations can be created during play. In such cases, these Blocks can then be Controlled and are treated as all other Blocks (so long as at least one Strategic Location remains within the Block). A Location Control marker must be removed (or flipped over) if the Controlling side loses Control of that Location. A non-Strategic Location may still be Controlled (as per A26.11-.12), but does not receive a Control marker. A Setup Area may currently contain no units, but can still have friendly units Shifted into it unless otherwise prohibited (9.613). Block Control is determined (and can change) only as a result of this step [EXC: Block Control Forfeiture; 9.6051]. The Blockhouse is always a valid Friendly Setup Area for the side that controls it (even if it has been destroyed, but not once its Rubble has been cleared; 5.2-.22).
9.6051 BLOCK CONTROL FORFEITURE: If at any point in the RePh armed, non-crew MMC of one side occupy one or more Strategic Locations within a Block while there are no armed, enemy, non-crew MMC within that Block (in any Locations, Strategic or otherwise), Control of that Block immediately switches to (or remains with) the side occupying the Block. The Block (and all Locations within it) is now considered Controlled by that side. Thus in such a case the requirements of 9.6053-.6054 will be NA. Units within the boundaries of that Block now consider it to be a valid Setup Area.
9.6052 UNCONTROLLED TERRITORY: As each side determines its Setup Area(s), there will be portions of the map that are not bounded by either side's setup area. These will primarily be road hexes and those areas not containing any Strategic Locations. No Units may set up in these hexes [EXC: Initial CG Scenario; Vehicles and Emplaced Guns may do so, provided the Location is within 2 hexes of a Friendly Setup Area; The Blockhouse]. Uncontrolled Territory may contain one or more Strategic Locations under certain conditions.
9.6053 ISOLATED UNIT: An Isolated unit/Weapon is one in a Location not contained within the boundaries of a Block Controlled by that side. Each Isolated Personnel/Mobile-vehicle unit (and its portaged/possessed/towed Equipment [EXC: non-dm Guns]) at scenario end is Retained into the nearest (along the shortest path of contiguous, Enterable, Uncontrolled Territory hexes) Friendly Setup Area or Eligible Entry Area; unit's owner's choice of Area if equidistant. Each SW/Gun may be freely (un)hooked/Eliminated/Transferred/dismantled. Each Personnel/Mobile-vehicle unit unable to trace such a path is required to attempt Escape. Each immobile vehicle becomes Abandoned, and its crew (if any) is then either Retained (if it can trace such a path) or required to attempt Escape [EXC: If the immobile vehicle is in Uncontrolled Territory, it remains in its current Location and VCA. It may, at the owner's option, be Abandoned (and turned into a (Burnt-out) wreck and may be Scrounged) and the crew is then Retained]. Emplaced guns in Uncontrolled Territory may remain in their current Location provided that Location is ≤ 2 hexes from any hex within a Friendly Setup Area. Non-dm Guns in an Enemy Setup Area, or in Uncontrolled Territory ≥ 3 hexes from a Friendly Setup Area, are left unpossessed in their current Location and the crew is then either Retained or must attempt escape.
EX: Block C is currently under British Control. At the end of the 18N CG Scenario, the German player has managed to take Control of all Locations within this Block with the exception of that occupied by the British 3-3-8 and wounded 7-0 leader in hex n. Since the German does not Control all Strategic Locations within the Block, the German units are Retained into a Friendly Setup Area and are removed from the Block. The immobilized PzKpfw IIIL must be Abandoned, but the crew will be Retained. None of these units will be required to Escape since they will be able to trace a path of Uncontrolled Territory hexes to a Friendly Setup (or Entry) Area along the road. The British player retains Control of the Block and regains Control of all Locations within it.
9.6054 ESCAPE: Each still-Isolated unit must now attempt Escape. If > one Personnel unit in the same Location wishes to Escape, they may combine into one or more stacks; each stack then makes its own DR on the Escape table. All such stacks must be predesignated prior to making any Escape DR for that Location. Each squad stacked with a Leader may freely Deploy. Prior to its possessor's Escape attempt, each SW/Gun may be dropped or freely (un)hooked/Eliminated/Transferred/dismantled. A non-dm Gun can never Escape [EXC: if hooked up to a mobile vehicle which successfully escapes].
9.60541 ESCAPE RESULTS: If a unit survives the Escape attempt, it and all Equipment it took with it are Retained into a Friendly Setup Area or off-map at an Eligible Entry Area-whichever is nearest in a path of contiguous, Enterable, Uncontrolled-Territory/Enemy-Setup-Area hexes (Escapee's choice if two such Areas are equidistant). If a unit is Eliminated (via Replacement/Casualty-Reduction) while escaping, all Equipment it took with it is Eliminated on a subsequent dr of 4-6; on a dr of 1-3 the Equipment is left in the Eliminated unit's last-occupied Location. CVP for eliminated units are awarded normally.
ESCAPE TABLE
| Final DR | Infantry | Mobile Vehicle |
|---|---|---|
| ≤ 8 | Escapes [et 1] | Escapes |
| 9 | Escapes, Replaced [et 2][et 3] | Abandoned [et 4][et 5]; crew (if any) Escapes |
| 10 | Escapes, Casualty Reduced [et 3] | Eliminated [et 6]; crew (if any) Escapes |
| 11 | Escapes, Replaced [et 2][et 3], then Casualty Reduced | Abandoned [et 4][et 5]; crew (if any) Eliminated |
| ≥ 12 | All units/weapons Eliminated | Eliminated; crew (if any) Eliminated |
[et 1] An Original 2 DR results in Escape and Heat of Battle for an eligible unit (A15): use Random Selection to determine the unit(s) affected in a stack [EXC: any result other than Hero-Creation or Battle-Hardening (i.e., Berserk/Surrender) results in the unit(s) Elimination].
[et 2] A crew, or unit which would otherwise become Disrupted, is Eliminated instead.
[et 3] Use Random Selection for a stack.
[et 4] The surviving crew may turn the vehicle into a (Burnt-out) wreck.
[et 5] In its current hex and VCA: the surviving crew may attempt to Scrounge the vehicle/wreck.
[et 6] The surviving crew may attempt to Scrounge the vehicle prior to its Elimination.
ESCAPE DRM:
- -1 lone unwounded SMC
- -1 Vehicle other than a CT AFV
- -1 just completed CG Date was Night (N)
- -2 CT AFV
- +x (Armor) Leader/Hero DRM (NA to Leader/Heroes escaping alone)
- +1 per multiple of two Uncontrolled-Territory/Enemy-Setup-Area hexes required to reach a Friendly Setup Area (FRU)
- +1 per HS-equivalent > 1 HS escaping with the same DR†
- +1 per PP > IPC carried (the unit carrying the most excess PP determines DRM for a stack; a Leader may combine with an MMC to increase that MMC's IPC provided the Leader and the MMC escape using the same DR)†
- +1 unarmed†, wounded†, Walking Wounded†, captured vehicle (each occurrence)
- +2 Encircled†
† NA to vehicle Escape attempt
9.6055 MARKING THE MAP: Included in the ABtF module is a reduced-size map. Each side should now record its Setup Area(s) on a new photocopy of the reduced-size map. Both sides outline (using different color pens, but on the same photocopy) each Block Controlled by them, removing the Retained units contained in each (taking care to not mix units from different Setup Areas). Once all Blocks have been indicated, mark all Uncontrolled Territory hexes using another color (suggestion: a yellow "highlighter"). Once all Setup Areas have been correctly marked, they remain thus until the start of the next CG scenario.
9.606 ENCIRCLED-MARKER REMOVAL: All Encircled markers are now removed.
9.607 EQUIPMENT POSSESSION AND HIDDEN FORTIFICATIONS
9.6071 IN SETUP AREA: Each piece of Equipment in a Setup Area is Retained (as Captured, if applicable) therein by the side Controlling that Setup Area. At its (new) owner's option, each such piece may be Eliminated by any Personnel (even an Abandoning crew) Retained in that Setup Area, and each such vehicle may be Abandoned, etc. exactly as per 9.6053. Each unpossessed/Abandoned Equipment piece in a Setup Area may remain unpossessed/Abandoned (in which case it retains its present CA), or may be automatically repossessed/remanned and operated (as per A21.11-.13, A21.21-22, D5.42 or D6.631) by Personnel Retained in that Setup Area. Each immobile vehicle must remain in its present Location and VCA until such time as it becomes Mobile.
9.6072 NOT IN SETUP AREA: All unpossessed/Abandoned Equipment in Uncontrolled Territory must remain in its present Location (and vehicle/Gun CA) until Eliminated or repossessed/remanned in (or after; 9.6071) a subsequent scenario. Each immobile vehicle must remain in its present Location and VCA until such time as it becomes Mobile.
9.6073 HIDDEN FORTIFICATIONS: Each still-hidden Fortification within a Setup Area of the purchaser's opponent is placed on-map. Each such minefield is marked by placing a Minefield counter to reveal its presence but not its strength/type. Each on-map Fortification (i.e., from previous CG Scenarios) is Controlled by the side (if any) Controlling its Location.
9.608 PRISONERS: Each prisoner unit is now removed from play. No additional CVP are awarded. Each unarmed unit not currently assigned to a Guard is Rearmed (A20.551) and Retained into any Friendly Setup Area (no Escape DR is necessary).
9.609 EXTINGUISHING FLAMES AND BLAZES: Each building/rubble Location currently marked with a Flame/Blaze counter is considered fully consumed by the fire. Players must remove each Flame/Blaze counter and make the appropriate terrain alterations when performing the following sub-steps (9.6091-.6095):
9.6091 BURNING WRECK: Each Burning Wreck has its Blaze marker removed [EXC: if that wreck is in Rubble or IN (not bypassing) a building/woods obstacle, move the Blaze marker to the building/rubble/woods so that it is now a terrain Blaze and mark it with a Pin counter to show that the Location begins the next CG Date with this terrain Blaze in place]. Replace the wreck with a Burnt-out Wreck.
9.6092 WOODEN RUBBLE, ORCHARD, WOODS: Remove the Flame/Blaze (and rubble if applicable), and place a shellhole counter in the hex. All other previous terrain in the hex is eliminated (each vehicle/wreck in the hex becomes a Burnt-out Wreck).
9.6093 STONE RUBBLE: Remove the Flame/Blaze marker. The stone rubble still exists (each vehicle/wreck in that Location becomes/remains a Burnt-out Wreck), and the Location may catch Fire again in a later scenario.
9.6094 BUILDING: Place the correct rubble counter at ground-level in each building hex that has at least one Flame/Blaze in any of its Locations, removing each Flame/Blaze marker. Any Cellar Location in the hex no longer exists. Such rubble may catch Fire again in a later scenario.
9.6095 ELIMINATIONS: All Fortifications/Equipment in what were (as per 9.6092-.6094) building/rubble Flame/Blaze Locations (including all building Locations just rubbled as per 9.6094) are Eliminated. All (Burnt-out) wrecks in buildings just rubbled as per 9.6094 are Eliminated.
WOUNDED LEADER TABLE
| Final DR | Result |
|---|---|
| ≤ 1 | Retained unwounded |
| 2-4 | Retained wounded |
| ≥ 5 | Eliminated |
DRM:
- -1 British
- -1 Heroic
9.610 WOUNDED LEADERS AND WALKING WOUNDED MMC
9.6101 WOUNDED LEADERS: Each side makes a dr on the following table for each currently wounded Retained leader:
9.6102 WALKING WOUNDED MMC: The British player now determines how many (if any) Walking Wounded MMC are recovered as per SSR CG 19. These MMC are placed in any Friendly Setup Area(s).
9.611 RECOMBINING AND BATTLE HARDENING
9.6111 RECOMBINING: All Retained same-class and-for Commandos and Engineers-same type HS with identical Strength Factors (and Walking Wounded status) within the same Setup/Entry Area must now recombine (A1.32) so that no more than one of each HS type is retained in that Area [EXC: each side may retain one HS per SW MTR/PSK/PIAT Retained even if that SW is currently malfunctioned].
9.6112 HEROS & MMC: On each side, each Retained hero [EXC: Leader; 9.6113] is Eliminated; however, each such Elimination enables that side to Battle Harden one non-crew MMC of the owner's choice within the same Setup/Entry Area as that hero [EXC: if no MMC are available to Battle Harden the Hero is Retained in that Setup/Entry Area]. Elite MMC that Battle Harden become Fanatic (but only for the duration of the next CG Scenario). No MMC may Battle Harden more than once per RePh.
9.6113 LEADERS: On each side, each Retained heroic Leader Battle Hardens and loses his heroic status [EXC: a heroic 10-3 loses his heroic status with no additional effect].
9.612 NEW CG DATE AND SAN ADJUSTMENT
9.6121 NEW CG DATE: Each passage of this RePh step represents the start of a new CG Date.
9.6122 SAN ADJUSTMENT: Each side must determine if the SAN of their side must be reduced for the current CG Scenario. A side whose SAN is currently < 2 has it automatically raised to 2 (no CPP expenditure is necessary).
9.61221 BRITISH SAN: If the British SAN is ~ 4 [as printed; the source uses "~" where the comparison appears to be "≥"], a SAN adjustment dr must be made with a +drm equal to the current British SAN minus four. A Final dr ~ 4 [as printed] immediately reduces the British SAN by two.
9.61222 GERMAN SAN: If the German SAN is ~ 5 [as printed], a SAN adjustment dr must be made with a +drm equal to the current German SAN minus five. A Final dr ~ 4 [as printed] immediately reduces the German SAN by two.
9.613 SHIFT: A Personnel/Mobile-vehicle unit (or group of such) Retained in a Setup Area may attempt to Shift to another Friendly Setup Area (or - if German - an Eligible Entry Area). A unit/group that wishes to Shift from a Setup Area must be able to trace a path (of any length) of contiguous Enterable (by all units of the Shifting group), Uncontrolled-Territory/Friendly-Setup-Area/Eligible-Entry-Area hexes from any friendly-Controlled hex of that Setup Area to any hex of the Area to which it is attempting to Shift. A unit/group may not Shift from an Entry Area. Each non-WW MMC may portage ≤ five PP, WW MMC may portage ≤ 3 PP, and each SMC may portage ≤ two PP [EXC: a wounded SMC can portage nothing]. Prior to its possessor's Shift (attempt), each SW/Gun may be dropped or freely (un)hooked/Eliminated/Transferred/dismantled. A non-dm Gun can not be Shifted [EXC: if hooked up to a mobile vehicle which successfully Shifts]. For each Leader attempting to shift, 3 squads may automatically deploy. Make a separate Secret DR on the following table for each unit/group attempting to Shift. Only one Shift attempt may be made per unit/group per CG Date, and all units attempting to Shift from the same, and to the same new, Entry or Setup Area must do so as a single group. A German unit/group that Shifts to an Eligible Entry Area may subsequently enter play at that Entry Area.
SHIFT TABLE
| Final DR | Result |
|---|---|
| ≤ 8 | Successful Shift |
| 9-10 | Failed attempt [tn 1] |
| 11 | Successful Shift, Casualty Reduction [tn 2] |
| ≥ 12 | Failed attempt, all units/weapons Eliminated [tn 3] |
[tn 1] Unit/group cannot Shift (the orders were not received or could not be carried out). Unit(s) may not attempt to Shift again until the next RePh, and must remain in its current Friendly Setup Area, though it may participate normally in the next CG Scenario.
[tn 2] Each Personnel unit suffers Casualty Reduction on a subsequent dr ≥ 4. Each vehicle is Eliminated on a subsequent dr ≥ 4; if Eliminated, make a CS DR for its Inherent crew (Casualty Reduction for surviving crews is NA) and remove the vehicle from play (no wreck is placed). Scrounging is NA. Roll separately for each unit. Equipment which becomes unpossessed as a result of Casualty Reduction of its possessor is Eliminated.
[tn 3] Enemy units detect the attempt and setup an ambush. Crew Survival and wreck placement for eliminated vehicles is NA.
SHIFT DRM:
- -1 Previous CG Date was Idle (British only)
- -2 British
- +1 Per multiple of two Uncontrolled Territory hexes along the path between the current Setup/Entry Area and the desired Area (FRD)
(Table notes [tn 1]-[tn 3] are the notes printed beneath the Shift Table.)
9.6131 VACATED SETUP AREA: If the last unit in a Friendly Setup Area is Eliminated or successfully Shifts elsewhere, each Location of that Setup Area remains Controlled by the last Controlling (i.e., by the vacating) side.
9.614 EQUIPMENT REPAIR AND REPLENISHMENT
9.6141 VEHICLES: Each side performs the applicable step(s) below for each friendly vehicle. CVP for Eliminated units are awarded normally.
a) ABANDONED: Each Abandoned vehicle in a Friendly-Setup/Eligible-Entry Area may remain Abandoned, or may be remanned and operated (as per A21.22 or D5.42/D6.631) by Personnel Retained within the same Setup Area. Abandoned vehicles in Uncontrolled Territory (including Front Line road hexes) remain Abandoned and may be captured (and remanned) only during play.
b) IMMOBILIZATION REPAIR: Each non-captured, non-Abandoned, immobilized vehicle must make a dr on the following table to determine if the immobilization is repaired:
IMMOBILIZATION REPAIR TABLE
| Final DR | Result |
|---|---|
| 1-2 | Vehicle becomes mobile [ir 1] |
| ≥ 3 | No effect |
[ir 1] And is Retained in its current (or nearest) Friendly Setup Area.
IMMOBILIZATION REPAIR DRM:
- +1 Only Non-Qualified Use (A21.13) possible
- +1 Vehicle is in a Front Line Location/Uncontrolled Territory
- +x Armor Leader
c) AFV RECALL: Each Mobile, Retained AFV under Recall is removed from play. CVP for Recalled AFV which ended the CG Scenario on map are awarded normally. No CVP are awarded for Recalled AFV which exited the map during play.
d) STUNNED: A side Retaining a vehicle suffering the results of a stun (small stun; D5.34) must make a dr on the following table to determine if the vehicle recovers from the stun result:
VEHICLE STUN RECOVERY TABLE
| Final DR | Result |
|---|---|
| 1-2 | Recovers; remove stun |
| 3-5 | Retain stun |
| 6 | Eliminated [st 1] |
[st 1] Full CVP awarded; wreck placement and Crew Survival are NA.
9.6142 WEAPON REPAIR: Each side now makes a separate dr on the table below for each malfunctioned, non-captured, Retained weapon in each friendly Setup/Entry Area that contains Personnel (or, for a vehicular Weapon, an Inherent crew in that vehicle):
WEAPON REPAIR TABLE
| Final DR | Result |
|---|---|
| ≤ 1 | Repaired |
| ≥ 2 | Eliminated [wr 1] |
[wr 1] If vehicular-mounted, the Weapon is disabled: if MA, the AFV is immediately Recalled (9.6141c applies) (i.e. re-perform 9.6141c; the vehicle is assumed to have ended the scenario on-map); if a Gun, the Gun is eliminated with full CVP awarded.
WEAPON REPAIR DRM:
- -1 vehicular-mounted
- -x Weapon Repair Number
- -y Armor Leader Leadership Rating (if vehicular mounted and the Armor Leader begins the next CG scenario manning this vehicle)
- +1 if only Non-Qualified Use (A21.13) possible
EX: A German Panther MA repairs on an original dr of ≤ 3. If the German player had a Retained 9-2 Armor Leader (and that Armor Leader was assigned to that Panther for the upcoming CG Scenario), the MA would repair on any original dr other than 6.
9.61421 VEHICULAR-MG EXCHANGE: A disabled, non-captured, vehicular MG may be automatically repaired (even if disabled in step 9.6142) by Eliminating a friendly SW LMG. In all cases, the MG to be Eliminated must be Retained within the same Setup/Entry Area as the AFV.
9.61422 ABANDONING, SCROUNGING, & REMOVAL: At the Controlling player's option, any non-Recalled vehicle in each Friendly Setup Area may be Abandoned and/or turned into a (Burnt-Out) wreck. Likewise, he may attempt to Scrounge any Abandoned-vehicle/non-Burnt-Out-wreck in each Friendly Setup Area. [EXC to all: Such actions are NA unless one Personnel unit (even an abandoning crew) is Retained in that Setup Area.]
9.6143 CAPTURED EQUIPMENT: The German player (only) now makes a separate dr for each of his functioning, captured, Retained Weapons in each Friendly Setup/Entry area that contains Personnel; if ≥ 4 it is Eliminated (disabled if vehicular). MA disabled by either of these means does not cause Recall. At its captor's option, a captured vehicle may remain in play if it has any functioning Weapon (even if MA is disabled); otherwise it is replaced with a Burnt-out Wreck. No CVP are awarded for Eliminated Weapons.
9.6144 SPECIAL AMMO: Each non-captured Weapon which has some form of depleted ammunition type may make a dr on the following table for each type of special ammunition which is depleted in order to attempt to resupply that type of special ammunition for that Weapon:
SPECIAL AMMO RESTORATION TABLE
| Final DR | Result |
|---|---|
| ≤ 3 | Restores special ammunition type |
| ≥ 4 | Ammo remains depleted |
SPECIAL AMMO RESTORATION DRM:
- +x current level of Ammunition Shortage (SSR CG 17) (British Only)
- -1 German
9.615 OB-GIVEN REINFORCEMENTS: During the RePh, it is possible that one/both sides will receive OB-given Reinforcements. These units may enter/setup as specified below and are in addition to the CG (Date) Maximums listed in the RG Charts. Strength, Leaders, and SW-Allotment are determined normally. See RG Chart notes.
9.6152 REINFORCEMENT SCHEDULE
| CG Date | British | German |
|---|---|---|
| 18AM | I11, I21, SAN +24 | 20 FPP2, SAN -15 |
| 18PM | G11,2, A11, SAN -15 | SAN +24 |
| 19AM | I13, I23 | |
| 20AM | SAN +14 |
Key to the schedule (the trailing digits in the cells are the key numbers below):
- 1 Enters on/after Turn 1 from any British Entry Area
- 2 Available for on-map setup
- 3 Enters on/after Turn 1 from any German Entry Area
- 4 SAN 7 maximum (effective at start of scenario)
- 5 SAN 2 minimum (effective at start of scenario)
9.6151 REINFORCEMENT ENTRY AREAS: Each Reinforcement unit listed in 9.6152 will be assigned an Eligible-Entry-Area or will be specified for on-map setup. The reinforcements entering the map this CG Date must enter/setup as listed. All/some/none may enter on any turn but those failing to enter/setup during the next non-Idle CG Scenario are Eliminated. Normal CVP are awarded for such units. These reinforcements are in addition to those listed in the RG Charts and never count against the CG Date or CG Maximums.
9.616 CPP REPLENISHMENT: CPP are replenished according to the following formula: the CPP Base # (9.6161) plus CG CPP Variable Arrival Points (9.6162) equals the final amount of CPP replenished.
9.6161 CPP BASE NUMBER: The CPP Base #s for the current CG Date is indicated in the CPP Base Number Chart.
9.6162 CG CPP VARIABLE ARRIVAL POINTS: Both players make a secret DR and add the DR to the CPP Base # to determine the total CPP received for the current CG Date.
CPP BASE NUMBER CHART
| CG Date | British | German | Campaign Exhaustion DRM |
|---|---|---|---|
| 17N | - | - | 0 |
| 18AM | 20 | 15 | 0 |
| 18PM | 25 | 15 | 0 |
| 18EVE | 15 | 20 | +1 |
| 18N | 5 | 20 | +1 |
| 19AM | 5 | 25 | +1 |
| 19PM | 0 | 25 | +1 |
| 19EVE | 0 | 30 | +2 |
| 19N | 0 | 30 | +2 |
| 20AM | 0 | 25 | +2 |
| 20PM | 0 | 20 | +2 |
| 20EVE | 0 | 20 | +3 |
| 20N | 0 | 10 | +3 |
| 21AM | 0 | 10 | +3 |
| 21PM | 0 | 10 | +3 |
| 21EVE | 0 | 10 | +4 |
9.617 PURCHASING REINFORCEMENT GROUPS: Both players now secretly allot CPP for the purchase of RG. All CPP expended are subtracted from the current CPP total. CPP not spent are divided by two (FRU) and recorded on the CG Roster in the "Left" column. The CPP expended, those remaining, and the RG(s) purchased may all be kept secret. The players consult their RG chart for the different types of RG historically available, the CPP cost of each, the number of each that may be purchased during the course of the CG, and any applicable notes. As each RG is selected, record its ID (and the CPP expended to purchase it) in the "RG Purchased" column on the line for the current CG Date on the CG Roster. After all the RG are selected, write the total CPP expended in the "Spent" column of the CG Roster for the current CG Date; then write the number of CPP remaining (after the above modification), even if zero, in the "Left" column for the current CG Date. These CPP may be used to purchase further RG in step 9.6171 of any subsequent RePh.
The RG chart contains the following information:
9.6171 ID: Provides an alphanumeric identification for each RG.
9.6172 GROUP TYPE: Lists the name of the RG. This name and its ID are secretly recorded on the RG Purchase Record (9.6178). The British player should secretly record the ID of Commando/Engineer MMC. [fn 16]
9.6173 CPP COST: Lists the CPP cost of the RG (regardless of its later-determined Strength). This is the number of CPP that must be subtracted from the current CPP total in order to receive that RG.
9.6174 UNITS REC'D FULL/DEPL: Lists the type(s) and quantity of units that each RG contains.
9.6175 CG DATE MAX: Lists the maximum number of RG of this type that may be purchased per CG Date (note that these limits are per CG Date and not calendar date).
9.6176 CG MAXIMUM: Lists the maximum number of RG of this type that may be purchased during the course of the CG. The players must keep a written record (using the 9.6178 RG Purchase Record) of each RG purchased during the CG in order to know if additional RG of that type are still available for purchase. RG listed as reinforcements during any CG Scenario never count against this maximum.
9.6177 NOTES: Special restrictions or comments about the RG.
9.6178 RG PURCHASE RECORD: After all RG for the current CG Date have been selected and CPP expended for them, the RG Purchase Record must be updated. One line of this sheet must be filled out for each RG purchased in order to keep track of the number purchased thus far in the CG. If preparing for a CG Initial Scenario, one line is also filled out for each RG given in the Initial Scenario OB (but these latter do not apply towards RG purchase limits). The following listing explains how each column of the RG Purchase Record is used.
CG Date: The CG Date the RG is purchased (e.g., 18PM).
RG ID: The RG's alphanumeric ID and KG from which it was purchased (German Only) (e.g., I1(K) for a German SS Infantry Platoon from KG Knaust).
Group Type: The RG's name (e.g., Para Pltn).
#P (Number Purchased): The total number of friendly RG of this Group Type purchased thus far during the CG.
#R (Number Remaining): The number of this RG Group Type still available for subsequent purchase in the CG. This number is derived by subtracting the number in that RG's #P column from the number listed in the "Maximum" column (for that RG for that CG) in the RG Chart.
Str: The RG's strength, as determined in RePh step 9.6181. Record "F" for a Full, "D" for a Depleted, RG.
Units (number): The number of units received in that RG of the Unit Type listed in the respective RG Chart (e.g., "3" for a Full Strength Commando Pltn), and the unit type.
SW Received: As each SW for that RG is determined (RePh step 9.6182), record the number and type of each Weapon received.
Leader: As each eligible RG's (Armor) Leader(s) is determined (RePh step 9.6183) record his A10.7/D3.4 Strength Factor.
9.618 RG STRENGTH, WEAPONS, LEADERS, AND COMPOSITION
9.6181 RG STRENGTH: For each RG eligible for Depletion that was just purchased (as well as for each such RG received in an Initial Scenario or during a RePh without purchase), make one secret DR on the RG Strength Table to determine whether it is received at Full or Depleted Strength. A Full Strength RG receives the number of specified units to the left of the "/", a Depleted RG receives the number of specified units to the right of the "/".
RG STRENGTH TABLE
| Final DR | Result | DRM | |
|---|---|---|---|
| ≤ 9 | Full | -2 | British |
| ≥ 10 | Depleted | +1 | German VG Pltn |
| +x/2 | Campaign Exhaustion DRM (FRD) |
9.6182 SUPPORT WEAPON ALLOTMENT: Determine the number of SW received by each Infantry-type RG listed on the appropriate "Infantry-Type SW Chart." A Full Strength RG automatically receives all SW indicated. A Depleted RG must make a secret dr ≤ the number listed in parentheses for each indicated SW in order to receive it. Record each SW received in its appropriate column on the RG Purchase Record on that RG's line. Each SW must set-up/enter with a unit of its RG.
BRITISH INFANTRY-TYPE SW CHART
| RG | LMG | PIAT | FT | DC | Lt. Mtr (a) |
|---|---|---|---|---|---|
| I1 | 1(5) | 1(3) | |||
| I2 | 1(5) | 1(3) | |||
| I3 | 1(5) | 1(3) | 1(3) | ||
| I4 | 1(5) | 1(2) | 2(3) |
(a) The light mortars are standard (i.e., non-airborne) versions of the OML 2-in Mortar.
GERMAN INFANTRY-TYPE SW CHART
| RG | LMG | PSK/Lt. Mtr (*) | FT | DC |
|---|---|---|---|---|
| I1 | 1(3) | *(2) | ||
| I2 | 1(2) | 2(3) | ||
| I3 | 1(1) |
(*) Make a secret dr; 1-2 RG receives a Lt. Mtr, 3-6 RG receives a PSK.
EX: The German player purchases 2 SS Rifle Pltns (one depleted) and a full strength Volksgrenadier Pltn. The full strength SS Rifle Pltn receives a LMG and either a Lt. Mortar (with a subsequent dr of 1-2) or a PSK (subsequent dr of 3-6). The Volksgrenadier Pltn receives one LMG. The depleted SS Rifle Pltn makes a dr to determine which SW (PSK or Lt Mtr) is available. Assume a 4 was rolled (making a PSK available). He then makes a dr for each possible SW. The LMG will be received if its dr is ≤ 3 while the PSK will be received if its dr is ≤ 2.
9.6183 LEADER ALLOTMENT: For each indicated purchased/OB-Given "I" or "A" type RG, make one secret DR on the appropriate column of the following Leader Table to determine the type of Leader received with that RG. Each newly-received Leader must setup/enter with a unit of his respective RG.
LEADER TABLE
| Final DR | British | German | (Armor) |
|---|---|---|---|
| < 2 | 10-3 | 10-2 | (10-2) |
| 2 | 10-2 | 10-2 | (9-2) |
| 3 | 9-2 | 9-2 | (9-1) |
| 4 | 9-2 | 9-1 | (9-1) |
| 5 | 9-1 | 9-1 | (8-1)† |
| 6 | 9-1 | 8-1 | |
| 7 | 8-1 | 8-1 | |
| 8 | 8-1 | 8-0 | |
| 9 | 8-0 | 8-0 | |
| 10 | 7-0 | 7-0 | |
| ≥ 11 | 6+1 | 7-0 |
† If selected for a Hvy Tank Pltn, replace with a 9-1 A.L.
LEADER TABLE DRM
| British | German | ||
|---|---|---|---|
| -1 | Commando | -1 | SS PG, SS Recon, Med Tank |
| -2 | Engineer | -2 | Engineer, Hvy Tank |
| +1 | Glider | +1 | SPG, Lt Tank |
| +2 | VG, AC |
9.6184 GERMAN VEHICLE GROUP COMPOSITION: For each German A2, A3, A4, or A6 RG purchased [EXC: A4 and A6 RGs available from KG Graebner] make a dr on the appropriate table below to determine the exact composition of the RG.
A6
| DR | Vehicles |
|---|---|
| 1-2 | SPW 250/9 x2; SdKfz 10/4 x1 |
| 3-4 | SdKfz 7/1 x1; SdKfz 6/2 x2 |
| 5 | SPW 250/9 x1; SdKfz 6/2 x1; SdKfz 10/4 x1 |
| 6 | SdKfz 10/4 x1; SdKfz 7/1 x1; SdKfz 6/2 x1 |
A4
| DR | Vehicles |
|---|---|
| 1 | StuH 42 x2 |
| 2 | StuG IIIG(L) x2 |
| 3-5 | StuG IIIG(L) x1; StuH 42 x1 |
| 6 | StuG IIIG(L) x3 |
A3
| DR | Vehicles |
|---|---|
| 1 | PzKpfw VIB x1; PzKpfw VIE(L) x1 |
| 2-4 | PzKpfw VIE(L) x2 |
| 5 | PzKpfw VIE(L) x1; PzKpfw VIE x1 |
| 6 | PzKpfw VIE x2 |
A2
| DR | Vehicles |
|---|---|
| 1 | PzKpfw VG x2 |
| 2-3 | PzKpfw IVJ x2 |
| 4-6 | PzKpfw VG x1; PzKpfw IVJ x1 |
9.619 PURCHASING FORTIFICATIONS: Fortifications, which are obtained by spending FPP, may be purchased on each CG Date if the player has the requisite FPP (either given as a reinforcement in the initial CG Scenario or as per 9.615, or purchased). All FPP unspent upon completion of this step are forfeit. As Fortifications are selected, the specific type (and strength, if mines) must be recorded in the "FORTIFICATIONS" area of the CG Roster.
FORTIFICATION PURCHASE TABLE
| Fortification Type | FPP | Notes |
|---|---|---|
| Trench | 6 | - |
| Foxhole | 3/2/1 | 1, F |
| A-P minefield factor | 3/6 | 2 |
| A-T Mine factor (British Only) | 4 | 2, 3 |
| Wire (German Only) | 10 | 7 |
| Fortified Location | 10 | 4, F |
| Breach | 5 | B, F |
| HIP | 3/2/1/1 | 5, F |
| "?" | 1 | 6, F |
Table notes:
- For 3-, 2-, and 1-squad capacity respectively.
- German/British FPP cost respectively. Each side may purchase no more than 12 A-P minefield factors (and, for the British, 2 A-T Mines) per CG Date. The British may not purchase more than 8 A-T Mines during any CG. During setup, the strength of friendly-Controlled, pre-existing minefields may be increased by adding extra A-P/A-T mine factors to them (though only in allowed increments and to allowed maximums). Minefields may not be decreased in this manner. Minefield factors purchased on the above Table may never be exchanged for Boobytrap capability (B28.9). Exchanging A-P minefield factors for A-T Mines (B28.5) is NA.
- Includes Daisy Chain.
- Per building Location; tunnels are NA.
- Squad/HS/crew/SMC cost respectively. No more than 10% (FRU) of a side's Retained/Just-Purchased Infantry squads (plus all SW/SMC set up with them in the same Location) may set up using HIP in a daytime scenario. The 25% allocation for a Scenario Defender at night (E1.2) costs no FPP. AFV HIP is NA. Guns, and their manning crew may set up using HIP per SSR CG 5. In all cases, the allowable percentage is calculated separately for each Setup Area.
- See SSR CG 12.
- HIP NA [EXC: Night CG Scenario]. B. Only the British may purchase this type of Fortification. F. Only those Fortifications marked with a "F" may be setup in a Front Line Location [EXC: neither the Blockhouse nor the rubble from its destruction (5.2) is ever considered a Front Line Location for purposes of this note].
AMMUNITION SHORTAGE AND ELR LOSS/GAIN DETERMINATION
9.6201 BRITISH AMMUNITION SHORTAGE DETERMINATION: Commencing on the 19AM CG Date (and every CG Date thereafter) the British player makes a DR on the following table to determine the Level of ammunition shortage (SSR CG 17) suffered for the current CG Date [EXC: This step is not performed if the previous CG Date was Idle; 9.62132].
AMMUNITION SHORTAGE LEVEL CHANGE
| Final DR | Result |
|---|---|
| ≤ 9 | No Change |
| ≥ 10 | Shortage increases one Level |
DRM:
- +x Campaign Exhaustion DRM
- +(y-1) Number of British Attack Chits selected during this CG (minimum of 0) (see 9.5, 9.52, SSR CG 3, 9.62132)
9.6202 ELR LOSS/GAIN: Each player makes a DR on the following table to determine the effects (if any) on his side's ELR for the current CG Date.
ELR LOSS/GAIN CHART
| Final DR | Result |
|---|---|
| ≤ 2 | ELR +1 |
| 3-12 | No Change |
| ≥ 13 | ELR -1 |
DRM:
- -1 Per 30 CVP (FRD) of enemy units Eliminated during the last CG Scenario (including CVP awarded thus far during this RePh)
- -3 Per Idle CG Date since the last CG Scenario
- +1 Per CG Scenario since the last Idle CG Date
- +1 Per Attack Chit selected by that side since the last Idle CG Date
- +x Campaign Exhaustion DRM (British Only)
- +y/2 Campaign Exhaustion DRM (FRD) (German Only)
- +z British Ammunition Shortage Level DRM (British Only)
EX: It is the 21PM CG Date. The British player chose an Attack Chit on 21AM and inflicted 42 CVP on the Germans. There was an idle CG Date on 20N. The British are under Ammunition Shortage Level 2. The British player's DRM total will be +7 (-1 for CVP, +1 for the 21AM CG Scenario, +1 for the Attack Chit used on 21AM, +4 for Campaign Exhaustion, and +2 for British Ammunition Shortage). The German player inflicted 38 CVP and also selected an Attack Chit on 21AM. The German player's DRM will be +3 (-1 for CVP, +1 for the 21AM CG Scenario, +1 for the Attack Chit used on 21AM, and +2 for Campaign Exhaustion).
9.621 SCENARIO COMMENCEMENT
9.6211 CG SCENARIO VICTORY CONDITIONS: In ABtF, the individual CG Scenarios have no specific Victory Conditions. A player does not "win" or "lose" a CG Scenario. Rather, the CG Scenarios are intended to position the players for the over-all CG Victory Conditions.
9.6212 SUDDEN DEATH VICTORY: The Germans win any CG at the end of any CG Scenario Game Turn by Controlling all Strategic Locations within Block H (see the Chapter R Divider).
9.6213 INITIATIVE DETERMINATION: Each side selects its Initiative for the current CG Date, either to "Attack" or stand "Idle", representing its desired tactical plans.
9.62131 CHIT UNITS: Each CG (9.51-.53) lists the maximum number of Attack and Idle Chits (9.62132) each side may select during the course of that CG. There is no limit otherwise on selecting Attack/Idle Chits on consecutive CG Dates.
9.62132 PROCEDURE: Each side takes its respective Initiative Chit and secretly places it on the playing area, hidden from the opponent's view, with the chit's face-up side displaying the side's Initiative selection (i.e., either an Attack Chit or an Idle Chit) for the next CG Scenario. The counters are then revealed simultaneously and cross-indexed on the following matrix to determine if a new CG Scenario is generated and, if so, what type it will be. Both players should note on a side record the chit selected and the total of each type used thus far in the CG for Ammunition Shortage (9.6201) and ELR Loss/Gain (9.6202) purposes.
INITIATIVE MATRIX
| Chits Selected | British Attack | British Idle |
|---|---|---|
| German Attack | Dual Assault [im 1] | German Assault [im 1] |
| German Idle | British Assault [im 1] | Idle CG Date [im 2] |
[im 1] Scenario generated; consult proper scenario type below for further information.
[im 2] No scenario generated for this CG Date; each side repeats RePh steps 9.612-.620.
9.62133 SCENARIO TYPES
a) Dual Attack - Represents a CG Date when both sides have planned offensive action. The German player makes a dr to determine which side sets up first: if ≤ 3 the British does; otherwise the German does. The side moving first (see 9.6215), however, is not determined until after all setup is complete (see also SSR CG 24).
b) German Assault - Represents a planned assault on the British positions. The British player sets up first and the German player moves first (see also SSR CG 24).
c) British Assault - This represents a local counterattack by British units. The German player sets up first and the British player moves first (see also SSR CG 24).
9.6214 UNIT SETUP: The side that sets up first (9.62133) in a given CG Scenario now sets up all of its Retained units, Equipment, and new Fortifications, after which the other side does likewise. Each unit/Equipment piece may be set up only in its current Setup Area [EXC: in its current Location and VCA, if an Immobile vehicle; 9.6071]. Emplaced Guns and mobile Vehicles may also set up in Uncontrolled Territory that is ≤ hexes from a Friendly Setup Area (see also SSR CG 5). Record the hex coordinates of new Fortification setup Locations on the CG Roster, in the appropriate line(s) and column(s) under "FORTIFICATIONS". As an exception to A2.9, units may set up overstacked if every Location within the Friendly Setup Area currently contains the maximum allowed by normal stacking limits (A5). Following this, the side setting up second does likewise. Units may not set up in enemy occupied Locations.
9.6215 FIRST MOVE DETERMINATION: [fn 18] For British or German Assaults, see 9.62133. For Dual Assaults, the German player now makes a dr. On a dr ≤ 4, the German moves first. On a dr ≥ 5, the British moves first.
9.6216 WEATHER DETERMINATION: The weather, NVR (if required), EC, and Wind Force (including direction if necessary) are now determined.
9.62161 WEATHER: The British player makes a DR and consults the table below to determine the weather for the upcoming CG.
WEATHER TABLE
| DR | Result | DRM |
|---|---|---|
| ≤ 2 | Mist | -2 Previous CG Scenario was Mist |
| 3-5 | Overcast | -1 Previous CG Scenario was Overcast |
| 6-10 | Clear | -1 Night Scenario |
| ≥ 11 | Clear & Gusty | +1 Previous CG Scenario was Clear & Gusty |
9.62162 NVR: For all CG Night Scenarios there is no Moon and Scattered Clouds. Determine Base NVR per E1.11.
9.62163 EC: The British player makes a dr and consults the following table to determine the EC for the upcoming CG Scenario.
| DR | Result | DRM |
|---|---|---|
| ≤ 1 | Wet | -1 Previous CG Scenario was Wet or Moist |
| 2 | Moist | -1 Night Scenario |
| 3-5 | Moderate | +1 Previous CG Scenario was Dry |
| ≥ 6 | Dry |
9.62164 WIND FORCE (AND DIRECTION): The British player makes a dr and consults the following table to determine the wind force for the upcoming CG Scenario.
| DR | Result | DRM |
|---|---|---|
| 1-3 | No Wind | -1 Night Scenario |
| 4-6 | Mild Breeze [wd 1] | +2 Weather is Overcast |
| ≥ 7 | Heavy Wind [wd 1] | +1 Previous CG Scenario was Clear & Gusty |
[wd 1] Determine Wind Direction per B26.52.
RG. A Bridge Too Far Reinforcement Groups
British Reinforcement Group Chart
| RG ID | Group Type | CPP Cost | Units Rec'd | Full/Depl | CG Date Max | CG I Max | CG II Max | CG III Max | Notes |
|---|---|---|---|---|---|---|---|---|---|
| I1 | Para Pltn | 4 | 6-4-8 | 4/3 | 4 | 9 | 0 | 9 | d, e, l, w, x |
| I2 | Glider Pltn | 3 | 4-5-8 | 4/3 | 2 | 4 | 0 | 4 | d, e, l, w, x |
| I3 | Commando Pltn | 5 | 6-4-8 | 3/2 | 2 | 7 | 0 | 7 | a, d, e, l, w, x |
| I4 | Engineer Pltn | 6 | 6-4-8 | 3/2 | 2 | 3 | 0 | 3 | b, d, e, l, w, x |
| I5 | MG Sect | 4 | HMG x1, MMG x2 | - | 1 | 3 | 0 | 3 | c, e, x |
| A1 | Carrier Sect | 3 | Carrier A x3 | - | 1 | 2 | 0 | 2 | e, x |
| G1 | Mortar Sect | 4 | OML 3" Mtr x3 | - | 1 | 1 | 2 | 3 | c, o, z |
| G2 | AT Sect | 6 | OQF 6 pdr AT x3 | - | 1 | 1 | 1 | 2 | c, o, z |
| O1 | Lt Arty | 3 | 80+mm OBA | - | 1 | 5 | 5 | 9 | m, o, r, z |
| M1 | Fortifications | 1 | 40 FPP | - | 5 | 17 | 15 | 30 | f, o, z |
| M2 | Sniper | 1 | SAN +1 | - | 1 | 4 | 6 | 10 | z |
British notes:
- a: Commandos (H1.24) and Sappers (H1.23)
- b: Assault Engineers (H1.22) and Sappers (H1.23)
- c: Each Weapon is accompanied by a 2-2-8 Infantry crew
- d: Check for Depletion (9.6181)
- e: All purchased (or OB-Given; 9.615) RGs must enter from a Red Entry Area [EXC: On map setup]. Carrier HS are 2-2-8 Infantry crews.
- f: Purchase specific fortifications per 9.619
- l: Determine Leaders per 9.6183
- m: Scarce Ammo. HE Only.
- o: Must set up on map in any Friendly Setup Area on CG Date of purchase
- r: Each Module is accompanied by a radio which must be possessed by a SMC in any Friendly Setup/Entry Area on CG Date of purchase
- w: Determine SW Allotment per 9.6182
- x: May not be purchased after 18EVE [the printed note reads "l8EVE"; read here as 18EVE]
- z: May not be purchased prior to 18PM [the printed note reads "l8PM"; read here as 18PM]
German Reinforcement Group Charts
KG Knaust
| RG ID | Group Type | CPP Cost | Units Rec'd | Full/Depl | CG Date Max | CG I Max | CG II Max | CG III Max | Notes |
|---|---|---|---|---|---|---|---|---|---|
| I1 | SS Rfl Pltn | 5 | 6-5-8 | 3/2 | 3 | 3 | 3 | 6 | d, l, w |
| I2 | SS End Pltn | 7 | 8-3-8 | 3/2 | 1 | 0 | 1 | 1 | a, d, l, w |
| I4 | SS PG Pltn | 4 | 6-5-8 | 3 | 1 | 1 | 1 | 1 | l, v |
| I5 | HW Pltn | 5 | HMG x1, MMG x2 | - | 2 | 1 | 2 | 2 | c, o |
| I6 | SS Recon Pltn | 3 | 3-4-8 | 3 | 1 | 1 | 1 | 1 | l, v |
| I7 | SS PG HW Sect | 4 | 3-4-8 | 2 | 1 | 0 | 1 | 1 | v |
| A1 | Lt Tank Pltn | 5 | PzKpfw IIIL x3 | - | 1 | 1 | 1 | 1 | l |
| A2 | Med Tank Pltn | 6 | See 9.6184 | - | 2 | 0 | 2 | 3 | l |
| A3 | Hvy Tank Pltn | 7 | See 9.6184 | - | 2 | 1 | 2 | 2 | l |
| A4 | SPG Pltn | 5 | See 9.6184 | - | 2 | 1 | 2 | 2 | l |
| T1 | Transport | 3 | Buessing-NAG x3 | - | 1 | 1 | 1 | 1 | - |
| G1 | FlaK Btty | 4 | 8.8cm FlaK 18 x2 | - | 1 | 0 | 1 | 1 | c, o |
| G2 | Art Btty | 4 | 15cm sIG33 x1; 10.5cm IeFH 18 x1; 8cm GrW34 x1 | - | 1 | 1 | 2 | 2 | c, o |
KG Brinkmann
| RG ID | Group Type | CPP Cost | Units Rec'd | Full/Depl | CG Date Max | CG I Max | CG II Max | CG III Max | Notes |
|---|---|---|---|---|---|---|---|---|---|
| I1 | SS Rfl Pltn | 5 | 6-5-8 | 3/2 | 3 | 4 | 7 | 9 | d, l, w |
| I2 | SS End Pltn | 7 | 8-3-8 | 3/2 | 1 | 1 | 2 | 3 | a, d, l, w |
| I3 | SS PG Pltn | 3 | 4-4-7 | 3/2 | 3 | 3 | 1 | 3 | d, l, w |
| I5 | HW Pltn | 5 | HMG x1, MMG x2 | - | 2 | 1 | 2 | 2 | c, o |
| A2 | Med Tank Pltn | 6 | See 9.6184 | - | 2 | 1 | 1 | 2 | l |
| A3 | Hvy Tank Pltn | 7 | See 9.6184 | - | 2 | 1 | 3 | 4 | l |
| A4 | SPG Pltn | 5 | See 9.6184 | - | 2 | 1 | 2 | 2 | l |
| T1 | Transport | 3 | Buessing-NAG x3 | - | 1 | 1 | 1 | 1 | - |
| G1 | FlaK Btty | 4 | 8.8cm FlaK 18 x2 | - | 1 | 0 | 1 | 1 | c, o |
| G2 | Art Btty | 4 | 15cm sIG33 x1; 10.5cm IeFH 18 x1; 8cm GrW34 x1 | - | 1 | 1 | 2 | 2 | c, o |
| G3 | AT Btty | 4 | 7.5cm PaK40 x2; 5cm PaK 38 x1 | - | 1 | 1 | 0 | 1 | c, o |
KG Harder
| RG ID | Group Type | CPP Cost | Units Rec'd | Full/Depl | CG Date Max | CG I Max | CG II Max | CG III Max | Notes |
|---|---|---|---|---|---|---|---|---|---|
| I1 | SS Rfl Pltn | 5 | 6-5-8 | 3/2 | 3 | 3 | 4 | 5 | d, l, w |
| I3 | SS PG Pltn | 3 | 4-4-7 | 3/2 | 1 | 1 | 0 | 1 | d, l, w |
| I4 | SS PG Pltn | 4 | 6-5-8 | 3 | 1 | 1 | 1 | 1 | l, v |
| I5 | HW Pltn | 5 | HMG x1, MMG x2 | - | 2 | 0 | 2 | 2 | c, o |
| I6 | SS Recon Pltn | 3 | 3-4-8 | 3 | 2 | 2 | 4 | 4 | l, v |
| I7 | SS PG HW Sect | 4 | 3-4-8 | 2 | 2 | 0 | 2 | 2 | v |
| A4 | SPG Pltn | 5 | See 9.6184 | - | 2 | 1 | 2 | 2 | l |
| A5 | AC Pltn | 4 | PSW 232 x1; PSW 222(L) x2 | - | 1 | 1 | 1 | 2 | l |
| A6 | FlaK HT Pltn | 4 | See 9.6184 | - | 2 | 1 | 3 | 4 | - |
KG Graebner
| RG ID | Group Type | CPP Cost | Units Rec'd | Full/Depl | CG Date Max | CG I Max | CG II Max | CG III Max | Notes |
|---|---|---|---|---|---|---|---|---|---|
| I1 | SS Rfl Pltn | 5 | 6-5-8 | 3/2 | 2 | 4 | 1 | 4 | d, l, w, x |
| I4 | SS PG Pltn | 4 | 6-5-8 | 3 | 1 | 1 | 0 | 1 | l, v, x |
| I6 | SS Recon Pltn | 3 | 3-4-8 | 3 | 2 | 3 | 1 | 3 | l, v, x |
| I7 | SS PG HW Sect | 4 | 3-4-8 | 2 | 2 | 2 | 0 | 2 | v, x |
| A4 | SPG Pltn | 4 | JgdPzV x1; StuG IIIG(L) x1 | - | 1 | 1 | 1 | 1 | l, x |
| A5 | AC Pltn | 4 | PSW 234/1 x1; PSW 232 x2 | - | 1 | 1 | 0 | 1 | l, x |
| A6 | FlaK HT Pltn | 4 | SPW 250/9 x2 | - | 1 | 2 | 1 | 2 | x |
| T1 | Transport | 3 | Kfz I x2; Kfz 4 x1; Opel Blitz x2 | - | 1 | 1 | 1 | 1 | x |
General RGs
| RG ID | Group Type | CPP Cost | Units Rec'd | Full/Depl | CG Date Max | CG I Max | CG II Max | CG III Max | Notes |
|---|---|---|---|---|---|---|---|---|---|
| O1 | Bn Mortars | 2 | 80+mm Bn Mtr OBA | - | 1 | 3 | 7 | 10 | m, p, q, r, s, x |
| O2 | Hvy Mortars | 3 | 120+mm OBA | - | 1 | 1 | 5 | 5 | m, p, q, r, s, x |
| O3 | Med Arty | 4 | 100+mm OBA | - | 1 | 1 | 5 | 5 | m, p, q, r, s, y |
| O4 | Hvy Arty I | 5 | 150+mm OBA | - | 1 | 1 | 3 | 5 | h, m, p, q, r, y |
| O5 | Hvy Arty II | 3 | 120+mm OBA | - | 1 | 1 | 7 | 7 | h, m, y, z |
| M1 | Fortifications | 1 | 20 FPP | - | 3 | 3 | 10 | 10 | f, o, x |
| M2 | Sniper | 1 | SAN +1 | - | 1 | 4 | 7 | 10 | - |
| M3 | Fanaticism | 5 | All MMC Fanatic | - | 1 | 1 | 2 | 3 | t, y |
Receives AFV as indicated:
| ID | Vehicles Received |
|---|---|
| I4 | SPW 251/1 x3 |
| I6 | SPW 250/10 x1; SPW 250/1 x3 |
| I7 | SPW 250/sMG x2; SPW 250/7 x1 (No additional HSs accompany the SPW 250/sMG) |
German notes:
- a: Assault Engineers (H1.22) and Sappers (H1.23)
- c: Each Weapon is accompanied by a 2-2-8 Infantry crew
- d: Check for Depletion (9.6181). The 4-4-7s in RG I3 are non-SS.
- f: Purchase specific fortifications per 9.619
- h: HE only
- l: Determine (Armor) leaders per 9.6183
- o: Available for on map setup on the CG Date of purchase
- p: May purchase ≤ 2 Pre-registered hexes per module at a cost of 1 CPP per module per hex. Pre-registered hexes may not be purchased for Retained (or Initial Scenario) OBA modules. See SSR CG10.
- r: For each module [EXC: Offboard Observer], the player may freely select either a radio or a field phone (see SSR CG 6) which must set up possessed by a SMC in any Friendly Setup Area or enter possessed by a SMC via any Eligible Entry Area.
- s: May fire HE and Smoke
- t: All Retained or just-Purchased MMC are considered Fanatic (A10.8) for the duration of the next non-Idle CG Date (only)
- w: Determine SW Allotment per 9.6182
- x: May not be purchased prior to 18AM
- y: May not be purchased prior to 19AM
- z: Directed by Offboard Observer at Level 0 (at no additional cost in CPP) in any hex along the south edge of the playing area (recorded prior to British setup) [fn 20]
Note q (the German chart's OFF BOARD OBSERVERS note; see footnote 17) includes this OBA ammunition determination table: dr 1 = Scarce; dr 2-5 = Normal; dr 6 = Plentiful; drm +1 Heavy Arty.
Offboard Observer levels and edges (printed beneath the German notes):
| CG Date | Level | Edge |
|---|---|---|
| Any | 2 | North or East |
| 18Eve - 19N | 4 | West |
| 20PM - 21Eve | 4 | West |
Only one Observer may be chosen for any particular map edge per CG Date. Any Observer selected for the west edge must be used on the CG Date of purchase or be Eliminated. In such a case, the module (if Retained) receives a radio as per note r for the following CG Date. Offboard Observers may not be purchased for Retained (or Initial Scenario OB) OBA modules.
CG. A Bridge Too Far Campaign Games
9.51 ABtF Campaign Game I: Block by Bloody Block
The main force of the British 1st Airborne began landing amid confusion west of Arnhem after midday on the 17th of September. Major delays were experienced organizing and taking inventory of the men and equipment which had landed safely. Communication was limited to a few nearly useless, low power wireless sets. Nonetheless, the advance elements, including the majority of the 2nd Parachute Battalion, set off in three pincers for the bridge.
CG LENGTH: This CG covers all CG Dates from 17N-19AM (6 CG Scenarios).
CG VICTORY CONDITIONS: Provided they Control 4 of the following 5 Blocks, the British win at the end of the CG if they have amassed CVP ≥ 3 times the CVP they have lost.
VICTORY BLOCKS: H, I, J, K, L (see the reduced-size map on the reverse of the Chapter R Divider).
CHIT LIMITS:
| Side | Limit |
|---|---|
| British | 5 Attack, 5 Idle |
| German | 4 Attack, 5 Idle |
INITIAL GERMAN OB [ELR 3]: {SAN 3}
Elements Stadtkommandant Arnheim Security Force:
- set up ≤ 2 hexes from hex T7: SS Rfl Pltn x1; 50L AT x1; 2-2-8 x1
- set up upon/between hexrows O and R with no more than 1 MMC per hex: VG Pltn x1; SS Rfl Pltn x1
- set up ≤ 3 hexes from hex R22: 4-3-6 x3; LMG x1; 7-0 x1
- set up with any other on-map German group (see SSR 3): ? x6; Fortified Location x1; Wire x2
- enter on Turn 5 on hex R23: PSW 232 x1
Elements of 3rd Company, 21st Panzergrenadier Regiment, SS-Panzer Division 10 enter on Turn 1 in Convoy (E11) on hex R0 (see SSR 5):
- 6-5-8 x4; 4-4-7 x2; 8-1 x1; 7-0 x1; dm MMG x1; LMG x1; Opel Blitz x4
enter on Turn 3 from any Eligible Entry Area(s) (See SSR 5): 10 CPP
INITIAL BRITISH OB [ELR 5]: {SAN 3}
Surviving Elements of 2nd Parachute Battalion, 1st British Airborne Division:
- enter on Turn 1 (see SSR 4): 10-2 x1; 30 CPP
- enter on Turn 2 (see SSR 4): 9-2 x1; Jeep x2; 57L AT x1; dm 76* Mtr x1; 2-2-8 x2
INITIAL SCENARIO BATTLE RULES
-
EC are Moderate, with no wind at start. See ABtF SSR. Night Rules are in effect. Base NVR is 3 hexes with No Moon and Scattered Clouds.
-
For RePh purposes, the initial German ELR is 4. It is reduced for the initial scenario per E1.22. The British are the Scenario Attacker and the Germans are the Scenario Defender. Majority Squad Type for the British is Stealthy, that of the Germans is Lax. Neither side may purchase a SAN Increase RG. The "1" counters in the initial German OB are in addition to those normally granted by E1.2.
-
Wire and/or mines may not be placed on Arnhem Bridge hexes or Ramp hexes (R5-R23). Wire may not be placed on the S1-T2-S4-P2-P13-M15-L15-G18-D19-A21 road.
-
Contrary to ABtF CG SSR 24 (CG Night Scenarios), all initial forces (including RGs purchased) must enter on the indicated turn (no dr is required). See 9.6151 for units/weapons not entering as indicated. All Purchased German RGs must enter on/east of hexrow V. RGs from KG Harder may be purchased but may not enter play during 17N (contrary to ABtF CG SSR 9, they will be Retained off-map for use on 18AM).
-
The German Turn 1 reinforcements must move as a Convoy (E11.) following the S1-T2-S4-P2-P13-M15-L15-G18-D19-A21 road and attempt to exit along the west edge from hex A21. All personnel units/weapons must enter (and remain) as Passengers. Cloaking is NA. The Convoy may only cross road hexsides and must move as far as possible each turn. Once the requirements of E11.251 are met, the German player is freed of this requirement and the PRC may (un)load normally. Any unit(s) exiting via hex A21 (whether still in Convoy or not) are Retained into either German west edge Entry Area (German player's choice). See also ABtF CG SSR 11.
-
All Strategic Locations on/east of hexrow N are under German Control at the start of the CG. All other Strategic Locations are Uncontrolled.
Aftermath: The British ran into stiff resistance almost immediately. The northern and center pincers were stopped near Oosterbeek. The southern pincer made steady but slow progress to the river and began to work its way eastward. There was a railway bridge just over a mile west of the main road bridge that was a key secondary objective. This railway bridge was demolished as the British approached. Turning their attention to the main road bridge, just visible in fading twilight, the men of the 2nd Para crept through the narrow streets toward the bridge. In the gathering darkness, an armored column sped south across the bridge (this was Captain Graebner's 9th SS Recon unit heading toward Nijmegen). After the column had passed, the Paras used a wide staircase as cover and assaulted the blockhouse several times before finally destroying it with a combination of PlAT, FT, and small arms fire. Ambushing a convoy of trucks heading west, they quickly set up a HQ position on the far side of the ramp, not realizing that they had chosen a building within 50 meters of the SS Police HQ. A bitter fight over these buildings ensued, with the British withdrawing to more secure positions adjacent to both sides of the bridge as daylight approached. At about 9am, Capt. Graebner's force returned and boldly attempted to force its way into Arnhem. From their positions on the upper floors and on the rooftops of the buildings, the British laid down murderous fire from their PIATs, a pair of 6-pounder anti-tank guns, mortars, small arms, grenades and gammon bombs. Expecting only a small holding force of less than 100 men, Graebner's unit was caught completely unawares by the response of the nearly 300 well armed and determined paratroopers. By the end of the day, September 18th, there were some 700 British Paratroopers hiding in the buildings near the Arnhem Road Bridge. But it became increasingly clear to Col. Frost that the situation was extremely grave. Commenting to his aide on the plans for defense of the bridge, Col. Frost stated, "We'll make them dig us out block by bloody block."
9.52 ABtF Campaign Game II: A Dark and Fateful Day
Colonel Frost's Parachute Battalion had solidified its perimeter near the Arnhem Road Bridge. The 700 men that had managed to reach the bridge were concentrated in a tight knot near the ramp. Some units had moved east in an effort to scout the German strength. These units were returning with alarming reports of heavy German troop concentrations as well as the presence of large numbers of tanks and self-propelled guns. The intelligence reports of only a minor German presence in and around the city of Arnhem seemed, to Col. Frost, to be "painfully reminiscent of a child's fairy tale."
CG LENGTH: This CG covers all CG Dates from 19AM-21AM (9 CG Scenarios).
CG VICTORY CONDITIONS: The Germans win at the end of any CG Scenario if they Control Block H (see the reduced-size map on the reverse of the Chapter R Divider), or at CG end if they Control the British Headquarters (see SSR CG 23) [the printed sentence continues: "there are no Good Order British MMC in any Strategic Location on/east of hexrow J."].
CHIT LIMITS:
| Side | Limit |
|---|---|
| British | 2 Attack, 8 Idle |
| German | 8 Attack, 3 Idle |
INITIAL BRITISH OB [ELR 4]: {SAN 4}
Surviving Elements of 2nd Parachute Battalion, 1st British Airborne Division, set up as indicated:
| Block H | Block J | Block K |
|---|---|---|
| 10-2 | 9-2 | 9-2 |
| 9-2 | Commando Pltn x1 | Engineer Pltn x1 |
| Para Pltn x2 | Engineer Pltn x1 | Fortified Building Locations x3 |
| Glider Pltn x1 | Para Pltn x1 | Trench x1 |
| Commando Pltn x2 | Breach x2 | 4-4-7 WW MMC x2 |
| MG Sect x2 | ||
| 57L AT x2 | Block I: | |
| 76* Mtr x3 | Glider Pltn x1 | |
| 2-2-8 x5 | 4-4-7 WW MMC x3 | |
| Jeep x1 | Breach x1 | |
| Carrier A x1 | ||
| 40 FPP |
| Block L | Block R |
|---|---|
| Engineer Pltn x1 | Glider Pltn x1 |
| Commando Pltn x1 | Para Pltn x1 |
| Para Pltn x1 | 4-4-7 WW MMC x3 |
| 4-4-7 WW MMC x3 | 57L AT x1 |
| 57L AT x1 | 2-2-8 x1 |
| 2-2-8 x1 | Foxholes x2 |
| Breach x1 |
Set up with ≥ 1 other group: 10 CPP; 100 FPP
INITIAL GERMAN OB [ELR 4]: {SAN 5}
Elements of SS Panzer Division 9:
Set up in ≥ 1 of the Blocks N, Q, V, W, X, Y and Z:
- SS Rfl Pltn x3; HW Pltn x1; Hvy Tank Pltn x1; SPG Pltn x1 (A4; see 9.6184)
Set up in ≥ 1 of the Blocks M, N, U, and V:
- SS Rfl Pltn x3; HW Pltn x1; AT Btty x1; Para Pltn x1; SS Eng Pltn x1; Flak Btty xI; VG Pltn x1; Med Tank Pltn x1; SPG Pltn x1; Hvy Tank Pltn x1
Set up in ≥ 1 of the Blocks A, B, and E:
- SS Rfl Pltn x1; VG Pltn x1; AC Pltn x1 (A5; see KG Harder)
Set up with ≥ 1 on map force: 40 FPP
Enter on/after Turn I: 25 CPP
INITIAL SCENARIO BATTLE RULES
-
EC are Moderate, with no wind at start. See ABtF SSR.
-
The British begin the CG at Ammunition Shortage Level One (SSR CG 17).
-
The British Control the following Blocks at CG Start: C, D, F, G, H, I, J, K, L, P, R, S, and T. For the purposes of 9.620, the British have previously selected four Attack Chits since the last Idle CG Date.
-
The Germans Control the following Blocks at CG Start: A, B, E, M, N, Q, U, V, W, X, Y, and Z. Block 0 and the Blockhouse (hex R21) are uncontrolled. The OB Designated Reinforcements listed in 9.615 have already been included in the At Start German OB. For the purposes of 9.620, the Germans have previously selected two Attack Chits since the last Idle CG Date.
-
The British player must select any 3 SMC from his at start OB (after Leader Determination; 9.6183). These SMC begin the CG Wounded.
-
The British receive one module of 80+mm OBA with Scarce Ammunition (C1.211). Place its radio with any British SMC. The Germans receive one module of 120+mm OBA (HE only) with Plentiful Ammunition (C1.211) directed by an Offboard Observer (C1.63) at Level 2 in any hex along the east edge (secretly recorded prior to British setup) and one Pre-Registered Hex (C1.73) (secretly recorded prior to British setup).
-
Make the following terrain changes prior to setup: place stone rubble at ground level in hexes T8, T9, T11, and V16; place shellholes in hexes K21, M15, M21, O15, P12, Q12, Q15, and Q21; place 2 Burnt-out Wrecks at Level 1 in hexes R16, R17, R18, R19, and R20; place a single Burnt-out Wreck in hexes N14, O14, P13, Q16, S12, and U12.
-
The Blockhouse has been destroyed (5.2). Place stone rubble on the bridge (i.e., at Level 1) in hex R21 as per 5.2. Place a 2 factor Known A-T Minefield at Level 1 in hex R21.
-
The British player secretly records his Headquarters prior to setup (see SSR CG 23).
Aftermath: First to feel the full brunt of the German response was Platoon Number 8 which had spread out through the industrial park to the east of the bridge. Under heavy assault from tanks and infantry, Platoon No. 8 was completely overrun and decimated. Captain Mackay and his Royal Engineers were likewise engaged in a grim struggle for the School House. The Germans assaulted this mini-fortress a number of times before the beleaguered engineers were finally forced to split up into pairs to attempt an escape to the main British perimeter. But the Germans still did not control the approaches to the bridge and thus no armor could be sent south to reinforce Nijmegen. Determined to drive the British out of their defenses, the Germans used concentrated artillery fire to turn the buildings to rubble and white phosphorous ammunition to set them alight. Captain Knaust kept up the pressure and gradually reduced the British pocket. The coup de grace came on the afternoon and evening of September 20th as a relentless German assault finally overcame the British defenses. Colonel Frost was wounded and captured. The remainder of the British withdrew to the burnt-out remains of the city near the river and later straggled back to the British defensive perimeter near Oosterbeek. Maj. Gen. Urquhart would later comment that when he realized, about midday on the 19th, that Col. Frost's men were cut off and could not be reinforced, "It was a dark and fateful day indeed."
9.53 ABtF Campaign Game III: A Bridge Too Far
CG LENGTH: This CG covers all CG Dates from 17N-21EVE (16 CG Scenarios).
CG VICTORY CONDITIONS: The Germans win at the end of any CG Date by Controlling all stone-building/stone-rubble Locations on the map. See also 9.6212.
CHIT LIMITS:
| Side | Limit |
|---|---|
| British | 6 Attack, 13 Idle |
| German | 13 Attack, 9 Idle |
All initial scenario OBs and SSR are as in CG1, Block by Bloody Block.
Footnotes (ABtF)
[fn 1] THE ARNHEM BRIDGE: The Arnhem Bridge was a dominating structure. Built circa 1930, it was a major accomplishment in the field of civil engineering. Spanning an elevated distance of over 400 meters and sporting 4 paved lanes as well as a wide sidewalk on both sides of the surface, it was the standard for highway bridges for some time. The entire underside of the bridge was interwoven with steel beams and there were concrete supports nearly 6 feet thick at varied intervals as well. Movement beneath the bridge was possible but difficult, particularly for vehicular traffic. Two separate underpasses (hexes R15 and R21) were available to facilitate vehicles. Paths along the sides of the bridge allowed sheltered travel for pedestrians.
[fn 2] 1.4 PEDESTRIAN ACCESS POINTS: There were two concrete enclosed staircases on either side of the bridge just north of the blockhouse. These were used by pedestrians to access the elevated portion of the bridge in order to cross the river. They were nearly entirely enclosed except for access ports allowing sunlight to illuminate the steps and opened into an area on the walk above with benches surrounded by a low wall.
[fn 3] 1.22 OT VEHICLE VULNERABILITY ON THE RAMP/BRIDGE: The buildings along the east and west sides of the bridge had been built up and expanded since the bridge's completion. Many of these structures were within 12 feet of the sidewalks on the span itself. British paratroopers were able to actually see into the open topped armored vehicles, allowing them to easily shoot the driver and assistant driver as the vehicles passed. Additionally, the paratroopers were able to throw grenades and gammon bombs into the passenger compartments from their vantage points in the upper floors and on rooftops. These rules attempt to simulate the extreme vulnerability of open-topped vehicles in this confined space.
[fn 4] 2. THE RAMP: The Ramp was a man-made structure of earth and concrete gradually rising in height from ground level to the level of the bridge. The slope was gradual but increased as one neared the top of the span (best available data places the grade varying from 0.5% near the base in hex R5 to 3.5% near the center of the span off the south edge of the map). Vision was clear from the peak of the bridge span (near the center of the river) all the way down the ramp to its base. The LOS mechanics of ASL make this difficult to portray. These LOS rules are an effort to simulate the gradual change in elevation from the top of the bridge to its base.
[fn 5] 3. FACTORIES: Players familiar with Red Barricades will note a few differences between the Chapter R Factory rules and those presented in Chapter O. The main differences are simply omissions of those circumstances which will not occur in ABtF. These mainly involve roofless factory hexes and their effects on play, particularly where combination roofless and roofed hexes would exist in the same factory. That will not occur in ABtF as the factory hexes will be either rubbled or roofed.
[fn 6] 3.332 OB/CG-PURCHASE OF BREACHES: The ability to "buy" breaches represents the use of "mouse-holes" by the British troops. These were small openings bored through the walls of neighboring rowhouses to provide limited movement between the structures. These often came as a nasty surprise to the Germans who frequently found themselves in the middle of a British strong-point where only a small outpost was suspected.
[fn 7] 4. CELLARS: Owners of Red Barricades will note two primary differences between the Cellar rules in Chapter O and the ones presented here, the cellars in Arnhem were for the most part simple fruit cellars and/or storage areas. Though they were primarily constructed of wood with some brick and mortar added for support, with the exception of their subterranean nature, they were much less sturdy than their Stalingrad counterparts. Additionally, most of these cellars had standard doorway openings and thus were easily accessible. The decision not to make them automatically fortified simulates the necessity of defenders to secure these accesses from entry. The lower stacking limit takes into account the predominant use of these areas, by both sides, to house the wounded and prisoners.
[fn 8] 5. THE BLOCKHOUSE: The blockhouses were pillbox type structures located at each end of the bridge. These were used by the German garrison and security troops to control the flow of traffic across the bridge. A small wooden shed was located behind the northern blockhouse. This was the main ammunition storage for the Arnhem garrison and was destroyed in a terrific explosion when hit by a flamethrower on the night of September 17th. The wooden shed is not depicted here as its effect on play was found to be minimal. When the northern blockhouse was finally destroyed by a combination of PIATs, small arms fire and a flamethrower, the resultant rubble inhibited movement down the bridge, though not to an extreme extent. The British did take the opportunity to hide a few anti-tank mines near the blockhouse using planks and other items of debris to conceal their location.
[fn 9] 6. UNIT REPLACEMENT: Much has been made about the elan and spirit of the British 1st Airborne, particularly in Arnhem. The truth of the matter is that only about half of the British troops had any battle experience at all. Those with experience were veterans of Tunisia and Sicily and were definitely no strangers to close quarter fighting. Though they had been fighting in mountain passes and rocky crags, these buildings at Arnhem were little different. This is reflected in game terms by the initial British forces having a morale of 8 and an ELR of 5. The staying power of these troops will dwindle away as the CG progresses, simulating the loss of the combat experienced men throughout the British units. Their German counterparts were a mixed group of veterans, old men and teenagers. Though nearly replenished to about one-half of their D-Day manpower strengths-at least on paper-the 9th and 10th SS Divisions were barely a shadow of their true TO&E. Much of their equipment and veteran cadre had been lost in the retreat from Cambrai. However, a pool of trained replacements was readily available. In many cases a veteran platoon would be broken down with its core distributed to several sections. This formed a section with 2 or 3 veterans surrounded by a balance of inexperienced troops. The result was a highly aggressive squad that was also very fragile. These rules simulate the nature of the forces battling in and around Arnhem. For the British, the troops lose their ability to fight for a number of reasons - wounds, exhaustion, lack of water and ammunition not the least among them. The Germans lose their ability to continue the fight due their rapidly depleting pool of experienced, fit fighting men. The Campaign Exhaustion DRM is an abstraction of these factors as well.
[fn 10] 7. WIDE BOULEVARDS AND NARROW STREETS: Arnhem was a maze of narrow streets. The buildings were often so close to the streets that no sidewalks were available (see ABtF CG SSR 5). Contrasting that sharply were the areas of wide open paved surfaces surrounding the industrial areas to the east of the bridge and the numerous parks throughout the town. The varied mix of these terrain types provides a fascinating tactical puzzle for attacker and defender alike.
[fn 11] CG9 REINFORCEMENTS: Though seemingly harsh at first glance, any reinforcements not entering play when "first available" are assumed to have been put to use elsewhere. Players will quickly find that the nature (and relatively small number) of unused reinforcements will render this effect minimal.
[fn 12] CG19 WALKING WOUNDED: The British troops at Arnhem were faced with a difficult position. Unable to evacuate their wounded, the British command reorganized those wounded that still retained some fighting ability into functional combat units. The seriously wounded or incapacitated were stripped of equipment and moved to cellars where they could be monitored.
[fn 13] CG21 BRITISH WATER SHORTAGES: The British briefings for Operation Market-Garden included a strict prohibition against using the Lower Rhine as a fresh water source. Chief among the concerns was the threat of dysentery. North Africa and Tunisia had taught tough lessons on the debilitating, long term effects of dysentery and had made the British commanders somewhat overly sensitive. Considering the expected short duration of the operation, it is unclear why the river was not utilized. Nonetheless, the troops in Arnhem did not do so. As a result, severe water shortages occurred during some of the heaviest fighting. Two short rain showers helped alleviate this shortage, but only temporarily. German sources following the battle commented on the curious levels of dehydration suffered by those British captured after the evacuation.
[fn 14] CG22 GERMAN ATTACK COORDINATION: The situation on and near the Bridge was confused to say the least. With two separate divisions and a number of unattached Corps assets in the area, the command structure was very cloudy. Second only to the difficulty in locating the British was the problem of coordinating strikes from the separate elements assigned the task of retaking the bridge and opening the roadway to Nijmegen. These rules force the German player to dilute his efforts to help recreate the feel of frustration at not being able to bring his whole force to bear in one fell swoop.
[fn 15] 9.605 BLOCK CONTROL: The control of the city blocks in Arnhem was a top priority for both attacker and defender-more so than in nearly any other single battle. The British defenses were designed with control of blocks of terrain in mind (as opposed to controlling single buildings) and the German attacks were likewise targeted at isolating and recapturing one or more city blocks. Past HASL modules have endeavored to provide a RePh process which emphasized localization of forces while still allowing for some movement between scenarios (limited as an abstraction of the time frame between CG Scenarios). These rules are designed to force the players to think (and conduct the battle) in terms of controlling city blocks instead of individual buildings or locations.
[fn 16] 9.6172 BRITISH TROOP TYPES: The Elite 6-4-8/3-3-8 counters provided have the "winged parachute" symbol of the 1st Airborne Division in place of the standard MMC class designation. Players may wish to use these counters for normal 6-4-8s/3-3-8s, use the West of Alamein 6-4-8/3-3-8 counters with the "E" designation for Commandos, and use the Pegasus Bridge 6-4-8/3-3-8 counters with the "Rider-upon-Pegasus" symbol for Engineers.
[fn 17] GERMAN RG CHART NOTE q, OFF BOARD OBSERVERS AND SAN VALUES: There were two primary sources of German off-map fire direction. The first was from direct fire of large caliber artillery from the south bank of the river. Numerous heavy artillery pieces and flak guns were deployed along the south bank. These fired over open sights into the buildings along the bank and later over the resulting rubble to the upper floors beyond. The south edge observers are an abstraction of these guns. Though not indirect fire per se, the prolonged shelling from these guns fits the ASL BOA engine quite nicely. Second, there is a large church located just off the northwest edge of the playing area. This church had a steeple over 300 feet high. From this point, almost any movement within the Arnhem town proper was easily observed. Additionally, this position was an excellent spot for snipers. The availability dates reflect the changes in possession of this key position throughout the battle. The changes in both players' SAN values likewise reflect the control of this position.
[fn 18] 9.6215 DUAL ASSAULT INITIATIVE: The German "advantage" of moving first more often than the British in Dual Assaults is not a reflection of any lack of initiative on the part of the British. Rather it represents a higher level of British surveillance and intelligence and a general desire to react to the Germans rather than to be preemptive.
[fn 19] ABtF CG SSR 1 CONCEALMENT: One of the biggest obstacles to the German forces was their inability to pin down the precise locations and numbers of British troops. Using the close proximity of the buildings and cover from the smoke and haze from the burning and rubbled buildings. The British were able to continually frustrate German attempts to locate them until it was often too late. Even at the end of the battle, German estimates of British forces arrayed in and near Arnhem were wildly inaccurate. The conclusions varied by as much as 300% from the actual troop strengths seen. It was only well after the war that official records were updated to reflect reality.
[fn 20] ABtF CG SSR 4 NO QUARTER: The battle of Arnhem was a hard fought affair. Quarter was seldom asked or given. Still, each side took large numbers of prisoners. The majority of these were severely wounded and infirmed. In many cases, soldiers of each side commented on the humane treatment by their captives.
[fn 21] ABtF CG SSR 7 DUTCH UNDERGROUND: The British commanders were cautioned against the use of information supplied by the Dutch Underground. The main reasons for this are unclear but seem to be centered around a baseless fear of Nazi collaborators within the ranks of the Dutch Resistance Movement. Little could have been farther from the truth. The Dutch Underground was composed of some of the bravest men and women in Europe and the information and intelligence they had obtained could easily have changed the entire course of the battle. Nonetheless, the British command climate severely hampered their usefulness. The designation of Holland as a "neutral country" in game terms reflects not upon the general posture of the Dutch, but rather serves to limit the amount of useful information that the British player in ABtF will gain from the Civilian Interrogation rules.
[fn 22] ABtF CG SSR 13 KINDLING: The Germans quickly realized that the best way to find the British was to set fire to their buildings. The structures in Arnhem were mostly old, wood framed houses with brick and stone interspersed between the frames. The results were very sturdy structures which were also highly susceptible to fires.
[fn 23] ABtF CG SSR 18 WHITE PHOSPHOROUS: The German forces in Arnhem made widespread use of the available white phosphorous ammunition. Though normally prohibited from using WP in ASL tenors, the Germans at Arnhem enjoyed an availability which justifies its use here. The tendency of the buildings to catch fire easily from the heat of a WP grenade and/or shell is well chronicled. These rules simulate the availability of WP to the Germans, the susceptibility of the buildings, and the resultant fires.
Appendix A: Use of Optional Black German Counters
A Bridge Too Far includes a German OB, in reduced numbers in most instances, as a throwback to the old Squad Leader Series. As they are printed on a black background, some concessions to the existing ASL symbology were necessary to retain the detail of the artwork while not lessening the functionality of the counter. Generally, all the black text/marks on a counter become white (with some noted exceptions). Experienced players will quickly recognize these changes and will experience minimal impact on play. For those less familiar with the ASL system, the following example counters and explanations are provided:
INFANTRY/SW: The only significant change to the Infantry/SW counters are that the malfunction "X" is now gray instead of white. There is no change in the meaning of the "X".
ORDNANCE: This is a Small Target and suffers the (Un)Hooking penalty. The ring is slightly larger than the Target Size circle to assist in identification. Similar to vehicles, the 360° symbol is gray instead of white to show up on the black background. The meaning doesn't change.
VEHICLES: The biggest difference, CYAN MP, means the vehicle is open-topped. Gray turret symbols replace white, they mean the same thing (1MT in this case). Unarmored vehicles. White outline stars (shown) represent solid black stars (i.e., the vehicle is unarmored), solid white stars are small (or double small) targets, solid red stars are large (or double large) targets.
[The example counter images referred to in Appendix A are not reproduced; the text above is the printed explanation.]