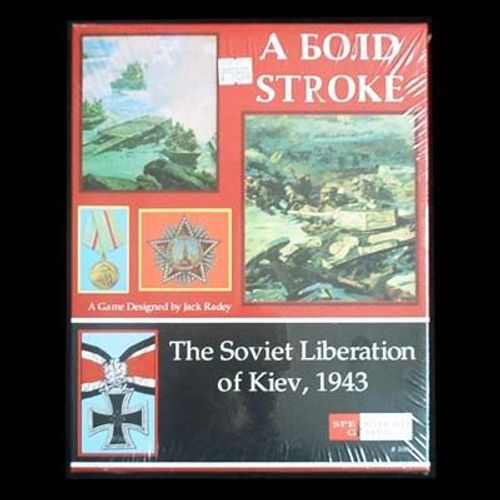
A Bold Stroke: The Soviet Liberation of Kiev, 1943
A Bold Stroke: The Soviet Liberation of Kiev, 1943 Rulebook
Table of Contents
Table of Contents
- 0.0 Preliminary Material
- 1.0 Introduction
- 2.0 Sequence of Play
- 3.0 Weather
- 4.0 Terrain
- 5.0 Initiative
- 6.0 Movement
- 7.0 Stacking
- 8.0 Zones of Control
- 9.0 Reserves
- 10.0 Reconnaissance
- 11.0 Combat
- 12.0 Artillery
- 13.0 Headquarters
- 14.0 Supply
- 15.0 Airpower
- 16.0 Reinforcements and Replacements
- 17.0 Optional Rules
- 18.0 Scenarios
- 19.0 Comprehensive Combat Example
- 20.0 Designer's Notes
- 21.0 Player's Notes
- 22.0 Historical Notes
- 23.0 Bibliography
0.0 Preliminary Material
0.3 Components
A. The game includes:
- One counter sheet with 280 die-cut playing pieces
- One 22" x 34" four color map
- One rulebook
- Two two-sided charts
- Two one-sided setup charts
- One 10-sided die
B. If any of these items are missing or damaged, please contact Spearhead Games at the locations shown on the inside front cover of this rulebook.
0.4 Abbreviations
| Abbr | Explanation | Abbr | Explanation |
|---|---|---|---|
| AFV | Armored Fighting Vehicle | MP | Movement Point |
| AP | Ammo Point | OOS | Out of Supply |
| AT | Anti-Tank | RP | Replacement Point |
| CRT | Combat Results Table | SP | Strength Point |
| DRM | Die Roll Modifier | TEC | Terrain Effects Chart |
| EZOC | Enemy Zone of Control | TRT | Turn Record Track |
0.5 Glossary
The following terms are used throughout this rulebook.
0.5.1 Advance. The act of moving attacking units into hexes they attacked, and beyond.
0.5.2 Anti-Tank Strength. The measured value of a unit's ability to resist enemy attacking AFVs (usually tanks) in combat. May be used only on defense.
0.5.3 Armor Strength. The measured value of a unit's armored AFVs (usually tanks) in combat. May be used on defense or attack.
0.5.4 Artillery Strength. The measured value of a unit's ability to contribute gun strength (usually tube artillery) to a combat.
0.5.5 Combat. The procedure that friendly units use to attack enemy units.
0.5.6 Cut-Off. The condition of a unit that cannot be provided with supply via a supply path.
0.5.7 Die-Roll Modifier. Adjustment to the Combat Die Rolls (plus or minus).
0.5.8 Initiative. The ability to determine which side moves and fights first during a turn.
0.5.9 Movement Allowance. The maximum number of Movement Points (MPs) a unit may expend during a phase while moving. This varies according to what phase a unit may be moving in.
0.5.10 Movement Class. The predominant type of transport in a unit: Leg, Cavalry, and Motorized. For purposes of simplification, Tracked and Wheeled transport types have been amalgamated into the Motorized class.
0.5.11 Movement Points. Discrete increments of movement that must be expended to enter hexes while moving.
0.5.12 Obligations. A measure of how badly one side has fared during a combat. Both the attacker and defender may suffer obligations during a combat. Obligations may be converted into retreats and/or losses.
0.5.13 Out of Supply. The condition of a unit that was originally Cut Off and has since moved or engaged in combat.
0.5.14 Phasing Player/Side and Non-Phasing Player/Side. The phasing player or side is the player or side whose player-turn it is. The other player is the non-phasing player or side.
0.5.15 Range. The distance (in hexes) between a unit providing support or artillery strength and the hex to which the support or artillery is being applied to. The hex of the unit providing the support or artillery is not counted.
0.5.16 Retreat. The act of displacing defending units after a combat.
0.5.17 Significant Strength. The strength of a unit that appears in a circle or square. This is the value that is reduced each time the unit takes losses.
0.5.18 Stacking. The simultaneous occupation of a hex by more than one combat unit.
0.5.19 Zone of Control. The area of influence that most units exert against enemy units in adjacent hexes.
1.0 Introduction
A. A BOLD STROKE: KIEV '43 is a simulation game of the battles between the Soviet and German forces for the control of Kiev and the right bank of the Dnepr River in November and December of 1943. Early November Soviet attacks blew holes in the thin German defenses, resulting in the liberation of Kiev and the pursuit to Korosten and Zhitomir. A massive German riposte led by the XLVIII Panzerkorps struck the Soviet flank and rolled back some of the initial Soviet gains. In December, additional German efforts pushed in Soviet forces around Korosten. Heavy Soviet reinforcements (undetected by the Germans) enabled the Soviets to return to the offensive on Christmas Eve and drive the Germans back from Kiev once and for all.
B. Information that is needed to play the game can be found in this rules booklet, various charts and tables printed on the map or on separate sheets, and on the playing pieces themselves.
1.1 Game Scale
The scale of the game is five miles per hex, with each Game-Turn (turn) representing the passage of two days of actual time. Counters represent the Soviet and German military formations that participated in this battle. Soviet counters depict corps, divisions, and brigades; Axis counters depict divisions, brigades, regiments, and some battalions.
1.2 The Playing Pieces
1.2.1 General. There are two kinds of playing pieces in the game: combat units and markers. Markers are used to record information and to assist in the conduct of play.
1.2.2 Combat Units. Each combat unit is represented by a counter marked with the unit's type, size, designation, and stacking and combat values. Each unit has a front (full strength) and back (reduced strength) side.
1.2.3 General Notes on Units.
A. If the unit box has a white or partially white background, the unit is motorized for movement purposes.
B. Significant Strength is the Strength that is highlighted by a colored or white square or circle.
C. When using the optional efficiency rules (17.3), the color of the square or circle surrounding the Significant Strength represents the efficiency rating of the unit.
| Color | Efficiency Rating |
|---|---|
| Red | 7 |
| Blue | 6 |
| Yellow | 5 |
| White | 4 |
1.2.4 Unit Types and Values.
1.2.4.1 Armor. Inside of oval is shaded yellow.
1.2.4.2 Non-Motorized Unit.
A. This is an airborne unit, though it functions as infantry.
B. Characteristics are the same except the middle value is the artillery strength.
C. Troop Strength is the Significant Strength.
D. Parentheses indicate AT Value only.
1.2.4.3 Artillery Unit.
A. Characteristics are the same except the middle value is the artillery strength.
B. Artillery Strength is the Significant Strength.
C. Parenthesized Troop Strength may not be used for attack.
D. Except for HQ units, any unit with a Range value is an Artillery unit.
1.2.4.4 Headquarters Unit.
A. Characteristics are the same except the middle value is the artillery strength.
B. Has range like artillery.
C. Parenthesized Troop Strength may not be used for attack.
D. Parenthesized Armor/AT Strength indicates AT Value only.
1.2.4.5 Air Unit. Aircraft silhouette indicates Air Unit. (The counter shows the air unit Type, e.g. B, and its Strength.)
1.2.5 Unit Symbols. The rulebook key pairs each symbol with its name:
1.2.5.1 Leg and Cavalry Units.
- Rifle/Infantry (crossed box)
- Fallshirmjager/Airborne (crossed box with arch)
- Security (box with "Sich")
- Cavalry (diagonal shaded box)
1.2.5.2 Motorized Units.
- Armored: Pz/Tank, Assault Gun, Mech Inf/PzGrenadier (crossed box), Recon (circle-crossed box)
- Artillery: Artillery, Rocket/Nebelwerfers, Mortars
- Anti-Tank
1.2.6 Unit Size.
| Symbol | Size | Symbol | Size |
|---|---|---|---|
| XXX | Soviet Corps | XX | Division |
| III | Regiment | X | Brigade |
| II | Battalion |
HEADQUARTERS symbols: Soviet Front (for example "1 Ukr"), Soviet Army (number above the bar), Soviet Tank (for example "3GTk"), German Army (for example "4 Pz"), German Korps (for example "VII").
1.2.7 Unit Abbreviations.
German:
| Abbr | Explanation |
|---|---|
| AH | 1st SS Panzer Division Leibstandarte Adolf Hitler |
| Baum | Baumgartner: an ad hoc combat unit including some cavalry |
| DR | 2nd SS Panzergrenadier Division Das Reich |
| FJ | Fallschirmjager (paratroopers - no jump ability) |
| KAC | Korps Abteilung "C" or Corps Group C, a division-sized amalgamation of three shattered divisions |
| Sec | Security Division |
| Tig | Tiger tank battalion |
Soviet:
| Abbr | Explanation |
|---|---|
| Cz | Czechoslovak Brigade |
| G | Guards |
| GTC | Guards Tank Corps |
| g | gun |
| hh | heavy howitzer |
| l | light artillery |
| m | mortar |
| RD | Rifle Division |
| Uk Fr | 1st Ukrainian Front |
Both:
| Abbr | Explanation |
|---|---|
| AD | Artillery Division |
| B | Bomber |
| F | Fighter |
| MC | Mechanized Corps |
| St | Sturmavik/Stuka |
| T | Transport |
1.2.8 Markers. The marker key shows: Combat Resolution (Die-Roll Modifiers), Out of Command, Strength Reduction, Second Combat, Anti-Tank, Unit Moved, Out of Supply, Cut Off, Partial Breakthrough, Ground Condition, Atmosphere Condition, Temperature Condition, Breakthrough, and the Kiev Bridge Marker.
1.3 Map Errata
A. The last two hex rows (closest to the TTRT) are incorrectly numbered. They should be the 2600 and 2700 rows. Substitute 26 and 27 for the first two digits of the hex number in these last two rows.
B. There should be a dirt road running through hexes 0928-0827-0826-0726. There should be a river crossing between hexes 0826-0726 in conjunction with the dirt road.
2.0 Sequence of Play
The Sequence of Play determines the order of all activity during a Game-Turn. This Sequence of Play should be closely followed, although an occasional grant of leniency helps to keep a game civilized.
2.1 The Game Turn
The basic increment of time and activity is the Game-Turn (or turn). The length of each scenario or the campaign game is measured by how many turns have elapsed before play must end. Turns are further subdivided into Phases. Phases are labeled as belonging to either the First Player or Second Player, depending which side is active during that phase.
2.2 Turn Sequence
Activity occurs during each turn in the order listed below. References in the rules to activities during a phase refer to the phasing side unless specifically referencing the non-phasing side.
A. Weather Determination
B. Initiative Determination
C. First Player Turn
- Supply and Replacement Phase
- Air Commitment Phase (both sides)
- First Player Movement Phase
- Second Player Reserve Movement Phase
- First Player Combat Phase
- First Player Exploitation Movement Phase
- Second Player Reserve Movement Phase
- First Player Second Combat Phase
D. Second Player Turn: Same sequence, reversed roles.
E. Game Turn Indication
3.0 Weather
To determine the weather, the Soviets roll the die twice; once for the temperature and once for atmospheric conditions. The results are compared to those on the Weather Table to help determine the weather conditions for the current turn. The weather at the start of each scenario is given in the exclusive rules for that scenario.
3.1 Weather Table
A. The Weather Table has two sections: Atmospheric Conditions, and Temperature.
B. Each section has two columns, one for November, and one for December. Use the column of the month for the current turn.
- Under each monthly column there are three possible atmospheric conditions and two possible temperatures.
- The range of die-roll values to the right of each condition indicate the results yielding that condition.
- After weather conditions have been determined, adjust the markers on the Weather Track to reflect the current turn's weather.
3.2 Ground Condition
A. The ground condition is given at the beginning of each scenario. A combination of Atmospheric and Temperature conditions determines the Ground condition for all but the first turn of each scenario.
B. There are three possible ground conditions: Frozen, Thaw, and Snow. Most scenarios start with the ground being Frozen.
C. Two consecutive turns of warm temperature change Freeze to Thaw starting with the Weather Determination Section of the second turn.
D. Cold temperature changes Thaw to Frozen immediately.
E. If it snows (3.3), the following turn will have a Ground condition of Snow if it is Cold on that turn.
F. If it rains, the Ground condition will become Thaw during the next turn if the Temperature is still Warm.
Example: The current turn's Ground condition is Freeze. If the Temperature becomes Warm and it Rains or remains Warm, the next turn's Ground condition will be Thaw.
Designer's Note: Warm, in this case, means between 33°F and 40° F!
G. Each movement class column on the Terrain Effects Chart (TEC) has three sets of Movement Point (MP) costs listed for it. Each set (separated from the others by slashes) is used with one of the three Ground Conditions. The first is used during Freeze, the second for Snow, and the third cost is for Thaw. Use the MP costs associated with the current Ground condition.
Example: A motorized movement class unit expends 1 MP to enter a Clear hex during Freeze, while the cost during Snow is 3 MPs.
3.3 Atmospheric Condition
A. The Atmospheric condition can be Clear, Cloudy, or Precipitation. The condition rolled on the Weather Table takes effect immediately and lasts until the next Weather Determination Section.
B. Precipitation and Temperature combine to cause either Snow or Rain.
- When the Temperature is Warm, Precipitation is Rain.
- If it is Cold, Precipitation is Snow.
- There are no air operations possible during precipitation turns.
C. Clear has no effect.
D. Cloudy causes both sides to roll a die to determine the number of air units available to commit that turn.
3.4 Weather Effects on Airpower
3.4.1 Thaw Turns
A. If either side controls all Kiev airfields (hard surfaced), it may commit all of [printed as "is"; read as "its"] air units during Thaw turns.
B. If neither side controls all of the airfields adjacent to Kiev, each must roll the die to determine the number of air units available to commit during that turn.
3.4.2 Cloudy Weather
Cloudy Weather causes each side to roll a die. Halve the result (rounding down), then add four to determine the number of air units that side may place in the Ready Box on its Airfields Display for that turn.
4.0 Terrain
A. Most hexagons (hexes) or their sides (hexsides) contain natural and/or artificial terrain features that have an effect on play.
B. There are also different kinds of transportation lines running through many of the hexes.
C. In the rules, and on various charts and tables, these features are generally referred to as the terrain type.
4.1 Hex and Hexside Terrain
A. If any portion of a hex contains even a small piece of a terrain type, then that terrain type is considered to be in the entire hex. A hex or hexside may contain more than one terrain type.
B. In the case of a hexside, a terrain type must run entirely from one end of a hexside to the other before it can be considered to contain that type of terrain.
Developer/Designer's Notes: In some cases, a terrain type may not always run through a hexside entirely, but if it runs in such a way so that it must be crossed to enter an adjacent hex, the hexside separating the two hexes is considered to contain that terrain type. This was done intentionally to keep the map looking natural.
4.2 Terrain Effects
Terrain affects most aspects of play. Movement, Combat, and Supply are some of the things that are affected by terrain type; specific rules explain these effects. Terrain types cost varying MPs to move into or across. In combat, terrain type may cause the combat odds to be changed by shifting the Odds Columns on the CRT.
4.3 Designer's Notes on Terrain Effects
A. Clear terrain is gently rolling farmland. In game terms it has minimal effects.
B. Woods consists of a mixture of deciduous and coniferous trees.
C. Swamp consists of marshy ground, with some vegetation. In Thaw conditions, swamps are impassable by motorized or track units.
D. River refers to the smaller rivers on the map, fordable and certain to freeze when cold temperature ensues.
E. Major River refers to rivers that are fordable for the most part and represent a serious obstacle to movement and assault.
F. The Dnepr River is a very wide river. It can be crossed at crossings only. There are sections of the Dnepr, particularly, but not exclusively north of Kiev, where the Dnepr has islands in it. Since crossing onto these islands would involve crossing a Dnepr hexside, it can only be done at a crossing.
G. Village hexes indicate the location of the larger villages on the map. Many other smaller villages are ignored as being of no game significance. These are wood built. The movement cost to enter a village is determined by the other terrain in the hex, as none of these places is five miles across.
H. Town hexes represent larger built-up areas, with some cement buildings. Towns are Korosten, Zhitomir, Berdichev, Kazatin, Belaya Tserkov, and Kanev.
I. City terrain means the city of Kiev. One of the four largest cities in the USSR, Kiev had been damaged in the fighting in 1941, with much of the population killed or deported by the Nazis.
J. Defense Lines had been built by both the Germans and Soviets to respectively wall off and defend the Soviet bridgeheads over the Dnepr River. The opposing armies had more than a month to dig them and they represent earth and timber dug outs, firing positions, and trench lines in depth with mines and barbed wire deployed.
K. Rough terrain is hilly and cut by ravines.
L. Roads are represented by three different terrain types: Dirt Roads, Paved Roads, and Railroads. Roads allow units moving along them to ignore other terrain in the hex and use road movement rates listed in the TEC, depending on the ground condition. Units may not [printed as "may not road movement"; sic] to enter a hex containing another friendly unit that has also entered the hex using road movement in the same turn, but must pay the normal movement cost to enter the hex. Road movement consists of movement from one road hex to an adjacent connected road hex.
M. Bridges are assumed to exist every place a road crosses a river or major river. Some of these are undoubtedly fords, but available maps are not detailed enough to tell. Doubtless these are all bridges where railroads and paved roads are involved and mostly fords where the dirt roads are concerned. Bridges allow units using road movement to ignore the movement cost of crossing river, major river, or Dnepr River hexsides.
N. Airfields: The airfields adjacent to Kiev have significance in Thaw conditions on the number of air units the owning side can ready. The other airfields are only used for possible air supply. They are also there if players wish to fashion their own rules about air basing, strikes against bases, planes being overrun on the ground, etc.
4.4 Kiev Bridge
A. The turn after taking Kiev, the Soviets place the Kiev Bridge counter on the Turn Record Track (TRT) seven turns into the future.
Example: If Kiev is taken on Turn 3, on Turn 4 the Soviets place the counter in the Turn 11 box.
B. On the future turn, the Soviets may place the marker on the bridge showing that the bridge has been repaired, allowing Soviet rail movement into Kiev.
C. If the Soviets lose either Kiev hex at any time during the building period, remove the marker from the track. The Soviets may place it on the TRT again seven turns from the time they retake Kiev.
D. Three turns after placing the bridge, assuming the rail line between Kiev and rail hex west of Gostomel has been in Soviet hands for those three turns, flip the bridge marker to indicate that the rail line now runs as far as Gostomel, allowing Soviet units to detrain there.
4.5 Major Rivers and Motorized Units
A. Motorized, non-artillery units may cross a Major River hexside during movement, but they must expend all of their movement to do so and begin their movement adjacent to the Major River hexside.
B. A supply path may be traced across a Major River Hexside, but the HQ providing supply must be in a hex on the other side of the river.
5.0 Initiative
A. In the Campaign game, the Soviets start as the First Player. During the game, both sides have the opportunity to take or retake the Initiative.
B. Each scenario specifies the side to start as the First Player, and the instructions indicate if the opposing side can take the Initiative during the scenario.
C. On any turn that the word Initiative appears on a side's TRT, or on any subsequent turn, that side may announce during the Initiative Determination Phase that it is taking the Initiative. To do so, it must have secretly written this intention during the Initiative Determination Phase of the previous turn.
D. A side taking the Initiative becomes the First Player for that turn, and remains so until the other side retakes the Initiative.
E. Having the ability to take the initiative does not require a player to do so immediately, or even at all if a player chooses not to.
Designer's Note: The effect of taking the initiative is to get two player turns in a row, thus allowing a side to throw its opponent badly off balance and unable to react in a big way (except with reserves). Astute players will note that receiving the initiative on the TRT is closely tied to receiving reinforcements and having fresh forces to introduce into the battle. This is not accidental.
6.0 Movement
A. During a friendly Movement Phase, the phasing side may move all, some, or none of its units.
B. Units must expend MPs to move. The terrain type and the Movement Class of the unit determines the cost (in MPs) to enter or cross hexes and hexsides. These costs are listed on the TEC.
C. When a unit moves, it cannot skip or jump hexes. Movement must be from one hex into an adjacent hex.
6.1 Movement Allowance
A. A unit may spend up to 12 MPs per friendly Movement Phase. Once a unit has expended its full MA, it must halt its movement for the remainder of that phase. A unit may not accumulate MPs from one turn to the next, nor may it transfer unused MPs to another unit.
B. A unit must have sufficient MPs remaining to pay the cost to enter a hex. If the unit does not, it cannot enter the hex. Round down any remaining fractional MP for this purpose.
C. Regardless of the other costs and restrictions, unless prevented by impassable terrain, enemy units, ZOCs, a unit may always move a minimum of one hex per turn.
6.2 Movement Classes
A. A unit belongs to one of three Movement Classes: Leg, Cavalry, or Motorized, designated by the color-code inside its Unit Type Box. A Motorized unit is white, a Cavalry unit is half-white and half-yellow, and a Leg unit has the same color as the rest of the counter. The unit symbol in this box also shows its Movement Class. See the Unit Description Chart for a list of symbols and their Movement Classes.
B. To determine MP costs, a unit's Movement Class is matched on the TEC with the terrain type it is attempting to enter or cross. If a unit's Movement Class is prohibited from entering or crossing the terrain type (shown on the TEC by an upper-case P), the unit may not execute the movement.
6.3 Moving Through Other Units
A. Units may freely move through other friendly units except in the following situation: a unit may not enter a hex using the road movement rate if another friendly unit in the hex entered it during the current Movement Phase using road movement rates. Units smaller than a division are not restricted by this rule.
B. When using road movement, Soviet and German artillery divisions are considered to occupy two hexes: the hex the unit is in, and the one it just exited. This rule applies to both hexes.
Designer's Note: Players may optionally agree to forget the road movement rule altogether in the interest of speeding up play and teaching someone new how to play.
6.4 Exploitation and Reserve Movement
A. Exploitation movement and Reserve movement are carried out like regular movement during a Movement Phase except that:
- Only units marked with a Reserve marker may move during Reserve movement.
- Only units marked with Reserve, Breakthrough, and Partial Breakthrough markers can move during Exploitation movement.
B. When Reserves are committed during an enemy Player-Turn, they can only use up to 6 MPs.
C. Reserves committed during a friendly Exploitation Movement Phase can use up to 12 MPs.
6.5 Movement as A Result of Combat
Units can also be displaced as a result of combat, retreating, and advancing. This is not considered to be regular movement, and is explained in the Combat Rules section.
6.6 Rail Movement
A. Units can move by rail. Soviet reinforcements can arrive, with no movement cost, at any village hex east of the Dnepr that is on, or adjacent to, a rail line connected with the eastern map edge.
B. Seven turns after the Soviets take Kiev, they are considered to have built (repaired) a railroad bridge over the Dnepr at Kiev and may bring their reinforcements in there.
C. Three turns later reinforcements can arrive at Kiev or Gostomel.
D. Germany can use rail movement to bring motorized reinforcements in at any town, or infantry reinforcements at any town or village that is west of the Dnepr. A town receiving reinforcements must be connected with the south or west map edge by rail line.
E. If a Soviet counter was the last to pass through a rail hex, it may no longer be used by Germany for rail movement.
F. Rail movement may not be used to enter EZOCs.
6.7 Movement and Weather
Reduce the MA of leg units by 2 MPs in Thaw conditions.
7.0 Stacking
A. More than one friendly unit may occupy a hex at the same time, up to the stacking limit.
B. Friendly and enemy units can never occupy the same hex simultaneously.
7.1 Stacking Points and Stacking Value
A. Each unit has a Stacking Value (measured in Stacking Points) printed to the right of its unit type box.
B. The stacking limit is ten stacking points of friendly units.
7.2 Overstacking
A. Units may freely move through friendly units without regard to the stacking limit, but may not voluntarily exceed them at the completion of their movement.
B. Units forced to retreat in violation of the stacking rules can do so by:
- Continuing to retreat until they reach a hex that is not overstacked;
- Displacing friendly units that are in their way by retreating them; or
- Overstacking, but they must undo this situation at the first available opportunity.
C. Units that are overstacked may not contribute to any combat in their hex but are affected by any combat results that are incurred against their hex. The defender selects the units in an overstacked hex that participate in combat.
D. Units that are overstacked in their initial setup may fight in this condition, but must meet the stacking limit as soon as possible.
7.3 Stacks and Movement
A. Units may stack and unstack freely (but see road movement rules, 6.3).
B. Units may move together as a stack (except on roads) expending MPs at the rate of whichever unit in the stack would have to spend the most MPs to enter each hex. If a unit in a stack exhausts its MPs while other units in the stack have MPs remaining, the owning side may halt the stack in place leaving it intact, or may continue to move the units with remaining MPs, leaving behind those units with none.
8.0 Zones of Control
A. A ZOC represents the ability of a unit to impede nearby enemy operations and logistics through the use of artillery, patrolling, and ranged direct-fire. ZOCs can restrict enemy movement, supply lines, retreat and advance after combat, reserves, and the use of HQs for support.
B. ZOCs exerted by friendly units do not affect other friendly units.
C. Units of both sides may exert a ZOC into a hex at the same time.
D. The presence of a friendly unit in a hex negates an EZOC for purposes of tracing supply lines, retreat after combat, and providing HQ support, but not for purposes of movement.
8.1 Units Which Exert a ZOC
A. All ground units exert ZOCs into the six surrounding hexes except for the situations listed below. [printed as "Al ground units"]
B. A unit does not exert a ZOC when:
- The ZOC would be into a hex on the west bank of the Dnepr, and the unit exerting it is in a Dnepr River Island hex or on the east bank of the Dnepr.
- The ZOC would be exerted by a motorized units into a woods or swamp hex.
- The ZOC would be exerted into a non-Clear hex by an artillery unit unless it is stacked with one or more non-artillery units. A Village/Clear hex is considered a Clear hex for this rule.
- The ZOC would be exerted into City or Town hexes, or across Defense Lines.
8.2 ZOC Effects on Movement
8.2.1 Entering Enemy ZOCs
When a unit moves into an EZOC it must stop and move no further for the rest of the phase, except for tank and panzer units, which may ignore the ZOC of units lacking any tank or anti-tank strength.
8.2.2 Exiting Enemy ZOCs
A unit that begins its movement in an EZOC may exit that ZOC and enter the ZOC of another enemy unit later during the same Movement or Exploitation Phase.
8.2.3 ZOC to ZOC Movement
A. Units may not move from one EZOC directly into another ZOC of the same enemy unit unless the ZOC hex being entered is occupied by a friendly unit.
B. Tank and panzer units can move directly from one ZOC to another of the same enemy unit if they do not cross Defense Lines, Rivers, or Major Rivers.
C. A unit moving from ZOC to ZOC like this may move a maximum of one hex during that Movement or Exploitation Phase.
8.2.4 Defensive Lines and Enemy ZOCs
No unit may cross a Defense Line hexside to enter a hex in an EZOC if the unit exerting that ZOC is in that Defense Line (adjacent and behind it).
8.2.5 Example of ZOC Effects
A. The black units are on one side, while the light gray units are enemy units. [The example diagram is not transcribed; its hex-numbered positions are summarized in B-E.]
B. Unit F must stop moving upon entering an EZOC in hexes 5, 13, or 7.
C. Unit G may move from 5 to 12 only if it is a tank or panzer unit and there are no defensive line or Major River between the hexes. This would consume the unit's entire MA.
D. Unit D may move into hex 10 because a friendly unit (E) is in the hex. This consumes the unit's entire MA.
E. Unit G may leave hex 5, go into hex 6, and then enter either hex 13 or 7.
8.3 ZOCs and Supply
Supply lines cannot be traced through an enemy ZOC unless the hex is occupied by a friendly unit.
8.4 ZOC and Combat
Units in EZOCs are never forced to attack. Units in the ZOCs of several enemy units can attack all, some, or none of them as the attacker desires.
8.5 ZOC and Retreats and Advances After Combat
A. Units whose largest strength (troop strength, artillery strength, or tank/anti-tank strength) is three or greater must lose a step when retreating out of a hex containing an EZOC, other than the initial hex of the attack.
B. Units whose largest strength is two or one may freely retreat out of EZOCs.
C. Units advancing after combat may ignore EZOCs being exerted into the hex that was attacked, but if they advance further, they must stop in the first EZOC they enter.
Designer's Notes: Taking losses due to retreating out of ZOCs is not a misprint! It puts a little twist on the usual retreat routine.
8.6 ZOC and Reserves
Reserve markers on friendly units must be removed as soon as an enemy unit exerts a ZOC into the hex containing the Reserve maker.
8.7 ZOC and HQ Support
The path of HQ support cannot be traced through a hex in an EZOC unless the hex is occupied by a friendly unit.
9.0 Reserves
A. Each side has a limited ability to designate some units as being in reserve. Each Soviet Army/German Corps HQ can designate one unit or stack of units in reserve.
B. Each Soviet Tank Army /German Panzerkorps can designate two units or stacks in reserve.
C. The only limit on the number of units or stacks that can be placed in reserve is the number of Reserve markers in the counter mix.
D. Units in reserve are limited in what they can do during their Movement Phase, but are, if committed from reserve, allowed to move during either their Reserve Movement Phase or during their Exploitation Movement Phase.
9.1 Designating Reserves
During the Movement Phase, the phasing side designates reserves by marking the units with a Reserve marker, indicating which HQ is creating which reserves under the above restrictions. The units designated may not be in an EZOC and must be within three hexes of the HQ that created them.
Exception: Units that are completely surrounded by enemy units and/or EZOCs may be designated reserves so that if they are unable to fight their way out of encirclement, friendly units can break the encirclement, allowing the encircled units to escape using exploitation movement.
9.2 Reserve Unit Restrictions
A. Until a unit in reserve is committed it may move no more than 4 MPs during a friendly Movement Phase.
B. Units in reserve are not required to remain within three hexes of the HQ that placed them into Reserve.
C. Units in reserve may stack with units which are not in reserve; place the Reserve marker over the units that are in reserve and be sure to keep track of this stack as the non-reserve units will be on top of the Reserve marker. Alternatively, orient the Reserve marker and the units in reserve at an angle that is 180 degrees from that of the other units in the hex.
9.3 Committing Reserves
A. During any Reserve Movement Phase or Exploitation Phase, the phasing side may commit a unit or stack of units by removing the marker and announcing the use of Reserves.
B. This unit or stack may now move up to 6 MPs in a Reserve Movement Phase, or 12 MPs in an Exploitation Phase. In the latter case, the unit may attack during the Combat Phase immediately following exploitation movement. Flip the Reserve marker to its Second Combat side to show that these units can attack in the Second Combat Phase.
C. Once units are committed, they may enter EZOCs.
10.0 Reconnaissance
These rules control how much each side is allowed to know concerning the composition of opposing forces and allow each side's limited examination of enemy forces.
10.1 Stacks Adjacent to Enemy Units
A. Stacks of units adjacent to an enemy unit must have the largest unit in the stack on top. If two units are of the same size, then the owning side may choose the unit to be on top.
B. Use the Unit Sizes Table (1.2.6) to determine relative sizes of units.
10.2 Stacks Within One Hex of Enemy Units
A. Stacks of units within one hex of enemy units must place a divisional or corps-sized unit on top.
B. If no such unit is present, then the largest non-artillery unit should be on top.
10.3 Stacks Within Two Hexes of More of Enemy Units
Stacks that are within two hexes or more of enemy units may have any kind of unit chosen to be placed on top.
10.4 Stacks and Combat
In combat each side should examine its own units and announce their total attack or defense strength, including artillery, and their tank or antitank strength.
Designer's Note: Wargames allow the players far more information about their opponents than was available to their historical counterpart, so every effort must be made to minimize the information that can be gleaned by looking at the game map. Yeah, I know, these rules require a certain amount of trust of your opponent. My advice is play with trustworthy people. You, I know, would never cheat, heck, it would ruin the game. Its just that other guy that you have to watch out for.
10.5 Examples of Reconnaissance
A. A Soviet Rifle Corps and Tank Corps are in the same hex and adjacent to a German unit. The Soviets could choose to have either unit as the top unit for the stack.
B. A German stack containing an Assault Gun Battalion and a Pz division is within one hex of a Soviet unit, but not adjacent to it. Germany would have to place the Pz division on top of the German stack.
11.0 Combat
A. To reach one's objectives and win the game it is necessary to displace or destroy enemy units. This is done by attacking adjacent opposing units, which causes Combat. During Combat, enemy units are attacked using the various strengths of the attackers, possibly involving additional artillery, HQs, and air units. The outcome of the attack is determined by comparing the strengths, factoring in terrain effects, and arriving at a ratio. The attacker then rolls the die, comparing the result with the ratio on the Combat Results Table (CRT) This produces obligations for one or usually both sides to fulfill by retreating and/or taking losses.
B. Units are not required to attack. During a friendly Combat Phase, the phasing side designates which units will attack and the defender's units to be attacked. Both sides secretly decide which combats will receive artillery, air, and HQ support, and then, combat by combat, reveal it to the opposing side. (If you don't trust each other, or yourself, you may write all this down. Better is to decide it and keep it in your head and then announce it honestly.)
C. Combat is then resolved, one combat at a time, all results applied before the next combat is resolved. Units may only attack in the Second Combat Phase if they are committed from reserve or as a result of partial or complete breakthroughs. However, artillery units and HQ units that are not designated for breakthrough or reserve may participate offensively or defensively in both Combat Phases.
11.1 Abilities and Restrictions
A. A unit may only attack once per Combat Phase.
B. A unit may only be attacked once per enemy Combat Phase. Defending units in the same hex must be attacked as a single stack.
C. Attacking units in the same hex may attack different enemy-held hexes.
D. An attacking unit may only attack one hex per Combat Phase.
E. Units that are not artillery, air, or HQs may attack any enemy units they are adjacent to, provided they would be able to move into the defending hex (the defending hex is not impassible terrain to the attacking unit). Thus, units may not attack across the Dnepr River except at a crossing. However, units may still use their artillery strengths across the Dnepr to support attacks by other friendly units.
11.2 Non-Adjacent Combat
A. Artillery units can add their artillery strength to an attack or defense if the supply rules are satisfied and the hex being attacked is within range of the artillery unit.
B. HQs may lend support on attack or defense if the hex under attack is within range of the HQ.
C. Air units may participate in combat as well (15.2, 15.3).
D. Artillery and air units are not affected by the results of combats that they participate in, unless the artillery unit is in the hex under attack.
E. HQs that provide only artillery support are treated like artillery units, but if they provide troop strength then they are eligible to take losses, even if they are not adjacent or directly in the hex in which combat occurs.
F. Air, artillery, and HQs may not attack without the participation of at least other unit that is not air, artillery, or HQ. [as printed]
G. Artillery units that are in hexes under attack and use their artillery strength may not retreat after combat.
11.3 Calculating Combat Odds
A. When resolving a combat, first resolve all air-to-air combat (15.4), then total the troop strengths of attacking units other than artillery and HQs.
B. The attacker next adds the total artillery strength being applied to the attack (halving the artillery due to swamp or defense lines) to the attacking troop strength. (A parenthesized troop strength cannot be used when attacking.)
C. The attacker then adds its total tank strength to the attacking troop and artillery strength, but the total armor strength is also noted separately.
D. The defender at the same time similarly totals its defending troop strength, artillery strength, and armor strength, and the effects of the terrain it occupies.
E. A comparison of the total attacking strength to the total defending strength produces a ratio, rounded down in favor of the defender to the nearest ratio on the CRT.
Examples: 15 to 4 rounds down to 3:1, while 3-2 is 1.5:1 exactly.
F. Attacks at odds of less than 1:2 are not permitted, while odds of greater than 7:1 add a +1 DRM for each level higher (Examples: 8:1 produces a +1 DRM, 10:1 a +3 DRM) up to a +5 DRM.
11.4 Armor/AT DRMs
A. Next the tank/panzer strength of the attacking units is compared to the anti-tank (AT) strength of the defenders (including possibly HQ AT support).
B. The resulting ratio provides DRMs to the combat as follows:
| DRM | Condition |
|---|---|
| +1* | Defender has no AT and Attacker has Tank |
| +1 | 1:1 < Attacker Tank:Defender AT < 2:1 |
| +2 | 2:1 Attacker Tank:Defender AT < 3:1 |
| +3 | 3:1 Attacker Tank:Defender AT < 4:1 |
| +4 | 2:1 ≤ Attacker Tank:Defender AT |
| -1 | Defender AT > Attacker Tank |
| -1 | Defender has Tank and Attacker has no Tank |
* per point of tank strength, max DRM +4
C. If both sides have tank, read defender's tank as AT strength.
D. In addition, both sides add their tank strength to the totals of their troop and artillery strength.
E. Ignore attacker's AT strength for all purposes.
F. Defender's AT strength is used only for Armor/AT ratio determination.
11.5 Air Support DRMs
A. After any air-to-air combat is resolved, determine if any air units participate in the combat. Apply a +1 DRM per attacking air point, and a -1 DRM per defending air point.
B. If the absolute value of the DRM is at least 5, shift the odds one column in that side's favor per every five DRMs above five.
Example: An attack supported by 12 air points receives a +5 DRM and one shift to the right. Once the odds are 7:1 plus five (7:1 +5), or 1:2 minus four (1:2 -4) all excess modifiers are ignored.
11.6 Terrain DRMs
The defender then announces any modifiers for the terrain the defenders occupy. This is the last modification of the raw odds.
Designer's Notes: The idea is that each side totals its various strengths and modifiers, and they are revealed after all decisions have been made so that the strength committed to a combat is not done in reaction to seeing what numbers will be most helpful (hmmm, another two points of artillery fire won't change the odds so let's not bother...).
11.7 Terrain and Combat
A. The defender receives the advantage of any terrain in the hex being defended. Terrain effects are cumulative.
B. Terrain effects are in the form of column shifts applied to the odds ratio and against the strength of attacking artillery. These effects are all listed on the TEC.
C. The defender may also receive column shifts if the enemy is attacking through certain hexsides. To receive these shifts, all enemy units must be attacking through these kinds of hexsides.
D. Motorized class units may only use their artillery values and one-half of their troop strength when attacking through a Major River hexside.
E. Armor Values may not be contributed over a Major River hexside for any combat purpose.
11.8 Resolution of Combat
A. Each attack is resolved individually, with all results and obligations being applied before the next attack is resolved.
B. The attacker may resolve attacks in any desired order.
C. The attacker rolls one die for each attack, applying relevant DRMs.
D. The result is found on the CRT by cross-indexing the final die-roll value with the appropriate odds column.
E. The result is listed in the form of numerical obligations or a lettered result. All results to the left of the slash apply to the attacker, while those to the right apply to the defender. All of these results must be satisfied before the next combat is resolved.
11.9 Obligations
A. The numerical results are called Obligations, which may be satisfied by retreating and/or taking losses.
B. The defender's Obligations must be satisfied first, followed by the attacker's Obligations.
C. When determining the defender's Obligations, the defender decides its odd numbered Obligations, while the attacker decides the even-numbered ones.
D. To advance after combat, the attacker must satisfy its obligations as losses, as retreat and advance at the same time are not possible.
E. Whatever the choice, the attacker may only choose to satisfy one obligation by a retreat, all others must be taken as losses.
Exception: Artillery units involved in the attack do not retreat as a result of a combat in which they contributed artillery strength and to which they are not adjacent.
F. The defender may not choose how the attacker satisfies attacker obligations.
Designer's Note: If the attacker retreats, it is liable to uncover its guns in the process, giving it the choice of taking its lumps or opening its artillery to counterattack.
11.10 Routs, Breakthroughs, and Partial Breakthroughs
There are three other kinds of Combat Results in addition to the numerical Obligations. These are described below.
11.10.1 Rout
A Rout (R) means the attack has been a fiasco and that the attacking units must retreat two hexes and take two losses, determined by the defender. In this instance only, the attacker may be made to retreat more than one hex.
11.10.2 Breakthrough
A Breakthrough (B) means that the defender must retreat two hexes, and take two other obligations determined by the attacker. In addition, the attacker may immediately mark one attacking stack with a Breakthrough Marker.
11.10.3 Partial Breakthrough
Any time that a defender is required to satisfy three obligations the attacker has achieved a Partial Breakthrough. The attacker may mark one unit or stack with a Partial Breakthrough marker.
11.10.4 Effects of Partial Breakthrough and Breakthrough
A. The numbers on the Breakthrough and Partial Breakthrough markers indicate the maximum number of MPs these units may expend (12 and 6, respectively) in the immediately following Exploitation Phase, except for cavalry units, which may move 8 MPs with a Breakthrough, and 4 MPs with a Partial Breakthrough.
B. After units move in the Exploitation Phase, flip the Partial Breakthrough and Breakthrough markers to their Second Combat side, signifying that these units may attack again.
C. These units may have combat in the immediately following Second Combat Phase. Remove the markers at the end of the Second Combat Phase, regardless of the actions the units take in that phase.
D. Units that achieve a Breakthrough or Partial Breakthrough during the Second Combat Phase receive no marker or special status.
E. If units in a stack marked Breakthrough or Partial Breakthrough advance so that they are unstacked at the end of the advance, each unit in the stack is marked with a marker for the appropriate type.
11.10.5 Infantry and Breakthrough/Partial Breakthrough
A. If a stack contains only infantry, it can achieve a Breakthrough and can move one hex in such cases, regardless of the MP cost to enter the hex.
B. A stack containing only infantry cannot [achieve] a Partial Breakthrough. [printed as "cannot a Partial Breakthrough"]
C. If a stack contains infantry with motorized and/or cavalry and achieves a partial breakthrough, the infantry cannot move.
11.11 Retreats After Combat
A. If a unit fulfills its obligations by retreating, it must retreat one hex per obligation, according to the following priority:
- Away from the enemy units attacking it.
- Toward a friendly supply source.
- Toward terrain that offers the most defensive benefits to the defender.
B. Units can be forced to take losses when retreating due to EZOCs (8.5).
C. The path of retreat is always determined by the owning side, even if the other side required the retreat.
D. Units may retreat in violation of Stacking (7.2).
E. Units that cannot retreat due to surrounding enemy units and/or impassable terrain must take their obligations as losses.
F. A unit may not retreat into the same hex twice during the same Combat Phase.
G. Units of a defending stack must retreat as a stack. The units cannot retreat into different hexes.
11.12 Advance After Combat
A. Attacking units may advance after combat [if] both of these conditions are met:
- The defender's hex is vacant either due to the retreat of the defenders or their destruction.
- The attacker took all of their obligations as losses.
B. If these conditions are met the attacker may always move one unit or stack of units into the vacated hex.
C. If the defender retreated more than one hex, or if the defender was destroyed in the hex but had remaining obligations that could not be satisfied due to the defender's destruction, the attacker may advance additional hexes equal to the number of hexes retreated or obligations left to fulfill.
Examples: If a defender retreated three hexes, the attacker could advance three hexes. If a defender were destroyed in place but had two additional unfulfilled obligations, the attacker could advance two hexes.
D. When advancing after combat, a unit must stop upon entering an EZOC, excluding EZOCs in the hex the defender vacated.
E. Leg class units may never advance more than one hex after combat.
F. Units must first advance into the hex being attacked, but after that, they may deviate or follow the defender's retreat path.
G. In Thaw turns, advance after combat is limited to one hex for motorized and infantry units, and to two hexes for cavalry units.
H. Units may advance only one hex after combat when attacking across major river hexsides.
I. Units with a tank strength may not advance over a Major River after combat.
J. Any units of the attacker's, excluding artillery, which did not engage in combat and are adjacent to units that attacked and advanced after combat, may also advance up to the same distance, depending on their movement class.
11.13 Losses
A. Units may take their obligations as losses rather than retreats. Units take losses from their significant strength, thus a 14-5-(2) Rifle Corps takes losses from its 14 troop strength, a 1-5-0 Nebelwerfer Brigade takes its losses from its 5 artillery strength while a 5-5-10 Panzer Division takes its losses from its 10 panzer strength. On the counters, the Significant Strength is shown enclosed in a circle or square. The other strengths remain the same until the counter is flipped.
B. Do not confuse step losses with strength reduction, although step losses result in strength reduction. A step loss represents a hit on a unit's strength, but the amount of strength reduction depends on the unit's strength at the time of the loss. Each Obligation taken as a loss (or hit, if you will) equals one step loss.
C. If a unit's current Significant Strength is greater than six, a step loss reduces the unit's current Significant Strength by two.
D. If a unit's current Significant Strength is six or less, a step loss reduces the unit's Significant Strength by one.
E. Loss markers placed under a unit show the amount of Strength reduction it has incurred from the printed Significant Strength value on the side of the unit counter that is currently face-up.
F. A unit on its full-strength side is flipped after it takes two step losses. After a unit is flipped to its reduced strength side, it is destroyed after it takes four step losses or its strength is reduced to zero, whichever comes first.
G. The large Soviet Rifle Corps with strengths of 15 and 14 have an extra substitute counter (the one with those initial strengths) that can take two step losses. On the third step loss, use the two-sided counter for these units in the normal fashion.
H. A unit on its reduced side uses the Significant Strength shown on that side, unless the unit has taken losses after being flipped. The strength reductions caused by flipping a unit may not always correspond to the normal loss formula, but it is used.
Designer's Note: During the Kiev fighting, one fact stands out among the statistics, namely that the big units took the big losses. This is contrary to usual wargame practice where little units can be sacrificed to maintain the hitting power of the big ones. Not in this game you don't. This leads to the concept of steps; it works like this.
11.13.1 Losses to Small Units
Units with a current strength of six or less have their Significant Strength reduced by one for each obligation satisfied by a step loss.
Example: Place a 1-loss marker under an n infantry division with a strength of 4-4-(2) when it takes its first loss. This makes its value 3-4-(2). When it takes another loss, flip it over to the side that reads 2-2-(1) and remove the loss marker. The next loss brings back the loss marker and the value falls to 1-2-(1). The final loss will eliminate the unit, but why should it be so easy? (See Unit Elimination below.)
11.13.2 Losses to Large Units
A. Units with an initial full-strength greater than six, each step loss reduces the unit's current strength by two.
B. Use a 2/4 loss marker on the 2-side to show the first loss as a reduction in strength of 2, and two losses on the 4-side to show a reduction in strength of 4.
C. When the unit suffers its third step loss, flip it to its reduced side.
D. Further losses will be in the same manner as a small unit (11.13.1); thus, the unit can take up to four step losses.
11.13.3 Loss Priorities
A. The strongest unit of the side taking losses must take the first loss, except that if armor and AT strength is used in the combat, the first loss must come from the strongest unit contributing tank/AT strength to the combat.
B. An artillery unit in a defending hex, or attacking from an adjacent hex, may take losses after all other non-artillery units take at least one loss each first. Subsequent losses must come from the strongest units available.
C. As units take losses, the strongest unit status may change, so different units may be required to take losses in the same combat.
Example: In an attack made by a rifle corps stacked with a tank brigade as well as two rifle divisions in another hex, all of them at full strength and using the two tank points of the tank brigade, if the attackers incurred two obligations and they were both taken as losses, the first would come from the tank brigade (flipping it) and the second from the strongest rifle corps, placing a 2-marker under it.
11.14 Forgiveness
Immediately before a die roll, an attacker may announce it is "forgiving" one Obligation of the defenders. When this occurs, the defender has one less Obligation to fulfill, as does the attacker. In effect, the attacker is not pushing it in order to keep its own losses down.
11.15 Unit Elimination
A. A unit down to its last step can only be eliminated when it takes two losses in one Combat Phase, so that a unit that is on its last step that is required to take another loss by an opponent (an even numbered loss) may retreat instead of taking the loss.
B. If a unit on its last step is required by its opponent to take an Obligation as a loss, it produces no result, unless it is preceded or followed by a decision of the owning side to take a loss from that last step, in which case the unit is eliminated.
C. If the owning side has a choice of a retreat or a loss, and the loss would be the first from a unit on its last step, and it is also the last obligation inflicted in this combat, then rather than take the obligation as a loss that will produce no effect, the owning side must retreat.
Designer's Note: This reflects the fact that units were hard to destroy if they had an escape route. It is a fact that only a few German divisions at Kiev were completely destroyed, even if they were reduced to a few hundred riflemen and a few battalions of artillery. When they got this thin, they were either withdrawn from combat to be rebuilt or were amalgamated with other skeletal units to make a korpsgruppe. If you like, I could spin you a rationale, but the fact remains: big units would lose enough men and equipment in a few days to make up several thin units, but the thin units could hang in for extended periods of time only losing a little of the little that they had.
11.16 Combat Procedure
A. Resolve air-to-air combat.
B. Total troop strength of non-artillery, non-HQ units. (Ignore parenthesized troop strength of attacking units.) Modify as required for hexside terrain.
C. Add total of attacking artillery, halving strength as required for swamps or defense lines.
D. Add total tank strength.
E. Modify defender strengths for terrain.
F. Calculate combat odds ratio, rounding in favor of defender.
G. Calculate tank/antitank ratio and DRMs.
H. Determine air support DRM.
I. Determine any column shifts as a result of terrain.
J. The attacker rolls the die, applying relevant DRMs, and cross-indexes the result with the appropriate CRT odds column.
K. Both sides apply all results before moving to the next combat.
L. When calculating odds and DRMs, players may use the markers labeled Combat Strength, Armor Strength, and DRMs to assist in remembering each of these categories for a combat. Note the appropriate values for a combat by placing the markers on the Record Track in the proper box. This will obviate the need to use paper and pencil to keep track of all of the various strengths and modifiers associated with a combat. Players can also tally up these values and then reveal them simultaneously as shown by the markers.
11.17 Loss Example
A. A full-strength Soviet 14-5-(2) Rifle Corps takes one Obligation as a step loss. Because the unit's Significant Strength is 14 (greater than six), one step loss reduces the unit's current Significant Strength to 12.
B. These large (14 or 15) units are special because they have an additional counter with values that start at ten. The flip side (reduced) of the 14-5-(2) is a 12-5-(2), so the Soviets only have to flip the unit over to that side to show the effects of one step loss.
C. If the unit took two step losses, the Soviets would have to substitute the 10-5-(2) counter for the original unit and place a 2-marker under it to account for the second loss. The unit's new Significant Strength would currently be 10 – 2 = 8.
D. If this unit took another loss, a 4-marker would be placed under it, reducing its strength to 6.
E. If the unit took a loss again, it would be flipped to its reduced side, since a unit on its full-strength side can only take two hits before being flipped.
F. The strength on the reduced side of this unit shows a 4. The unit could now take up to four losses before being eliminated.
G. Each loss would reduce the units remaining strength by one because the unit's strength is now six or less.
H. As another example, assume that the full-strength Soviet 5GTC with a Significant Strength of six takes a hit. A 1-loss marker would be placed under the unit and its current Significant Strength would be reduced to five.
I. If the unit took another loss, the 1-marker would be flipped to its 2-side, reducing the unit's strength to four.
J. Another loss would require the unit to be flipped over to its reduced side (2-1-3) because a unit on its full-strength side can only take two hits before flipping. The unit would now use the values shown on this reduced side. In this case, the unit could take up to two more hits before being eliminated.
K. If the unit had been the 1st Panzer Division, it could have taken up to four hits on its reduced side, going from a five to a four, to a three, to a two.
L. The rules were modified after the examples, so this example may not match the rules.
12.0 Artillery
A. Artillery units primarily contribute their artillery strengths to a combat in support of other ground units. While most units have artillery strengths, they are not artillery units unless they have a printed range on their counter.
B. Soviet and German HQs may have artillery strengths and ranges but they are always HQ units rather than artillery.
12.1 Providing Artillery Support
A. Artillery support may be added to an attack or defense if the artillery unit or HQ is within range of the defender's hex.
B. Artillery or HQ units can provide artillery support to a hex they are adjacent to or occupy, but an artillery unit in a hex alone must defend itself with its strength, not with its artillery strength.
C. If a HQ unit is attacked in a hex by itself, it may use its artillery strength as well as its troop strength, but if it does it must take any obligations as losses.
D. The artillery strengths of non-artillery units may be used, if the supply situation allows (14.0), to support an attack that unit is making or to support the unit in defense. This support is the adding of the artillery strength to the unit's strength.
E. Soviet artillery units, except for rocket and mortar artillery units, may not engage in combat in the Combat Phase immediately following a Movement Phase in which they move.
F. Mark Soviet artillery units that have moved with the Unit Moved markers to note that these units may not fire. Remove these markers at the beginning of the next Regular Soviet Movement Phase.
G. Artillery support is allocated secretly and then announced.
H. Artillery fire may only be used to attack a unit that is being attacked by another non-artillery ground unit.
12.2 Artillery Units and Obligations
A. Artillery that is not adjacent to a combat suffers no combat results from the combat and cannot be used to absorb losses required.
B. Artillery units that are adjacent to a combat may only be used to absorb losses if no other units are available.
C. Artillery, except rocket or mortar artillery, that is forced to retreat, automatically takes two step losses. These steps are in addition to any obligations taken and do not satisfy loss obligations.
D. Artillery units that are in hexes under attack and use their artillery strength cannot retreat unless they are mortar or rocket units, thus any obligations they must satisfy must be in losses.
12.3 Range
A. Range is the distance, in hexes, from the firing unit to the hex that the artillery strength is being allocated to. Do not count the hex the firing unit occupies.
B. Units with Range of one may provide support to the hex they are in and to any adjacent hexes.
12.4 Soviet Artillery Units and Subordination (Optional)
A. The Soviets should be clear on which artillery units are attached to which army, and only use units subordinate to that army to support its subunits. Since the 38th Army and 3rd Tank Army can often get a little tangled, it may be worth noting on paper the artillery attached to each army.
B. Germany may freely allocate its artillery support as desired.
C. Players should note that this rule increases the historical dilemmas of Soviet artillery support, and also raises the level of bookkeeping that is necessary to play the game. It is not recommended for beginners.
Designer's Note: In the case of the German panzerkorps and the Soviet front HQ and the HQs of several armies (1st Gd, 38th, and 60th), the artillery assets were substantial enough to be represented by separate counters. These are considered to be brigade sized units They are really groups of Soviet regiments or German battalions.
13.0 Headquarters
A. HQ units represent not only the actual front, army, and corps HQ units but also attached antitank, engineer, and artillery units too small to justify separate counters, as well as supply, repair, medical, and other units that make up the "tail" of the fighting forces. These are not all necessarily concentrated in the hex with the HQ unit.
B. HQ units perform a number of functions.
- If within three hexes of a unit that is subordinate to them and is not in an EZOC they may designate that unit a reserve unit.
- They may act as artillery units (12.0).
- They also have the ability to provide HQ support to units in combat. This represents the allocation of the antitank, engineer, antiaircraft, and other assets to support the units in combat.
13.1 Headquarters Support
A. To support attacking or defending units, the HQ must be within three hexes of the units being supported. Unlike artillery support, which may have its range traced through intervening enemy units or ZOCs (shells flying overhead), HQ support must be traced through hexes passable to motorized units through hexes free of enemy units and ZOCs (troops and guns moving overland). Friendly units negate the effects of EZOCs for this purpose.
B. HQ support cannot be split among different hexes but must be allocated to one hex.
C. HQs can use their AT strength for support.
D. Soviet HQs may only provide support to units subordinate to them, German HQs should generally restrict their support to units subordinate to them, but had more flexibility than the Soviets in this regard.
13.2 Headquarters Assets
A. Some HQs have their artillery (and, in some Soviet cases, AT assets) as separate counters.
- These units are treated as brigade-sized for stacking purposes.
- They act in all ways like other artillery (or AT) units except that they must remain within three hexes of their parent HQ. If they are forced further than that from their HQ by enemy action, they must be moved to within three hexes of their HQ as soon as possible.
B. Use common sense here, so that if their HQ is surrounded by enemy units the asset counter is not forced to charge to its death trying to follow the rule. If the HQ is destroyed in combat (13.5), try to keep the asset counters in the army/korps area.
13.3 Restrictions on HQ Support
A. Germany may use up to one German infantry korps HQ and one panzerkorps HQ to provide artillery or AT support for a single combat.
B. The Soviets may use up to one Soviet army HQ and one Soviet tank army HQ to provide artillery or AT support for a single combat.
C. HQs using their artillery strength during combat may not retreat. Temporarily mark these HQs by orienting them upside down.
13.4 Command
A. HQs have a command radius of four hexes.
B. Any Soviet unit more than four hexes from the HQ to which it is subordinate may expend only 8 MPs during any Movement Phase.
C. German units do not specifically trace command to a particular HQ unless using optional rule 14.6.
- If using rule 14.6, no more than five divisions may trace command to the same HQ and they must be within 6 MPs to do so.
- German subordination should written down using wire diagrams to show the command chain. (This will slow play of the game.) Players may also use photocopies of the game map provided in the back of this booklet to record unit and formation subordination. An easy way to do this is by drawing Korps, and Army boundaries on the photocopy.
13.5 Replacing Headquarters
In the battle for Kiev no HQs on the level represented by counters in this game were destroyed, although the Soviet 60th Army HQ and most of the German Korps HQs defending the line north of Kiev had to run for their lives at some point.
A. It is possible for a HQ to be destroyed in the course of play. If this had happened historically, it would have been replaced as rapidly as possible.
B. If an HQ is destroyed, place it on the TRT two turns after the turn in which it is eliminated. Flip it and have loss markers under it to show it on its last step.
- Bring it into play as a reinforcement. It will represent an ad hoc grouping without much in the way of supporting arms.
- It can subsequently be built up using the replacement procedure.
C. The Soviet 1st Ukrainian Front HQ and the German 4th Panzer Army HQs normally have no units directly subordinate to them. If a lower HQ is destroyed, these HQs may fill in temporarily to provide command and possibly a supply link for orphaned units.
D. If either of these HQs are destroyed, the player losing them should resign, since he is probably either dead, a POW, or at a minimum out of communications with his forces for a while. You don't have to, of course, and it is specifically gamy and poor play to go head hunting for them, but players should be encouraged to keep higher HQs out of harm's way.
14.0 Supply
There are two procedures for dealing with supply. General Supply deals with supply for non-artillery units and requires no record keeping, Artillery Supply requires keeping track of ammo points (APs).
Designer's Notes: Many items are required to supply military forces in the field, but those that concern us in the game are primarily ammunition (especially for artillery), and then fuel and food. The two procedures for supply require tracing supply lines, which abstracts transport, road maintenance, traffic control, dumps, distribution, etc.
14.1 Supply Lines
A. A supply line is traced from a combat unit to a supply source using the motorized rate for terrain. The line is first traced no more than 6 MPs to a road. Do not count the unit's hex in calculating the MPs, but do count the road hex. The road must then lead to a supply source.
B. A supply line may not be traced through enemy units, impassable terrain, or EZOCs (unless the ZOC is occupied by a friendly unit).
C. If a unit cannot trace a valid supply line mark it with a Cut Off marker.
D. Alternatively, subordinate units may trace supply lines to their HQ, then the HQ must trace a line 6 MPs to a road. If the HQ cannot trace a supply line, it can still provide supply to its subordinate units but if it does so, marked it Out of Supply and cannot serve as a supply source until it reestablishes a supply line.
14.2 General Supply
During the Supply and Replacement Phase, check the supply status of the phasing side's units. If they are not, mark them Cut Off.
14.2.1 Cut Off Effects
A. Cut Off units function normally except that they may not use their artillery strength.
B. Cut Off Artillery units may fire, but become Out of Supply when they do so.
C. When a Cut Off unit has combat, the marker is flipped to Out of Supply.
14.2.2 Out of Supply Effects
A. Out of Supply units may not attack, have no ZOC, and no tank effects.
B. Motorized units have their MA halved.
C. Attackers receive a +1 DRM against Out of Supply motorized units.
D. When Out of Supply units are determined to be back in supply at the beginning of a player turn, remove the marker. The unit functions normally, except for HQ units which require 3 APs to remove the marker, and for artillery units, which cost the same number of APs as it would to fire it.
14.3 Artillery Supply
A. Artillery ammunition represents the bulk of supply requirements. As a result, players must keep track of artillery APs for their independent artillery units and HQs.
B. To use their artillery strengths, artillery units must be in supply from either a supply source or an HQ.
C. For each combat, total the amount of artillery firing. Deduct one point from the available APs for each four points of artillery fired (rounded down).
D. Each side is allocated a certain number of APs at the beginning of each scenario. Record these on the Ammo Tracks.
E. Each side rolls a 10-sided die on the Artillery Supply Table during its friendly Supply Phase for additional artillery APs. Add these to the total.
F. When an artillery unit is used (fires), deduct the appropriate number of APs. If there are insufficient APs for a unit to fire, it may not do so.
Artillery Supply Table
| Roll | German APs | Soviet APs |
|---|---|---|
| 1-3 | 6 | 9 |
| 4-7 | 9 | 12 |
| 8-10 | 12 | 16 |
+1 DRM if Freeze. -2 DRM if Thaw.
14.4 Air Supply
14.4.1 Regular Air Supply
A. It is possible to supply units by air to some extent. A unit must be able to trace a supply line up to 6 MPs (motorized) to an airfield on a hex that was last occupied by a friendly unit.
- The airfield can be used as a friendly supply source for up to 15 stacking points worth of units, or
- Up to 4 APs can be transferred to the airfield for artillery units to use (if they are able to trace a supply line to the airfield).
B. Only one such airfield can be used as a supply source per side per turn.
14.4.2 Air Dropping Supply
A. If units are unable to trace a normal supply line and to an airfield, they may be supplied by air drop.
B. Indicate the hex during the Supply and Replacement Phase and announce an air drop.
C. Either general supplies or APs may be dropped. Roll one die and consult the Air Drop Supply Table.
14.5 Supply Dumps (Optional)
A. Germany must establish one or more on board ammunition dumps secretly, recorded on paper.
- They must be on a rail line and/or on a paved road.
- They must be in or adjacent to a town or city hex.
B. Each dump must hold at least 5 APs to start with and, unless Soviet forces approach within one move of a dump's location, every attempt should be made to keep at least 3 APs in each dump.
C. The APs may be expended to supply artillery units that can trace a supply line to them and should be refilled by arriving APs.
D. If the Soviets occupy an ammo dump, any APs in the dump are removed from play. Inform the Soviet player when this occurs.
Designer's Note: This rule can be valuable to Germany if its other supply lines are cut, but basically it will just be one more thing to worry about.
14.6 German Subordination (Optional)
A. Ordinarily, German units are not specifically subordinated to particular HQs. This was for the sake of simplicity and to reflect a higher degree of flexibility.
B. Players who desire a more accurate depiction may assign divisions to particular HQs and Army and Corps boundaries using photocopies of the blank game map. If this is done, no HQ may provide supply to more than six divisions per turn.
C. Also, see rule 13.4.C concerning Command and German units.
15.0 Airpower
A. There are four kinds of air units in the game.
| Abbr | Type | Abbr | Type |
|---|---|---|---|
| F | Fighter | St | Ground Attack (Stuka/Sturmavik) |
| B | Bomber | T | Transport |
B. Fighters can fight enemy aircraft or attack ground targets.
C. Ground attack and bomber units can attack ground targets.
D. Transport units can provide supplies as described in the supply rules.
15.1 Bases
A. All aircraft units start in their side's Ready box. After flying missions, they return to the Unready box.
B. Weather conditions and the possession of the three hard surfaced airfields around Kiev (in case of Thaw) determine how many air units can be moved to the Ready box at the beginning of each turn.
15.2 Operational Air Commitment
A. In the Air Commitment Phase near the beginning of each player turn, both sides may commit air units by taking them from the Ready box and placing them in the box of the German Korps or Soviet Army that they will support that turn.
Example: With a full contingent of air units available in the Ready box, Germany commits three bomber units and a fighter unit to the XLVIII Panzerkorps box.
B. Once committed to a korps/army, those air units may support any combat involving units of that Korps/Army and no other.
C. The commitment lasts the length of the player turn, at the end of which the air units return to the Unready box if not used.
D. Air units return to the Ready box only at the beginning of a turn, so carefully consider what air strength to commit during you player-turn and what to save for your opponent's turn.
15.3 Tactical Air Commitment
A. Once committed to a korps/army, air units are available for tactical commitment during the Combat Phase to affect combat in a specific hex.
B. When resolving combat in a particular hex, both sides first make their artillery and HQ support commitments.
C. First, the attacker announces whether it is committing a unit.
D. Then the defender may commit one air unit to the combat.
E. The attacker may then commit another and the two sides continue in this manner until one side passes or has no more aircraft to commit.
F. At this point, the side with remaining aircraft may commit any committed to that korps/army to the combat.
Example: Continuing the example from 15.2, Germany commits two bombers to a hex being attacked by the XLVIII Panzerkorps units, announcing the commitment of air, and if the Soviets have none here, places its two bomber units next to the hex under attack.
Designer's Note: It is unnecessary and not a great idea to actually put the air units in the hex under attack. Put them somewhere nearby.
15.4 Air to Air Combat
A. If both sides committed air units to a combat, and if either side committed fighters in a fighter mode (as opposed to fighter-bomber mode, 15.6), there is air-to-air combat.
B. If only one side has fighters in fighter mode the side with the fighters may choose one opposing air unit per fighter unit in the hex.
- Each side rolls a die, if the fighter side rolls higher, the opponent takes one loss from its air unit.
- Regardless of any losses, all of the fighters and all of the opposing units that were attacked by fighters are immediately returned to their respective Unready boxes.
C. If both sides have fighters in the hex, they are matched off one for one. If one side has more fighters in the hex, it may choose to double up on particular opposing fighters or it may use the excess to attack enemy bombers or ground attack units as described above.
D. In fighter-on-fighter combat, each side rolls a die for each pair of opposing fighters. The side with the higher roll inflicts a loss of one on its opponent. In case of a tie each side takes a loss.
- Apply the following DRMs:
| DRM | Condition |
|---|---|
| +1 | More fighters, but less than 2:1 advantage |
| +2 | 2:1 advantage, less than 3:1 |
| +3 | 3:1 advantage, less than 4:1 |
- Increase the DRM similarly for advantages of 4:1 and beyond.
E. Whatever the outcome, return all participating fighters to their Unready box immediately after the resolution of air-to-air combat.
15.5 Air-to-Ground Combat
A. For each point of air strength committed to a hex, the side with the air strength receives a +1/-1 DRM (offensively/defensively).
B. Both sides' air units that participated in the combat return to their respective Unready boxes as soon as the combat is resolved.
15.6 Fighter-Bombers
A. These were fighters with bombs or rockets slung underneath and given a ground attack mission. All fighter units in the game may be given fighter-bomber missions.
B. To indicate that a fighter unit is on a fighter-bomber mission place it on the Korps/Army box with its nose pointing down rather than up.
C. Fighter-bombers attacking ground targets do so with half of their strength points (SPs), rounded down, so that a full-strength fighter unit with 4 SPs would produce 2 DRMs on the combat it was applied to rather than 4.
D. Fighter-bombers can convert to fighters by simply jettisoning their air-to-ground ordnance. Thus, a player who commits fighter-bombers to a hex and has the unpleasant surprise of meeting enemy fighters there has the option of switching the fighter-bombers to fighters to tangle with the opposing fighters.
- This commitment must be made the moment an enemy fighter appears in the hex, and cannot be switched back.
- If the switch is not made, the fighters may be attacked as ground attack aircraft and cannot fight back.
- If the fighter-bombers do jettison their air to ground ordnance, they participate in air-to-air combat with a -1 DRM.
16.0 Reinforcements and Replacements
During the course of the game, both sides receive reinforcements, new units, and replacements, points that can be used to replace lost steps, indicated on the TRT.
16.1 Reinforcements
Reinforcements are units that enter the map during the course of play. Each side handles them differently.
16.1.1 Soviet Reinforcements
A. Soviet reinforcements initially arrive at Brovary.
B. Two weeks (seven turns) after the Soviets take both Kiev hexes, they may also arrive at Kiev.
C. One more week (four turns) later, they may also arrive at Gostomel.
D. Any number of units may arrive at a permissible location (railroad station) from which they may move normally the turn in which they arrive.
E. Use the KIEV Bridge marker placed on the TRT to show the progress of the bridge (4.4).
16.1.2 German Reinforcements
A. German reinforcements arrive differently depending on whether they are panzer units or not.
B. Non-panzer units can arrive at any town or village on a rail line from which a rail line can be traced to from the point on the west or south board edge indicated on the TRT.
- The line must be free of Soviet units and their ZOCs.
- The line cannot contain hexes in which the Soviets were the last to pass through.
C. Panzer units arrive at Berdichev or Kazatin by rail, or on a road on a board edge as specified in the TRT. They may move normally the turn that they arrive.
D. If the Soviets have closed off all board edge road and railroad hexes, Germany can delay the arrival of reinforcements and bring them onto the map on the hexes nearest to the road or railroad on which they were to arrive, although if this situation occurs it is a sign that Germany is in deep trouble.
E. Germany may choose to delay reinforcements two turns, bringing them on through any road on either the southern or western board edge.
16.2 Soviet Air Reinforcements
A. The Soviets begin the game with four fighter units, four ground attack (Sturmavik) units, and one bomber unit.
B. The TRT indicates when the Soviets receive air reinforcements. At the beginning of the scenario being played, place surplus air units (one each of fighters, bombers, and Sturmavik) on these boxes in the TRT. These units will then arrive per their has placement. [printed as "has placement"]
16.3 Withdrawals
During the course of play, certain units withdraw from the map. Some, like the German 3rd Panzer Division and 2nd Fallschirmjager Division, were sent to other sectors of the front (Kirovograd) that needed them.
A. Withdrawals are mandatory and if the requisite unit is unavailable because it is destroyed or surrounded, a unit of as close as possible to the same strength must be withdrawn.
B. To withdraw the unit, on the specified turn, move it to any railroad line that leads to a friendly board edge (preferably the southern one, as that is where they went).
Other units, namely the 88th Infantry Division and the 10th and 20th Panzergrenadier were pulled out to rebuild, as they had almost been wiped out.
C. Such units appear on the TRT in brackets. It is possible that these units might not be reduced to their last step. It may be that other German units, like the 7th and 8th Panzer Divisions, were badly chewed up but not withdrawn and received enough replacements and (probably repaired) tanks to keep them in play.
D. Germany has two options:
- The historical one, which requires the withdrawal of one infantry division and any panzergrenadier division reaching its last step must be withdrawn the next possible turn.
- The alternative is to assume that in game terms the units had lost their last step and their withdrawal is simulated by their removal to the dead pile. This alternative is perhaps slightly more realistic and will definitely benefit the Germans.
16.4 Korps Abteilung C
The 183rd, 217th, and 339th Infantry Divisions were barely there to start with, and were quickly pushed past the point of being viable divisions, each having barely regimental strength. On November 5th they were amalgamated into Korps Abteilung "C". K Abt C functioned as a division for the rest of the battle.
A. Remove the three divisions (183rd, 217th, and 339th), placing the K Abt C unit in any of their hexes.
B. If the divisions are widely separated, amalgamate the available ones and mark K Abt C for losses equal to the strength of the missing unit. Move it to join up as soon as possible and remove it from the board at that time, adjusting K Abt C's strength to reflect the addition.
C. If any of the three are destroyed prior to Nov 5th (Turn 3), place a loss marker under K Abt C to indicate the strength of the destroyed division.
D. If two or three of these units are destroyed in the first two turns, the withdrawal does not happen and the K Abt C unit never enters play.
16.5 Replacements
A. Each side receives replacement points (RPs) during the game. Each side receives two tank/panzer points and one infantry point per turn, and one artillery and one air point every four turns.
B. A side may not receive RPs if none of its units has lost any steps.
C. While either side may accumulate RPs, keeping track of them on the Replacement Boxes on the map using step loss markers, rather than rebuilding damaged units, if the total of accumulated RPs equals the amount needed to rebuild all damaged units, no more RPs will be received until the number of damaged units exceeds the accumulated RPs.
Designer's Note: The idea here is that if things quieted down on the front and all units were up to the (admittedly weakened) strength that they started the battle, replacements would be going to fronts that were active and needed them. This front was the most critical in the war to both sides at this point, and if replacements were needed, they went here, but there is no evidence of any formation being built up beyond its printed strength.
D. During the Supply and Replacement Phase, RPs may be used to replace steps or to return destroyed units to play.
E. To be eligible to receive replacements, a unit must be in supply.
F. To replace more than one lost step, a unit may not be in an EZOC.
G. Units that lose 1 SP per step lost can be rebuilt with 1 RP per step regained, while those that lose 2 SPs per step take 2 RPs to rebuild a step.
H. Infantry replacements are used to replace lost steps of strength, while tank/panzer points replace lost armor strength, and artillery replacements for artillery and HQ losses.
I. Mechanized corps require one armor and one infantry replacement point per step.
J. Air points can be used to replace any type of losses from air units.
K. Cavalry units cannot be replaced.
16.6 Rebuilding Destroyed Units
A. Different unit types require different combinations of RP types to be rebuilt.
- Destroyed infantry/rifle units may be rebuilt by spending one artillery RP plus the appropriate number of RP to replace at least one step of the unit.
- Artillery units and AT units are rebuilt exclusively with artillery replacements.
- HQs use the type of replacements indicated by the strength in the colored circle on the counter (troop or artillery strength).
- Tank/panzer units require an infantry RP, an artillery RP, and appropriate tank/panzer RPs to replace at least one step.
- German assault gun and Tiger tank battalions, which are rebuilt with tank/panzer RPs only.
- Mechanized corps require an artillery RP plus one armor RP and one infantry RP per step replaced.
- Panzergrenadier divisions require an artillery RP and an armored RP to rebuild, plus infantry RPs per step to be replaced.
- Cavalry units and the Czech motorized brigade cannot be rebuilt if destroyed.
- Air units are rebuilt point per point with air RPs.
B. Rebuilt units are marked with an appropriate marker to indicate their new strength and are brought on the map as reinforcements.
C. Rebuilt German units cannot return to the board by railroad movement.
17.0 Optional Rules
These rules are extra, but recommended. The designer strongly recommends using rules 17.3, 17.4, 17.6, and 17.9.
17.1 Road Movement
Rule 6.3 (Moving Through Other Units) applies to units of all sizes.
17.2 Soviet Advanced Detachments
A. The Soviets have four counters to use in forming Advanced Detachments at the start of the Soviet Regular Movement Phase.
B. Up to one detachment can be formed from a Tank Corps not on its reduced side.
C. Place the detachment in the same hex as the parent unit with either the full (2) strength side or the reduced (1) strength side face-up. Reduce the parent unit's current strength by the strength of the detachment it formed.
D. The Soviets may also form one Cavalry detachment from the Cavalry Corps in this manner.
E. Advanced Detachments have a special ability to advance faster after combat under certain circumstances. As long as the ground is not Thaw, an Advanced Detachment may advance one more hex than would normally be allowed if the unit advances entirely along a road of any kind. The normal restrictions of ZOCs and enemy units still apply, but the unit may deviate from the retreat path of the defender after the first hex. of advance.
F. Advance Detachments may recombine with their parent units only at the start of a Regular Movement phase. They must be in the same hex as the parent unit. Add their current strength to that of the parent unit.
G. An Advanced Detachment may not use its Armor Strength in combat if stacked with another unit. This is to prevent their creation to get an extra armor strength in some combat.
17.3 Efficiency
This rule reflects the edge that Germany still retained over many Soviet formations in terms of training, communications, leadership, and doctrine. It also reflects that the Soviets were still mostly equipped with the T-34c model and a few KV-85s, as well as Lend Lease materiel, while Germany had substantial numbers of Panthers and Tigers in the field. The German tactical edge had been considerably eroded during the course of the war, and would further decrease as the war continued.
A. In determining combat odds, one further calculation is called for, the comparison of the efficiency rating of both sides. Units are rated as follows for efficiency, expressed in efficiency points. The efficiency rating is described in 1.2.3.C.
B. When calculating odds, after all other calculation is completed, determine the highest efficiency rating of any unit on each side directly involved in the combat. Out-of-hex support from HQs and artillery are not considered for this determination.
C. If a side has two or more efficiency points more than its opponent, it receives a shift on the CRT, to the right if attacking, and to the left if defending.
17.4 Limited Intelligence
A. Units that are not within three hexes of enemy units may be removed from the map and their location recorded on a copy of the blank scenario map.
B. When such units move (or the enemy moves) so as to come within three hexes of the enemy, place them on the board at the end of enemy movement.
C. If their own movement places them within three hexes of the enemy, place them on the map at the end of friendly movement.
D. If enemy movement brings an enemy unit or stack adjacent to a hidden stack, place it on the map immediately.
17.5 Probes
A. German reconnaissance battalions and Soviet advance detachments and the cavalry corps may conduct probes after the first friendly Movement Phase.
B. To conduct a probe the probing unit must be adjacent to the enemy to be probed. The probing unit spends 1 MP, ending the movement for the probing unit for this Movement Phase.
C. Each side rolls a die and the higher result wins. In case of a tie the larger unit wins, if both sides are of the same size the prober wins. If the prober wins, the contents of the stack are revealed. If the prober loses, nothing besides the top unit on the stack is revealed.
17.6 Odds Calculations
You often get the situation of ratios that are almost, but not quite, enough to raise the odds by a column, say 25:9, which is 2:1 but pretty close to 3:1. In cases where the attacker has at least 50% more than is required for the next higher column (in this example at least 23:9), divide the attacker's total by the defender's total (23 ÷ 9 = 2.55). The attacker then rolls a die. On a 5 or less, the odds go up to the next column (3:1). The closer you are to the next level, the more likely you use the higher column (if the odds were 25:9 that would be 2.77 to require a 7 or less for a 3:1). This also discourages combat bookkeeping.
17.7 German Replacements
The first German units to get replacements on equipment were usually the SS, so if either SS division is at less than full strength, it must receive at least one replacement step before any other unit does.
17.8 German Optional Reinforcements
Army Group South's commander von Manstein had pleaded with Hitler for massive reinforcements and a concentration against Vatutin's First Ukrainian Front, fearing that if Vatutin broke out to the south the whole German group of armies in the Dnepr bend could be cut off. Hitler, concerned for the mineral resources in the Nikopol bridgehead, and the geopolitical implications of losing the Crimea, insisted on keeping strong forces thrust out into the long salient to the east. To improve Germany's chances, this rule provides additional strong forces that never appeared in the battle but could conceivably have been released.
A. On the November 9 German player-turn, during the Supply and Replacements Phase, Germany rolls one die and receives the replacements from the German Optional Reinforcements Table.
B. If the Soviets have taken Korosten, Zhitomir, and/or Belaya Tserkov by this turn, apply a +1 DRM.
C. Regardless of the result, Germany rolls a second die.
- If the first die roll was a 1-4, disregard the second roll. It is only to keep the Soviets guessing.
- If the first die roll was a 5-9 and the second roll was 6 or more, the reinforcements arrive this turn. If the second roll was 5 or less, the reinforcements arrive next turn.
- If the first roll was a 10, one division arrives this turn, one next turn.
D. In all cases, the German rolls are secret, and use of the Limited Intelligence rules with this will make it much more effective.
German Optional Reinforcements
| Roll | Result |
|---|---|
| 1-4 | Nothing |
| 5-7 | Gross Deutschland |
| 8-9 | 24 Pz |
| 10 | Both |
17.9 Stavka Restrictions
After the 6th German Army was encircled and destroyed at Stalingrad, Stalin issued instructions that the Red Army was to conduct no major encirclements until further notice. The experience of having one front tied up for months trying to reduce the pocket while the rest of the army overextended its pursuit and was tumbled back out of Kharkov by von Manstein's "Backhand Blow" convinced Stalin that large encirclements were beyond the ability of the Red Army. He rescinded this ban only in January, 1944, with the Korsun-Shevchenkovsky operation being the first in a series of caldrons that were to swallow huge chunks of the Wehrmacht.
A. The Soviets should play the game as if under this restriction. What is a major encirclement? Good question, but the best benchmark would be more than one division. Does that mean its OK to surround a division but not a division and a battalion?
B. What it means is that the Soviets should plan and conduct operations with the objective of seizing territory, specifically those places that produce victory points (VPs) for the scenario. If the Soviets ignore this restriction, he will probably be able to destroy large sections of the German Army, making it incapable of defending either victory objectives or itself. This can easily cause the game to collapse in the early scenarios.
Does this mean that Stalin was just plain stupid? Probably not. Remember that encircling enemy units is much easier in a wargame, where they will stand still while you move behind them, than in real life, where they will bag it rather than be bagged, and where all questions are less clear than they are on a game map. Suffice it to say that for the rest of the war, Soviet pockets of German troops proved difficult to seal, just as German pockets of Soviet troops had been difficult to seal during the beginning of the war.
17.10 Mechanized Combat Benefit in Clear (House Rule)
The mechanized stuff was too weak playing the game with RAW.
For mechanized units, any combat factor with a red circle should be doubled if the unit is defending in, or attacking into Clear terrain and the ground condition is not Thaw.
Example: A 3-5-3 Pz unit becomes a 3-5-6 in clear terrain under these conditions, and if expending supply for the artillery support, is worth 14 total points in combat.
18.0 Scenarios
Each scenario provides set up locations and strengths for units starting the scenario, first turn weather and movement restrictions (if any), the length of the scenario, victory conditions, starting supply levels and accumulated replacements, and special rules, if any.
18.1 Setup Keys
A. To determine the units at the start of a particular scenario and their strength, should consult the Setup Key (a separate printed chart).
B. Each Setup Key has a column of letter codes used on the Setup maps. To the right of the letter codes are five columns of unit IDs, with each column corresponding to a start date of one of the scenarios.
C. When a letter code appears on the Setup map for a scenario, cross index that letter code with the appropriate column (correct scenario starting date) to the right, displaying one or more unit IDs. The corresponding units are placed in the hex that the letter code appears in on the Setup Map.
- If a unit ID is followed by a set of parentheses, the unit starts at less than full strength.
- The letter F indicates the unit starts on its reduced side. A minus value indicates that the unit's Significant strength is reduced by that amount.
- If an asterisk appears after the unit's ID, that unit starts in Reserve.
D. At the bottom of the German Setup Key, there are listings for German Asset units. If a Korps ID appears in the scenario column for such a unit, that unit may be placed in any hex within the Korps's boundary drawn on the map.
E. All German HQs start every scenario at full strength.
18.2 Victory
A. In determining victory conditions, one side or both may be required to hold certain locations, usually Kiev, towns and/or villages. When required to hold a location, that side must physically occupy it with a unit, or be the last to move units through it, or have the location indisputably behind its front line, even if no unit went directly through it.
B. In addition, the location must be able to trace a valid supply line.
C. For victory purposes, control of victory locations is determined at the end of the scenario.
D. Where losses affect the VP total, these are also determined at the end of the scenario, so that units rebuilt and brought back to play with replacements are not counted for victory if they are in play at the end of the scenario.
E. Units that are unable to trace a line of supply at the end of the scenario are counted as half their VP value as if they had been destroyed.
F. (Optional) For scenarios other than 3 and 8, award VPs based on reduced units at half their value.
18.3 Setup Maps
A. Each Setup Map contains information on the setup location and operational boundaries of HQs. Letter codes appear on the map in particular hexes, indicating where units listed on the Setup Key start the scenario on the map.
B. The Soviets have Asset listings in white boxes on each map. These list the asset units not listed on the Setup Keys starting with various Soviet Formations (armies, mostly) on the map.
C. As an option, players may decide to allow freer set up, either allowing units in a korps/army to set up anywhere in their formation area as long as they cover their front line as well as it was covered in the initial setup, or for a very different and less historical option, set up your units anywhere on your side of the front line, with a die roll determining who sets up first, or each player placing one unit and then his opponent placing one until all are placed. You can probably think of variations on this, allowing the player with the initiative to secretly set up anything that starts behind the front line.
18.4 Scenario 1: The Breakout
Frustrated in its repeated attempts to breakout of the Bukrin Bridgehead, the Soviet command secretly transferred a tank army, rifle corps, and artillery corps out of Bukrin and into the Lyutezh bridgehead. The Germans failed to detect the build up, and when yet another attack was launched from Bukrin on November 1, they assumed that this was the main effort. Instead, the Lyutezh front erupted on November 3, and after a few days heavy fighting, a breakthrough was achieved. Kiev was taken on November 6, Fastov on the 7th, Pavoloch and Popelnya on the 8th, and by the 11th Zhitomir was liberated.
18.4.1 Scenario Length
The scenario begins on the Nov 1 turn and ends at the end of the Nov 13 turn.
18.4.2 Setup
A. Germany sets up first per the Nov 1 column of the Unit Location Chart. If more units are indicated as starting in reserve than there are markers for, choose the ones to place in reserve.
B. The Soviets set up nine air units, and Germany all of its air units on the Unready box of their respective displays. After determining the weather, some or all may be moved to their Ready box.
18.4.3 Supply and Replacements
Supply: The Soviets with 75 points of supply, and German player with 36 points.
Replacements: Neither side has any replacements available first turn.
18.4.4 Special Rules
Historically the Soviets attacked from Bukrin on Nov 1 and did not begin at Lyutezh until Nov 3. The Germans expected the attack from Bukrin and had not detected the Soviet build up north of Kiev.
A. Germany may not commit more than a third of its air assets to the Lyutezh front until one turn after the Soviets have commenced an attack there.
B. Germany may not transfer units from the Bukrin front until one turn after the Soviets have attacked from the Lyutezh front.
C. If the Soviets do not attack from the Bukrin Bridgehead with every rifle unit set up adjacent to the Fortified line (only Bukrin, not Rishishchev), Germany may freely transfer units north.
D. If the Soviets move through the fortified line facing Lyutezh across at least two separate hexsides, Germany may move up the arrival of Korps Abt C by one turn, and may begin transferring units from the Bukrin area north the turn following the Soviet breakout.
18.4.5 Initiative
The Soviets have the initiative at the beginning of the game.
18.4.6 Victory
A. Only the Soviets earn VPs for holding territorial objectives at the end of the scenario.
B. Award VPs as follows:
| VPs | City |
|---|---|
| 5 | Zhitomir, Fastov, Malin, Korosten, and Belaya Tserkov (each) |
| 10 | Kiev if taken before November 7 |
| 5 | Kiev if taken on or after November 7 |
| 10 | Berdichev and Kazatin (each) |
C. Add VPs for destroyed German units and subtract VPs per destroyed Soviet units.
| VPs | Unit Type Destroyed |
|---|---|
| 1 | German infantry division |
| 3 | German panzer division or HQ |
| -2 | Soviet rifle division or any Soviet brigade |
| -5 | Soviet rifle corps |
| -7 | Soviet tank, mech, or cavalry corps or HQ |
D. Victory Levels are:
| VPs | Level |
|---|---|
| 26+ | Overwhelming Soviet |
| 21-25 | Substantial Soviet |
| 15-20 | Marginal German |
| 10-14 | Substantial German |
| ≤9 | Overwhelming German |
E. Historically the Soviets scored 25 points, a substantial victory, for taking Zhitomir, Fastov, Malin, and Kiev (on Nov 6).
18.5 Scenario 2: Riposte
Pressed back in three directions, towards Belaya Tserkov in the south, Zhitomir in the west and Korosten in the northwest, the Germans struggled desperately to hold together a front and slow the Soviet drive. Massive reinforcements, in the form of XLVIII Panzerkorps were brought up south of the Zhitomir-Kiev rail line. On November 12 they were launched into the badly stretched southern flank of 38th Army. Breaking through easily, 1st and 7th Panzer Divisions, supported by 68th Infantry, wheeled left, striking the forces in Zhitomir in the rear and forcing them to evacuate, causing serious losses to 23 Rifle Corps, 1 Gds Cavalry Corps and 17th Artillery Division. A terrific battle then ensued around Brusilov between most of XLVIII Panzer's flood of tanks and parts of 3rd Gds Tank Army and 5 Gds Tank Corps. The right wing of XLVIII was halted in front of Fastov by 3rd Gds Tank Army and 50 Rifle Corps, but Brusilov was lost to the Germans. The action was broken off by late November due to a combination of heavy losses and exhaustion of both sides and by warm weather that temporarily ended the opportunities for maneuver.
18.5.1 Scenario Length
The scenario begins on November 11 and ends with the November 25 turn.
18.5.2 Setup
A. Both sides set up per the Nov 15 column on the Unit Location Chart.
B. The Soviets set up first. All Reserve markers may be deployed at start, except that none may be set up in the Soviet 60th Army area.
C. The Soviets set up 11 air units and Germany nine in their respective unready boxes. Each side has six steps worth of air losses, distributed as each wishes, except that no unit can have more than one step loss until all units have had one each.
18.5.3 Supply and Replacements
Supply: The Soviets start with 40 supply points and Germany with 22.
Replacements: Neither side has any replacement points accumulated.
18.5.4 Special Rules
There are no special rules in this scenario.
18.5.5 Initiative
Germany has the initiative in this scenario.
18.5.6 Victory
A. Award VPs as follows:
| VPs | City |
|---|---|
| 5 | Zhitomir, Brusilov, Fastov, Stavische, Malin and Korosten (each) |
| 5* | any one hex of the Korosten-Zhitomir rail line |
| 10 | Kiev, Berdichev, Kazatin, Belaya Tserkov and Kanev (each) |
* only if the Soviets control neither Korosten nor Zhitomir
B. VPs are also awarded and deducted for units destroyed as per Scenario 1.
C. Victory Levels are:
| VPs | Level | VPs | Level |
|---|---|---|---|
| 31+ | Major Soviet | 21-25 | Draw |
| 26-30 | Minor Soviet | ≤ 20 | Major German |
D. At the end of the fighting the Soviets had 20 points, retaining only Fastov and Kiev of the victory locations, and cutting the Zhitomir-Korosten rail line, a German substantial victory.
18.6 Scenario 3: November Battles
Scenario 3 runs from Nov 1 through the end of the Nov 25 turn. Use the setup, supply, replacements and restrictions from Scenario 1 and the victory conditions from Scenario 2. Germany can take the initiative on any turn in which it first commits (moves next to a Soviet unit) any unit of XLVIII Pz Korps.
18.7 Scenario 4: Manstein Strikes Again
On December 6 the lull ended as XLVIII Panzerkorps again led the way, wheeling north of Zhitomir and then cutting across the rail line to slam into 60th Army's left flank. In very heavy fighting General Chernyakovsky's 60th Army lost half of its artillery strength and was forced north of the Irscha River. Considerable reinforcements were rushed to support the front and once again the Germans had pushed in the flank of a Soviet army and regained some ground, yet the basic situation had not altered. Behind the front line, a large Soviet build up continued undetected.
18.7.1 Scenario Length
The scenario begins with the Dec 5 turn through the Dec 15 turn.
18.7.2 Set Up
A. Set up per the Dec 5 column on the Unit Location Chart.
B. The Soviets set up first.
C. No more than one Soviet unit may set up in reserve.
D. The Soviets set up 17 air units and Germany nine in their respective Unready boxes.
18.7.3 Supply and Replacements
Supply: The Soviets begin with 50 supply points and Germany with 38.
Replacements: Each side has two tank/panzer steps and two infantry steps available in its replacement pool.
18.7.4 Special Rules
The Soviets may commit no more than four air units to the 60th Army on the first turn of the scenario.
18.7.5 Initiative
A. Germany has the initiative to start.
B. The Soviets may take the initiative on any turn in which they commit (moves adjacent to a German unit) any unit of the 1st Gds, 1st Tank, or 18th Armies, but lose VPs for doing so (18.7.6).
18.7.6 Victory
A. Award VPs as follows:
| VPs | City |
|---|---|
| 5 | Korosten, Malin, Radomyshl, Brusilov, Fasovaya and Fastov (each) |
| 10 | Zhitomir, Berdichev, Kazatin, Belaya Tserkov, Kanev, and Kiev (each) |
| 10* | any hex on the Korosten-Zhitomir rail line |
* only if the Soviets control neither Korosten nor Zhitomir
B. The Soviets lose 2 VPs per unit of the 1st Gds, 1st Tank, or 18th Army they commit (moves adjacent to a German unit or has a German unit move adjacent to).
C. Victory levels are:
| VPs | Level |
|---|---|
| 36+ | Major Soviet |
| 31-35 | Minor Soviet |
| 25-29 | Draw |
| 20-24 | Minor German |
| 15-19 | Major German |
| ≤ 14 | Substantial German |
D. The Soviets retained Malin, Fastov, Fasovaya and Kiev for a total of 25, while the Germans held everything else. While 60th Army was beaten up and the Soviets were forced to commit two corps of 1st Guards Army as the Germans failed to notice a new army present but did identify the corps (reducing the Soviet point total to 21), and the pressure on LIX Korps at Korosten was relieved, it was hardly more than a minor victory for the Germans.
18.8 Scenario 5: The Phantom Pocket
This scenario is only by way of pointing out that the premiere writer in the West about this battle, the ex-chief of staff of the XLVIII Panzerkorps, Maj. Gen. F.W. von Mellenthin, in his book Panzer Battles, (1956, University of Oklahoma Press, also in paperback, Ballantine, 1971) is a great fiction writer but as a historian, he leaves much to be desired. He describes an attack on December 16 by XLVIII Pz Korps to pocket a Soviet force at Melini (roughly hex 3307) launched by a full-strength 7th Pz Div from a bridgehead north of the Irscha at Malin and by the 1st Pz and LAH SS Divisions from east of Korosten to almost trap a pocket around Melini. The pocket proved too much for the panzerkorps to swallow and they had to back off. The problem with the story is that 7th Panzer was never rebuilt, never crossed the Irscha, never took Malin, never established a bridgehead, and never participated in any attempt to pocket anyone around Melini. Other then that the story is accurate! The other arm of the non-pincer was a straight up frontal assault by 1st Panzer and LAH SS down the Korosten-Kiev road that made some minor progress and was given up shortly afterwards as a bad job. Despite the designer's well-known biases, the refutation of von Mellenthin's fantasy is to be found in the German situation maps and strength returns from the period. OK, I also found an account of the Soviet defense of the Irscha by a tank brigade commander, but most information came completely from Wehrmacht sources.
18.8.1 Scenario Length
The scenario begins with the December 15 turn and ends on the December 23 turn.
18.8.2 Setup
A. Set up per the Dec 15 column on the Unit Location Chart.
B. Germany sets up first.
C. All air units of both sides set up in the Unready boxes, with each side having taken five steps of air losses. Distribute the losses as per Scenario 2.
18.8.3 Supply and Replacements
Supply: The Soviets begin with 60 supply points and Germany with 40.
Replacements: The Soviets have two tank and two infantry replacements accumulated. Germany has two panzer and one infantry replacement accumulated.
18.8.4 Special Rules
There are no Special Rules in this scenario.
18.8.5 Initiative
Germany has the initiative, but the Soviets can take it any turn they commit (move next to any German unit) any unit of the 1st Gd, 1st Tank, or 18th Armies.
18.8.6 Victory
A. The victory conditions are the same as Scenario 4.
B. At the end of this fighting 60th Army and XLVIII Pzkorps had each taken more lumps. Nothing else had been resolved. Hoorah. Outside of relieving the LIX Korps around Korosten and diminishing slightly the threat to the north-south rail connections, the Germans were off on a tangent that had no chance of making any difference in the big issues. For more on them, see below.
18.9 Scenario 6: Balck's Northern Expedition
Combine Scenarios 4 and 5, using setup, supply, replacements, special rules, and victory conditions from Scenario 4, running it through the December 23 turn.
18.10 Scenario 7: Zhitomir-Berdichev Operation
While Germany had been dithering around Korosten, the Soviets had kept their eyes on the prize. Their objective was to expand their bridgehead so that it was irreversible, evicting the Germans from the Ukraine. They had brought three armies to reinforce the 1st Ukrainian Front – the 1st Tank, the 1st Guards, and the 18th – and had kept their sights set on Zhitomir and Berdichev. On Christmas Eve they unleashed their torrent, catching their opponents completely off-guard. Not only was their buildup undetected (again) but instead of attacking at dawn as was their usual practice, they waited until noon, catching the Germans well into their Christmas boozing. The 8th, 19th, and hard luck 25th Panzer Divisions found themselves in the way of an offensive by three armies and two tank armies and were washed away in the flood. Despite vigorous efforts by the XLVIII panzers, Kazatin fell to the 1 Tank Army on December 28. Zhitomir was freed by the 31st and the issue was decided. From now on the front would move only west, until it reached Berlin, Vienna, and Prague. The "Thousand Year Reich" had sixteen months left to live.
18.10.1 Scenario Length
The scenario begins on the December 23 turn and ends with the January 1 turn.
18.10.2 Setup
A. Set up per the Dec 23 column on the Unit Location Chart.
B. Germany may deploy only two Reserve markers. The Soviets player may deploy all of theirs.
C. All air units start in the Unready boxes, with Germany having four losses on its air units.
18.10.3 Supply and Replacements
Supply: The Soviets start with 75 supply points and Germany with 45.
Replacements: Neither side has any accumulated replacements.
18.10.4 Special Rules
A. Germany may not commit more than four air units to the XLII Korps sector on Turn 1.
B. Germany may not have any reserves except in the sector of XLVIII Pz Korps.
18.10.5 Initiative
The Soviets begin with the initiative and keep it throughout the scenario.
18.10.6 Victory
A. Award VPs as follows:
| VPs | Cities |
|---|---|
| 5 | Korosten, Zhitomir, Berdichev, Kazatin, Belaya Tserkov and Kanev (each) |
B. Count losses per Scenario 2.
C. Victory levels are:
| VPs | Level |
|---|---|
| 30+ | Substantial Soviet |
| 25-29 | Major Soviet |
| 21-25 | Moderate Soviet |
| 16-21 | Marginal Soviet |
| 11-15 | Draw |
| 6-10 | Marginal German |
| 1-5 | Major German |
| ≤5 | Substantial German |
Note: the level ranges as printed overlap at 21 and at 5; they are transcribed as printed.
D. At the end of the scenario the Soviets had all of them except Kanev for 25 points and a major victory.
18.11 Scenario 8: Decision in the Ukraine
A. This is the campaign game, the whole nine yards. Use the Scenario 1 setup, supply, replacements, and special rules.
B. As to victory conditions, at the end of the battle the Germans held nothing of significance on the map except Kanev. If they still hold anything important at the end, they have done better than history, if the Soviets have pushed all German units off the map, they have done a little better than history.
C. At the end of the game, you will know who won, and if you don't, like von Mellenthin, you can mutter about how clever you were and that it was the rules' fault that everything didn't come out the way that you liked.
19.0 Comprehensive Combat Example
- The rules were modified after the examples, so this example may not match the rules.
- Units are: A. 6th and 7thTnk Corps, 91stTk Bg B. 94th Rifle Corps, 9thMech Corps, 32Gd Rkt Bg C. Various Soviet units D. Soviet HQ E. 25th Pz Div, 208th lnf Div, 276th AG Bn F F. German HQ
- The gray arrows show the advance after combat by stacks A, B, and C.
- The large black arrow shows the retreat of stack E.
- If Stack F contained an HQ friendly to Stack E, it could have lent artillery support because it was within three hexes with a clear path to the unit.
- Either stack A or B could be marked with a Partial Breakthrough marker.
- The 94th Rifle Corps can only advance one hex (Leg Class) so it must go into hex 11.
- Stack E would have to try to avoid retreating into hexes 4 or 18 because of EZOCs in those hexes.
- The number in parentheses after each unit below is the number of steps it has lost, so far.
- Two Soviet stacks are attacking an adjacent German stack that is in a woods hex. There is also a Defense line running through the hexsides separating the Soviet stacks from the German stack, and the German stack is in this line.
- The German stack consists of the 25th Pz division (-1), 208th Inf division (full), and the 276th Assault Gun Bn. The total
- German strength in the hex is as follows: A. 25th Pz XX has a troop strength of 6, artillery strength of 3, and an Armor strength (its significant strength) of 5: 6 - 1 (for the step loss). B. 208th Inf XX has a troop strength of 2 (its significant strength), artillery strength of 3, and an AT value of 2 (not added to the strength total). C. The 276th Assault Gun Bn has a troop strength of 0, artillery strength of 0, and an Armor strength of one (its significant strength). D. Therefore, the total combat values of the defending German stack are: 6 + 2 + 0 = 8 troop strength, 3 + 3 + 0 = 6 artillery strength, and 5 + 1 = 6 Armor strength.
- One Soviet stack contains the 6th Gd Tank Corps (-2), 7th Gd Tank Corps (-1), and the 91st Tank Bg (- 1). The other Soviet stack contains the 94th Rifle Corps (full), 9th Mech Corps (-1), and the 32nd Gd Rkt Bg (full).
20.0 Designer's Notes
I set out to do this game under a discipline: to keep the rules short and simple and to keep the counter mix small. Many designers, myself prominently included, have a weakness. After learning a lot about a battle during research, the temptation is strong to put as much of it as possible into the game, often to the detriment of the game as a game. The dialectic of game design, however, forces us to pay something to keep the game down to size. One immediate problem is that keeping the counter mix small, which keeps the game more affordable and quicker to play, means that a player has less flexibility in terms of the "concentration vs. dispersion" dialectic. Put simply, if you have corps and division counters, they can only be in one 5-mile hex at a time, with ZOCs into surrounding hexes. In reality, that corps could stretch its divisions into a line covering 25 miles, and that division, if it had to, could do something similar, if not too effectively. At times they did. That panzer division might take its recon battalion and its engineers, reinforce them with an AT battery, and another borrowed from a neighboring division, attach an artillery battalion, and send them off to cover five or more miles of flank of the division. Likewise, the Soviets at times would detach a tank brigade from a tank corps to support a rifle corps, or to lead the way in an offensive. This is represented in the detachment optional rule, the advance detachments, and the German recon battalions.
The larger dialectical problem concerns the staying power of the weak German 4th Panzer Army. Starting the battle with divisions that sometimes had as few as a thousand infantrymen in them, and panzer divisions with perhaps a few dozen running tanks, Hoth's soldiers were faced by a 1st Ukrainian Front averaging 60% of "book" strength. At the intended breakthrough point, German VII Korps with three infantry divisions with a total of 5,500 infantrymen amongst them, a panzer division with 30 panzers, and a panzergrenadier division with another 1500 motorized infantry, all supported by a dozen stürmgeschutzen and perhaps 30 artillery pieces faced the 38th Army. General Moskalenko had in his first echelon seven rifle divisions (backed up by four more and a brigade), a tank corps, and a tank regiment, all supported by an artillery corps of two artillery divisions and a rocket division, plus an additional artillery brigade, nine regiments, and an assault engineer brigade!
Any gamer will look at that and go, poof, D-Elim. A game designer, looking at it more carefully, will discover that General Hell's (sic) VII Korps actually held up Moskalenko for two days, and was only swept away when the Third Guards Tank Army was added to the battle. One of the infantry divisions and the panzergrenadiers were withdrawn to be rebuilt, which might equate to a D-Elim. But north of this front, facing General Chemyakovsky's 60th Army, the Germans were even thinner on the ground. Oh my!
A CRT that punishes the attacker, plus terrain modifiers, especially fortifications that take the sting out of artillery, plus the ability of the defenders to modify the odds with reserves all helped to prevent the Soviet player from vaporizing the Germans in the first few turns. Indeed, in playtesting there were Soviet players who had great difficulty breaking out of their bridgehead(s). Given a skillful German player and reasonable luck, the Soviet player will pay a high price in blood for his accomplishments.
But this brings on the second half of the contradiction, because Germany, while weak in infantry and overall numbers, mounted two ferocious counterattacks in mid-November and early December that set the 38th and then the 60th Armies back on their heels, and heavily wrote down the strength of the 3rd Guards Tank Army. Indeed, the Germans, by using the huge concentration of tanks in the XLVIII Panzerkorps, kept the initiative from the middle of November to the end of December. But having made the attacker's lot an unhappy one for the Soviets in early game, it was hard to have the Germans able to shift those big rifle corps, with their generous support units. This brought on the efficiency rules. Despite what some German writers and their echoes claim, however, the fact is that while XLVIII Panzerkorps did tumble the 38th Army out of Zhitomir, rip up several corps of that army as well as the 3rd Gds Tank Army, and later roughly handle the 60th Army, their actual progress was unimpressive, their own losses astronomical, and their accomplishments irrelevant to the operational course of the battle. Their main accomplishment was to reopen the Zhitomir-Korosten rail line for less than a month. Meanwhile the Soviets felt sufficiently confident the stability of their front-line forces to commit only one rifle corps and two tank corps from their reserves to oppose these while five other rifle corps, a tank corps, a mechanized corps, and an artillery division (two armies and a tank army) massed undisturbed in the second echelon, preparing to smash the German front and make big gains at the end of December and into the new year.
Incidentally, this may be a good place to point out that the Germans never used XLVIII, instead of XXXXVIII, as well as XXXXII instead of XLII. The reason I used XL instead of XXXX is that it takes up less room on the counters. The Soviets, despite my mistake in some earlier games, never used Roman numerals for anything.
The most unusual rule, in terms of traditional wargame practice, is the way that casualties are taken. Partly this is influenced by the discipline of the small counter-mix, but the main idea I am trying to convey is that what happened in the battle, relying primarily on the German strength returns, is that large units took losses and took them in remarkably short periods of time. In your usual wargame, you take your losses from the units you can best afford to lose. Let that infantry division take the loss or sacrifice the assault gun battalion to preserve the powerful panzer division. On the battlefield you don't get those choices to make. Similarly, even though attacking side by side on December 5th, the 7th Panzer Division with 18 tanks loses six tanks in two days, while the LAH SS Panzer Division with 64 tanks loses 33 in the same two days. This pattern holds up for the whole battle, and I am certain applies as well to the Soviet units. Which unit would you send to take the tough position? The fact is that the small units show generally small fluctuations in their strengths and the big units show big ones. Contrary to previous practice? Frustrating? OK, but real.
Finally, there are no rules concerning bridges being demolished by engineers or bombers. I basically decided that it was too much bother, would require more counters to represent which bridges were functional and which were not, and would add more complication to a game that I was trying to keep simple. If you want to put it in, make your own counters and be my guest. Figure that any HQs of either side, as well as each German motorized division, could bridge any water obstacle in about a day with the exception of the Dnepr, where repairing the railroad bridge at Kiev took about a week. Yes, it was possible to put a pontoon bridge across the Dnepr, but it wasn't done, or rather had already been done before the battle.
There is also no provision for basing air units on the board, or attacking them on their bases. My information on air bases comes from a German map, and I am convinced that it is not definitive. It would involve having boxes on the player display for each base, a hide and seek sub-game of attacking bases in hopes that there are air units there when the attack goes in, and some routine for flak losses (that goes for bridges, too). Once again, more complication than I want for the game, as well as more counters (flak). If you want to do all of this, keep in mind that airfields and bridges tend to be priority targets for antiaircraft defense. While a certain amount of airfield attack did take place during the battle, bridge bombing did not. Bridge destruction by engineers was common, however, but repair was often very rapid.
Another item lacking is the ability of units to improve their defenses by the use of the spade. It is true that the line that stabilized between Fastov and Tripolye, as well as the lines around Korosten, were dug in, wired, and mined after about a week, while the German offensive on December 5th caught the Soviet 60th Army in the process of construction of a defensive line along the Korosten-Zhitomir rail line, a process that had doubtless been hampered by the wet and warm weather that preceded the attack. The counter mix limits, the desire for simplicity, and a CRT that is nasty to the attacker kept this out of the game. If you want to put it in, go ahead, but be cautious.
The Soviet rifle corps are given the strength they had (as near as I could estimate) when they engaged in the battle. but they were quite fluid in their structure. Rifle divisions were traded back and forth between corps, both to reinforce points under attack and to relieve badly weakened formations. A corps might have from two or three divisions, all the way up to as many as six at some point. Just remember folks, it's an abstraction, a snapshot of history. To give you all the rifle divisions, running from an average of 4,000 to 5,000 infantry down to a few thousand soon thereafter, would provide you with more flexibility than you might want to be bothered with. All of the Soviet regiment sized units, self-propelled guns, artillery of all kinds, heavy tanks, engineers, and anti-aircraft divisions and regiments, motorcycle battalions, etc., are all represented by the headquarters units or factored into the corps.
German Arkos (regiment sized artillery commands) are to be found in the Korps HQs, along with AT, engineer, and flak battalions. If the. divisions could be broken down into their component units, it would be possible to represent the 25th Panzer coming into battle with their motorized infantry arriving first from Berdichev, only to be massacred before their large (but green) panzer regiment arrived from Kirovograd (SE of Kanev off map).
In fact, both the 1st Panzer and SS Leibstandarte fought the battle with two main kampfgruppen each. Each consisted of a panzergrenadier regiment reinforced by a panzer battalion, an engineer company, antitank company, etc. The Panther battalion typically went with the regiment having a half-tracked battalion along, as well as the StG battalion. The artillery was divided between the two kampfgruppen. In addition, a third kampfgruppen of each division was formed around the aufklaraung abteilung, the reconnaissance battalion of each division, reinforced perhaps with the Tiger company, a company of armored infantry; etc. But to make all of that available meant more counters, more rules, etc. Not for this game. This is as close as I've ever come to making a simple game, I hope that you like it.
The air units have no designations because although I have that information for most of the Soviet units I came up with, nothing on the Germans except that they were of the 8th Fliegerkorps of General Seidemann.
21.0 Player's Notes
Do not look at your playing pieces as a collection of cardboard, or as a bunch of playing pieces of various strengths. Look on them as armies and korps. Plan out objectives for them. Think of what objectives you wish to accomplish with them and tailor them accordingly. If you try to play the game a counter at a time you will not be able to use your forces coherently to accomplish anything in particular. Look at your scenario's victory conditions and keep your eyes on the prize. If you have six turns to get from A to B, don't take your strongest forces and spend two turns beating up on an enemy unit that is not holding anything important but is in a vulnerable position. (Not unless that will in some way further the achievement of your objective.) It is easy to get involved in a meaningless struggle that will result in both sides attriting each other and no major issues resolved one way or another. If you are going to attack, determine where you want to get to, what you will need to do it, what you will need to cover your flanks while you do it, and then concentrate your forces to accomplish the job. It is unlikely that you will have enough forces to try to do more than a few things in any given scenario, so concentrate. Be a bully, pick on the little guys. If the enemy counters against your flank, determine if it matters if he gains a few hexes in that direction. Use the minimum necessary to hold him off or delay him while your concentration remains on achieving your goals. That's how you win.
The Soviets, on the attack at the beginning and end of the game, must use their powerful artillery to break through, and then use their armor to exploit the holes created. Once you have a breakthrough, push it, try to occupy enemy defense lines before your enemy can. If you use the armor to break the holes, you will not have much to exploit with. On defense your rifle corps provide your main defense with HQs and artillery brigades for support to conserve ammunition, while armor in reserve can defend a wide expanse of front. If you have figured out where the German attack is headed, do your best to get an antitank brigade or two in the way. It really takes the bite out of those Tigers and Panthers. Beware of making attacks that are not overwhelming or that won't have much impact if they do succeed.
Historically, Stalin forbade the Red Army from attempting any major encirclements after Stalingrad until the Korsun-Shevchenkovski Operation in January, 1944. The feeling of the Soviet command was that the difficulty producing an outer and inner encirclement front was too demanding, and had led to the defeat in the Spring of 1943 when their forces were split between Stalingrad and the Donbas. As a result, they strove after Kursk and in the Kiev operation to split their enemy and force back, not to encircle large forces. (They weren't averse to snapping up a division if presented with it, but this was not their aim.) In keeping with this, the Soviet player should be advised that it is poor simulation, although probably better gaming, to aim to surround and destroy your enemy. Stalin, perhaps correctly, felt that the Red Army was not quite ready for this method of operations. In 1944, his was to change dramatically.
The Germans must make the Soviets pay a high butcher's bill for their early advances, and then concentrate their panzers and air strength to counter attack. Figure put what you can hope to accomplish with your attacks, and then concentrate to accomplish it. On defense, your artillery (HQs) is the key to keeping your front line alive, so position them with care. Your assault guns and weak panzer divisions can accomplish the most defensively when on reserve where they can threaten to intervene in several combats from the same hex. Let the Soviets sweat about where they will be committed.
According to von Mellenthin, the XLVIII Panzerkorps leadership wanted to attack towards Fastov-Kiev, figuring that this would cut off the Soviet bridgehead at its base. The commander of the 4th Panzer Army, General Rauss, preferred a small solution by striking between Fastov and Zhitomir. The rest of the battle the Germans sought to lever the Soviets away from the Korosten-Zhitomir line. This had the advantage of striking the left flanks of the Soviet armies facing west, but had little likelihood of destroying as opposed to driving back the bridgehead. Perhaps you want to von Mellenthin's approach.
22.0 Historical Notes
At dawn on November 1st, 1943, the soldiers of the German XXIV Panzerkorps were treated to another heavy artillery barrage, ending with salvos of Katyusha rockets and then waves of Sturmavik ground attack planes. "Here they come again," thought the soldiers. Their commander, General Nehring, was fairly confident that his men could beat back this attack. They had beaten back dozens of others since that day in September when the sky had rained paratroopers across the bend in the Dnepr River that had become known as the Bukrin Bridgehead.
The terrain was a tangle of gullies, hills, ravines, and tree covered ridges, no place for a tank army to attack from. But this is exactly what General Rybalko's 3rd Guards Tank Army had tried to do. Had been trying to do since September 22nd, when their submachine gunners had paddled across the river before Nehring's men could get there. Then two airborne brigades had been dropped across the neck of the bulge and Rybalko's T-34s had been ferried across, a few at a time. Alas, the airdrop was a fiasco, and the panzers, moving swiftly along the roads leading across the Dnepr and to the neck of the bulge, overran the scattered paratroops before they could organize. Then they had held back the Soviet attackers before they could extricate themselves from the difficult ground. Attack then had followed attack, as the 3rd Guards Tank, along with 27th Army, 40th Army, and 47th Army had pounded away at the German defenses. Small gains had hardly justified the long casualty list, and although the Germans had paid dearly as well, Nehring's six divisions had kept the Soviets locked up in the bulge all through October.
The Soviet army commanders, Marshal Vatutin commanding the 1st Ukrainian Front, and Marshal Zhukov, coordinating Vatutin and General Konev's 2nd Ukrainian Front, had protested in vain that this avenue was fruitless. Finally, Stalin turned around, rebuked the commanders on the spot for continuing their unsuccessful attacks, and ordered a major regrouping. Moving by night and under cover of smoke, bad weather, and fighter patrols, the 3rd Guards Tank Army, 23rd Rifle Corps, three artillery divisions, and various other supporting units slipped out of Bukrin, across the river, up the left bank of the Dnepr, and across again into the Lyutezh Bridgehead north of Kiev. The Germans, thanks to extensive deception practiced by the Soviets, including dummy tanks, phony radio stations, and roving guns simulating batteries, had only a vague notion that there was some movement into Lyutezh and assumed that the attack launched on November 1st from Bukrin was just another example of the Stavka's inflexibility.
For two days Nehring's troops held off the attacks. Nehring noted with satisfaction that the attacks seemed weaker, no doubt due to the losses inflicted in the previous month. Then to the German's surprise, the storm broke over the heads of General Hell's VII Korps defending Kiev. After a barrage of 2,000 guns and 500 rocket launchers, four rifle corps and a tank corps hammered at the lines of the 68th, 88th, and 20th Panzer Grenadier. Having only 4,500 infantry, 77 howitzers, 35 antitank guns, as well as six Marder tank destroyers and six stürmgeschutz assault guns total in the three divisions, the Germans nevertheless clung stubbornly to their lines for two days. They were backed up by the remnants of the 7th Panzer Division, which could boast only 25 tanks and 850 motorized infantry, supported by 18 guns and 16 antitank guns.
Then Rybalko's tankers were cut loose, two guards tank corps and a mechanized corps with their tank's sirens blaring and headlights on smashed through, and set off towards Fastov. Kiev was liberated on November 6th and the advance developed in three directions. General Moskalenko's 38th Army drove up the Kiev-Zhitomir road with the 1st Guards Cavalry and the 21st and 23rd Rifle Corps, while the 50th and 51st Rifle Corps followed in the wake of the 3rd Guards Tank Army towards Fastov.
Meantime in the north, General Chernyakovsky's 60th Army pursued the LIX Korps back towards Korosten.
Of LIX Korps four divisions, the 183rd, 217th, and 339th had but 2,300 infantry, 28 antitank guns and 49 artillery pieces between them. By November 5th, the Germans consolidated them into Korps Abteilung "C", which fought the battle as a division. Along with the weak but resilient 291st Division, they delayed all the way back to Korosten, losing it on the 17th of November, only to retake it ten days later from Chernyakovsky's weakened units.
Meanwhile Moskalenko's troops pushed aside the battered VII Korps and stormed Zhitomir on the 11th. To the south, advanced detachments of the 7 Guards Tank Corps led the way past Fastov, which they took November 7th, overrunning airfields, supply dumps, and rear area units. Suddenly they ran into units of a fresh German panzer division, just arrived from the French coast.
This was General von Schell's 25th Panzer. Rushed east in a hurry, its motorized elements had detrained at Berdichev and been rushed straight to Fastov by road to defend the town as an assembly point for the arriving XLVIII Panzerkorps of General Knobelsdorf. The division's panzer regiment, with 100 Pzkpf IVs, was unloading in Kirovograd (off map to the southeast). As the panzergrenadiers advanced towards Fastov, they suddenly encountered the T-34s of the 55th Guards Tank Brigade under Lt. Col. David Dragunsky. Lacking experience and leadership, as well as any tanks of their own, the 146th Panzergrenadier regiment was routed and most of the division's transport and trains were destroyed. According to von Mellenthin, the division commander, General von Schell, "...rallied his troops by his personal efforts..." According to Marshal von Manstein, commanding Army Group South, von Schell was "...put out of action moment it (the division's vanguard) made contact with the enemy..."
Lt. Col. Dragunsky has a different view, reacting to reading von Mellenthin's Panzer Battles, "Rallied by the personal efforts of General von Schell indeed! He could not have rallied anyone, for the simple reason that he had saved his own skin by fleeing in a lorry in a southerly direction, abandoning his subordinates to their fate." The 25th Panzer's troubles did not end there, and by the end of two weeks fighting, in which they drove up to the outskirts but could not quite take Fastov, the division having lost all but three of its panzers.
But the Germans had better cards to play than the green 25th Panzer. The heart of the XLVIII Panzerkorps was the 1st Panzer Division, with 171 tanks, including 92 of the deadly Pzkpfw V Panthers, and the 1st SS Leibstandarte Adolf Hitler Panzer Division, with 137 tanks including its share of Panthers and Tigers. As of November 12, General of Panzertruppen Balck replaced Knobelsdorf. Assembling south of Fastov, the panzer mass was unleashed on November 13 into the extended southern flank of 38th Army. The Soviet Front command, realizing the developing threat, shifted the 38th and 3rd Tank Armies over to defense, leaving the 60th Army to continue its attack towards Korosten.
General Balck wanted to attack through Fastov towards Kiev, with the aim of cutting the bridgehead off at its base. This would have entailed a frontal assault against the 3rd Guards Tank Army, through difficult terrain, and against the axis most easily reinforced by the Soviets. On the other hand, it had the outside possibility of proving decisive, if successful. However General Hoth, commanding the 4th Panzer Army, ordered an attack north across the Zhitomir-Kiev rail line, with part of the Korps hooking west to take Zhitomir (seizing it on the night of the 18th-19th November) from the rear while the rest turned east to prevent any Soviet attack from Brusilov.
The 17th Guards Rifle Corps had just come south from the 13th Army's sector (just north of the game map) was pushed back in heavy fighting with SS Leibstandarte, while the 21st Rifle Corps was mauled by the 1st Panzer. The 7th Panzer and 1st attacked the 23rd Rifle Corps in Zhitomir from the east, while the 8th Panzer and VII Korps kept the attention of the 1st Guards Cavalry Corps.
The Germans wheeled the 1st Panzer around to strike east, too fast to pocket anything around Zhitomir, and the right wing of 38th Army fell back to the north. The XLVIII Panzer Korps then turned its weight against Brusilov, and fought it out with the V Guards Tank Corps, 17th Gd and 52nd Rifle Corps, and parts of the 3rd Guards Tank Army for Brusilov. Despite increasingly bad weather, by November 26th Brusilov was in German hands and according to Earl Ziemke, the Germans had given the Soviets, "a lesson in maneuver."
The Germans claimed 20,000 Soviet dead, 5,000 POWs, 600 tanks destroyed and 300 artillery pieces as well as 1,200 antitank guns destroyed or captured. (It is worth noting that the 1st Ukrainian Front only had 675 tanks and assault guns at the start of the offensive.) While there is some exaggeration in these figures, especially in the tank losses, they are probably in the ballpark. Missing, however, from the accounts of von Mellenthin and Ziemke, to say nothing of the rantings of "Paul Carrel," are any listing of the German losses.
The sources available to me are listings of the strengths of German units on various days. Every division does not have a report in on every day, and some units never seem to report. Further the information only lists strengths, not losses or replacements. So, if a unit had 100 tanks on Monday and 50 on Saturday, it may have lost 100 and received 50 replacements and/or returnees from the repair shop. We can only prove that they lost 50 over that period, however. Let's look at the data. 1st Panzer went from 171 tanks and assault guns on Nov 16, near the beginning of the counterattack, down to 40 on November 22 (leaving only 26 Pzkpfw IVs and 14 Panthers left from 92!). SS Adolf Hitler dropped from 137 to 47 during the same period.
Subsequently during December, the strength of these two units fluctuated up and down, but never exceeded 80 and 64 respectively. The 7th Panzer went from 25-30 at the beginning of November down to four on November 22. The 25th Panzer began with 100 Pzkpfw IVs, lost 48 of them by November 8 but gained 23 Tigers, by November 22 had only 3 stürmgeschutzen. It had 30 of them on November 29, then was built up to 57 armored vehicles on December 15 (8 Pzkpfw IIIs, 9 stürmgeschutzen, and 40 Pzkpfw IVs), but after the Soviet offensive struck them on December 24, they dropped to four Pzkpfw IVs by December 26. We can safely conclude that XLVIII Panzerkorps, having lost a minimum of 221 panzers from only two divisions in six days, paid a terrible price for Zhitomir and Brusilov.
After November 26 exhaustion and a thaw put an end to fighting for nine days. The 1st Ukrainian Front pulled the 5th and 7th Guards Tank Corps out of the line to rebuild, and both the 38th Army and the 1st Guards Cavalry Corps had been badly beaten up. Chernyakovsky took Korosten but was stretched over a wide front (he was steadily sending units south to help stem the German counterstroke). The 4th Panzer Army was likewise torn up, and spent the lull trying to rebuild its shattered panzer arm. The 88th Infantry Division and 20th Panzergrenadier were pulled out to be rebuilt.
In the air over the battlefield, General Seidemann's 8th Fliegerkorps had dueled with General Krasovsky's 2nd Air Army. Each had started with about 600 aircraft, the Germans predominately bombers, the Soviets mostly fighters, and each had lost about 200 aircraft. Despite rain and snow and clouds, strikes had gone in against troops in the field and on the road behind the lines, as well as against supply dumps and airfields. Krasovsky received substantial reinforcements, boosting his strength by the early part of December to 750 machines.
On the ground, the Soviet build up was even more impressive. Along with replacements and many support units that swelled the strengths of the armies in the field, the Soviets prepared for the next phase of the battle by secretly reinforcing Vatutin with three new armies. General Katukov's crack 1st Tank Army, rebuilt after the heavy summer and fall battles for Kursk and the east bank of the Dnepr, was brought in, along with General Grechko's 1st Guards and General Leselidze's 18th Army which both arrived from the Kuban, now clear of Germans. With the rail line across the Dnepr now functioning as far as Gostomel, the new armies moved into camouflaged positions and waited while stocks of ammunition and fuel were brought up and the battered formations that had fought all of November absorbed replacements.
The line up on December 5th was as follows. The German LIX Korps had retaken Korosten with the 291st Division (somewhat rebuilt) and Korps Abteilung C, badly depleted. They faced the six divisions of the 77th and 24th Rifle Corps of 60th Army, likewise seriously weakened. South of the LIX Korps there was a gap of almost 30 miles to the positions of the XLVIII Panzerkorps around Chernyakov. Unknown to the Germans, the 60th Army's 18th Gd Rifle Corps was digging in, facing west behind the Zhitomir-Korosten rail line. They were backed up by the 23rd Rifle Corps. The line was effectively cut by their presence, embarrassing the rail communications with Army Group Center in Byelorussia.
General Balck's XLVIII Panzerkorps was massed just north of Zhitomir with the 1st SS, 1st, and 7th Panzer Divisions screened by the 208th Infantry. The XIII Korps was to their right, facing north, between Zhitomir and south of Radomyshl, with the 340th, 213th Security, and 68th Divisions facing the 60th Army's 30th and 15th Rifle Corps. To the right of XIII was the German XLII Korps, containing five divisions. On the korps' left flank, the 2nd Fallschirmjager Division, with two regiments of "superb" infantry supported by only a single artillery battalion, although well supported by 88mm guns, was southeast of Radomyshl, with the SS Das Reich to the right of them holding as far as the Zhitomir-Kiev highway. The line then curved away so that it ran north-south, with the 8th and 19th Panzer Divisions. Facing the XLII Korps was the 38th Army, 94th (from the undetected 1st Guards Army), 52nd, 17 Gds, and 21st Rifle Corps (these last three badly battered). Finally, the korps' right flank was the 25th Panzer Division, stretched out over 20 miles of frontage. It partly faced the similarly extended 50th Rifle Corps of 40th Army, centered on Fastov. The battered 38th Army's right flank was backed up by General Grechko's newly arrived 1st Guards Army (unknown to the Germans) with the 74th and 107th Rifle Corps, with 18th Army's 11th Rifle Corps behind them. Meanwhile the 3rd Gds Tank Army was mostly back near Kiev being rebuilt.
South of Fastov, the German VII Korps had the remnants of the 88th Infantry facing north against the 50th Corps, the stronger 198th and 75th Infantry Divisions straddled the Belaya Tserkov-Kiev road facing the 51st Rifle Corps, and the weak 82nd held the rough country south of Tripolye and linked up with the XXIV Panzerkorps 34th Infantry which held the line to and along the Dnepr. The 50th and 51st Corps were now commanded by 40th Army. General Trofimenko's 27th Army had six divisions still holding the Rishishchev and Bukrin bridgeheads, watched by the 168th and 112th Infantry. The 18th Army and 1st Tank Army were assembling west of Kiev, undetected by the Germans.
Before the Soviets could attack, however, the Germans jumped off again. The XLVIII Panzerkorps wheeled northwest around Zhitomir on December 5 and then struck across the Zhitomir-Korosten rail line. They carefully avoided air or ground reconnaissance in advance so as not to tip off the Soviets as to what was coming. As a result, the Germans had no idea what they were facing. The surprise was mutual when over 200 of Balck's panzers hit General Lazko's 30th Rifle Corps and overran it. The AH SS Division fought its way through by December 7, but was then held up for 24 hours by lack of fuel. It is probable that while the division fought its way through, the Soviet infantry closed in behind them and prevented fuel supplies from getting forward.
Pushing on, Balck's troops drove to the northeast, forcing the 60th Army's HQ to displace rapidly and in heavy fighting Chernyakovsky's army was mauled and forced north of the Irscha and east of the Teterev Rivers. In German Defense Tactics Against Russian Breakthroughs, US Department of the Army pamphlet, the anonymous German author claims that one Soviet army (presumably the 60th) was destroyed, and another (no other army available in the sector of the attack) "...suffered such heavy casualties that is was at least temporarily rendered ineffective...more than 200 tanks were destroyed...German losses were light." Von Mellenthin echoes this view. Unfortunately for these claims, the German strength returns tell a somewhat different story.
From December 5 to December 7, the XLVIII Panzerkorps lost at least 88 tanks! By December 15 the total reached at least 111. In light of the fact that the only Soviet tank corps supporting the 60th Army initially was the 4th Guards, and the Germans only certainly identified the 6th Guards Tank Corps as reinforcements, the German claims for Soviet tank casualties seem quite high. The losses, in tanks at least, were probably pretty close to even.
There is no denying that the 60th Army took a real pounding, however. It suffered about 50% losses in its artillery as well as heavy infantry losses and was driven from its positions. The 1st Ukrainian Front was forced to divert forces from its main build up to support the 60th Army, including committing two corps of the 1st Guards Army (the Germans were only able to make a tentative identification of this army by December 11th.) The Germans also succeeded in relieving the pressure on Korosten and freeing up the Zhitomir-Korosten railroad. For all of this, however, they paid a stiff price, and when the real results were added up, their position was hardly improved enough to justify such losses. The fact is that for all the talk of brilliant maneuver, this had been more attrition, which the Red Army was better prepared to engage in than the Wehrmacht.
Now we come to an operation that von Mellenthin refers to, in great detail, as the battle of the Melini Pocket. According to him, on December 16 the Germans sent the 7th Panzer, which he describes previously as being brought up to full strength, from its bridgehead north of the Irscha at Malin, attacking north and then west, while the 1st Panzer and 1st SS wheeled left and then right again, moving around through Korosten to attack eastward north of the Irscha River to link up with the 7th Panzer. He then describes how the almost-pocket, centered around Melini (about hex 3307), couldn't be closed because it contained four rifle corps and three tank corps. The Germans then backed away and by December 24 were pulling the XLVIII Panzerkorps out of the line, presumably to refit from its "light" losses.
There are a few flaws in this story, and they give one some insight into von Mellenthin as a historian. For one thing, the German records show clearly that 7th Panzer was never rebuilt to anything near full strength (1,100 infantry and 18 tanks on December 5, for instance). For another, the 7th Panzer never had a bridgehead north of Malin, nor did any German (except prisoners) set foot in Malin after the 60th Army took it in early November. On December 16 German situation maps, the 7th Panzer shows up clearly strung out in a defensive line south of the Irscha. The attack instead seems to be a push into 60th Army's right flank in front of Korosten by the depleted 1st and LAH SS Panzer Divisions that made no spectacular progress. Indeed, the attack seems to have taken place only on the 20th and 21st of December and not to have amounted to much at all. Just to put the cherry on the top of this mound of nonsense, an analysis of the locations of the various units shows that the only units that could have conceivably been in von Mellenthin's phantom pocket were the 23rd and 18th Gds Rifle Corps, 4th Gds Tank Corps, and 1st Gds Cavalry Corps. The first three were supposed to have been destroyed in early December, while the cavalry were supposed to have been trashed at Brusilov (they weren't there at all). Finally, note what the "destroyed" 60th Army does to celebrate Christmas.
Air fighting was heavy, with General Krasovsky's 750 machines reduced to 529 by the end of December despite serious reinforcements.
The Germans believed that they had so weakened the Red Army that it would be unable to mount any offensive efforts for a while. The Red Army had different ideas, and had been building and planning, not in the secondary direction of Korosten, but facing Brusilov. Their intentions were to seize Berdichev, Zhitomir, Kazatin, and Vinnitsa (southwest of the game map). This would cripple the communications of Army Group South, and leave the inner flanks of the 1st Panzer Army and 8th Army, clinging to the Dnepr around Korsun-Shevchenkovsky, in a very vulnerable position.
The attack, preceded by a terrific barrage and airstrikes, caught the Germans off guard. General Chemyakovsky's allegedly destroyed 60th Army waited until noon to jump off instead of the usual dawn assault, letting the German troops opposite them get deep into their holiday boozing before the attack. The front was held by the 8th, 19th and 25th Panzer Divisions, with 27, 14, and 49 panzers, respectively. With only 5,600 motorized infantry between them, they were holding over 35 miles of front. Six rifle corps, supported by three tank corps and two mechanized corps and three artillery divisions washed over this obstacle, destroying all but four of the 25th Panzer Division's tanks in two days. The 8th and 19th were surrounded and battered and the 25th driven in rout to the south. The 1st Panzer and 1st SS Panzer were in reserve moving south on the Korosten-Zhitomir road when the storm burst, and had considerable trouble untangling themselves from the traffic jam created in Zhitomir by the 18th Artillery Division's arrival there. An attempt by the Germans to copy the Soviet practice, the 18th turned out to be a clumsy failure. The 1st Panzer was down to 25 tanks and the 1st SS to 49. They attacked against the flank of the Soviet offensive, and helped extricate the remnants of the 8th and 19th Panzer, but despite their efforts the 1st Tank Army rolled into Kazatin on the 28th, crippling German rail communications, and headed for Vinnitsa, while the 3rd Guards Tank Army pushed on Berdichev. Meanwhile on the 28th of December, the "destroyed" 60th Army pushed southwest between the LIX and XIII Korps and then sent its 4th Gds Tank Corps south behind Zhitomir to cut off the German retreat. Attacked from the east and encircled from the west, the Germans abandoned Zhitomir and fell back to the southwest.
Eventually the Soviet drive was slowed and stopped by reinforcements railed in from the quiet front in western Europe, and by heavy air reinforcements that pounded the advancing Soviet columns. By the new year the Red Army had liberated Korosten, Zhitomir, Berdichev, and Kazatin, and the 40th Army had pushed the Germans out of Belaya Tserkov. The drive to Vinnitsa, however, was stalled and then driven back and 1st Tank Army took some serious losses in the German counterattack that stabilized the front about twelve days into the new year. But the issue had been clearly decided: the Dnepr bridgeheads were not in question; the only question now was how soon the Germans would be completely expelled from the Ukraine and how soon the Red Army would be beginning its march into Rumania and Poland.
23.0 Bibliography
- Lost Victories, Manstein, Erich von, 1955, Presidio Press, Novato, California
- The Soviet Air Force in World War II, Wagner, Ray, editor, 1973, Doubleday & Co, Garden City, New York
- Dnepr, Karpaty, Krym, Grylev, A.N. (in Russian), 1970, Nauka, Moscow USSR
- The Road To Berlin, Erickson, John, 1983, Westview Press, Boulder, Colorado
- The Memoirs of Marshal Zhukov, Zhukov, G. K., 1969, Delacorte Press, New York, New York
- A Soldier's Memoirs, Dragunsky, David, 1983, Progress Publishers, Moscow USSR
- The Soviet Conduct of Tactical Maneuver, Glantz, David, 1991, Frank Cass and Company Ltd., London, England
- Soviet Military Deception in the Second World War, Glantz, David, 1989, Frank Cass and Company Ltd., London, England
- Red Army Tank Commanders, The Armored Guards, Armstrong, Richard, 1994, Schiffer Publishing Ltd., Atglen, Pennsylvania
- Red Phoenix, Hardesty, Von, 1982, Smithsonian Institution, Washington, D.C.
- Soviet Generals Recall World War II, Vitukhin, Igor, editor, Sphinx Press, Inc. in cooperation with Novosti Press Agency Publishing House, New York, New York
- Great Patriotic War of the Soviet Union, 1970 {abridged, in English), Pospelov, P. N. et al editors, Progress Publishers, Moscow, USSR
- Handbook on USSR Military Forces, US War Department, Washington, DC
- Small Unit Actions During the German Campaign in Russia, US Department of the Army Pamphlet, 1953, Washington DC
- Stalingrad to Berlin, Ziemke, Earl, 1968, Dorset Press, New York, New York
- Russia At War, Werth, Alexander, 1964, E. P. Dutton & Co, Inc., New York, New York
- German Order of Battle 1944, 1944, Arms and Armour Press, London, England
- The Red Army Order of Battle in the Great Patriotic War, Conner, Albert, and Poirier, Robert, 1985, Presidio Press, Novato, California