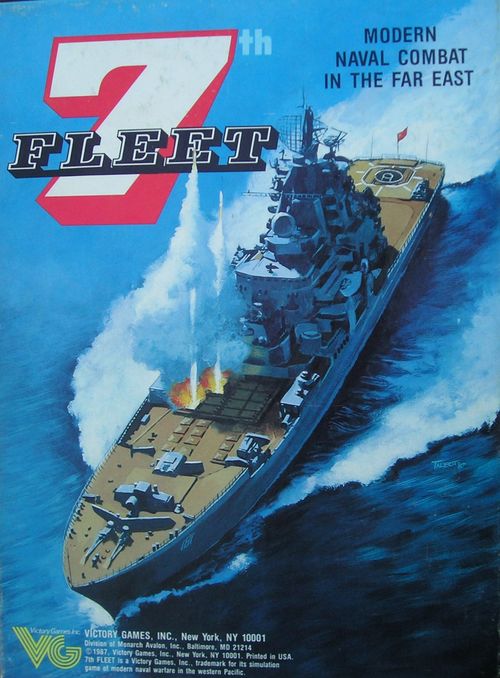
7th Fleet: Modern Naval Combat in the Far East
7th Fleet: Modern Naval Combat in the Far East Rulebook
Table of Contents
Table of Contents
1.0 Introduction
7TH FLEET is a simulation of contemporary naval warfare in the western Pacific Ocean. In turns representing eight hours of real time, the players maneuver surface warships, submarines, squadrons or regiments of combat aircraft, amphibious assault vessels, and freighters on a detailed map of the region stretching from the Kamchatka Peninsula to Vietnam. A hexagonal grid has been superimposed over the map and each hex equals about 46 nautical miles. Note that the east side of the central map has distorted hexes; this distortion is used so that Guam may appear. Each distorted hex is considered a normal hex for movement and range purposes.
Sections 4.0 through 12.0 teach players basic movement and combat rules; the nine scenarios in 13.0 allow the players to use the rules in simple, one-map games. Sections 14.0 and later introduce additional rules that are used only in the Advanced Game Scenarios.
Note to Owners of Sixth and 2nd Fleets: 7TH FLEET uses many of the game mechanics from its two older cousins. However, there are some differences among the systems of the three games. Players who own SIXTH FLEET, but not 2ND FLEET, should read all the rules in 7TH FLEET thoroughly. The major differences in rules between 2ND FLEET and 7TH FLEET are denoted by stars (*). It is suggested that players who own 2ND FLEET should skim through the rules, paying particular attention to any information preceded by a star. The main modifications to 7TH FLEET from 2ND FLEET are as follows:
- Sequence of Play: There is no Invasion Phase. A new phase (the Air Unit Replacement Phase) has been added.
- Counters: There are no submarine tender (ST), ballistic submarine (SB) or cargo (CR) units. Corvette (CO), oiler (OL), maritime prepositioning (MP), slow and fast convoy (SC and FC), and bomber (BMB) units have been added. Tanker (TK) units have a different function. Marine, parachute and commando markers are not used.
- CAP: Air units on CAP missions may be allowed to assist friendly units that are attacked by enemy CAP missions.
- Combat: Cruise missile and close defense hex combat have been added. There are subtle modifications to all forms of combat, and Section 10.0 should be studied carefully to note the differences.
- Submarine Detection: Submarines are more difficult to detect.
- Optional Rules: A number of new optional rules (22.0) have been added, and there are important changes to former optional rules.
Other significant changes to rules, in addition to those listed above, are noted by stars.
2.0 Game Equipment
2.1 Game Components
A complete game of 7TH FLEET contains these items:
- One Rules Booklet
- Three 22-inch by 32-inch Mapsheets
- Two sets of 192 ½-inch Playing Pieces (Counters)
- One set of 96 ½-inch Playing Pieces
- One set of 260 ½-inch Game Markers
- Two Charts and Tables Booklets
- Two Pads of Logistics Rosters/Player Records
- Three Deployment/Reinforcement Cards
- Two Strategic Air Display Cards
- One 10-sided die
Note: The game uses a 10-sided die. When a "0" is rolled, this is considered "0" and not "10" as in many other games. Also, a "0" is always considered an even number.
2.2 Game Questions
If you have any questions about the rules to 7TH FLEET please feel free to send in your questions written so that they can be answered with a simple one-word response when possible. Be sure to enclose a stamped, self-addressed envelope. Mail your questions to:
7th Fleet Questions Victory Games, Inc. 43 West 33rd Street New York, NY 10001
Note: We ask your cooperation in sending a self-addressed, stamped envelope with your game questions; queries without a return envelope will not be answered. Also, we ask that you not call in your game questions.
2.3 Playing Pieces
At the start of the game, one person is chosen as the Allied player and the other as the Soviet player. Each player controls playing pieces (counters) from among 11 nations. The Allied player controls counters from:
- United States
- Japan
- South Korea
- Australia
- Canada
- Philippines
- Taiwan
- China
The Soviet player controls counters from:
- Soviet Union
- North Korea
- Vietnam
Allied counters (except China and Taiwan) have green borders but each country has a different interior color. China and Taiwan have tan borders with different interior colors (since one or the other is neutral in many scenarios). Soviet counters have red borders, but each Soviet-controlled country has a specific interior color. In addition to the colors on counters, each nation's forces can be distinguished by the two-letter abbreviation on the counter.
The backs of counters are printed with a starburst design and reduced values indicating that these units have been damaged. Each player also has a set of half-inch markers that are used to record game information. Some markers are printed in the Allied color, some in the Soviet color and others in a neutral color.
Summary of Counter Types
Surface Combat Units: Aircraft Carrier (CV), Cruiser (CG), Light Cruiser (CL), Destroyer (DD), Frigate (FF), Battleship (BB), Corvette (CO), Patrol Combatant (PC), Reconnaissance (RCN).
Non-Combat Surface Units: Amphibious Assault (AA), Maritime Prepositioning (MP), Tanker (TK), Oiler (OL), Combat Support (CS), Slow Convoy (SC), Fast Convoy (FC).
Submarine Units: Nuclear Submarine (SN), Diesel Submarine (SS).
Air Units: Airborne Early Warning (AEW), Electronic Warfare (EW), Bomber (BMB), Attack (ATK), Interceptor (INT).
Note: An "N" in place of the SSM, ASW, Anti-Air or Close Combat values indicates that the unit cannot perform that form of combat. If it has a Close Anti-Air or Area Anti-Air value, but not both, a "0" indicates which value it cannot use. Aside from the Victory Point value, all other values on submarine units are identical with surface units. Except for AA units, Victory Point values are lower on the damaged sides of units than they are on their undamaged sides. A submarine unit always has an "N" for its Anti-Air value. Only Soviet and Chinese submarine units have the "Noisy Sub Indicator." Some US air units have the "Special SSM Indication," which is used in the Advanced Game. Air units do not have Defense values. Their Movement Allowances are either a two- or three-digit number.
Summary of Game Markers
CAP Mission, Task Group/Task Force, Local/Strategic Detection, Damage, Destroyed, Nationality, Time of Year, Action Segment, Armistice, Out of Fuel, Out of Ammo, Out of Fuel & Ammo, Deep (submarine mode), Mine.
Note: The backs of the Out of Ammo and Out of Fuel markers read "Out of Fuel & Ammo."
2.4 Abbreviations
The following abbreviations are used in the game:
Surface Units: AA: Amphibious Assault; AM: Ammunition Carrier; BB: Battleship; CG: Missile Cruiser; CL: Light Cruiser; CO: Corvette; CON: Convoy; CS: Combat Support; CV: Aircraft Carrier; DD: Destroyer; FC: Fast Convoy; FF: Frigate; FLOT: Flotilla; MP: Maritime Prepositioning; MPS: Maritime Prepositioning Squadron; OL: Oiler; PC: Patrol Combatant; PCS: Patrol Combatant Squadron; SC: Slow Convoy; TK: Tanker.
Air Units: AEW: Airborne Early Warning; ATK: Attack; B: Beriev; BMB: Bomber; EW: Electronic Warfare; H: Hongzhaji ("Bomber"); I: Ilyushin; INT: Interceptor; J: Jian ("Fighter"); M: Mikoyan (MiG); RCN: Reconnaissance; S: Sukhoi; T: Tupolev; Y: Yakolev.
Submarine Units: H: Han; R: Romeo; SN: Nuclear Submarine; SS: Diesel Submarine.
Sea Zones: BO: Bonin Islands; CP: Central Pacific; EC: East China Sea; FO: Formosa; HK: Hokkaido; JP: Japan; MR: Marianas; NP: North Pacific; NW: Northwest Pacific; PH: Philippines; SC: South China Sea; SJ: Sea of Japan; SO: Sea of Okhotsk; SP: South Pacific.
Countries: AU: Australia; CA: Canada; CH: China (People's Republic); JP: Japan; NK: North Korea; PH: Philippines; SK: South Korea; SO: Soviet Union; TW: Taiwan (Republic of China); US: United States; VN: Vietnam.
Miscellaneous: AAA: Area Anti-Air; AP: Ammunition Point; ASW: Anti-Submarine Warfare; CAP: Combat Air Patrol; CM: Cruise Missile; FP: Fuel Point; SSM: Surface-to-Surface Missile; TORP: Torpedo; VP: Victory Points.
Ship Names: Only ships whose names have been abbreviated are included on the ship-name lists printed on the Logistics Rosters, organized by nation (Australia, Canada, China, Japan, North Korea, Philippines, South Korea, Soviet Union, Taiwan, United States, and Vietnam).
3.0 Sequence of Play
All actions that occur in a Game Turn take place in a strict Sequence of Play, which is composed of a number of Phases, which in turn are comprised of a number of Segments, that must be performed in the order listed below. A day of real time is represented by three Game Turns: AM, PM, and Night, each of which represents eight hours of real time. Some Phases in the Sequence of Play take place only in an AM or Night turn and are ignored in others.
Strategic Cycle (AM Game Turns only)
A. Political Events Phase (Advanced Game; not on Game Turn 1)
The Allied player rolls a die and the players consult the Armistice Table. The Armistice marker may be advanced or the players may be required to consult the Random Events Table. If the Armistice marker advances, the players may receive Victory Points (see 17.0).
B. Weather Phase (Advanced Game)
The Allied player rolls the die and consult the Weather Table (see 15.0). If a squall or storm results, the die is rolled again and the Zone Table is consulted to determine which zones are affected.
C. Reinforcement Phase (Advanced Game; not on Game Turn 1)
Both players roll a die and consult the Reinforcement Table (see 18.0). Any reinforcements made available by these rolls are deployed on the map.
D. Submarine Mode Phase (Advanced Game; optional)
The players can place Deep markers on any of their submarines that have a Movement Allowance of two or more. Also, the players can remove Deep markers from their submarines (see 20.0).
E. Strategic Air Phase
- Allocation Segment: Both players secretly assign air units to strategic missions on their Strategic Air Displays (see 7.1).
- Interception Segment: Opposing air units that are on Interception missions within the same zone perform Air-to-Air Combat (see 7.2).
- Bounce Segment: Surviving Interception air units perform Air-to-Air Combat against enemy air units in the same zone on non-Interception missions (see 7.2).
- Mine Segment (Optional): Air units on Mining missions place Mine markers in coastal hexes (see 21.0).
- Strategic Detection Segment: For each Reconnaissance mission in a zone, the owning player can place a Strategic Detection marker on an enemy surface unit (or stack) or an enemy submarine that occupies that zone (see 9.2).
Activity Cycle (All Game Turns)
F. CAP Phase
Both players assign air units to CAP (see 8.0).
G. Minesweeping Phase (Advanced Game; optional)
A player rolls the die once for each hex containing mines to determine if any Mine markers are removed (see 21.0).
H. Replenishment Phase (Advanced Game; optional)
Both players can perform in-port and at-sea replenishment (see 16.0).
I. Local Detection Phase
Local Detection markers are placed on surface and submarine units occupying enemy Limited or Extended Detection Zones (see 9.2).
J. Action Phase
- First Action Segment: The die is rolled to determine the "first" player. On an even roll, the Allied player is first; on an odd roll, the Soviet player is first. The first player states which type of units he will activate: surface, submarine, or air. After the first player has finished activating all actions with the chosen type, the second player selects a type of unit for activation and carries out all actions with this type.
- Second Action Segment: After the first player, each player activates a second unit type. Neither player can select the unit type they chose in the First Action Segment, after the first player has performed all actions, the second player chooses a unit type for activation (he cannot choose the type he selected in the First Action Segment) and carries out all actions with this type.
- Third Action Segment: After the die is rolled to determine first player, each player activates the remaining unit type not activated so far and completes all actions with them. The second player then activates his last remaining unit type.
K. Local Detection Removal Phase
★Surface and submarine units that do not occupy enemy Detection Zones may have their Local Detection markers removed (see 9.5).
L. CAP Landing Phase
All CAP units are returned to the airfield or aircraft carrier from which they started (see 8.4).
Terminal Cycle (Night Game Turns only)
M. Fuel Phase (Advanced Game; optional)
Fuel expenditure for surface combat units is recorded on the Logistics Rosters (see 16.0).
N. Repair Phase
Damage 1 markers are removed from ports and airfields. Damage 2 markers are flipped to their Damage 1 side (see 11.0).
O. Strategic Air Mission Termination Phase
Air units on the Strategic Air Display are returned to the parent aircraft carrier or the airfield from which they began their mission (see 7.5).
P. Air Unit Replacement Phase (Advanced Game; Game Turns 9, 18, and 27 only)
Each player rolls the die to determine the number of Air Replacement Points he receives. The players then expend their points to place destroyed air units back on the map and/or flip damaged air units to their full-strength sides (see 14.0).
Q. Strategic Detection Removal Phase
★Strategic Detection markers may be removed from units or they may be flipped to their Local Detection sides (see 9.5).
Game Turn Indication
The Game Turn is now over. The Game Turn marker is advanced one space along the Game Turn Track. Players now go to the Strategic Cycle, if the next turn is an AM turn, or the next turn is a PM or Night turn, this process is repeated until the game ends or an Armistice is declared (see 17.0).
Basic Game Rules
4.0 The Action Phase
Most game activities take place during the Action Phase, which is composed of three Action Segments. During each Action Segment, a player moves and performs combat with units of a particular type (surface, submarine, or air). When he has finished activating units of the desired type, he states this fact aloud.
4.1 The Action Segments
To determine who goes first in each Action Segment, the Allied player rolls the die. If the result is even (including 0), the Allied player activates units first in the segment; if the result is odd, the Soviet player activates units first. This determination takes place at the beginning of each Action Segment.
In the First Action Segment, the first player states the type of unit he will activate: surface, submarine, or air. He can then activate any or all of the units of that type. The second player then states which unit type he wishes to activate in the segment, but is not obligated to state the same unit type as the first player.
In the Second Action Segment, after the first player is determined by die roll, each player activates a second unit type. Neither player can select the unit type he activated in the First Action Segment.
In the Third Action Segment, after the first player is determined by die roll, each player activates his remaining unit type.
A player can elect to "pass" in any Action Segment if he does not want to activate any of his unit types; he must pass in an Action Segment if he does not possess all three unit types on the map. (Note that in some Basic Game Scenarios, both players possess only two unit types. In these cases, the Action Phase consists of two Action Segments, not three.) If a player passes, he does not perform any activities in that Action Segment.
4.2 Unit Activation
To be eligible for activation, a unit must belong to the unit type selected for the current segment (surface, submarine, or air), and it must not have been activated previously in that segment. For example, if a player announces "Air" at the start of an Action Segment, he can activate only Air units of that type. A player must complete the actions of each unit (or stack) before going on to activate another unit (or stack).
To keep track of which units have already been activated in a segment, players may wish to rotate units 90 degrees after activation. At the end of the segment, they can be returned to their normal positions.
Air units on aircraft carriers are maintained off-map on the Aircraft Carrier Displays. When such units are activated, they are considered to occupy the same hex as their "parent" carrier. Movement of air units between the map and these Displays occurs only when they are activated in an Action Segment.
4.3 Limitations on Activation
The activation of units in an Action Segment is completely voluntary. A player is not obligated to activate any units in his surface, submarine, or Air Actions Segments. Units occupying different hexes can be activated together.
Surface Units: A player can activate any or all surface units occupying the same hex at the beginning of an Action Segment. All units of a chosen nationality that are stacked together must activate together as a stack (see 6.0).
★Soviet and North Korean surface units can activate together without restriction, as can Allied surface units of any nationality.
Submarines: Submarines must be activated individually. A submarine must complete its activities before another submarine is activated.
Air Units: A player can activate up to four air units (regardless of type) that are stacked together in the same hex. A player can activate fewer than four air units within a stack if he wishes, but never more.
★Soviet, North Korean, and Vietnamese air units can activate together without restriction, as can Allied air units of any nationality.
★Chinese Restrictions: Chinese surface and air units can never activate with non-Chinese Allied units of the same type.
4.4 What Activated Units Can Do
Once a player has stated which unit type he will activate in an Action Segment, he can move and perform combat with each of his units (or stacks) of that type. A unit or stack must complete all its activities before any other unit or stack is activated. Also, a unit can be activated only once per segment. When a unit is performing actions, no other unit — enemy or friendly — can move or attack, except for enemy CAP units (see 8.2).
Surface units or units that are stacked together and activated as a single force are considered one unit for activation purposes; they cannot split up until they and they must perform the same types of attacks in the stack must participate in the attack.
Surface Units: A surface unit or stack can move and/or attack subject to the following restrictions:
- It can move and not attack;
- It can move and perform one or two attacks;
- It can perform one or two attacks and then move;
- It can perform one or two attacks and not move;
- It can perform one attack, move, and then perform a second attack.
A surface unit can never perform two attacks of the same type in the same segment. Thus, in a Surface Action Segment, a surface unit can perform one or two of the following three types of attacks (but never more than one of each): ASW, SSM, and Cruise Missile (see 10.0).
Example: A player has a stack of four surface units and decides to activate them together. First, he performs ASW Combat; then he moves the stack; finally, he performs a Cruise Missile attack.
Submarines: Each submarine is activated individually. Each submarine can move and perform one attack at any time during its movement.
Air Units: Air units are the only ones which can perform two attacks of the same type in the same activation (for example, two air units in a stack each performing a Bombing attack). Also note that air units can move before and after combat, or move once, attack, and stop.
4.5 The Action Segment Track
Each player has three Action Segment markers labeled "Air," "Surf" (Surface), and "Sub" (Submarine). In order to remind the players which unit types have been selected for activation in the three segments of the Action Phase, the players should place these markers on their Action Segment Tracks. As each player selects a unit type for activation in an Action Segment (or passes), he should place the appropriate marker in the box corresponding to the current segment. At the end of the Action Phase, the markers are removed from the track.
Example of Activation: The Allied player has a US F16 unit in Osan, the US surface units LBech and Txtn in Sasebo, and the US submarine NYCty in Yokosuka. The Soviet player has a T26 air unit in Vladivostok, the surface unit Minsk in Pos'yet, and no submarines at all. During the First Action Segment, the Allied player rolls a 2, and so goes first. He states "Surface" and decides to activate LBech and Txtn as a stack. He moves these units together but performs no combat. Then, he places the USSR "Surf" marker in the 1st Action Segment box of the Allied player's Action Segment Track. The Soviet player goes second and states "Air." He activates the T26, moving it from Vladivostok and executing an air strike.
In the Second Action Segment, on a roll of 3, the Soviet player goes first, announcing "pass" and performing no actions. He places his "Sub" marker in his 2nd Action Segment box. The Allied player goes second and also announces "pass." He decides to place his "Air" marker in his 2nd Action Segment box — meaning that he cannot activate air units for the rest of the Phase. In the Third Action Segment, on a roll of 8, the Soviet player goes first and states "Submarine." He places the NYCty in Cruise Missile attack, moving it and then performing one Cruise Missile attack. He places the "Sub" marker in his 3rd Action Segment box. The Soviet player goes second and states "Surface." He activates Minsk, moving it but making no attack. He places the "Surf" marker in the 3rd Action Segment box. The Action Phase is over.
In the above example, the Soviet player must pass in at least one of his Action Segments, since he has no submarines. Once a player has passed with one of his unit types, placing an Action Segment marker of that type on his Action Segment Track, he cannot go back and activate that unit type in a later segment of the current Action Phase.
5.0 Movement
★There are several different types of hexes on the map. Sea hexes are composed entirely of water. Land hexes are composed entirely of land. Coastal hexes are composed of a combination of land and sea (including hexes containing islands) and are sub-divided into two types: restricted water hexes and non-restricted water hexes. There are also two special types of hexes: drift ice hexes, which have varying characteristics in the Advanced Game depending on the time of year in which the scenario is taking place; and shallow hexes, which can affect detection and combat against submarines. There are also two special areas on the map affecting victory conditions in some scenarios: the Tsushima Straits area, between Japan and South Korea, and the Soviet Bastion area, within the Sea of Okhotsk. Finally, there are several coastal defense hexes on the map, which can be either Soviet or Japanese. See the Terrain Key for a list of all types of hexes.
No unit can ever leave the map in any scenario in the game.
5.1 How Units Move
Each unit's Movement Allowance (printed directly on its counter) is the maximum number of hexes the unit can move when activated. A unit can move less than its printed Movement Allowance, but never more. When a unit moves, the moving player moves it from hex to contiguous hex. Note that some units cannot move into certain types of hexes.
When activated together in a stack, a surface or air units can move a number of hexes equal to the lowest Movement Allowance of any unit in the stack. A stack of units moved together cannot drop off a unit and continue moving. The stack must move, attack, and stop together.
5.2 Surface Unit Movement
A surface unit can enter any sea, shallow, coastal, or drift ice hex; it can never enter a land hex. During movement, surface units can move through hexes occupied by friendly or enemy units. Similarly, they can move through enemy base hexes without restriction. However, surface units can never end their active status in the same hex with an enemy unit or base.
A surface unit cannot enter a hex by crossing a hexside composed entirely of a land feature. For example, a surface unit in hex 1217 could not move directly into hex 1317; it would have to move first into hex 1216.
A surface unit and cannot move over any sea, shallow, coastal, or drift ice hex without expending Movement Points. During movement, surface units can move through hexes occupied by friendly or enemy units. Similarly, they can move through friendly or enemy bases without restriction. However, surface units can never end their active status in the same hex as an enemy unit or base.
5.3 Submarine Unit Movement
Submarines are subject to the same movement restrictions as surface units. (Remember that submarines must be activated individually.)
★Full Speed: At the moment a submarine is activated the owning player may state that his submarine will move at full speed. If activated at full speed, a submarine's Movement Allowance is increased by one. However, moving at full speed may result in the placement of a Strategic Detection marker on the submarine (see 9.2). A player cannot activate his submarines at full speed if they occupy a restricted water hex. Similarly, a submarine moving at full speed can never enter a restricted water hex.
5.4 Air Unit Movement
Air units can enter and move through any hex on the map, regardless of terrain, or the presence of enemy or friendly units or bases. Air units have only one movement restriction: they must begin and end their activation on a friendly airfield or aircraft carrier.
★Soviet, Vietnamese, and North Korean air units can start or end their activation on any of the Soviet player's airfields. US and Australian air units can activate or end their active status on any Allied airfield except those in China and Taiwan. All other Allied air units can only start or end their activation on an airfield within their own country. (Note that the airfields on the islands of Iwo Jima and Okinawa are in Japan.)
★Changing Airfields: Subject to the restrictions above, it is not necessary for an air unit to end its activation in the airfield from where it began — it can move to a new airfield within range of its Movement Allowance. However, if it changes airfields, it cannot activate for the next five full Game Turns. On the sixth turn following the one in which it changed airfields, it can activate again. (To remind players that an air unit at a new airfield cannot activate for the number of full Game Turns still remaining, they may wish to place it on the Game Turn Track six boxes ahead of the current turn with a note on a piece of scrap paper referring to the airfield from where it was taken. At the beginning of the turn of its availability, it should be placed back on the airfield, ready for activation, CAP, or strategic missions.)
5.5 Base Hexes
There are three types of base hexes: airfields, ports, and a port/airfield combination. Bases belong to either the Allied or the Soviet player. Each base possesses a Close Anti-Air value, which is used in attacks against that base (see 10.0).
6.0 Stacking
A maximum of 12 friendly surface combat units (CV, CG, CL, DD, FF, BB, CO, and PC) can end the surface Action Segment stacked together in a hex. Non-combat surface units do not count towards this maximum. Groups (see 6.2) can end an Action Segment in the same hex as long as the limit of 12 surface combat units per hex is observed.
Any number of friendly submarines can stack together at the end of the submarine Action Segment. Submarines can end their activation stacked in the same hex as friendly units (and vice versa) and do not count towards the stacking limit of the surface units.
A maximum of four friendly INT, ATK, and/or BMB air units can occupy an airfield hex at any given time in a turn. (Air units can move over and through in violation of this restriction.) RCN, EW, and AEW air units do not count against the four unit maximum. Air units on airfields in coastal hexes can use the same hex as surface and submarine units.
Friendly units of different nationalities may occupy the same hex. However, there are restrictions on activation together; see 4.3.) Opposing units can never occupy the same hex at the end of an Action Segment.
NOTABLE EXCEPTION: If the Tactical Nuclear rule is being used (see 19.0), players can stack as many surface combat units in a hex as they wish.
6.1 Stacking Restrictions
Movement: A player can activate any or all surface units in a hex as a stack except for Groups (see 6.2), which he can activate separately. Up to four units, regardless of type, can be activated from an airfield or aircraft carrier at one time. Submarines must be activated individually.
Position: The position of surface units in a stack is irrelevant until the applicable die roll declares a Bombing or SSM Combat against the stack. After the combat resolution starts, he can no longer adjust his ships' positions. The position of air units within a stack is likewise irrelevant.
If there are several Task Forces and/or Task Groups in a hex, or Groups stacked with other surface units not in a Group, the Groups do not benefit each other or either units with their Close Anti-Air values during defensive combat in SSM and Bombing attacks (see 10.4 and 10.6).
★6.2 Groups
Creating Groups: At the beginning of a player's surface Action Segment (before the activation of any units) and at the end of this segment (after the activation of all units), a player can create Groups from stacks of eligible surface units and adjust the status of already existing Groups. The creation and maintenance of Groups is voluntary. A player is never obligated to form a Group and can break up his Groups at the beginning or end of his surface Action Segments if he wishes (and must break them up if they no longer fulfill size requirements). Units of different nationalities can belong to the same Group.
★NOTABLE EXCEPTION: Chinese surface units can never be in a Group with other non-Chinese Allied units.
Each player has several Group markers, labeled "Task Force" on one side and "Task Group" on the other. The creation of Groups is not limited to the number of markers on hand. Should players run out of markers, they can still create Groups by using blank counters to represent them.
To create a Group, a player points to a stack of eligible surface units and declares which units within the stack will comprise the Group. These units are removed from the map and are replaced by a Task Group or Task Force marker of the appropriate side (Allied or Soviet). If two or three combat units (CV, CL, CG, DD, FF, BB, CO, PC) plus any number of non-combat units are chosen to comprise a Group, the owning player uses the Task Group side of the marker. If four or more combat units plus any number of non-combat units are chosen, the owning player uses the Task Force side of the marker. More than one Group can be formed from a stack of units.
When surface units are chosen to form a Group, the owning player places them on his Task Group/Task Force Display in the boxes corresponding to the numbered Task Group/Task Force marker that replaced them. On the display, one surface unit is placed per box — the order of placement is considered the order in which the units are stacked (Box 1 being considered the top of the stack). If a Group contains more units than there are boxes, place the extra units at the end of the row of boxes.
Enhancement of Groups: At the beginning or the end of a player's surface Action Segment, he can add surface units to existing Groups as long as they are situated in the same hex. Remove the units being added to the Group from the map and place them on the Task Force/Group Display in the boxes corresponding to their new Task Group/Force. If the addition of ships changes a Task Group to a Task Force, the marker on the map should be flipped to its correct side.
Disbanding Groups: At the beginning or the end of a player's surface Action Segment, he can disband any of his Groups. To do so, he removes the Task Group/Force marker and places the surface units that comprise the Group back on the map. If, due to combat losses, a Group falls below minimum size requirements, the owning player must adjust this Group (see below).
Groups occupying the same hex until the beginning or the end of the owning player's surface Action Segment.
Movement: A Group marker functions as a surface unit in all respects. It can move a number of hexes equal to the lowest Movement Allowance of any unit within the Group. Groups stacked in the same hex must be activated individually. If a Group is activated, it must move and attack as a stack; no unit can separate from the Group until the end of the surface Action Segment. Remember that each time units in a Group perform combat, the participating units must perform the same type of combat. (For example, some units could not perform SSM Combat while others perform ASW Combat at the same time.)
Defense Combat Benefit: Units belonging to a Task Force that are attacked by Torpedo, SSM, or Bombing Combat receive a +2 modifier to Defensive combat die rolls (see 10.0). Units belonging to a Task Group do not receive this benefit.
Combining Groups: At the beginning or the end of a player's surface Action Segment, he can combine any of his Groups that occupy the same hex. The combined Group is represented by a single Group marker (all other Group markers are removed) and the placement of the surface units on the Task Group/Force Display is adjusted to reflect the new Group's structure. If the new Group has four or more combat units, use the Task Force side of the marker.
Groups and Combat Losses: If, due to combat losses, a Task Group falls below two combat units, the owning player must adjust the status of this Group immediately by removing the marker and placing the remaining units back on the map. (If a Task Force falls below four combat units, it is adjusted by simply flipping it to its Task Group side, assuming it has two or three combat units.) Task Groups and Task Forces that are adjusted due to combat losses cannot combine with other friendly units.
7.0 Strategic Air Missions
Air units can be assigned to Strategic Air Missions during the Strategic Air Phase, which occurs during AM Game Turns. A unit assigned to a strategic mission cannot be activated during the next three Action Phases (AM, PM, Night). When performing strategic missions, air units are placed on the Strategic Air Display.
★7.1 Mission Eligibility
There are three strategic missions to which air units can be assigned in the Basic Game:
- Interception
- Reconnaissance
- Tactical Coordination
Note: A fourth mission, Mining, can be used as an optional mission in the Advanced Game (see 21.0).
Strategic Air Mission Eligibility Chart: This chart indicates the kinds of strategic missions each air unit can undertake. There are six types of air units: Interceptor (INT), Attack (ATK), Bomber (BMB), Reconnaissance (RCN), Electronic Warfare (EW), and Airborne Early Warning (AEW). Some air unit types are prohibited from performing certain missions. For example, an INT unit can never be assigned to a Mining mission.
Strategic Air Display: Each player has a Strategic Air Display Card on which air units performing strategic missions are placed. The display is divided into 14 zones, each of which is named. The Strategic Air Display is also delineated on the map with borders corresponding to the configuration of the Strategic Air Display. Each zone has four "mission" boxes, plus additional "Return to Base" boxes (see 7.5).
During the Allocation Segment of the Strategic Air Phase, each player secretly assigns any or all eligible air units to strategic missions. Such units are placed on the display in the desired mission boxes. To assign an air unit to a strategic mission:
- Decide the type of mission the unit will perform;
- Decide the zone in which it will be placed;
- Pick the unit up from its airfield or aircraft carrier and place it in the desired mission box on the display.
Damaged air units can perform missions normally. Friendly air units of different nationalities can perform missions in the same zone.
False Mission Assignment: During the Allocation Segment, a player is permitted to mislead his opponent by removing one or more of his air units from the map which will not be assigned to strategic missions. (If a player knew exactly how many of his opponent's air units were removed from the map, he would know how many of them are actually about to perform missions — even though the actual mission assignment is secret — it could strongly influence his own allocations.) At the end of the Allocation Segment, air units not assigned to strategic missions are placed back on the airfields from which they were removed.
Zone Range of Air Units: An air unit is considered to occupy the zone in which its airfield or aircraft carrier is situated. Some air units can perform missions at extended ranges. The Movement Allowance of an air unit determines the range (in zones) at which it can perform a mission:
| Movement Allowance | Range |
|---|---|
| 71 or more | 3 zones |
| 51-70 | 2 zones |
| 26-50 | 1 zone |
| 11-25 | Only in zone occupied |
| 10 or less | May not perform strategic missions |
Special Soviet Restrictions: The Soviet player is subject to two special restrictions in strategic mission allocation:
- Soviet and North Korean non-INT air units occupying the Sea of Japan Zone can perform Reconnaissance, Tactical Coordination, and Mining missions only in the Sea of Japan and Hokkaido Zones, regardless of their Movement Allowance. Soviet INT air units can perform any strategic missions they are allowed in any zones their Movement Allowance allow them to reach.
- If two or more Allied INT air units occupy the Philippines Zone at the beginning of an Allocation Segment, Soviet non-INT air units occupying the South China Sea Zone can perform Reconnaissance, Tactical Coordination, and Mining missions only in the South China Sea Zone, regardless of their Movement Allowance. Soviet INT air units can perform any strategic missions they are allowed in any zones their Movement Allowance allow them to reach.
If less than two Allied INT air units occupy the Philippines Zone at this time, Soviet and Vietnamese air units in the South China Sea Zone are not subject to mission allocation restrictions.
Ending Strategic Air Missions: An air unit remains on its assigned mission until it is destroyed, is forced to "Return to Base" (see 7.5), or until the Strategic Air Mission Termination Phase of the next Night Game Turn.
Solitaire Mission Assignment (Optional): To simulate the uncertainty of mission assignment when playing the game solitaire, a player can use the following rule:
- Roll the die. On an even roll (not counting 0), the Allied side has initiative; on an odd roll (not counting 9), the Soviet side has initiative.
- For the side with initiative, the player can either assign one of its air units to a mission or pass. If the player passes, that side cannot have any air units assigned to missions for the remainder of the Allocation Segment.
- On the first die roll of 0, the player must pass for the Allied side; on the first die roll of 9, the player must pass for the Soviet side. (In either event, the affected side cannot use any of its air units assigned to missions for the rest of the segment.)
NOTABLE EXCEPTION: Die rolls of 0 and 9 are ignored in the first four rolls of this routine in Basic Game Scenarios, and in the first 10 rolls of this routine in Advanced Game Scenarios.
- Continue to roll the die and assign air units to missions in this fashion until a pass has been declared for both sides (or there are no more air units eligible for missions on the map). If there has been a pass declared only for one side, die rolls that would normally give initiative to that side are ignored and the die is rolled again.
Example: A US F16 unit (Movement Allowance: 20) and a P3 unit (Movement Allowance: 70) occupy the Japan Zone. The F16 can be assigned to a Reconnaissance or Interception mission in the Japan Zone (since its Movement Allowance is between 11 and 25). The P3 can be assigned to a Reconnaissance, Tactical Coordination, or Mining mission in Zone or any zone up to two zones away. (This would include every zone on the map except for the South China Sea Zone, which is three zones away.)
7.2 Interception Missions
Air units on Interception missions can attack enemy units on strategic missions in the same zone.
Interception Segment: During this segment of the Strategic Air Phase, opposing air units on Interception missions within the same zone must perform Air-to-Air Combat. First, the players should check each others' Strategic Air Displays, zone by zone. A single Air-to-Air Combat may take place within a given zone if both players have assigned air units to Interception missions within that zone. If only one (or neither) player has assigned air units to Interception within that zone, Air-to-Air Combat (see 10.8) applies to all enemy air units currently on non-Interception missions in that zone, regardless of quantity or type. The air units on Interception missions initiating this combat can never suffer an adverse result when "bouncing" enemy units. At the end of the Bounce Segment, all units on Interception are placed in one of the Return to Base boxes on the Strategic Air Display (see 7.5).
Example of Interception: During the Strategic Air Phase, the Allied player assigns two units to an Interception mission in the Japan Zone. In the same zone, the Soviet player assigns one unit to Interception, one to Reconnaissance, and one to Mining. During the Interception Segment, Air-to-Air Combat takes place between the Allied and Soviet units on Interception. Assume the Allied player wins; his two units remain on Interception and the Soviet unit returns to base. In the Bounce Segment, the Allied units attack the Soviet units on Reconnaissance and Mining. If the Allied unit's elimination, while the other returns to base. At the end of the Bounce Segment, the two Allied units return to base.
7.3 Reconnaissance Missions
Air units on Reconnaissance missions affect the placement of Strategic Detection markers in the Strategic Detection Segment of the Strategic Air Phase (see 9.0). At the end of this segment, all air units on Reconnaissance are placed in one of the Return to Base boxes in the zone they occupy (see 7.5).
7.4 Tactical Coordination Missions
Air units on Tactical Coordination missions are used to enhance attacks made on enemy units during the following three Action Phases (AM, PM, Night). For each air unit assigned to Tactical Coordination, the owning player adds one to any combat die roll made during an attack (except Air-to-Air and Cruise Missile Combat) against an enemy unit that occupies the zone in which the Tactical Coordination mission is taking place. Up to three air units can contribute to this bonus in any single attack; thus, a maximum of three can be added to an attack die roll for this reason. The owning player must announce that he is using Tactical Coordination before the combat die roll is made. After an air unit on Tactical Coordination is used to enhance an attack, it is placed in one of the Return to Base boxes in the zone it occupies (see 7.5).
7.5 Returning to Base
Air units receiving an "r" result in Air-to-Air Combat during the Strategic Air Phase are placed in one of the Return to Base boxes in the zone they occupy on the Strategic Air Display. A unit in one of these boxes can perform no function.
Return to Base Boxes: There are four Return to Base boxes in each zone on the Strategic Air Display. Each box corresponds to the zone from which an air unit was moved to perform its mission. Units that began a mission in the zone they occupy are placed in the "Occupy" box when forced to return to base; units that moved one zone to perform their mission are placed in the "1 Zone" box when forced to return to base; and units that moved two or three zones are placed in the "2 Zones" or "3 Zones" box, respectively, when forced to return to base. Each of these four boxes includes the initials of the zone which the air unit left to perform its mission. When an air unit is placed in a Return to Base box, the turn counter so that its top points in the direction of the initials of the zone from which it came.
Bounce Segment: During this segment, air units still on Interception missions can initiate combat against all enemy air units in the same zone on non-Interception missions — Reconnaissance, Tactical Coordination, and Mining (if this optional rule is being used). To perform this combat, the Interception player rolls the die and consults the "Bounce" column of the Air-to-Air Combat Results Table (no ratio is calculated).
Interception, Reconnaissance, and Mining missions take place in the Strategic Air Phase; players should be able to remember the zones from which their units originated. Tactical Coordination bonuses are used in the Action Phases; players having difficulty remembering the zones from which their units originated may wish to note them down on a piece of paper.
★Strategic Air Mission Termination Phase: During this phase, which takes place during Night Game Turns, all units on the Strategic Air Display are placed back on the airfield or aircraft carrier from where they began their missions. (Units having difficulty remembering the actual airfield to which their air units must return may wish to note these on a piece of paper. Alternatively, the scenario starting set-up should help remind them where to return their air units.)
Non-carrier air units may return to a different airfield than the one from where they started, as long as the new airfield is in the same zone as the original one and stacking restrictions are not violated. However, if air units switch bases at the end of a mission, they cannot activate, perform CAP, or execute another strategic mission for five full Game Turns following the current turn (see 5.4). If an airfield from which air units began a mission is destroyed, the units must return to a different airfield if possible, subject to the above penalty. If there is no friendly airfield available, the air units are destroyed.
Carrier-based air units must be returned to the same Aircraft Carrier Display after a mission (the carrier may have moved to another zone — this does not affect the return of its air units). If the carrier is destroyed while some of its units are on strategic missions, all of its air units on missions are destroyed in the Strategic Air Mission Termination Phase.
Example of Return to Base Boxes: A US air unit based in Kadena (in the East China Sea Zone) is assigned to an Interception mission in the Japan Zone. After the mission, the unit is placed in the "1 Zone" Return to Base box of the Japan zone with the top of the counter pointing to the initials "EC" (East China Sea). During the Strategic Air Mission Termination Phase, the unit is returned to the Kadena airfield.
8.0 Combat Air Patrol (CAP)
CAP is a special role for air units that allows them to "stand guard" over an airfield or aircraft carrier.
★8.1 How to Perform CAP
During the CAP Phase, players can assign any or all of their INT, AEW, or EW air units that are not on strategic missions to CAP. The Soviet player declares CAP missions first, followed by the Allied player. (Units of different nationalities can combine in the same CAP mission.) CAP units cannot be activated during the Action Phase.
Each airfield or aircraft carrier can assign four air units to a CAP mission. If two or more carriers occupy the same hex, or a carrier is in an airfield hex, all CAP units must be combined into a single CAP mission. As long as each airfield or carrier does not assign more than four units to a CAP mission, each mission can contain an unlimited number of air units. Should carriers providing air units in a combined CAP mission separate (or leave an airfield with which it combined in a CAP mission), the owning player must break up the combined mission and provide a separate CAP marker for each carrier and airfield that provided CAP units.
CAP markers on airfields can never be moved. CAP markers on carriers are moved as the carriers are moved.
Special EW and AEW Restriction: EW and AEW units cannot be assigned to a CAP mission unless at least one INT unit is in that mission.
CAP Display: Each player has a CAP Display for maintaining air units on CAP missions. The display consists of a series of numbered boxes; CAP markers are provided to each player corresponding to these boxes. Air units on CAP missions are removed from the map and are placed in one of the boxes on this display. The CAP marker corresponding to that box is placed on the map in the hex from which the air units were removed. A hex can contain only one CAP marker. The number of CAP boxes on the display is not a limit; a player with more CAP missions than boxes can use blank counters to create new CAP markers.
★8.2 CAP and Air-to-Air Combat
A CAP marker allows friendly air units to interfere with the movement of enemy air units during the Action Phase.
Range of CAP Missions: A CAP mission has a range of four hexes (exclusive of the hex the CAP marker occupies). When an active enemy air unit or stack moves into a hex that is within range of a CAP mission, the movement of the enemy air unit(s) temporarily ceases. The CAP player has a choice: he can engage the enemy air units in Air-to-Air Combat in their hex, or he can do nothing. In the first instance, Air-to-Air Combat between all the units in the attacking CAP mission and all the defending enemy units is immediately resolved (see 10.8). In the second instance, no combat takes place and the enemy units continue their movement.
A CAP mission can make a maximum of one attack against a given enemy air unit or stack in an Action Segment; however, it can perform other attacks against different units in that segment. The CAP player can choose to attack enemy units any time they move into a hex or activate within the CAP marker's range. If it did not attack at a range of four hexes, it could attack at a range of three, two, or one. It cannot attack enemy units in the hex occupied by the CAP marker.
An enemy air unit or stack that activates from an airfield or carrier within 4 hexes of a CAP mission can be attacked in the hex where the activation occurs as soon as it occurs.
The range of friendly CAP missions can overlap. If enemy air units enter a hex within range of two or more CAP missions, the CAP player can either combine his CAP missions to attack the enemy units or he can attack them separately with each eligible CAP mission. Enemy units can be attacked an unlimited number of times by CAP missions in an Action Phase, but they can be attacked by a given CAP mission only once.
Under some circumstances, a player whose units are being attacked by an enemy CAP mission can use his own CAP missions in the subsequent Air-to-Air Combat; see 10.8. Otherwise, CAP missions affect only enemy air units moving or activating within their range, never enemy CAP missions.
Limitations to CAP Attacks: A CAP mission can initiate an unlimited number of combats against different enemy air units or stacks during the Action Phase as long as the mission does not suffer an "r" (Return to Base) result in combat. Units in the Return to Base box on the CAP Display can never initiate combat.
Air-to-Air Combat between a CAP mission and enemy air units is resolved before the enemy air units initiate combat in the hex into which they have just moved. If the enemy units survive Air-to-Air Combat, they can initiate an attack from that hex or they can continue moving and then attack.
★CAP Combat Values: Air units on CAP missions over aircraft carriers which include an AEW unit in the mission and all air units on CAP missions over airfields — even without an AEW unit in the mission — employ their full Anti-Air values when initiating Air-to-Air Combat against enemy air units at any range.
Air units on CAP missions over aircraft carriers which do not include an AEW unit in the mission may have their Anti-Air values modified. In this case, air units in CAP missions initiating Air-to-Air Combat at one hex range use their full Anti-Air values; the combined Anti-Air value of those initiating Air-to-Air Combat at two or three hex range is halved (round fractions up); the combined Anti-Air value of those initiating Air-to-Air Combat at four hex range is multiplied by one-quarter (round fractions up).
The Aircraft Carrier CAP Chart summarizes the modifications made to Anti-Air values based on the presence or absence of an AEW unit with the mission.
NOTABLE EXCEPTION: When an aircraft carrier without an AEW unit and a friendly airfield hex combine in a CAP mission, all CAP units in that mission always use their full Anti-Air values at any range. In this case, the Aircraft Carrier CAP Chart is not consulted.
Example: The Allied player has a CAP marker in hex A (an airfield). The Soviet player activates an air unit in hex F and moves into hex E. Since this hex is within range of the CAP mission, the unit's movement is halted and the Allied player has a choice of attacking the Soviet unit or not. The Allied player decides not to attack, so the unit continues to move. The air unit moves into hex D and the Allied player again has the choice to attack — and again decides not to. The Soviet player moves into hex C, and the Allied player still declines to attack. When the Soviet player moves into hex B, the Allied player decides to attack and Air-to-Air Combat is resolved. After combat resolution, the Soviet player, if his unit survives and it is allowed to continue the mission, has the option to continue moving or to initiate an attack.
Now assume that hex A is not an airfield but an aircraft carrier containing a CAP marker without an AEW unit. The combined Anti-Air value of the Allied air units in the mission is 19. If the Allied player engages the Soviet unit at four hex range, the modified Anti-Air value of the CAP mission is 5 (19×¼=5, rounding up). At two or three hex range, the modified Anti-Air value would be 10 (19×½=10, rounding up). At one hex range, the CAP mission uses its full Anti-Air value.
★8.3 CAP and SSM Combat
If a CAP mission containing an EW air unit or a US F14 INT unit is in the same hex as a surface unit being attacked by enemy SSM combat, the CAP mission can aid in the defense of that surface unit (see 10.4). This contribution takes place as long as the CAP units have not been forced to return to base.
8.4 Returning to Base
Air units attacked by a CAP mission which suffer an "r" result are immediately picked up and returned to the airfield or Aircraft Carrier Display from where they started. (They cannot be activated for the rest of the Action Phase.) If they have moved more than half their Movement Allowance before suffering an "r," they must be able to reach a friendly airfield within range of the remaining Movement Allowance or else they are destroyed.
If CAP units suffer an "r" result in Air-to-Air Combat, all the air units comprising that mission are placed in the Return to Base box on the CAP Display, directly beneath their normal CAP box. Units in the Return to Base box can perform no functions whatsoever during the remainder of the Action Phase.
CAP Landing Phase: During this phase, all units on the CAP Display, including those in Return to Base boxes, are placed back on the airfield or carrier occupied by their CAP markers. The CAP markers are then removed from the map.
CAP units return to airfields or carriers that are damaged. If an airfield or carrier occupied by a CAP marker has been destroyed in the Action Phase of the current cycle, the air units in that CAP mission are eliminated in the CAP Landing Phase. (They continue to perform CAP throughout the Action Phase in which their airfield or carrier was destroyed.)
9.0 Detection
Detection is a means of pinpointing the location of enemy surface or submarine units so they subsequently can be attacked. A unit or stack that has been detected has a Detection marker placed on it. There are two types of Detection markers: Strategic and Local. Air units and bases do not need to be detected.
9.1 Detection Zones
There are two types of Detection Zones: Limited Detection Zones, consisting of the hex occupied by a unit plus the six hexes immediately surrounding it; and Extended Detection Zones, consisting of the twelve additional hexes surrounding the Limited Detection Zone. Only surface and submarine units have Detection Zones; air units and bases do not.
Example: In the diagram above, unit A has a Limited Detection Zone in the hex it occupies plus the six lightly shaded hexes around it. It has an Extended Detection Zone in the twelve darker-shaded hexes around them.
Determining Detection Zones: All submarines exert Limited Detection Zones. All surface units or stacks have both a Limited Detection Zone and an Extended Detection Zone.
9.2 Placement of Detection Markers
When a Soviet unit is detected, place a "Soviet" Detection marker on it; when an Allied unit is detected, place an "Allied" Detection marker on it. When a Detection marker is placed on a unit, it remains with that unit and moves with it wherever it goes until the Strategic or Local Detection Removal Phase, at which time it may be removed. Each submarine or surface unit or stack can possess only one Detection marker (Strategic or Local) at any given time.
Strategic Detection Segment: This segment occurs in the Strategic Detection Phase of AM Game Turns. For each air unit currently on a Reconnaissance mission in a given zone (see 7.3), the owning player has a choice during the Strategic Detection Segment (Soviet player first, Allied second):
- He can place a Strategic ("Strat") Detection marker on any enemy surface unit or stack occupying the zone in which the Reconnaissance mission is taking place. (If the unit or stack already has a Local Detection marker, flip it to its Strategic Detection side.)
- He can attempt to place a Strategic Detection marker on any enemy submarine occupying the zone in which the Reconnaissance mission is taking place.
To attempt to place a Strategic Detection marker on an enemy submarine, the player points to the submarine he wishes to detect and determines its owner (Allied or Soviet) and type (SS, SN, or Noisy SN). He consults the Submarine Detection Table and rolls the die, cross-referencing the die result with the column corresponding to the submarine's owner and type. (This die roll may be modified; see below.) On a result of "D," a Local Detection marker is placed on the submarine; on a result of "-," the attempt has failed and no marker is placed. A maximum of one detection attempt can be made against a given submarine per Local Detection Phase — even if the submarine occupies the Limited Detection Zone of several enemy units.
Units already possessing Local or Strategic Detection markers cannot be further affected in this phase, even if they meet the requirements of local detection. Their current detection status remains unaltered.
★Local Detection Phase: This phase occurs in all Game Turns. Only Local Detection markers are placed in this phase — never Strategic Detection markers.
- In this phase, a Local Detection marker is placed on each enemy surface unit or stack that occupies the Limited or Extended Detection Zone of a friendly surface unit or stack, or the Limited Detection Zone of a friendly submarine.
- If an enemy submarine occupies a Limited Detection Zone during this phase and the friendly surface unit(s) and/or submarine(s) exerting this Limited Detection Zone have a combined ASW value of 6 or more, the player owning the submarine must roll the die and consult the Submarine Detection Table to determine if his submarine is detected. Cross-reference the die roll with the column corresponding to the submarine's owner and type. (This die roll may be modified; see below.) On a result of "D," a Local Detection marker is placed on the submarine. On a result of "-," the attempt has failed and no marker is placed.
Once an air unit on Reconnaissance has placed (or attempted to place) a Strategic Detection marker on an enemy unit, it is placed in one of the Return to Base boxes in the zone it occupies on the Strategic Air Display (see 7.5).
★Action Phase: There are four ways Detection markers can be placed on units during the Action Phase:
- If a surface unit or stack executes an SSM, Cruise Missile, or ASW attack and it is situated in an enemy unit's Limited Detection Zone after the attack has been resolved, place a Local Detection marker on that surface unit or stack. If a submarine executes a Torpedo, Cruise Missile, ASW, or SSM attack and it is situated in an enemy unit's Limited Detection Zone after the attack has been resolved, the submarine player must roll the die and consult the Submarine Detection Table to determine if his submarine is detected. (This is performed exactly as in the Local Detection Phase; see above. There is also an automatic modifier to this die roll; see below.) On a "D" result, a Local Detection marker is placed on the submarine; on a "-," result, no marker is placed.
- At the moment an enemy surface unit or stack moves directly from one Limited or Extended Detection Zone exerted by a friendly unit(s) into another Limited or Extended Detection Zone exerted by the same unit(s), a Local Detection marker is placed on the enemy unit or stack. If an enemy submarine moves from one Limited Detection Zone exerted by friendly units with a combined ASW value of 6 or more to another Limited Detection Zone exerted by the same units, the submarine player must roll the die and consult the Submarine Detection Table to determine if his submarine is detected. (This is performed exactly as in the Local Detection Phase; see above.) On a "D" result, a Local Detection marker is placed on the submarine; on a "-" result, no marker is placed.
Units already possessing Local or Strategic Detection markers cannot be further affected in this phase, even if they meet the requirements of local detection. Their current detection status remains unaltered.
★Submarine Detection Table Modifiers: There are several modifiers to Submarine Detection Table die rolls (all modifiers are cumulative):
- -3: All detection attempts against SN or Noisy SN in shallow hex.
- -3: All detection attempts against SN or Noisy SN in enemy close defense hex.
- -3: All detection attempts against any type of submarine in restricted water hex.
- -2: In the detection attempt made against any type of submarine immediately following the submarine's execution of Torpedo, SSM, Cruise Missile, or ASW Combat.
- +2: All detection attempts made against any type of submarine in Deep mode (Advanced Game only; see 20.0).
- A Strategic Detection marker is placed on a submarine that is moving at full speed (see 5.3) if it starts its movement or enters any hex during its movement that is within five hexes of an enemy surface unit, submarine, or coastal defense hex.
- At the moment a surface unit or stack enters an enemy close defense or base hex, place a Strategic Detection marker on it. (Japanese close defense hexes are considered Allied unless otherwise noted.) At the moment a submarine enters an enemy close defense hex, the submarine player must temporarily halt the movement of his submarine and roll the die, consulting the Submarine Detection Table to see if his submarine is detected. (This is performed exactly as in the Local Detection Phase; see above.) On a "D" result, a Strategic Detection marker is placed on the submarine. On a "-" result, no marker is placed. If a submarine enters an enemy close defense hex and also moves directly from one enemy Limited Detection Zone to another in the same move, consult the Submarine Detection Table twice. (Note that units may be attacked upon entering an enemy close defense hex; see 10.9.)
If a unit already has a Strategic Detection marker, it cannot be further detected during the Action Phase. If it possesses a Local Detection marker, it is not further detected unless it fulfills the requirements of Strategic Detection, in which case its Local Detection marker is flipped over to its Strategic side.
9.3 Detection Restrictions
Submarines: The detection status of submarines is determined individually. If several submarines within the same hex are detected, each must be assigned its own Detection marker. Undetected submarines entering a hex with a detected submarine remain undetected. Thus, it is possible for a hex to contain both detected and undetected submarines. A submarine can never have more than one Detection marker.
Surface Units: The detection of surface units is determined by hex. When a Detection marker is placed on a surface unit, all surface units in the hex are immediately detected. If a surface unit or stack that is not detected ends an Action Segment in the same hex as a detected surface unit or stack, the undetected unit or stack is immediately detected. (Similarly, if a surface unit or stack that has a Local Detection marker ends an Action Segment in a hex with a surface unit or stack possessing a Strategic Detection marker, the Local marker is removed and all units in the hex are detected strategically.) The reverse is also true: A detected surface unit or stack ending an Action Segment in the same hex as an undetected surface unit or stack immediately causes that unit or stack to be detected. If a stack of detected surface units is activated into separate forces, all the separating units are detected and Detection markers are placed in all hexes in which these units end their movement.
Undetected surface units that end an Action Segment in the same hex with a detected submarine are not detected and vice versa. Submarine detection status does not affect surface detection status.
If a Group is detected, all units comprising it (and any other surface units in that hex) are detected. A surface unit or stack can never have more than one Detection marker.
Bases: Bases are automatically detected at all times. However, submarine and surface units occupying bases must be detected to be attacked.
9.4 Effects of Detection
Surface or submarine units must have a Detection marker (either Local or Strategic) to be attacked. Should a detected submarine occupy a hex with an undetected submarine, only the detected unit can be attacked. All surface units in a hex containing a Detection marker can be attacked.
9.5 Removing Detection Markers
Detection markers can be removed at two different times in the Game Turn.
★Strategic Detection Removal Phase: This phase occurs during Night Game Turns only. In this phase, Strategic Detection markers are removed from surface and submarine units with the following exceptions:
- If a surface unit with a Strategic Detection marker is situated in an enemy Limited or Extended Detection Zone at this time, flip the Strategic Detection marker to its Local Detection side.
- If a submarine with a Strategic Detection marker is situated in an enemy Limited Detection Zone exerted by enemy units with a combined ASW value of 6 or more at this time, flip the Strategic Detection marker to its Local Detection side. (Do not consult the Submarine Detection Table.)
- If a surface unit or submarine with a Strategic Detection marker is situated in or within three hexes of an enemy close defense hex, the Strategic Detection marker remains in place.
★Local Detection Removal Phase: This phase occurs in all Game Turns. In this phase, Local Detection markers are removed from surface and submarine units with the following exceptions:
- If a surface unit with a Local Detection marker is situated in an enemy Limited or Extended Detection Zone at this time, the Local marker remains in place.
- If a submarine with a Local Detection marker is situated in an enemy Limited Detection Zone exerted by enemy units with a combined ASW value of 6 or more at this time, the Local marker remains in place. (Do not consult the Submarine Detection Table.)
- If a surface unit or submarine with a Local Detection marker is situated in or within three hexes of an enemy close defense hex, the Local marker remains in place.
10.0 Combat
There are six kinds of combat:
- Torpedo
- Surface-to-Surface Missile (SSM)
- ★Cruise Missile
- Bombing
- Anti-Submarine Warfare (ASW)
- Air-to-Air
The first five kinds of combat are resolved using the Combat Results Table and the last type on the Air-to-Air Combat Results Table.
10.1 Initiating Combat
Only an active unit or stack can initiate combat. To do so, the owning player states the type of attack and the target.
Surface Units: Enemy surface units must possess Detection markers before they can be attacked. A surface unit can perform up to two attacks during its activation, each of which must be a different type. Surface units activated together are considered a single unit for combat purposes — regardless of how many units comprise the stack, it is still limited to two attacks per activation. Units of different nationalities can perform combat together.
★NOTABLE EXCEPTION: Chinese units can never perform an attack with non-Chinese Allied units.
Submarines: An enemy submarine must possess a Detection marker before it can be attacked. Each submarine attacks and is attacked separately.
Air Units: Air units never possess Detection markers. They can be attacked by Defensive fire in Bombing Combat and by enemy air units on CAP.
★Bases: Bases never possess Detection markers. They can be attacked by Bombing and Cruise Missile Combat. Surface units and submarines in a base must be detected before they can be attacked.
★10.2 Combat Values
The values printed on surface, submarine, and air units are described below:
Movement Allowance: The maximum number of hexes a unit can move during its activation.
Defense Value: A measure of a unit's ability to withstand damage. Air units do not have a Defense value.
SSM Value: A quantification of a unit's SSM capability. Units also have an SSM Range, which is the maximum distance in hexes it can be from its target to launch an SSM attack (do not count the hex occupied by the attacking unit). An SSM attack must take the most direct route to the target (it cannot zig-zag).
10.3 Torpedo Combat
(The concluding steps of the Torpedo Combat resolution procedure, as printed:) The attacker cross-references the modified die roll in the "Attack" column with the "Combat Value" column corresponding to the number of points applied to the attack. The combat result will be a number from 0 to 11.
- The combat result is compared with the Defense value of the target unit. Damage or destruction is applied immediately (see 11.0). The attacker performs steps 6 and 7 for each target declared in step 2.
- After all targets declared in step 2 have been attacked, combat is over. If necessary, the players consult the Submarine Detection Table to see if the attacking submarine is detected (see 9.2).
Example of Torpedo Combat: The detected Soviet SN Sorkn (Torpedo value: 22) uses Torpedo Combat against a detected US task consisting of Vnson (Defense value: 9; ASW: 12), Kirk (Defense: 2; ASW: 4), and Prebl (Defense: 2; ASW: 1). None of the US units are in a Group, and Kirk and Prebl are selected as targets, with 1 point allocated against Kirk and 21 against Vnson (1+21=22, the Torpedo value of Sorkn).
The Allied player adds up the ASW value of the three units (17) and rolls the die, obtaining a 4. Since none of the targets are in a Task Group or Force, 2 is subtracted from this roll. Since Sorkn is currently detected, 1 is added, yielding a final die roll of 3 (4-2+1=3). Cross-referencing 3 in the Defense column with the "15 to 20" Combat Value column yields a Defense modifier of 3. Sorkn now attacks Kirk with 1 point. 0. Subtracting the Defense modifier of 3, a final die roll of -3 is the result. Cross-referencing -3 in the Attack column with the "1 to 2" Combat Value column yields a result of 0. Thus, Kirk is not damaged.
Vnson is now attacked with 21 points. The Soviet player rolls a 4, which is reduced to 1 due to the Defense modifier (-3). Before he rolled the die, however, the Soviet player declared that he would use two Tactical Coordination air units in the attack (+1 each), yielding a final modified roll of 3. Cross-referencing 3 in the Attack column with the "21 to 27" Combat Value column produces a final result of 3. Vnson suffers 3 damage and the combat is over.
★10.4 Surface-to-Surface Missile (SSM) Combat
SSM Combat can be performed under these circumstances:
- ★The initiating force is an active surface, submarine, or air unit (or stack of surface or air units). Close defense hexes can also perform SSM attacks (see 10.9).
- ★The target of the attack is a detected enemy surface unit or stack. Bases cannot be attacked by SSM Combat.
- The target must be within the SSM Range (in hexes) of the attacking unit.
- Submarine and surface units cannot attack across a full land hexside. Air units are exempt from this restriction.
- The unit (or stack) performing SSM Combat can attack targets in one hex only. If a stack of units performs SSM Combat, not all the units within the stack need participate.
Positioning of Defending Units: Immediately before SSM Combat is resolved, the defender can adjust the positions of his units within the defending stack as he wishes. Units in different Groups must remain separate from each other and from other units in the same hex. Once combat resolution begins, the defender can no longer reposition his units.
Resolving SSM Combat: The SSM Combat procedure is outlined below:
Preparing for Attack
- The attacker determines the combined SSM value of all units participating in the attack and announces the target hex.
If more than half of the units contributing their SSM values to the attack have "sea-skimmer" SSM's, the attack is considered a sea skimmer attack. If only one unit is attacking, it is a sea skimmer attack if that unit has sea-skimmer SSM's.
- The defender can reposition the units in the target hex.
- The attacker rolls the die to determine which units can be selected as targets. On an even roll (including 0), only units in the top half of the defending stack can be chosen as targets; on an odd roll, only units in the bottom half of the stack can be chosen as targets. In stacks containing an odd number of units, the "top" of the stack includes the unit directly in the middle. (For example, in a stack of three units, the second unit from the top is considered in the top half of the stack.) If there is only one unit in a defending stack, it can always be chosen as a target and there is no need to roll the die. The attacker can choose any or all of the units in the eligible half of the defending stack as targets.
- The attacker splits up the SSM value as he wishes and directs it against the defender how many SSM points will be directed against each target. If there is only one target, the entire value is directed against it. A given target can be attacked only once per SSM Combat, but it can be attacked several times by different enemy active units in the same Action Segment.
Defense Die Roll
- The defender combines the Anti-Air values of his units as follows:
A. Add together the Area Anti-Air values of all surface units in the hex. If the attack is not a sea skimmer attack, the Area Anti-Air values of all surface units are multiplied by two. If air units are performing the SSM attack and they execute their attack in a hex adjacent to the target hex, all surface units in the target hex with a long-range Area Anti-Air capability (denoted by a colored square) have their values multiplied by six. (Six is the maximum amount by which a unit's Area Anti-Air value can be multiplied, even when the above two conditions are in effect simultaneously.)
NOTABLE EXCEPTION: Skip step A if the target is in a restricted water hex or if the attack is being executed by a close defense hex (see 10.9).
B. Add together the Close Anti-Air values of all surface units that are targets of the SSM attack (as determined in step 3). C. Add the Close Anti-Air values of the units stacked directly beneath the target units.
NOTABLE EXCEPTIONS: If a unit beneath a target is also a target, do not add it in Close Anti-Air value. A unit's Close Anti-Air value can only be added once per SSM Combat. Also, a unit on the top of a stack is considered stacked "beneath" the unit on the bottom of the stack. Thus, all units in a stack have a unit stacked "beneath" them, if there are several Groups in a hex, they cannot assist each other as described in step C. Finally, if a unit stacked directly beneath a target has an Anti-Air value of "N," it contributes nothing to the defense of the target.
D. If the target hex is situated in a friendly port (not airfield) hex, the port's Close Anti-Air value (printed directly in the hex) is added to the defender's Anti-Air sum. E. Add in the Area Anti-Air values of any friendly surface units in hexes the enemy SSM attack transited on its way to the target hex.
10.5 Cruise Missile Combat
(A gap in the available scan omits this section's opening rules. The procedure resumes as follows:)
Resolving Cruise Missile Combat: The Cruise Missile Combat procedure is outlined below:
Preparing for Attack
- The attacker determines the combined Cruise Missile Attack value of all units participating in the attack and announces the enemy base (within 25 hexes) that he will attack.
Defense Die Roll
There is no Defense die roll in Cruise Missile Combat.
Resolving Attacks
- The attacker rolls the die and consults the Combat Results Table, cross-referencing the die roll in the "Attack" column with the "Combat Value" column corresponding to the combined Cruise Missile Attack value determined in step 1. (No modifiers are applied to the roll.) The result will be a number from 0 to 11. Damage or destruction of the base is immediately inflicted (see 11.0). The attack is now over. If necessary, if the attacking unit was a submarine, the players may be required to consult the Submarine Detection Table; see 9.2.)
Cruise Missile Ammunition: In all scenarios, the quantity of ammunition available to cruise missile units is limited. In Basic Game Scenarios, this information is provided in each game's special rules. In the Advanced Game, players must record cruise missile expenditure even if not using the Logistics option. The number of Cruise Missile attacks a unit can perform is listed on the player's Logistics Roster. Each time a unit participates in a Cruise Missile attack, the owning player should check off one of its "CM" (Cruise Missile) heading. When all of its CM circles have been checked off, it no longer can participate in Cruise Missile Combat for the rest of the game.
Example of Cruise Missile Combat: A stack of US surface units consisting of the BB Msour and the CG LBech is performing a Cruise Missile attack. LBech is damaged, so the combined Cruise Missile Attack value of the stack is 33 (9+24=33). (Remember that Msour's value is equal to its SSM Attack value multiplied by two.) The Allied player decides to attack the Soviet port of Pos'yet, which is situated 24 hexes away from the stack. The Allied player rolls the die with the "28 to 35" Combat Value column yields a result of 0. Thus, Pos'yet is not damaged and the attack is over.
★10.6 Bombing Combat
Bombing Combat can be performed under the following circumstances:
- The initiating force is an active air unit or stack.
- The target of the attack is an enemy airfield or port hex or a detected enemy surface unit (or stack).
- The attacking air unit must be in the same hex as the target.
- The attacking unit can initiate Bombing Combat against one hex only. It cannot split its Bombing value to attack different hexes. If a stack initiates Bombing Combat, not all the units in the stack need participate.
- Once an air unit has completed a Bombing attack, it must continue moving back to a friendly airfield or aircraft carrier.
Attacks Against Bases: A Bombing attack against an enemy base cannot be combined with an attack against enemy surface units situated in that base (and vice versa). The attack must be made against the base or the surface units, not both. If a player attacks a hex with a port/airfield combination, he must specify whether he is attacking the port or the airfield.
Positioning Defending Units: Immediately before a Bombing attack against surface units is resolved, the defender can adjust the position of his units within the defending stack as he wishes. Units in different Groups must remain separate from one another and from other units in the hex. Once the combat begins, the defender can no longer reposition his units.
Resolving Bombing Combat: The Bombing Combat procedure is outlined below:
Preparing for Attack
- The attacker determines the combined Bombing value of all participating units and announces the hex he will attack.
- If the attack is against surface units, the defender can reposition his units within a stack.
- The attacker can choose any or all surface units in a hex as targets. If the attack is against a base, only the base can be the target.
- The attacker splits up his Bombing value as he wishes, telling the defender how many points will be applied to each target. If there is only one target, the whole value is applied against it. A given target can be attacked only once per Bombing Combat.
Defense Die Roll
- The defender combines the Anti-Air values of his units as follows:
A. Add together the Area Anti-Air values of all units in the hex.
NOTABLE EXCEPTIONS: If the target units occupy a restricted water hex, skip step A. Also, if the target is an enemy base, enemy surface units situated in that base cannot contribute their Area Anti-Air values to the defense.
B. Add together the Close Anti-Air values of all surface units that are the targets of the Bombing attack (as declared in step 3). If the target is a base, use the base's Close Anti-Air value (printed directly within the hex) only; surface units situated in that base cannot contribute their Close Anti-Air values to the defense. C. Add the Close Anti-Air values of the units stacked directly beneath the target units.
NOTABLE EXCEPTIONS: If a unit beneath another target is also a target, do not add in its Close Anti-Air value. A unit's Close Anti-Air value can only be added once per Bombing attack. A unit on the top of a stack is considered stacked "beneath" the unit on the bottom of the stack. Thus, all units in a stack have a unit stacked "beneath" them. Note that Groups in the same hex cannot assist each other as described in step C. Finally, if a unit stacked directly beneath a target has an Anti-Air value of "N," it contributes nothing to the defense of the target.
D. If the target is a surface unit (or stack) situated in a base hex, the base's Close Anti-Air value is added to the Defense sum, even though the base itself is not being attacked. E. Add in the Area Anti-Air values of any friendly surface units situated in hexes through which the attacking enemy air units passed on their way to the target. Also, if the attacking enemy air units passed through any hex within two hexes of friendly surface units with "long-range" Area Anti-Air capability, add in the values of those units. A unit can contribute its Area Anti-Air value in this step only if it does not occupy the target hex. Eligible units can contribute their values a maximum of once per Bombing attack.
★BMB Attack Restrictions: BMB air units cannot perform Bombing Combat against enemy surface units. They can make a Bombing attack only against an enemy base. (If they possess SSM values, they can perform SSM Combat against enemy surface units.) INT and ATK air units can make Bombing attacks against enemy bases or surface units.
★10.7 Anti-Submarine Warfare (ASW) Combat
(A gap in the available scan omits this section's opening rules. The procedure resumes mid-way through a die-roll modifier list:)
If the target submarine is an SN (not SS) which occupies a shallow water hex, the attacker adds 3 to his die roll.
- The combat result, which will be a number from 0 to 11, is compared to the Defense value of the target. Damage or sinking is immediately inflicted (see 11.0). The combat is over. If necessary, a Local Detection marker is placed on the attacking units. If the attacking unit was a submarine, the players may be required to consult the Submarine Detection Table (see 9.2).
Example of ASW Combat: The US SN Btfsh (ASW value: 9) initiates an ASW attack against the detected Soviet SS Serp (Defense value: 6). The Allied player has three Tactical Coordination units in this zone which are allocated to this attack. The Allied player rolls a die and obtains a 9. Three is added due to the attack values, giving a modified result of 12. Cross-referencing 12 in the Attack column with the "9 to 14" Combat Value column gives a result of 6. Serp is sunk and the attack is over. The three air units are placed in Return to Base boxes of this zone.
★10.8 Air-to-Air Combat
Air-to-Air Combat is performed between opposing air units and is resolved on the Air-to-Air Combat Results Table. It can occur at three times during a Game Turn.
Interception Segment: In this segment, which occurs only in the Strategic Air Phase, Air-to-Air Combat must take place between opposing air units on Interception missions in the same zone (see 7.2). To determine who is the attacker, roll the die once for each zone in which combat must take place. On an even roll (including 0), the Allied player is the attacker; on an odd roll, the Soviet player is the attacker.
Bounce Segment: In this segment, surviving units on Interception missions can initiate combat against all enemy air units in the same zone that are on non-Interception missions — Reconnaissance, Tactical Coordination, and Mining. To perform this combat, the Interception player rolls the die and consults the "Bounce" column of the Air-to-Air Combat Results Table (no combat ratio is calculated). The Interception player is the attacker. In a Bounce Segment, a maximum of one "Bounce" combat can be performed per player in each zone, regardless of the number of Interception units involved.
Resolving Air-to-Air Combat: The Air-to-Air Combat procedure is outlined below:
- Combine the Anti-Air values of the attacker's air units. No units can be withheld.
- Combine the Anti-Air values of all the defender's air units. No units can be withheld. If a CAP mission is attacking active air units, the defender (that is, the player controlling the active units) can contribute the Anti-Air values of friendly air units on CAP missions within range to this sum (see above).
- Compare the step 1 sum to the step 2 sum and express this as a ratio: attacker's Anti-Air value to defender's Anti-Air value. Round this ratio down in favor of the defender to conform to one of the ratio columns on the Air-to-Air Combat Results Table. There are two rows of ratios; the Interception row is used in combat taking place in the Interception Segment, and the CAP row is used in combat initiated by CAP units. The "Bounce" column is used in combat resolved in the Bounce Segment.
- The attacker rolls the die and modifies the die roll if any of the following conditions are in effect (all modifiers are cumulative):
- If the attacker has at least one EW unit in his force, he adds 2 to his die roll.
- If the defender has at least one EW unit in his force, the attacker subtracts 2 from his die roll.
- The modified die roll is cross-referenced with the ratio (or "Bounce") column determined in step 3. The combat result is divided by a slash. Results to the left of the slash apply to the attacker; results to the right of the slash apply to the defender. Each result has a number and some also have an "r."
- Numbered results indicate the number of "steps" of damage suffered by the affected player's units. For each step, one unit that is already damaged is destroyed if it suffers another step loss. Undamaged units are destroyed if they take two step losses. (In the Advanced Game, destroyed air units are sometimes allowed to return to play; see 14.0.)
In Air-to-Air Combat, the enemy player always applies damage to air units as he wishes, but he must always apply damage first to INT units (if any) in the affected force.
- If the combat result contains an "r," the affected player's units must "Return to Base." If the result has no "r," they continue their mission (see below).
NOTABLE EXCEPTION: If no INT unit is present with enemy units being attacked by a CAP mission, the CAP mission ignores all step losses and "r" results in the combat result.
- After combat results are applied, the combat is over.
★RCN Air Units: All RCN air units have Anti-Air values of "N" (0). If an air unit or stack with a combined Anti-Air value of 0 is attacked by an enemy CAP mission during an Action Phase, all of the active air units are automatically destroyed. There is no need to refer to the Air-to-Air Combat Results Table.
Returning to Base: An "r" result means that the air unit or stack must "Return to Base." This result can have several meanings depending on when the combat took place.
- Interception Segment: Air units on Interception missions which suffer an "r" in combat taking place while the zone in which combat is taking place are placed in one of the "Return to Base" boxes in the zone they occupy on the Strategic Air Display. Place the unit in the box corresponding to the zone where it began, with the top of the counter pointing to the initials of the correct zone.
- Bounce Segment: An "r" result applies to all the defender's air units on non-Interception missions in the zone in which the combat is taking place. Remove the air units from their mission boxes and place them in one of the "Return to Base" boxes in the zone they occupy.
Action Phase: CAP units from one or more CAP missions can interrupt the movement of enemy air units within range to initiate Air-to-Air Combat (see 8.2). CAP units interrupting enemy air unit movement are always considered the attackers.
★If a CAP mission attacks active enemy air units, enemy CAP missions may sometimes participate in this combat (see below).
★Defender's CAP: If a CAP mission interrupts the movement of active enemy air units to attack them during the Action Phase, any of the enemy player's air units on CAP within range of the hex in which the Air-to-Air Combat takes place can contribute their Anti-Air values to this combat. If the enemy CAP mission is over a carrier and does not contain an AEW unit, the enemy air units' Anti-Air values are modified depending on the range from their CAP marker at which the combat is taking place (see 8.2). Unless it is destroyed or suffers a Return to Base result in combat, a CAP mission can contribute its Anti-Air value in this manner an unlimited number of times, even in the same Action Segment, without affecting its ability to attack active enemy air units in the enemy player's air Action Segment.
10.9 Close Defense Hex Combat
(An entire page is missing from the available scan at this point — physical page 25, covering Section 10.9 in full — so this section could not be transcribed.)
★11.0 Damage
Damage may occur to units or bases in combat. Units always begin the game undamaged. The damaged side of a unit is indicated by a starburst design and, in most cases, reduced values.
11.1 How Damage Occurs
Damage Against Surface and Submarine Units: Numbered combat results obtained in attacks are compared with the Defense value of the target unit. There are three possible results:
- No Effect: If the combat result is less than one-half the target's Defense value, the attack is unsuccessful. The target is unaffected.
- Damage: If the combat result is equal to or greater than one-half the target's Defense value, but less than its full Defense value, the target is damaged (see 11.2).
- Sunk (Destroyed): If the combat result is equal to or greater than the target's Defense value, the target is sunk (eliminated).
Damage Against Air Units: Air units suffer damage in terms of "steps." Air units take damage in Bombing Combat (see 10.6) and in Air-to-Air Combat (see 10.8). In the Advanced Game, destroyed air units are placed in the Destroyed Air Units box (see 14.0) and they may be allowed to return to play (see 14.0).
Damage Against Bases: A combat result against a base in Cruise Missile or Bombing Combat may cause damage or destruction of the base:
| Combat Result | Effect |
|---|---|
| 3 or less | None |
| 4 to 8 | Damage 1 |
| 9 to 10 | Damage 2 |
| 11 | Destroyed |
When an airfield is damaged, place an "airfield" Damage marker in the hex. If necessary, players can make additional Damage markers from blank counters.
Destroyed markers are printed on one side with a port symbol and on the other with an airfield symbol. When a base is destroyed, place a "Destroyed" marker in the hex with the appropriate symbol showing. If necessary, players can make additional Destroyed markers from blank counters.
Damage to Units: Units in a base that are damaged are not damaged themselves. However, air units on a damaged airfield or CAP cannot activate or perform strategic missions or CAP. Air units already on a strategic mission or CAP when their airfield is damaged continue their mission. They return to the airfield in the Strategic Mission Termination Phase or the CAP Landing Phase, respectively. The Close Anti-Air value of a damaged base is functional.
Air units in an airfield that is destroyed are also destroyed. (Surface and submarine units in a destroyed port are not destroyed.) Units on CAP over a destroyed airfield continue their mission but are destroyed in the CAP Landing Phase. Units on a strategic mission cannot return to a destroyed airfield, but they may return to a different airfield in the Strategic Mission Termination Phase (see 7.5). A destroyed base is not functional for the rest of the game and cannot be attacked again. Its Close Anti-Air value can no longer be used.
In hexes with port/airfield combinations, all Damage markers contain only the port or airfield symbols, if a port is damaged, only the port symbols are consulted.
11.2 Effects of Damage
Unit Damage: When a unit is damaged, it is flipped to its starburst side. If a damaged unit is damaged again, it is sunk or destroyed and is removed from the map.
Base Damage: If a base is damaged, place a marker of the appropriate type (Damage 1, Damage 2, Destroyed) in the hex. Damage is cumulative. If a base at Damage 1 receives another Damage 1 result, the marker is flipped to its Damage 2 side. Any base reaching a cumulative damage level above Damage 2 is destroyed.
11.3 Repair
Damaged surface and submarine units cannot be repaired. In the Advanced Game, damaged or destroyed air units can be repaired or return to play (see 14.0). Damaged bases can be repaired. In the Repair Phase of the Terminal Cycle (which occurs in Night Game Turns only), all Damage 1 markers are removed from the map; all Damage 2 markers are reduced to Damage 1. Destroyed bases can never be repaired.
12.0 Aircraft Carriers
Aircraft carriers (CV) are mobile airfields from which air units operate as the carrier moves. Air units assigned to a carrier at the start of a game cannot be assigned to an airfield or a different carrier (or vice versa).
Deployment of Air Units: Air units assigned to a carrier are deployed on off-map Aircraft Carrier Displays. The air units are considered to occupy the same hex as their parent carrier. Air units on a carrier can be activated individually or in stacks of up to four units. If a carrier is damaged, its air units subtract 1 from their Movement Allowance for the rest of the game.
- A maximum of two of its units can be assigned to CAP.
- ★A maximum of two of its units can be assigned to strategic missions.
- A maximum of two of its units can activate during the air Action Segment. (They can be activated together or individually.)
If a carrier is destroyed, all its air units are destroyed. (Units on CAP or strategic missions are destroyed in the CAP Landing Phase or Strategic Mission Termination Phase, respectively.)
★USS Wasp: The US AA unit Wasp is considered an aircraft carrier even though it is not labeled as such. (It also functions as an AA unit.) It can operate one AV8 air unit in the same manner as a carrier.
13.0 Basic Game Scenarios
(A gap in the available scan omits this section's introduction and the full text of Scenario 1: Civil War in the Philippines, and Scenario 2: Blockading the Philippines — their background, deployment, special rules and victory conditions could not be transcribed from the sources located. Scenario 3 onward resumes below.)
13.3 Scenario 3: Battle of the South China Sea
Background: Six days ago, a Soviet naval infantry battalion seized the Filipino island of Batan, situated mid-way between the Philippines and Taiwan. This attack, in which no casualties were suffered, came as a complete surprise to Western intelligence. The object of the attack was the small airfield at the town of Basco which, in Soviet hands, could pose a significant threat to the northern and eastern approaches to the Philippine Islands. The Soviets intend to operate ASW helicopters from the island at first; after engineers lengthen the runway, they plan to deploy both fighters and long-range reconnaissance aircraft.
Coming in the midst of the Philippine Civil War, the Filipino leaders were in no position to take military action in response to the Soviet invasion. In fact, many Filipino insurgents welcomed the Soviet action as an indication of direct support for their rebellion. However, after strong appeals by Filipino loyalists to the United States, the President, with the full approval of the Joint Chiefs of Staff and the National Security Council, has initiated a full military response to the Soviet invasion.
Three days ago, the "ready" battalion of the 82nd Airborne Division (1st Battalion, 504th Infantry), stationed at Fort Bragg, North Carolina, and the 1st Battalion, 75th Infantry (Ranger), from Fort Lewis, Washington, were parachuted into Batan to wrest control of the Basco airfield from the Soviet marines. Within 48 hours, this mission was accomplished, although at heavy cost. The few hundred Soviet naval infantrymen managing to disengage have withdrawn to the northern tip of the island and have formed a defensive perimeter.
The Soviet Union has angrily responded to the American action by deploying all of its available naval forces from the Red Banner Pacific Fleet. Pravda has sworn that "no Yankee ships will get near to Batan," and the "forces of Imperialism on the island will be left to wither on the vine." To conduct a sustained campaign against American naval forces in the South China Sea, the Soviets are conducting a major sealift operation from Vladivostok to its bases in Vietnam. The supplies carried in this lift will enable Soviet forces in Vietnam to conduct continuous operations for six weeks. To ensure the convoys' safe arrival at Cam Ranh, the Soviets have allocated most of their Pacific surface forces for their protection.
One convoy of nine merchantmen is already nearing the Paracel Islands, only a little over 400 miles from Cam Ranh. This group is protected by the cruiser Vasily Chapaev, the destroyers Marshal Shaposhnikov and Bezuprechnyy, and a flotilla of Petya and Grisha corvettes. Another convoy of twelve merchantmen, situated about 100 miles south of Hong Kong, is protected by the cruiser Admiral Yumashev, the destroyer Admiral Tributs, and several frigates. Also, a task force centered around the carrier Novorossiysk has been deployed to provide local air protection for the convoys with the carrier's Yak-36 Forgers. Accompanying this group are the cruisers Riga and Vitse Admiral Drozd and the destroyer Admiral Tributs.
Eight Soviet submarines have been deployed to the area with instructions to interdict American shipping heading towards Batan. Three of these submarines are nuclear-powered, including Admiral Sidorov, an ultra-modern Mike-class boat which is faster and deeper-diving than any US Navy submarine. In Vietnam, the Soviets also have two regiments of Tu-16 Badger bombers, a regiment of MiG-23 Floggers, and two regiments of Vietnamese MiG-21 Fishbeds.
Pacific Command (PACOM) has deployed the Midway carrier battle group (Task Group 70.1) to the South China Sea with orders to support the movement of the 13th Marine Amphibious Unit (MAU) from Subic Bay to Batan and, should the opportunity arise, to conduct air strikes against the Soviet convoys en route to Cam Ranh. In addition to Midway (CV-41), TG 70.1 consists of the cruisers Reeves (CG-24) and Sterett (CG-31) and the destroyers Cochrane (DDG-21), Benjamin Stoddert (DDG-22), and Oldendorf (DD-972). Embarked on Midway is Carrier Air Wing 5, consisting of three squadrons flying the F/A-18A Hornet (VFA-195 "Dam Busters," VFA-192 "Golden Dragons," and VFA-151 "Vigilantes"), one A-6E Intruder squadron (VA-115 "Eagles"), one EA-6B Prowler squadron (VAQ-136 "Gauntlets"), and one E-2C Hawkeye squadron (VAW-115 "Sentinels"). Midway is the oldest carrier in the fleet and it cannot accommodate F-14 Tomcats.
The 13th MAU at Subic Bay consists of the 2nd Battalion, 9th Marines and helicopter squadron HMM-364. It is deployed in an amphibious ready group (ARG) of five vessels centered around the helicopter landing ship Tripoli (LPH-10) and protected by the escorts HMAS Darwin (F-04), Francis Hammond (FF-1067), Lockwood (FF-1064), and John L. Hall (FFG-32). The group has been instructed to land its Marines at Batan to support the Army troops that are already deployed there.
Maritime Prepositioning Squadron 3, home-ported in Guam, has also been ordered at all possible speed to Batan. This squadron consists of four roll-on/roll-off (RO/RO) cargo vessels, each of which remains on perpetual alert, fully loaded and ready to move to a crisis zone at a moment's notice. After the arrival of MPS-3 at Batan, Marines from the 1st Marine Amphibious Brigade (MAB), stationed in Hawaii, will be airlifted to the Basco airfield where they will join up with the off-loaded heavy equipment and supplies from MPS-3. The squadron is protected by the frigates Samuel B. Roberts (FFG-58), Halyburton (FFG-40), Taylor (FFG-50), and Hepburn (FF-1055).
In response to disturbing reports from the Commander-in-Chief, 7th Fleet that Subic Bay and Cubi Point NAS will run out of ammunition and spare parts after only about a week of sustained conflict, PACOM has also dispatched a fast convoy of three SL-7 super-freighters from San Diego to the Philippines. This convoy, labeled FC-6, is escorted by the frigates De Wert (FFG-45) and Robert E. Beadley (FFG-49). The SL-7's, which are capable of faster speeds than their escorts, are already only about 600 miles northeast of Luzon.
Caught up in the conflict are three Japanese super-tankers which the Soviets have threatened to sink due to Japan's support of the United States in the crisis. These tankers are returning to Japan with full loads of oil from the Middle East. Sailing unescorted but in contact with US Navy ships, they have been instructed to steer a wide course around the Philippine Islands as a safety precaution.
Two American submarines have been deployed to the South China Sea with the mission of harassing the Soviet convoys heading to Cam Ranh. These are New York City (SSN-696) and San Juan (SSN-751), both of which are equipped with the strategic version of the Tomahawk missile. The President has given CINCPAC full approval to use the Tomahawks against Soviet runways in Vietnam so long as there is little chance of civilian casualties. San Juan is the first US Navy submarine with the Submarine Advanced Combat System (SUBACS) and is considered the most sophisticated submarine in the fleet. A third submarine, Barfish (SSN-681), has been ordered to conduct ASW operations in support of the Philippines-bound convoys.
Air units at PACOM's disposal include two squadrons of P-3C Orions (VP-19 "Big Red" and VP-26 "Tridents"), stationed at Cubi Point NAS, plus the 3rd and 90th Tactical Fighter Squadrons of the US Air Force, flying F-4E Phantoms from Clark Field. The Orions are equipped to fire Harpoon anti-ship missiles and have been ordered to strike the Soviet convoys should the situation permit.
Complexity Level: High
Deployment
Allied (set up first): Together in any sea or shallow hex within 5 hexes of Templer Bank (1574): Midway (US/CV), Reeves (US/CG), Sterett (US/CG), Oldendorf (US/DD), Cochrane (US/DD), Stoddert (US/DD). On Midway: F18 (US/INT)x3, A6 (US/ATK), EA6 (US/EW), E2 (US/AEW). 2252: Beadley (US/FF), DWert (US/FF), Con1 (US/FC). 2956: Hepburn (US/FF), Roberts (US/FF), Halburn (US/FF), Taylor (US/FF), MPS3A (US/MP), MPS3B (US/MP). 2862: AMaru (JP/TK). 3164: TMaru (JP/TK). 3465: OMaru (JP/TK). 1667: Cubi Point: P3 (US/RCN)x2. 1666: Clark Field: F4 (US/INT)x2, F4G (US/EW). Any sea or shallow hex within 2 hexes of Truro Shoal (1068): NYCty (US/SN). Any sea or shallow hex within 1 hex of Bombay Reef (0571): SJuan (US/SN). Any sea hex within 3 hexes of 2754 (may be stacked with other US units): Btfsh (US/SN).
Together in any sea or shallow hex within 5 hexes of Templer Bank (1574): Luce, Trpli (US/AA), Vncvr (US/AA), Clvnd (US/AA), LCnty (US/AA), FCnty (US/AA). Together in any sea or shallow hex within 5 hexes of Templer Bank (1574): Drwin (AU/FF), Hmond (US/FF), Lckwd (US/FF), JHall (US/FF).
Soviet (set up second): Together in any sea or shallow hex within 2 hexes of 0666: Nvrsk (SO/CV), Riga (SO/CG), Drozd (SO/CG), Tribts (SO/DD). On Nvrsk: Y36 (SO/INT). 0369: Chpev (SO/CG), Shpkv (SO/DD), Bzhny (SO/DD), Flotl (SO/CO), Con1 (SO/SC), Con2 (SO/SC), Con3 (SO/SC). 0463: Ymstw (SO/CG), Trbut (SO/DD), Dzvti (SO/FF), FloQ (SO/CO), Con4 (SO/SC), Con5 (SO/SC), Con6 (SO/SC). Any sea or shallow hex within 2 hexes of Stewart Bank (1164): Srius (SO/SS). Any sea or shallow hex in Formosa Zone, not stacked together, not in or adjacent to Batan (1359) or any hex with a US or Soviet unit: Minya (SO/SS), Zrnta (SO/SS). Any sea or shallow hex in South China Sea Zone, not in or adjacent to hex with a US or Soviet unit: Ypter (SO/SS). Any sea hex within 4 hexes of 2159, not stacked together: Sdorv (SO/SN), Ygrov (SO/SN), Nfdov (SO/SN). Any sea hex within 2 hexes of 2560, not in hex with Soviet unit: Glbus (SO/SS). 0377: T16G, M23, T16E, T16O (SO/BMB)x2 (SO/INT), 138 (SO/EW), (SO/RCN), (SO/RCN). 0276: Tuy Hoa: M21 (VN/INT)x2.
Special Rules
- The Allied player can make a total of three SSM attacks with his F18 and A6 units (not three each). As each attack is made, the Allied player should note this fact on a piece of paper. The same unit can make all three attacks (assuming the attacks are in different turns) or different units can make separate attacks — as long as no more than three attacks are made per game. All three attacks can be made in the same turn (assuming different units make each attack); if so, the attacks can be combined. The Attack/Range values of an SSM attack by F18 or A6 units are 50/2 (even if the attacking unit is damaged).
- At a cost of 1 Movement Point, Japanese TK units can exit the map from a full hex (never from a half hex) between hexes 2052 and 2852 (inclusive). Once exited, they can neither return to play nor be attacked.
- Soviet surface and submarine units cannot end an activation in Batan (1359), Aparri (1461), Laoag (1363), or Dagupan (1465). (They can attack Allied units in these hexes.) Allied AA, FC, and MP units ending an activation in any of these hexes can be immediately removed from the map by the Allied player. Once removed, they can neither return to play nor be attacked.
- The US SN units NYCty and SJuan can each make one Cruise Missile attack per game. No other units can make such attacks.
- Soviet SC units ending an activation in Cam Ranh (0378) are immediately removed from the map. Once removed, they can neither return to play nor be attacked.
Game Length: — (not stated in the recovered text)
Victory Conditions
The Allied player gains Victory Points (VP) for having US AA, FC and MP units reach certain hexes on the map and be removed. In addition, he receives VP for Japanese TK units that exit the map. Depending on the hex from which the Allied unit is removed, the Allied player consults the following schedule to determine how many VP he receives:
| Hex Unit Reached | Victory Points Received |
|---|---|
| Laoag (1364) | 3 VP per US FC (2 VP if damaged) |
| Aparri (1461) | 3 VP per US FC (2 VP if damaged) |
| Dagupan (1465) | 6 VP per US FC (4 VP if damaged) |
| Subic Bay (1567) | 12 VP per US FC (8 VP if damaged) |
| Batan (1359) | 20 VP per US MP (14 VP if damaged); 2× Victory Point value per US AA unit |
| Exiting map | 9 VP per Japanese TK (6 VP if damaged) |
In addition, the Allied player receives VP for eliminating Soviet units, as follows:
| Condition | Victory Points |
|---|---|
| For each Soviet SN or CV sunk | +6 |
| For each Soviet DD or CG sunk | +5 |
| For each Soviet SS sunk | +4 |
| For each Soviet FF or CO sunk, or INT or BMB destroyed (including Vietnamese) | +2 |
| For each Soviet SC sunk | +1 |
The Allied player also loses VP for Allied units eliminated and for Soviet SC units that reach Cam Ranh (0378). For each US AA unit sunk, the Allied player loses the printed Victory Point value of that unit. For each undamaged Soviet SC unit that reaches Cam Ranh, he loses 12 VP (he loses 8 VP if the unit is damaged). He also loses VP for the following reasons:
| Condition | Victory Points |
|---|---|
| If US CV Midway is sunk | -15 |
| For each US SN sunk | -8 |
| For each US DD or CG sunk | -6 |
| For each Allied FF sunk | -4 |
| For each US INT or ATK unit destroyed | -2 |
| For each Allied FC, MP, or TK unit sunk | -1 |
At the end of the game, the Allied player determines his VP total and consults the following chart to determine the winner:
| Allied VP | Victory Level |
|---|---|
| 230 or more | Decisive Allied Victory |
| 185 to 229 | Substantive Allied Victory |
| 140 to 184 | Marginal Allied Victory |
| 95 to 139 | Marginal Soviet Victory |
| 40 to 94 | Substantive Soviet Victory |
| 39 or less | Decisive Soviet Victory |
13.4 Scenario 4: Soviet Bastion
Background: Mikhail S. Gorbachev has been deposed as the General Secretary of the Soviet Communist Party. Following a violent one-day insurrection, a group of high-ranking military officers and KGB officials, disenchanted with Gorbachev's liberalization policy and the phased withdrawal of Soviet troops from Afghanistan, have seized power in the Kremlin with the full support of the armed forces. Soviet troops, on full alert throughout Europe and Asia, are edgy. In an incident reminiscent of the Korean Airlines tragedy in 1983, a Soviet MiG-31 Foxhound fighter has recently shot down a Royal Thai Airlines 747 en route to Bangkok that the Soviets say strayed too close to the Kamchatka Peninsula and, in particular, to the Soviet submarine base at Petropavlovsk. All passengers and the crew were lost.
The new Soviet regime has reinitiated the war in Afghanistan with a vengeance. Reports reaching the West, although sketchy at best, indicate that the Soviets have embarked on a course of total extermination in the war against the Afghan partisans. The United States and its Western allies have reacted angrily to these reports, vowing to support the guerrilla movement with as much materiel as possible. In response, the Soviets have torpedoed a French merchantman off the mouth of the Indus near the Pakistani port of Karachi.
Western satellite photos and intelligence reports show that the Soviets have mobilized their Category II and III divisions and are in the process of building up enormous stockpiles of military equipment in their forward bases throughout Europe and Asia. In the Pacific, the Soviet build-up has been focused on the port of Petropavlovsk in Kamchatka. This port, which is one of the only Soviet naval bases with unrestricted access to the open ocean, is normally a submarine base, but recently large numbers of surface warships and combat aircraft have been deploying there from Siberia. In addition, heavily-laden convoys with military supplies have been arriving daily from Vladivostok and Sovetskaya Gavan.
Also, in the Okhotskoye More (Sea of Okhotsk), the Soviets appear to be putting their "bastion" theory, so vigorously debated in the Western press, into actual practice. Using submarines and surface forces to seal off the Sea of Okhotsk, the Soviets hope to make it an impenetrable lake in which ballistic missile submarines can safely hide while convoys sail with impunity between Siberia and Kamchatka.
The United States has demanded that the military build-up at Petropavlovsk be halted, vowing to send nuclear attack submarines into the Sea of Okhotsk to assure compliance. The Soviets, reacting with indignation to this threat, have stated openly that the entry of American submarines into the Sea of Okhotsk will be considered an act of war and will be resisted to the fullest.
Seven Soviet submarines have been hastily deployed from Petropavlovsk in a picket line around the Kurile Islands and Sakhalin with orders to prevent the movement of American boats into the Soviet bastion. This force includes Admiral Sidorov, an ultra-modern design of the Mike class, five nuclear-powered Victor boats, and a single diesel submarine of the Kilo class. Also, the large naval aviation base at Aleksandrovsk Sakhalinskiy will support the operation with 50 Tu-95F Bear, Il-38 May, and Be-12 Mail ASW aircraft. Several smaller bases throughout the Kuriles have received detachments of Ka-25 Hormone and Ka-27 Helix ASW helicopters, with orders to maintain constant patrols in the straits between the Pacific and the Sea of Okhotsk.
The Commander-in-Chief, 7th Fleet has deployed all the submarines at his disposal to the northwest Pacific. These are the Los Angeles-class submarines Springfield (SSN-752) and Bremerton (SSN-698), a Sturgeon-class boat, Silversides (SSN-679), and two Permit-class submarines, Dace (SSN-607) and Guardfish (SSN-612). This force has received orders from the Commander, Task Force 74 (Submarine Force, 7th Fleet) to penetrate the Sea of Okhotsk and report on the movement of Soviet convoys and ballistic missile submarines. If attacked, they are permitted to respond.
Three squadrons of P-3C Orion patrol aircraft are supporting the operation: VP-4 ("Skinny Dragons") and VP-26 ("Tridents"), flying from the US Air Force base at Misawa in northern Japan; and VP-48 ("Boomerangers"), operating from Adak NAS in the Aleutians. (Note: Since Adak is not on the map, VP-48 is deployed at Misawa in this scenario.)
Complexity Level: Low
Map: Use only the north map.
Deployment
Soviet (set up first): 0313: Aleksandrovsk: T38 (SO/RCN), B12 (SO/RCN), T95F (SO/RCN)x2. Any sea, coastal, or drift ice hex within 3 hexes of any Soviet close defense hexes, not stacked: Sdorv (SO/SN), Khvrn (SO/SN), Mmko (SO/SN), Ygrov (SO/SN), Kpmt (SO/SN), Mkhly (SO/SN), Shmn (SO/SS).
Allied (set up second): 1323: Misawa: P3 (US/RCN)x3. Any sea, coastal, or drift ice hex (see special rules), not adjacent to any Soviet unit and 4 or more hexes from the nearest US SN: Spfld (US/SN), Brrntn (US/SN), Svsds (US/SN), Dace (US/SN), Gfish (US/SN).
Special Rules
- Each of the five US SN units sets up in a hex whose first two digits number 20 or more (that is, hex rows 20xx through 45xx) or whose last two digits number 22 or higher (that is, hexes 0322-0326 through 4522-4526). A submarine can never set up in a partial hex.
- No Cruise Missile attacks are permitted.
- Only Soviet close defense hexes are functional. Japanese close defense hexes are ignored.
- If playing solitaire, do not use the solitaire strategic air mission assignment system. The player can assign US and Soviet air units to any eligible mission in a full or partial north map zone with no restrictions.
Game Length: 4 Game Turns
Victory Conditions
The Allied player gains and loses Victory Points (VP) according to the following schedule:
| Condition | Victory Points |
|---|---|
| For each US SN (even if damaged) that ends the game within the Soviet bastion area in the Sea of Okhotsk Zone | +6 |
| For each Soviet SN sunk | +2 |
| Soviet SS Sherm sunk | +1 |
| For each US SN sunk | -3 |
At the end of the game, the Allied player determines his VP total and consults the following chart to determine the winner:
| Allied VP | Victory Level |
|---|---|
| 32 or more | Decisive Allied Victory |
| 26 to 31 | Substantive Allied Victory |
| 21 to 25 | Marginal Allied Victory |
| 15 to 20 | Marginal Soviet Victory |
| 8 to 14 | Substantive Soviet Victory |
| 7 or less | Decisive Soviet Victory |
13.5 Scenario 5: Return of the Dreadnought
(A gap in the available scan omits this scenario's full text.)
13.6 Scenario 6: Invasion of Hokkaido
(A gap in the available scan omits this scenario's full text.)
13.7 Scenario 7: Tsushima Again
(A gap in the available scan omits this scenario's full text.)
13.8 Scenario 8: Korean War
(A gap in the available scan omits this scenario's full text.)
13.9 Scenario 9: Blockading Japan
(A gap in the available scan omits this scenario's full text.)
Advanced Game Rules
14.0 Air Unit Replacement
(A gap in the available scan omits this section's full text.)
15.0 Time of Year
(A gap in the available scan omits this section's full text, including 15.1 Darkness, 15.2 Drift Ice, and 15.3 Weather. An example from elsewhere in the rulebook indicates the following procedure existed: the Weather Phase die roll is checked against a Time-of-Year-dependent column of the Weather Table for a possible Squall or Storm result, and a second die roll against a Zone Table determines which map zones are affected. Squalls and storms restrict surface movement, detection, and air activation in the affected zones; see 16.0 for the Weather effects that are described in the surviving text below.)
Example of Time of Year: Assume a scenario is being played in Period 3 (July-August). During the Weather Phase of Game Turn 1, the Soviet player rolls the die and gets an 8. Checking this roll under the "July-August" column of the Weather Table, the players find a "Squall" result. The Soviet player rolls the die again and obtains a 6. Checking this result on the Zone Table, the players find that the squall result applies to four zones — Formosa, South China Sea, Sea of Okhotsk, and North Pacific. The players should also note that drift ice hexes are sea hexes in this scenario and that Night Game Turns in the Sea of Okhotsk, Hokkaido, and Northwest Pacific Zones are day.
Squall and Storm Effects:
Squalls have the following effects:
- A surface unit must spend three Movement Points to enter a squall zone hex. (Remember that surface units can always move at least one hex in their activation.)
- Surface units in a squall zone have Limited Detection Zones only.
- A submarine unit's Movement Allowance is unaffected by squalls.
- Air units on airfields in a squall zone can activate normally. However, carrier-based air units cannot activate or perform strategic missions/CAP in a squall zone.
- Air units can move through a squall zone normally.
- At-sea replenishment cannot take place in a squall zone (see 16.0).
Storms have the following effects:
- A surface unit must spend four Movement Points to enter any type of hex in a storm zone. (Remember that surface units can always move at least one hex in their activation.)
- A submarine unit's Movement Allowance is unaffected by storms.
- Air units in a storm zone cannot be activated or perform strategic missions/CAP.
- A strategic mission cannot be performed in a storm zone even by air units that begin in another zone.
- Air units can move through a storm zone normally.
- Detection markers are removed from all units occupying or entering a storm zone. Thus, units in a storm zone cannot be attacked.
- Attacks cannot be made by a unit in a storm zone.
- Units in a storm zone do not exert Detection Zones, nor do Detection Zones extend into storm zones.
- At-sea and in-port replenishment cannot take place in a storm zone (see 16.0).
Note: A surface unit starting its movement in a squall or storm zone can move into an adjacent hex within a clear zone with no detrimental effect. Also, air units on strategic missions are not affected by squalls or storms in zones between where they begin their mission and where they perform it. Thus an air unit in the Japan Zone that performs a strategic mission in the Philippines Zone is not affected by a storm or squall in the Central Pacific Zone.
16.0 Logistics (Optional)
The logistics option makes the game more realistic, but lengthens playing time and requires record-keeping. Logistics should be used only in the Advanced Game.
16.1 The Logistics Rosters
Each player has a Logistics Roster (which also includes his Player Record for Advanced Game Scenarios). Victory Games, Inc., grants players permission to make reproductions of the rosters for personal use. Units on the rosters are listed by country and are subdivided into four categories: Surface, Carrier, Submarine, and Replenishment. Each unit has a number of boxes on which ammunition and fuel expenditure are recorded. A unit can never have more boxes than those provided on the roster. Marks on the rosters should be made in pencil, since information will change as the game progresses. Several types of units are not listed on the roster (such as AA, PC, TK, SC) because logistics information is not kept for these units. Roster information is open to both players at all times.
16.2 Surface Units and Ammunition Expenditure
Surface units (except for carriers) have three types of ammunition boxes: Surface-to-Surface Missile (SSM), Anti-Submarine Warfare (ASW), and Area Anti-Air (AAA). If a unit has no boxes for one of these types it can never perform that kind of combat. Also, when a unit has no more unchecked boxes in any of these categories, it can no longer employ the value corresponding to that ammunition type (it can however be replenished; see 16.6).
SSM Ammunition: When a unit participates in SSM Combat, one of its SSM boxes is checked off. If several units perform SSM Combat, each participating unit has a box checked off. Some surface units have a star (*) next to their SSM boxes. This means the unit can replenish its SSM's only in-port, never at-sea (see 16.6).
Intensive and Maximum SSM Attacks: When surface units make an SSM attack, the owning player can state that any or all of his participating units are making an "intensive" or "maximum" attack. In an intensive attack, the SSM Attack value of the participating units is multiplied by 1½ (round fractions down) but two SSM boxes are checked off for each participating unit; in a maximum attack, the SSM Attack value of the participating units is multiplied by 2, but three SSM boxes are checked off for each participating unit. In an attacking stack some units may perform one type of SSM attack while other units make different kinds of SSM attacks. PC units are not allowed to make intensive and maximum SSM attacks.
Secondary SSM Ammunition: Some US surface units have two series of SSM boxes. This means the unit is armed with two kinds of SSM's: one kind is represented by the SSM values printed on the counter and the other is represented by the parenthesized values on the Logistics Roster (this second kind also has a gray band over it). The number to the left of the slash in this value is the SSM Range of the second SSM type; the number to the right is its SSM Attack value. If a unit with two SSM types participates in an SSM attack, the owning player must indicate which SSM is being used (both types cannot be used in the same attack). The player checks off a box of the appropriate SSM type after the attack. Upon replenishment (see 16.6), both SSM types return to full capacity. It should be noted that SSM's with a range of 2 are Harpoons and those with a range of 5 are Tomahawks.
ASW Ammunition: If a surface unit participates in ASW Combat, the owning player checks off one of the unit's ASW boxes. A unit using its ASW value in defensive combat against a Torpedo attack does not have an ASW box checked off. Once the unit has all its ASW boxes checked off, it can no longer use its ASW value in either ASW Combat or defensive combat against Torpedo attacks. Lack of ASW ammunition does not affect a unit's detection capabilities.
AAA Ammunition: When a unit employs its Area AA value in defensive combat against an enemy SSM or Bombing attack, the owning player checks off one of the unit's AAA boxes.
Cruise Missile Ammunition: Cruise missile equipped units (those with the silhouette of a cruise missile on their counters) have one or more circles under the "CM" column on the Logistics Rosters. In a Cruise Missile attack, each participating unit has a circle crossed out. When a unit has no more circles left, it can no longer participate in Cruise Missile Combat. Cruise missiles can never be replenished.
Aircraft Carriers: If an aircraft carrier uses its SSM, ASW, or AAA values in combat, this expenditure is recorded in the same manner as other surface units.
Patrol Combatants (PC): PC units are not listed on the Logistics Rosters and do not record ammunition (or fuel) expenditure. They can make an unlimited number of SSM attacks and never need to be replenished (but they cannot make intensive and maximum SSM attacks). However, if a PC unit is not situated in a port hex within its own country during the Fuel Phase of the Terminal Cycle (which occurs in Night Game Turns only), it is automatically eliminated (sunk); the opposing player receives Victory Points for PC units lost in this manner. If a PC unit is situated in a port hex of a country different than its own nationality during the Fuel Phase, it is still lost.
16.3 Submarines and Ammunition Expenditure
Submarines have two types of ammunition boxes: SSM and Torpedo (TORP). All submarines have torpedoes, but many do not have SSM's. When all boxes of a given type are checked off, a submarine can no longer use the value corresponding to that ammunition type until it is replenished (see 16.6).
SSM Ammunition: When a submarine performs SSM Combat, one of its SSM boxes is checked off. Submarines can perform intensive and maximum SSM attacks like surface units (see 16.2). Also, some US submarines possess two kinds of SSM's, which are used in the same way as surface units.
Torpedo Ammunition: When a submarine participates in Torpedo or ASW Combat, the owning player checks off one of its TORP boxes on the roster. Submarines using their ASW value in defensive combat against a Torpedo attack do not expend TORP boxes, although once all its TORP boxes have been checked off, it can no longer use its ASW value in defensive combat against a Torpedo attack. Lack of Torpedo ammunition does not affect a submarine's detection capabilities.
Cruise Missile Ammunition: Cruise missile-equipped submarines expend cruise missile ammunition in exactly the same way as surface units (see 16.2).
Intensive and Maximum Torpedo Attacks: When a submarine is making a Torpedo attack, the owning player can state that the attack is "intensive" or "maximum." These attacks expend ammunition and enhance the Torpedo value in the same way as intensive and maximum SSM attacks (see 16.2).
16.4 Air Units and Ammunition Expenditure
For each air unit based on an aircraft carrier that performs Bombing Combat, the owning player must check off one BOMB box belonging to the parent carrier. After all of a carrier's BOMB boxes have been checked off, air units based on that carrier can no longer perform Bombing Combat until the carrier is replenished (see 16.6). Air units based on airfields which perform Bombing or SSM Combat do not expend ammunition — the base is considered to possess an unlimited supply of both types. Air units performing ASW or Air-to-Air Combat never expend ammunition. Air units can always perform strategic missions and CAP regardless of ammunition.
Aircraft SSM's: Some US carriers have a special series of boxes labeled "AIR SSM." Air units based on these carriers possessing a Special SSM Indicator (F18, A6, S3) can perform SSM attacks. For each air unit performing an SSM attack, one AIR SSM box is checked off. The SSM Attack/Range values of such an attack are 50/2 (even if the unit is damaged). The SSM's are considered sea-skimmers. When all of a carrier's AIR SSM boxes are checked off, air units on that carrier can no longer perform SSM attacks until it is replenished (see 16.6). US F18 and A6 air units based on airfields cannot perform SSM attacks.
16.5 Movement and Logistics
Units on the Logistics Roster with Fuel boxes must record fuel expenditure. Those without Fuel boxes, such as submarines, replenishment ships, and all aircraft carriers do not expend fuel. (Note that nuclear-powered ships and the US BB Msour also do not expend fuel. These are listed as "UNLIM" [unlimited] in the Fuel column.)
Fuel Expenditure: During the Fuel Phase of the Terminal Cycle (which takes place in Night Game Turns), all surface units on the map possessing Fuel boxes have one of these boxes checked off. This mark is made regardless of how far the unit moved in the previous turns (it may not have moved at all).
Optional Fuel Expenditure: If players wish to keep more realistic records of fuel expenditure, they can agree not to check off Fuel boxes for units that do not move or that move no more than one hex during each of the AM, PM and Night Game Turns. To keep track of which units moved how far, put a slash (/) in a Fuel box if the unit moves more than one hex in any of the three Action Phases of the AM, PM, and Night Game Turns. If the unit does not move or moves only one hex, do not put a slash. During the Fuel Phase a unit with a slash has this box checked off. Units without a slash do not have a box checked off.
Out of Fuel: When all of a unit's Fuel boxes have been checked off, the unit has run out of fuel. Place an "Out of Fuel" marker on it. A unit running out of fuel faces the following restrictions:
- Its Movement Allowance is one.
- Its Defense value is reduced by one (to a minimum of one).
16.6 Replenishment
In order to regain full ammunition and fuel capacities a unit must replenish. There are two types of replenishment: in-port and at-sea. A unit can replenish before all its fuel and ammunition boxes have been checked off. A unit that replenishes cannot activate in the Action Phase immediately following the Replenishment Phase. Units stacked in the same hex that are not replenishing can activate. Players should turn a replenishing counter 180 degrees to remind them that the unit cannot be activated. Air units assigned to a replenishing carrier cannot be activated, but they can perform CAP and strategic missions. At the end of the Action Phase, players should flip replenishing units back to their normal alignment.
If a unit is attacked while it is replenishing (that is, it is rotated 180 degrees), its Defense value is reduced by one (to a minimum of one). This reduction is not in addition to running out of fuel (see 16.5). In a stack only those units actually replenishing suffer this penalty.
Replenishment Units: There are three types of replenishment units: combat support (CS), oiler (OL), and ammunition (AM). Japanese TK (tanker) units are not replenishment units. Replenishment units have two sets of boxes on the roster: Ammunition Points (AP) and Fuel Points (FP). US CV units (but not Wasp) and the BB Msour also have FP boxes on the Allied Logistics Roster. These boxes are used only when optional rule 22.8 is being employed.
In-Port Replenishment: To replenish in-port, a unit must occupy a friendly port hex at the beginning of the Replenishment Phase. In-port replenishment cannot take place in a damaged or destroyed port or a port situated in a storm zone. No more than four units (only one of which can be a replenishment unit or an aircraft carrier) may replenish in each port per Replenishment Phase. A player performs the following actions for each unit replenishing in-port:
- If the unit is a non-carrier surface combat unit, he erases all check marks in the unit's SSM, ASW, AAA, and Fuel boxes.
- If the unit is a submarine, he erases all check marks in the unit's TORP and SSM boxes.
- If the unit is an aircraft carrier, he erases all check marks in the unit's SSM, ASW, AAA, BOMB, and AIR SSM boxes.
- If the unit is a replenishment unit, he erases all check marks in the unit's AP and FP boxes.
Cruise missile (CM) and nuclear weapon (N) check marks for surface and submarine units can never be erased. Ports possess unlimited supply and do not expend any points or boxes to replenish friendly units.
★Notable Exception: Allied ports in the Philippines and the Soviet ports Oktyabrskiy (1001), Petropavlovsk (1100) and Cam Ranh (0378) are sometimes prohibited from in-port replenishment (see 16.8).
In-Port Replenishment Restrictions: Allied units are subject to special restrictions when replenishing in-port:
- Chinese, Taiwanese, Japanese, and South Korean units can replenish only in ports within their own countries.
- US, Canadian, and Australian units can replenish fully only in Yokosuka (1830), Pusan (0738), Sasebo (0940), Naha (1549), Guam (4850), and Subic Bay (1567). If they replenish in any other Allied port only check marks in their Fuel boxes can be erased; SSM, ASW, AAA, TORP, BOMB, and AIR SSM marks cannot be erased. US, Canadian, and Australian units can never replenish in Chinese ports.
Example of In-Port Replenishment: During the Replenishment Phase, the US units Owen (FF), Kirk (FF), Fife (DD), Mrmck (OL), and Seatl (CS) occupy Naha. Because Mrmck and Seatl are both replenishment units, the Allied player could not replenish both at the same time in a given port. Thus, he decides to replenish DWert, Kirk, Fife, and Seatl. All boxes checked off in these units' logistics boxes are erased (except for any cruise missile or nuclear weapon marks).
At-Sea Replenishment: To replenish at sea, a surface unit must occupy the same hex as a friendly replenishment unit (CS, AM, OL) at the start of a Replenishment Phase. Subject to the following restrictions, for each Ammunition Point (AP) box of a replenishment unit checked off, the owning player can do one of four things for friendly surface units in the same hex:
- He can erase all SSM, ASW and AAA (but not cruise missile or nuclear weapon) check marks from a single non-carrier surface unit.
- He can erase all SSM, ASW, AAA, and AIR SSM check marks from an aircraft carrier.
- He can erase a single BOMB box from an aircraft carrier.
- He can erase a single AP box from another replenishment unit.
Subject to the restrictions listed below, for each Fuel Point (FP) box of a replenishment unit checked off, the owning player can do one of two things for friendly surface units in the same hex:
- He can erase all Fuel check marks from a single surface combat unit.
- He can erase a single FP box from another replenishment unit.
At-Sea Replenishment Restrictions: At-sea replenishment is subject to the following restrictions:
- Submarines can never be replenished at-sea.
- Surface units whose SSM boxes are followed by a star (*) cannot have their SSM check marks erased if they replenish at-sea. They can have their SSM boxes erased only if they replenish in-port.
- A replenishment unit can check off no more than six AP's and/or FP's per Replenishment Phase.
- At-sea replenishment cannot take place in hexes situated in squall or storm zones.
★Allied At-Sea Replenishment Restrictions: Taiwanese units can never replenish at-sea. Chinese units can replenish at-sea only from Fqing, the Chinese oiler. Non-Chinese units can never replenish from Fqing. Otherwise, Allied units can replenish at-sea from Allied replenishment units regardless of their nationalities.
Example of At-Sea Replenishment: During the Replenishment Phase, the US units KHawk (CV), Sterett (CG), and Klzoo (CS) are stacked in the same hex. The Allied player checks off five AP and one FP boxes from Klzoo (the maximum he is allowed to check off for a replenishment unit per phase). He decides to erase the Fuel check marks from Sterett (expending the FP), the SSM, ASW, and AAA check marks from Sterett (expending one AP), three BOMB check marks from KHawk (expending three more AP's), and, finally, all the ASW and AIR SSM check marks from KHawk (expending the fifth AP).
16.7 Out of Fuel/Ammo Markers
Both players should check the Logistics Rosters when a unit uses an applicable combat value. If a unit runs out of some kind of supply, the owning player should place an "Out of Fuel" or an "Out of Ammo" marker on it. If it runs out of both fuel and ammo, flip the marker to its "Out of Fuel & Ammo" side. Note that an Out of Ammo marker is placed on a unit if it runs out of one kind of ammunition; it does not necessarily mean it has run out of all types of ammunition. The unit can still use the combat values corresponding to the types of ammunition it has left. Remove Out of Fuel/Out of Ammo markers when a unit replenishes.
★16.8 Bases and Supply
Some Allied and Soviet bases may run out of supply.
Soviet Bases: If, by the Fuel Phase of the Terminal Cycle of Game Turn 21, no Soviet SC units have "unloaded" (see 23.2) in Oktyabrskiy (1001) or Cam Ranh (0378), that base is considered out of supply. After Game Turn 21, the base comes back into supply (and remains so for the rest of the game) at the moment at least one Soviet SC unit unloads there.
Allied Bases: If, by the Fuel Phase of the Terminal Cycle of Game Turn 21, no US SC or FC units have "unloaded" (see 23.2) in Subic Bay (1567), that base is considered out of supply. After Game Turn 21, the base comes back into supply at the moment at least one US SC or FC unit unloads there.
Out of Supply Bases: Bases that are out of supply cause the following restrictions:
- If Cam Ranh is out of supply, in-port replenishment cannot take place there. Also, Soviet-controlled air units cannot activate from airfields in Vietnam (they can perform strategic missions and CAP).
- If Oktyabrskiy is out of supply, in-port replenishment cannot take place there, nor can it take place in Petropavlovsk (1100). Also, Soviet air units cannot activate from airfields in the Kamchatka Peninsula and in the Kurile Islands (they can perform strategic missions and CAP).
- If Subic Bay is out of supply, in-port replenishment cannot take place there, nor can it take place in Manila (1767). Also, Allied air units cannot activate from airfields in the Philippines (they can perform strategic missions and CAP).
SC and FC units are allowed to unload in damaged and destroyed ports.
★17.0 Political and Random Events
Advanced Game Scenarios last until an armistice or until the end of the 36th Game Turn, whichever comes first.
17.1 Armistice
At the beginning of the game, the Armistice marker is placed in the "Start" box on the Armistice Track. It may be moved along the track during the Political Events Phase. When it reaches the Armistice box, the game immediately ends.
Armistice Table: During the Political Events Phase of the Strategic Cycle, the Allied player rolls a die and both players consult the Armistice Table. If the result calls for the Armistice marker to be advanced one space, this should be done immediately. The table may call for the players to consult the Random Events Table (see 17.2). Depending on the length of the scenario (short, medium, or long; see 24.0), the Armistice Table die roll may be modified. In games of short length, add 1 to the die roll; in games of long length, subtract 1 from the die roll. Players do not consult the Armistice Table on Game Turn 1.
Victory Points: When the Armistice marker advances, the players may receive Victory Points (see 23.0).
17.2 Random Events
If the Armistice Table calls for the players to consult the Random Events Table, the Allied player rolls the die and the players determine a result. There are six possible results, which are explained below:
UN Talks Collapse: Subtract 1 from all Armistice Table die rolls for the rest of the game. Ignore this result if it occurred earlier in the game.
UN Breakthrough: Add 1 to all Armistice Table die rolls for the rest of the game. (This is cumulative with other modifiers.) Ignore this result if it occurred earlier in the game.
Command Failure: Roll the die again. On an odd roll, the command failure applies to the Soviet player; on an even roll (including "0"), command failure applies to the Allied player. The affected player rolls a die and consults the Zone Table. In the ensuing Strategic Air Phase, he cannot perform any strategic missions in the indicated zones and air units situated on airfields or carriers in these zones perform no strategic missions at all.
Reinforcements Enhanced: The die is rolled to determine the affected player as described above. This player adds 3 to his Reinforcement Table die rolls for the remainder of the game (see 18.0). Ignore this result if it occurred to the same player earlier in the game.
Reinforcements Delayed: The die is rolled to determine the affected player as described above. This player does not roll for reinforcements in the Reinforcement Phase of the current Strategic Cycle and the Reinforcement Phase of the next Strategic Cycle (three turns in the future). This event can happen any number of times per game to the same player.
South Korean Bases Fall: The Allied bases in Seoul (0236), Inchon (0237), Osan (0337), and Kangnung (0435) are captured by North Korean ground attack. Place a Destroyed marker on each of these bases. Allied air units situated in them are destroyed. Surface and submarine units are unaffected. This result is ignored in Scenario 10 or if it occurred earlier in the game.
18.0 Reinforcements
Each player has a Reinforcement Track which records the status of his reinforcements. Depending on a scenario's Preparedness Level, a player's Reinforcement marker starts the game in different boxes on his Reinforcement Track.
Replenishment Units: On the Reinforcement Charts, replenishment units (CS, AM, OL) are printed in italics. These units are not received as reinforcements unless the logistics option is used (see 16.0).
18.1 Availability of Reinforcements
★Random Events: The Random Events Table may call for an addition to a player's Reinforcement Table rolls. Also, it may prohibit a player from consulting the table for a certain period (see 17.0).
During the Reinforcement Phase of the Strategic Cycle, starting with Game Turn 4, both players roll a die and consult the Reinforcement Table. Each player's die roll is cross-referenced with his column. The result will be a number; this is the number of boxes the player's Reinforcement marker advances on his Reinforcement Track. For example, if a player's Reinforcement marker occupies the 13 box and a 7 result is obtained, the marker advances to the 20 box. On a result of 0, the marker does not advance.
Reinforcement Charts: Each player has a Reinforcement Chart. The chart consists of a series of consecutively numbered groups, each group corresponding to a box on the player's Reinforcement Track. When the Reinforcement marker advances, a player receives the reinforcement groups corresponding to the boxes through which the Reinforcement marker moved and including the box in which it ends. For example, if the Reinforcement marker advanced from box 23 to box 30, the player receives reinforcement groups 24 through 30.
★Reinforcements belonging to countries that do not participate in a scenario are never used (see 24.0). When advancing the Reinforcement marker on the Reinforcement Track, do not skip boxes corresponding to reinforcement groups consisting entirely of non-participating units; instead, consider such a box to have no effect on a player's reinforcement availability.
18.2 Placement of Reinforcements
When reinforcements are made available to a player, he consults his Reinforcement Chart to determine the units he receives. Each reinforcement group consists of one or more units, specified by name, type, and nationality. Each group also has an indicated placement hex or locale. Subject to the limitations listed below, reinforcements are immediately placed on the map.
Placement Restrictions: If an arrival hex is enemy-occupied, reinforcements can be placed in any empty or friendly-occupied map-edge hex within five hexes of the original arrival hex. If an airfield at which an air unit reinforcement arrives is destroyed, the unit can be placed in any airfield on the map from which it is permitted to activate (see 5.4). Surface and submarine reinforcements arriving at a destroyed port are unaffected. Reinforcements can be placed on the map in violation of stacking restrictions, but they must adhere to these restrictions at the end of the Action Phase of the current turn.
19.0 Tactical Nuclear Warfare (Optional)
The game assumes that only conventional weapons are being used. However, upon mutual consent, the players may employ nuclear weapons, but only if the Logistics option is being used (see 16.0). When using these rules, ignore the surface unit stacking limit listed in Section 6.0. Any number of friendly surface units can be stacked together at the end of the surface Action Segment.
19.1 Availability of Nuclear Weapons
Only US and Soviet units can use nuclear weapons. There are four kinds of nuclear weapons: SSM, Bomb, ASW, and Area Anti-Air. (Cruise Missile attacks cannot be nuclear.) If a surface or submarine unit possesses nuclear weapons in one or more of these categories, it has an "N" printed next to the appropriate ammunition boxes on the Logistics Roster. (Submarines with nuclear ASW weapons have an "N" next to their TORP boxes.) Air units can also make nuclear attacks (see below).
19.2 Use of Nuclear Weapons
When a player initiates combat and one or more of the participating units have nuclear weapons for that type of combat, he can declare that any or all of these units are using nuclear weapons. For each unit using nuclear weapons, the owning player crosses out its "N" (or checks off a box in the case of air units) in the appropriate area of the Logistics Roster. If a surface or submarine unit's "N" has been crossed off, it cannot use that type of nuclear weaponry for the rest of the game. Nuclear weapons can never be replenished.
Note: It should be stressed that the "N" is crossed off when a nuclear weapon is used, not one of the boxes. Nuclear weapons availability is above and beyond the number of boxes for other weapons systems. Air units can continue to make nuclear attacks as long as there are unchecked boxes on the owning player's Air Unit Nuclear Attack section of his Logistics Roster.
Combat with nuclear weapons is resolved normally with the following exceptions:
SSM: A unit using nuclear SSM's has its SSM Attack value increased. Multiply the attacking unit's SSM Attack value by the following factors, which vary depending on the number of enemy surface ships (of any type) in a target hex:
| Number of Surface Units in Hex | SSM Attack Value Multiple |
|---|---|
| 13 or more | ×5 |
| 5 to 12 | ×4 |
| 4 or less | ×3 |
A unit using nuclear SSM's cannot make intensive and maximum attacks. ★Soviet (but not Allied) air units with SSM values can make nuclear SSM attacks. For each Soviet air unit making such an attack, the Soviet player checks off one SSM box in the Air Unit Nuclear Attacks section of his Logistics Roster.
★Bombing: All US INT and ATK air units plus Soviet S24 air units can make nuclear Bombing attacks. Such attacks can be made only against enemy surface units — not against bases. The Bombing value of units performing nuclear Bombing attacks is enhanced in the same manner as SSM's (see above). For each unit making such an attack, the owning player checks off one BOMB box in the Air Unit Nuclear Attacks section of his Logistics Roster.
ASW: Surface, submarine, and air units making nuclear ASW attacks have their ASW values multiplied by five. This enhancement is not used in defensive combat against Torpedo attacks. Among air units, only US and Soviet RCN air units can make nuclear ASW attacks; if they do, the owning player checks off one ASW box for each attacking unit in the Air Unit Nuclear Attacks section of the Logistics Roster. A nuclear ASW attack cannot be made against a submarine occupying a base hex.
Area Anti-Air: If a surface unit uses nuclear Anti-Air (including "long-range") weapons in defensive combat against SSM or Bombing attacks, its Area Anti-Air value is multiplied by five.
19.3 First Use of Nuclear Weapons
The player who first uses nuclear weapons is penalized (see 23.0). Once a player has used nuclear weapons, both players can use them without penalty for the rest of the game. However, the first use of nuclear weapons is limited:
- Neither player can use them for the first three Game Turns of the game.
- If neither player has used nuclear weapons and the Armistice marker has advanced into the "Negotiations Progress" box on the Armistice Track, neither player can use them for the rest of the game. If a player has used nuclear weapons before the Armistice marker reaches this box, both players can freely use them for the rest of the game.
★20.0 Deep Mode (Optional)
If players agree to use this option, submarines can enter a special mode called "deep mode."
20.1 How to Enter Deep Mode
During the Submarine Mode Phase of the Strategic Cycle, first the Soviet player and then the Allied player can place Deep markers on any or all of their submarines whose Movement Allowance is two or more. During this phase, players can also remove Deep markers from their submarines. When a submarine enters Deep mode, it must remain in this mode for the next three Game Turns (AM, PM and Night). A submarine cannot enter Deep mode in a shallow or restricted water hex.
20.2 Effects of Deep Mode
Submarines in Deep mode operate normally with the following exceptions:
Movement: The Movement Allowance of all submarines in Deep mode is one. Submarines in Deep mode cannot move at full speed and cannot enter shallow or restricted water hexes.
Combat: If a submarine in Deep mode is attacked by ASW Combat, the attacker subtracts one from his die roll. Submarines in Deep mode can perform ASW Combat normally, but they cannot conduct Cruise Missile or SSM attacks. Submarines in Deep mode can perform Torpedo Combat, but their Torpedo values are halved (round fractions down).
Detection: When resolving a detection attempt against a submarine in Deep mode on the Submarine Detection Table, two is added to the die roll (see 9.2).
21.0 Mines (Optional)
If players agree to this option they can add Mining to the other strategic missions air units can perform (see 7.0).
21.1 Mine Placement
There are two methods of mine placement:
Mining Missions: Each air unit on a strategic Mining mission can place a single Mine marker in any coastal hex (not including hexes containing only islands) within the zone in which the mission is taking place. This placement takes place in the Mine Segment of the Strategic Air Phase (Soviet player first, Allied player next). Once an air unit places mines it is placed in the appropriate "Return to Base" box on the Strategic Air Display (see 7.5).
Soviet Submarines: Soviet (not North Korean) submarines have the capability to lay mines, but only when using the Logistics option (see 16.0). During the Mine Segment of the Strategic Cycle the Soviet player can place a single Mine marker in any coastal hex (not including hexes containing only islands) adjacent to a Soviet submarine. To do so, the Soviet player checks off three TORP boxes for that submarine. (If it has less than three boxes remaining, it cannot lay mines.)
Mine Limitations: The number of Mine markers provided in the game (25) is a strict limit. If all Mine markers are on the map, no more can be placed. However, as mines are removed (see 21.3) they again become available for use. A maximum of four Mine markers can be placed per hex.
21.2 Effects of Mines
Mine markers are neutral; they affect both players no matter who placed them. Units can enter mine hexes with no detrimental effect. However, at the moment an active surface unit (or stack) or submarine exits a mine hex, the movement of that unit is temporarily halted while the mine effects are resolved. The player controlling the active force rolls a die and compares the result with the number of Mine markers in the hex. If the die roll is greater than the number of Mine markers, the mines have no effect and the active force resumes its movement. If the die roll is less than or equal to the number of Mine markers, one or more of the active units is damaged.
Damage: If damage results from mines, determine the difference between the die roll and the number of Mine markers in the hex: this is the number of active units damaged by mines (if the die roll is equal to the number of Mine markers, one unit is damaged). If the difference between the die roll and the number of mines is greater than the number of active units in the force, each unit in the force is damaged and the extra damage is ignored. (Units already damaged which are damaged by mines are sunk.) If a hex contains damaged and undamaged units, the undamaged units must take damage from mines before any damaged units are affected. A unit can be damaged a maximum of once per Action Segment by mines. If the active player's mine die roll was odd, he applies damage to his force as he wishes. If the die roll was even (including 0), the enemy player decides which units will suffer damage.
Example of Mine Damage: An Allied force consisting of the undamaged US Fife (DD), Crmln (FF), and Cvlnd (AA), and the damaged StLou (AA) occupies hex 1241, which also contains four Mine markers (the maximum allowed in a hex). The Allied player activates the stack and moves it out of the hex; he must immediately roll the die to see if any damage is inflicted. He rolls a "2," which is two less than the number of Mine markers in the hex. Two of his units suffer damage. Since his die roll was even, the Soviet player has his choice of which units will be damaged. The Soviet player selects Fife and Crmln, and these units are flipped to their damaged side. The Soviet player cannot select StLou because undamaged units must be selected first. If the Allied player had rolled a "0," which is four less than the number of mines in the hex, each of the US units would have been damaged. In this case, StLou would have been sunk upon receiving its second damage result.
21.3 Minesweeping
Mines stay in a hex until removed by minesweeping. During the Minesweeping Phase, either player rolls the die once for each hex on the map containing mines. Depending on the location of the mine hex, a single Mine marker is removed as per the instruction of the following chart:
| Location of Mine Hex | Die Roll Needed to Remove a Single Mine Marker |
|---|---|
| Soviet Union, Japan | 0, 1, 2 |
| Any other hex | 0 |
US Aerial Minesweeping: If a US aircraft carrier or one of these AA units (Wasp, Nasau, Trpli) is situated within five hexes of a mine hex, the Allied player can attempt aerial minesweeping against that hex. If so, a single Mine marker is removed on a die roll of 0 or 1. A maximum of one aerial minesweeping attempt can be made per Minesweeping Phase. The Allied player can make both an aerial minesweeping and a regular minesweeping attempt against the same hex in this phase, but only one Mine marker can be removed from a hex per phase.
★22.0 Optional Rules
The following optional rules may be used selectively upon mutual consent of the players.
22.1 Increased Movement for Air Units
Extended Range: An active air unit can operate at "extended range" (that is, adding extra fuel in lieu of ordnance). If so, the Movement Allowance of the unit is increased by six, but its Bombing, Anti-Air and SSM Attack values are halved (round fractions down).
Mid-Air Refueling: Soviet air units activating in Petropavlovsk (1100) or Vladivostok (0227) and US air units activating from a carrier (not counting Wasp) or Clark Field (1666), Kadena (1448), or Kunsan (0438) can use mid-air refueling. A maximum of one Soviet air unit can use mid-air refueling per Game Turn; a maximum of one US air unit activating from a carrier and one US air unit activating from one of the three eligible airfields can use mid-air refueling per Game Turn. A unit can use mid-air refueling only if there is no enemy INT unit within four hexes of the airfield or carrier from which it activates. The Movement Allowance of units using mid-air refueling is increased by eight.
High Mission Profile: Any INT, ATK, BMB, or EW air unit can activate with a high mission profile (that is, fly at the highest possible altitude to conserve fuel). If so, the Movement Allowance of the unit is increased by four, but if it executes Bombing or SSM Combat during this activation, the enemy player adds two to his defensive combat die roll.
Note: Eligible air units can combine all of the above Movement Allowance bonuses for a maximum movement increase of 18 hexes.
22.2 Alternate Air Wings on US Aircraft Carriers
The US Navy is in the process of reorganizing its carrier air wings to provide more long-range striking power at the expense of shorter-ranged interceptors. To simulate this, the US CV's KHawk and Vlson (not Midway and Wasp) should each have one more A6 ATK unit added to their aircraft complement while one F18 INT unit should be removed. Two extra US A6 air units are included in the counter-mix.
22.3 Soviet "Tattletales"
In peacetime, the Soviet Navy keeps a sharp watch on Allied warships with "tattletales" (small intelligence vessels). To reflect this tactic, all Allied surface units not in ports are automatically
(A page is missing from the available scan at this point — physical page 47 — covering the remainder of 22.3 and all of Section 22.4 High Speeds. The text resumes with 22.5 below.)
22.5 Soviet SS-22 Missiles
The Soviet Union has a number of ground-based SS-22 missiles under the control of their Army. The Soviet player can make a total of four SS-22 missile attacks during the game (but never more than one per turn). On the Soviet Logistics Roster are four SS-22 boxes, and as the Soviet player uses them, he should check off these boxes. SS-22 attacks are resolved exactly like Cruise Missile attacks (see 10.5). However, they can be directed only against Allied bases situated within 11 hexes of Nakhodka (0327) from where they are launched. An SS-22 attack has a Cruise Missile Attack value of 30. SS-22 attacks cannot be combined with normal Cruise Missile attacks. An SS-22 attack can never cause more than a Damage 2 result against an Allied base (if an SS-22 attack would result in a cumulative destroyed result against the base, this result is ignored).
Note: The SS-22 missile can use chemical weapons (which are not otherwise used in the game) and the damage caused is a result of lingering chemicals, not of actual physical damage to the base.
22.6 Close Combat
If a player declares an SSM attack at one-hex range, he can use the Close Combat option. If so, the SSM attack will be enhanced, but enemy units are allowed to respond, even though they are inactive.
Restrictions: Only an active surface unit (or stack) can use Close Combat. Enemy targets must be in an adjacent hex, not separated by a land hexside. A unit cannot use Close Combat and then make a different SSM attack in the same segment.
Executing Close Combat: All surface combat units have a Close Combat value, which is simply an enhanced SSM value taking close-range weapons, such as guns and helicopters into account. If Close Combat is used, two SSM Combats are subsequently resolved: one for the active player and one for the inactive player. With the following exceptions, these attacks are resolved normally:
- Participating units use their Close Combat (not their SSM) values.
- The attacker is permitted to choose his targets freely; he does not have to roll a die to determine whether the targets must be chosen from the top or the bottom of the stack.
- When performing defensive combat, the defender does not take the Area Anti-Air values of any of his units into account. They are simply ignored.
- F14 units in CAP missions and EW units (either the attacker's or the defender's) do not modify defensive combat die rolls.
- Restricted water hexes do not modify the attacker's combat die roll.
When Close Combat is declared, the attacker rolls a die. If the roll is odd, the active player executes his attack first; if the roll is even, the inactive player goes first. After a player resolves the first attack, the opposing player can make his attack, assuming any of his units survived. Damage inflicted in Close Combat is applied immediately. Close Combat expends SSM ammunition normally for both players. A player can use intensive and maximum attacks in Close Combat (see 16.2); if so, his Close Combat values are enhanced, not his SSM values.
Surface combat units with no SSM Attack values and surface combat units with no more unchecked SSM boxes may perform Close Combat, but they cannot use intensive and maximum attacks. A unit with no unchecked SSM boxes has a Close Combat value equal to its printed Close Combat value minus its SSM Attack value.
Terminating Close Combat: As soon as the second attack in Close Combat occurs, the combat is over and the active force can resume its activities. The status of inactive units participating in Close Combat is unaffected. As long as they did not activate earlier in the phase, they can activate normally — even though they participated in this combat.
22.7 Soviet Type 65 Attacks
If a Soviet submarine with a Torpedo value of 22 participates in a Torpedo attack, the Soviet player can declare this as a Type 65 attack. (The Type 65 torpedo is an extremely long-range, wake-following weapon.) Type 65 attacks expend Torpedo ammunition normally.
A Type 65 Torpedo attack is resolved normally with the following exceptions:
- The Soviet player rolls a die prior to combat resolution. If the die roll is even, only Allied units in the top of the defending stack can be chosen as targets. If the roll is odd, only units in the bottom of the stack can be chosen as targets.
- The Allied player does not perform a Defensive die roll.
- The Soviet player automatically subtracts three from his attack die roll.
- Two is not subtracted from a detection attempt die roll following a Type 65 attack (see 9.2).
22.8 US Aircraft Carriers as Oilers
All US aircraft carriers (not counting Wasp) and the BB Msour can also act as OL (oiler) replenishment units without affecting their normal capabilities. Each of these units has five Fuel Point (FP) boxes on the Logistics Roster which are used only when this option is employed. The FP boxes can be used to replenish friendly surface units at-sea (see 16.6). If one of these units replenishes in-port, all check marks in the FP boxes are erased along with the ammunition boxes. These units can also be replenished at-sea by any US replenishment unit with FP boxes; for each box checked off on the replenishment unit, one box is erased on the CV or BB up to a maximum of five (see 16.6). US CV and BB units cannot replenish other units in squall and storm zones.
22.9 Coordinated Air Strikes
If an active air unit or stack enters a hex with an airfield or a carrier containing friendly air units that have not yet activated in the current segment, the air units on the airfield/carrier can join the active force and move and attack with it as long as the addition of these units does not enlarge the active force to more than four units. The new Movement Allowance of this force is either the lowest Movement Allowance among the air units just added to the force or the remaining Movement Allowance of the original active force — whichever is lower.
When returning to an airfield, the attacker can "drop off" some units in eligible airfields and then continue moving back to another airfield. However, air units returning to an airfield different from the one in which they started the segment suffer penalties (see 5.4). After returning to base, the air units that participated in a coordinated strike are not allowed to activate for the rest of the segment.
23.0 Victory Points
(A gap in the available scan omits Sections 23.1 Victory Point Awards, 23.2 Unloading, and 23.3 Victory Point Multiples. The text resumes with 23.4 below.)
23.4 Recording Victory Points
Players should record their VP gains on their Player Record. At the end of the game, after applying all VP multiples (see 23.3), each player should determine his final VP sum. The Soviet sum is then subtracted from the Allied sum and the result is applied to the chart below to determine a winner:
| Final Allied VP Total | Victory Level |
|---|---|
| +201 or more | Allied Decisive Victory |
| +101 to +200 | Allied Substantive Victory |
| +1 to +100 | Allied Marginal Victory |
| -99 to 0 | Soviet Marginal Victory |
| -199 to -100 | Soviet Substantive Victory |
| -200 or less | Soviet Decisive Victory |
24.0 Advanced Game Scenarios
There are four Advanced Game Scenarios, each of which can be played in many different ways. To begin one of the four Advanced Game Scenarios, follow this procedure:
- Choose Sides: One side must be Allied and the other Soviet.
- Time of Year: The players must agree to the time of year in which the scenario will take place (see 15.0).
- Game Length: The players can make the scenario short, medium, or long. The length of the game may modify Armistice Table die rolls (see 17.1). The game lasts until the Armistice marker reaches the "Armistice" box or until the end of Game Turn 36, whichever comes first.
- Preparedness Level: The players must agree upon one of three Preparedness Levels: Low, Moderate, or High. This level determines the number of units available to a player at the start of the game.
- Set Up Maps: The three maps are set up. Note the north and south maps overlap the central map.
- Deploy: The players deploy their units on the map (see 24.1). Also, the players' Reinforcement markers are placed in the appropriate boxes on their Reinforcement Tracks.
- Begin Game: Place the Game Turn marker in the first space on the Game Turn Track. Place the Armistice marker in the "At Start" box on the Armistice Track. Begin Game Turn 1.
This die roll continues indefinitely to determine the player who deploys a free set-up submarine or surface group. When one player has no more free set-up units, no more die rolls are made and the player with remaining free set-up units deploys them all on the map.
Free Set-up Restrictions: When free set-up units are deployed on the map, they are subject to these placement restrictions:
- They cannot be deployed in or adjacent to a base hex or an enemy close defense hex.
- They cannot be deployed in or adjacent to any hex containing enemy units.
- They cannot be deployed in the same hex as any friendly units. However, all units in a surface group must be deployed in the same hex.
US F18 Unit on Iwakuni: One of the US F18's on Iwakuni (1137) can begin a scenario either assigned to Midway or based on the airfield. Once the Allied player has made his decision, he cannot reverse it. The F18 must remain on the carrier or the airfield. However, if the F18 is eliminated, it can be brought back as a replacement unit and can then be assigned to Midway or to any other eligible US airfield.
Group Markers: Once all units are deployed on the map, both players can place Task Group/Force markers on their eligible stacks of surface units (see 6.2).
Optional Deployment: In order to facilitate set-up and to allow players to experiment with the capabilities of their units, the players may decide to ignore the names of units in deployment instructions and instead select any units of the same type and nationality for set-up in the indicated location.
24.1 Deployment
After selecting a Preparedness Level, the players deploy their units on the map as per the instructions of their Deployment Cards. At Preparedness Level Moderate, the players deploy the units listed under this heading in addition to Preparedness Level Low; at Preparedness Level High, all units at all Preparedness Levels are deployed. Deployment is performed as follows:
- Each player deploys his rigid set-up units.
- The players perform the free set-up procedure (see below).
Replenishment Units: Replenishment units are printed in italics on the Deployment Cards. Do not use these units unless the Logistics option (see 16.0) is being used.
Free Set-up Procedure: At all Preparedness Levels, each player has "free set-up" units. These are either individual submarines or numbered groups of surface units. Free set-up units are provided with specific deployment instructions, although they are placed on the map they must adhere to free set-up restrictions (see below). The free set-up procedure is performed as follows:
- The Allied player rolls a die. On an even roll, the Allied player can deploy either one of his free set-up submarines or one of his free set-up surface groups.
(A gap in the available scan omits the rest of the free set-up procedure and the full text of Sections 24.2 through 24.6 — Scenario 10: Pacific Sideshow, Scenario 11: The Korean War, Scenario 12: Invasion of Japan, Scenario 13: World War Three, and Creating Scenarios — could not be transcribed from the sources located.)
Situation Analysis
by Joseph M. Balkoski
There has never been a fleet in the history of the world with the global responsibilities of the contemporary US Navy. The continuous projection of sea power in remote areas of the world is unparalleled in naval history. Even at the height of the British Empire, when Royal Navy warships sailed the Seven Seas with impunity, the British were never forced to maintain a major portion of their battle fleet on foreign stations, tens of thousands of miles from home. The fundamental threat to British security was generally in European waters; and it was there that the vast majority of their battleships were deployed. When Royal Navy vessels were dispatched "east of Suez," they ran virtually no chance of encountering an enemy with a formidable navy.
Since the establishment of the "Great White Fleet" in the early 20th century, US naval strategy significantly diverged from the British model, for threats to American security have rarely, if ever, been in home waters. Instead, they have been in foreign seas at enormous distances from American shores, usually in regions totally unfamiliar to Americans. On 1 May 1898, the US Navy's first modern fleet action was fought in Manila Bay in the Philippines when Admiral George Dewey defeated the Spanish Pacific flotilla in a locale that virtually no Americans had ever seen. Eighteen years later, the Royal Navy's most significant engagement of the 20th century was fought at Jutland, almost within earshot of the British east coast. In contrast, the US Navy waged the Battle of Leyte Gulf — probably the largest naval battle in history — 7,500 miles from home.
Extended Diplomacy
As the United States established naval preeminence after the Second World War, the US Navy assumed a broad diplomatic role around the globe. The collapse of the British Empire and drastic British military cutbacks left power vacuums in several remote areas of the world, particularly in the Mediterranean and the Far East, and the US Navy shortly found itself with an expanded mission. Also, the outbreak of the Korean War in 1950 focused American diplomacy and military strategy on the Asian mainland, a fixation that lasted throughout the 1960's and Vietnam and which is continuing in the present day. Moreover, the growing European and North American dependence on Middle East oil after the Second World War, accompanied by increasing Arab dissatisfaction with the West, has led the US Navy to use its Navy as a political tool in this region with increasing frequency. Finally, the dramatic expansion of the Soviet Navy since 1960 has forced an increased tempo of US Navy operations in all corners of the world — a state of peacetime vigilance unparalleled in American history.
In addition to its traditional spheres of influence in the Atlantic and Pacific, the American fleet has assumed significant roles in the Mediterranean, Far East, and the Indian Ocean since the end of the Second World War — regions that had heretofore witnessed only a rare American presence. The Iraqi attack on the US frigate Stark in the Persian Gulf during May 1987 focused intense public scrutiny on these ambitious policies. Even though the Navy has maintained a presence in this region (labeled the "Middle East Force") since the late 1940's, the death of 37 sailors and the near loss of the ship painfully demonstrated that the strategy of forward deployment has its price, especially in an area so few Americans understand.
Weak Links
The role demanded of the Navy in American diplomacy places enormous strain on the fleet. The most significant problem is the retention of a large pool of skilled manpower, for morale difficulties are great among sailors facing six-month separations from homes and families. Also, the logistical demands of ships operating in far-flung corners of the world necessitates a continuous, intense effort to keep them supplied. Since many of the Navy's regular patrol areas are about as far from the United States as one can get, this logistical effort is no easy task; in wartime, it would be infinitely more difficult.
A strategy of forward deployment also necessitates the establishment of bases in foreign countries, the use of which is usually a sensitive political issue both at home and abroad. The US military bases in the Philippines, for example, are the linchpins of American Pacific strategy. They face an uncertain future; their closing would force an overhaul of US diplomacy in the region. Where bases have not been available, the United States has had to build them. Fifteen years ago, Diego Garcia was a tiny reef in the Indian Ocean, virtually uninhabited; today, it is a major American military base, about as isolated from the United States as one can imagine.
Bases on foreign soil are likely to be vulnerable to attack or sabotage, but any effort to enhance their defensive capabilities adds significantly to the logistical effort required to maintain them. Moreover, the more permanent the bases appear to be, the more sensitive the use of those bases may be to the host country. There was a storm of protest from our closest ally, Great Britain, when a squadron of American F-111's stationed at a British airfield was used in the April 1986 air strike against Libya. Another ally, France, refused to allow passage of the aircraft over its airspace. Reaction to the use of combat aircraft from bases in Japan or the Philippines would probably be much more severe.
US Strategy
The US Navy is a fighting force above all. The implementation of a real military strategy, however, has been significantly affected by the Navy's peacetime role as a tool of American diplomacy. The problem is one of concentration of force. The US Navy is, without doubt, the most powerful fleet in the world, and it will be for years to come; but its worldwide responsibilities are more encompassing than all other Western nations combined. The only question of importance in a military sense is: How many ships can the Navy get to a crisis point and how fast can it get them there? It does no good to have a 600-ship Navy if it must fight a decisive first battle of some future war with only five ships.
The United States actually has two different Navies: one for the Atlantic and one for the Pacific. The two are roughly equal in size, but the ability of one to reinforce the other on short notice is not good. If the Panama Canal is not available — it is now a Panamanian canal — this problem will become considerably worse. Both the Atlantic and Pacific Fleets rotate their warships on forward deployments: Atlantic units go to the Mediterranean while Pacific units operate in the Far East. Both fleets contribute vessels to Indian Ocean and Persian Gulf patrols. Because of the great distance between the Far East and the United States, however, and given the current international climate, one can expect a continuation of the Navy's commitment to a naval renaissance. (The fourth battleship, Wisconsin, will re-enter service in 1989.) The 16-inch guns of the battleships are no longer their most potent weapons (although they still attract a great deal of attention). Instead, their complement of 32 Tomahawk cruise missiles apiece — four times as many as any other US Navy surface warship (except for those with vertical missile launching systems) — is their primary strength. Although the exact mixture of the Tomahawks onboard each ship is unknown, some are undoubtedly of the long-range strategic variant, while others are anti-shipping versions with a 250-mile range. On occasion, battleships have taken the place of carriers on long-range patrols, especially in areas where air cover can be provided from land or where potential threats from the air are non-existent. The battleships, however, guzzle fuel at an alarming rate and require very large crews: their complement of more than 1,500 men apiece is four times the size of an Aegis cruiser's crew, although the cruiser is essentially a more valuable warship.
(A gap in the available scan omits the remainder of the Situation Analysis essay, covering the closing sections mentioned in the outline — Aircraft Carrier Controversy, Lessons of the Falklands, Submarines and Modern ASW Warfare, Logistics and Modern Warfare, and Final Notes.)
Military Forces
United States
Aircraft Carriers
| Name | Class | Year |
|---|---|---|
| Carl Vinson | Nimitz | 1982 |
| Kitty Hawk | Kitty Hawk | 1961 |
| Midway | Midway | 1945 |
Notes: The Pacific Fleet has seven of the Navy's fifteen aircraft carriers. However, one or two (and sometimes more) of the seven carriers are unavailable for deployment at any given time due to long-term overhaul or "selected restricted availability" (SRA) shipyard work. In mid-1988, Kitty Hawk will enter Philadelphia Naval Shipyard for a two and one-half year service life extension program (SLEP), which will extend her commissioning well into the 21st century. At least two of the Pacific Fleet's flattops, although one of these may make a two to four-month patrol in the Indian Ocean and the Arabian Sea, Midway is home-ported in Yokosuka, Japan, and is permanently attached to the 7th Fleet. When another carrier is available, it generally operates in the southwest Pacific, where the American naval base at Subic Bay in the Philippines can be used for repair, replenishment, and liberty calls. (The north Pacific, including the Aleutian Islands and the Bering Sea, is an area of 3rd Fleet responsibility. Occasionally, a 3rd Fleet carrier will deploy to this region.)
Of the three carriers represented in the game, Vinson is by far the most powerful. In addition to her nuclear propulsion (her reactors can last 15 years), she has significantly more space aboard for aviation ordnance and fuel than her older cousins. The air wings deployed onboard Vinson and Kitty Hawk are identical, although they are in the midst of organizational change. To add more long-range striking power, each wing will lose four F-14 Tomcats and four F/A-18 Hornets (as well as all its KA-6D refueling aircraft) and gain ten A-6 Intruders. Midway, being an older and smaller carrier, has a completely different air wing. She cannot handle the large and heavy F-14 Tomcat and, as a result, she deploys three squadrons of F/A-18 Hornets for interception or attack missions (in addition to a fourth squadron may be added), plus the normal A-6 and support aircraft squadrons. (Midway does not, however, operate S-3 Viking ASW aircraft.) Each of the carriers in the game deploys a squadron of SH-3G Sea King helicopters for close ASW pro-
Cruisers
| Name | Class | Year |
|---|---|---|
| Antietam | Ticonderoga | 1987 |
| Harry E. Yarnell | Leahy | 1963 |
| Long Beach | Long Beach | 1961 |
| Reeves | Leahy | 1964 |
| Sterett | Belknap | 1967 |
| Truxtun | Truxtun | 1967 |
| Valley Forge | Ticonderoga | 1986 |
Notes: American cruisers are primarily air defense ships which are intended to operate as part of carrier battle groups. Antietam and Valley Forge are of the vaunted Aegis type, which is probably the most sophisticated air defense system in the world. Each ship's SPY-1A radar is supposedly capable of controlling more than a dozen missiles in flight, three to four times the capacity of older anti-aircraft cruisers and destroyers. Antietam is the third of the class to be equipped with vertical launchers below decks for its missiles. This launch system speeds up the firing procedure, protects the missiles from fragmentation and water damage, and enables far larger quantities of weapons to be carried. (So far, only Tomahawks and Standard SAM's may be fired from these launchers; ASROC ASW missiles may not, although this capability is planned for the early 1990's.)
Although not nearly as efficient as the Aegis cruisers in detection and tracking techniques, some of the non-Aegis cruisers and destroyers carry a comparable weight of firepower.
(The remainder of the Military Forces appendix — the rest of the United States Navy's destroyer, frigate, and submarine classes, plus the equivalent order-of-battle sections for the Soviet, Japanese, South Korean, Australian, Canadian, Philippine, Taiwanese, Chinese, North Korean, and Vietnamese navies, and the closing Player Charts and Tables appendix — could not be transcribed from the sources located within the time available. It follows the same format as the Aircraft Carriers and Cruisers entries above: a table of ship names, classes, and commissioning years per type, with an accompanying notes paragraph.)