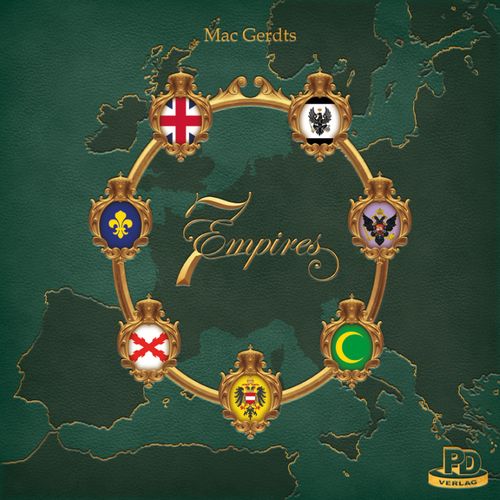
7 Empires
7 Empires Rulebook
Table of Contents
Table of Contents
1. Game Material
4 Storage Boxes - The boxes are used to store the game components. During the game, the materials for the Empires can be stored in the 4 lids and 3 of the bases.
Material of the Empires
- 47 two-masters
- 47 three-masters
- 49 infantry
- 49 artillery
- 7 power markers
- 26 city tiles
- 26 palace tiles
- 140 flags
- 17 hourglass tiles
- 6 position tiles (1 to 6)
- 18 victory point tiles (12 x 50 and 6 x 100)
- 1 game board
- 7 action marker trays
- 35 action markers (7 per color)
Each color represents the material of one Empire. Each Empire has one power marker and 20 flags. The number of city and palace tiles corresponds to the number of city regions of the Empire.
The number of military units for each Empire is listed in parentheses in the following order (two-masters, three-masters, infantry, artillery):
- Great Britain: red (8, 8, 6, 6)
- Prussia: gray (6, 6, 7, 7)
- Russia: pink (7, 7, 7, 7)
- Ottomans: green (6, 6, 7, 7)
- Habsburg: yellow (6, 6, 8, 8)
- France: blue (7, 7, 8, 8)
- Spain: white (7, 7, 6, 6)
7 monarchs (1 per Empire), 49 influence cards (7 per Empire), 7 worker influence cards (1 per Empire).
16 double-sided starting or overview cards displaying: Timeline setup (5 pages), Overview "campaign" (4 pages), Overview "your turn" (4 pages), Overview "starting distribution" (15 pages).
4 reference sheets, orange pawn (for the starting player).
The term "player" is occasionally used to simplify the language and stands for anyone who plays this game.
2. Game Setup
1. Materials of the Empires Store the colored materials (military units, cities, palaces, and flags) of the Empires as a supply in the corresponding boxes (base or lid).
2. Power Markers Place the seven markers on space 0 of the power track on the game board.
3. Cities and Palaces The 7 Empires start with initial cities and a palace in their capital city, which are placed as shown on the game board. The cities with the dashed borders remain unoccupied. The setup for Great Britain is depicted on the board. Edinburgh remains unoccupied. Place the palace with the two-crown side face-up.
4. Flag Spaces and Action Markers Place the 7 trays for the action markers to the left of the flag spaces of the Empires. Place the 7 blue action markers on position III and the 7 red action markers on position II of the flag trays. Place the remaining 3 action markers on the action marker tray. The setup for Russia and Great Britain is illustrated here.
5. Influence Cards Sort the 49 influence cards by color with values 3 to 7 in the following order: Nobility (A) is placed on top, followed by Clergy (B), Bourgeoisie (C), Magistrate and the three Peasants at the bottom. Place these 7 stacks on the corresponding flag spaces of the game board.
6. Worker Influence Cards Form a separate stack with the worker influence cards of all the Empires next to the game board.
7. Starting player pawn and position tiles Choose a starting player at random and give this person the orange pawn and the position tile 1. The other position tiles are assigned in ascending order, clockwise. Any remaining tiles are returned to the box. This assignment of position tiles remains unchanged throughout the entire game.
8. Hourglass tiles and Time track Take the setup card corresponding to the number of players. The example shows the setup card for 4 players. On the left side, 8 hourglass tiles are depicted. Place the tile featuring the laurel on space 1770 of the time track. The other 7 tiles are shuffled face down and randomly distributed with the hourglass side face-up on spaces 1700 to 1760.
The two hourglass tiles shown on the right are added in variants with a longer playtime (see Variants). The letters in the top right corner of the card provide information for an additional variant. In this variant, all influence cards are selected individually by the players themselves. This interesting variant requires some experience with the game and extends the playtime.
9. Influence Cards and Monarchs Choose a starting distribution card corresponding to the number of players. The example displays a card for 5 players. Each player takes the influence cards matching the position tile they have (A: Nobility, B: Clergy, C: Bourgeoisie). Whoever has the most influence over any particular Empire takes the corresponding monarch (indicated by a crown on the distribution card).
Throughout the game, the player with the greatest sum on influence cards has the most influence and is in possession of the monarch. Ties are broken by the highest letter on influence cards: A > B > C. Put down your influence cards so everyone can see them throughout the game.
10. Starting Units Place starting infantry units in the capital cities (with a palace) of each Empire depending on the number of influence cards distributed in step 9:
- 0 influence cards: 3 x infantry
- 1 influence card: 2 x infantry
- 2 influence cards: 1 x infantry
- 3 influence cards: 0 x infantry
11. Player Aids Place the reference sheets, the cards "your turn" and "campaign" in a way that all players can look at them easily throughout the game.
Map Legend
- Land Borders - The borders between neutral land regions are depicted in brown/black.
- Compass Lines - The star-shaped light-blue lines radiating from the compass are not meant to be sea borders.
- Neutral Land Regions - They are depicted in brown (e.g. Sweden).
- Sea Borders - Sea borders are depicted in blue.
- Sea Region - e.g. the North Sea.
- Borders of City Regions - The borders between city regions are depicted in black.
- City Region - e.g. Paris.
- River - The rivers, in this case the Loire, are for decorative purposes only. They should not be confused with any boundaries.
- Anchor - Anchors indicate harbor cities. Ships may only embark on sea in a region with an anchor.
3. Game Flow
The game is played over 8 decades. On your turn, you choose an Empire that has not yet taken its turn and select the action for that Empire. Once all Empires have taken their turn, the current decade ends.
3.1. Action Mechanism
The following example illustrates the situation for the Habsburg Empire. Habsburg has not yet taken its turn in the current decade as there is no action marker on position I. If you choose an action for Habsburg, you move one of the action markers from its action marker tray to position I of the flag tray and perform the corresponding action. In the example shown, only the actions Palace, Attack, or Build & Deploy are possible. If the yellow action marker (Build & Deploy) is selected, the depicted situation occurs. Once all Empires have taken their turn, the next decade begins, and all action markers on the flag tray are shifted one step to the left. Put the leftmost action marker from the game board (position III) back into the tray. Afterwards the game state of Habsburg will look like the picture on the right.
3.2. Your turn
Starting with the first player, players take turns in clockwise order. During your turn, you act for one of the Empires. There are certain rules for selecting an Empire during your turn:
a) If you are in possession of a monarch, whose Empire has not acted during the current decade (there is currently no action marker on position I), choose one of those Empires, take an available action marker from its action marker tray of that Empire and place it on position I to take the corresponding action.
b) If a) does not apply: Choose one of the Empires that has not yet acted during the current decade and of which you have the highest combined influence (the sum on all your influence cards from that Empire). You need a minimum influence of 3 in order to act with any Empire. In case you have an equal amount of influence in more than one Empire, you may act with one of them of your choosing. Take an available action marker from the action marker tray of that Empire and put in on position I to take the action (The will of the monarch can be ignored in this case.).
c) If neither a) nor b) apply: Choose one of the Empires that has not yet acted during the current decade. The player who is currently in possession of the monarch takes an available action marker from the action marker tray of that Empire, puts it on position I and executes the corresponding action for that Empire. This still counts as your turn although the other player gets to make all the decisions for that turn. Therefore, turn order does not change as well. As a compensation, you choose any available city region of any Empire and deploy one unit the city can produce at that time. This happens before the chosen player acts on their behalf. (You may not choose a city region currently occupied by a foreign Empire). At the end of your turn, the monarch of the Empire where the unit was placed in must reduce the total number of units down to 3 if necessary.
3.3. A new decade
The current decade ends when all 7 Empires have moved exactly once.
-
The person to the left of the player who has taken the last turn receives the orange pawn and becomes the starting player for the next decade. Therefore, no players are skipped taking turns during the game.
-
Now flip over the next hourglass tile and resolve its effect depending on the depicted symbol:
- Player tile with position number: The depicted player (in this example player 1) has the first choice and picks an available influence card from any Empire to add to their personal display. The other players do the same in clockwise order until each player has selected an influence card.
- Orange pawn: The player currently in possession of the orange pawn has the first choice and picks an available influence card from any Empire to add to their personal display. The other players do the same in clockwise order until each player has selected an influence card.
- Worker: The player currently in possession of the orange pawn has the first choice and picks an available worker influence card (value=1) from the stack beside the game board to add to their personal display. The other players do the same in clockwise order until each player has selected a worker influence card.
- Infantry: All 7 monarchs choose one of their cities and add an infantry to it. Each monarch chooses one of its own city regions, even if it cannot produce units yet or if it is a harbor city. As usual you cannot choose a city region currently occupied by a foreign unit or a city region that already has 3 of its own units in it.
- Two-master: All 7 monarchs choose one of their harbor cities and place a two-masted-ship in it. As usual you cannot choose a city region currently occupied by a foreign unit. After placing the two-master, monarchs must reduce the total number of units down to 3 if necessary.
-
Finally shift all action markers on the flag tray one step to the left. Markers on position III are moved onto their respective action marker tray as described under 3.1. Markers from position I go to position II and markers from position II to position III.
The last decade When the tile with the laurel is flipped, the last decade is over. No more actions can be executed and players proceed to end game scoring.
4. Actions
4.1. Build & Deploy
Carry out this action in two steps:
- Build: The Empire builds a new city or upgrades an existing one. Do this only if no foreign Empire has a military unit in the city you choose. Place a city tile in the corresponding space if you build a new city (dashed borders). Depending on the illustration either place a city tile with a two-master or a city tile with an infantry (one-crown side face up). If you upgrade a city, simply flip an existing tile to its other side (now showing either artillery or three-master, each with 2 crowns).
- Deploy: After building choose either a) or b): a) Deploy one unit of the type the city can produce in each city you own. OR b) Choose one of your own city regions with a palace and deploy 3 units there. The deployed units must be of the type that city can produce. If at the end of your turn, there are more than 3 units in that region, you must reduce their number to 3 by removing excess units from the board.
If the supply of units of an Empire is exhausted, no more units of that type can be deployed. Exception: In this case, players may opt to produce infantry instead of artillery or two-masters instead of three-masters.
Example: Ship movement — The Ottoman three-master in Salonica could move via the Aegean Sea (the coastal line being the first crossed border) and on through the Ionian Sea (second crossed border) to the Tyrrhenian Sea (third crossed border). It could not reach the Ligurian Sea then. The two-master from the Adriatic Sea could also reach the Tyrrhenian Sea but not the Ligurian Sea since it can only move two steps.
4.2. Move & Fight
Carry out this action in three steps: First, move all your ships, then all your land units and finally put down flags in occupied regions.
1. Ships
Move the ships of the Empire you're acting for one after another in any order you choose. The first step of a new ship is always from the harbor city where it was built into the adjacent sea region marked with an anchor. Once at sea, ships may never return to land regions. Two-masters may move across two borders and three-masters across three borders. When you finish a movement, lay down the ship as a sign that you have already moved that ship during this turn. After having moved all the ships you want, put them back in their upright position.
The movement of a ship may not end in a region where there is a ship of the same color. You may cross regions with ships you own or foreign ships without having to ask for permission.
If the movement of a ship ends in a region with a foreign ship, a fight is triggered automatically. When passing a foreign ship, the active Empire may decide to either initiate a fight or "slip through" to an adjacent region. In a fight, ships will be both eliminated 1:1 and put back into their respective storage boxes. Three-masters have the same fighting power as two-masters. Ships may never attack land regions from sea, but they can fight while still laying in a harbor city.
Example: Ship movement & fight — Great Britain has 3 three-masters that all have to set sail into the North Sea. They could pass the Prussian and proceed to three different sea regions: one to the North Atlantic, one to the Baltic Sea and one to the Gulf of Bothnia. Great Britain would then take possession of these 3 sea regions by putting a flag into each region. Great Britain might instead opt to fight the Prussian three-master in the North Sea. In this case, both ships would be eliminated and put back into their respective storage boxes.
2. Land units
Move the land units of the Empire you're acting for one after another in any order you choose. Both infantry and artillery can cross up to two borders. They can move on land or be transported with ships of the same color to regions further away. Their movement needs to end in a land region (neutral brown region or city region of an Empire).
If a land unit ends their movement in a region with at least one foreign unit, a fight is triggered automatically. In case of several units, the entering unit decides which unit to fight against. Land units are both eliminated 1:1 with one exception: If an artillery ends their movement in a region with an infantry, the artillery eliminates the foreign infantry 1:0. The foreign infantry is put back into its storage box while the artillery remains in the region. If there are still foreign units in a city region after such a fight, the attacked monarch decides which of their units now fights against the artillery. Even if it is another infantry or a ship, the fight against the artillery which has attacked before is resolved 1:1.
After finishing all movements, each sea and neutral land region can only ever hold one military unit. Foreign city regions can only hold one unit as well whereas your own city regions can hold up to 3 units as usual.
Example: Land units move & fight — The Spanish artillery from Madrid attacks Marseille where France currently has 2 infantry and one ship. If Spain were to attack the two-master first, both units would be destroyed. If Spain decides to attack the infantry first, the artillery in Marseille would survive for now while the infantry would be eliminated. In return, France would now decide with which unit to fight against the artillery. They should use the infantry to retaliate though. In doing so France would prevent Spain from moving in with its second artillery, once again fighting 1:0 against the remaining infantry and thus occupying the city region of Marseille. Remember that units of different colors can never coexist in the same region, not even in a city region.
Example: Sea transportation — Great Britain moves its two-master from Liverpool via the Irish Sea to the North Atlantic. An infantry in York can now move to Edinburgh and in a second step, is transported over the North Atlantic to Ireland. The second infantry uses the three-master in the North Sea to move to Norway and continues its way to occupy Sweden. The ship in the North Sea can transport more land units so a third infantry is being transported to Livonia using the ships in the North Sea and in the Baltic Sea and from where it moves on to Western Polonia.
The rules for transporting over sea are as follows:
- You may only use ships of the same color as the land unit.
- Ships may not move anymore since they have finished movement already.
- Land units may cross any coastal line to board ships. Boarding ships at corners is not allowed (e.g. from Sweden to the North Sea or from Norway to the Baltic Sea).
- The whole transport via sea can continue using several ships as a chain of any length. Boarding a ship and landing in another region counts as one step for the land unit. Thus, a land unit can make an additional movement or even undertake another transport via sea either before or after a transport.
- Two-masters can only transport one land unit per turn. Lay the ship down after transporting to indicate it has already been used for transportation purposes this turn.
- Three-masters can transport an unlimited number of land units per turn. Therefore, they don't need to be laid down after each transport.
If at the end of a turn a land unit remains in a foreign city region, that region counts as occupied. Empires cannot deploy units or build cities or palaces in occupied city regions. Their city tiles and palaces don't count for scoring crowns. The last unoccupied city region may never be occupied. An Empire must always be able to deploy new units onto the game board.
3. Placing flags
After all movement and fighting is concluded, flags are placed in every newly occupied neutral land or sea region. Thus flags cannot be placed while moving through a region. If another flag is present in the newly occupied region, replace it with the new one. Exception: City regions can never be marked with any flags.
A flag stays in a region until it is replaced by another flag. Empty regions therefore keep the flag that was placed there before, even if no unit is present anymore.
Example: Placing flags — Continuing the previous example about sea transportation, the final situation is depicted here. Great Britain places a flag in every newly occupied region (Ireland, North Atlantic, Sweden and Western Polonia). In the North Atlantic the Prussian flag is removed.
4.3 Attack
Place any two units either in a single city region or in two different city regions of your Empire. Then immediately move and fight with these two units only. For this action only, you may choose any type of units and even units your cities cannot produce at the moment (think of them as imported mercenaries).
You may deploy land units in any of your city regions and ships in your harbor regions. You may exceed the limit of 3 units per region for this action since you will move with these units right away. Move and fight according to the usual rules. You may use ships you owned before for sea transportation purposes, but you are not allowed to move any units not acquired during this action.
Example: Attack — Habsburg chooses the "Attack" action and places a three-master and an artillery in Trieste. The three-master then moves over the Adriatic Sea to the Ionian Sea. Now the freshly acquired artillery can use the ship route to enter Sicily. The two-master in the Adriatic Sea and the infantry in Budapest were not acquired in this action and thus cannot move this turn. Finally, flags are placed in the Ionian Sea and in Sicily.
4.4 Palace
Carry out this action in two steps:
- Build a new palace or expand an existing one — Build a palace in a city region that doesn't have a palace yet by placing a palace tile with the one-crown side face up in that region. When expanding an existing palace, just flip an existing palace tile to its two-crown side (regular palace) or three-crown side (capital palace). You cannot build or expand a palace in a region currently occupied by a foreign unit.
- Add up power points — Count all crowns on city and palace tiles in your city regions not occupied by foreign units. Add the sum to the existing power points by moving the corresponding marker on the power track by this amount.
Example: Palace — In the example shown here, Habsburg cannot build a palace in Budapest as it is currently under occupation by a foreign infantry unit. The palace in Trieste cannot be expanded as well, as it already shows the two-crown side. The palace in Vienna also shows two crowns but since this is the capital (starting with 2 crowns already), it can be expanded and flipped to its three-crown side. A new palace could also be built in Prague. The options are therefore either flipping the palace in Vienna or placing a new palace tile in Prague (one-crown side face up). In both cases, Habsburg now has 6 crowns and therefore, Habsburg moves its power marker 6 spaces forward.
4.5 Empire
Count all the flags in land and sea regions of your Empire and add the sum to your existing power points on the power track.
Example: Empire — The picture shows all flags of Habsburg (9 in total). If Habsburg plays the "Empire" action, move its power marker 9 spaces forward.
5. Game End and Scoring
After the last decade is completed, the game ends with the flip of the laurel tile. This tile instructs all monarchs to count all their flags and crowns one last time and add the total count to their existing points on the power track. The final score for each Empire is then used to determine their relative strength to each other. Sort the power markers on the corresponding spaces on the game board by placing the Empire with the most points at space 1, the Empire with the second most points at space 2 and so on up to space 7 for the Empire with the fewest points. Then multiply the numbers on all your influence cards by the factor which is indicated on the right of each space. Repeat this for any Empire where you have at least one influence card.
You can use your position tile to track your victory points on the Empire track, taking a "50 victory point tile" each time you pass the end of the track.
The player with the most victory points is the winner. In case of a tie, the tied player with the most influence in the leading Empire is declared the winner. Compare the second best Empire if necessary and continue this process until the tie is resolved in favor of one player.
A tie between Empires on the Empire track is resolved by their relative order on the game board. The higher a flag space, the more ties it wins. Prussia on top wins every tie, whereas Great Britain on the very bottom loses every tie.
Example: final scoring — The Empires are sorted according to their relative strength on the power track. With the following influence cards acquired throughout the game, your score is as follows:
| Empire | Calculation | Points |
|---|---|---|
| France | 5 x 4 | 20 |
| Great Britain | 14 x 2 | 28 |
| Habsburg | 6 x 5 | 30 |
| Ottomans | 10 x 7 | 70 |
| Sum | 148 |
You have reached 148 points.
6. Variants
Drafting the starting influence cards
The timeline setup cards indicate on the top right corner with letters (A: Nobility, B: Clergy, C: Bourgeoisie) how many influence cards of each letter each player receives at the start of the game. In the depicted example of a 3-player game, you each get two Nobility (A), 1 Clergy (B) and 1 Bourgeoisie (C).
Starting with the first player and then clockwise, pick one card from any stack and place it in your display. Then repeat this process starting with the last player in turn order and going back anti-clockwise. Repeat this process until all players have the cards as indicated on the setup card.
The following rules apply for influence card selection:
- Cards have to be picked in order as indicated on the setup card: First all A cards, then all B cards, then all C cards. In this example the first two rounds of drafting players can only take A cards.
- All your influence cards have to be from different Empires.
Now calculate who has the most influence for all the Empires. The player with the most influence takes the monarch. In case of a tie, apply: A > B > C.
In this variant, it is possible that no influence cards for an Empire have been selected and the monarch is not distributed. If during your turn there is no Empire where you have the monarch or at least 3 influence that hasn't made a turn in the current decade, choose an action marker for the neutral Empire. You have to act on behalf of that Empire in a peaceful way. This means, you cannot attack any foreign Empires, nor can you occupy city regions of foreign Empires and you cannot enter any regions with foreign flags.
Exception: City regions are still defended by fighting against foreign units that have entered there. If there are several units in that city region, the attacker decides which one is used to defend it. The neutral Empire always grants free passage if the active Empire doesn't want to fight.
Simplified Drafting Variant
When making your pick for influence cards, you may always take the top card of any stack, no matter what letter it depicts. The selection process remains unchanged and you still cannot have more than one card per Empire.
Longer game: 10 or 9 decades
If all players agree to play a longer game, you can play two more decades until 1790. In this case, add the two hourglass tiles depicted on the right side of the timeline setup cards to the mix before shuffling. Place the tile with the laurel on the year 1790 and distribute the rest among the remaining spaces at random with one tile covering each space, hourglass side face-up.
You can also opt for a slightly longer game of 9 decades. In this case, remove one random tile from the setup for 10 decades (see above) and return it to the box without looking at it.
Quickstart
All Empires start with the units preprinted on their cities. For example Spain would start with an infantry in Madrid and a two-master in Barcelona. For France this means a start with 4 units. In this variant you still place the infantry units at the start of the game depending on the number of influence cards taken (apply the limit of 3 units per region).
On the Creation of 7 Empires
Originally inspired by my classic game IMPERIAL, it didn't take long for 7 Empires to develop into its own completely new strategy game. Many elements from IMPERIAL were replaced by different ones. This would not have been possible without the contribution of many board game enthusiasts who constantly contributed fresh ideas and helped to test the game over and over again: Pietro Cremona, Ralph H. Anderson, Sven de Bakker, Daniel Martinez (Dan Titan), Stephan Borowski, Thomas Mumm, Kirsten Schmidt, Claudia Barmbold, Mareike and Björn Andreas, Johann A. Gerdts, Rainer Vogler, Felix Lübeck, the players of Riekhof, SpielDoch in Dortmund, Civitonix near Rome, in Bologna, at Bremer Spieletage, the super-creative graphic designer David Roterberg, Anika Rost and finally my friend and savvy publisher Peter Dörsam with his editorial team JP and Karol. Special thanks go to Frank Lamprecht, who, as an editor, contributed with clever ideas in intense discussions throughout the whole development process. Many people, who cannot be all named here, have helped as well. My sincere thank you to all of you!
Hamburg, September 2024
Mac Gerdts
FAQ
Is it allowed to arrange strategic alliances between Empires? Absolutely. Players can discuss zones of interest or even declare a non-aggression treaty. There is however no way that makes any deal binding by the rules of the game. Players are always free to perform any action according to the rules of the game. Second, be aware that majorities come and go quickly.
Which islands can be occupied? Islands without a name cannot be entered. This is true e.g. for Corsica, Sardinia, Crete and Cyprus. Only Ireland, Sicily and the Berber Coast are island regions where an Empire can set foot on.
What land borders do exist? A land border is a border with a clear border line. Some easily overlooked land borders exist between Bavaria and Switzerland and between Venice and the Papal States. Not connected by land are the following regions: Denmark and Sweden, Sweden and Finland, Ireland and Edinburgh, Madrid and the Berber Coast or Sicily and Naples. All of these cases require a transport by sea.
Can land units be transported from "across corners"? No, a transport by sea requires a clear coastal line between the regions. No transports are allowed from the Baltic Sea to Norway, from the North Sea to Sweden or Paris, from the English Channel to Southern Netherlands, from the Atlantic to Madrid, from the Western Mediterranean Sea to Portugal, from the Ligurian Sea to the Papal States, from the Tyrrhenian Sea to the Tuscany, from the Aegean Sea to Wallachia or from the Black Sea to Constantinople. This counts for both directions respectively.
Does Constantinople consist of several regions? No, like all other regions, Constantinople is a single region with borders to Salonica to the West, Bulgaria to the North and to Konya to the East. The European and Asian parts are not treated separately here. Going by land from Salonica to Konya only crosses two land borders. In the same way, the Aegean Sea surrounds the city on both sides. Going by sea from the Black Sea to the Ionian Sea or to the Levantine Sea only crosses 2 sea borders.