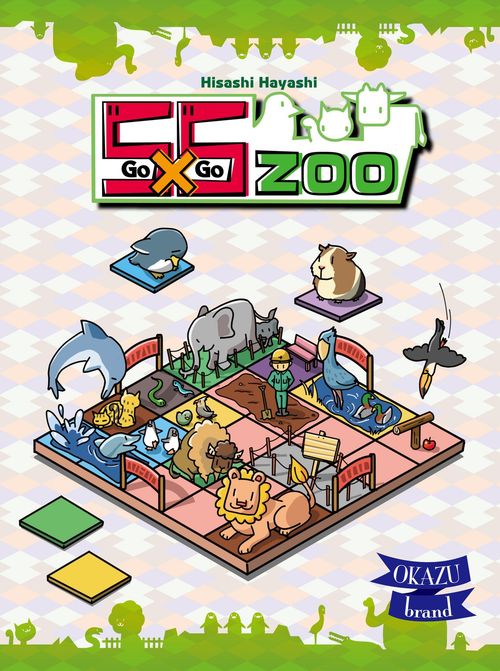
5x5 Zoo
5x5 Zoo Rulebook
Table of Contents
Table of Contents
Game Contents
Game Boards
- 1 Main board
- 1 Scoreboard
- 4 Zoo boards
Wooden pieces
- 75 One Time Customer cubes: 15 cubes each in 5 colours: red, blue, green, yellow, black
- 2 Wild One Time Customer cubes (white cubes)
- 15 Regular Customer meeples: 3 each in 5 colours: red, blue, green, yellow, black
- 4 Victory point discs: 1 each in 4 colours: red, blue, green, yellow
Tiles and tokens
- 65 Animal tiles
- 12 Large animal tiles
- 40 Popularity tokens
- 25 Door tokens
- 5 One Time Customer display tokens
- 4 High score display tokens
Cards
- 15 Special cards
- 28 Request cards
- 25 One Time Customer cards
- 6 Popularity condition cards
- 8 Final bonus cards
- 4 Direction cards
- 1 Start player card
The others
- 4 Player summaries
- 1 Rulebook
Game Setup
We will now explain the game for 2-4 players. For solo play, see the Solo Rules section.
General Setup
-
Place the Main board and the scoreboard in the center of the table. Ensure that there is room of about the same size as the Main board on the left and right sides of the Main board for placing Animal tiles and cards.
-
Group the One Time Customer cubes, Wild One Time Customer cubes, and Regular Customer meeples by shape and colour, and place them in the stock.
-
Shuffle the Animal tiles, Large animal tiles, Special cards, Request cards, and One Time Customer cards face down and create decks. Reserve a place for a discard pile next to the deck of One Time Customer cards.
-
Create stacks of the Popularity tokens and Door tokens and place them in the stock.
-
Shuffle the Final bonus cards face-down. From there, draw three cards and place them face-up at the bottom of the scoreboard.
- If you are new to the game or if you are not familiar with it, we recommend using the Final bonus cards "A", "B", and "C". The rest of the Final bonus cards will not be used in this game, so please return them to the box.
-
Shuffle the Popularity condition cards face-down. From the deck, draw one card and place it face-up at the bottom of the scoreboard.
- If you are new to the game or if you are not familiar with it, we recommend using the "A" Popularity condition card. The rest of the Popularity condition cards will not be used in this game, so please return them to the box.
-
Shuffle the Direction cards face-down. Draw three of them and place them face-up in the Round 1 to Round 3 spaces on top of the main board. The rest of the Direction cards will not be used in this game, so please return them to the box.
-
Shuffle the One Time Customer display tokens face-down.
Player Setup
-
Each player picks one colour of red, blue, green and yellow and receives the following:
- 1 Zoo board of their selected colour. Place it such that the North side is pointing up.
- 1 Victory point disc of their selected colour, placed on the "0" space on the scoreboard.
- 1 High score display token of their selected colour to be in their hand.
- 3 Request cards, drawn from the Request card deck. Place these 3 cards face-up on top of the Zoo board.
- 1 Door token
- 1 Player summary
Components belonging to unused colours will not be used in this game, so you can put them back in the box.
-
From the Start player and going clockwise, each player draws 2 Animal tiles from the deck and places them in two of the four squares marked with a red square on the Zoo board. When placing Animal tiles on the Zoo board, please read the rules on Placing Animal tiles below.
[Example Setup (3 Players) diagram on page 4 of the printed rulebook.]
To Start
Overview
In 5X5 Zoo, you will earn points mainly by collecting animal tiles and visitors (One Time Customer cubes and Regular Customer meeples) and placing them on the zoo board.
About Animal tiles
Animal tiles are classified into the following 6 types:
- Carnivore (red)
- Herbivore (green)
- Aquatic animal (blue)
- Birds (yellow)
- Reptiles (black)
- Park (purple)
There are Animal tiles which take up 1 space and Large animal tiles that take up 2 spaces. Unless otherwise stated, both are treated as "Animal tiles" in the rules.
When in reference to requirements on Special cards or Request cards, Large animal tiles are treated the same as Animal tiles. There are tiles with numbers in star icons on the top left of the Animal tiles, which are worth points at the end of the game.
- Please note that you will not receive points at the moment that they are placed on the Zoo board.
Some Animal tiles also have a "wall" at the edge of the tile, example below.
[Image: an Animal tile with a wall along its right edge.]
About One Time Customer cubes & Regular Customer meeples
In the game, One Time Customer cubes and Regular Customer meeples are both referred to as "visitors" unless otherwise specified.
One Time Customer cubes can only be used in the round they were obtained, but Regular Customer meeples can be used from the round they were obtained in until the end of the game.
There are 5 basic colours for One Time Customer cubes and Regular Customer meeples, each paired with a classification of Animal tile. Visitors of the same colour can be placed on the correspondingly coloured Animal tiles.
- Red ... Carnivorous animals
- Blue ... Aquatic animals
- Green ... Herbivores
- Yellow ... Birds
- Black ... Reptiles
The Park tiles can accommodate all colours of visitors.
There are also white One Time Customer cubes, which are wild cubes. These match all Animal tile types and can be placed on any Animal tile.
Placing Animal tiles
When placing Animal tiles on the Zoo board, they can be placed in any open space (spaces without tiles). Place the size-one Animal tile on a single space on the Zoo board and place the size-two Animal tile on two spaces on the Zoo board. The Zoo board has four directions: north, south, east, and west. Animal tiles also have a fixed orientation. Place the Animal tiles face-up such that the top of the graphic orients towards the north of the Zoo board.
[Image: example of an Animal tile placed with its top oriented north ("up" arrow).]
- For Animal tiles with a ☆ icon, the direction in which the numbers can be read correctly is the right side up. ☆ Animal tiles without icons can be placed in any direction because there is no effect on gameplay.
About One Time Customer cards
The corresponding One Time Customer cubes to be obtained are written on the One Time Customer cards.
If you are instructed to "randomly acquire 1 One Time Customer cube", do the following:
Draw 1 One Time Customer card and obtain 1 One Time Customer cube of that color from stock. After that, the drawn card is discarded as a face-up card into the discard pile.
If there are no One Time Customer cards left in the deck, shuffle the discard pile to make a new deck.
Gameplay Tip: Since there will be many opportunities to draw One Time Customer cards in the game, it may be easier to let one player manage the deck of One Time Customer cards on behalf of the active player to facilitate the game.
About Points
The score is indicated by moving the Victory Points disc on the scoring board. The scoreboard is divided into spaces from 0 to 50 points. If a player goes beyond 50 points, they place a High Score token from their hand in the 50-point space and start again from 0. Similarly, if you exceed 100 or 150 points, place the High Score token in the 100-point or 150-point space.
About Popularity tokens and Door tokens
These are considered to be infinite. If you run out, use a suitable replacement.
Gameplay Rules
This game has 3 rounds in total. After 3 rounds, the final score is then calculated to determine the winner of the game.
Each round consists of the following phases, which will be carried out in order by all players:
- I. Preparation phase
- II. Main phase
- III. Line-up phase
- IV. Scoring phase
I. Preparation phase
-
Clean up any used tiles from the previous round.
- Remove all Animal tiles and Large animal tiles leftover on the right side of the main board, as well as any Special cards leftover on the left side of the main board, and return them to the box; they will not be used for the rest of this game.
- Take the One Time Customer display tokens on the main board and shuffle them face-down.
- Each player returns all the One Time Customer cubes on their Zoo board to the stock and keeps their Regular Customer meeples in their hand.
- Leave in place the Popularity tokens and Door tokens that were placed on the Zoo board in the previous round, as well as Door tokens in players' hands.
-
Place the Animal tiles in the Animal tile area on the right side of the main board. Draw Animal tiles from the stack and place them face-up according to the number printed for each action row on the main board.
- For the top row, place 2 Animal tiles face-up. For the 2nd to 5th row, refer to the number of players. The 6th row has no size-one Animal tiles.
- *Placing the Animal tiles facing up will be easier for players to process the information.
-
Draw Large animal tiles and place them face-up in the Animal tiles area on the right side of the 6th action row on the main board according to the number of players.
- *Placing the Large animal tiles facing up will be easier for players to process the information.
-
From the start player, in clockwise order, draw One Time Customer cards from the deck according to the round, and draw One Time Customer cubes from the stock for each player. The number of cards to be drawn is equal to the round: 1 for round 1, 2 for round 2, 3 for round 3.
- However, due to the effect of some Special cards, additional One Time Customer cubes may be acquired.
II. Main phase
In the main phase, players take actions clockwise starting from the start player. This phase ends when all players have completed 5 actions.
- There should be 2 tiles left in the Animal tile area after 5 turns.
Structure of a Turn
When it is your turn, follow the steps below in order:
- Acquire Animal tiles and One Time Customer cubes
- Use action effects
- Arrange your Animal tiles
When these steps are over, it is the turn of the next player clockwise.
In addition, during the turn, you may win Popularity tokens by satisfying the conditions of the Popularity condition card. For details, please refer to the section on Gaining Popularity with the popularity condition card.
1. Acquire Animal tiles and One Time Customer cubes
Take one of the Animal tiles on the right side of the main board and place it in your hand. In addition, take 1 One Time Customer cube from the stock according to the One Time Customer display token in the same action row as the Animal tile.
2. Use action effects
Use the action effect of the action row on which the Animal tile was taken. Some action rows do not have action effects; in that case, do nothing.
- Second action row: Take one Popularity token from the stock and place them an Animal tile of your choice. However, each Animal tile may only have one token.
- Third action row: Choose one Special card on the left side of the main board and put it in your hand. If there is an (immediate symbol) written on the Special card, execute that effect immediately. Cards with (Game End symbol) or (Immediate & Start of round symbols) are kept in your hand. For the effects of Special cards, please see the Special cards section below.
- Fourth action row: Draw 2 One Time Customer cards, and obtain a total of 2 One Time Customer cubes from the stock by the cards. Place the One Time Customer cubes in your hand.
- Fifth action row: Select and obtain one Regular Customer meeple on the left side of the main board and keep it in your hand.
- Common: 2nd to 5th action rows: Instead of the usual action, you may obtain 1 Door token. Keep the Door tokens you have acquired in your hand.
3. Animal tile placement
Place the Animal tiles you picked or the Animal tiles you earned from the effects of this turn's Special card on your Zoo board.
For more details on placing Animal tiles, see Animal tile placement.
Gaining Popularity with the popularity condition card
Depending on the conditions of the popularity condition card, you may gain popularity at the moment that you acquire Animal tiles during your turn or place Animal tiles on the Zoo board. If you do so, place the Popularity token on the Animal tile that meets the conditions. For more information on the Popularity condition card, please see the Popularity condition card section.
III. Lineup phase
Gameplay tip: In and before the Lineup phase, place and move around visitors on top of the Animal tiles to better visualize your strategy before visitor placement is confirmed in III. Lineup phase.
This phase is performed by all players simultaneously. In this phase, place the visitors (One Time Customer cubes and Regular Customer meeples) on Animal tiles in order starting from the gate indicated on the direction card for this round.
The following steps 1 and 2 are repeated until there are no more visitors at hand or no more can be placed.
- Move to the next Animal tile
- Place visitors (Repeat)
1. Move to the next Animal tile
From your current location (Gate or Animal tile), move to the next adjacent Animal tile. However, you cannot move in the following cases:
- If the Animal tile already has visitors.
- If there is a wall between your current location and the neighbouring Animal tile.
- However, if a Door token is placed between your current location and the neighbouring Animal tile, you can move to it.
- If you do not have a corresponding Visitor for the neighbouring Animal tile.
Example of possible movement
A. The neighbouring tile is an Animal tile with no walls and no visitors, and there is a visitor of that colour in your hand.
B. There is an unoccupied Animal tile adjacent, and there is a visitor of that colour in your hand. There is a wall between the Animal tiles, but there is a Door token which allows movement over.
Example of illegal movement
C. There are no visitors in your hand that match the next Animal tile.
D. There is a wall between Animal tiles without a Door.
E. There are already visitors present on the tile.
2. Place visitors
From the movement in 1, place your visitors on top of the Animal tiles that were moved onto this round. The following visitors can be placed on each animal tile:
- Carnivore: Red or White
- Aquatic: Blue or White
- Herbivore: Green or White
- Birds: Yellow or White
- Reptile: Black or White
- Park: Any colour
You can also execute the following free actions during this phase.
Free actions
At any time during the Lineup phase you can:
- Obtain Door or Popularity Tokens by paying One Time Customer cubes
- By paying any 3 One Time Customer cubes from your hand, you may:
- A. Acquire one Popularity token and immediately place it on your Animal tile of choice.
- B. Acquire one Door token to your hand
- By paying any 3 One Time Customer cubes from your hand, you may:
- Place Door tokens
- You may place Door tokens from your hand on the following spaces:
- A. Between Animal tiles
- B. Between an Animal tile and the Gate
- Door tokens may be placed on borders with or without walls.
- You may place Door tokens from your hand on the following spaces:
When all the visitors have been placed, proceed to IV: Scoring Phase.
Example (Mr. A's Zoo board):
- Mr. A's Zoo board is as follows. His visitors and Door tokens on hand are also shown.
- There was a Carnivore (red) Animal tile next to the gate and a red visitor in hand, so he moved there and placed the red visitor on the Carnivore (red) Animal tile.
- Similarly, a green visitor was placed on the Herbivore (green) Animal tile.
- He places a blue visitor on the Park tile (purple) because visitors of any color can be placed on a Park.
- There is a wall between the current Park tile and the Reptile (black) Animal tile, so movement is blocked for the moment. A Door token was placed to connect through the wall and a black visitor was placed.
- Since there are no yellow visitors, movement to the Bird (yellow) Animal tile is disallowed. However, a white Wild One Time Customer cube replaces a yellow which allows movement to the tile.
- The Animal tile next to it is a Carnivore (red), and only black visitors are left in hand. Movement is now over.
IV. Scoring Phase
In the scoring phase, points can be obtained according to the visitors that entered the zoo in the III. Lineup Phase.
All players will do the following steps in order.
- Lineup score
- Award for Most Visitors
- Fulfilling Request cards
- Change Start Player
1. Lineup score
Start from the starting player, players score the visitors that entered the zoo in III. Lineup phase. Players will score for the following:
- 1 Animal tile with a Visitor: 1 Point
- Each Popularity token placed on an Animal tile that was visited: 1 Point
- A Door token that was utilized: 1 Point
Example: Mr. A's points are as follows:
- 5 Animal tiles with visitors: 5 points
- 2 Popularity tokens on Animal tiles with visitors: 2 points
- 1 Utilized Door: 1 point
8 points in total.
- There is a Popularity token on the Carnivore (red) Animal tile on the top right, but it is not scored because it was not visited.
Gameplay tip: Since they are all 1 point each, just add up all of the above to get your points!
2. Award for Most Visitors
All players will count the number of visitors placed this round.
- Popularity tokens do not count towards this.
The player who has the most visitors obtains 4 points. The player with the second highest number obtains 2 points (not awarded in a 2 player game). If there is a tie for first place, 4 points + 2 points = 6 points will be split amongst the players. If there is a tie for second place, 2 points will be split amongst the players. All fractions will be rounded down.
3. Fulfilling Request cards
Each player checks to see if the Request cards in front of them have been fulfilled. Request cards have icons from each category of Carnivore / Aquatic / Herbivore / Bird / Reptile printed on them. If your zoo contains Animal tiles with visitors matching the Request card, you will obtain the points printed on the bottom right of the card.
As mentioned in the section on Animal tiles, Large animal tiles can be regarded as Animal tiles in regards to fulfilling Request cards. However, each Animal tile can only supply one Request card. If you want to achieve more than one Request card in the same round, you will need to have different Animal tiles for each card.
Example: Mr. A has a Bird x3 & Aquatic x1 Request card, and a Request card for Bird x2 & Reptile x2. In order for Mr. A to achieve these two Request cards, he needs to place visitors on the following Animal tiles: Bird x 5, Reptile x 2, and Aquatic x 1.
4. Change Start Player
The player with the lowest score will be the next Start player; pass that player the Start Player Card. If there is more than one player with the lowest score, the closest player of these players clockwise of the current starting player will be the next starting player.
Game End and Final Scoring
Final Scoring
After three rounds, the final score is calculated to determine the winner of the game.
Follow the steps below to calculate the final score.
- Final bonus card
- Special cards scoring
- Animal tile points
1. Final bonus card
Everyone earns points for each of the three Final bonus cards revealed at the start of the game. The Final bonus card will allow you to score a stipulated number of points if you fulfil certain conditions. For more details, refer to the section on Final bonus cards.
2. Special cards scoring
Some of the Special cards have an icon (hourglass) which refer to the end of the game scoring. The players who own them may score them if they fulfil the conditions on the card. For more details, refer to the section on Special cards.
3. Animal tile points
Each player scores the star value on the top left of the Animal tiles on their Zoo board.
Winning the Game
The player with the most points wins.
In case of a tie, use the following tiebreakers in order:
- Most Popularity tokens
- Most Animal tiles on the Zoo board
- Furthest clockwise from the Start player card
Solo Rules
Play the game alone and aim for better ranking by getting higher scores!
Carry out the same setup as when playing with two players.
However, when arranging Animal tiles on the right side of the main board, line them in two columns from the top to bottom action rows.
The following rules apply for the Solo game. Besides the following rules, all other rules follow the rules when playing with two people.
-
There will be an AI player that removes Animal tiles from the game during II. Action Phase. After the player takes their turn first, the AI will remove the Animal tile from the game subject to the following priority:
- The first tile to the bottom of the animal tile that the player has taken will be removed.
- If there is no tile to the bottom that the player took in his turn the same column, continue to the next column and remove the next available tile from top to bottom.
[Diagram captions: "Tile chosen by player on their turn", "Tile removed by AI". A further diagram shows "There is no animal tile to the bottom that the player took in his turn, so look at it from the top of another row".]
-
In IV Scoring Phase, you will get 4 points if you have visitors higher than the totals listed below:
- 1st round: 7 visitors
- 2nd round: 10 visitors
- 3rd round: 13 visitors
-
Earn the following ranks after calculating the final score:
| Score | Rank |
|---|---|
| Over 160 | Legendary Zookeeper |
| 150-159 | World's Best Zookeeper |
| 140-149 | Chief of the Zoo |
| 130-139 | Outstanding Zoo Head |
| 120-129 | Ordinary Zoomaster |
| 110-119 | Deputy Director |
| 100-109 | Excellent Keeper |
| 80-99 | Normal Keeper |
| 60-79 | Part-time Keeper |
| 59 and under | Totally uninterested in zookeeping |
Card Reference
Special cards
The Special card reference shows six example cards. Each card's icons are shown in the rulebook image; the printed text is given here.
- In the Final Scoring, if an Animal tile of the category indicated by that card is placed on your Zoo board, gain 1 point for each tile. * Keep this card in your hand until the end of the game.
- Gain 3 Points in the Final Scoring. * Keep this card in your hand until the end of the game.
- Immediately draw 1 One Time Customer cube randomly. In addition, randomly obtain 1 One Time Customer cube every round during the I. Preparation Phase. * Keep this card in your hand until the end of the game.
- Immediately gain 1 Door token and 1 random One Time Customer cube.
- Immediately place 1 Popularity token on the Animal tile of your choice and draw 1 One Time Customer cube at random.
- Immediately draw an Animal tile from the stack and place it on your Zoo board.
Popularity condition cards
The Popularity condition card describes the conditions for placing Popularity tokens on Animal tiles. If you fulfil the conditions on the card, you may place a Popularity token on an Animal tile.
- A. Four Corners: If you place an Animal tile on any one of the four corners of the zoo board, place a Popularity token on that Animal tile.
- B. 2+ Walls: If you place an Animal tile that borders more than one wall, place a Popularity token on that Animal tile. The walls can be on the Animal tile itself or another Animal tile.
- C. 3 Animals of the same category: When you place an Animal tile that results in 3 tiles of the same category that are vertically or horizontally connected, place a Popularity token on that Animal tile.
- If you have already obtained a Popularity token from creating a group of 3, you may not gain a Popularity token from that same group.
- D. Last turn of each round: Place a Popularity token on the Animal tile you chose in the last turn of a round.
- These do not apply to Animal tiles gained through Special cards.
- E. First turn of each round: Place a Popularity token on the Animal tile you chose in the first turn of a round.
- These do not apply to Animal tiles gained through Special cards.
- F. Last Animal on each row: For each Animal tile taken in 1. Acquire Animal Tiles and One Time Customer Cubes which is the last tile in the row that it is taken from, place a Popularity token on that Animal tile.
Final bonus cards
The Final bonus cards allow players to gain points at the end of the game by fulfilling various conditions.
- A. Number of visitors in the 3rd round: Gain points according to the number of visitors placed on the Zoo board in the third round according to the chart.
- B. Popular Animals visited in the 3rd round: Gain points according to the number of popular animals that have a visitor placed on them in the third round according to the chart.
- C. Number of filled rows and columns: Gain points according to the number of rows or columns that you have filled to 5 spaces according to the chart.
- D. Number of Connected Walls: Gain points according to your longest connected wall length according to the chart. Walls are connected if they touch each other on the side or corner. Door tokens do not matter. If walls are back-to-back, they count as 2. Gain 1 point per wall.
- E. Number of rows and columns with exactly 3 types of animals: Gain points according to the number of rows or columns that have exactly 3 types of animals according to the chart. Parks count as one category. The row or column does not need to be filled to 5 spaces.
- F. Number of rows and columns with 4-5 types of animals: Gain points according to the number of rows or columns that have 4 or 5 types of animals according to the chart. Parks count as one category. The row or column does not need to be filled to 5 spaces.
- G. Each set of 5 coloured visitors in the 3rd round: Count the number of sets of 5 visitor colours that you have at the end of the 3rd round and refer to the chart for the points. The visitors can be in any Animal tile in your zoo. White cubes cannot be included in a set.
- H. Number of rows and columns with 2 or more walls: Gain points according to the number of rows or columns that have 2 or more walls according to the chart. The walls do not need to be in the middle and Door tokens do not matter. A back-to-back wall counts as a total of two. The row or column does not need to be filled to 5 spaces.
Final bonus card charts
The charts are printed on the cards. Each chart pairs a count (top row) with points (bottom row).
- A (visitors in 3rd round): 10-13 visitors: 1, 2, 4, 6 points; 14-17+ visitors: 8, 10, 12, 15 points.
- B (popular animals visited in 3rd round): 3, 4, 5, 6 animals: 1, 2, 4, 6 points; 7, 8, 9, 10+ animals: 8, 10, 12, 15 points.
- C (filled rows or columns): 2, 3, 4, 5 rows/columns: 1, 2, 4, 6 points; 6, 7, 8, 9+ rows/columns: 8, 10, 12, 15 points.
- D (connected walls): 1 point per wall (no numeric chart; the card shows a wall-times-star icon).
- E (rows/columns with exactly 3 types) and F (rows/columns with 4-5 types): 1, 2, 3, 4 rows/columns: 2, 4, 6, 8 points; 5, 6, 7, 8+ rows/columns: 10, 12, 15, 18 points.
- G (sets of 5 colours in 3rd round): 1 set: 3 points; 2 sets: 7 points; 3+ sets: 12 points.
- H (rows/columns with 2 or more walls): 1, 2, 3, 4 rows/columns: 2, 4, 6, 8 points; 5, 6, 7, 8+ rows/columns: 10, 12, 15, 18 points.
Note: the chart values above are read from the card art in the official rulebook's scoring pages; the wall-count chart on card D has no numbers and is recorded as printed.