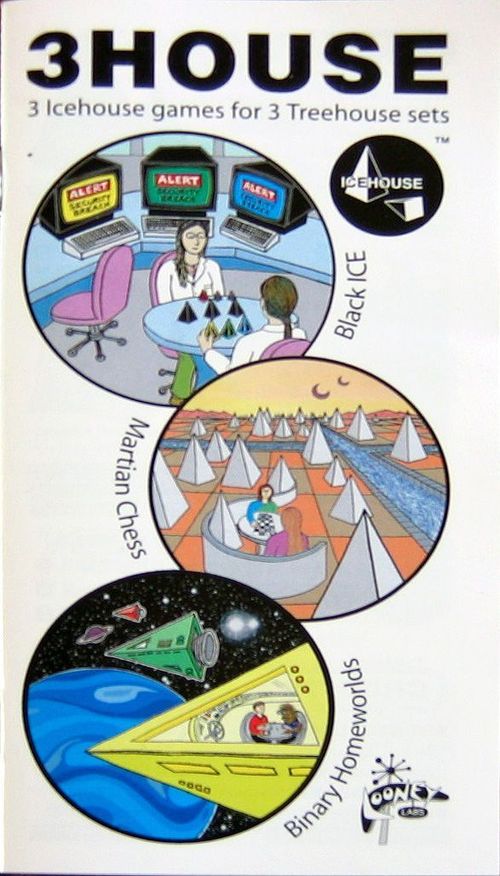
3House
Official rulebook: Looney Labs · PDF
3House Rulebook
Table of Contents
Table of Contents
Black Ice
Introduction: You are a computer hacker trying to break into a secure system. To gain access, you need a three-color password. The secret codes are changed frequently, by the system's ICE (Intrusion Countermeasures Electronics), and if you try using the wrong password, the Black ICE will shut you down. So don't try to open the locks until you have the right colors programmed in!
Number of Players: 2
Equipment: 3 Rainbow Stashes, 3 Treehouse Dice, a cloth bag (which will be called the "Black Box").
Setup: Place the three Large opaque pieces in a row in the center of the table. Make two more rows of opaque pieces, one row in front of each player, running parallel to the center row. Sort out the other pieces by size.
Put all the Smalls into the Black Box. Give all the Mediums to the player who has the Small opaques, and give all the Larges to the player with the Medium opaques. (Your Keys will completely cover your Nodes.)
Hide a random Small pyramid from the Black Box under each of the three Large opaques.
Don't let anyone see the hidden Smalls!
Goal: Match the 3 hidden pyramids with a row of 3 of your own in the same sequence. To win, you must cover the three nodes in your row of base pyramids (your "Keychain") with three of your colored pyramids (your "Keys") which exactly match the colors and sequence of the three Small pyramids (the "Codes") hidden underneath the three Large pyramids (the "Locks") in the center of the table. You also win if your opponent makes a guess and is incorrect.
How to Peek: The best way to look inside a Lock is to cup your hand around it, forming a little shield, and then lift the large piece and look underneath. (Illustration captions: "Make a shield with one hand..." then "...use your other hand to get a TIP on the secret data.")
Turn Options: On your turn, roll three dice, then perform three actions (in any order). Each duplicate turns into a WILD. Examples:
- SWAP + TIP + DIG = SWAP + TIP + DIG
- TIP + HOP + HOP = TIP + HOP + WILD
- DIG + DIG + DIG = DIG + WILD + WILD
The actions are:
- TIP: PEEK: "Tip" open one of the Locks to take a peek at the Code inside.
- SWAP: SWAP: Trade the places of two of the Locks, or swap two of your Keys (but not your opponent's Keys).
- HOP: SET: Place a Key onto a Node of your Keychain. (Anytime you "hop" onto a Node, remove old Key first.)
- DIG: RESET: Open a Lock, take out the Code, and reload it with a new Code.
- AIM: COPY: Cap a Node with a Key of the same* color as whatever your opponent has in that spot. (* rhymes with AIM)
- WILD: Take your choice of any of the other 5 actions.
Null = Wild: If one of your actions is rendered meaningless because none of its options actually do anything, you get a Wild action instead. Thus, Copy becomes Wild if your three Nodes already match your opponent's, and Reset becomes Wild if the Locks are all un-Peeked by your opponent.
Passing: You can also Pass on any action.
How to Reset: Lift the Lock to reveal the old Code on the table. As you reload the Lock, look the other player in the eye -- that way, you can both be sure neither of you sees the new color being loaded. Lastly, return the old Code to the Box. Place the Lock into the Black Box. DIG around in the box, without looking, and push a Code into the Lock. Use your thumb to keep the Code hidden inside the Lock as you return both to the table.
Who Starts: Winner of the previous game goes first.
Game Over: The game ends as soon as someone declares it. If it's your turn, and you think you've got the correct Keys in place, declare "I win!" and reveal the Secret Codes. If you were correct, you win! If you were wrong, say "Wait, I'm wrong! You win!" and demand a rematch!
Martian Chess
Introduction: In Martian Chess, color means nothing. Instead, location determines which pieces you may move. As in Chess, each type of piece has its own way of moving, and you capture by entering an opponent piece's square. However, you can move only the pieces sitting in your sixteen-square section of the board, and you can only attack pieces in other zones. Thus, a piece changes ownership after it attacks. The game ends when a player has no pieces left in their quadrant.
Number of Players: 2 or 4
Equipment: 6 Trios (for 2 players) or 12 Trios (for 4) of any color, Chessboard
Other group sizes: This game can also be played with 3, 5, or 6 players; however, you will need special wedge-shaped gameboards. Find them here: http://www.ee0r.com/tri-chess/
Setup: Each player starts by setting up nine pyramids, three of each size, in the corner of their quadrant of the board, as shown here.
Randomize Colors: Since color has no meaning, each player should select a variety of colors to start out with, in order to make it easier to disregard the color of the pyramids.
Binary Setup: For the two player game, a half-sized board is used. (The other half of the chessboard should be folded away or covered up.) The pieces are then set up in opposing corners as shown.
Goal: Get the most points. ("Checkmate" is an Earthly concept; the term has no meaning here.)
Scoring: Each piece you capture is worth its pip count in points; the winner is whoever has the highest score.
- Pawn = 1 point
- Drone = 2 points
- Queen = 3 points
Who Starts: Place a Queen for each player into an opaque bag or hat, with just one being red (or orange). Each player draws a piece, and whoever gets the red Queen goes first.
Turn Options: On your turn, move one of the pieces in your quadrant as follows:
- PAWN: One space at a time, in any of the diagonal directions.
- DRONE: One or two spaces, on either the horizontal or vertical lines.
- QUEEN: Any distance, in any straight-line direction. Jumping is never allowed.
Ownership: You control ALL and ONLY the pieces currently in your quadrant of the board. After you move your piece into another player's quadrant, it stops being your piece.
Canals: It's helpful to imagine that the quadrants are divided by small canals.
Capturing: When your piece moves into a space occupied by an opponent's piece, remove their piece from the board and keep it for scoring.
Field Promotions: If you have no Queens, you can create one by moving a Drone into a Pawn's space (or vice versa) and merging them. Similarly, if you control no Drones, you can make one by merging two of your Pawns.
No Undo With Two: In a 2-player game, your opponent may not "reject" your move; if one player moves a piece across the canal, the other can't move it back to the same square it came from.
Game Over: The game ends as soon as one quadrant is totally empty. This means if you have only one piece left, you can force the end of the game by moving your last piece across a canal. Then, everyone totals up their captured pieces, and the high score wins!
Breaking Ties: If the game ends in a tie, the player who made the move that caused the tie is the winner. This includes the case in which a third player with a lower score can win by causing the game to end in a tie between 2 other players.
Strategy Tips
Beware the Double Whammy: Whenever you capture a piece, make sure the piece you moved isn't in a position where it can immediately capture one of your own remaining pieces (unless you're happy enough making an exchange...).
Remember the Bottom Line: Keep in mind that the goal is points, not position. This is particularly vital in a four-player game, when two people can use the Double Whammy on each other to quickly trade pieces for points.
Run for the Border: If you're ahead on points and low on pieces, try to end the game quickly by pushing your last few pieces across a canal.
Homeworlds
Introduction: Homeworlds is an epic space opera in which the players each control an interstellar space fleet. It's all done with what appear to be random clusters of colorful pyramids arranged upon the table.
Each player begins with one star system: the Homeworld. Each will then build a fleet of ships and expand to colonize other star systems, spreading out across the galaxy until one side conquers the other, either by capturing or destroying the enemy's Homeworld.
Number of Players: 2
Equipment: 3 Rainbow Stashes
The Star Map: Star systems are marked on the playing field with upright Icehouse pieces. The "star map" displays only the star systems actually being visited by spaceships.
The Bank: All inactive pieces are stacked up and placed nearby, forming the bank.
When a ship discovers a new star system, it appears on the star map, and when the last ship leaves the system, the star piece is immediately returned to the Bank.
Spaceships: Spaceships are represented by non-vertical pyramids. The direction they point in indicates who they belong to. Your pieces always point away from you.
Star Travel: You can move a ship from one star system to another ONLY if the stars are of different sizes.
Connections Between Star Systems: Differently-sized star systems are connected... but same-sized stars are not. Systems are not connected if both contain a star of the same size. (Why? It's just the way the wormhole technology works...)
Goal: To conquer or destroy your opponent's Homeworld. You lose the game if you have zero ships at your Homeworld, regardless of how many other planets or starships you might control.
The First Turn: The game begins with a setup round, during which the players choose their initial pieces.
Two Stars and One Large Ship: To begin, take a Large spaceship (of any color) along with a Homeworld made of two upright pyramids (also in your choice of colors). Stack them up to form a binary star. (All Homeworlds are two-star systems, whereas all other stars in the game are single stars.)
Choosing Your Homeworld: The decisions you make during setup will greatly affect the entire game. You need to make smart choices when deciding on the colors & sizes of your Homeworld stars and the color of your Large ship.
3 Homeworld Options
- Banker: This setup gives you an edge when using the Investment strategy. (Connected to Large stars.)
- Fortress: When all the Smalls are gone, this Homeworld becomes harder to invade. (Connected to Small stars.)
- Goldilocks: The stars you can go to from here are not too big and not too small. (Connected to Medium stars.)
Small Universe: If both players choose the same two sizes of pieces for their Homeworlds, the map will be far more compact than with non-matching Homeworlds. This shrunken universe makes the game very claustrophobic. Choosing a "Gemini Star" (1-1, 2-2, or 3-3) also shrinks the universe.
Which Starting Setup Is Best? Most Starship Captains agree that you need to start with Blue and Green along with either Red or Yellow. Beyond that, opinions vary. Some players like to start with Yellow, so they can move immediately, but others prefer starting off with a Red ship. Many like building a "Planetary Defense System" which means including Red as one of the two colors that form the Homeworld itself.
Turn Options: During each turn, you may perform one Basic action, OR you may return one of your ships to the Bank in order to gain as many as three Sacrifice actions. Also, at any time during your turn, you may invoke the Catastrophe option for any Overpopulation situation on the table.
Basic Action: You may perform your Basic action in any system where you have a ship, using any power you can access in that ship's system.
Sacrifice Action: The number of Sacrifice actions you get by removing one of your ships is equal to the pip count of that ship. You get that many actions, of that ship's color, in any systems where you still control a ship.
Color Powers: Access to a power you can use for your action is provided by one of the following:
- Star: Color of the system's star
- Ship: Color of a ship YOU have there
- Sacrifice: Color of a ship you give up
Each color provides a different game option (as described in detail below):
- GREEN = CONSTRUCT
- BLUE = TRADE
- YELLOW = MOVE
- RED = ATTACK
The green Colonists build the starships. The yellow Navigators grok the wormholes. The red Warriors wield the weapons. The blue Ice-Traders offer transformations.
Overpopulation: Too much of one color in one system can trigger a disaster. Overpopulation exists any time a single system contains four or more pieces of the same color -- including ships on both sides AND the star itself. (Danger begins at 4.)
Catastrophes: At any point during your turn, if you notice an Overpopulated star system, you have the OPTION to declare a Catastrophe in that system (even if you don't have a ship there). If called, all pieces of the overpopulated color are returned to the Bank. If this includes the star itself, then ALL ships at that location are destroyed (unless the star was half of a binary system, in which case it becomes a single-star).
Game Over: It's OK to temporarily abandon your Homeworld as long as you have a ship there again by the time your turn is over. However, you are eliminated from the game if both stars in your Homeworld are destroyed, or if none of the ships at your Homeworld are yours.
Who Starts: Flip a coin if the players' skills are evenly matched. Otherwise, the novice begins.
Marking the Homeworld: Ideally, each player's Homeworld will be easily identifiable as such, by stacking the pieces of the Homeworld onto a token of some kind, like a card or a poker chip. (But this isn't really needed until a Homeworld is halfway destroyed.)
The Turn Indicator: It's very helpful to move a token back and forth to indicate whose turn it is. This helps avoid confusion (in cases of distraction or interruption), but also signifies that you're done with your move. Since one turn may consist of a sequence of actions, there are times when you won't realize that you want to rethink your move until after you've seen how it looks on the table. So think of moving the coin as being like clicking "send" on the orders to your fleet.
Green = Construct
Green: Build a new ship in the target system.
Same Color: The color of your new ship must be the same as one of the ships you control in the target system.
Smallest Size: You must take as a new ship the smallest piece of the target color available at that moment in the Bank.
Blue = Trade
Blue: Swap one of your ships with a differently colored piece of the same size from the Bank.
Yellow = Move
Yellow: Move a ship from the target system to any other Connected system (new or known).
Discovery: Take a piece of your choice from the Bank, add it to the board as a star, then move your ship to that star.
Abandonment: Return a star to the Bank immediately if zero ships are there.
Red = Attack
Red: Take control of an enemy ship, by turning the piece around so that it points away from you. (Note that attacking never destroys another ship; it's more like stealing than attacking.)
Size Matters: You cannot attack a ship if it's larger than the biggest ship YOU have in that system. But note that a small red CAN be used to attack a larger ship -- you just need to have your own large ship in that system, which can attack the enemy's large using the power of your small red.
Arranging the Star Map: Because the layout of this game's playing area is free-form and ever-changing, players should feel free to move the star systems as needed, to positions that are the most desirable for seeing the connections.
A typical game in progress: Stars connected to a player's Homeworld are placed nearest to said Homeworld. Stars not connected to either Homeworld go in the middle. Arranged in this way, each star is connected to the stars in the rows ahead and behind, but not to stars in the same row. Like cars on a freeway, your ships (and the systems you control) are moved to your side of the road. (Note: Arrows only depict some of the possible interstellar connections.)
Xeno Colors: If your set was made from Xeno stashes, you will need this translation chart:
- CYAN = CONSTRUCT (green)
- CLEAR = MOVE (yellow)
- ORANGE = ATTACK (red)
- PURPLE = TRADE (blue)
Non-Binary Variations
Binary Homeworlds: The basic, 2-player game is known as Binary Homeworlds. If you have enough pyramids, you can play with more than 2 players: just add one Rainbow Stash for each player. (If you have 4 Rainbow Stashes, then 3 people can play, if you have 5 then 4 can play, and so on.) You will also need to choose one of these special options:
- Sinister Homeworlds: In this variation, your goal is to eliminate the person currently to your left. If anyone else causes that player's elimination, then the game continues without them. Eliminated players' pieces remain in play.
- Good vs. Evil: In this scenario, each player is randomly assigned a secret alignment of either Good or Evil. (You will need tokens with those labels, split 50/50 for an even number of players, or with an extra Good for an odd-sized group.) A player with the Evil alignment has the goal of eliminating ANY other player, while all players with the Good alignment win collectively when ALL Evil players are eliminated. Whenever one player eliminates another, both must reveal their secret alignments.
- Last Captain Standing: The name says it all. The last survivor wins!
Novice vs. Expert
Homeworlds is a complex game with a steep learning curve. Because of this, novice players (known as "Junior Officers") will be no match for experienced players (called "Senior Officers"). To make the game equally challenging for both, a Senior Officer may wish to offer one or more of these headstart options to the new player:
- Second Turn Timewarp: After both players build their Homeworlds, the Junior Officer may be allowed to perform one or more bonus actions during Turn #2, so as to get ahead faster.
- Red Alert: Not unlike to saying "Check" in Chess, the Senior Officer will say "Red Alert" whenever the Junior Officer is in immediate danger of elimination.
Three Paths to Victory
- Direct Assault: Use Red to take control of all enemy ships at the enemy's Homeworld.
- Fleet Catastrophe: Destroy all enemy ships at their Home by causing a catastrophe.
- Star Demolition: Cause two catastrophes, destroying both halves of the Homeworld.
Doomsday Machine: With a particular fleet of nine ships, scattered across the galaxy in specific positions, you can vaporize your enemy's Homeworld in exactly two moves. We call this setup a Doomsday Machine:
- 2 Large Yellow ships (for two triple-jump moves)
- 3 ships of one of the colors of the target system, all located at systems one jump away
- 3 ships of the target system's other color, located at stars that will be within one jump after the first half of the target Homeworld is gone
- 1 extra ship, to protect your own Homeworld
Defend the Homeworld! That's the Starship Captain's Primary Directive. Here are four practical tips for accomplishing this:
- Keep a large ship at the Homeworld at ALL times. Tempting though it can be to use that big powerful ship elsewhere, you should always protect your Homeworld with a Large ship, unless you are about to win or are absolutely certain you will get a Large back at home before being invaded.
- As soon as your enemy gets a weapon, get one too. You don't need a weapon until your enemy has one, but as soon as they do, you need to arm yourself immediately. (This is particularly true if you lack a Planetary Defense System.)
- Diversify and minimize your local defense fleet. To reduce the threat of catastrophe, avoid having more than one piece of each color at Home. In particular, never let all your home ships be of a single color if there's ANY chance of being invaded.
- If your star is half-destroyed, monopolize the other color. After half of your Homeworld has been blown up, your enemy needs just three ships of your remaining color to finish you off. Take those pieces out of circulation any way you can!
Strategy Tips
It's All About the Economy: While Homeworlds may seem like a war game, like most wars, it's all about the financing. So keep a close eye on the bank! Here are some tips on banking wisely:
Don't Take the Last Serving: Whenever possible, avoid being the player who has to take the last available Small or Medium piece of any given color. (You'd rather be the one who gets to build the first ship of the next size.)
Don't Get Frozen Out: Maintain control of at least one ship of each color (and seek to freeze out your enemy by monopolizing a color they lack).
The Investment: When the only ship at a star system goes away, the star-piece is immediately returned to the bank. If the ship that just departed was Green, and was Sacrificed, it may be possible to instantly change the star it was taken from into a ship. Parking Green ships at stars you'd like to change into ships later is called Investing. The best use of this strategy is to park Greens at Large stars while Mediums and Smalls of that color are available, then wait until the Bank is empty to "cash in."
Play Keep-Away: If you can't build a desirable piece as a ship, try turning it into a star. Even if the ship you discover it with isn't Green, you might be able to turn the system into an Investment opportunity later on. More importantly, you are preventing your enemy from getting to build a ship with that piece.
The Factory: A Large Green ship, along with another Green ship in the same system, sets up a powerful maneuver called the Factory. Once no Greens remain in the Bank, you can Sacrifice your Large Green for three Construct actions. Then, as one of those actions, re-build the Large Green in the same system you took it from. You can do this over and over again!
Green Teleportation: This trick is very useful if you get frozen out of Yellow. You can "teleport" a Green ship into any other system where you have another Green ship. Just Sacrifice the ship to get a Construction action, then rebuild that ship in a different star system.
Beware the Incomplete Battle-Plan: One of the easiest ways to lose this game is to mount an attack that fails to annihilate your opponent, but does leave your own empire vulnerable. Plan for total victory!