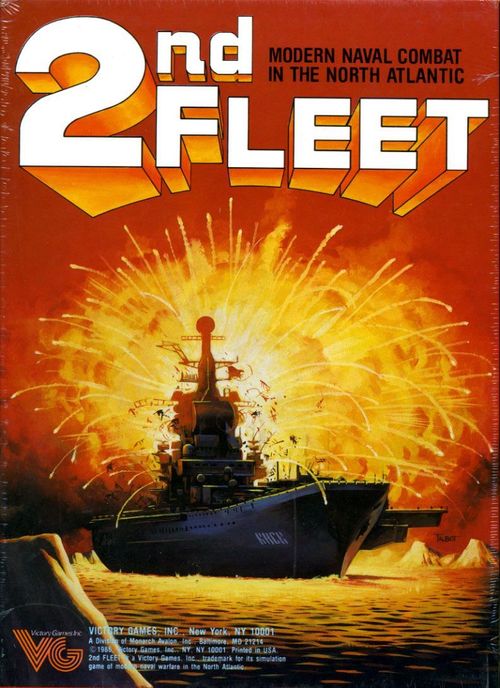
2nd Fleet: Modern Naval Combat in the North Atlantic
2nd Fleet: Modern Naval Combat in the North Atlantic Rulebook
Table of Contents
Table of Contents
1.0 Introduction
2nd Fleet is a simulation of contemporary naval warfare in the North Atlantic and Arctic Oceans. In turns representing eight hours of real time, the players maneuver surface warships, submarines, squadrons of combat aircraft, amphibious assault vessels, and cargo ships on a detailed map of the region stretching from Greenland to the Soviet Union. A hexagonal grid has been superimposed over the map and each hex equals 46 nautical miles.
Sections 4.0 through 12.0 teach players basic movement and combat rules; the five scenarios in Section 13.0 allow the players to use these rules in simple, short games. Section 14.0 introduces some additional rules that are used in the four Intermediate Scenarios (Section 15.0) and the Advanced Game. Sections 16.0 through 28.0 describe the Advanced Game, which is the most realistic and complex scenario.
2.0 Game Equipment
2.1 Game Components
A complete game of 2nd Fleet contains these items:
- One Rules Booklet
- Two 22-inch by 32-inch Mapsheets
- Two Sets of 192 5/8-inch Playing Pieces (Counters)
- One Set of 260 1/2-inch Game Markers
- Two Charts and Tables Booklets
- One Pad of Logistics Rosters
- Two Deployment/Reinforcement Cards
- One 10-sided die
Note: The game uses a 10-sided die. When a "0" is rolled, this is considered a "0" and not "10" as in many other games. Also, a "0" is always considered an even number.
2.2 Game Questions
If you have any questions about the rules to 2nd Fleet, please feel free to send in your questions, written so they can be answered with a simple one-word response when possible. Be sure to enclose a stamped, self-addressed envelope. Mail your questions to:
2nd Fleet Questions Victory Games, Inc. 43 West 33rd St. New York, NY 10001
Note: We ask your cooperation in sending a self-addressed, stamped envelope; queries without a return envelope will not be answered. Also, we ask that you not call in your game questions, since the designer does not work on our staff.
2.3 Playing Pieces
The playing pieces (counters) include military forces from seven nations. The US and allied NATO counters have green borders, and each has a different interior color; all non-Soviet forces belong to NATO and are always on the same side. The Soviet counters are red. In addition to the colors on the counters, each nation's forces can be distinguished by the two-letter abbreviation on the counter.
The backs of the counters are printed with a starburst design and reduced values, indicating that these units have been damaged. Note that certain units (cargo ships and some air units) are not backprinted. When these units are damaged, they are destroyed or sunk.
Each player also has a set of half-inch markers that are used to record game information. Some markers are printed in the NATO color, some in the Soviet color, and others in a neutral color.
Summary of Counter Types
Surface Combat Units: Aircraft Carrier (CV), Cruiser (CG), Light Cruiser (CL), Destroyer (DD), Frigate (FF), Battleship (BB), Patrol Combatant (PC).
Non-Combat Surface Units: Amphibious Assault (AA), Tanker (TK), Ammunition Carrier (AM), Submarine Tender (ST), Combat Support (CS), Cargo Ship (CR — unloaded on the Soviet back).
Submarine Units: Nuclear Submarine (SN), Diesel Submarine (SS), Ballistic Missile Submarine (SB).
Air Units: Interceptor (INT), Attack (ATK), Reconnaissance (RCN), Airborne Early Warning (AEW), Electronic Warfare (EW).
Summary of Game Markers
CAP Mission / CAP & AEW; Task Group/Force / Task Force (+2); Mine; Out of Ammo / Out of Fuel & Ammo; Out of Fuel (see 20.7); Local/Strategic Detection / Strat Detect NATO; Marine; Parachute; Commando; Deep; Destroyed / Damage; Action Segment; Time of Year; Armistice; Soviet Strategy; Game Turn.
Sample Counters
Sample Surface Unit (Front): shows Nationality, Movement Allowance, Defense Value, Silhouette, Name, ASW Value, Type, SSM Attack Value, SSM Range, Close Combat Value, Area Anti-Air Value, Close Anti-Air Value.
Note: An "N" in place of the SSM, ASW, Anti-Air, or Close Combat values indicates that the unit cannot perform that form of combat. If a unit has a Close Anti-Air or Area Anti-Air value, but not both, a "0" indicates which value it cannot use.
Sample Submarine Unit (Front): shows Movement Allowance, Nationality, Defense Value, Silhouette, Name, ASW Value, Type, SSM Attack Value, SSM Range, Torpedo Value, Anti-Air Value. ● = Noisy Submarine Indication.
Note: A submarine unit always has an "N" for its Anti-Air value. Only Soviet submarine units have the "Noisy Sub Indicator."
Sample Amphibious Assault Unit (Front): shows the Amphibious Assault Value.
Note: Aside from the Amphibious Assault value, all other values on an AA unit are identical with other surface units.
Sample Air Unit (Front): shows Nationality, Movement Allowance, SSM Attack Value, Silhouette, Name, SSM Range, Bombing Value, ASW Value, Type, Anti-Air Value. ★ = Special SSM Indication, ■ = All-Weather Indication.
Note: Some US and UK air units have the "Special SSM Indication," which is used in the Advanced Game (see 20.4). Some carrier-based US air units have the "All-Weather Indication," which is used in the Advanced Game (see 16.0 and 17.0). Also, air units do not have Defense values. Their Movement Allowance is either a two- or three-digit number.
2.4 Abbreviations
The following abbreviations are used in the game:
Surface Units: AA: Amphibious Assault. AM: Ammunition Carrier. BB: Battleship. CG: Missile Cruiser. CL: Light Cruiser. CR: Cargo Ship. CS: Combat Support. CV: Aircraft Carrier. DD: Destroyer. FF: Frigate. PC: Patrol Combatant. PCS: Patrol Combatant Squadron. ST: Submarine Tender. TK: Tanker.
Submarine Units: SB: Nuclear Ballistic Missile Submarine. SN: Nuclear Submarine. SS: Diesel Submarine.
Air Units: AEW: Airborne Early Warning. ATK: Attack. B: Beriev. BUC: Buccaneer. CAN: Canberra. EW: Electronic Warfare. HAR: Sea Harrier. HLX: Helix. I: Ilyushin. INT: Interceptor. M: Mikoyan (MiG). NIM: Nimrod. PHN: Phantom. RCN: Reconnaissance. S: Sukhoi. SKG: Sea King. T: Tupolev. TOR: Tornado. Y: Yakolev.
Countries: CA: Canada. IT: Italy. NE: Netherlands. NO: Norway. SO: Soviet Union. UK: United Kingdom. US: United States. WG: West Germany.
Sea Zones: BI: British Isles. BS: Barents Sea. GS: Greenland Sea. IC: Iceland. LS: Labrador Sea. NA: North Atlantic. NS: Norwegian Sea. SV: Svalbard.
Miscellaneous: AAA: Area Anti-Air. AP: Ammunition Point. ASW: Anti-Submarine Warfare. CAP: Combat Air Patrol. FP: Fuel Point. Hpn: Harpoon. Mav: Maverick. PR: Parachute Regiment. RCR: Royal Canadian Regiment. SEg: Sea Eagle. SSM: Surface-to-Surface Missile. SUSA: Susa Alpini Battalion. TORP: Torpedo. VP: Victory Points.
Ship Names
Only ships whose names have been abbreviated are included on this list:
Canada: IROQS: Iroquois. NPGON: Nipigon. OTTWA: Ottawa. SGNAY: Saguenay.
Netherlands: BNKRT: Banckert. BTRES: Bloys Van Treslong. DERUY: De Ruyter. EVTSN: Evertsen. KRTNR: Kortenaer. PHEIN: Piet Hein. VGALN: Van Galen. WDEWT: Witte de With.
Norway: BERGN: Bergen. NRVIK: Narvik. SKLNA: Sklinna. STVGR: Stavanger.
Soviet Union — Surface Combat Units: AMTST: Ametist. BSHKY: Bashkiriy. BSMNY: Bessmennyy. DZHSK: Dzerzhinskiy. FRNZE: Frunze. GNVNY: Gnevnyy. GRMKY: Gromkiy. GRVAL: Gorval. GRZIN: Gruzin. KKRYM: Krasnyy Krym. KRMLN: Kremlin. KRSDT: Kronshtadt. MNSHK: Menshinsky. NKHMV: Nakhimov. NKLYV: Nikolayev. NKTMY: Neukrotimyy. OBRSV: Obraztsovyy. ORLVY: Orlovskiy. ORVDT: Oktyabrskaya Revolutsiya. OSMTR: Osmotritilnyy. OTCHY: Otchayannyy. SDRZY: Sderzhannyy. SILNY: Silnyy. SMTLV: Smetlivyy. SPRNV: Admiral Spiridonov. STRNY: Stroynyy. SVRPY: Svirepyy. SVTPL: Sevastopol. TALLN: Tallin. TMSHK: Timoshenko. UDLOY: Udaloy. UKRNY: Ukrainyy. VRYAG: Varyag. VSLYV: Vasil'yevskiy. ZGCHY: Zhguchiy. ZOZLY: Zozulya.
Soviet Union — Submarine Units: ABLGN: Anatoliy Blagonravov. CCHER: Constantin Chernenko. CHSKY: Chelyabinskiy. DNSKY: Donskaya. FDZHR: Feliks Dzerzhinksy. FKZLV: Frol Kozlov. IKNEV: Ivan Konev. KLMYA: Kalmytskaya. KLSKY: Kolskiy. KRLSK: Karelskaya. KSNGV: Krasnogvardets. KVSKY: Kvibishevskiy. LNSKY: Leninskiy. MGNIT: Magnitogorskiy. MKALN: Mikhail Kalinin. MTSKY: Mikhail Tukhachevskiy. PPSLV: Pyotr Pospelov. SGRCH: Stepan Georgievich. UKRNA: Ukraina. VCHKV: Vasily Chuykov. VFGNR: Vera Figner. VLDMR: Vladimirskiy. VLGDA: Vologda. YGAGR: Yuri Gagarin. YRSKY: Yaroslavskiy.
Soviet Union — Non-Combat Surface Units: BELOY: Beloye More. CHSKY: Cheshkaya Guba. CHLKN: Boris Chilikin. GSNOV: Gasanov. KLYKN: Kolyshkin. KRSKY: Karskoye More. LDNEV: Lednev. PCHOR: Pechorskoye More. OBSKY: Obskaya Guba. RYBKV: Riyabakov. VDYEV: Vidyaev. VLYUY: Vilyuy.
United Kingdom — Surface Combat Units: ACTVE: Active. ANDRM: Andromeda. BDSWD: Broadsword. BRMHM: Birmingham. BRSTL: Bristol. BTAXE: Battleaxe. CMBIA: Cumbria. GLSGW: Glasgow. ILTRS: Illustrious. INVCL: Invincible. LNDON: London. LVRPL: Liverpool. MNCTR: Manchester. MNRVA: Minerva. NRFLK: Norfolk. PHEBE: Phoebe. SCYLA: Scylla. SHFLD: Sheffield.
United Kingdom — Submarine Units: CONQR: Conqueror. SPRTN: Spartan. SUPRB: Superb. TALNT: Talent. TFLGR: Trafalgar. UPHLD: Upholder. WRSPT: Warspite.
United Kingdom — Non-Combat Surface Units: BAYLF: Bayleaf. BLRVR: Blue Rover. FAUST: Fort Austin. FGRGE: Fort Grange. INTRP: Intrepid. NRLND: Norland. RGENT: Regent. SBDVR: Sir Bedivere. SLNCT: Sir Lancelot. STRIS: Sir Tristram.
United States — Surface Combat Units: BELNP: Belknap. BGLEY: Bagley. BHILL: Bunker Hill. BURKE: Arleigh Burke. BYRD: Richard E. Byrd. CNOLY: Conolly. CRSEA: Coral Sea. DAVID: Albert David. DAVIS: Rodney M. Davis. GDBOR: Goldsborough. INPDN: Independence. JAMES: Reuben James. MSBGR: Moosbrugger. PAGE: Richard L. Page. RDGRS: John Rodgers. RSVLT: Theodore Roosevelt. SCLNA: South Carolina. SPNCE: Spruance. TATNL: Tattnall. TRIPE: Trippe. VNCNS: Vincennes. VRGNA: Virginia.
United States — Submarine Units: GROTN: Groton. LAJLA: La Jolla. LPCMB: Lipscomb. NPNWS: Newport News. OLYPA: Olympia. PHENX: Phoenix.
United States — Non-Combat Surface Units: ALTAR: Altair. AUSTN: Austin. BAUGH: William B. Baugh. BWOOD: Belleau Wood. CGNUS: Cygnus. CMDEN: Camden. CNSTO: Canisteo. FFSHR: Fort Fisher. GNTWN: Germantown. HAUGE: Louis J. Hauge, Jr. HRCTY: Harlan County. IIJMA: Iwo Jima. KAISR: Henry Kaiser. KOCAK: Sgt. Matej Kocak. LUMUS: 1st Lt. Jack Lummus. MLWKE: Milwaukee. MTEOR: Meteor. NWPRT: Newport. PLLUX: Pollux. SGNAW: Saginaw. TCLBA: TransColumbia. TCLDO: TransColorado. WLMET: Willamette.
West Germany: MOLDR: Molders.
3.0 Sequence of Play
"All contemporary great powers are maritime states." — Admiral Sergei G. Gorshkov
All actions that occur in a Game Turn take place in a strict Sequence of Play. The Game Turn is composed of a number of Phases, which in turn can be comprised of a number of Segments, that must be performed in the order listed below.
A day of real time is represented by three Game Turns: AM, PM, and Night, each of which represents eight hours of real time. Some Phases in the Sequence of Play take place only in an AM or Night turn and are ignored in other turns.
Strategic Cycle (AM Game Turns only)
A. Political Events Phase (Advanced Game; not on Game Turn 1)
The NATO player rolls a die and the players consult the Armistice Table. The Armistice marker may be advanced or the players may be required to consult the Random or Special Events Tables. If the Armistice marker advances, the Soviet player receives Victory Points for controlling NATO bases and for "sea denial" (see 28.5).
B. Weather Phase (Advanced Game)
The NATO player rolls the die and the players consult the Weather Table (see 17.0). If a squall or storm results, the die is rolled again and the Zone Table is consulted to determine which zones are affected.
C. Reinforcement Phase (Advanced Game; not on Game Turn 1)
Both players roll a die and consult the Reinforcement Table (see 26.0). Any reinforcements made available by these rolls are deployed on the map.
D. Submarine Mode Phase (Advanced Game; optional)
The players can place Deep markers on any of their submarine units whose Movement Allowance is two or more. Also, players can remove Deep markers from their submarine units (see 22.0).
E. Strategic Air Phase
- Allocation Segment: Both players secretly assign air units to strategic missions on their Strategic Air Displays (see 7.1).
- Interception Segment: Opposing air units that are on Interception missions within the same zone perform Air-to-Air Combat (see 7.2).
- Bounce Segment: Surviving Interception air units perform Air-to-Air Combat against enemy air units in the same zone on non-Interception missions (see 7.2).
- Mine Segment (Optional): Air units on Mining missions place Mine markers in coastal hexes (see 23.0).
- Strategic Detection Segment: For each Reconnaissance air unit in a zone, the owning player can place a Strategic Detection marker on an enemy surface unit (or stack) or attempt to place a Strategic Detection marker on an enemy submarine within that zone (see 9.2).
F. Invasion Phase (Advanced Game)
- Soviet Segment: The Soviet player can place Ground Force markers in eligible NATO bases (see 18.0).
- NATO Segment: The NATO player can place Ground Force markers in any NATO bases (see 18.0).
- Control Segment: If Soviet and NATO Ground Force markers occupy the same base, the players determine who controls that base (see 18.5).
Activity Cycle (All Game Turns)
G. CAP Phase
Both players assign air units to CAP (see 8.0).
H. Minesweeping Phase (Advanced Game; optional)
A player rolls the die once for each hex containing mines to determine if any Mine markers are removed (see 23.3).
I. Replenishment Phase (Advanced Game; optional)
Both players can perform in-port and at-sea replenishment (see 20.0).
J. Local Detection Phase
Local Detection markers are placed on surface and submarine units occupying enemy Limited or Extended Detection Zones (see 9.2).
K. Action Phase
- First Action Segment: The die is rolled to determine the "first" player. On an even roll, the NATO player is first; on an odd roll, the Soviet player is first. The first player states which type of units he will activate: surface, submarine, or air. After the first player has finished performing all actions with the chosen type, the second player selects a type of unit for activation and carries out all actions with these units (see 4.0).
- Second Action Segment: The die is rolled to determine the first player. This player states the type of units he will activate (he cannot select the unit type chosen in the First Action Segment). After the first player's units have performed their actions, the second player chooses a unit type for activation (he cannot choose the type he selected in the First Action Segment) and carries out all actions with this type.
- Third Action Segment: The die is rolled to determine the first player. This player activates the remaining unit type not activated so far and completes all actions with them. The second player then activates his last type of unit and completes all actions with them.
L. Local Detection Removal Phase
Some surface and submarine units that do not occupy enemy Detection Zones have their Local Detection markers removed (see 9.5).
M. CAP Landing Phase
All CAP units are returned to the airfield or aircraft carrier from which they started (see 8.4).
Terminal Cycle (Night Game Turns only)
N. Fuel Phase (Advanced Game; optional)
Fuel expenditure for surface combat units is recorded on the Logistics Rosters (see 20.5).
O. Repair Phase (Intermediate and Advanced Games)
Damage 1 markers are removed from ports and airfields. Damage 2 markers are flipped to their Damage 1 side (see 14.2).
P. Strategic Air Mission Termination Phase
Air units on the Strategic Air Display are returned to their parent aircraft carrier or an airfield in the zone from which they started (see 7.5).
Q. Strategic Detection Removal Phase
All Strategic Detection markers are removed from units (see 9.5).
Game Turn Indication
The Game Turn is now over. The Game Turn marker is advanced one space along the Game Turn Track. Players now go to the Strategic Cycle, if the next turn is an AM turn, or to the Activity Cycle, if the next turn is a PM or Night turn. This process is repeated until the game ends or an Armistice is declared (see 28.1).
Basic Game Rules
4.0 The Action Phase
"To be a successful soldier, you must know history. What you must know is how man reacts. Weapons change, but man who uses them not at all. To win battles, you do not beat weapons — you beat the soul of the enemy man." — General George S. Patton
Most game activities take place during the Action Phase, which is composed of three Action Segments. During each Action Segment, a player moves and performs combat with units of a particular type (submarine, surface, or air). When he has finished activating units of the desired type, he states this fact aloud.
4.1 The Action Segments
To determine who goes first in each Action Segment, the NATO player rolls the die. If the result is even (including "0"), the NATO player activates units first in the segment; if the result is odd, the Soviet player activates units first. This determination takes place at the beginning of all three Action Segments.
In the First Action Segment, the first player states the type of unit he will activate: surface, submarine, or air. He can then activate any or all of the units of that type. The second player then states which unit type he wishes to activate in the segment; he is not obligated to activate the same unit type as the first player.
In the Second Action Segment, after the first player is determined by die roll, each player activates a second unit type. Neither player can select the unit type that he activated in the First Action Segment. In the Third Action Segment, after the first player is determined by die roll, each player activates his last remaining unit type.
Should a player not have all three unit types, he must declare "pass" in any Action Segment of his choice in lieu of stating the unit type he does not possess. A player can also elect to "pass" in any Action Segment if he does not want to activate one of his unit types. When a player passes, he does not perform any activities in that Action Segment. For example, if the NATO player has air and surface units on the map but no submarines, he is obligated to "pass" in any one of the Action Segments.
4.2 Unit Activation
To be eligible for activation, a unit must belong to the unit type selected for the current segment (surface, submarine, or air), and it must not have been activated previously in that segment. For example, if a player announces "Air" at the start of an Action Segment, he can activate only air units in that segment. A player must complete the actions of each unit (or stack) before going on to activate another unit (or stack). To keep track of which units have already been activated in a segment, players can rotate their counters 90 degrees after they have completed their actions; at the end of the Action Segment, they should be rotated to their normal positions.
Notable Exception: Air units on CAP missions can perform combat during the enemy player's "Air" Action Segment. As long as CAP units do not return to base, they can perform combat several times in the enemy player's Air Action Segment (see 8.2).
Air units on aircraft carriers are maintained off-map on the Aircraft Carrier Displays. When such units are activated, they are considered to occupy the same hex as their "parent" aircraft carrier. Movement of air units between the map and these Displays occurs only when they are activated in a player's "Air" Action Segment.
4.3 Limitations on Activation
The activation of units in an Action Segment is completely voluntary. A player is not obligated to activate any units in his surface, submarine, or air Action Segments. Units occupying different hexes cannot be activated together.
Surface Units: A player can activate any or all surface units that occupy the same hex at the beginning of an Action Segment. All surface units within a hex do not have to be activated at the same time; a player can choose to activate some surface units in a hex at one point in the segment and then activate other units later. However, all units that are activated together must perform their activities together in a stack (see 6.0).
The NATO player controls all non-Soviet units. NATO surface units of different nationalities can activate together without restriction.
Submarines: Submarine units must be activated individually. A submarine must complete its activities before another submarine is activated.
Air Units: A player can activate up to four air units (regardless of type) that are stacked together in the same hex. A player can activate fewer than four air units within a stack, but never more. NATO air units of different nationalities in the same airfield can be activated together.
Aircraft carrier air units are considered stacked together. These units can be activated individually or as stacks up to a limit of four per activation. If two or more aircraft carriers occupy the same hex, air units from different carriers can be activated as part of the same force (even if they are of different nationalities).
4.4 What Activated Units Can Do
Once a player has stated which unit type he will activate in an Action Segment, he can move and perform combat with each of his units (or stacks) of that type. A unit or stack must complete its activities before any other unit or stack is activated. Also, a unit can be activated only once per segment. When a unit is performing actions, no other unit — enemy or friendly — can move or attack, except for enemy CAP units (see 8.2).
Surface or air units that are stacked together and activated as a single force are considered one unit for activation purposes; they cannot split up and they must perform the same types of attacks. If an attack is made, not all the units in the stack must participate in the attack.
Surface Units: A surface unit or stack can move and/or attack in an Action Segment subject to the following restrictions:
- It can move and not attack;
- It can move and perform one or two attacks;
- It can perform one or two attacks and then move;
- It can perform one or two attacks and not move;
- It can perform one attack, move, and then perform a second attack.
A surface unit can never perform two attacks of the same type in the same segment. Thus, in the Basic Game, a surface unit can perform one ASW and one SSM Combat in the same Action Segment (see 24.1 for "Cruise Missiles" and 24.9 for "Close Combat," which are forms of SSM Combat used only in the Advanced Game).
Example: A player has a stack of four surface combat units in a hex. He first performs ASW Combat against an adjacent detected enemy submarine, moves the stack, and then performs SSM Combat. He cannot have some units in the stack perform ASW and SSM Combat simultaneously; some units in the stack could first perform SSM Combat and subsequently some could perform ASW Combat at different times in the surface Action Segment.
Submarines: Each submarine unit is activated individually. A submarine can move and perform one attack, in any order, during an Action Segment.
Air Units: An air unit or stack can move and perform one attack at any time during its movement. Air units are the only ones that can interrupt their movement to attack. Air units must always begin and end their active status on a friendly airfield hex (or on an aircraft carrier of the same nationality; see 12.1).
4.5 The Action Segment Track
Each player receives three Action Segment markers labeled "Air," "Surf" (Surface), and "Sub" (Submarine). In order to remind the players which unit types have been selected for activation in all three segments of the Action Phase, the players should keep these markers nearby their Action Segment Tracks. As each player selects a type of unit for activation in a given Action Segment, he should place the appropriate marker in the box corresponding to the current segment on his track. At the end of the Action Phase, these markers should be removed from the track.
Example of Activation: The NATO player has a Norwegian F16 air unit in Bodo, the British surface units Arrow and Bdswd in Rosyth, and the US submarine NpNws in Holy Loch/Faslane. The Soviet player has a T26 air unit in Murmansk, the surface units Kiev and Tula in Pechenga, and no submarine units at all.
During the First Action Segment, the NATO player rolls a "2" and so goes first. He states "Surface" and decides to activate Arrow and Bdswd as a single stack. He moves these units together but performs no combat. (Otherwise, if detected Soviet units were within range, he could have performed SSM and ASW Combat before or after moving, or one combat type before moving and the other type after moving.) When he is finished, he places the NATO "Surface" marker in the "1st Action Segment" box of the NATO Action Segment Track. The Soviet player goes second and announces "Air." He activates the T26 unit, moving it from Murmansk and executing a single attack along the way. At the end of its activation it returns to Murmansk. The Soviet player places the Soviet "Air" marker in his "1st Action Segment" box.
In the Second Action Segment, on a roll of "3," the Soviet player goes first, announcing "pass" and performing no actions. The Soviet player places his "Submarine" marker in his "2nd Action Segment" box. The NATO player goes second and states "Air." He activates the F16 unit, moving it from Bodo to Andoya, but performs no combat along the way. He has no other air units, so he places the NATO "Air" marker in his "2nd Action Segment" box, indicating the end of the current Action Segment.
In the Third Action Segment, on a roll of "8," the NATO player goes first and states "Submarine," activating NpNws, moving it, and executing a single attack. Afterwards, he places the NATO "Submarine" marker in his "3rd Action Segment" box. The Soviet player goes second and announces "Surface." He decides to activate Kiev and Tula separately, moving Kiev to one hex and then moving Tula to another. Neither unit performs any combat. The Soviet player places the "Surface" marker in his "3rd Action Segment" box. The Action Phase is now over.
Note that in the example above, the Soviet player must pass in one of his Action Segments, since he has only two types of units on the map. A player can also elect to "pass" rather than activate a unit type, but he must place all three of his Action Segment markers on the Action Segment Track during the Action Phase. Once a player has passed with one of his unit types, placing an Action Segment marker on the track, he cannot in a later segment go back and activate the type he passed.
4.6 Fiords
Units occupying fiord hexes can activate normally with one exception: Air units assigned to aircraft carriers that occupy a fiord hex cannot activate at all; they can, however, perform Strategic Air Missions and CAP (see 7.0 and 8.0).
5.0 Movement
"I wish to have no connection with any ship that does not sail fast, for I intend to go in harm's way." — Captain John Paul Jones
The three different unit types (surface, submarine, and air) have different movement capabilities.
The hexes within the hexagonal grid superimposed over the mapsheets are divided into several different types. Sea hexes are composed entirely of water. Land hexes are composed entirely of land. Coastal hexes are composed of a combination of land and sea and are sub-divided into two types: fiord hexes (those containing the fiord symbology) and non-fiord hexes (those coastal hexes, including hexes containing islands, that do not possess this symbology). Pack ice hexes are composed entirely of ice. Drift ice hexes have some characteristics of sea and some of ice. Sub-oceanic mountain hexes are special hexes that affect "deep" movement by submarines (see 22.2). See the Terrain Summary in the Charts/Tables Booklet for a listing of the effects of the various terrain types.
No unit can ever voluntarily leave the map in any scenario in the game.
Note: In Basic and Intermediate Scenarios, all drift ice hexes are considered sea hexes, and the presence of sub-oceanic mountains is ignored. Special rules for drift ice hexes are taken into account only in the Advanced Game (see 16.2) as is the optional rule for sub-oceanic mountains.
5.1 How Units Move
Each unit's Movement Allowance (printed directly on its counter) is the maximum number of hexes the unit can move when activated. A unit can move less than its printed Movement Allowance, but never more. When a unit moves, the owning player moves it from hex to contiguous hex on the map. Note that some units are prohibited from moving into certain types of hexes.
When activated together in a stack, surface or air units can move a number of hexes equal to the lowest Movement Allowance of a unit in the stack. A stack of units moved together cannot drop off a unit and continue moving; the stack must move, attack, and stop together.
5.2 Surface Unit Movement
A surface unit can enter any sea, drift ice, or coastal hex; it can never enter a pack ice or land hex. During movement, surface units can move through hexes occupied by friendly or enemy units. Similarly, they can move through enemy base hexes without restriction. However, surface units may never end their active status stacked in the same hex as any enemy unit or base.
A surface unit can never enter a hex by crossing a hexside that is entirely composed of a land feature. For example, a surface unit in hex 3720 could not move directly into hex 3820; it would have to move into hex 3721.
Special Norwegian Restrictions: Norwegian surface units can never enter a hex that is more than six hexes away from a Norwegian coastal hex.
Fiord Hexes: If a surface unit enters a fiord hex, it must stop in the hex and move no further during the current Action Segment. If a surface unit begins its movement in a fiord hex, its Movement Allowance is reduced by one-half (round fractions up).
5.3 Submarine Unit Movement
Except for movement in pack ice hexes, submarines are subject to the same movement restrictions as surface units, including fiord penalties. Remember that submarines must be activated individually.
Full Speed: Whenever a submarine unit is activated, the owning player may declare that his submarine will move at full speed. When a submarine is activated at full speed, its Movement Allowance is increased by one. However, a Strategic Detection marker (see 9.0) is immediately placed on the submarine; if there is already such a marker on the submarine unit, there is no further effect. A submarine starting its movement in a pack ice hex cannot move at full speed.
Pack Ice Hexes: Only nuclear submarines (SN) and ballistic missile submarines (SB) can enter pack ice hexes; diesel submarines (SS) cannot enter these hexes. When an SN or SB unit enters a pack ice hex, it must stop and move no further in the current Action Segment. If an SN or SB unit begins its movement in a pack ice hex, its Movement Allowance is always one.
5.4 Air Unit Movement
Air units can enter and move through any hex on the map, regardless of terrain or the presence of enemy or friendly units or bases. Air units have only one movement restriction: They must begin and end their active status on a friendly airfield or aircraft carrier. NATO air units can end their active status in any NATO airfield regardless of nationality. It is not necessary that an air unit end its active status in the airfield in which it began; it can change airfields at the end of its active status as long as the new airfield is within the Movement Allowance of the air unit. Remember that air units are the only ones that can interrupt their movement to make an attack and then resume movement.
Aircraft Carriers: Air units beginning the game on an aircraft carrier (CV) unit must remain on this carrier for the duration of the game. Air units assigned to a carrier are destroyed if their parent carrier is sunk; air units on the Aircraft Carrier Display are immediately removed, air units on CAP are removed during the CAP Landing Phase, and air units on strategic missions are removed during the Strategic Air Mission Termination Phase (air units on CAP and strategic missions continue their missions until it is time for them to land). Air units not assigned to a carrier at the beginning of a game can never end their active status on a carrier.
International Borders: Air units can move through hexes of any country without restriction, including Finland and Sweden.
5.5 Base Hexes
There are four types of base hexes: ports, airfields, landing strips, and a port/airfield combination. Each base belongs either to the NATO or Soviet player (see the Terrain Key on the map). Several other values, which are used only in Intermediate and Advanced Scenarios, are also indicated. Although units can pass through enemy base hexes without restriction, they cannot end their movement in an enemy base. Air units must begin and end their activation on a friendly airfield or aircraft carrier — never on a landing strip (landing strips are used only for Victory Point purposes in the Advanced Game).
6.0 Stacking
"The age old dreams of our people have become a reality. The pennants of Soviet ships now flutter in the most remote corners of the seas and oceans. Our navy is a real force and possesses the ability to resolve successfully the task of defending the state interests of the Soviet Union and the whole socialist world." — Admiral Sergei G. Gorshkov
A maximum of 12 friendly surface combat units (CV, CG, CL, DD, FF, BB, and PC) can end the surface unit Action Segment stacked together in the same hex. Non-combat surface units do not count towards the 12 unit maximum. Groups (see 6.2) can end an Action Segment in the same hex as long as the limit of 12 surface combat units per hex is observed.
Any number of friendly submarine units can stack together at the end of the submarine Action Segment. Submarines end their active status stacked in the same hex as friendly surface units (and vice versa) and do not count toward the stacking limit of the surface units.
A maximum of four friendly INT and/or ATK air units can occupy an airfield hex at any given time in a turn. (Friendly air units can move over an airfield in violation of this restriction.) RCN, EW, and AEW air units do not count against the four unit maximum. Air units situated in airfields in coastal hexes can occupy the same hex as surface and submarine units.
NATO units of different nationalities can occupy the same hex. NATO surface and air units stacked in the same hex can activate together without restriction. Opposing units can never occupy the same hex at the end of an Action Segment.
Notable Exception: If the Tactical Nuclear rule (see 21.0) is being used, players can ignore the surface unit stacking restrictions of this section and can stack as many surface combat units in a hex as they wish (although a large stack will be a tempting target for a nuclear attack).
6.1 Stacking Restrictions
Movement: A player can activate any or all surface units in a hex as a stack, except for Groups (see 6.2), which must be activated separately. Up to four air units, regardless of type, can be activated from an airfield or aircraft carrier at one time. Submarines must be activated individually.
Position: The position of surface units within a stack is irrelevant until the opposing player declares a Bombing or SSM Combat against this stack; after the combat resolution starts, he can no longer adjust his ships' position. The position of air units within an active stack is always irrelevant.
If there are several Groups (Task Forces and/or Task Groups) in a hex, or Groups stacked with other surface units not in a Group, the Groups do not benefit each other or other units with their Close Anti-Air values when defensive combat occurs in SSM and Bombing Combat (see 10.4 and 10.5).
6.2 Groups
Groups are collections of surface units that perform their activities together. There are two types of Groups: Task Groups and Task Forces.
Creating Groups: At the beginning of a player's surface Action Segment, before the activation of any units, a player can create Groups from stacks of eligible surface units and adjust the status of already existing Groups. The creation and maintenance of Groups is voluntary: A player is never obligated to form a Group; similarly, he can break up his Groups at the beginning of his surface Action Segments if he wishes (and must break them up if they no longer fulfill size requirements for a Group). NATO units of different nationalities can belong to the same Group.
The creation of Groups is limited by the number of Task Group/Task Force markers available to a player. Each player has eight Group markers, printed "Task Group" on one side and "Task Force" on the other. If no Group marker is available to a player, he cannot create a new Group. However, as soon as Groups are disbanded, the markers immediately become available for use again.
To create a Group, a player points to a stack of eligible surface units and declares which units within the stack will comprise the Group. These units are removed from the map and are replaced by a Task Group or Task Force marker of the appropriate side (NATO or Soviet). If two or three combat units (CV, CL, CG, DD, FF, BB, PC) plus any number of non-combat units are chosen to comprise a Group, the player uses the Task Group side of the marker; if four or more combat units plus any number of non-combat units are chosen to comprise a Group, the player uses the Task Force side of the marker. Note that at least two combat units must be in a stack before a Group can be formed. More than one Group can be created from a single stack of surface units.
When surface units are selected to form a Group, the owning player places them on his Task Group/Force Display in the boxes corresponding to the numbered Task Group/Task Force marker that replaced them. On the display, one surface unit is placed per box — the order of placement is considered the order in which the units are stacked (Box 1 being considered the top of the stack). If a Group contains more units than there are boxes, place the extra units at the end of the row of boxes.
Enhancement of Groups: At the beginning of a player's surface Action Segment, he can add surface units to existing Groups as long as they are situated in the same hex. Remove the units being added to the Group from the map and place them on the Task Force/Group Display in the boxes corresponding to their new Task Group/Force. If the addition of ships changes a Task Group to a Task Force, the marker on the map should be flipped to the correct side.
Disbanding Groups: At the beginning of a player's surface Action Segment, he can disband any of his Groups. To do so, he removes the Task Group/Force marker and places the surface units that comprise this Group back on the map. If, due to combat losses, a Group falls below minimum size requirements, the owning player must adjust this Group (see below).
Combining Groups: At the beginning of a player's surface unit Action Segment, he can combine any of his Groups that occupy the same hex. The combined Group is represented by a single Group marker (all other Group markers are removed) and the placement of the surface units on the Task Group/Force Display is adjusted to reflect the new Group's structure. If the new Group has four or more combat units in it, use the "Task Force" side of the marker.
Groups and Combat Losses: If, due to combat losses, a Task Force falls below four combat units (or a Task Group falls below two combat units), the owning player must adjust the status of this Group at the beginning of his surface unit Action Segment by disbanding the Group or combining it with another in the same hex. (If a Task Force falls below four combat units, it can be adjusted by simply flipping the marker over to its "Task Group" side, assuming it still has two or three combat units.)
Note that Group creation, adjustment, and disbandment takes place only at the beginning of a player's surface Action Segment. Even if a Group falls below minimum size requirements due to losses, its marker remains unchanged until the player's next surface Action Segment.
Movement: A Group marker functions as a surface unit in all respects. It can move a number of hexes equal to the lowest Movement Allowance of any unit within the Group. Groups stacked in the same hex must be activated individually. If a Group is activated, it must move and attack as a stack; no unit can separate from the Group until the next surface Action Segment. Remember that each time units in a Group perform combat, those that are participating must perform the same type of combat (that is, some units cannot perform SSM Combat while others perform ASW Combat at the same time).
Defense Combat Benefit: Units belonging to a Task Force that are attacked by Torpedo, SSM, or Bombing Combat receive a +2 modifier to Defensive combat die rolls (see 10.1). Units belonging to a Task Group do not receive this benefit.
7.0 Strategic Air Missions
"There is, in fact, no real choice for western Europe. The inescapable necessity for the whole of NATO is to bend the efforts of foreign policy to repairing the cracks appearing in the Alliance and to recognize that there are long-term strategic concerns that override short and medium-term conflicts of economic interests because they are not matters simply of stability and prosperity but of survival." — The Right Hon. The Lord Chalfont
Air units can be assigned to Strategic Air Mission during the Strategic Air Phase, which occurs during AM Game Turns. A unit assigned to a strategic mission cannot be activated during the next three Action Phases (AM, PM, Night). When performing strategic missions, air units are placed on the Strategic Air Display.
7.1 Mission Eligibility
There are three strategic missions to which air units can be assigned in the Basic Game:
- Interception
- Reconnaissance
- Tactical Coordination
Note: A fourth mission, Mining, can be used as an optional rule in the Advanced Game (see 23.0).
Strategic Air Mission Eligibility Chart: This chart (see the map) determines the kinds of strategic missions each air unit type can undertake. There are five types of air units: Interceptor (INT), Attack (ATK), Reconnaissance (RCN), Electronic Warfare (EW), and Airborne Early Warning (AEW). Some air types are prohibited from undertaking certain missions; for example, an INT unit can never be assigned to a Mining mission.
Strategic Air Display: Each player has a Strategic Air Display on the map on which air units on strategic missions are placed. The display is divided into eight zones, each of which is labeled (for example, "Barents Sea"). Each zone is also delineated on the map with borders corresponding to the configuration of the Strategic Air Display. Each zone on the map has four "mission" boxes, plus additional "Return to Base" boxes (see 7.5).
During the Allocation Segment of the Strategic Air Phase, each player secretly assigns any or all eligible air units to strategic missions. Such units are placed on the display in the desired mission boxes. To assign an air unit to a strategic mission:
- Decide the type of mission the unit will perform;
- Decide the zone in which it will be placed;
- Pick the unit up from its airfield hex or aircraft carrier and place it in the desired mission box on the display.
Damaged air units can perform strategic missions normally. NATO air units of different nationalities can perform missions in the same zone without restriction.
Zone Range of Air Units: An air unit is considered to occupy the zone in which its airfield or aircraft carrier is situated. However, some air units can perform missions at extended ranges. The Movement Allowance of an air unit determines the range (in zones) at which it can perform a mission:
| Movement Allowance | Range |
|---|---|
| 71 or more | 3 zones |
| 51-70 | 2 zones |
| 26-50 | 1 zone |
| 25 or less | Only in zone occupied |
Example: Two Norwegian air units occupy the airfield at Andoya in the Norwegian Sea Zone. One is an F16 INT unit (Movement Allowance: 20) and the other is a P3 RCN unit (Movement Allowance: 70). The NATO player decides to assign both units to strategic missions. The F16 can be assigned to either a Reconnaissance or an Interception mission and can operate only in the Norwegian Sea Zone (since its Movement Allowance is 25 or less). The P3 can be assigned to either Reconnaissance or a Tactical Coordination mission and can operate on any zone on the map (since its Movement Allowance is in the 51-70 range, it can operate up to two zones away from the one it occupies; there is no zone on the map that is more than two zones away from the Norwegian Sea Zone).
Ending Strategic Air Missions: An air unit remains on its assigned mission until it is destroyed, it is forced to "Return to Base" (see 7.5), or until the Strategic Air Mission Termination Phase of the next Night Game Turn.
Solitaire Mission Assignment (Optional): To simulate the uncertainty of mission assignment when playing the game solitaire, a player may wish to use the following optional rule:
- Roll the die. On an even roll (including "0"), the player places a NATO air unit on a mission; on an odd roll, he places a Soviet air unit on a mission.
- Continue to roll the die and assign air units to missions in this fashion until the player either does not wish to assign anymore air units to air missions, or a "9" is rolled at which point no more air units can be assigned. Note that if a "9" is rolled on the first four Mission Allocation die rolls, the result is ignored and the die is rolled again.
7.2 Interception Missions
Air units on Interception missions can attack enemy units on strategic missions in the same zone.
Interception Segment: During this segment of the Strategic Air Phase, opposing air units on Interception missions within the same zone must perform Air-to-Air Combat. First, the players should check each other's Strategic Air Displays, zone by zone; a single Air-to-Air Combat must take place within a given zone if both players have assigned air units to Interception missions within that zone. If only one (or neither) player has assigned air units to Interception within that zone, Air-to-Air Combat does not take place. Thus, from 0 to 8 Air-to-Air Combats can take place during this segment. When performing Air-to-Air Combat in a given zone, a player's air units on Interception must be combined into a single force for combat (including NATO units of different nationalities). See 10.7 for an explanation of how to perform Air-to-Air Combat.
After Air-to-Air Combat has taken place, any air units that are allowed to continue their Interception missions (that is, they were not obligated to return to base as a result of combat) can proceed to initiate Air-to-Air Combat in the Bounce Segment. Air units that receive an "r" result in combat are placed in one of the "Return to Base" boxes on the Strategic Air Display (see 7.5).
Bounce Segment: During this segment, air units still on Interception missions can initiate combat against all enemy air units in the same zone that are on non-Interception missions — Reconnaissance, Tactical Coordination, and Mining (if this is being used). To perform this combat, the Interceptor rolls the die and consults the "Bounce" column of the Air-to-Air Combat Results Table (no combat ratio is calculated). The result is applied as described in Case 10.7; this result applies to all enemy air units currently on non-Interception missions in that zone, regardless of quantity or type. The air units on Interception missions that initiated this combat can never suffer an adverse result when "bouncing" enemy units. At the end of the Bounce Segment, all units on Interception missions are automatically placed in one of the "Return to Base" boxes on the Strategic Air Display (see 7.5).
Example of Interception: During the Strategic Air Phase, the NATO player assigns two US air units to Interception missions in the Iceland Zone. At the same time, the Soviet player assigns one air unit to Interception, one unit to Reconnaissance, and one unit to Tactical Coordination in the Iceland Zone. During the Interception Segment, Air-to-Air Combat takes place between the two US air units and the single Soviet unit on Interception. Assume the NATO player wins this combat; his two units remain on Interception and the Soviet unit returns to base. In the Bounce Segment, the US units attack the Soviet units on Reconnaissance and Tactical Coordination. The NATO player rolls the die and consults the "Bounce" column of the Air-to-Air Combat Results Table. Assume the result calls for one Soviet unit's elimination, while the second unit must return to base. At the end of the Bounce Segment, the two US units must return to base.
7.3 Reconnaissance Missions
Air units on Reconnaissance missions affect the detection of enemy units, which occurs in the Strategic Detection Segment of the Strategic Air Phase (see 9.0). At the end of this segment, all air units on Reconnaissance missions are placed in one of the "Return to Base" boxes in the zone they occupy (see 7.5).
7.4 Tactical Coordination Missions
Air units on Tactical Coordination missions are used to enhance attacks made on enemy units during the following three Action Phases (AM, PM, and Night). For each air unit assigned to Tactical Coordination, the owning player adds one to any combat die roll made during an attack (except Air-to-Air Combat) against an enemy unit that occupies the zone in which the Tactical Coordination mission is taking place. Up to three air units can contribute to this bonus in any single attack; thus, a maximum of three can be added to any attack die roll. The owning player must announce that he is using this Tactical Coordination bonus before the combat die roll is made. After an air unit on a Tactical Coordination mission provides this bonus to an attack, it is placed in one of the "Return to Base" boxes in the zone it occupies (see 7.5).
7.5 Returning to Base
Air units that receive an "r" result in Air-to-Air Combat during the Strategic Air Phase are placed in one of the "Return to Base" boxes in the zone they occupy on the Strategic Air Display. A unit in one of these boxes can perform no function.
Return to Base Boxes: There are four Return to Base boxes in each zone on the Strategic Air Display. Each box corresponds to the zone from which an air unit was moved to perform its strategic mission. Units that began a mission in the zone they occupy are placed in the "Occupy" box when forced to return to base; units that moved one zone to perform their mission are placed in the "1 Zone" box when forced to return to base; and units that moved two or three zones are placed in the "2 Zones" or "3 Zones" box, respectively, when forced to return to base. Each of these four boxes includes the initials of the zone which the air unit left to perform its mission; when an air unit is placed in a Return to Base box, turn the counter so that its top points in the direction of the initials of the zone from which it came.
Interception and Reconnaissance missions (in addition to Mining missions, if this optional rule is used) are resolved during the Strategic Air Phase; players should be able to remember the zones from which their air units began. Tactical Coordination units provide combat bonuses during the Action Phases; players having difficulty remembering the zones from which these air units began this mission may wish to write them down on a piece of paper.
Strategic Air Mission Termination Phase: During this phase, which takes place during Night Game Turns, all units on the Strategic Air Display are placed back on an airfield hex or aircraft carrier. Air units that initiated their strategic mission from an airfield can be placed on any airfield hex within the zone in which they began their mission subject to stacking restrictions (see 6.1). If no friendly airfield is available, the air units are destroyed.
Air units that initiated their mission from an aircraft carrier must be returned to the same Aircraft Carrier Display from which they began their mission (the carrier may have moved to another zone in the interim; this displacement does not affect the return of its air units). If the carrier was destroyed in a previous Action Phase, all its air units on strategic missions are destroyed in the Strategic Air Mission Termination Phase.
Example: A US air unit based in Wick (in the British Isles Zone) is assigned to an Interception mission in the Norwegian Sea Zone. After the unit completes its mission, it is placed in the "1 Zone" Return to Base box of the Norwegian Sea Zone with the top of the counter pointing to the initials "BI" (British Isles). During the Strategic Air Mission Termination Phase, the unit can be returned to any airfield in the British Isles, subject to stacking restrictions.
8.0 Combat Air Patrol (CAP)
"Westminster Abbey or victory!" — Admiral Horatio Nelson
CAP is a special role for air units that allows them to "stand guard" over an airfield or aircraft carrier.
8.1 How to Perform CAP
During the CAP Phase, players can assign any or all of their INT or AEW air units that are not on strategic missions to CAP. The Soviet player declares CAP missions first, followed by the NATO player. (NATO units of different nationalities can combine in the same CAP mission.) When placed on CAP, air units cannot be activated during the Action Phase.
Each airfield or aircraft carrier can assign three units to a CAP mission. If two or more carriers occupy the same hex, or a carrier is situated in an airfield hex, all CAP units must be combined into a single CAP mission. As long as each airfield or carrier does not assign more than three units to a CAP mission, each mission can contain an unlimited number of air units. Should carriers providing air units in a combined CAP mission separate (or leave an airfield with which they combined in a CAP mission), the owning player must break up the combined mission and provide a separate CAP marker for each carrier and airfield that provided CAP units.
CAP markers on airfield hexes can never be moved. CAP markers on aircraft carriers are moved as the carriers are moved.
Aircraft carriers can initiate CAP missions in fiord hexes.
CAP Display: Each player has a CAP Display for maintaining air units on CAP missions. This display consists of a series of numbered boxes; CAP markers are provided to each player that correspond with these boxes. Air units on a CAP mission are removed from the map and are placed in one of the boxes on the display. The CAP marker corresponding to that box is placed on the map in the hex from which the air units were removed. A hex can contain only one CAP marker. The number of CAP boxes on the display is not a limitation. A player who wishes to have more CAP missions than he has boxes should place the extra CAP units near the display and should use blank counters to create more CAP markers.
8.2 CAP and Air-to-Air Combat
A CAP marker allows friendly air units to interfere with the movement of enemy air units during the Action Phase.
Carrier-Based CAP: If a carrier-based CAP mission does not possess an AEW air unit in the mission, use the front of the CAP marker. If the mission does contain an AEW unit, use the reverse side ("CAP & AEW") of the CAP marker.
Range of CAP Missions: A CAP mission has a range of four hexes (exclusive of the hex the CAP marker occupies). When an active enemy air unit or stack moves into a hex that is within range of a CAP mission, the movement of the enemy air unit(s) temporarily ceases. The CAP player has a choice: He can engage the enemy air units in Air-to-Air Combat in their hex, or he can do nothing. In the first instance, Air-to-Air Combat between all the units in the attacking CAP mission and all the defending enemy units is immediately resolved (see 10.7). In the second instance, no combat takes place and the enemy units can continue their movement.
A CAP mission can make a maximum of one attack against a given enemy air unit or stack in an Action Segment; however, it can perform other attacks against different air units in that segment. The CAP player can choose to attack enemy units any time they move within the CAP marker's range. If it did not attack at a range of four hexes, it could attack at a range of three, two, or one hexes. It cannot attack enemy air units in the hex occupied by the CAP marker.
The range of friendly CAP missions can overlap. If enemy air units enter a hex within range of two or more CAP missions, the CAP player can attack the enemy air units with each CAP mission separately. (Different CAP missions can never combine in an attack.) Enemy air units can be attacked an unlimited number of times by CAP missions in the Action Phase, but they can be attacked by a given CAP mission only once.
Friendly and enemy CAP missions can overlap without affecting each other. CAP missions affect only enemy units moving through its range, never enemy CAP missions.
Limitation to CAP Attacks: A CAP mission can initiate an unlimited number of combats against different enemy air units or stacks during the Action Phase, as long as the CAP mission does not suffer an "r" (Return to Base) result in combat. Units in the CAP Display's Return to Base box cannot initiate combat.
Air-to-Air Combat between a CAP mission and enemy air units is resolved before the enemy units initiate any combat in the hex into which they have just moved. If the enemy units survive Air-to-Air Combat, they can initiate an attack from that hex or can continue moving and then attack.
CAP Combat Values: Air units on CAP missions over airfield hexes use their full Anti-Air value when initiating Air-to-Air Combat against enemy air units at any range.
Air units on CAP missions over aircraft carriers can have their Anti-Air values modified. The range from the carrier at which a CAP mission initiates Air-to-Air Combat against enemy units and the presence of an AEW unit in the mission both can affect this modification. The Aircraft Carrier CAP Chart on the map lists the modifications to Anti-Air values of CAP units on aircraft carriers. The minimum Anti-Air value of air units on a CAP mission is one, even if this value would normally be modified to zero by the Aircraft Carrier CAP Chart.
Note that, if the AEW unit is a UK SKG unit or Soviet HLX unit, the modification at a 4-hex range is ⅛, not ¼.
Notable Exception: When an aircraft carrier is in a friendly airfield hex and has a combined CAP mission with the airfield, all CAP units in that mission use their full Anti-Air value at any range. The Aircraft Carrier CAP Chart is not consulted.
Example: The NATO player has a CAP marker in hex A (an airfield hex). The Soviet player activates an air unit in hex F and moves it into hex E. Since this hex is within the range of the CAP mission, the unit's movement is halted and the NATO player has his choice of attacking the Soviet unit or not. The NATO player decides not to attack, so the unit can continue to move. The air unit is moved into hex D, and the NATO player again has the choice to attack. Again, he decides not to attack. The Soviet player moves his air unit into hex C, and the NATO player still decides not to attack. When the Soviet player moves his unit into hex B, the NATO player decides to attack. Air-to-Air Combat is resolved in hex B. After the combat is resolved, the Soviet player, if his unit survives, has the option to continue moving or to initiate an attack.
Now assume that hex A is not an airfield, but instead contains an aircraft carrier with a CAP marker on it and that the combined Anti-Air value is 19, plus there is an AEW unit with the CAP mission. If the NATO player engages the enemy unit at a four hex range, the modified Anti-Air value of the CAP mission is 5 (19×¼=5, rounding fractions up); if the CAP mission did not contain the AEW unit, it would have a combined Anti-Air value of 3 (19×⅛=3, rounding up).
If the CAP mission attacked at a three hex range, the combined Anti-Air value would be 10 (19×½=10, rounding up) or 5 (19×¼=5, rounding up), depending on whether the CAP mission included an AEW unit or not. At a two-hex range the CAP mission would attack at its full strength (19×1=19) with the AEW unit and at 10 (19×½=10, rounding up) without the AEW unit. At a one-hex range, the CAP mission would attack at full strength whether an AEW unit is with the CAP mission or not.
8.3 CAP and SSM Combat
If a CAP marker is stacked in the same hex as a surface unit that is being attacked by an enemy SSM combat, the CAP mission can aid in the defense of that surface unit (see 10.4 for details). This contribution takes place as long as the CAP units have not been forced to return to base; the CAP units can have participated in Air-to-Air Combats at an earlier point in the Action Phase.
8.4 Returning to Base
Air units that are attacked by a CAP mission and suffer an "r" result are immediately returned to the airfield or to the Aircraft Carrier Display from where they started. If these units have moved half their Movement Allowance or less, the owning player picks them up and returns them to their original locations. (They cannot be activated for the rest of the Action Phase.) If they have moved more than half their Movement Allowance before suffering an "r" result at the hands of a CAP mission, the owning player must be able to reach a friendly airfield that is within range of the remaining Movement Allowance or else they are destroyed.
If CAP units suffer an "r" result in Air-to-Air Combat, all the air units comprising that mission are immediately placed in the Return to Base box on the CAP Display, directly beneath their normal CAP box. Units in the Return to Base box can perform no functions whatsoever during the remainder of the Action Phase.
If enemy units attacked by a CAP mission do not contain any INT units, "r" results against the CAP mission are ignored (see 10.7).
CAP Landing Phase: During this phase, all air units on the CAP Display, including those in Return to Base boxes, are placed back on the airfield or aircraft carrier in which the CAP markers are located. The CAP markers are then removed from the map.
CAP units can return to airfields or carriers that are damaged. If an airfield occupied by a CAP marker has been destroyed in the immediately preceding Action Phase, the CAP units can return to any friendly airfields in the same zone, subject to stacking restrictions (see 6.1); if no friendly airfield is available in the zone, the air units are destroyed. Air units on CAP belonging to an aircraft carrier that is destroyed are eliminated during the CAP Landing Phase; these units continue to perform CAP throughout the Action Phase of the Game Turn in which they were assigned to their mission.
9.0 Detection
"Whether they will or no, Americans must begin to look outward." — Alfred Thayer Mahan
Detection is a means of pinpointing the location of enemy surface or submarine units so that they can subsequently be destroyed. A unit or stack that has been detected has a Detection marker placed on it. There are two types of Detection markers: Strategic and Local. Air units and bases do not need to be detected.
9.1 Detection Zones
There are two types of Detection Zones: Limited Detection Zones, consisting of the hex occupied by a unit plus the six hexes immediately surrounding it; and Extended Detection Zones, consisting of the twelve additional hexes surrounding the Limited Detection Zone. Only surface and submarine units have Detection Zones; air units and bases do not.
Example: In the diagram above, unit A has a Limited Detection Zone in the hex it occupies plus the six lightly shaded hexes around it. It has an Extended Detection Zone in the twelve darker-shaded hexes surrounding the Limited Detection Zone.
Determining Detection Zones: All submarines exert Limited Detection Zones. All surface units or stacks have both a Limited Detection Zone and an Extended Detection Zone.
9.2 Placement of Detection Markers
When a Soviet unit is detected, place a "Soviet" Detection marker on it; when a NATO unit is detected (regardless of nationality), place a "NATO" Detection marker on it. When a Detection marker is placed on a unit, it remains with that unit and moves with it wherever it goes until the Strategic or Local Detection Removal Phase, at which time it may be removed. Each submarine or surface unit or stack can possess only one Detection marker (Strategic or Local) at any given time.
Strategic Detection Segment: This segment occurs in the Strategic Air Phase of AM Game Turns. For each air unit currently on a Reconnaissance mission in a given zone (see 7.3), the owning player has a choice during the Strategic Detection Segment (Soviet player first, NATO second):
- He can place a Strategic ("Strat") Detection marker on any enemy surface unit or stack that occupies the zone in which the Reconnaissance mission is taking place.
- He can attempt to place a Strategic Detection marker on any enemy submarine that occupies the zone in which the Reconnaissance mission is taking place.
A submarine in a pack ice hex can never be detected by Strategic Detection.
To attempt to place a Strategic Detection marker on an enemy submarine, the player points to the enemy submarine he wishes to detect and determines its nationality and type (SB, SN, Noisy SS, or non-Noisy SS). He consults the Submarine Detection Table and rolls the die, cross-referencing the die result with the column corresponding to the the submarine's nationality and type. On a result of a submarine (if it already has a Local Detection marker on it, flip the marker to its Strategic ("Strat") Detection side). On a result of "-," the attempt has failed and no marker is placed. If an attempt to detect a submarine fails, other air units on Reconnaissance missions can attempt to detect the submarine again in the segment.
Notable Exceptions: An INT or ATK air unit on a Reconnaissance mission can never attempt to detect a submarine unit. Soviet T16D and T95D RCN air units cannot attempt to detect submarine units.
Once an air unit on a Reconnaissance mission has placed (or attempted to place) a Strategic Detection marker on an enemy unit, it is placed in one of the Return to Base boxes in the zone it occupies on the Strategic Air Display (see 7.5).
Local Detection Phase: This phase occurs in all Game Turns. Only Local Detection markers are placed during this phase — never Strategic Detection markers.
- In this phase, a Local Detection marker is placed on each enemy surface unit or stack that occupies the Limited or Extended Detection zone of a friendly surface unit or stack, or the Limited Detection Zone of a friendly submarine.
- In this phase, a Local Detection marker is placed on each enemy submarine that occupies a Limited Detection Zone and the friendly surface unit(s) and/or submarine(s) exerting this Limited Detection Zone have a combined ASW value of 6 or more. No Detection marker is placed on the enemy submarine if the friendly units exerting the Limited Detection Zone into the hex containing the enemy submarine have a combined ASW value of 5 or less. All units exerting a Limited Detection Zone into a hex containing an enemy submarine combine their ASW values for detection purposes.
Units already possessing a Local or Strategic Detection marker cannot be further affected in this phase, even if they meet the requirements of local detection. Their current detection status remains unaltered.
Action Phase: There are four ways Detection markers can be placed on units during the Action Phase:
- If a surface unit or stack executes an SSM or ASW attack and it is situated in an enemy unit's Limited Detection Zone after the attack has been resolved, place a Local Detection marker on that surface unit (or stack). If a submarine executes a Torpedo, SSM or ASW attack and it is situated in an enemy unit's Limited Detection Zone after the attack has been resolved, place a Local Detection marker on that submarine.
- At the moment an enemy surface unit or stack moves directly from one Limited or Extended Detection Zone exerted by a friendly unit(s) into another Limited or Extended Detection Zone exerted by the same unit(s), a Local Detection marker is placed on the enemy unit or stack. If an enemy submarine moves from one Limited Detection Zone exerted by friendly units with a combined ASW value of 6 or more to another Limited Detection Zone exerted by the same units, a Local Detection marker is placed on the enemy submarine.
- As soon as a player declares that one of his submarines will move at full speed (see 5.3), he must place a Strategic Detection marker on it.
- At the moment any Soviet surface unit or stack enters a coastal hex of Great Britain or Norway (not counting hexes composed entirely of islands), a Strategic Detection marker must be placed on that unit or stack.
Note: Even though Spitsbergen is part of Norway, Soviet surface units are not detected when they enter a coastal hex in the Spitsbergen island group.
If a unit already has a Strategic Detection marker, it cannot be further detected during the Action Phase. If it possesses a Local Detection marker, it is not further detected unless it fulfills the requirements for receiving a Strategic Detection marker, in which case its Local Detection marker is flipped over to its Strategic side.
9.3 Detection Restrictions
Submarines: The detection status of submarines is determined individually. If several submarines within the same hex are detected, each must be assigned its own Detection marker. Undetected submarines entering a hex with a detected submarine remain undetected. Thus, it is possible for a hex to contain both detected and undetected submarines. A submarine can never have more than one Detection marker.
Surface Units: The detection of surface units is determined by hex. When a Detection marker is placed on a surface unit, all surface units in the hex are immediately detected. If a surface unit or stack that it not detected ends an Action Segment in the same hex as a detected surface unit or stack, the undetected unit or stack is immediately detected. (Similarly, if a surface unit or stack that has a Local Detection marker ends an Action Segment in a hex with a surface unit or stack possessing a Strategic Detection marker, the Local Detection marker immediately becomes a Strategic Detection marker.) The reverse is also true; a detected surface unit or stack that ends an Action Segment in the same hex as an undetected surface unit or stack immediately causes that unit or stack to be detected. If a stack of detected surface units is activated into separate forces, all the units in the separate forces are detected and Detection markers are placed in all hexes in which these units end their movement.
Undetected surface units that end an Action Segment in the same hex with a detected submarine are not detected. The reverse also holds true. In effect, the detection status of submarines does not affect surface units and vice versa.
Group markers are considered surface units; if a Group is detected, all units that comprise it (and any other surface units in the same hex) are detected. A surface unit or stack can never have more than one Detection marker.
Base Hexes: Base hexes are automatically detected at all times. However, submarine and surface units occupying bases must be detected in order to be attacked.
9.4 Effects of Detection
Surface or submarine units must have a Detection marker (either Local or Strategic) in order to be attacked. Should a detected submarine occupy a hex with an undetected submarine, only the detected unit can be attacked. All surface units in a hex that contains a Detection marker can be attacked.
9.5 Removing Detection Markers
There are two methods of removing Detection markers:
Strategic Detection Removal Phase: This phase occurs during Night Game Turns only. In this phase, all Strategic Detection markers are removed from surface and submarine units, regardless of their location.
Notable Exception: In the Advanced Game, Strategic Detection markers are not removed from Soviet submarines in or within 3 hexes of SOSUS bases (see 19.2).
Local Detection Removal Phase: This phase occurs in all Game Turns. During this phase, all Local Detection markers are removed from surface and submarine units, with the following exceptions:
- Surface Units: Enemy surface units or stacks that are situated within the Limited or Extended Detection Zones of friendly units during this phase do not have their Local Detection markers removed.
- Submarines: Enemy submarines that are situated within the Limited Detection Zone exerted by friendly units with a combined ASW value of 6 or more do not have their Local Detection markers removed during this phase.
Example of Detection: Unit A is a NATO surface unit with an ASW value of 4, exerting a Limited and Extended Detection Zone as shown. Assume the NATO unit already possesses a Strategic Detection marker, so it cannot be further affected. Units B and E are Soviet surface units; units C, D, and F are Soviet submarines.
In the Strategic Detection Segment of the AM Game Turn, assume the NATO player has assigned one NATO air unit to Reconnaissance mission in this zone. It attempts to detect Soviet submarine C. In this case, the NATO player's detection attempt succeeds on the Submarine Detection Table; thus, a Strategic Detection marker is placed on unit C. In the Local Detection Phase of the AM Game Turn, a Local Detection marker is placed on Soviet surface unit B because it occupies the Extended Detection Zone of a NATO unit. A Local Detection marker is not placed on Soviet submarine unit F because the NATO unit exerting the Limited Detection Zone has an ASW value of less than 6.
In the Action Phase, Soviet submarine D moves at full speed in the path shown. As soon as the Soviet player announces that it will move at full speed, he places a Strategic Detection marker on that unit. Soviet surface unit E moves in the indicated path. As soon as it does, a Local Detection marker is placed on it because it moved directly from one NATO Extended Detection Zone to another. Finally, Soviet submarine F executes a Torpedo attack against the NATO unit. Assuming the NATO unit survives the attack, a Local Detection marker is placed on unit F because it occupies the Limited Detection Zone of a NATO unit after it executed an attack.
Combat
10.0 Combat
"I cannot conceive of a NATO war in which we would not be putting not one, but several carrier battle groups into the Norwegian Sea at some point. What we must do is to seek out and destroy the Soviet capacity to interdict our uses of the sea." — Secretary of the Navy John Lehman
There are five kinds of combat that can occur in the game:
- Torpedo
- Surface-to-Surface Missile (SSM)
- Bombing
- Anti-Submarine Warfare (ASW)
- Air-to-Air
The first four kinds of combat are resolved using the Combat Results Table and the last kind on the Air-to-Air Combat Results Table (both printed on the map and in the Charts/Tables Booklets). Note that the Combat Summary printed on the map uses "AA" as the abbreviation for "Anti-Air."
10.1 Initiating Combat
Only an active unit or stack can initiate combat. To do so, the owning player states the type of attack and the enemy units that are the targets.
Surface Units: Enemy surface units must possess Detection markers before they can be attacked. A surface unit can perform up to two attacks during its activation; one attack may be ASW and the other SSM (the same type cannot be initiated twice in a single activation). Surface units activated together are considered a single unit for combat purposes — regardless of how many units comprise the stack, it is still limited to two attacks per activation. NATO units of different nationalities can combine in a stack and perform combat together.
Submarines: An enemy submarine unit must possess a Detection marker before it can be attacked. Each submarine attacks and is attacked separately.
Air Units: Air units never possess Detection markers. They can be attacked by defensive fire in Bombing Combat and by enemy air units on CAP missions.
Base Hexes: Base hexes never possess Detection markers. Bases cannot be attacked in Introductory Scenarios. Surface and submarine units in a base must be detected before they can be attacked. They can be attacked by any form of combat while in a base except by Torpedo Combat, which is prohibited against surface units situated in a base hex.
Pack Ice Hexes: Only SN or SB submarines can enter pack ice hexes. When occupying a pack ice hex, an SN or SB can only initiate ASW combat — and only against another SN or SB also in a pack ice hex. Moreover, an SN or SB in a pack ice hex can be attacked only by ASW Combat initiated by another SN or SB that is also in a pack ice hex.
Combat Bonuses: Two forms of bonuses can be applied to combat:
- Tactical Coordination: For each air unit assigned to a Tactical Coordination mission in a zone, the owning player can add one to any Attack die roll (except in Air-to-Air Combat) up to a maximum of three per combat (see 7.4).
- Task Forces: Surface units that are part of a Task Force which are the targets of Torpedo, SSM, or Bombing Combat receive a +2 modifier to all Defensive die rolls. Units that are part of a Task Group do not receive this bonus. Units that belong neither to a Task Force nor to a Task Group have their defense die roll negatively modified. See 10.3, 10.4, and 10.5.
10.2 Combat Values
Printed on the surface, submarine, and air units are numbers that represent their movement and combat capabilities. These values are described below:
Movement Allowance: The maximum number of hexes a unit can move during its active status.
Defense Value: A measure of a unit's ability to withstand damage. Air units to not possess a Defense value.
SSM Value: A quantification of a unit's SSM capability. A unit is also given an SSM Range, which is the distance in hexes it can be from its target in order to conduct SSM Combat (do not count the hex occupied by the attacking unit). An SSM attack must take the most direct route to the target (that is, it cannot zigzag to the target).
ASW Value: A quantification of a unit's ASW capability.
Anti-Air Value: A quantification of a unit's anti-aircraft capability. An air unit has a single Anti-Air value; a surface unit has two Anti-Air values (Close Anti-Air value and Area Anti-Air value).
Special Value: A quantification of a unit's capabilities in a kind of warfare unique to its type. Air units have a Bombing value. Surface combat units have a Close Combat value (used as an optional rule in the Advanced Game; see 24.9). Amphibious assault (AA) units have an Amphibious Assault value (used in the Advanced Game; see 18.2). Submarine units have a Torpedo value.
In addition to the values listed above, some units possess special symbols to indicate unique characteristics: "noisy" Soviet submarines (affecting detection attempts on the Submarine Detection Table; see 9.2); "all-weather" air units (see 16.1); and air units with a limited SSM capability (used in the Advanced Game; see 20.4). See Case 2.3 for an explanation of these symbols.
Interceptor and Attack Air Units: Interceptor (INT) and Attack (ATK) air units have special restrictions regarding the use of their combat values. Depending on the whim of the owning player, these units can reverse their roles in an Action Phase. Before activating an INT or ATK unit, the owning player must indicate which role, INT or ATK, the unit will perform when active. The decision has the following effects:
- An air unit used as an Interceptor (INT) always has Bombing and SSM values of 0, but it employs its printed Anti-Air value.
- An air unit used as an Attack (ATK) unit always employs its printed Bombing and SSM values, but it has an Anti-Air value of 1.
Special NATO Restriction: NATO air units of different nationalities can activate from any friendly airfield. However, in every Action Phase, a maximum of two non-Norwegian INT or ATK air units can initiate Bombing or SSM Combat when activating from a Norwegian airfield.
10.3 Torpedo Combat
Torpedo Combat can be done under these circumstances:
- The attacking unit is an active submarine;
- The force being attacked must be a detected enemy surface unit or stack;
- The attacking submarine must be adjacent to the target unit;
- The attacking submarine can attack only one hex, even if it is adjacent to several enemy-occupied hexes.
Notable Exceptions: A surface unit in a base hex cannot be attacked by Torpedo Combat. A surface unit cannot be attacked if it is separated from the attacking submarine by a full land hexside. A submarine cannot perform Torpedo combat if it occupies a fiord hex.
Resolving Torpedo Combat: Follow the procedure outlined below to resolve Torpedo Combat.
Preparing for Attack
- The attacker determines the Torpedo value of the attacking submarine.
- The attacker can choose one or two surface units in the hex as targets, making this declaration aloud. A surface unit can be a target a maximum of once per Torpedo Combat.
- The attacker can split up his Torpedo value in any way he desires. He tells the defender how many points of the Torpedo value will be applied against each target. If only one unit is the target of the attack, the complete value is applied against it.
Defense Die Roll
- The defender selects up to five units in the target hex (including submarines, if any) and adds their ASW values together.
- The defender rolls the die and consults the Combat Results Table, cross-referencing the result in the "Defense" column with the "Combat Value" column corresponding to the ASW value calculated in step 4. The following die roll modifiers are applied at this time.
- If at least one (not necessarily both) of the targets chosen in step 2 belongs to a Task Force, the defender adds 2 to his Defensive die roll.
- If all targets chosen in step 2 do not belong to a Task Force or Task Group, the defender subtracts 1 from his Defensive die roll.
- If the target chosen in step 2 is the only surface unit in the hex, the defender subtracts 3 from his Defensive die roll.
Note: The last two die roll modifiers are not cumulative. A unit alone in a hex subtracts 3 from the Defensive die roll, not 4.
A result from 0 to 11 will be found. This is the Defense modifier and should be noted for later use.
Notable Exception: If all units in the target hex have ASW values of "N," no Defense die roll takes place. Skip steps 4 and 5 of this procedure.
Resolving Attacks
- The attacker states a target unit and the number of points from the Torpedo value applied against it as declared in step 3. He rolls the die and subtracts the Defense modifier calculated in step 5 from the roll. (Note that this modifier is applicable to every die roll made by the attacker during the Torpedo Combat, not just to the first attack.) The following modifiers are applied to the die roll:
- If the attacker wishes, he can add from 1 to 3 to the die roll for Tactical Coordination air units in that zone (see 7.4).
- If the target units occupy a fiord hex, 3 is subtracted from this roll.
The attacker cross-references the modified die roll in the "Attack" column with the "Combat Value" column corresponding to the number of points applied to the attack. The combat result will be a number from 0 to 11.
- The combat result is compared with the Defense value of the target unit. Damage or destruction of a unit is immediately declared in step 2.
- After all targets declared in step 2 have been attacked, the Torpedo Combat is over. If necessary, a Local Detection marker is placed on the submarine (see 9.2).
Example of Torpedo Combat: The Soviet SN VFgnr (Torpedo Value: 22) uses Torpedo Combat against a detected US stack in a fiord hex consisting of Rsvlt (Defense Value: 9; ASW Value: 5), Knox (Defense: 2; ASW: 4), and Rdgrs (Defense: 4; ASW: 8). None of the US units are part of a Group. VFgnr selects Rsvlt and Knox as targets, allocating 1 point against Knox and 21 against Rsvlt (1+21=22, the Torpedo value of VFgnr).
The NATO player adds up the ASW values of his three units (17) and rolls the die, obtaining a 4. Since none of the ships belongs to a Task Group or Force, 1 is subtracted from this roll, yielding a 3. Cross-referencing 3 in the Defense column with the "15 to 20" Combat Value column, a Defense modifier of 3 is obtained.
VFgnr now attacks Knox with 1 point. The NATO player rolls a 2. The Defense modifier of 3 and 3 more for the fiord hex causes 6 to be subtracted from the roll, yielding a -4. Cross-referencing -4 in the Attack column with the "1 to 2" Combat Value column yields a result of 0. Thus, Knox is not damaged.
Rsvlt is now attacked with 21 points. The Soviet player rolls a 7, which is modified to 1 due to the Defense modifier (-3) and the fiord (-3). Before rolling the die, however, the Soviet player announced that he would add two Tactical Coordination air units to the attack (+1 each), yielding a final modified roll of 3. Cross-referencing 3 in the Attack column with the "21 to 27" Combat Value column produces a final result of 3. Rsvlt suffers no damage and the combat is over.
10.4 Surface-to-Surface Missile (SSM) Combat
SSM Combat can be performed under these circumstances:
- The initiating force is an active surface, submarine, or air unit (or stack of surface or air units);
- The target of the attack is a detected enemy surface unit (or stack) or airfield/port hex in the Intermediate and Advanced Games (see 14.0);
- The target of the attack must be within the SSM Range (in hexes) of the attacking unit;
- Submarine and surface units cannot occupy a fiord hex when attacking, nor can they conduct an attack across a full land hexside or through a fiord hex. (Enemy units occupying fiord hexes can be attacked.) Air units are exempt from these restrictions.
- The unit (or stack) performing SSM Combat can attack targets in one hex only. If a stack of units performs SSM Combat, not all the units within the stack need participate in the SSM attack.
Note: An SSM attack must follow the most direct route to its target. It cannot zigzag or take a circuitous route in its flight path to the target.
Positioning of Defending Units: Immediately before SSM Combat is resolved, the defending player can adjust the positions of his units within the defending stack in any way he wishes. Different Groups must remain separate from each other and from other units in the same hex. Once SSM Combat begins, the defending player can no longer reposition his units.
Resolving SSM Combat: The SSM Combat procedure is outlined below:
Preparing for Attack
- The attacker determines the combined SSM value of all units participating in the attack and announces the hex he will attack.
- The defender can reposition the surface units in the target hex.
- The attacker can choose any or all surface units in the hex as targets. He must tell the defender which units will be targets.
- The attacker splits up the SSM value in any way he sees fit and tells the defender how many SSM points will be directed against each target. If there is only one target, the entire SSM value is applied against it. A given target can be attacked only once per SSM Combat, but it can be attacked several times by different enemy active units in the same Action Segment.
Defense Die Roll
- The defender combines the Anti-Air values of his units as follows:
A. Add together the Area Anti-Air value of all units in the hex;
Notable Exception: If the defender occupies a fiord hex, skip the above step.
B. Add together the Close Anti-Air values of all surface units that are targets of the SSM attack (as determined in step 3); C. Add the Close Anti-Air values of the units stacked directly beneath the target units;
Notable Exceptions: If a unit beneath another target unit is also a target, do not add in its Close Anti-Air value. A unit's Close Anti-Air value can be added in only once per SSM Combat. A unit at the bottom of the stack obviously has no other unit beneath it. If there are several Groups in a hex, they cannot assist each other as outlined in step 3C.
D. If there is a CAP mission in the target hex, add 2 to the total for each US F14 air unit in the mission; otherwise, add 1 for each additional non-F14 INT air unit in the CAP mission. E. Add in the Area Anti-Air values of any friendly surface units in hexes the SSM attack passed through on its way to the target hex. This addition can happen only if the SSM attack was initiated at a range of greater than one hex and if the path of hexes from the attacking unit transits a hex occupied by enemy surface units.
- The defender combines the values from step 5. He rolls the die and consults the Combat Results Table, cross-referencing the die roll in the "Defense" column with the "Combat Value" column corresponding to the combined sum from step 5. The following die roll modifiers are applied:
- If at least one (not necessarily all) of the targets chosen in step 3 belongs to a Task Force, the defender adds 2 to his Defense die roll.
- If all targets chosen in step 3 do not belong to a Task Group or Task Force, the defender subtracts 1 from his Defense die roll.
- If the target chosen in step 3 is the only surface unit in the hex, the defender subtracts 3 from his Defense die roll.
Note: The last two die roll modifiers are not cumulative.
The resulting number found is the Defense modifier and is applied to each SSM attack in step 7. It should be noted for future use.
Resolving Attacks
- The attacker now resolves his SSM attacks one at a time (declared in step 4). For each attack, he rolls the die and immediately subtracts the Defense modifier from the result. (This modifier is subtracted from every Attack die roll made during the combat, not just the first one.) He consults the Combat Results Table, cross-referencing the modified die roll in the "Attack" column with the "Combat Value" column corresponding to the number of points from the SSM value applied to the attack. The combat result will be a number from 0 to 11.
- There are three possible modifiers to the attacker's step 7 die roll (in addition to the Defense modifier):
- The attacker can add from 1 to 3 to his die roll for Tactical Coordination air units in this zone (see 7.4).
- If the target units occupy a fiord hex, 3 is subtracted from the attacker's die roll.
- If, at the moment an SSM attack is initiated, there are no surface units owned by the attacker in a hex adjacent to the target hex, 2 is subtracted from the attacker's die rolls. Any friendly surface unit can be used to satisfy this requirement, even those initiating SSM Combat against another hex.
Notable Exception: In an SSM attack against an airfield or port hex, 4 is subtracted from the attacker's die roll, regardless of the presence of friendly surface units in an adjacent hex; see 14.0.
- Compare the result from the Combat Results Table with the Defense value of the target unit. Damage or sinking is immediately inflicted (see 11.0).
- The attacker performs steps 7, 8, and 9 once for each target declared in step 3. After all targets declared in step 3 have been attacked, the SSM Combat is over. If necessary, a Local Detection marker is placed on the attacking unit(s); see 9.2.
Example of SSM Combat: The US DD's Byrd, Scott, and Luce (each SSM Attack Value: 8; SSM Range: 2) are situated two hexes away from a detected Soviet Task Group consisting of the CG Frnze (Area Anti-Air: 8; Close Anti-Air: 7; Defense Value: 7) and the DD Obrsv (Area Anti-Air: 2; Close Anti-Air: 2; Defense: 3). The US player declares an SSM attack against this stack.
The combined SSM value of the US units is 24; the NATO player decides to attack Frnze with 21 points and Obrsv with 3 (21+3=24, the combined US SSM value). The combined Area Anti-Air value of the Soviet units is 10, and the Close Anti-Air value is 9. Thus, the Soviet player's combined value in Defense combat is 19. (Note that, since both Soviet units are targets, their Close Anti-Air values are simply added together. There are no non-target units stacked beneath these two units, so there is no enhancement of their Close Anti-Air values.) The Soviet player rolls the die and gets a 2. Cross-referencing this result on the Defense column with the "15 to 20" Combat Value column gives a Defense modifier of 2.
The NATO player now attacks Frnze with 21 points. He rolls the die and gets a 9. The Defense modifier of 2 is immediately subtracted from the die result, and an additional 2 is subtracted because no NATO surface unit is adjacent to the Soviet units. The final die result is 5 (9−2−2=5). Cross-referencing 5 on the Attack column with the "21 to 27" Combat Value column yields a result of 4. Frnze is therefore damaged (see 11.0).
Obrsv is now attacked with 3 points. The NATO player rolls the die and gets a 1. Subtracting 4 from the die roll (for the 2 Defense modifier and because there are no NATO surface units adjacent to the Soviet stack) yields a −3. Cross-referencing −3 in the Attack column with the "3 to 5" Combat Value column produces a result of 0. Obrsv is undamaged, and the SSM Combat is now over.
10.5 Bombing Combat
Bombing combat can be done under these circumstances:
- The initiating force is an active air unit or stack;
- The target of the attack is a detected enemy surface unit (or stack) or airfield/port hex (in the Intermediate and Advanced Game; see 14.0);
- The attacking air unit must be in the same hex as the target unit (or stack) or airfield/port hex;
- The attacking unit or stack can initiate Bombing Combat against one hex only. It cannot split its Bombing value to attack different hexes. If a stack of units initiates Bombing Combat, not all units in the stack need participate.
Once the air unit or stack has completed it Bombing Combat, it must continue moving to a friendly airfield or back to its parent carrier. If it does not have the Movement Allowance to do so, it is destroyed.
Positioning Defending Units: Immediately before Bombing Combat is resolved, the defender can adjust the positions of his units within the defending stack in any way he wishes. Units in different Groups must remain separate from one another and from other units in the hex. Once Bombing Combat begins, the defender can no longer reposition his units.
Resolving Bombing Combat: The Bombing Combat procedure is outlined below:
Preparing for Attack
- The attacker determines the combined Bombing value of all units participating in the attack and announces the hex he will attack.
- The defender can reposition his units in the target hex.
- The attacker can choose any or all surface units in a hex as targets. He must tell the defender which units will be targets.
- The attacker splits up the Bombing value in any way he sees fit and tells the defender how many Bombing points will be directed against each target. If there is only one target, the whole Bombing value is applied against it. A given target can be attacked only once per Bombing Combat.
Defense Die Roll
- The defender combines the Anti-Air values of his units as follows:
A. Add together the Area Anti-Air value of all units in the hex;
Notable Exception: If the defender's units occupy a fiord, skip the above step.
B. Add together the Close Anti-Air values of all surface units that are the targets of the Bombing attack (as determined in step 3); C. Add the Close Anti-Air values of the units stacked directly beneath the target units;
Notable Exceptions: If a unit beneath another target is also a target, do not add in its Close Anti-Air value. A unit's Close Anti-Air value can be added in only once per Bombing Combat. A unit at the bottom of the stack obviously has no other unit beneath it. Note that Groups in the same hex cannot assist each other in step C.
D. Add in the Area Anti-Air values of any friendly surface units in hexes the air units passed through on their way to the target hex.
- The defending player combines the values from step 5, rolls the die and consults the Combat Results Table, cross-referencing the die roll in the "Defense" column with the "Combat Value" column corresponding to the combined sum from step 5. The following modifiers are applied to the die roll:
- If at least one (not necessarily all) of the target units chosen in step 3 belongs to a Task Force, the defender adds 2 to his Defense die roll.
- If all targets chosen in step 3 do not belong to a Task Group or Task Force, the defender subtracts 1 from his Defense die roll.
- If the target chosen in step 3 is the only surface unit in the hex, the defender subtracts 3 from his Defense die roll.
Note: The last two die roll modifiers are not cumulative.
The resulting number is the Defense modifier and is applied to each Bombing attack in step 7. It should be noted down for later use. Also, this number may damage the attacking air units:
- If the number is between 0 and 4 (inclusive), the attacking air units are unaffected.
- If the number is between 5 and 8 (inclusive), one air unit of the owning player's choice within the attacking stack is immediately damaged. (Flip it over to its damaged side). It is not mandatory that the damaged unit be one actually participating in the attack, but it must be in the stack of attacking units.
- If the number is 9 or more, two air units of the owning player's choice within the attacking stack are immediately damaged. If only one air unit is attacking, it is destroyed.
Resolving Attacks
- The attacker now resolves the Bombing attacks he declared in step 4 one at a time. For each attack, he rolls the die and subtracts the Defense modifier from the result. He consults the Combat Results Table, cross-referencing the modified die roll in the "Attack" column with the "Combat Value" column corresponding to the number of points from the Bombing value applied to the attack. (The attacker can add from 1 to 3 to his die roll for Tactical Coordination air units in this zone; see 7.4.) The result will be a number from 0 to 11.
Notable Exception: If an attacking unit is damaged due to the Defense die roll in step 6, the attacker must adjust the number of points allocated against each target in step 4 to reflect his Bombing value reduction. The attacker can reallocate the surviving Bombing points in any way he sees fit as long as only the same units he declared in step 3 are chosen as targets again (he must attack the same number of units he declared). If the units damaged in step 6 are not participating in the attack, no adjustment is necessary.
- Compare the result from the Combat Results Table with the Defense value of the target unit. Damage or sinking is immediately inflicted (see 11.0).
- The attacker performs step 7 and 8 for each target declared in step 3. After all targets declared in step 3 have been attacked, the Bombing Combat is over.
Example of Bombing Combat: A stack of three US air units consisting of two F18's (each Bombing Value: 60) and one A6 (Bombing: 75) initiates Bombing Combat against a detected Soviet Task Force consisting of (from top to bottom): AM Venta (Area Anti-Air Value: 0; Close Anti-Air Value: 1; Defense Value: 2), FF Dzhsk (Area Anti-Air: 0; Close Anti-Air: 4; Defense: 3), CG Frnze (Area Anti-Air: 8; Close Anti-Air: 7; Defense: 7) and CV Kiev (Area Anti-Air: 6; Close Anti-Air: 7; Defense: 6). The combined Bombing value of the US units is 195. The NATO player states he will attack Venta with 90 points and Kiev with 105 (90+105=195, the combined US Bombing value).
The combined Area Anti-Air value of the Soviet force is 14. The Close Anti-Air value of Venta (1) is augmented by Dzhsk's Close Anti-Air value (4), since Dzhsk is stacked directly beneath a target. Kiev does not receive any augmentation to its Close Anti-Air value because it is at the bottom of the stack. The combined Anti-Air value of the Soviet stack is 26 (8+6+1+4+7=26). The Soviet player rolls the die and gets a 9; he adds 2 to this result because at least one target is in a Task Force, for a modified roll result of 11. He cross-references the 11 in the Defense column with the "21 to 27" Combat Value column. The result is 7. Immediately, one US air unit must be damaged.
The NATO player selects an F18 and flips it over, revealing a new Bombing value of 30. He must now reallocate the Bombing points against the targets. He decides to continue to attack Venta with 90 points, but he reduces the attack on Kiev from 105 to 75 (a reduction of 30).
In the attack on Venta, the NATO player rolls the die and gets a 3. The Defense modifier of 7 is subtracted, yielding −4. Cross-referencing −3 in the Attack column with the "90 or more" Combat Value column gives a result of 2. Venta is sunk (see 11.0). In the attack on Kiev, the NATO player rolls the die and gets a 0. Subtracting the Defense modifier of 7 from this roll yields a modified result of −7. Cross-referencing −7 in the Attack column with the "72 to 89" Combat Value column gives a result of 0. Kiev is undamaged and the combat is over.
10.6 Anti-Submarine Warfare (ASW) Combat
ASW Combat can be performed under these circumstances:
- The initiating force is an active surface, submarine, or air unit (or stack of air or surface units);
- The target of the attack is a detected submarine unit. The submarine can occupy a fiord or base hex;
- An attacking surface unit (or stack) or submarine must be in a hex that is adjacent to the target submarine. The attacking unit cannot occupy a fiord hex nor can it be separated from the target by a land hexside;
- An attacking air unit (or stack) must be in the same hex as the target submarine;
- A unit performing ASW Combat can attack one hex at a time;
- A submarine can be attacked only once by ASW Combat in the enemy player's surface Action Segment and once in the enemy player's air Action Segment. Once attacked by surface or air units, it cannot be attacked again in that segment. However, it can be attacked an unlimited number of times in the enemy player's submarine Action Segment.
Resolving ASW Combat: The ASW Combat procedure is outlined below:
Preparing for Attack
- The attacking player can select up to five active surface units, four active air units, or a single active submarine unit to attack. He determines the combined ASW value of the units participating in the attack.
- The attacking player can choose only one detected submarine in a hex as his target. The target is the only submarine that can be affected by the combat.
Defense Die Roll
There is no Defense die roll in ASW Combat.
Resolving Attacks
- The attacker resolves the ASW Combat by rolling the die and consulting the Combat Results Table, cross-referencing the die roll in the "Attack" column with the "Combat Value" column corresponding to the attacker's combined ASW value (step 1). The attacker can add from 1 to 3 to his die roll for Tactical Coordination air units in his zone (see 7.4). The result will be a number from 0 to 11.
- Compare the result from the Combat Results Table with the Defense value of the target unit. Damage or sinking is immediately inflicted (see 11.0). The combat is over. If necessary, a Local Detection marker is placed on the attacking unit(s); see 9.2.
Example of ASW Combat: The US SN NpNws (ASW Value: 9) initiates an ASW attack against the detected Soviet SS Mgnit (Defense: 6). The NATO player has three air units on Tactical Coordination in this zone, which are allocated to aid this attack. The NATO player rolls the die and obtains a 9. Three is added due to the air units, giving a modified result of 12. Cross-referencing 12 in the Attack column with the "9 to 14" Combat Value column gives a result of 6. Mgnit is sunk (see 11.0) and combat is over. The three air units are placed in one of the Return to Base boxes on the Strategic Air Display.
10.7 Air-to-Air Combat
Air-to-Air Combat is performed between opposing air units and is resolved on the Air-to-Air Combat Results Table. Air-to-Air Combat can occur at three times during a Game Turn:
Interception Segment: In this segment, which occurs only in the Strategic Air Phase, Air-to-Air Combat must take place between opposing air units on Interception missions in the same zone (see 7.2). To determine who is the attacker, roll the die once for each zone in which combat occurs. On an even die roll (including "0"), the NATO player is the attacker; on an odd die roll, the Soviet player is the attacker.
Bounce Segment: This segment occurs immediately after the Interception Segment. In this segment, surviving units on Interception missions can initiate combat against all enemy air units in the same zone that are on non-Interception missions — Reconnaissance, Tactical Coordination, and Mining (if that optional rule is being used; see 23.0). To perform this combat, the Interception player rolls the die and consults the "Bounce" column of the Air-to-Air Combat Results Table (no combat ratio is calculated). The Interception player is considered the attacker. In a Bounce Segment, a maximum of one "Bounce" combat can be performed per player in each zone, regardless of the number of surviving units on Interception missions a player has in that zone.
Action Phase: CAP air units can interrupt the movement of enemy air units that move within range to initiate Air-to-Air Combat (see 8.2). CAP units are always considered the attackers.
Resolving Air-to-Air Combat: The Air-to-Air Combat procedure is outlined below:
-
Combine the Anti-Air values of the attacker's air units. No units can be withheld.
-
Combine the Anti-Air values of all the defender's air units. No units can be withheld.
-
Compare the step 1 sum with the step 2 sum and express this as a ratio: attacker's Anti-Air value to defender's Anti-Air value, rounding the ratio down (if necessary) to conform to one of the simplified ratio columns on the Air-to-Air Combat Results Table. Note that there are two rows of ratios listed on the table. The "Interception" row is used in Air-to-Air Combat that takes place during the Interception Segment. The "CAP" row is used during combat initiated by CAP units. The "Bounce" column is used in the Bounce Segment.
-
The attacker rolls the die and cross-references the result with the ratio column (or "Bounce" column) determined in step 3. The combat result is divided by a slash. Results to the left of the slash are applied to the attacker; results to the right of the slash are applied to the defender. Each result will have a number, and some results also have an "r."
-
Numbered combat results indicate the number of "steps" of damage suffered by the affected player's air units. For each step of damage, one air unit is damaged (flipped over; see 11.0); an air unit that does not possess a reverse side is destroyed when it suffers one step loss. An air unit that is already damaged is destroyed when it suffers a second step loss. Air units with a front and reverse side are destroyed if they take two step losses. The owning player always applies damage to his units. He can split up his loss in any way he sees fit among those units that took part in the combat.
-
If the combat result contains an "r," the affected player's air units must "Return to Base." If the result has no "r," they are allowed to continue their mission (see below).
Notable Exception: If no INT unit (or an ATK unit acting as an INT unit) is present with enemy air units being attacked by a CAP mission, the CAP mission ignores all step losses and "r" results in the Air-to-Air Combat result.
- After combat results have been applied, the Air-to-Air Combat is over. Air units occupying a "Return to Base" box can perform no functions for the remainder of the Game Turn.
Continuing a Mission: Results on the Air-to-Air Combat Results Table that do not have an "r" mean that the air units continue their mission. What the unit can do depends on when the combat occurred.
- Interception/Bounce Segments: The units remain on their assigned Strategic Air Missions.
- Action Phase: CAP units remain where they are and can initiate Air-to-Air Combat again. Units whose movement was interrupted by CAP units can continue their movement from the point where they were interrupted. These units cannot be attacked in Air-to-Air Combat by the same CAP marker for the duration of the current Action Segment.
Returning to Base: An "r" result on the Air-to-Air Combat Results Table means that the air unit or stack must "Return to Base." This result can have several meanings, depending on when the combat took place.
- Interception Segment: Air units on Interception missions in the zone in which the combat is taking place that must return to base are placed in one of the "Return to Base" boxes in the zone they occupy on the Strategic Air Display. Place the unit in the box corresponding to the zone in which it began, with the top of the counter pointing to the initials of the correct zone.
- Bounce Segment: An "r" results applies to all of the defender's air units on non-Interception missions in the zone in which the combat is taking place. Remove the affected air units from their Reconnaissance, Tactical Coordination, and Mining boxes and place them in one of the "Return to Base" boxes in the zone they occupy.
- Action Phase: CAP units that receive an "r" result are placed in their "Return to Base" box on the CAP Display. An active unit or stack whose movement was interrupted by a CAP mission and which receives an "r" result must immediately be returned to the airfield or carrier from which it began, assuming the unit has expended half its Movement Allowance or less (see 8.4).
Example of Air-to-Air Combat: The NATO player has two F14 units (each Anti-Air Value: 9) in the Interception box of the Iceland Zone. In the Iceland Zone of his display, the Soviet player has a Y36 unit (Anti-Air: 5) based on Kiev also on an Interception mission. He also has a T16D on a Reconnaissance mission and a T95D on a Tactical Coordination mission in the Iceland Zone.
During the Interception Segment, Air-to-Air Combat must take place between the F14's and the Y36. A 3 is rolled, indicating that the Soviet player is the attacker. The ratio is 5-to-18, or 1-4. The Soviet player rolls the die and obtains a 5. Cross-referencing this roll with the "1-4" ratio column of the "Interception" line on the Air-to-Air Combat Results Table, a "1r/0" result is obtained. The F14's suffer no loss and remain on Interception. The Y36 loses one step and must return to base. It is flipped over and placed in the "Return to Base" box corresponding to the zone currently occupied by Kiev.
In the Bounce Segment, the NATO player can attack the two Soviet air units on non-Interception mission in the Iceland Zone. No ratio is calculated; the NATO player simply rolls the die and consults the "Bounce" column of the Air-to-Air Combat Results Table. Assume the NATO player rolls a 9. Thus, a result of "0/3r" is obtained. The NATO player suffers no loss, but the Soviet T16D and T95F units must suffer three step losses between them (the Soviet player decides how) and must be placed in one of the "Return to Base" boxes in the Iceland Zone. When the Bounce Segment ends, the F14's are placed in a "Return to Base" box.
10.8 Combat and Base Hexes
Base hexes can only be attacked in Intermediate and Advanced Scenarios (see 14.0). In Basic Scenarios, surface units occupying base hexes do not benefit from the bases' Close Anti-Air values when attacked by SSM or Bombing Combat.
11.0 Damage
"A critical study of bourgeois military theory by military cadres of the socialist state is dictated by the objective necessity of knowing the enemy, his actual strength and capabilities, and his plans to utilize his forces in war." — A. S. Milovidov
Damage may occur to units in combat. Units always begin the game on their undamaged (front) sides. Damage causes a unit to be flipped to its reverse side, indicated with a starburst. A damaged unit has a lower Movement Allowance and decreased combat values. Note that CR units and some RCN air units do not have a damaged side; these units are destroyed if they suffer a damage result or a single step loss in combat.
11.1 How Damage Occurs
Numbered combat results obtained due to attacks are compared with the Defense value of the surface or submarine target unit. There are three possible results:
- No Effect: If the combat result number is less than one-half the target unit's Defense value, the attack is unsuccessful and the target is unaffected.
- Damage: If the combat result number is equal to or greater than one-half the target unit's Defense value, but less than the full Defense value, the target is damaged (see 11.2).
- Sunk (Destroyed): If the combat result number is equal to or greater than the target unit's Defense value, the target unit is sunk or destroyed (that is, eliminated).
Note that damage to air units occurs in "steps," with each step being equal to a single air unit being damaged (see 10.7).
11.2 Effects of Damage
When a unit is damaged, it is flipped to its starburst side. If a damaged unit receives another damage result, it is sunk or destroyed and is removed from the map. A damaged unit cannot be repaired.
Example of Damage: The US CV Rsvlt (Defense Value: 9) suffers a combat result of 5 in an attack. Because this number is greater than one-half Rsvlt's Defense value, the CV is damaged (flipped over). If Rsvlt suffers another combat result of 5 or more, it would be sunk.
11.3 Air Unit Damage in Bombing Combat
Air units participating in Bombing Combat can be damaged or destroyed as a result of defensive combat undertaken by the surface units that are being attacked (see 10.5).
12.0 Special Units
"It appears to me to be the province of our infant Navy to surprise and spread alarm with our fast sailing ships. When we grow stronger, we can meet their fleets and dispute with them the sovereignty of the ocean." — Captain John Paul Jones
12.1 Aircraft Carriers
Aircraft carriers (CV) are mobile airfields from which air units operate as the carrier moves. Air units are assigned to a carrier at the beginning of a game and must remain with that carrier. Air units beginning the game on an airfield or different carrier cannot be assigned to a carrier.
Deployment of Air Units: Air units assigned to a carrier are not deployed on the map. Each player has Aircraft Carrier Displays on the map, and his carrier-based air units are normally kept on this display. The air units are always considered to occupy the same hex as their parent carrier.
Air units on a carrier can be activated separately or in stacks of up to four units. If an aircraft carrier is damaged, its air units suffer the following restrictions:
- A maximum of two of its units can be assigned to CAP.
- A maximum of one of its units can be assigned to a Strategic Air Mission.
- A maximum of two of its units can become active during the air Action Segment (they can be activated together or individually).
If an aircraft carrier is destroyed, all its air units are destroyed. (Units on CAP or Strategic Air Missions are destroyed in the CAP Landing Phase or Strategic Air Mission Termination Phase, respectively.)
12.2 Airborne Early Warning (AEW) Air Units
When activated with friendly air units, AEW units enhance the capabilities of that CAP mission in Air-to-Air Combat (see 8.2). AEW units do not enhance the capabilities of CAP units in airfield hexes. A maximum of one AEW unit can be assigned to a CAP mission. When an AEW unit is on a CAP mission, use the "CAP & AEW" side of the CAP marker.
The Soviet Helix (HLX) and UK Sea King (SKG) AEW units are not as effective as the US E2 AEW unit. If a HLX or SKG is in a carrier's CAP mission, it modifies the Anti-Air values of the air units on that mission at a four hex range by ⅛, not ¼. (See the Aircraft Carrier CAP Chart on the map.)
12.3 Electronic Warfare (EW) Air Units
When activated with friendly air units, EW units enhance the capabilities of those units in Air-to-Air, Bombing, and SSM Combat.
Restrictions on EW Air Units: EW units cannot perform CAP or Strategic Air Missions. Only one EW unit can be activated as part of a stack of air units.
Attacks by CAP Missions: If an EW unit is stacked with air units attacked by an enemy CAP mission, its presence reduces by two the combined Anti-Air value of the enemy CAP mission. If the CAP mission is assigned to a carrier, this reduction takes place before any further modifications are applied due to the Aircraft Carrier CAP Chart.
Bombing and SSM Combat: If an EW unit is part of an active stack of air units executing Bombing or SSM Combat against enemy surface units, the Area Anti-Air value of each enemy surface unit within the target hex is reduced by one (but never below 0) for the combat.
In Intermediate and Advanced Scenarios, if an EW unit is part of an active stack of air units executing Bombing or SSM Combat against an enemy airfield or port, the Close Anti-Air value of the airfield/port is reduced by one for the combat.
Introductory Scenarios
13.0 Introductory Scenarios
"Russian policy is a riddle wrapped in a mystery inside an enigma; but perhaps there is a key. That key is the Russian national interest." — Winston Churchill
It is recommended that the players try the following scenarios in order to become familiar with the Basic Rules. Each of the scenarios can be played in a short time and require only a handful of units. Once the players become familiar with the Basic Game system, they should go on to the Intermediate Scenarios (see 15.0). In the Introductory Scenarios, all Game Turns are considered day. Also, all drift ice hexes are considered sea hexes. Do not use any Optional Rules in the Introductory Scenarios.
Note that in the set up of units, instructions are given as to whether units must be together in specific hexes or if they can be placed in different hexes.
13.1 Scenario 1: Standing Naval Force Atlantic
Background: While shadowing the Soviet heavy cruiser Kirov in the Mediterranean, a US Navy destroyer has been rammed and sunk with heavy loss of life. In Washington, the Chairman of the Joint Chiefs of Staff has laid the blame for this incident squarely on Soviet shoulders and has asked the President to demand a Soviet apology and appropriate reparations. Meanwhile, the Soviet Politburo has accused the US Navy's 6th Fleet of dangerous violations of international maritime law and has labeled the incident as "tragic but unavoidable." Both sides have placed their naval forces on full alert.
In the Norwegian Sea, a US Navy Amphibious Ready Group (ARG) has just off-loaded a battalion landing team of US Marines in northern Norway as part of NATO's Ocean Venture summer maneuvers. This ARG consists of the helicopter carrier Iwo Jima (LPH-2), the assault transports Austin (LPD-4) and Ogden (LPD-5), and a single escorting frigate, USS Hawes (FFG-53). Shortly after receiving news of the Mediterranean incident, Iwo Jima was strafed by two Su-27 Flankers operating out of bases on the Kola Peninsula. The Commander-in-Chief, Atlantic (CINCLANT) has ordered the ARG to leave the Marines ashore and to steam southwards at all possible speed to a safe Norwegian or British port. Intelligence gathering by P-3C Orion sorties over the Norwegian Sea has indicated that the powerful Soviet cruiser Frunze (sister to Kirov) and the new destroyer Ottuk are situated in the vicinity of Jan Mayen island; it is reported that these two warships will shortly sail at high speed to Murmansk in view of the current crisis. It has also been reported that the two ships have been ordered to destroy NATO shipping in northern Norwegian waters during their passage back to Soviet territory because of the Stavka's fears of a surprise NATO amphibious assault against the Kola Peninsula.
CINCLANT, who also doubles as NATO's Supreme Allied Commander, Atlantic (SACLANT), has directed the multinational task force Standing Naval Force Atlantic to move into the Norwegian Sea at high speed. This force, which is currently on maneuvers in the North Sea, consists of the US destroyer Luce (DDG-38), the Royal Navy frigate Active (F-171), the Dutch frigate Piet Hein (F-811), the West German destroyer Molders (D-186), and the Canadian frigate Ottawa (DDE-229). The task force has been ordered to prevent the passage of Frunze and Ottuk to Murmansk and to protect the US ARG from Soviet attack. Supporting this operation from its airfield at Andoya in northern Norway is 333 Squadron of the Kongelige Norske Luftforsvaret (Royal Norwegian Air Force), consisting of a handful of P-3B Orion maritime reconnaissance aircraft.
Map: Use only the north map. Units are not allowed to exit the map.
Deployment
NATO (set up first)
Together in any sea hex within 6 hexes of Trondheim (3721): Luce (US/DD), Moldr (WG/DD), Actve (UK/FF), PHein (NE/FF), Ottwa (CA/FF).
2906: Hawes (US/FF), IJima (US/AA), Ogden (US/AA), Austn (US/AA).
3313: Andoya: P3 (NO/RCN).
Soviet (set up second)
Together in any sea or drift ice hex within 6 hexes of Jan Mayen (2119): Frnze (CG), Ottuk (DD).
3806: Kilpyavr: T16D (RCN).
Special Rules
- Air units can be assigned only to strategic missions; they cannot activate. Thus, there can only be surface Action Segments, never any submarine or air Action Segments.
- Units occupying a port hex can neither attack nor be attacked.
Game Length: 6 Game Turns
Victory Conditions
The Soviet player receives Victory Points (VP) for the following accomplishments:
| Condition | Victory Points |
|---|---|
| For each NATO FF or DD sunk | 1 |
| Ogden or Austn sunk | 2 each |
| IJima sunk | 4 |
| Ottuk ends game in Soviet port | 3 |
| Frnze ends game in Soviet port | 7 |
Note: Soviet airfield/port combinations count as ports.
At the end of the game, the Soviet player adds up the number of VP he gained and consults the following chart to determine the winner:
| Soviet VP | Victory Level |
|---|---|
| 14 or more | Decisive Soviet Victory |
| 12-13 | Substantive Soviet Victory |
| 10-11 | Marginal Soviet Victory |
| 8-9 | Marginal NATO Victory |
| 6-7 | Substantive NATO Victory |
| 5 or less | Decisive NATO Victory |
13.2 Scenario 2: Sink the Boomers!
Background: Warsaw Pact forces have launched a surprise offensive against West Germany. NATO ground troops have been caught unprepared and a catastrophe for Western arms appears inevitable. No nuclear weapons have been used as of yet by either side, but the President of the United States has stated that nuclear retaliation by the United States will take place should Warsaw Pact forces cross the Rhine. A day after the President's warning, no de-escalation of the Warsaw Pact offensive has become apparent; a report from the front has indicated that the Soviet 5th Guards Motor Rifle Division will reach the Rhine at Wiesbaden within a day or two.
Against the advice of the Joint Chiefs of Staff, the President has ordered preparatory steps for a retaliatory nuclear strike against a key Soviet military base. The deployment of US Navy ballistic missile subs (SSBN's) has been stepped up, while attack submarines have been ordered to prevent the passage of Soviet "boomers" into the Atlantic. As a direct warning to Moscow that a nuclear attack is a real possibility, the President has ordered US Navy attack submarines to hunt down and destroy a handful of Soviet SSBN's currently on station in the Barents Sea. The JCS has warned the President that this step will be considered highly escalatory by Moscow, but the President has insisted that it is the last preventative measure at his disposal that will save western Europe from Soviet occupation.
The submarine chief of the Red Banner Northern Fleet has gathered intelligence of increased NATO ASW activities in the Barents Sea. Suspecting these moves as the preparation for a campaign against his SSBN's, he has called many of his boomers back to port. However, in order to disperse Soviet nuclear strike assets in the event of a surprise US attack on the Kola Peninsula, the commander has ordered three SSBN's to operate under the Arctic ice pack for the next six weeks. Should they reach the ice, detection and eventual destruction by NATO ASW forces will become extremely unlikely. These three submarines are Ukraina, a new Typhoon boat of some 30,000 tons; Donskaya, a Delta-3; and Karelskaya, a Delta-1. Running interference for the SSBN's in their passage to the ice are three attack submarines: Pyotr Pospelov, a 40-knot Alfa; Anatoly Blagonravov, a Victor-3; and Magnitogorskiy, an elderly diesel-powered Foxtrot.
Only two US Navy attack submarines are currently on station in the Barents Sea and in a suitable position to intercept this Soviet movement. These two boats, Newport News (SSN-750) and La Jolla (SSN-701), are currently situated near Svalbard. Supporting this operation is 333 Squadron of P3-B Orions from the Kongelige Norske Luftforsvaret (Royal Norwegian Air Force).
Map: Use only the north map. Units are not allowed to exit the map.
Deployment
Soviet (set up first)
Any sea or drift ice hexes within 4 hexes of Pechenga (3605), but not stacked with any other unit: Krlsk (SB), Dnsky (SB), Ukrna (SB).
Any sea or drift ice hexes in the Barents Sea Zone, but not stacked with any other unit: Mgnit (SS), PPslv (SN), ABlgn (SN).
3806: Kilpyavr: T95F (RCN).
3605: Pechenga: I38 (RCN).
NATO (set up second)
Any sea or drift ice hexes within 4 hexes of Longyearbyen (2106), but not stacked with any other unit: NpNws (US/SN), LaJla (US/SN).
3313: Andoya: P3 (NO/RCN).
Special Rules
- No submarine can enter a fiord or base hex for the duration of the scenario.
- Only Soviet SB units can enter a pack ice hex. Upon doing so, they are immediately removed from the game and the Soviet player gains Victory Points.
- Since there are no surface units in the scenario, neither player can have a surface unit Action Segment during the Action Phase.
Game Length: 9 Game Turns
Victory Conditions
The Soviet player receives Victory Points (VP) for the following accomplishments:
| Condition | Victory Points |
|---|---|
| For each US SN sunk | 1 |
| Krlsk or Dnsky reaches pack ice | 4 each |
| Ukrna reaches pack ice | 5 |
At the end of the game, the Soviet player adds up his VP and consults the following chart to determine the winner:
| Soviet VP | Victory Level |
|---|---|
| 15 | Decisive Soviet Victory |
| 13-14 | Substantive Soviet Victory |
| 10-12 | Marginal Soviet Victory |
| 8-9 | Marginal NATO Victory |
| 6-7 | Substantive NATO Victory |
| 5 or less | Decisive NATO Victory |
13.3 Scenario 3
Background: The Soviet 45th and 54th Motor Rifle Divisions have crossed the Norwegian-Soviet border near Pechenga. Although intelligence is sketchy, it is reported that two Norwegian infantry battalions from Brigade North are engaged in combat with their Soviet foes. The objective of the Soviet offensive is still not clear: it is possible that the attack will be purposefully contained within the border area in order to seek only limited goals; on the other hand, it could be the first stage of a major offensive designed to seize Norwegian ports and airfields on the Atlantic coast.
NATO's SACLANT has ordered limited reinforcement of the Norwegian Nordkapp (North Cape) area. The British 1st Battalion, Parachute Regiment and the Italian Susa Alpini Battalion have been airlifted to the bleak Banak airfield, 240 miles north of the Arctic Circle. In addition, the US Navy ARG 6-88, which had been en route for the Mediterranean, has been ordered to alter its course and land its Marine contingent, the 22nd Marine Amphibious Unit (MAU), in northern Norway. ARG 6-88 consists of the assault ship Iwo Jima (LPH-2), the landing ship dock Whidbey Island (LSD-41), and the tank landing ship Peoria (LST-1183).
In Britain, 3 Commando Brigade has been hastily placed onboard ship for deployment to Norway. This brigade consists of 42 and 45 Commandos, Royal Marines, carried in the North Sea ferries Elk and Norland; the 1st Combat Group, Royal Netherlands Marine Corps, carried in the Royal Navy's Intrepid (L-11); and 29 Commando Regiment, Royal Artillery, carried in the landing ships Sir Bedivere (L-3004), Sir Lancelot (L-3029), and Sir Tristram (L-3505).
The Royal Navy's Flag Officer, 1st Flotilla, has been handed the responsibility of protecting all NATO shipping being directed to Norway, including the US Navy's ARG. An ad hoc battle group has been formed, consisting of the aircraft carriers Invincible (R-05) and Illustrious (R-06); the destroyers Liverpool (D-92), York (D-104), Glasgow (D-88), and Bristol (D-23); and the frigates London (F-95), Boxer (F-92), Active (F-171), Arrow (F-173), and Andromeda (F-57). Carried onboard the carriers are 800 and 801 Squadrons, consisting of Sea Harrier FRS.1 VSTOL fighters.
Satellite reconnaissance of the Kola Peninsula has spotted about 20 T-26 Backfires and 25 T-16C Badger attack aircraft, plus a large force of supporting fighter and electronic warfare assets. It is fully expected that these air forces will contest the movement of NATO's amphibious forces to Norway.
Map: Use only the north map. Units are not allowed to exit the map.
Deployment
Soviet (set up first)
3806: Kilpyavr: M23 (INT), M25 (INT), T26 (ATK), T16C (ATK), T16E (EW).
NATO (set up second)
Any sea or drift ice hexes in the Norwegian Sea or Greenland Sea Zones (they can stack with AA units, but they do not have to set up together): Iltrs (UK/CV), Invcl (UK/CV), Lvrpl (UK/DD), York (UK/DD), Glsgw (UK/DD), Brstl (UK/DD), Actve (UK/FF), Lndon (UK/FF), Boxer (UK/FF), Arrow (UK/FF), Andrm (UK/FF).
On Iltrs: HAR (UK/INT), SKG (UK/AEW). On Invcl: HAR (UK/INT), SKG (UK/AEW).
3120: Intpd (UK/AA), Elk (UK/AA), Nrlnd (UK/AA), SLnct (UK/AA), STris (UK/AA), SBdvr (UK/AA).
2314: BWood (US/AA), IJima (US/AA), Ogden (US/AA).
Special Rules
- At the moment a NATO surface unit enters a fiord hex (including fiords that are ports and airfields), it is removed from play. The NATO player may receive VP for these units (see "Victory Conditions").
- All NATO units are automatically detected throughout the game.
- No air units can be placed on Strategic Air Missions in this scenario.
- In all CAP Phases, all available UK air units must be placed on CAP missions.
- Since there are no submarine units in the game, neither player has a submarine Action Segment. Also, the Soviet player has the air Action Segment only.
- Since there are no Soviet surface units in the game, all Soviet SSM attacks executed by air units must be penalized by subtracting two from the attack die roll (because no friendly surface unit is adjacent to the target hex; see 10.4).
Game Length: 7 Game Turns
Victory Conditions
The NATO player loses Victory Points (VP) as follows:
| Condition | Victory Points |
|---|---|
| Each NATO CV sunk | −2 |
| Each NATO FF or DD sunk | −1 |
| Each NATO air unit destroyed | 0 |
The NATO player gains VP for each NATO AA unit that reaches the hexes listed below. The unit's Amphibious Assault value is enhanced by the Amphibious Assault value multiple for the hex it enters, and the result is the number of VP gained by the NATO player. For example, if the US AA Ogden (Amphibious Assault value of 4) reaches Banak, the NATO player would receive 8 VP (4×2=8).
| Destination Hex | Amphibious Assault Value Multiple |
|---|---|
| Tromso (3311) | ×1 |
| Banak (3308) | ×2 |
| Gamvik (3406) | ×3 |
Note: Amphibious Assault values, which are also printed on the AA units, are as follows:
| Amphibious Assault Value | Units |
|---|---|
| 8 | BWood, IJima |
| 4 | Ogden, Elk, Intpd, Nrlnd |
| 2 | SLnct, STris, SBdvr |
At the end of the game, the NATO player adds up his VP and consults the following chart to determine the winner:
| NATO VP | Victory Level |
|---|---|
| 94 or more | NATO Decisive Victory |
| 70-93 | NATO Substantive Victory |
| 46-69 | NATO Marginal Victory |
| 30-45 | Soviet Marginal Victory |
| 20-29 | Soviet Substantive Victory |
| 19 or less | Soviet Decisive Victory |
13.4 Scenario 4: Damn the Torpedoes!
Background: The diplomatic situation in central Europe is critical. NATO has been aware of a massive Warsaw Pact military buildup in East Germany and Czechoslovakia for the past two weeks and has demanded that it be halted. The Soviets have ignored this warning and the troop buildup is continuing unabated. In response, US forces from the continental United States (CONUS) have been moved by air to West Germany where they have armed themselves with pre-positioned heavy equipment, maintained in Germany for use in just such an emergency. Also, large amounts of ammunition and supplies have been readied in American and Canadian ports for eventual movement to Europe by sea.
The Soviet Union has warned NATO that such a large-scale reinforcement of West Germany will be viewed as an act of war. The Politburo has declared that any significant movement of troops and supplies to Europe will be prevented by Soviet naval and air forces. NATO intelligence has learned that there are currently only six Soviet submarines in the Greenland-Iceland-UK (GIUK) gap area that are in a suitable position to attack NATO shipping. These submarines are: Pyotr Pospelov, a 40-knot Alfa; Leninskiy, a new Sierra design; Vera Figner and Ivan Konev, both Victor-3's; Mikhail Tukhachevskiy, a Tango; and Magnitorgorskiy, a Foxtrot.
There are currently 13 American cargo ships and tankers in the North Atlantic. These vessels are formed into three convoys: a slow grouping of eights ships is currently situated about 250 miles south of Iceland; a fast convoy of three vessels is located about 400 miles to the west; and a small convoy of two superfast SL-7 container ships, capable of 33 knots, is situated about 250 miles south of Cape Farewell, Greenland's southernmost tip. The US Navy has hastily deployed a handful of escorts to protect the convoys during their perilous journeys. Four Spruance-class destroyers, John Rodgers (DD-983), Moosbrugger (DD-980), Spruance (DD-963), and Conolly (DD-979), form the backbone of this force; in addition, six frigates have been made available: Hawes (FFG-53), Reuben James (FFG-57), Gary (FFG-51), Bagley (FF-1069), Knox (FF-1052), and Richard L. Page (FFG-5). A small detachment of P-3C Orions from Patrol Squadron 10, stationed at Brunswick, Maine, has been deployed to the airfield at Keflavik in order to support the convoys.
The Royal Navy's Flag Officer, Scotland and Northern Ireland, has managed to scrape together four warships to support the convoys during their approach to the British Isles. These ships are the destroyers Birmingham (DD-86) and Glasgow (DD-88) and the frigates Norfolk (F-101, a new "Type 23") and Boxer (F-92).
Map: Use only the south map. Units are not allowed to exit the map.
Deployment
NATO (set up first)
Any sea hexes in the Labrador Sea or North Atlantic Zones (they can stack with CR's, and they do not have to set up together): Spnce (US/DD), Rdgrs (US/DD), Cnoly (US/DD), Msbgr (US/DD), Page (US/FF), James (US/FF), Hawes (US/FF), Bgley (US/FF), Gary (US/FF), Knox (US/FF).
Together in any sea or coastal hex within 3 hexes of Holy Loch/Faslane (3736): Glsgw (UK/DD), Brmhm (UK/DD), Nrflk (UK/FF), Boxer (UK/FF).
2535: Buyer (US/CR), Bay (US/CR), TCldo (US/CR), Eagle (US/CR), TClba (US/CR), Baugh (US/CR), Lumus (US/CR), Hauge (US/CR).
1637: Kocak (US/CR), Mteor (US/CR), Cgnus (US/CR).
0642: Altar (US/CR), Pllux (US/CR).
1831: Keflavik: P3 (US/RCN).
Soviet (set up second)
Any hexes adjacent to Vago (2930) or Keflavik (1831), but not stacked with any other unit: PPslv (SN), IKnev (SN), Lnsky (SN), VFgnr (SN), Mgnit (SS), MTsky (SS).
Special Rules
- The US P3 unit must perform either a Tactical Coordination or a Reconnaissance strategic mission. It cannot activate. As a result, each player has only one Action Segment per Action Phase: surface for the NATO player and submarine for the Soviet player.
- NATO CR units are sunk if they suffer a damage result.
- As soon as a NATO unit (including surface combat units) enters Holy Loch/Faslane, Reykjavik, or Bergen, it is removed from the map. The NATO player receives Victory Points (VP) for this accomplishment (see "Victory Conditions").
- Soviet submarines can attack NATO units occupying base hexes by Torpedo Combat (but not NATO units removed from the map; see 3 above). Such combat is resolved normally.
Game Length: 10 Game Turns
Victory Conditions
The NATO player gains and loses Victory Points as follows:
| Condition | Victory Points |
|---|---|
| Each CR that reaches Bergen (3926) | +6 |
| Each CR that reaches Holy Loch/Faslane (3726) | +4 |
| Each CR that reaches Reykjavik (1830) | +3 |
| Each NATO FF or DD sunk | −1 |
At the end of the game, the NATO player adds up his VP and consults the following chart to determine the winner:
| NATO VP | Victory Level |
|---|---|
| 55 or more | NATO Decisive Victory |
| 46-54 | NATO Substantive Victory |
| 36-45 | NATO Marginal Victory |
| 29-35 | Soviet Marginal Victory |
| 22-28 | Soviet Substantive Victory |
| 21 or less | Soviet Decisive Victory |
13.5 Scenario 5: The Big Stick
Background: The recent Soviet invasion of Norway has stagnated due to fierce resistance of the Norwegian Brigade North and the rapid deployment of supporting NATO forces to the Nordkapp area. NATO intelligence has learned that the Soviets will shortly attempt to break the stalemate by dropping the 76th Guards Airborne Division on critical Norwegian airfields, such as Bodo and Banak, while marines and commandos from the 34th Naval Infantry Regiment land simultaneously on the Norwegian coast behind NATO lines. In addition, it is expected that the Soviets will attempt to land engineers on Spitsbergen in order to seize and lengthen the runway of the Longyearbyen landing strip.
The US Navy's 2nd Fleet has been directed to divert a strong aircraft carrier battle group to the Norwegian Sea to thwart these Soviet moves. This force, labeled Task Force 20.1, has been ordered to clear the Norwegian Sea of Soviet shipping and to prevent the landing of Soviet amphibious forces on the Norwegian coast. Task Group 20.1 consists of the new carrier Theodore Roosevelt (CVN-71), plus the escorts South Carolina (CGN-37), Vincennes (CG-49), Spruance (DD-963), Luce (DDG-38), Moosbrugger (DD-980), and Reuben James (FFG-57). Deployed onboard Roosevelt is Carrier Air Wing 15, consisting of two F-14 Tomcat squadrons (VF-51 "Screaming Eagles" and VF-111 "Sundowners"), two F-18 Hornet squadrons (VA-27 "Royal Maces" and VA-97 "Warhawks"), one A-6 Intruder squadron (VA-52 "Knightriders"), and one EA-6 Prowler squadron (VAQ-134 "Garudas").
Norwegian P-3B Orion reconnaissance flights have reported to the task group that a significant Soviet naval force has put to sea, including the aircraft carriers Kiev and Baku, as well as the nuclear-powered cruiser Frunze — one of the most powerfully armed warships in the world. It also appears that about eight cargo and troop transport vessels are accompanying the task force, escorted by a handful of destroyers.
Map: Use only the north map. Units are not allowed to exit the map.
Deployment
NATO (set up first)
2119: Jan Mayen: Rsvlt (US/CV), Vncns (US/CG), SClna (US/CG), Spnce (US/DD), Luce (US/DD), Msbgr (US/DD), James (US/FF).
On Rsvlt: F14 (US/INT) ×2, F18 (US/INT) ×2, A6 (US/ATK), EA6 (US/ATK).
Soviet (set up second)
Any sea or drift ice hex or hexes in the Barents Sea Zone (can be split up and be stacked with AA or CR units): Kiev (CV), Baku (CV), Tula (CG), Frnze (CG), Kursk (CG), Ottuk (DD), Obrsv (DD), Sprnv (DD), Udloy (DD).
On Kiev: Y36 (INT). On Baku: Y36 (INT).
3210: Cshky (AA), Obsky (AA), Krsky (AA), Pchor (AA), Beloy (AA).
2901: Yauza (CR), Ldnev (CR), Irbit (CR).
Special Rules
- All units of both sides are detected throughout the scenario.
- Neither player can allocate air units to strategic missions.
- Since neither player has submarines, each player has only two Action Segments per Action Phase: one for surface units and the other for air units.
- The US A6 and F18 units can each make one SSM attack per game. The F18's SSM Range/Attack Value is 1/30 (1/15 if the unit is damaged); the A6's SSM Range/Attack Value is 2/40 (2/20 if the unit is damaged). When one of these air units makes its SSM attack, the NATO player should record this fact on a piece of paper.
- Soviet AA and CR units are permitted to end their movement in NATO base hexes. If they do so, they are removed from the game and the Soviet player may receive Victory Points, even if the AA units are damaged. Also, if a Soviet AA unit ends its movement in Lofoten (3315), it is removed from the map and the Soviet player receives Victory Points. (See "Victory Conditions.")
- No surface units can enter a fiord hex for the duration of the game (except Soviet CR/AA units entering NATO bases in fiord hexes; see 5, above).
- Soviet CR units are sunk if they receive a damage result.
Game Length: 6 Game Turns
Victory Conditions
The Soviet player gains and loses Victory Points (VP) as follows:
| Condition | Victory Points |
|---|---|
| US CV Rsvlt sunk | +12 |
| Each US CG sunk | +5 |
| Each AA unit that reaches Bodo (3516) | +4 |
| Each CR unit that reaches Longyearbyen (2106) | +4 |
| Each AA unit that reaches Lofoten (3315) | +3 |
| Each US DD sunk | +2 |
| Each US FF sunk | +1 |
| Each US air unit destroyed | +1 |
| Each AA unit that reaches Andoya (3313) | +1 |
| Each Soviet CV or CG sunk | −1 |
At the end of the game, the Soviet player adds up his VP and consults the following chart to determine the winner:
| Soviet VP | Victory Level |
|---|---|
| 25 or more | Soviet Decisive Victory |
| 20-24 | Soviet Substantive Victory |
| 15-19 | Soviet Marginal Victory |
| 10-14 | NATO Marginal Victory |
| 4-9 | NATO Substantive Victory |
| 3 or less | NATO Decisive Victory |
Intermediate Game Rules
14.0 Airfields and Ports
"There is a rank due to the United States among nations, which will be withheld, if not absolutely lost, by the reputation of weakness. If we desire to avoid insult, we must be able to repel it; if we desire to secure peace, one of the most powerful instruments of our rising prosperity, it must be known that we are at all times ready for war." — President George Washington
In Intermediate and Advanced Scenarios, airfields can be attacked by SSM and Bombing Combat. In Advanced Scenarios using the Logistics option (see 20.0), ports can be attacked by SSM and Bombing Combat. Landing strips can never be attacked. If a player attacks a hex containing a port/airfield combination, he must specify whether he is attacking the port or the airfield.
14.1 Attacking Airfields and Ports
An attack on an airfield or port cannot be combined with attacks on surface units occupying that base hex. An attack on an airfield or port is separate and distinct from all other attacks. An airfield or port can be attacked an unlimited number of times by different active forces in a given Action Segment.
Close Anti-Air Value: Each base hex has a Close Anti-Air value printed in its hex (in addition to its Intrinsic Defense value; see 18.5). When attacked by SSM or Bombing Combat, the Close Anti-Air value is used by the base in its defensive combat calculation. Surface units stacked in a port or airfield hex at the moment of combat cannot contribute their Area or Close Anti-Air values to the port/airfield that is being attacked. However, CAP units in an airfield hex can contribute to the port/airfield's defense in SSM (never Bombing) Combat.
The following modifiers are applied to an airfield's Close Anti-Air value in SSM Combat:
- For each US F14 unit in a CAP mission over the airfield, add 2 to the Close Anti-Air value.
- For each non-F14 INT unit in a CAP mission over the airfield, add 1 to the Close Anti-Air value.
- When an EW air unit is part of an attacking stack executing Bombing or SSM Combat, subtract 1 from the Close Anti-Air value.
A base can contribute its Close Anti-Air value to surface units occupying that hex which are the targets of SSM or Bombing Combat. Add the base's Close Anti-Air value to the targets' Close Anti-Air values in defensive combat.
Resolving Attacks on Airfield and Ports: Airfields and ports are always detected (although units in the airfields/ports must be detected to be attacked). Bombing Combat against airfields or ports is resolved normally. However, in SSM Combat against an airfield or port, the attacker must subtract four from his attack die roll in addition to the normal subtraction for the defense modifier. (Modifiers for fiords and for the lack of friendly surface units in a hex adjacent to the target hex are ignored; see 10.4.) When a combat result of 5 or more is achieved by a Bombing or SSM attack on a port or airfield, the target airfield/port is damaged or destroyed as per the instructions of the following chart:
| Combat Result | Effect |
|---|---|
| 4 or less | None |
| 5-6 | Damage 1 |
| 7-9 | Damage 2 |
| 10-11 | Destroyed |
If an airfield or port is damaged, place a Damage marker of the appropriate type (1 or 2) in the hex. If an airfield or port is destroyed, place a Destroyed ("Destroy") marker in the hex. Damage is cumulative. If a port or airfield at Damage 1 receives another Damage 1 result, flip the marker over to its Damage 2 side. Any port or airfield reaching a cumulative damage level above Damage 2 is destroyed.
Note: In hexes with a port/airfield combination, Damage markers affect only the port or airfield that was specified as the target of an attack. Players may wish to make a note of whether a Damage marker applies to the port or the airfield in such a hex.
Effects of Damage: Air units are not affected by a Damage 1 or Damage 2 result, but they cannot activate, initiate Strategic Air Missions, or perform CAP from a damaged airfield. Air units already on a strategic mission when their airfield is damaged continue their mission; they can return to any friendly airfield except a destroyed one within the zone in which they began the mission (damaged or not), subject to stacking restrictions (see 6.2). Air units on CAP when their airfield is damaged remain on their CAP mission and take no damage; they must return to the damaged airfield in the CAP Landing Phase.
The Close Anti-Air value of a damaged airfield is still functional. A damaged port cannot be used for in-port replenishment (see 20.0).
Effects of Destruction: Air units occupying a destroyed airfield are eliminated from play, including all units on CAP in the hex. CAP units are eliminated during the CAP Landing Phase. The elimination of these units counts for Victory Point purposes in the Advanced Game (see 28.5). Air units on Strategic Air Missions when their airfield is destroyed continue their mission; they can return to any friendly airfield, except a destroyed airfield, within the zone in which they began their mission. Air units that cannot return to an airfield are eliminated in the Strategic Air Mission Termination Phase and count for Victory Points purposes.
A destroyed airfield is not functional for the remainder of the game. A destroyed port cannot be used for in-port replenishment (see 20.0). A destroyed port or airfield cannot be attacked again; its Close Anti-Air value is no longer functional.
Tactical Coordination: An attacker can use Tactical Coordination (see 7.4) to enhance attacks against airfields and ports.
14.2 Repair
Damaged airfields and ports can be repaired. In the Repair Phase of the Terminal Cycle (which occurs in Night Game Turns only), all Damage 1 markers are removed from the map; all Damage 2 markers are reduced to Damage 1. Destroyed ports and airfields cannot be repaired.
15.0 Intermediate Scenarios
"As long as capitalism and socialism exist, we cannot live in peace; in the end, one or the other will triumph — a funeral dirge will be sung over the Soviet Republic or over world capitalism." — V. I. Lenin
Intermediate Scenarios are similar to the Introductory Scenarios, but they take slightly longer to play and use more units. As with the Introductory Scenarios, all Game Turns in Intermediate Scenarios are day. All drift ice hexes are considered sea.
15.1 Scenario 6: Into the Norwegian Sea
Background: Prior to its planned attack on Norway, the Soviet Stavka has ordered the Red Banner Northern Fleet to sortie from its bases in the Kola Peninsula to clear the Norwegian Sea of NATO warships. Following this operation, the Soviet fleet has been directed to prevent the reinforcement of Norway by interdicting NATO shipping lanes. Six attack submarines will participate in the initial sweep down the Norwegian coast, including Pyotr Pospelov, a 40-knot Alfa, and Volga, a 14,000-ton Oscar. In addition, a strong surface battle group has been formed at Murmansk to support this operation. This force includes Kiev, a VSTOL aircraft carrier, and Frunze, a 28,000 ton nuclear cruiser of the Kirov class. A large force of Soviet naval aircraft has also been ordered to support the operation from airfields within the Kola. Included in this force is a full regiment of T-16C Badger strike aircraft, a squadron of MiG-23 Flogger interceptors, and a squadron of Su-27 Flanker fighter-bombers.
The Soviet offensive has come as a complete surprise to NATO naval forces. Only a small Norwegian standing naval force, consisting of a handful of Hauk-class patrol boats, two frigates, and a single submarine will be able to contest the Soviets initially. SACLANT is moving three nuclear attack submarines to the area with orders to initiate ASW operations against Soviet submarines. These boats are: USS La Jolla (SSN-701), USS Olympia (SSN-717), and HMS Trafalgar (S-107). A Royal Navy flotilla is also hastily sailing northwards to block the Soviet movement. This force consists of the aircraft carrier Illustrious (R-06, carrying 800 Squadron of Sea Harrier FRS.1 fighters), Birmingham (D-86), Glasgow (D-88), Arrow (F-173), Boxer (F-92), Battleaxe (F-89), Minerva (F-45), and Andromeda (F-57). A detachment of RAF Nimrod maritime reconnaissance aircraft from 201 Squadron at RAF Kinloss has been deployed to Norway to support the operation. Also, 333 Squadron of the Royal Norwegian Air Force is currently operating several P-3B Orions from airfields in northern Norway. Norwegian F-16 fighters from 331 and 338 Squadrons have been ordered to fly continuous patrols over north Norway to protect NATO shipping and to engage Soviet aircraft attempting to attack the critical Norwegian airfields.
Map: Use only the north map. Units are not allowed to exit the map.
Special Rules
- The UK HAR unit can make one SSM attack in the game. It has an SSM Range/Attack Value of 2/40 (2/20 if the unit is damaged).
- The US SN Olypa can make one cruise missile (CM) SSM attack in the game. A CM attack is considered normal SSM combat, but it can be used only against an enemy airfield. The airfield's Close Anti-Air value and CAP (if any) are taken into account in defensive combat against a CM attack, but the attacker does not subtract 4 from his attack die roll as he normally would in an SSM attack against a port or airfield (see 14.1). Unlike normal SSM attacks, a cruise missile attack can transit full land hexsides on the way to the target. The SSM Range/Attack Value of a CM attack is 25/60 (25/40 if Olypa is damaged).
Deployment
NATO (set up first)
Any sea or drift ice hexes within 3 hexes of Bjornoya (2708); they can be set up in the same hex: Olypa (US/SN), LaJla (US/SN), Tflgr (UK/SN).
Together in any sea hex within 3 hexes of Trondheim (3721): Iltrs (UK/CV), Brmhm (UK/DD), Glsgw (UK/DD), Arrow (UK/FF), Boxer (UK/FF), Btaxe (UK/FF), Mnrva (UK/FF), Andrm (UK/FF).
On Iltrs: HAR (UK/INT), SKG (UK/AEW).
Any sea hex within 3 hexes of Tromso (3311): Kaura (NO/SS).
3311: Tromso: Bergn (NO/FF), Stvgr (NO/FF), PCS1 (NO/PC), PCS2 (NO/PC).
Any airfields in Norway (they do not have to be in the same airfield): F16 (NO/INT) ×2, P3 (NO/RCN) ×2, NIM (UK/RCN).
Soviet (set up second)
Any sea or drift ice hexes in the Greenland Sea Zone, but not stacked with or adjacent to any NATO unit (they stack together): PPslv (SN), Mgnit (SS).
Together in any sea hex within 2 hexes of Pechenga (3605): FKzlv (SN), VFgnr (SN), MKaln (SN).
3705: Polyarnyy: Volga (SN).
3605: Pechenga: T16D (RCN), T95F (RCN), I38 (RCN).
3805: Murmansk: Kiev (CV), Frnze (CG), Tula (CG), Svtpl (CG), Nklyv (CG), Otchy (DD), Udloy (DD), Mnshk (FF), Grmky (FF).
On Kiev: Y36 (INT).
3806: Kilpyavr: M23 (INT), S27 (INT), T16C (ATK) ×2, T16E (EW).
Game Length: 6 Game Turns
Victory Conditions
The Soviet player gains Victory Points (VP) as follows:
| Condition | Victory Points |
|---|---|
| Each NATO SN sunk | 5 |
| UK CV Iltrs sunk | 5 |
| Each Norwegian SS sunk | 4 |
| Each NATO DD sunk | 3 |
| Each NATO FF sunk | 2 |
| Each NATO INT air unit destroyed | 2 |
| Each Norwegian PC sunk | 1 |
| Each Destroyed combat result achieved against a NATO airfield | 9 |
| Each Damage 2 combat result achieved against a NATO airfield | 6 |
| Each Damage 1 combat result achieved against a NATO airfield | 3 |
| Each Soviet SS, SN, or Task Force (not Task Group) ending the game in the Norwegian Sea Zone | 3 |
Note: Victory Points for damaging NATO airfields are awarded on the basis of the actual combat result, not on cumulative damage levels. For example, an airfield with a Damage 1 marker that receives another Damage 1 result has its marker adjusted to Damage 2, but the Soviet player receives only 3 VP for this new result (in addition to the 3 VP for the first Damage 1 result).
The Soviet player loses VP as follows:
| Condition | Victory Points |
|---|---|
| Each Soviet CV or CG sunk | −2 |
| Each Soviet FF, DD, SS, or SN sunk | −1 |
| Each Soviet INT or ATK air unit destroyed | −1 |
At the end of the game, the Soviet player adds up his VP and consults the following chart to determine the winner:
| Soviet VP | Victory Level |
|---|---|
| 38 or more | Soviet Decisive Victory |
| 33-37 | Soviet Substantive Victory |
| 27-32 | Soviet Marginal Victory |
| 21-26 | NATO Marginal Victory |
| 16-20 | NATO Substantive Victory |
| 15 or less | NATO Decisive Victory |
15.2 Scenario 7: In Harm's Way
Background: World War 3 has begun. American ground forces are currently in combat in Korea, central Europe, and the Middle East, and a ferocious naval battle is taking place in the Mediterranean. News from the fighting fronts is sketchy, although several false reports of Soviet nuclear missile launchings have triggered near-panics in American and western European cities.
NATO intelligence has reported that large numbers of Soviet SSBN's are putting to sea and are congregating in large "bastions" in the Barents Sea and the Sea of Okhotsk. These bastions are readily defensible by Soviet air, surface, and sub-surface forces; as a result, pinpointing and eventually destroying the SSBN's is a virtually impossible task for NATO ASW forces.
Upon being informed of the establishment of the Soviet bastions, Western political leaders have become seriously concerned about the possibility of a massive Soviet first strike against Europe and America. In an extremely controversial move, American military planners have convinced NATO political leaders to allow Western naval forces to attempt to penetrate the bastions in order to destroy as many Soviet SSBN's as possible. This plan has been loudly criticized for its escalatory effect on Soviet strategy: Could the penetration of the bastions imply to the Soviets that NATO is seeking a safe first-strike capability without fear of massive retaliation? Apart from the escalation issue, many high-ranking NATO naval officers have questioned the wisdom of sending naval forces directly into the jaws of powerful Soviet land-based air power in areas so remote from friendly bases: Would not these forces be better employed in securing the Atlantic and Pacific sea lanes? Despite these objections, Western leaders have agreed to initiate an anti-SSBN campaign against the bastions.
While preparing for the operation, SACLANT has learned that five Soviet SSBN's have just recently departed ports in the Kola Peninsula. It appears that they are escorted by several attack submarines and a single surface action group, including the VSTOL carrier Kiev. More disturbing, however, is the report that two regiments of Soviet naval aircraft are being readied for operations at Kola airfields, including a squadron of T-26 Backfires.
For his initial penetration of the Barents Sea bastion, SACLANT has four highly effective ASW submarines at his disposal: HMS Trafalgar (S-107), USS La Jolla (SSN-701), USS Newport News (SSN-750), and USS Pogy (SSN-647). In addition, a powerful carrier battle group, consisting of the carrier Theodore Roosevelt (CVN-71), the cruisers Virginia (CGN-38) and South Carolina (CGN-37), and the destroyers Conolly (DD-979) and Moosbrugger (DD-980), has been ordered to support the operation. Also proceeding to the scene is the Standing Naval Force Atlantic, which has been directed to assist the US/British forces in hunting Soviet submarines. This force consists of the Dutch frigate Witte de With (F-813), the Canadian destroyer Huron (DDH-281), the West German destroyer Molders (D-186), the US frigate Reuben James (FFG-57), and the British frigate Boxer (F-92).
Carrier Air Wing 1, deployed onboard Roosevelt, is being prepared for action against Soviet aircraft operating from the Kola airfields. This wing consists of two F-14 Tomcat squadrons (VF-33 "Tarsiers" and VF-102 "Diamondbacks"), two F-18 Hornet squadrons (VA-46 "Clansmen" and VA-72 "Blue Hawks"), one A-6 Intruder squadron (VA-34 "Blue Blasters"), one EA-6 Prowler squadron (VAQ-135 "Ravens"), one E-2C Hawkeye squadron (VAW-123 "Screw Tops"), and one S-3 Viking squadron (VS-32). In addition, two F-16 squadrons and one P-3B squadron of the Royal Norwegian Air Force are prepared to support SACLANT's operation from airfields in northern Norway.
Map: Use only the north map. Units are not allowed to exit the map.
Deployment
Soviet (set up first)
3605: Murmansk: Klsky (SB).
3505: Vlgda (SB).
3704: Klmya (SB).
3705: Polyarnyy: Dnsky (SB).
3604: Krlsk (SB).
Any sea or drift ice hexes within 3 hexes of Bjornoya (2708), but not stacked with any other unit: Fkzlv (SN), YGagr (SN), Don (SN), PPslv (SN), Vldmr (SS).
Together in any sea or drift ice hex within 3 hexes of Pechenga (3605): Kiev (CV), Nkhmv (CG), Sprnv (DD), Udloy (DD), Grzin (FF). On Kiev: Y36 (INT).
3905: Kildenstroy: M23 (INT), T16D (RCN), T95F (RCN), I38 (RCN), B12 (RCN).
3806: Kilpyavr: T26 (ATK), T16C (ATK), M25 (INT), S27 (INT), T16E (EW).
NATO (set up second)
Any sea or drift ice hex in Barents Sea Zone, but not stacked with or adjacent to any Soviet unit: Tflgr (UK/SN).
Any sea or drift ice hexes within 8 hexes of Jan Mayen (2119), but not stacked with any other unit: Pogy (US/SN), LaJla (US/SN), NpNws (US/SN).
Together in any sea hex within 3 hexes of Andoya (3313): Huron (CA/DD), Moldr (WG/DD), Boxer (UK/FF), James (US/FF), WdeWt (NE/FF).
Together in any sea or drift ice hex within 3 hexes of Jan Mayen (2119): Rsvlt (US/CV), Vrgna (US/CG), SClna (US/CG), Cnoly (US/DD), Msbgr (US/DD).
On Rsvlt: F14 (US/INT) ×2, F18 (US/INT) ×2, A6 (US/ATK), EA6 (US/EW), S3 (US/RCN), E2 (US/AEW).
Any airfields in Norway (do not have to be in same airfield): F16 (NO/INT) ×2, P3 (NO/RCN) ×2, NIM (UK/RCN).
Special Rules
- US F18, A6, and S3 air units can each make one SSM attack in the game. An F18 has an SSM Range/Attack Value of 1/30 (1/15 if the unit is damaged); the A6 and S3 have an SSM Range/Attack Value of 2/40 (2/20 if the unit is damaged).
- The US CG SClna can make one cruise missile (CM) SSM attack in the game. A CM attack is considered normal SSM Combat, but it can be used only against an enemy airfield. The airfield's Close Anti-Air value and CAP (if any) are taken into account in Defensive combat against a CM attack, but the attacker does not subtract 4 from his Attack die roll as he normally would in an SSM attack against a port or airfield (see 14.1). Unlike normal SSM attacks, cruise missile attacks can transit full land hexsides on the way to the target. The SSM Range/Attack Value of a CM attack is 25/60 (25/40 if SClna is damaged).
Game Length: 6 Game Turns
Victory Conditions
The Soviet player gains and loses Victory Points (VP) as follows:
| Condition | Victory Points |
|---|---|
| US CV Rsvlt sunk | +10 |
| Each Soviet SB ending the game in the Svalbard Zone (even in ice pack hex) | +7 |
| Each NATO CG or SN sunk | +3 |
| Each NATO DD sunk | +2 |
| Each NATO FF sunk or INT/ATK air unit destroyed | +1 |
| Each Soviet CV or CG sunk | −2 |
| Each Soviet DD, FF, SN, or SS sunk | −1 |
| Each Soviet SB or air unit destroyed | 0 |
At the end of the game, the Soviet player adds up his VP and consults the following chart to determine the winner:
| Soviet VP | Victory Level |
|---|---|
| 33 or more | Soviet Decisive Victory |
| 26-32 | Soviet Substantive Victory |
| 20-25 | Soviet Marginal Victory |
| 14-19 | NATO Marginal Victory |
| 7-13 | NATO Substantive Victory |
| 6 or less | NATO Decisive Victory |
15.3 Scenario 8: The Battle of the Gap
Background: The Soviet invasion of Norway has been underway for two weeks. Soviet ground forces, paratroops, and marines have cleared the Norwegian coast as far south as Narvik; meanwhile, the Soviet Navy stands triumphant in the Norwegian Sea — not a single NATO warship is currently situated north of the Greenland-Iceland-UK gap. Stavka has determined that the time is ripe for launching a major interdiction effort against NATO's North Atlantic shipping lanes. The Red Banner Northern Fleet has been ordered to prevent the passage of NATO merchant ships from the United States and Canada to Europe. Submarines will be the main tools in this campaign, but major surface forces and long-range attack aircraft operating out of airfields on the Kola Peninsula will be readily available to support the submarines and to engage NATO surface forces if necessary.
NATO intelligence has reported to SACLANT that no less than 11 Soviet attack submarines are currently in position to launch this campaign. Over half these boats have already penetrated the GIUK gap and are currently shadowing American cargo vessels en route to Britain. Reports from Nimrod reconnaissance flights from the RAF's 206 Squadron, operating out of Stornoway in the Hebrides, have indicated that two major Soviet surface task forces are also preparing to transit the gap into the North Atlantic. One group includes the VSTOL carrier Kiev and the cruiser Frunze; the other group includes a second VSTOL carrier, Baku. It is also estimated that over 100 Soviet long-range attack and reconnaissance aircraft will support this campaign from the Kola Peninsula.
The situation in the North Atlantic is critical for NATO. There are currently three small convoys of American cargo ships and tankers en route to Britain, each of which is carrying significant quantities of ammunition and equipment for NATO ground forces. SACLANT has directed the US Navy's Commander-in-Chief, 2nd Fleet, and the Royal Navy's Flag Officer, 2nd Flotilla, to ensure the arrival of these convoys in Britain. The Royal Navy has been assigned the responsibility of securing the western approaches to the British Isles; the US Navy has assumed direct protection of the convoys.
US Navy forces consist of a carrier battle group, including the carrier Theodore Roosevelt (CVN-71, embarking Carrier Air Wing 1 — see Scenario 7 for a description of this wing), the cruiser Virginia (CGN-38), the destroyers John Rodgers (DD-983) and Conolly (DD-979), and the frigate Bagley (FF-1069). A small convoy escort group, consisting of the frigates Knox (FF-1052), Trippe (FF-1075), and Reuben James (FFG-57), as well as the Standing Naval Force Atlantic, comprised of the USS Moosbrugger (DD-980), HMS Scylla (F-71), HMCS Huron (DDH-281), HNMS Kortenaer (F-807), and FGS Molders (D-186), have all been assigned to 2nd Fleet.
The Royal Navy's 2nd Flotilla consists of the aircraft carriers Invincible (R-05) and Illustrious (R-06), embarking 800 and 801 Squadrons of Sea Harriers and 706 Squadron (Sea King helicopters). Escorting vessels include York (D-104), Birmingham (D-86), Broadsword (F-88), Minerva (F-45), Arrow (F-173), Andromeda (F-57), and Boxer (F-92). In addition, several submarines have been assigned to 2nd Fleet: HMS Trafalgar (S-107), HMS Conqueror (S-48), HMS Talent (S-115), USS Whale (SSN-638), and USS Olympia (SSN-717).
NATO air units in the GIUK gap area are being briefed on the upcoming operation. The Royal Norwegian Air Force's 338 Squadron (F-16) will defend central Norwegian airfields against Soviet air attack. In Scotland, the RAF's 12 Squadron (Buccaneers) and 43 Squadron (Tornados) have been deployed to the Wick airfield. At Keflavik, the US Air Force's 612th Squadron (F-15 Eagle) and the Navy's Patrol Squadron 5 ("The Mad Foxes," P-3C Orion) are also at SACLANT's disposal.
Map: Use both maps in this scenario.
Special Rules
- UK HAR and US F18, A6, and S3 air units can each make one SSM attack in the game. The F18 has an SSM Range/Attack Value of 1/30 (1/15 if damaged); the HAR, A6, and S3 units have an SSM Range/Attack Value of 2/40 (2/20 if damaged).
- NATO CR units are destroyed if they receive a damage result.
- NATO CR units that reach Holy Loch/Faslane (3736) or Reykjavik (1830) are removed from the game. The NATO player receives Victory Points for this accomplishment.
Game Length: 9 Game Turns
Deployment
NATO (set up first)
Any sea or drift ice hexes in British Isles or Iceland Zone (they can be in same hex): Tflgr (UK/SN), Olypa (UN/SN).
Any sea or drift ice hexes in Iceland, British Isles, North Atlantic, or Labrador Sea Zone (they can be in same hex): Whale (US/SN), Conqr (UK/SN), Talnt (UK/SN).
3736: Holy Loch/Faslane: Invcl (UK/CV), York (UK/DD), Bdswd (UK/FF), Mnrva (UK/FF), Arrow (UK/FF). On Invcl: HAR (UK/INT), SKG (UK/AEW).
Together in any sea hex within 3 hexes of Kirkwall (3531): Iltrs (UK/CV), Brmhm (UK/DD), Andrm (UK/FF), Boxer (UK/FF). On Iltrs: HAR (UK/INT), SKG (UK/AEW).
Together in any sea hex in Labrador Sea Zone (can stack with any other NATO units): Rsvlt (US/CV), Vrgna (US/CG), Rdgrs (US/DD), Cnoly (US/DD), Bgley (US/FF). On Rsvlt: F14 (US/INT) ×2, F18 (US/INT) ×2, A6 (US/ATK), EA6 (US/EW), S3 (US/RCN), E2 (US/AEW).
Any sea hexes in Labrador Sea or North Atlantic Zone (can be in different hexes; can stack with other NATO units): Knox (US/FF), Tripe (US/FF), James (US/FF).
2240: Buyer (US/CR), Hauge (US/CR), Baugh (US/CR), TCldo (US/CR), Bay (US/CR), Eagle (US/CR), TClba (US/CR), Lumus (US/CR).
1440: Kocak (US/CR), Cgnus (US/CR), Mteor (US/CR).
0741: Altar (US/CR), Pllux (US/CR).
Together in any sea or drift ice hex in Iceland, British Isles, North Atlantic or Labrador Sea Zones (can stack with other NATO units): Huron (CA/DD), Msbgr (US/DD), Moldr (WG/DD), Scyla (UK/FF), Krtnr (NE/FF).
3720 Orland, or 3516 Bodo: F16 (NO/INT).
1831: Keflavik: F15 (US/INT), P3 (US/RCN) ×2.
3532: Wick: TOR (UK/INT), BUC (UK/ATK).
3334: Stornoway: NIM (UK/RCN) ×2.
Soviet (set up second)
Any sea or drift ice hexes in Norwegian Sea or Greenland Sea Zone, but not stacked with or adjacent to any NATO unit (can be in same hex or hexes): Volga (SN), PPslv (SN), FKzlv (SN), MKaln (SN).
Any sea hexes in British Isles Zone, but not stacked with or adjacent to any NATO unit (can be in same hex): Lnsky (SN), CCher (SS).
Any sea hexes in North Atlantic Zone, but not stacked with or adjacent to any NATO unit (can be in same hex): IKnev (SN), MTsky (SS).
Any sea hexes in Labrador Sea Zone, but not stacked with or adjacent to any NATO unit (can be in same hex): ABlgn (SN), Kvsky (SS).
Any sea or drift ice hex on either map, but not stacked with or adjacent to any NATO unit (can stack with any other Soviet units): Oka (SN).
Together in any sea hex within 5 hexes of Tromso (3311): Baku (CV), Kursk (CG), Zozly (CG), Vryag (DD), Osmtr (DD), Sprnv (DD), Obrsv (DD), Dzhsk (FF), Grzin (FF). On Baku: Y36 (INT).
3705: Polyarnyy: T16D (RCN), T95D (RCN), T95F (RCN), I38 (RCN).
Together in any sea hex within 8 hexes of Bodo (3516): Kiev (CV), Frnze (CG), Tula (CG), Svtpl (CG), Nklyv (CG), Udloy (DD), Grmky (FF), Mnshk (FF). On Kiev: Y36 (INT).
3605: Pechenga: M25 (INT), S24 (INT), T26 (ATK).
3806: Kilpyavr: S27 (INT), T16C (ATK), T16G (ATK), T16E (EW).
Victory Conditions
The NATO player gains Victory Points (VP) as follows:
| Condition | Victory Points |
|---|---|
| Each Soviet CG, CV, or SN sunk | 2 |
| Each Soviet DD, FF, or SS sunk | 1 |
| Each Soviet INT or ATK air unit destroyed | 1 |
| Each NATO CR unit that reaches Holy Loch/Faslane (3736) | 4 |
| Each NATO CR that reaches Reykjavik (1830) | 1 |
The NATO player loses VP for the following reasons:
| Condition | Victory Points |
|---|---|
| US CV Rsvlt sunk | −12 |
| Each NATO CG, SN, or UK CV sunk | −4 |
| Each NATO CR or DD sunk | −3 |
| Each NATO FF sunk, or INT or ATK air unit destroyed | −2 |
| Each Destroyed combat result achieved against a NATO airfield in Britain or Iceland | −12 |
| Each Damage 2 combat result achieved against a NATO airfield in Britain or Iceland | −8 |
| Each Damage 1 combat result achieved against a NATO airfield in Britain or Iceland | −4 |
| Each Destroyed combat result achieved against a NATO airfield in Norway | −9 |
| Each Damage 2 combat result achieved against a NATO airfield in Norway | −6 |
| Each Damage 1 combat result achieved against a NATO airfield in Norway | −3 |
Note: VP for damaging NATO airfields are awarded on the basis of the actual combat result, not on cumulative damage. For example, a Norwegian airfield with a Damage 1 marker that receives a Damage 1 result has its marker adjusted to Damage 2, but the NATO player loses only 3 VP for this result (in addition to the 3 VP for the first Damage 1 result).
At the end of the game, the NATO player adds up his VP and consults the following chart to determine the winner:
| NATO VP | Victory Level |
|---|---|
| +28 or more | NATO Decisive Victory |
| +15 to +27 | NATO Substantive Victory |
| +2 to +14 | NATO Marginal Victory |
| −10 to +1 | Soviet Marginal Victory |
| −21 to −11 | Soviet Substantive Victory |
| −22 or less | Soviet Decisive Victory |
15.4 Scenario 9: NATO Resurgent
Background: The recent Soviet attempt to sever NATO's North Atlantic shipping lanes has been defeated. Soviet warships that had transited the GIUK gap only two weeks ago have been either sunk or sent reeling back to the safer waters of the Norwegian Sea. With the safety of the North Atlantic convoys assured, SACLANT has been able to concentrate NATO naval forces for a counterattack into Soviet-controlled waters. With most of Norway under Soviet domination, SACLANT has been ordered to direct this offensive against Soviet naval forces in the Norwegian Sea so that NATO amphibious forces can be safely landed on the Scandinavian coast. Furthermore, with the Norwegian Sea under NATO domination, Soviet ground forces in Norway would be subject to severe logistical constraints, for their only supply route would be over the tenuous mountain roads of northern Norway.
The Commander-in-Chief of the Red Banner Northern Fleet is still recovering from the disastrous North Atlantic campaign. Recognizing that NATO will inevitably come roaring back north of the GIUK gap, the Soviets have deployed the handful of surviving submarines in a weak patrol line from Iceland to the Norwegian coast. Only meager surface forces outlived the recent debacle, but those that did have recently replenished at Murmansk and have been ordered south again to protect the Soviet-controlled Norwegian coast. Despite its recent losses, this force is still potent; it includes the VSTOL carrier Kiev and the cruisers Frunze and Tula.
Should NATO attempt to probe into the Norwegian Sea, the Red Banner Northern Fleet still has enormous air power at its disposal, for the long-range strike aircraft operating out of airfields on the Kola Peninsula were relatively unscathed in the recent campaign. A combined regiment of Backfire/Badger aircraft is reportedly fully operational and several squadrons of long-range interceptors have been transferred to the Kola from the Baltic.
NATO naval forces have been assigned a triple mission by SACLANT. Their most important task is to protect the convoys of amphibious transports that are currently forming in NATO ports. A large US Navy Amphibious Ready Group has recently departed Norfolk, carrying a powerful Marine Amphibious Brigade. In Britain, a Royal Marine Commando brigade has been embarking onto a motley collection of transports, including two North Sea passenger ferries. Sixteen NATO destroyers and frigates are available in the North Atlantic for escort duty, including the multinational Standing Naval Force Atlantic squadron. It has not yet been determined exactly where NATO amphibious forces will disembark, but several key Norwegian airfields and ports currently under Soviet control are being considered for invasion.
SACLANT's second mission is to eliminate the Soviet naval presence in the Norwegian Sea. In order to fulfill this task, SACLANT has ordered four US and Royal Navy submarines to penetrate the GIUK gap in order to initiate offensive operations in the area. These submarines are: USS Olympia (SSN-717), USS Jack (SSN-605), HMS Trafalgar (S-107), and HMS Conqueror (S-48). In addition, powerful NATO air units will be at SACLANT's disposal for anti-shipping duties in the Norwegian Sea. Carrier Air Wing 1 (see Scenario 7 for a description of this wing), embarked on USS Theodore Roosevelt (CVN-71), 801 Squadron (Sea Harriers), deployed onboard HMS Invincible (R-05), and the RAF's 12 Squadron (Buccaneers), 43 Squadron (Tornados), and 74 Squadron (Phantoms) will all participate in this operation.
The final task assigned to SACLANT is to disrupt Soviet air operations in the Kola Peninsula in order to ensure the safety of NATO shipping in the Norwegian Sea. The only methods by which this mission can be fulfilled are with carrier-based air power — a highly dangerous task, since the carriers will have to approach the Kola at close range — or with anti-airfield cruise missiles. Four US Navy warships belonging to SACLANT are armed with the nonnuclear BGM-109F Tomahawk missile, an accurate weapon that can be fired at over 1,200 miles from its target.
Map: Use both maps in this scenario.
Deployment
Soviet (set up first)
Any sea hexes in Norwegian Sea Zone, but not stacked with any other unit: IKnev (SN), MKaln (SN), Lnsky (SN), Mgnit (SS), CCher (SS).
Any sea or drift ice hexes in Iceland Zone, but not stacked with any other unit: Volga (SN), PPslv (SN).
Together in any sea hex within 4 hexes of Tromso (3311): Kiev (CV), Frnze (CG), Tula (CG), Svtpl (CG), Osmtr (DD), Udloy (DD), Grzin (FF). On Kiev: Y36 (INT).
3605: Pechenga: T16D (RCN), T95D (RCN), T95F (RCN), I38 (RCN).
3705: Polyarnyy: S24 (INT), T26 (ATK), T16E (EW).
3806: Kilpyavr: M25 (INT), T16C (ATK), T16G (ATK).
NATO (set up second)
Any sea hexes within 2 hexes of Vago (2930), but not stacked with or adjacent to any Soviet units (can be in same hex): Olypa (US/SN), Jack (US/SN).
Any sea hexes within 2 hexes of Sumburgh (3529) (can be in same hex): Conqr (UK/SN), Tflgr (UK/SN).
3736: Holy Loch/Faslane: Intpd (UK/AA), STris (UK/AA), SLnct (UK/AA), SBdvr (UK/AA).
3736: Holy Loch/Faslane, or 3834: Rosyth (can be split between the hexes as desired): Msbgr (US/DD), Huron (CA/DD), Moldr (WG/DD), Krtnr (NE/FF), Invcl (UK/CV), Brmhm (UK/DD), York (UK/DD), Bdswd (UK/FF), Andrm (UK/FF), Mnrva (UK/FF), Arrow (UK/FF). On Invcl: HAR (UK/INT), SKG (UK/AEW).
3834: Rosyth: Elk (UK/AA), Nrlnd (UK/AA).
1830: Reykjavik, or any one hex in North Atlantic Zone (can be split between Reykjavik and North Atlantic Zone as desired): Rsvlt (US/CV), Vrgna (US/CG), Rdgrs (US/DD), Cnoly (US/DD), Bgley (US/FF), Knox (US/FF), James (US/FF). On Rsvlt: F14 (US/INT) ×2, F18 (US/INT) ×2, A6 (US/ATK), EA6 (US/EW), S3 (US/RCN), E2 (US/AEW).
1830: Reykjavik: IJima (US/AA), Ogden (US/AA), Sgnaw (US/AA), Gntwn (US/AA).
Together in any sea hex in North Atlantic Zone (can stack with other NATO units): BWood (US/AA), Austn (US/AA), Nwprt (US/AA), FFshr (US/AA), Alamo (US/AA), HrCty (US/AA).
3532: Wick: PHN (UK/INT), TOR (UK/INT), BUC (UK/ATK).
3334: Stornoway: NIM (UK/RCN) ×3.
Special Rules
- The Soviet player cannot attack NATO bases.
- UK HAR and US F18, A6, and S3 air units can each make one SSM attack in the game. The F18 has an SSM Range/Attack Value of 1/30 (1/15 if damaged); the HAR, A6, and S3 have an SSM Range/Attack Value of 2/40 (2/20 if damaged).
- The US CG Vrgna, the DD's Rdgrs and Cnoly, and the SN Olypa can each make one cruise missile (CM) SSM attack in the game. A CM attack is considered normal SSM Combat, but it can be used only against a Soviet airfield. The airfield's Close Anti-Air value and CAP (if any) are taken into account in defensive combat against a CM attack, but the attacker does not subtract 4 from his attack die roll as he normally would in an SSM attack against a port or airfield (see 14.1). Unlike normal SSM attacks, cruise missile attacks can transit full land hexsides on the way to the target. The SSM Range/Attack Value of a CM attack is 25/60 (25/40 if the unit is damaged).
- Each NATO AA unit that reaches Bergen (3926), Trondheim (3721), Orland (3720), Bodo (3516), Andoya (3313), Narvik (3412), or Tromso (3311) is immediately removed from the map. The NATO player receives VP for this accomplishment.
Game Length: 9 Game Turns
Victory Conditions
The NATO player gains Victory Points as follows:
| Condition | Victory Points |
|---|---|
| Each Soviet CV, CG, or SN sunk | 2 |
| Each Soviet DD, FF, or SS sunk | 1 |
| Each Soviet INT or ATK air unit destroyed | 1 |
| Each Destroyed combat result achieved against a Soviet airfield | 9 |
| Each Damage 2 combat result achieved against a Soviet airfield | 6 |
| Each Damage 1 combat result achieved against a Soviet airfield | 3 |
Note: VP for damaging Soviet airfields are awarded on the basis of the actual combat result, not on cumulative damage. For example, a Soviet airfield with a Damage 1 marker that receives a Damage 1 result has its marker adjusted to Damage 2, but the NATO player loses only 3 VP for this result (in addition to the 3 VP for the first Damage 1 result).
The NATO player also receives VP for NATO AA units that reach the hexes listed below. The AA's Amphibious Assault value is enhanced by the indicated multiplier for the hex, and the NATO player receives the result in VP.
| Destination Hex | Amphibious Assault Point Multiplier |
|---|---|
| Bergen (3926) | ×½ |
| Trondheim (3721), Orland (3720), or Bodo (3516) | ×1 |
| Andoya (3313), Narvik (3412), or Tromso (3311) | ×1½ |
The NATO player loses VP as follows:
| Condition | Victory Points |
|---|---|
| US CV Rsvlt sunk | −12 |
| Each NATO CG or SN, or UK CV, or AA unit with an Amphibious Assault Value of 8 sunk | −4 |
| Each NATO DD sunk | −3 |
| Each NATO FF or AA unit with an Amphibious Assault Value of 4 sunk | −2 |
| Each NATO INT or ATK air unit destroyed | −2 |
| Each NATO AA unit with an Amphibious Assault Value of 2 sunk | −1 |
| Each Soviet SN, SS, or Task Force (not Task Group) ending the game in the Norwegian Sea Zone | −3 |
At the end of the game, the NATO player adds up his VP and consults the following chart to determine the winner:
| NATO VP | Victory Level |
|---|---|
| +60 or more | NATO Decisive Victory |
| +39 to +59 | NATO Substantive Victory |
| +20 to +38 | NATO Marginal Victory |
| +3 to +19 | Soviet Marginal Victory |
| −14 to +2 | Soviet Substantive Victory |
| −15 or less | Soviet Decisive Victory |
Advanced Game Rules
16.0 Time of Year
"It ain't the guns or armament, or the money they can pay. It's the close cooperation that makes them win the day; it ain't the individual, nor the army as a whole, but the everlastin' teamwork of every bloomin' soul." — J. M. Knox
At the beginning of the Advanced Game Scenario, the players must agree upon the time of year in which the scenario will take place. The time of year determines the number of turns of darkness in each day, the limit of drift ice, and the weather. There are four time of year periods: 1 (January-February), 2 (March-April or November-December), 3 (May-June or September-October), and 4 (July-August). At the beginning of the scenario, the players choose a single period and place the Time of Year marker in the corresponding box on the Time of Year Track.
16.1 Darkness
In the Advanced Game, there are two types of Game Turns: day and darkness. Note that Night Game Turns are not necessarily dark and AM or PM Game Turns are not necessarily day. If the scenario is taking place in Period 1 (January-February), all three Game Turns in the day (AM, PM, and Night) are dark, with the exception of the Labrador Sea, North Atlantic, and British Isles Zones where the AM Game Turn is day in this period. If the scenario takes place in Period 2 (March-April or November-December), the AM Game Turn is day and the PM/Night Game Turns are dark. In Period 3 (May-June or September-October), the AM/PM Game Turns are day, and the Night Game Turn is dark. In Period 4 (July-August), all three Game Turns are day.
Effects of Day: All normal rules are in effect during day Game Turns.
Effects of Darkness: The following limitations are applied to air units during dark Game Turns:
- Air Unit Activation: Air units based on airfields can activate normally in darkness. However, only US "all-weather" carrier-based units (all-weather units have a small box (■) printed on their counters) can activate from a carrier in darkness. Darkness does not affect an air unit's ability to perform CAP and strategic missions, however.
- Bombing: US all-weather air units can perform Bombing Combat normally during darkness. However, all other air units have their Bombing values halved (round fractions up) in Game Turns of darkness. Air units can perform SSM and ASW Combat normally in darkness.
- Air-to-Air Combat: All Soviet INT and ATK air units have their Anti-Air values reduced by one (to a minimum of 1) in darkness Game Turns. NATO air units are unaffected when performing Air-to-Air Combat in darkness.
16.2 Drift Ice
Drift ice hexes can be affected by the time period in which the scenario takes place. If the scenario takes place in Period 1 (January-February), all drift ice hexes are considered pack ice hexes instead (see 5.0). In Periods 2 or 3 (March-April, May-June, September-October, or November-December), drift ice hexes are not altered; see below for special drift ice hex rules. In Period 4 (July-August), all drift ice hexes are considered sea hexes instead.
Effects of Drift Ice: Drift ice hexes do not affect combat in any way, but they do have the following effects on movement:
- Surface Units: Surface units must expend two points from their Movement Allowance to enter a drift ice hex; they can exit a drift ice hex with no additional movement penalty. A surface unit is always permitted to move at least one hex during its activation, regardless of its Movement Allowance. Thus, a unit with a Movement Allowance of 1 can enter a drift ice hex.
- Submarines: Submarines can enter drift ice hexes without penalty. However, a submarine moving at full speed (see 5.3) cannot enter a drift ice hex; similarly, a submarine occupying a drift ice hex cannot be activated at full speed.
17.0 Weather
"We must challenge Capitalist naval superiority on all the seas and oceans of the world." — Admiral Sergei G. Gorshkov
During the Weather Phase, which occurs in the Strategic Cycle of AM Game Turns only, either player rolls the die and consults the Weather Table. The die roll is cross-referenced with the column corresponding to the period in which the scenario takes place (see 16.0). There are three possible results: clear, squall, or storm.
If the result is clear, nothing further is done; the weather has no effect for the next three Game Turns. If the result is squall or storm, the die must be rolled again and the Zone Table must be consulted. Apply this die roll to the table to determine the zones that are affected by the squall or storm. Players should note down on their Player Records the names of the affected zones — all hexes within these zones are affected by the result for the next three Game Turns.
Example of Weather: Assume a scenario is being played in July (Period 4). During the Weather Phase, the Soviet player rolls the die and gets an 8. Checking this roll on the "July-August" column of the Weather Table, the players find a "Squall" result. The Soviet player again rolls the die and obtains a 0. Applying this roll to the Zone Table, it is determined that the squall result applies to the Labrador Sea and Barents Sea Zones.
Squalls: Squalls have the following effects:
- A surface unit must spend two points from its Movement Allowance to enter a sea or coastal hex in a squall zone. If a surface unit enters a drift ice hex in a squall zone, combine the squall/drift ice penalties (that is, the unit must expend four points from its Movement Allowance to enter the hex). Remember that a surface unit is always permitted to move at least one hex during its activation.
- Surface units occupying a hex in a squall zone have Limited Detection Zones only (see 9.1).
- A submarine's Movement Allowance is not affected by squalls.
- If an aircraft carrier occupies a squall zone, only all-weather air units (see 16.1) can become active, perform Strategic Air Missions, or perform CAP. Air units occupying airfields in a squall zone are unaffected.
- Air units can move through a squall zone with no detrimental effect.
- Invasions cannot take place in a squall zone (see 18.0).
- If the Logistics option is being used (see 20.0), at-sea replenishment cannot take place in a squall zone.
Storms: Storms have the following effects:
- A surface unit must spend four points from its Movement Allowance to enter any type of hex in a storm zone. Remember that a surface unit is always permitted to move at least one hex during its activation.
- A submarine's Movement Allowance is not affected by storms.
- No air units in an airfield or on an aircraft carrier that occupy a storm zone can be activated, perform Strategic Air Missions, or initiate CAP.
- No Strategic Air Mission can be performed in a storm zone, even by air units that began the Strategic Air Phase in a clear or squall zone.
- Air units can move through a storm zone with no detrimental effect.
- All Local and Strategic Detection markers on surface and submarine units that occupy or enter a storm zone are immediately removed. Thus, a unit in a storm zone cannot be attacked.
- No attacks can be initiated by any unit in a storm zone, even if the unit begins its activation in a squall or clear zone.
- Units in a storm zone do not exert Limited or Extended Detection Zones, nor do Limited or Extended Detection Zones extend into storm zones.
- Invasions cannot take place in a storm zone (see 18.0).
- If the Logistics option is being used (see 20.0), no at-sea or in-port replenishment can take place in a storm zone.
Note: A surface unit that begins its movement inside a squall or storm zone can move into an adjacent hex that is within a clear zone with no effect on its Movement Allowance. A surface unit that begins movement in a clear zone must begin to pay the movement penalties for the squall or storm zone upon entering the first hex in the squall/storm zone; if the unit does not have enough points in its Movement Allowance, it cannot enter the squall/storm zone (remember, however, that a surface unit can always move one hex).
18.0 Invasion of NATO Bases
"Today, a fleet operating against the shore is able not only to solve the tasks connected with territorial changes but to directly influence the course and even the outcome of war. In this connection the operations of a fleet against the shore have assumed paramount importance in armed conflict at sea." — Admiral Sergei G. Gorshkov
During the Invasion Phase of the Strategic Cycle (which occurs in AM Game Turns only), first the Soviet player and then the NATO player can place Ground Force markers on the map. There are three types of Ground Force markers: Marine, Parachute, and Commando.
18.1 Invasion Hexes
Ground Force markers can be placed only in NATO bases. Soviet bases can never be invaded. Subject to the invasion rules, the NATO player is permitted to place his Ground Force markers in any NATO base during an Invasion Phase. The Soviet player, however, can invade only those NATO bases that the current Soviet strategy (see 27.0) allows to be invaded.
Ground Force markers can be placed in eligible NATO bases by both players an unlimited number of times per game, even if it already contains friendly or enemy markers. Once a Ground Force marker is placed in a NATO base, it must remain there for the rest of the game.
NATO Airfields: During the Soviet Invasion Segment, at the moment a NATO airfield is invaded, all NATO air units on that base can freely relocate. The NATO player picks up the air units and places them in the "Occupy" Return to Base box of the zone in which they are situated on his Strategic Air Display. The air units must remain in the Return to Base box for the rest of the current turn and for the next two turns. These units cannot be activated, perform strategic missions, initiate CAP, or provide "escort" or "cover" for parachute assaults (see 18.3) during this time. During the Strategic Air Mission Termination Phase of the next Night Game Turn, the air units can be relocated to any NATO airfield (except a destroyed airfield) in the zone they occupy that is not currently controlled by the Soviet player (see 18.5) and subject to stacking restrictions (see 6.1). If no airfield is available, the air units are destroyed.
Note that the NATO player is not forced to remove his air units during the Soviet Invasion Segment. He can instead activate them during the air Action Segment of the Action Phase if the airfield is not Soviet controlled.
18.2 Amphibious Assaults
In a player's Invasion Segment, he can place Marine markers in eligible NATO bases that are adjacent to at least one of his Amphibious Assault (AA) surface units. The NATO player can also place Marine markers in NATO bases occupied by his AA units; since the Soviet player may not have units end their movement in a NATO base, he could not do so. The NATO base in which a Marine marker is placed can be occupied by enemy or friendly units, including other Ground Force markers. Soviet surface, submarine, and air units occupying a base in which Soviet Ground Force markers are also situated continue to function normally, unless the Soviet player gains "control" of the base (see 18.5). Amphibious assaults cannot take place in squall or storm zones.
Conducting Amphibious Assaults: The owning player states which base he will invade and states which AA units in the adjacent hex (or, in the case of the NATO player, the base hex itself) will participate in the invasion. He places a Marine marker of the appropriate value in the base or augments the Marine marker already occupying the base. The AA unit(s) used in the invasion and the invaded base should be noted down, since the AA unit cannot perform another amphibious assault for the rest of the game.
Amphibious assaults are voluntary. If several AA units are eligible to invade, the owning player states which will take part. AA units can move and perform combat normally, even after they have executed their single amphibious assault.
Marine Markers: Each player has his own set of Marine markers. NATO markers are used for NATO invasions and Soviet markers are used for Soviet invasions. Marine markers have printed numbers. Only one Marine marker per player can occupy a NATO base at any time. If a player makes additional amphibious assaults against a base hex already containing a friendly Marine marker, simply add up the total value of Marine markers in the hex and replace the existing marker with a new one reflecting its augmented value.
Value of AA Units: Each AA unit has an Amphibious Assault value, from 2 to 8, printed on it (see 2.3). The Amphibious Assault value determines the value of the Marine marker placed in a base due to an invasion. If more than one AA unit participates in an invasion, combine their Amphibious Assault values. An AA unit must be unloaded as a whole into a base; a player cannot unload some points from an AA unit into one base and the rest into another base later in the game.
Example of Amphibious Assault: The NATO player has a Marine marker with a value of 4 in Bodo, and he has the AA units IJima (Amphibious Assault Value: 8) and Ogden (Amph Value: 4) in an adjacent hex. During the Invasion Phase, the NATO player decides to conduct an amphibious assault against Bodo using both AA units. Their combined Amphibious Assault value is 12, which, when combined with the existing Marine marker of 4, yields 16. A new NATO Marine marker worth 16 is placed in Bodo and the old marker is removed. The NATO player notes down the hexes where IJima and Ogden unloaded, since they cannot be used for an amphibious assault again for the rest of the game.
18.3 Parachute Assaults
Players can invade NATO bases with Parachute markers. Each player has a set of Parachute markers, which read "PARA 8" and include the battalion designations of the units. All Parachute markers have a value of 8.
The NATO base in which a Parachute marker is placed can be occupied by enemy or friendly units, including other Ground Force markers. NATO surface, submarine, and air units situated in such a hex continue to function normally, unless the Soviet player gains "control" of the base (see 18.5). Unlike Marine markers, Parachute markers are placed individually. A base hex can contain any number of friendly and enemy Parachute markers. Parachute assaults cannot take place in a squall or storm zone.
Parachute markers are made available to players in scenario set-up instructions (see 28.3) and by reinforcements (see 26.0). If a player has Parachute markers, he places them aside for future use. They can be saved by the owning player and can be used at any time during the game as he desires, although once placed in a base hex, they cannot be moved again.
Placement of Parachute Markers: Parachute markers can be placed on the map only during the Soviet and NATO Invasion Segments. If a player wishes to place a Parachute marker on an eligible NATO base, at least one of the following two conditions must be fulfilled:
- There are no enemy INT air units situated within range of the base (that is, within half the enemy INT air unit's Movement Allowance from its airfield to the invasion base hex); or,
- If there are enemy INT air units within range of the base to be invaded (that is, within half their Movement Allowance to the base), they all provide "cover" for the base. The invading player must provide "escort" if he wishes to invade the hex by specifying any or all of his INT units within range of the base to be invaded. The invading player compares the combined Anti-Air values of all his "escort" INT air units with the combined Anti-Air values of all the enemy "cover" INT units; if the "escort" Anti-Air value is greater than the "cover" Anti-Air value, then the Parachute marker can be placed in the base to be invaded.
The friendly air units providing this "escort" (but not the enemy air units providing "cover") cannot be activated, perform Strategic Air Missions, or initiate CAP for the next three Game Turns. The owning player may wish to place these units in the "Occupy" Return to Base box of the zone in which they are situated on his Strategic Air Display to indicate that they are unable to function for the next three Game Turns. During the Strategic Air Mission Termination Phase of the next Night Game Turn, these units are returned to a friendly airfield in the zone they occupy.
Note: The same friendly air units can be used to "cover" more than one base at a time. Carrier-based INT air units must also be taken into account when determining "escort" and "cover." Parachute markers can be placed in NATO bases that contain NATO INT air units as long as condition 2, above, is fulfilled.
A player can make more than one parachute assault per Invasion Segment as long as all bases that are invaded fulfill the conditions listed above (and, for the Soviet player, the current Soviet strategy allows the base to be invaded).
18.4 Commando Assaults
Players can invade NATO bases with Commando markers. Each player has a set of Commando markers, which read "CMDO 1." All Commando markers have a value of 1.
The NATO base in which a Commando marker is placed can be occupied by enemy or friendly units, including other Ground Force markers. NATO surface, submarine, and air units situated in such a hex continue to function normally, unless the Soviet player gains "control" of the base (see 18.5). Commando markers are placed individually. A base can contain any number of NATO and Soviet Commando markers. Commando assaults cannot take place in a squall or storm zone.
Commando markers are made available to players by die rolls during the scenario set-up (see 28.3). If a player has Commando markers, he places them aside for future use. They can be saved by the owning player and can be used at any time during the game he desires, although once placed in a base they cannot be moved.
Placement of Commando Markers: Commando markers are placed on the map only during the players' Invasion Segments. To place a Commando marker, a friendly submarine must be adjacent to an eligible NATO base (or, in the case of the NATO player, the submarine can be in the base hex itself). A submarine fulfilling this condition can place one Commando marker per Invasion Phase. Subject to Commando marker availability, the same submarine can place Commando markers in bases an unlimited number of times per game. Different submarines can place Commando markers in the same or different bases during the same segment.
Example of Parachute Assault: The Soviet player has the Parachute markers 1/239, 2/239, and 3/239 available. He wishes to make a parachute assault against Longyearbyen (2106) and Banak (3308). There is currently a Soviet S24 INT unit (Anti-Air Value: 5; Movement Allowance: 38) and an M23 INT unit (Anti-Air: 7; Movement Allowance: 18) in Pechenga. Assume for the moment that there are no NATO INT air units within range of either base. The Soviet player can place his Parachute markers as he wishes in the NATO bases. Because no NATO INT air units are within range of these bases, the Soviet player does not have to provide "escort" and so his S24 and M23 units can be used for other functions in the Game Turn.
Now assume that there is a Norwegian F16 INT air unit (Anti-Air: 8; Movement Allowance: 20) in Andoya (3313). The F16 is within range of Banak (5 hexes from Andoya) but not within range of Longyearbyen (13 hexes from Andoya); thus, this unit can provide "cover" for Banak but not for Longyearbyen. The Soviet player can place any of his Parachute markers in Longyearbyen without providing "escort." Assuming he wishes to place two Parachute markers in Banak, he first must determine that his INT units are within range of Banak (they both are); then he compares the combined Anti-Air of his two INT units (12) with the F16 Anti-Air value (8) and finds his total is greater. Thus, he places the 1/239 and 2/239 Parachute markers in Banak and the 3/239 Parachute marker in Longyearbyen. Finally, the two Soviet INT units (but not the NATO unit) are placed in the "Occupy" Return to Base box of the Barents Sea Zone on the Soviet Strategic Air Display.
18.5 Control of NATO Bases
How to Determine Control: If no Soviet Ground Force markers occupy a NATO base, the NATO player automatically controls that base. However, if Soviet Ground Force markers occupy a NATO base, the players must determine control of that base at various times during the game (see below). To determine control, each player combines the values of all his Marine, Parachute, and Commando units (and, for the NATO player, the base's Intrinsic Defense value; see below) in the base. The two sums are compared. The Soviet player controls the base if he has at least twice the sum of the NATO player; otherwise, the NATO player controls the base. Control of a base can change several times during a game.
NATO Intrinsic Defense: All NATO bases have an Intrinsic Defense value printed in their hexes (in addition to their Close Anti-Air values). When determining control of a base, the NATO player includes the base's Intrinsic Defense value in the sum of his Ground Force markers. This value is taken into account even if there are no NATO Ground Force markers in the hex. The Intrinsic Defense value can never be eliminated.
When to Determine Control: Control of NATO bases must be determined during the Political Events Phase of the Strategic Cycle each time the Armistice marker progresses (see 25.0). If the Armistice marker advances, the Soviet player receives Victory Points for the NATO bases under his control. The control of NATO ports and airfields must also be calculated in the Control Segment of the Invasion Phase. However, the Soviet player never receives Victory Points for controlling a NATO base in the Control Segment.
Effects of Control: If the NATO player controls a base, the base retains its normal capabilities. Until a base falls under Soviet control, it continues to be used normally even if it is currently occupied by Soviet Ground Force markers.
If the Soviet player controls a NATO base, he may gain Victory Points during the Political Events Phase (see 28.0). Also, if a NATO airfield or port comes under Soviet control during either the Political Events Phase or the Control Segment of the Invasion Phase, a Destroyed marker is immediately placed in the hex (if the airfield or port already has a Destroyed marker, nothing further is done). NATO air units that occupy an airfield when the Soviet player gains control of it are immediately eliminated (remember, however, that NATO air units in an invaded airfield can relocate; see 18.1). NATO air units on CAP over an airfield that comes under Soviet control are eliminated in the CAP Landing Phase; NATO air units on strategic missions that originated in an airfield that comes under Soviet control can return to any available NATO-controlled airfield in the same zone during the Strategic Air Mission Termination Phase, subject to stacking restrictions (see 6.2).
NATO surface and submarine units are not affected by the capture of a NATO base. They can end their movement in a Soviet-controlled base as per the normal movement rules. If they occupy a base when it comes under Soviet control, they are not obligated to leave it.
The destroyed port or airfield loses its capabilities for the remainder of the game (see 14.1). In-port replenishment cannot occur at a destroyed port (see 20.6).
The Soviet player can never use a NATO base that he controls. Soviet submarines, surface, and air units cannot end their movement in a Soviet-controlled NATO base.
Notable Exception: Soviet CR units can end their movement in a NATO port or airfield that is currently under Soviet control; see 28.5.
Note that a NATO base can change hands several times during a game. Each player can continue to place Ground Force markers in a NATO base hex, even if the hex has a Destroyed marker on it.
Example of Control: During the Control Segment of Game Turn 4, the Soviet player has a Marine marker worth 6, three Parachute markers (each worth 8), and two Commando markers (each worth 1) in Bodo. The NATO player has a Marine marker worth 4, one Parachute marker (8), one Commando (1), and Bodo's Intrinsic Defense value (3). The Soviet Ground Force sum is 32 (6+24+2=32); NATO's sum is 16 (4+8+1+3=16). Because the Soviet sum is at least twice the NATO sum, the Soviet player controls the base. A Destroyed marker is immediately placed on Bodo, and any NATO air units currently occupying the airfield are destroyed.
19.0 Sound Surveillance System (SOSUS) Hexes
"NATO has so far done the job for which it was created. It has kept the peace. But the elements which have so far assured the success of NATO — the rough balance of power, global stability, and trans-Atlantic solidarity — cannot be taken for granted; they have to be constantly renewed and adapted to the changing environment." — Ambassador John G. H. Halstead
There are a number of SOSUS hexes on the map. These are underwater listening devices that are capable of detecting and tracking Soviet submarines.
19.1 Units Affected by SOSUS Hexes
Only Soviet submarines are affected by SOSUS hexes. Soviet surface units and all NATO units are completely unaffected.
19.2 Effects of SOSUS Hexes
Soviet Submarine Movement: At the moment a Soviet submarine enters a SOSUS hex during its activation, its movement is interrupted and the NATO player consults the Submarine Detection Table. Note that if the submarine already possesses a Strategic Detection marker, the NATO player does not consult the table.
The NATO player rolls the die, automatically subtracting two from the roll, and cross-references the modified result with the column corresponding to the type of submarine (SS, SN, Noisy SN, or SB). If the result is "D," place a Strategic Detection marker on the submarine; if it already possesses a Local Detection marker, flip it to its Strategic Detection side. On a result of "−," the submarine is not detected. After consulting the table, the submarine can resume its movement from the point of interruption. Note that a detection roll must be made for each SOSUS hex a Soviet submarine enters.
Detection Removal: In the Strategic Detection Removal Phase, all Soviet submarines possessing Strategic Detection markers that are located in a SOSUS hex or within three hexes of a SOSUS hex do not have their Strategic Detection markers removed.
20.0 Logistics (Optional)
"One must say that our fleet, moving out onto the expanse of the world ocean, on the question of rear support finds itself in an unequal situation compared with the fleets of other countries. The naval forces of the United States, for example, have at their disposal more than 500 bases from which American ships and naval aviation are supported . . . The Soviet Union does not have overseas military bases and does not intend to have any because the desire to seize the territory of another is alien to it." — Admiral Sergei G. Gorshkov
The use of logistics makes the game more realistic, but lengthens playing time and necessitates record-keeping. Logistics should be used only in the Advanced Game.
20.1 The Logistics Rosters
There is one pad containing the Logistics Rosters for both players. One side of the pad contains the rosters for the United States and the United Kingdom, and the other side contains the rosters for Canada, the Netherlands, Norway, West Germany, and the Soviet Union.
Victory Games, Inc., grants permission to players to make photocopies of these rosters if they run out of those provided in the game.
Units on the rosters are listed by country and are subdivided into four categories: Surface, Carrier, Submarine, and Replenishment. Each unit has a series of boxes on which ammunition and fuel expenditure are recorded. A unit can never have more fuel or ammunition than the number of boxes on the roster. Checks on the Logistics Rosters should be made in pencil, since information will sometimes change as the game progresses.
Amphibious assault (AA) units, cargo units (CR), Soviet SB submarines, and air units are not listed on the rosters because logistics information is not kept for these units. The information on the rosters is open to both players at all times.
20.2 Surface Units and Ammunition Expenditure
Surface combat units (except for aircraft carriers) have three types of ammunition boxes: Surface-to-Surface Missile (SSM), Anti-Submarine Warfare (ASW), and Area Anti-Air (AAA). If there are no boxes for one of these types printed on the roster, the surface unit can never perform that kind of combat. Also, when a surface unit has no more unchecked boxes in one of these categories, it can no longer employ the value corresponding to that ammunition type (it can, however, be replenished; see 20.6).
SSM Ammunition: When a unit participates in SSM Combat, one of its SSM boxes is checked off. If several surface units perform SSM Combat, each participating unit has an SSM box checked off. Some surface units have a star (★) next to their SSM boxes. This means the unit can replenish its SSM's only in-port, never at-sea (see 20.6).
Intensive and Maximum SSM Attacks: When surface units make an SSM attack, the owning player can state that any or all of his participating units are making an "intensive" or "maximum" attack. In an intensive attack, the SSM Attack value of the participating units is multiplied by 1½ (round fractions down), but two SSM boxes are checked off for each participating unit; in a maximum attack, the SSM Attack value of the participating units is multiplied by two, but three SSM boxes are checked off for each participating unit.
A stack of units can combine intense and maximum SSM attacks with normal SSM attacks. Some units in the stack can perform one kind of attack while others perform different forms.
Special SSM Ammunition: Some US surface units have two series of SSM boxes. This means the unit is armed with two kinds of SSM's: one kind of SSM is represented by the SSM values printed on the counter and the other is represented by the parenthesized values on the Logistics Roster (this second type also has a gray band over it). The number to the left of the slash in parentheses is the SSM Range of the second SSM type; the number to the right of the slash in parentheses is the SSM Attack value.
If a unit with two SSM types participates in an SSM attack, the owning player must indicate which SSM is being used (both types cannot be used in the same attack). The player checks off the box of the appropriate SSM type after the attack. Upon replenishment (see 20.6), both SSM types return to full capacity.
ASW Ammunition: If a surface unit participates in ASW Combat, the player checks off one of the unit's ASW boxes. A unit using its ASW value in defensive combat against a Torpedo attack does not have an ASW box checked off. However, once the unit has all its ASW boxes checked off, it can no longer use its ASW value in defensive combat against Torpedo attacks. Lack of ASW ammunition does not affect a unit's detection abilities.
AAA Ammunition: When a unit employs its Area AA value in defensive combat against an enemy SSM or Bombing attack, the owning player checks off one of the unit's AAA boxes. If the unit uses only its Close Anti-Air value, an AAA box is not checked off.
Aircraft Carriers: If an aircraft carrier uses its SSM, ASW, or AAA values in combat, this expenditure is recorded in the same manner as other surface units.
Intensive and Maximum Torpedo Attacks: When a submarine is making a Torpedo attack, the owning player can state that the attack is "intensive" or "maximum." These attacks expend ammunition and enhance the Torpedo value in the same way as intensive and maximum SSM attacks (see 20.2). Remember, however, that submarines are activated and attack individually.
20.3 Submarines and Ammunition Expenditure
There are two types of ammunition possessed by submarines: SSM and Torpedo (TORP). All submarines have torpedoes, but many do not have SSM's. When all boxes of a type are checked off, the submarine can no longer use the value corresponding to that ammunition until it is replenished (see 20.6).
SSM Ammunition: When a submarine performs SSM Combat, one of it SSM boxes is checked off. Submarines can perform "intensive" and "maximum" SSM attacks like surface units (see 20.2). Also, some US submarines possess two kinds of SSM's, which are used in the same way as surface units.
Torpedo Ammunition: When a submarine participates in Torpedo or ASW Combat, the owning player checks off one of the TORP boxes on the roster. Submarines using their ASW value in defensive combat against a Torpedo attack do not expend TORP boxes, although once all its TORP boxes have been checked off, it can no longer use its ASW value in defensive combat against a Torpedo attack. Lack of Torpedo ammunition does not affect a submarine's detection abilities.
AAA Ammunition: When a unit employs its Area AA value in defensive combat against an enemy SSM or Bombing attack, the owning player checks off one of the unit's AAA boxes. If the unit uses only its Close Anti-Air value, an AAA box is not checked off.
20.4 Air Units and Ammunition Expenditure
For each air unit based on an aircraft carrier that performs Bombing Combat, the owning player must check off one BOMB box belonging to the parent carrier. When all of an aircraft carrier's BOMB boxes have been checked off, air units based on that carrier can no longer perform Bombing Combat until it is replenished (see 20.6).
Air units based on airfields that perform Bombing and SSM Combat do not expend ammunition — their base is considered to possess an unlimited supply of both ammunition types. Air units performing ASW and Air-to-Air Combat never expend ammunition. Air units can always perform strategic and CAP missions regardless of ammunition expenditure.
Aircraft SSM's: US and UK carriers have a special series of boxes labeled "AIR SSM." There are three types of Air SSM's: Harpoon (Hpn), Maverick (Mav), and Sea Eagle (SEg). Air units based on these carriers that possess a Special SSM Indicator (see 2.3) are permitted to perform SSM attacks. For each unit performing an SSM attack, one AIR SSM box of the declared type is checked off. To determine the SSM values used in such attacks, consult the parenthesized numbers next to the AIR SSM boxes: the number to the left of the slash is the air unit's SSM Range; the number to the right of the slash is the air unit's SSM Attack value. When all of a carrier's AIR SSM boxes have been checked off, air units on that carrier can no longer perform SSM combat until the carrier is replenished (see 20.6).
Example: One A6 and two F18 units are based on the US CV Rsvlt. The two F18's are activated and perform a Bombing attack against a Soviet port. Two of the Rsvlt's BOMB boxes are checked off. The A6 is activated and performs an SSM attack against a Soviet surface unit. The NATO player specifies that a Harpoon (Hpn) will be used in the attack, so one of Rsvlt's Harpoon AIR SSM boxes is checked off.
20.5 Movement and Logistics
Non-carrier combat units must record the expenditure of fuel. Submarines, US aircraft carriers, cargo, replenishment, and amphibious assault units do not expend fuel. Units that expend fuel have FUEL boxes. Note that some surface units are nuclear-powered and do not expend fuel (nor does the US BB Iowa, even though it is not nuclear-powered); these units are listed as "UNLIM" (unlimited) in the Fuel column of the Logistics Rosters.
Fuel Expenditure: During the Fuel Phase of the Terminal Cycle (which takes place in Night Game Turns), all surface units on the maps possessing Fuel boxes have one of these boxes checked off. This mark is made regardless of how far the unit moved in the preceding Action Phases (it may not have moved at all).
Optional Fuel Expenditure: If players wish to keep more realistic records of fuel expenditure, they can agree not to check more than one hex during each of the AM, PM, and Night Game Turns. To keep track of which units moved how far, put a slash (/) in a Fuel box if the unit moves more than one hex in any of the three Action Phases of the AM, PM, and Night Game Turns. If the unit does not move or moves only one hex, do not put a slash. During the Fuel Phase, a unit with a slash in the Fuel box has this box checked off. A unit that does not have a slash does not have the box checked off.
Out of Fuel: When all of a unit's Fuel boxes have been checked off, the unit has run out of fuel. Place an "Out of Fuel" marker on it. A unit that has run out of fuel has the following restrictions:
- Its Movement Allowance is one.
- Its Defense value is reduced by one (to a minimum of one).
20.6 Replenishment
In order to regain its full ammunition and fuel capacities, a unit must replenish. There are two types of replenishment: in-port and at-sea. A unit can replenish before all of its fuel and ammunition boxes have been checked off.
A unit that replenishes cannot become active in the Action Phase immediately following the Replenishment Phase. Units stacked in the same hex that are not replenishing can be activated. Players should adjust the alignment of a replenishing unit by turning it 180 degrees to remind them that the unit cannot be activated. Air units assigned to a replenishing aircraft carrier cannot be activated, but they can perform CAP and strategic missions. At the end of the Action Phase, players should readjust the replenishing units to their normal alignment.
If a unit is attacked while it is replenishing (that is, it is rotated 180 degrees), its Defense value is reduced by one. However, this reduction is in addition to any Defense value penalty due to running out of fuel (see 18.5). However, only those units actually replenishing suffer the Defense value penalty described above.
Replenishment Units: There are four types of replenishment units: combat support (CS), tanker (TK), and submarine tender (ST). Replenishment units have two sets of ammunition on the roster: Ammunition Points (AP) and Fuel Points (FP).
In-Port Replenishment: To be replenished in-port, a unit must occupy a friendly port hex at the beginning of the Replenishment Phase. In-port replenishment cannot take place if a port is in a storm zone. No more than four units (only one of an aircraft carrier) can be replenished each Replenishment Phase. A player performs the following actions for each unit replenishing in-port:
- If the unit is a non-carrier surface combat unit, he erases all check marks in the unit's SSM, ASW, AAA, and Fuel boxes.
- If the unit is a submarine, he erases all check marks in the unit's TORP and SSM boxes.
- If the unit is an aircraft carrier, he erases all check marks in the unit's SSM, ASW, BOMB, and AIR SSM boxes.
- If the unit is a replenishment unit, he erases all check marks in the unit's AP and FP boxes.
Ports are considered to possess unlimited supply and do not require replenishment units. Players should adjust their Logistics Rosters accordingly.
In-Port Replenishment Restrictions: NATO units are subject to special restrictions when replenishing in-port:
- Norwegian units can replenish only in Norwegian ports.
- Non-Norwegian NATO units cannot erase SSM, ASW, AAA, TORP, BOMB, and AIR SSM check marks when replenishing in Norwegian ports. In effect, only their Fuel boxes can be erased.
Example of In-Port Replenishment: During the Replenishment Phase, the US units Luce (DD), Cnoly (DD), Cmden (CS), and Cnsto (TK) occupy the port of Rosyth. The NATO player can select only three (not four) of these units to replenish; he cannot select Cmden and Cnsto at the same time because they are both replenishment units. He selects Luce, Cnoly, and Cmden. All checked boxes in the selected units' logistics boxes are erased.
At-Sea Replenishment: To be replenished at-sea, a unit must occupy the same hex as a friendly replenishment unit (CS, AM, TK, ST) at the beginning of the Replenishment Phase. Subject to the restrictions listed below, for each Ammunition Point (AP) box of a replenishment unit checked off, the owning player can do one of five things for friendly units in the same hex:
- He can erase all SSM, ASW, and AAA check marks (except SSM's with a star) from a single non-carrier surface combat unit.
- He can erase all SSM and TORP check marks from a single submarine.
- He can erase all SSM, ASW, AAA, and AIR SSM check marks from a single aircraft carrier.
- He can erase a single BOMB box from an aircraft carrier.
- He can erase a single AP box from another replenishment unit in the same hex.
Subject to the restrictions listed below, for each Fuel Point (FP) box of a replenishment unit checked off, the owning player can do one of two things for friendly units in the same hex:
- He can erase all Fuel check marks from a single surface unit.
- He can erase a single FP box from another replenishment unit in the hex.
At-Sea Replenishment Restrictions: At-sea replenishment is subject to the following restrictions:
- A given replenishment unit can check off no more than four AP's/FP's per Replenishment Phase.
- Surface units can be replenished at-sea by CS, AM, and TK units only (not by ST units).
- Submarines can be replenished by ST units only.
- CS, AM, and TK units can be replenished at-sea by other CS, AM, or TK units. ST units cannot be replenished at-sea.
- At-sea replenishment cannot take place in hexes situated in squall or storm zones.
NATO At-Sea Replenishment Restriction: In order to check off an AP, a replenishment unit must be of the same nationality as the unit it is replenishing. However, Canadian and Dutch (NE) units can be replenished by British AP's, and the West German unit can be replenished by US AP's. Any NATO replenishment unit can check off FP's to replenish any other NATO unit's fuel.
Example of At-Sea Replenishment: During the Replenishment Phase, the US units Rsvlt (CV), NpNws (SN), Byrd (DD), Cmden (CS), and Dixon (ST) are stacked in the same hex. The NATO player checks off three AP and one FP boxes from Cmden (the maximum he is allowed to check off for a unit per Replenishment Phase); he decides to erase the Fuel check marks from Byrd (expending the FP), the SSM, ASW, and AAA check marks from Byrd (expending one AP), and a single BOMB check mark plus all ASW and AIR SSM check marks from Rsvlt (expending the second and third AP's). Finally, the NATO player checks off one of Dixon's AP's and erases all of NpNws's SSM and TORP checks.
20.7 Out of Fuel/Ammo Markers
Both players should check the Logistics Rosters when a unit uses a combat value. If the unit runs out of some kind of supply, the owning player should place an "Out of Fuel" or "Out of Ammo" marker on it. If it runs out of both fuel and ammunition, flip the marker over to its "Out of Fuel & Ammo" side. Note that an Out of Ammo marker is placed on a unit if it runs out of one kind of ammunition; it does not necessarily mean it has run out of all types of ammunition. The unit can still use combat values corresponding to the type of ammunition it has left. Remove Out of Fuel/Out of Ammo markers when a unit replenishes.
21.0 Tactical Nuclear Warfare (Optional)
"Nothing except a battle lost can be half so melancholy as a battle won." — Arthur Wellesley, 1st Duke of Wellington
The game generally assumes that only conventional weapons are being used. However, upon mutual consent, the players may employ nuclear weapons, but only if Logistics (20.0) is being used. When using these rules, ignore the stacking limits listed in Section 6.0; any number of friendly surface combat units can be stacked together at the end of the surface Action Segment.
21.1 Availability of Nuclear Weapons
Only US, UK, and Soviet units can use nuclear weapons. There are four kinds of nuclear weapons: SSM, Bomb, ASW, and Area Anti-Air. If a surface or submarine unit possesses nuclear weapons, they are marked with a small "N" printed next to the appropriate ammunition boxes on the Logistics Roster. Air units can also use nuclear weapons; each time a US, UK, or Soviet air unit makes a nuclear SSM, Bombing, or ASW attack, check off a single box of the appropriate ammunition type in the special "Air Unit Nuclear Attacks" section provided on the Logistics Roster. Submarines possessing nuclear ASW weapons have an "N" listed next to the Torpedo boxes.
21.2 Use of Nuclear Weapons
Combat with nuclear weapons is resolved normally with the following exceptions:
SSM: A unit using nuclear SSM's has its SSM Attack value increased. For the number of enemy surface units (of any type) in a target hex, multiply the attacking unit's SSM Attack value by the multiple indicated in the following chart:
| Number of Surface Units in Hex | SSM Attack Value Multiple |
|---|---|
| 13 or more | ×5 |
| 9-12 | ×4 |
| 5-8 | ×3 |
| 4 or less | ×2 |
A unit using nuclear SSM's cannot make intensive and maximum attacks (see 20.2). Nuclear SSM's cannot be used against airfields and ports. Soviet air units possessing SSM values can make nuclear SSM attacks, but NATO air units cannot make nuclear SSM attacks. For each Soviet air unit making a nuclear SSM attack, the Soviet player checks off one SSM box in the Air Unit Nuclear Attacks section of the Logistics Roster.
Bombing: The Soviet S24 INT unit and all US and UK INT and ATK air units can make nuclear Bombing attacks. The US and UK units must begin their activation on a British airfield or US carrier to make a nuclear Bombing attack. The Bombing value of ATK units performing nuclear Bombing attacks is enhanced in the same manner as for SSM's (see above). For each unit that makes a nuclear Bombing attack, the owning player checks off one BOMB box in the Air Unit Nuclear Attacks section of the Logistics Roster. Nuclear Bombing attacks cannot be made against airfields and ports.
ASW: Surface, submarine, and air units making nuclear ASW attacks have their ASW values multiplied by three. This enhancement is not allowed in defensive combat against Torpedo attack. Among air units, only US, UK, and Soviet RCN air units can make nuclear ASW attacks; if they do so, the owning player checks off one ASW box for each attacking unit in the Air Unit Nuclear Attacks section of the Logistics Roster. Surface units are not affected by a nuclear ASW attack that occurs in the hex they occupy.
Area Anti-Air: If a surface unit uses nuclear Anti-Air weapons in defensive combat against SSM or Bombing attacks, its Area Anti-Air value is multiplied by three.
21.3 First Use of Nuclear Weapons
The player who first uses nuclear weapons is penalized. If the Soviet player uses nuclear weapons first, he loses 60 Victory Points; if the NATO player uses nuclear weapons first, the Soviet player gains 70 Victory Points (in addition, the Soviet strategy is escalated; see 27.0 and 28.0). Also, if the NATO player is the first to use nuclear weapons, all Dutch (NE) units are immediately removed from the game (they are not considered eliminated). Once a player has used nuclear weapons, both players can freely use them for the rest of the game.
The first use of nuclear weapons is subject to the following restrictions:
- Neither player can use them for the first three Game Turns of the game.
- If neither player has used nuclear weapons and the Armistice marker has advanced into the "Negotiations Progress" box on the Armistice Track, neither player can use them for the rest of the game. However, if one player has used nuclear weapons before the Armistice marker reaches this box, both players can freely use them for the rest of the game.
22.0 Deep Mode (Optional)
"I am tired and sick of war. Its glory is all moonshine. It is only those who have neither fired a shot nor heard the shrieks and groans of the wounded who cry aloud for blood, more vengeance, more desolation. War is hell." — General William T. Sherman
If the players agree to this option, some submarines can enter a special mode called "deep mode."
22.1 How to Enter Deep Mode
During the Submarine Mode Phase, which occurs in the Strategic Cycle of AM Game Turns, first the Soviet player and then the NATO player can place Deep markers on any or all of their submarines whose Movement Allowance is two or more. During this phase, the players can also remove Deep markers from their submarines. When a submarine enters Deep mode, it must remain in this mode for the next three Game Turns (AM, PM, and Night); the marker cannot be removed from it until the next Submarine Mode phase.
Notable Exception: A submarine cannot enter Deep mode in a coastal or pack ice hex.
22.2 Effects of Deep Mode
Submarines in Deep mode operate normally with the following exceptions:
Movement: The Movement Allowance of all submarines in Deep mode is one. Submarines in Deep mode cannot move at full speed (see 5.3). Submarines in Deep mode cannot enter coastal or pack ice hexes.
Combat: If a submarine in Deep mode is attacked by ASW Combat, the attacker subtracts one from his attack die roll. Submarines in Deep mode can perform ASW Combat normally. Submarines in Deep mode perform Torpedo Combat normally, but their Torpedo values are halved (round fractions down); they cannot perform SSM Combat while in Deep mode.
Detection: Submarines in Deep mode are detected normally in the Local Detection Phase (see 9.2). However, anytime a detection attempt is made against a submarine in Deep mode by referring to the Submarine Detection Table (by a Reconnaissance strategic mission or by SOSUS), two is added to the detection die roll when consulting the table (except in sub-oceanic mountain hexes; see below). If a submarine in Deep mode is detected, place the appropriate Detection marker directly on top of the submarine's Deep mode marker.
Sub-Oceanic Mountain Hexes: There are a number of sub-oceanic mountain hexes on the map. If a submarine in Deep mode occupies a sub-oceanic mountain hex and a detection attempt is made against that submarine on the Submarine Detection Table, four (not two) is added to the detection attempt die roll.
23.0 Mines (Optional)
"Wars are not won by big armies but by good ones." — Marshal Saxe
If players agree to this option, they can add Mining to the other strategic missions that air units can perform in the Strategic Air Phase (see 7.0).
23.1 Mine Placement
There are two methods of placing mines on the map: by strategic missions or by Soviet submarines.
Mining Missions: Each air unit on a strategic Mining mission can place a single Mine marker in any coastal hex (including fiords and ports, but not including hexes containing islands only) within the zone in which the mission is taking place. This placement takes place during the Mine Segment of the Strategic Air Phase (Soviet player first, NATO player second). Once an air unit places a mine, it is placed in the appropriate "Return to Base" box on the Strategic Air Display (see 7.5). Air units on Mining missions are "bounced" normally by enemy Interception air units.
Soviet Submarines: Soviet submarines have the capability to lay mines, but only when using the Logistics option (see 20.0). During the Mine Segment of the Strategic Cycle, the Soviet player can place a single Mine marker in any coastal hex adjacent to a Soviet submarine. To do so, the Soviet player checks off three TORP boxes on the Logistics Roster for that submarine. (If the submarine has less than three boxes remaining, it cannot place mines.)
Mine Limitations: The number of Mine markers (10) provided in the game is a strict limit. If all Mine markers are on the map, no more can be placed. However, as mines are removed (see 23.3), they again become available for use by either player. A maximum of four Mine markers can be placed in one hex.
23.2 Effects of Mines
Mine markers are neutral; they affect both players no matter who placed them. Units can enter mine hexes with no detrimental effect. However, at the moment an active surface unit (or stack) or submarine exits a mine hex, the movement of that unit is temporarily halted while the mine effects are resolved.
The player controlling the active force rolls one die and compares the result with the number of Mine markers in the hex. If the die roll is greater than the number of Mine markers, the mines have no effect and the active force resumes its movement. If the die roll is less than or equal to the number of Mine markers, one or more of the active units is damaged.
Damage: If damage results from mines, determine the difference between the die roll result and the number of Mine markers in the hex; the difference is the number of active units damaged by mines (if the die roll was equal to the number of Mine markers, one active unit is damaged). If the difference between the die roll and the number of mines is greater than the number of active units in the force, each unit in the force is damaged and the extra damage is ignored. (Damaged units that suffer additional damage from mines are sunk.) If a hex contains damaged and undamaged units, the undamaged units must take damage from mines before any damaged units are affected. A unit can be damaged a maximum of once per Action Segment by mines.
If a force containing more than one surface unit is damaged by mines, a die is rolled to determine which units are damaged. On a result of 0-5, the owning player assigns damage to his units as he wishes; on a die roll of 6-9, the enemy player decides which units will suffer damage.
Example of Mine Damage: A NATO force consisting of the undamaged US Cnoly (DD), James (FF), and Ogden (AA), and the damaged FFshr (AA) is in Bodo, and four Mine markers occupy the hex (the maximum allowed in a hex). The NATO player activates the force and decides to move it; he must immediately roll the die to see if any damage is inflicted. He rolls a "2," which is two less than the number of Mine markers in the hex. Two of his units must suffer damage. He rolls the die again and gets a "7," which means that the Soviet player has his choice of which units will be damaged. The Soviet player selects Cnoly and Ogden, and these two units are flipped to their damaged side. The Soviet player cannot select FFshr because undamaged units must be selected first.
If the US player had received a "0" on his first die roll, which is four less than the number of mines in the hex, each of the US units would have been damaged (no second die roll would have been necessary). In this case, FFshr would have been sunk upon receiving its second damage result.
23.3 Minesweeping
Mines stay in a hex until removed by minesweeping. During the Minesweeping Phase, either player rolls the die once for each hex on the map containing mines. Depending on where the coastal hex is, a single Mine marker is removed if the player gets a die roll result as indicated on the following chart:
| Location of Coastal Hex | Die Roll Result to Remove Mine |
|---|---|
| Soviet Union | 0, 1, 2 |
| Great Britain | 0, 1 |
| Any other coastal hex | 0 |
US Aerial Minesweeping: If mines occupy an Icelandic or Norwegian coastal hex and a US aircraft carrier or amphibious assault unit is situated within ten hexes of the mined hex, the NATO player can specify that the minesweeping die roll applied to that hex is aerial minesweeping. If so, a single Mine marker is removed on a die roll of 0 or 1. A maximum of one aerial minesweeping attempt can be made per Minesweeping Phase. If the NATO player performs an aerial minesweeping attempt in a hex, he cannot then make a regular minesweeping attempt in the same phase.
24.0 Optional Rules
"The necessity of a navy, in the restricted sense of the word, springs from the existence of a peaceful shipping, and disappears with it, except in the case of a nation which has aggressive tendencies, and keeps up a navy merely as a branch of the military establishment." — Alfred Thayer Mahan
The following optional rules can be used selectively upon mutual consent of the players.
24.1 Cruise Missiles
Both the US and Soviet Navies have land-attack cruise missiles in their inventories. The US version is the strategic variant of the Tomahawk (BGM-109F); the Soviet version is the SSN-21.
Cruise Missile-Equipped Units: All US surface and submarine units with an SSM Range of 5 are Tomahawk-equipped. All Soviet submarine units with an SSM Range of 6 are SSN-21-equipped. Each of these units can make one cruise missile attack per game. A cruise missile attack uses the procedure for SSM Combat, and an SSM box is checked off after the attack. Players should keep track of cruise missile attacks on their Player Records, since each unit can perform only one attack per game.
Cruise Missile Attacks: Cruise missile attacks can be used only against enemy ports and airfields. These attacks use the procedure for SSM Combat, and the Close Anti-Air value (and CAP, if any) can be used by the base in defense (see 14.1). However, the attacker does not subtract four from his attack die roll as he normally would in an SSM attack against a base. Also, unlike an SSM attack, cruise missiles can transit land hexsides.
The SSM Range/Attack Value of a cruise missile attack is 25/60 (25/40 if the attacking unit is damaged). A cruise missile attack cannot be used in conjunction with normal SSM attacks (including intensive and maximum attacks), and a unit can use its cruise missile values or its normal SSM values in an Action Phase, never both. Cruise missiles can never be replenished.
24.2 The US B-1 Air Unit
At the beginning of every Reinforcement Phase, the NATO player rolls the die (this roll is in addition to his normal reinforcement die roll; see 26.1). On the first die roll of 0, he places the US B-1 ATK air unit on the Keflavik airfield (hex 1831). The NATO player can use the B-1 as a normal air unit for the rest of the game. However, it must begin and end every Action Phase in Keflavik. If Keflavik is controlled by the Soviet player (see 18.5), the B1 is destroyed; it is not allowed to relocate (see 18.1).
24.3 Alternate Air Wings on US Aircraft Carriers
In 1983, the US Navy initiated tests of non-standard air wings onboard its aircraft carriers. USS John F. Kennedy (CV-67) was the first carrier to conduct these tests. Kennedy's mission was to evaluate the effectiveness of a "heavy" wing in which no A-7 Corsair or F-18 Hornet aircraft were deployed, their place being taken by a second squadron of A-6 Intruders.
Using this option, the NATO player can have any US CV deploy a heavy wing. Once this decision is made, it cannot be changed for the duration of the game. Remove two F18 air units from the carrier and add a second A6 air unit (this extra counter is not included in the game, so the NATO player will have to make his own). Thus, the carrier would have two F14's (or two F18's in the case of Coral Sea), two A6's, and the normal complement of support aircraft.
24.4 Future Combatants
The US Burke (DD) and the Soviet Kremlin (CV) are not used in any scenarios because they are not expected to be in service until 1990. However, if both players agree, they can use these units in place of a friendly unit of the same type. If the Soviet player uses Kremlin, he receives three S27 INT and one HLX AEW air units, which are deployed onboard the carrier.
24.5 Soviet "Tattletales"
In peacetime, the Soviet Navy keeps a sharp look-out on NATO warships with "tattletales" (small intelligence vessels). To reflect this tactic, all NATO surface units are automatically detected throughout the first three Game Turns of the game.
24.6 High Speeds
Any US, Soviet, or West German battleship (BB), aircraft carrier (CV), cruiser (CG or CL), or destroyer (DD) is allowed to increase its Movement Allowance by one during its active status. However, the owning player must immediately check off one Fuel box for that unit on the Logistics Roster. This check mark is in addition to the one placed in the Fuel Phase.
24.7 Increased Movement for Air Units
Extended Range: During the active status of any INT, ATK, or EW air unit, the owning player can state that he is using that unit at "extended range" (that is, sacrificing attack capability for extra fuel). If this option is used, the Movement Allowance of the air unit is increased by eight. However, the Bombing, Anti-Air, and SSM Attack values of the air unit are halved (round fractions up).
Mid-Air Refueling: The Soviet and NATO players can each declare one mid-air refueling per day (AM, PM, and Night Game Turns). Only an INT, ATK, or EW air unit (or stack of such units) is eligible to use mid-air refueling; moreover, it can use this option only if, for the first 10 hexes it moves during its activation, it does not enter a hex that is within 10 hexes of an enemy INT or ATK air unit. The Movement Allowance of units using mid-air refueling is increased by eight. If the units are also operating at extended range, their Movement Allowances are increased by 16.
24.8 Variable SSM Targeting
When using this option, a player making an SSM attack against a stack of enemy surface units does not freely choose the enemy units that will be the targets of the attack (see 10.4). When the attacker is about to choose enemy ships within the stack as targets, he rolls the die. On an odd die roll, he can choose targets normally; on an even die roll (including "0"), he is restricted in the targets he can choose. Use the following chart to determine what units are chosen for targets:
| Even Die Roll | Targets That Can Be Chosen |
|---|---|
| 0 | The defender chooses one surface unit in his stack as the only target of the SSM attack. |
| 2, 4 | The attacker can choose surface units only from the top half of the target stack (rounding fractions down). |
| 6, 8 | The attacker can choose surface units only from the bottom half of the target stack (rounding fractions up). |
24.9 Close Combat
If a player declares an SSM attack against an enemy surface unit (or stack) at a one-hex range, he can declare the Close Combat option. Using this option, the SSM attack will be increased in strength, but the enemy units will be able to respond, even though they are inactive.
Close Combat Restrictions: Only an active surface unit (or stack) can use the Close Combat option, and the enemy targets must be in an adjacent hex (not separated by a land hexside). Submarines and air units cannot perform Close Combat. The Close Combat option cannot be used against bases. Close Combat and ASW Combat can be used by the same units in a given Action Segment, but not Close Combat and SSM Combat in the same segment.
How to Execute Close Combat: All surface combat units have a Close Combat value, which is simply an enhanced SSM value taking into account close-range weapons, such as guns and helicopter-mounted weapons. If a Close Combat is declared during an SSM attack, two SSM combats are subsequently resolved: one for the active player and one for the inactive player. These SSM attacks are resolved normally, except that both players use the Close Combat values instead of the SSM values.
As soon as Close Combat is declared, the attacker rolls the die. If the die roll is odd, the active player executes his SSM attack first, using Close Combat values in place of SSM values; if the die roll is even, the inactive player goes first. After a player resolves the first attack, the opposing player can immediately make a Close Combat attack, assuming any of his units survived.
Damage inflicted in Close Combat is applied immediately. Close Combat expends SSM ammunition normally. A player is permitted to use intensive and maximum attacks in Close Combat (see 20.2); if he does so, his units' Close Combat values are enhanced, not their SSM values.
Terminating Close Combat: As soon as the second SSM attack in Close Combat occurs, the combat is over and the active unit (or stack) can resume its activities. The status of inactive units that participated in Close Combat is not affected; as long as they did not activate earlier in the Action Phase, they can became active normally — even though they participated in this combat.
Political and Random Events
25.0 Political and Random Events
"That the political point of view should end completely when war begins is only conceivable in contests which are wars of life and death, from pure hatred . . . The subordination of the political point of view to the military would be contrary to common sense, for politics has declared the war." — Karl von Clausewitz
The Advanced Game lasts until an armistice or until the end of the 36th Game Turn, whichever comes first.
25.1 Armistice
At the beginning of the game, the Armistice marker is placed in the "Start" box on the Armistice Track. It may be moved along the track during the Political Events Phase. When it reaches the Armistice box, the game immediately ends and victory is determined.
Armistice Table: During the Political Events Phase of the Strategic Cycle, the NATO player rolls a die and both players consult the Armistice Table. If the result calls for the Armistice marker to be advanced a space, this should be done immediately. The table may call for the players to consult the Random Events Table (see 25.2).
Depending on the length of the scenario (short or long; see 28.0), the die roll on the Armistice Table is modified. In games of short length, add 1 to the die roll; in games of long length, no modifier is made to the roll.
Players do not consult the Armistice Table on Game Turn 1.
Victory Points: When the Armistice marker is moved along the Armistice Track, the Soviet player may receive Victory Points (see 28.0).
25.2 Random Events
If the Armistice Table calls for the players to consult the Random Events Table, the NATO player rolls a die and the players consult the table to determine the result. There are five possible results, which are explained below:
UN Talks Collapse: Subtract 1 from all Armistice Table die rolls for the remainder of the game. (Ignore this result if it has occurred earlier in the game.)
UN Breakthrough: Add 1 to all Armistice Table die rolls for the remainder of the game. This addition is cumulative with other modifiers. (Ignore this result if it has occurred earlier in the game.)
Command Failure: Roll the die again. On an odd roll, the command failure applies to the Soviet player; on an even roll (including "0"), command failure applies to the NATO player. The affected player rolls the die and consults the Zone Table; in the ensuing Strategic Air Phase, he cannot perform any strategic missions in the indicated zones. Air units in the affected zones can perform strategic missions, but not in the zones they occupy.
Norwegian Base Falls: Banak airfield (3308) is captured by Soviet overland ground attack. If Banak is currently Soviet-controlled or it has been captured earlier due to an earlier Random Event result, the port of Tromso (3311) is taken by Soviet ground attack. If Tromso is currently Soviet-controlled or it has been captured earlier, then Bardufoss airfield (3411) is taken by Soviet ground forces. Note that Soviet Ground Force markers do not need to occupy the above hexes for them to be captured. A Destroyed marker is placed on a captured Norwegian airfield and all NATO air units on that airfield are immediately eliminated (they may not relocate; see 18.1); NATO CAP units are eliminated during the CAP Landing Phase. Surface and submarine units are not affected. The Soviet player controls the captured base for the remainder of the game, regardless of the presence of NATO Ground Force markers, and he gains Victory Points for the base normally (see 18.5). Any Ground Force markers already in the hex remain, but they have no effect. The NATO player can never regain control of these bases.
Consult Special Events Table: The players must consult the Special Events Table (see 25.3).
25.3 Special Events
If the Random Events Table calls for the players to consult the Special Events Table, the NATO player rolls a die and the players consult this table to determine a result. There are six possible results, which are described below:
NATO Break-up: The NATO player rolls the die again to determine which NATO ally withdraws from the war:
| Die Roll | Country |
|---|---|
| 0 | United Kingdom |
| 1 | Canada and West Germany |
| 2-5 | Norway |
| 6-9 | Netherlands |
The NATO player removes all of the affected country's surface, submarine, and air units (not Ground Force markers) from the map. In addition, the NATO player does not receive reinforcements for that country for the rest of the game. Bases within the affected country can still be invaded; their Intrinsic Defense and Close Anti-Air values are still functional. Control of such bases must be determined normally. However, ports and airfields within the affected country cannot be used for replenishment or activation of air units. Units removed from the map due to this result are not considered eliminated for Victory Point purposes. Optional Rule: Players can agree before starting play to allow either the United Kingdom or Norway, but not both, to withdraw.
Accident: The NATO player rolls the die again to determine the affected player. On an odd roll, the accident applies to the Soviet player; on an even roll (including "0"), the accident applies to the NATO player. The player who is not affected by the accident must now choose any single undamaged CG, CL, DD, or FF unit (not in a port) belonging to the enemy player; the chosen unit has suffered an accident and is damaged. If there are no eligible units to choose from, the accident has no effect.
Submarine Accident: The NATO player rolls the die again to determine the affected player as described above. The affected player must choose a single submarine, damaged or undamaged, that he controls. The chosen submarine has suffered an accident and is sunk; it is considered eliminated for Victory Point purposes. The submarine selected must occupy a sub-oceanic mountain hex if possible; if there are no friendly submarines in these hexes, it can be chosen from any of those on the map. If there are no submarines on the map, this result has no effect.
Reinforcements Enhanced: The NATO player rolls the die again to determine the affected player as described above. The affected player adds 3 to his Reinforcement Table die rolls for the remainder of the game. This result has no effect if it happened earlier in the game to the same player.
Example: The NATO player receives this enhancement on Game Turn 4. On Game Turn 10, this special event occurs again. If the second die roll is even, there is no effect (the NATO player cannot receive the benefit again). If the second roll is odd, then the Soviet player gets the enhancement.
Reinforcements Delayed: The NATO player rolls the die again to determine the affected player as described above. The affected player does not roll for reinforcements during the Reinforcement Phase of the current Strategic Cycle and the Reinforcement Phase of the next Strategic Cycle (three Game Turns from now). This event can happen a number of times in a game to the same player.
Automatic Escalation: The Soviet strategy is automatically escalated by one box to the maximum allowed (see 27.0).
26.0 Reinforcements
"Something must be left to chance; nothing is sure in a sea fight beyond all others." — Admiral Horatio Nelson
Each player has a Reinforcement Track which records the status of his reinforcements. Depending on the scenario's Preparedness Level (see 28.0), a player's Reinforcement marker begins the game in a different box on his Reinforcement Track. As a player's Reinforcement marker advances, he receives reinforcements.
26.1 Availability of Reinforcements
During the Reinforcement Phase of the Strategic Cycle, starting with Game Turn 4, both players roll the die and consult the Reinforcement Table. Each player's die roll is cross-referenced with his column. The result will be a number; this is the number of boxes that the player's Reinforcement marker advances on his Reinforcement Track. For example, if a player's Reinforcement marker occupies the 13 box and a 7 result is obtained on the Reinforcement Table, the marker is advanced to the 20 box.
The Reinforcement Charts: Each player has a Reinforcement Chart printed on the Deployment/Reinforcement Cards. The chart is a series of consecutively numbered groups, each numbered group corresponding to a box on the player's Reinforcement Track. When the Reinforcement marker advances, a player receives the reinforcement groups corresponding to the boxes through which the Reinforcement marker moved and including the box in which the marker ends. For example, if the Reinforcement marker advanced from box 23 to box 30, the player receives reinforcement groups 24 through 30 (inclusive).
Note that on the Reinforcement Charts replenishment units (AM, CS, ST, TK) are printed in italics. These units do not come in as reinforcements unless the Logistics option is being used (see 20.0).
Special Events Table: The Special Events Table may call for a die roll addition to a player's Reinforcement Table die rolls. Also, it may prohibit a player from consulting the table for a certain period of play (see 25.3).
26.2 Placement of Reinforcements
When reinforcements are made available to a player, he consults his Reinforcement Chart to determine the exact units he receives. Each reinforcement group consists of one or more units, specified by name, type, and (for the NATO player) country. Each group also has a placement hex or locale indicated for it. Subject to the limitations listed below, these reinforcements are immediately placed on the map. Note that Parachute reinforcements are simply placed aside for later use (see 28.3).
Placement Restrictions: Surface and air unit reinforcements can be placed on the map in violation of stacking restrictions, but they must adhere to these restrictions at the end of the ensuing Action Phase. If an airfield at which an air unit reinforcement arrives is destroyed or controlled by the enemy player, it can be placed in any friendly airfield on the map. If the port at which NATO surface or submarine reinforcements arrive is controlled by the Soviet player, the reinforcements are not available for the rest of the game. If a non-base arrival hex is enemy-occupied, the reinforcements can be placed in any empty or friendly-occupied mapedge hex within four hexes of the original arrival hex.
Special US Reinforcements: Immediately before NATO reinforcement group 35 is placed on the map, the NATO player must roll the die. On an even die roll, the NATO player receives the US CV Inpdn (plus its assigned air units); on an odd die roll, he receives the US BB Iowa. The NATO player receives one or the other of these units, not both.
27.0 Soviet Strategy
"One of the Navy's main tasks will be to sever the enemy's ocean and sea transport routes. Eighty to one hundred large transports would arrive daily at European ports in time of war. Operations against enemy sea lines of communication should be developed on a large scale." — Marshal Sokolovskiy
At the start of the game, the Soviet player must choose a strategy. He has four choices: Defensive, Restricted, Unrestricted, and World War 3. The Soviet player places the Soviet Original ("Orig") Strategy marker in the box corresponding to his strategy on the Soviet Strategy Track.
27.1 Effects of Soviet Strategy
Soviet strategy has two effects:
Invasion of NATO Bases: The current Soviet strategy determines the NATO bases that the NATO player can invade (see 18.1). Listed under each box of the Soviet Strategy Track are the names of bases that can be invaded at that strategy level. For example, with an Unrestricted strategy, the Soviet player can invade Hofn and Bodo, but not Wick.
Victory Conditions: Victory conditions depend on the original (not current) Soviet strategy (see 28.6).
27.2 Escalation
By means of escalation, the Soviet strategy can progress on the Soviet Strategy Track. The Soviet player does not choose escalation voluntarily; escalation takes place only due to special events or NATO actions. If escalation does occur, place the Soviet Current ("Curr") Strategy marker in the box to which the strategy has escalated; the Original Strategy marker remains in place. The current strategy determines the NATO bases the Soviet player can invade.
The highest strategy is "World War 3." If the Current Strategy marker reaches this box, no further escalation can occur, although the NATO player can perform actions that would normally cause escalation (see below).
The Soviet strategy escalates based on these conditions:
- Special Events: Due to the "Automatic Escalation" result on the Special Events Table, the Soviet strategy escalates one box (see 25.3).
- Nuclear Weapons: If the NATO player is the first to use nuclear weapons, the Soviet strategy escalates one box (see 21.0). In addition, the Soviet player receives Victory Points (see 28.5).
- Soviet Bases: The first time the NATO player attacks a Soviet port or airfield, the Soviet strategy escalates one box. This occurs only once per game. Also, the Soviet player receives Victory Points (see 28.5).
- Soviet SB's: The first time the NATO player attacks a Soviet SB submarine, the Soviet strategy escalates one box. This occurs only once per game, whether the SB is damaged or not. The Soviet player also receives Victory Points (see 28.5).
The Advanced Game Scenario
28.0 Advanced Game Scenario
"In war, nothing is impossible, providing you use audacity." — General George S. Patton
There is only one Advanced Scenario, but it can be played in many different ways. To begin the Advanced Scenario, follow the procedure outlined below:
- Choose Sides: One side must be the NATO player and the other must be the Soviet player. The NATO player controls all non-Soviet units.
- Soviet Strategy: The Soviet player must select his original strategy (see 27.0).
- Time of Year: The players must agree to the time of year at which the scenario will take place (see 16.0).
- Game Length: The players must agree upon game length (see 28.1).
- Preparedness Level: The player must agree upon a Preparedness Level (see 28.2).
- Deploy: The players deploy their units on the map (see 28.3). In addition, each player's Reinforcement marker is placed in the appropriate box on his Reinforcement Track (see 26.0).
- Begin Game: Place the Game Turn marker in the first space on the Game Turn Track. Place the Armistice marker in the "At Start" box on the Armistice Track. Begin Game Turn 1.
28.1 Game Length
Depending on how much time the players wish to devote to a game, they can make the Advanced Game short or long. In games of short length, one is added to the Armistice Table die rolls (see 25.1); in games of long length, there is no modification to the die roll.
The game lasts until the Armistice marker reaches the "Armistice" box or until the end of the 36th Game Turn, whichever comes first.
28.2 Preparedness Levels
At the start of the game, the players must agree upon one of three Preparedness Levels: Low, Moderate, or High. The Preparedness Level determines the number of units available to the player at the start of the game.
28.3 Deployment
After selecting a Preparedness Level, the players must deploy their units on the map as per the instructions on their Deployment Charts (on the Deployment/Reinforcement Cards). Note that at Preparedness Level Moderate, the players deploy the units listed under this heading in addition to the units listed under Preparedness Level Low; at Preparedness Level High, all units at all Preparedness Levels are deployed. Deployment is performed as follows:
- Each player determines the number of Commando markers he has available. The die is rolled and the result is the number of Commando markers the player receives; only one die roll is made no matter what the Preparedness Level. Commando markers are placed aside (see 18.4).
- Each player locates the Parachute markers made available to him. At Preparedness Level Low, the Soviet player receives 9 Parachute markers and the NATO player 3; at Preparedness Level Moderate, the Soviet player receives 12 markers and the NATO player 6; at Preparedness Level High, the Soviet player receives 15 markers and the NATO player 9. Parachute markers are placed aside (see 18.3).
- Each player deploys his rigid set-up units on the map. Set-up hexes for these units are printed on the Deployment Chart.
- The players perform the free set-up procedure (see below).
Note: Replenishment units are printed in italics on the Deployment Chart. These units are deployed only if the Logistics option (see 20.0) is being used.
Free Set-Up Procedure: In all Preparedness Levels, each player has "free set-up" units. Free set-up units are either individual submarines or numbered groups of surface units. All free set-up units are provided with specific deployment instructions, although when they are placed on the map, they must adhere to the free set-up instructions (see below). The free set-up procedure is performed as follows:
- The NATO player rolls the die. On an even result (including "0"), the NATO player can deploy either one of his free set-up submarines or one surface group. On an odd result, the Soviet player deploys one free set-up submarine or one surface group.
- The players alternate rolling die indefinitely to determine which player deploys a free set-up submarine or surface group. When one player has no more free set-up units, no more die rolls are made and the player with remaining free set-up units deploys them all on the map.
Free Set-Up Restrictions: When free set-up units are deployed on the map, they are subject to these placement restrictions:
- They cannot be deployed in or adjacent to any base hex;
- They cannot be deployed in or adjacent to any hex containing enemy units;
- Submarines must be deployed individually in hexes, and they cannot be in or adjacent to a hex containing friendly units;
- All units in a surface group must be deployed in the same hex.
Task Group/Force Markers: Once all units are deployed on the map, both players can place Task Group/Force markers on their stacks of surface units on the map. Each player can place as many markers as he wishes as long as the restrictions of 6.2 are observed.
Optional Deployment: In order to facilitate the set-up and to allow players to experiment with the capabilities of their units, the players can decide before starting play to ignore the names of units in deployment instructions and instead select any unit of the same type and nationality for set-up in the indicated hex or location.
28.4 NATO First Game Turn Restrictions
In the first Game Turn of an Advanced Scenario, Air-to-Air Combat in the Strategic Air Phase is the only kind of combat that NATO units can freely initiate. During the Action Phase, no NATO unit can attack before at least one Soviet attack has taken place. Starting with Game Turn 2, there are no restrictions on combat initiation by either player.
28.5 Victory Conditions
Only the Soviet player gains and loses Victory Points (VP). There are eight ways for the Soviet player to gain VP:
- NATO first use of nuclear weapons (see 27.2);
- NATO first attack on a Soviet port or airfield (see 27.2);
- NATO first attack on a Soviet SB submarine (see 27.2);
- Soviet control of NATO bases;
- Sea denial;
- Soviet CR units in NATO bases;
- Soviet SB's surviving at the end of the game;
- Soviet destruction of NATO units.
The Soviet player loses VP for the following three reasons:
- Soviet first use of nuclear weapons;
- NATO CR units in NATO bases;
- NATO destruction of Soviet units.
Gaining VP: The first time the NATO player performs any of the following actions, the Soviet player gains the indicated number of VP:
| NATO Action | VP Gain |
|---|---|
| First use of nuclear weapons | 70 |
| First attack on Soviet port or airfield | 15 |
| First attack on Soviet SB submarine | 15 |
Whenever the Armistice marker advances to a new box on the Armistice Track or at the end of Game Turn 36, the Soviet player receives VP for the following reasons:
- Controlling NATO Bases: The Soviet player consults the NATO Bases Victory Point Chart for each NATO base he currently controls (see 18.5). The Soviet player continues to gain VP for controlled NATO hexes each time the Armistice marker advances. If the game concludes at the end of Game Turn 36, the Soviet player also gains VP for controlling NATO bases. The VP value of that base is enhanced depending on which box the Armistice marker has just advanced into:
| Armistice Marker Advances Into | VP Value of Base Multiple |
|---|---|
| Negotiations Begin Box | ×1 |
| Negotiations Progress Box | ×2 |
| Armistice Box or end of game | ×3 |
Example: The Soviet player controls Vago when the Armistice marker advances from the "Start" box to the "Negotiations Begin" box. The Soviet player checks the NATO Bases Victory Point Chart and sees that Vago is worth 2 VP, which multiplied by 1 results in the Soviet player receiving 2 VP. Later, the Armistice marker advances into the "Negotiations Progress" box; the Soviet player now receives 4 VP for controlling Vago. Assuming he controls the base when the Armistice marker moves into the "Armistice" box (ending the game) or at the end of Game Turn 36, he would gain 6 VP.
- Sea Denial: The Soviet player receives a variable number of VP when the Armistice marker advances for each SS, SN, or Task Force (not Task Groups) in the Labrador Sea, North Atlantic, British Isles, or Norwegian Sea Zones. The Soviet player receives these VP each time the Armistice marker advances or when the game ends (either because the "Armistice" box is reached or Game Turn 36 ends).
| Zone Occupied by Soviet Submarine/Task Force | Number of VP Gained |
|---|---|
| Labrador Sea Zone | 4 |
| North Atlantic Zone, British Isles Zone | 3 |
| Norwegian Sea Zone | 2 |
Example: The Soviet player has one SS in the Labrador Sea Zone, one Task Force in the British Isles Zone, and one SN in the Norwegian Sea Zone when the Armistice marker moves into the "Negotiations Begin" box. The Soviet player immediately receives 4 VP for the SS, 3 VP for the Task Force, and 2 VP for the SN, for a total of 9 VP. When the Armistice marker in a later turn advances into the "Negotiations Progress" box, the Soviet player has an SN in the Labrador Sea Zone, an SS and an SN in the North Atlantic Zone, and a Task Force in the Norwegian Sea Zone; thus, he receives 12 VP (4+3+3+2=12). The Soviet player receives more VP for sea denial when the "Armistice" box is reached or at the end of Game Turn 36.
The Soviet player receives additional VP for the following reasons:
- Soviet SB Units: Depending on the current strategy, the Soviet player receives a variable number of VP for each Soviet SB submarine that ends the game in any sea, drift ice, or pack ice hex on the map except in the Barents Sea Zone:
| Current Strategy | VP for Each SB |
|---|---|
| Defensive | 0 |
| Restricted | 1 |
| Unrestricted | 3 |
| World War 3 | 6 |
- Cargo Units: Soviet CR's are permitted to end their movement in a Soviet-controlled NATO port or airfield if there are no NATO surface or submarine units in the hex (see 18.5). The Soviet player receives VP for each Soviet CR unit that reaches and "unloads" in a Soviet-controlled NATO port or airfield (including bases that are destroyed). As soon as a CR unit enters the NATO port or airfield, it is flipped over to its "Unloaded" side and is removed from the map and placed aside. The Soviet player immediately notes down the VP he receives on his Player Record. A maximum of two Soviet CR's can unload in the same NATO base; once unloaded, the CR unit cannot be activated again nor can it be attacked. The Soviet player receives a variable number of VP depending on the zone in which the NATO base is located:
| Zone of NATO Port/Airfield | Number of VP Gained |
|---|---|
| Barents Sea Zone | 7 |
| Any other zone | 10 |
Example: The Soviet player has one CR unit unloaded in Tromso (3311) in the Barents Sea Zone, and two CR's unloaded in Bodo (3516) and one CR unloaded in Orland (3720) in the Norwegian Sea Zone, all of which are controlled by the Soviet player. The Soviet player receives 7 VP for the unit in Tromso and 10 VP for the rest of the units, for a total of 37 VP (7+10+10+10=37).
| NATO Port (Hex) | Number of VP Lost |
|---|---|
| Tromso (3311) | 12 |
| Narvik (3412) | 12 |
| Trondheim (3721) | 10 |
| Bergen (3926) | 8 |
| Rosyth (3834) | 6 |
| Holy Loch/Faslane (3736) | 6 |
| Reykjavik (1830) | 3 |
- Destroyed Soviet Units: The Soviet player loses VP for the following units when they are destroyed:
| Destroyed Unit | Number of VP Lost |
|---|---|
| CV | 10 |
| AA (before invasion), CG, SN | 8 |
| DD, CL | 6 |
| FF, SS, AM, ST, TK, CS | 4 |
| INT or ATK air unit | 4 |
| AA (after invasion) | 2 |
| CR, SB | 0 |
Recording VP: The Soviet player should record his VP gains on his Player Record as they occur. The NATO player records Soviet VP losses on his Player Record as they occur. At the end of the game, the NATO player's total VP are subtracted from the total Soviet VP to find the total Soviet VP gained. The players consult Levels of Victory (see 28.6) to determine the winner and the level of victory.
28.6 Levels of Victory
At the end of the game, both players determine the total number of Soviet VP and consult the victory conditions applying to the original (not current) strategy listed below to determine the winner of the game:
Original Strategy: Defensive
| Soviet VP | Victory Level |
|---|---|
| +41 or more | Soviet Decisive Victory |
| +21 to +40 | Soviet Substantive Victory |
| +1 to +20 | Soviet Marginal Victory |
| −20 to 0 | NATO Marginal Victory |
| −40 to −21 | NATO Substantive Victory |
| −41 or less | NATO Decisive Victory |
Original Strategy: Restricted
| Soviet VP | Victory Level |
|---|---|
| +57 or more | Soviet Decisive Victory |
| +32 to +56 | Soviet Substantive Victory |
| +7 to +31 | Soviet Marginal Victory |
| −18 to +6 | NATO Marginal Victory |
| −43 to −19 | NATO Substantive Victory |
| −44 or less | NATO Decisive Victory |
Original Strategy: Unrestricted
| Soviet VP | Victory Level |
|---|---|
| +108 or more | Soviet Decisive Victory |
| +73 to +107 | Soviet Substantive Victory |
| +38 to +72 | Soviet Marginal Victory |
| +3 to +37 | NATO Marginal Victory |
| −32 to +2 | NATO Substantive Victory |
| −33 or less | NATO Decisive Victory |
Original Strategy: World War 3
| Soviet VP | Victory Level |
|---|---|
| +130 or more | Soviet Decisive Victory |
| +90 to +129 | Soviet Substantive Victory |
| +50 to +89 | Soviet Marginal Victory |
| +10 to +49 | NATO Marginal Victory |
| −30 to +9 | NATO Substantive Victory |
| −31 or less | NATO Decisive Victory |
Notable Errata
Counters. The Norwegian SS Ula should have an ASW value of 1 (not N) on the reverse side of its counter.
Map. In the Combat Summary printed on the North Map, under SSM Combat for the defender, paragraph 5 should read: "5. Add 2 per F14 on CAP mission in target hex; add 1 per other INT air unit on CAP."