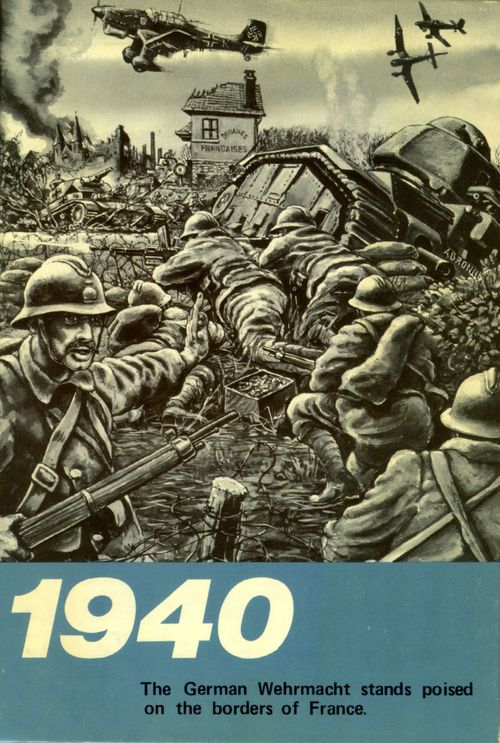
1940
1940 Rulebook
Table of Contents
Table of Contents
- Rules of Play
- 1 - Elements of the Game
- 2 - Game Sequence
- 3 - Stacking
- 4 - Zones of Control
- 5 - Friendly Territory
- 6 - Movement
- 7 - Combat
- 8 - Supply
- 9 - Air Support
- 10 - Fortifications
- 11 - Airborne Operations
- 12 - Armoured Units
- 13 - Neutral Countries
- 14 - Reserves and Reinforcements
- 15 - Optional Units
- 16 - Plans and Deployment
- 17 - Command
- 18 - The Attack (Turn 0)
- 19 - Victory Conditions
- 20 - Options
Rules of Play
1 - Elements of the Game
- The map represents the north-east quarter of France, the Benelux and the west of Germany. It is covered by a network of hexagons which standardises positions and the movement of units. Each hexagon (hereafter called hex) is numbered.
- The counters represent the forces that fought from 10 May to the end of June 1940. Each counter bears various indications, of which the meaning is explained below.
Example of a counter
The unit shown is the IVth Army Corps (IVe corps d'infanterie) of the 1st French Army. Its label reads (from the counter diagram):
- Unit size: XXX (corps)
- Unit type: infantry
- Army to which the unit belongs: 1st Army (shown on the left edge)
- Unit identity: the unit's designation (the Roman numeral IV, shown on the right)
- Combat factor: 4 (lower left)
- Defence factor: 8 (lower right)
Symbols of unit types
Motorised units
- Armoured (Panzers)
- Mechanised cavalry
- Motorised infantry
Non-motorised units
- Infantry
- Cavalry
- Fortress infantry
- Mountain infantry
- Airborne infantry (glider-borne)
- Parachute infantry
Unit size symbols
XXX = corps; XX = division; III = regiment.
Abbreviations
- BEF: British Expeditionary Force
- Cav: cavalry
- Geb: Gebirgs (mountain)
- Opt: optional
- Renf: reinforcement
- Res: reserve
- SSC: SS unit grouping (regroupement d'unités SS)
- SSV: SS Verfuegungs (SS-Verfügungstruppe)
Colour code of counters
- Wehrmacht: black on field grey
- SS: white on black
- French: black on blue
- British: black on beige
- Belgians: black on brown
- Dutch: white on brown
- Swiss: white on red
The detailed rules below, together with the necessary tables and a series of historical options, use a six-sided die, which you will often need. You will have to obtain one!
2 - Game Sequence
1940 is played in eleven game turns numbered 0 to 10, each representing five days of real time (except turn 0). Each game turn consists of a German player's turn followed by an Allied player's turn.
During the German turn, this player is said to be "in phase" and the Allied player is said to be "not in phase" or "out of phase". During the Allied turn the roles are reversed. The actions carried out during one player's turn are divided into two "assaults", each divided into three "phases", executed in the following sequence:
1 - First assault
- A. Movement phase. The player in phase may move all or part of his units, within the limit of their movement factor. Special movements (airborne operations, rail movement) may be carried out. Reinforcements and reserves may enter play.
- B. Combat phase. The player in phase may make attacks (rule 7).
- C. Reorganisation phase. Certain disorganised units recover all their capacities (rule 7).
2 - Second assault
- D. Movement phase. The player in phase may move his units up to half of their movement factor (rounded down). Special movements may be carried out.
- E. Combat phase. The player in phase may make attacks.
- F. Reorganisation phase. Certain disorganised units recover all their capacities.
Units that moved and fought during the first assault may again move and fight during the second assault of the same player's turn. All the units of one player may therefore move and fight twice in succession before their opponents can react. All actions must nevertheless be carried out strictly in the order indicated.
3 - Stacking
This rule limits the number of units present in a hex. Stacking limits are in force at the end of each phase. A unit may violate them during a phase, but must conform to them by the end of that phase.
No more than four divisions may be present in one hex. For the purposes of this rule, a corps counts as three divisions. In other words, one may not stack in the same hex more than one corps and one division, or four divisions. Regiments do not count for stacking.
In addition to the rule above, no more than three armoured divisions (or Panzers) may be present in one hex. Thus an armoured division may not stack with an armoured corps (any other division may).
Allied co-operation
A French division may not stack with a British corps. There is no other stacking restriction between allied nations.
4 - Zones of Control
All units that are not disorganised, except regiments, have a zone of control (ZOC). A ZOC extends into the six hexes surrounding the unit, but it never extends across a hexside that is a sea hexside (even if that hexside is crossed by a road) or across a lake hexside. A unit must stop and may not move again for the rest of the movement phase when it enters an enemy ZOC. A unit that begins a movement phase in an enemy ZOC may leave it by spending one additional movement point. However, a non-motorised unit may never move directly from one enemy ZOC into another: such a unit must first enter a hex outside all enemy ZOCs. By contrast, a motorised unit may move directly from one enemy ZOC into another (if, in doing so, it does not cross a fortified hexside of the enemy); of course, the motorised unit must stop after having entered this first hex of movement.
Enemy ZOCs block the supply lines of non-motorised units. A non-motorised unit may not trace a supply line through an enemy ZOC unless the hex is occupied by a friendly unit. Motorised units, on the other hand, may trace their supply lines through enemy ZOCs.
Likewise, non-motorised units may not retreat into an enemy ZOC unless the hex is occupied by a friendly unit; motorised units may always retreat into an enemy ZOC.
5 - Friendly Territory
The concept of friendly territory is used in several rules. A hex is considered friendly territory under the following conditions (in decreasing order of priority):
- a unit of the player occupies the hex;
- a unit of the player exercises an uncontested ZOC in the hex;
- one of the player's units was the last to occupy the hex or to exercise a ZOC in it, uncontested;
- the hex was at the start of the game in friendly territory.
A ZOC is uncontested in a hex if no enemy unit exercises a ZOC in that hex, nor of course occupies it.
The player who controls a hex under the above condition of dominant priority considers that hex as friendly territory; his opponent may not. If both players exercise a ZOC in the same hex, one must go to priorities 3 and 4 to determine control of the hex. At the start of the game, France is friendly territory for the Allied player, Germany is friendly territory for the German player, and any other territory is neutral (see rule 13).
6 - Movement
During its movement phases, the player in phase may move all or part of his units. The movement of a unit depends on its movement factor, which expresses the number of its movement points (MP). During the movement phase of the first assault, a unit may spend its whole movement factor, or fewer, but may not spend more. During the movement phase of the second assault, a unit may spend only half of its movement factor (rounded down) or less, but never more.
Example: a unit with movement factor 5-6 may spend at most 6 MP in the movement phase of its first assault, and at most 3 MP in the movement phase of its second assault.
Movement is always voluntary: a unit is never obliged to move. A unit moves from hex to adjacent hex, spending MP according to the terrain, as indicated on the Terrain Effects Table.
A unit must spend 1 additional MP to leave an enemy ZOC. It must spend 2 additional MP to enter a hex containing a disorganised friendly unit. A unit may never enter a hex occupied by the enemy.
Question: Why are there trees along the roads of France?
Answer: So that the German army can march in the shade.
(English humour)
Special movements
- Rail. During each movement phase the player in phase may move one unit by rail. Allied units may use this movement only in friendly territory in France; Allied units may use it only in friendly territory in Germany. Rail movement consists of moving the unit in question to its destination by a route to be traced on the map: this route has no length limit, but must be in friendly territory and in a friendly nation, and may not pass through an enemy ZOC nor cross a sea hexside.
- Sea hexsides. Allied units may cross the sea hexsides of hexes at the cost shown on the Terrain Effects Table; they may not enter sea hexes. A unit may never enter directly, across a sea hexside, an enemy ZOC or enemy territory. German units may cross sea hexsides only by roads. The river-mouth indication distinguishes sea hexsides from river hexsides and from sea hexsides. Thus hexside 0411/0512 is a river hexside and hexside 0411/0412 is a sea hexside.
- Naval evacuation. Allied units may be evacuated by sea from ports. Up to one corps (three divisions) may be evacuated from each port per movement phase. A unit must spend 1 MP in the port hex to be evacuated. Once evacuated, the unit is removed from play and may not return; however, it is not counted as eliminated for victory points (rule 18).
- Airborne movement. German airborne units may be moved by air. Airborne operations are described in rule 11.
7 - Combat
During a combat phase, the units of the player in phase may attack the adjacent enemy units. Combat is semi-voluntary. A unit is, in principle, never obliged to attack; however, when an attack is made, all enemy units adjacent to the attacking unit must be attacked. A unit that attacks does not have to attack all the units adjacent to it; friendly units may do so instead. In the latter case, all enemy units adjacent to those friendly units must also be attacked, and so on.
Diagram: hexes with counters F1, F2, F3, A1, A2, A3 (see example a below).
Examples:
a) It is the German combat phase. The German player wishes to attack the French unit F3 with unit 1. Therefore unit F2 must also be attacked. If A1 does not attack both F3 and F2, A2 or A3 must undertake to attack F2. And if it is A3, that unit must also attack F1.
b) If it is the Allied combat phase and the Allied player wishes to attack with F2, the three German units must be attacked, the manner of doing so depending on the Allied player.
Attacks are resolved one at a time, in the order chosen by the player in phase. The total of the combat factors of the attacker is compared with the total of the combat factors of the defender, in the form of a ratio attacker/defender. Round this ratio in favour of the defender (8 against 3 gives 2 against 1). All applicable modifications (terrain, supply, air support) must be made. Roll a die and cross the result obtained with the column adapted to the ratio to obtain a result. This result is applied immediately.
Units from different hexes may join together to attack a single hex, as long as all the attacking units are adjacent to the attacked hex. All the defending units in a hex must be attacked at the same time. A unit may attack more than one hex, but all terrain effects are then cumulative. For example, if an armoured unit in hex 1607 attacks hexes 1508 and 1608, it must be divided by two because it attacks in forest (1608) and the strength ratio will be shifted one column to the left because 1508 is a rough hex.
Influence of terrain
The Terrain Effects Table summarises its influence on combat. An attack across a river hexside requires one die roll per attacking unit: non-motorised units attacking normally on a roll of 1 to 4 and are divided by two (without rounding the result) on a roll of 5 or 6; motorised units attacking normally with a roll of 1 or 2 and are divided by two with a roll of 3 to 6. The attacker may not cancel its attack after having made these die rolls.
Combat results
- AE: attacker eliminated. All attacking units are removed from play.
- AR: attacker repulsed. All attacking units are disorganised (see below).
- FS: front stabilised. The attack has achieved nothing.
- DR %, DR: defender retreats. It must withdraw its units by two hexes, in accordance with the retreat rule (below). Once withdrawn, these units are disorganised. A DR % becomes an FS for defenders occupying certain types of terrain (see the Terrain Effects Table).
- DE: defender eliminated. All defenders are removed from play.
Disorganisation
A disorganised unit is turned over to show its state. It no longer exerts a ZOC and may neither move nor attack. If it is attacked, it defends normally. However, the opposing player is never obliged to attack it, even if it is adjacent to one of its attacking units.
A unit is reorganised after having suffered an AR result during the reorganisation phase of the friendly assault following the assault in which the AR result was suffered. Thus a unit suffering an AR in the first assault of a turn will be reorganised at the end of the second assault of the same turn. If the AR was suffered in the second assault, the unit will be reorganised at the end of the first assault of the following turn.
A unit is reorganised after having suffered a DR result during the reorganisation phase of the second assault of its own turn.
It may be useful to use small markers marked "1" or "2" to distinguish disorganised units according to the moment at which they must be reorganised, depending on whether they are to be reorganised at the end of a first or a second assault.
Retreat
A unit forced to retreat must complete its retreat movement at least two hexes away from the hex in which it fought. If this movement obliges it to violate stacking, it must retreat one or more other hexes (as few as possible) until the situation is normalised.
- French "B" reservists: the French corps 2-5 are composed of "B" reservists, poorly trained, relatively old and of mediocre morale. Therefore, each time a French corps 2-5 retreats, it must retreat 4 hexes and not 2.
A non-motorised unit may not retreat into an enemy ZOC unless the hex is occupied by a friendly unit. By contrast, a motorised unit may retreat into an enemy ZOC. If a unit cannot retreat without violating these conditions, it is eliminated.
Each player retreats his own units. If a unit that has just retreated stacks with a unit that is then attacked in the same assault, it does not take part in the defence of the hex, but suffers all eventual results of the assault.
Advance after combat
If the defenders of a hex are all eliminated or retreat, the attackers may advance into the hex thus freed, OR into another hex not occupied by the enemy, adjacent to the freed hex. A unit may advance by one hex at most. Any advance after a combat must be carried out before the next combat or any other action. Stacking limits must be respected.
Example: a German unit in 1511 attacks a French unit in 1512, obtaining a DR. The German unit may advance into hex 1411, 1512 or 1611.
8 - Supply
To operate at full effectiveness, units need supply. A unit is supplied if it can trace a supply line between itself and a supply source.
Supply line
Such a line may only be traced in friendly territory. A non-motorised unit may not trace a supply line through an enemy ZOC, unless the hex is occupied by a friendly unit. Motorised units may trace their supply lines through enemy ZOCs. Moreover, a unit may not trace a supply line through terrain that is impassable to it. A supply line may be of any length.
Supply sources
- German supply sources are:
- every hex on the map edge north of Switzerland; or
- every major city hex in Germany.
- Franco-British supply sources are:
- every hex on the western map edge, or on the southern map edge west of Switzerland; and
- every hex of Paris.
- Belgian and Dutch supply sources are the major city hexes of their respective countries. These units may also use French supply sources.
- Swiss supply sources are the Swiss towns and the hexes on the map edge in Switzerland.
A supply source may only be used if it is situated in friendly territory.
Effects of lack of supply
Supply is judged for all units at the start of each assault. If a unit cannot trace a supply line at the start of an assault, it is isolated for all that assault. An isolated unit has its movement and combat factors divided by two (without rounding). It may not use rail movement.
9 - Air Support
At the start of each game turn, the German player receives six air points, the Allied player receives three (two French and one British). An air point may only be used in the game turn in which it is received. If it is not used, it is not put in reserve for the following turn, but lost.
An air point shifts a column of the combat-result ratio in favour of the player who uses it. Several air points may be used for a single attack and shift the strength ratio accordingly (3 points thus transform a 2/1 into a 5/1).
The two players may use air points in the same combat. The Allied player indicates each time, first whether he uses any, and how many; then the German player decides his own. The use of these points must be decided before the attacker throws the die to determine the effects of any rivers on the attack.
A player may use two air points to forbid a hex. He decides at the start of one of the assaults of his own turn, and the prohibition will persist until the end of the following turn of the opposing player. The German player may forbid 2 or 3 hexes. A forbidden hex (mark it with any marker) is considered, as far as the movement of enemy units is concerned, to be a hex in which the player who forbids it exerts a ZOC. Enemy units present in the hex must spend one additional MP to leave it; those that enter it must stop there.
10 - Fortifications
Fortifications benefit only their owner: a unit gains nothing by occupying a fortified hex belonging to an enemy army. Fortified hexsides are unidirectional: they only affect attacks if the defender occupies the fortified hex (the one containing the fortification symbol).
A motorised unit may not pass directly from an enemy ZOC hex into a hex of enemy ZOC if it must for that cross a fortified enemy hexside. Thus, if a French unit holds hex 2604 and a German panzer division is at 2704, the latter may not pass directly to 2705.
A fortification can never be destroyed, with the exception of Eben Emaël.
Minor fortifications
A unit attacking across such a hexside sees its strength divided by two. Units protected by these fortifications consider DR % results as FS results suffered, and therefore do not retreat.
Eben Emaël
This is the fortress that protects Liège (hex 1110). This fortification has an intrinsic strength of two combat points, which is usable only in defence and exerts no ZOC. Moreover, it is a minor fortification. If a German unit occupies hex 1110 at the end of a combat phase, the fortress and its intrinsic strength are destroyed.
The Maginot Line
These are very important fortifications. Units attacking across such a hexside see their strength divided by two. Moreover, Allied units occupying the Maginot Line are automatically supplied: they do not need to trace a supply line. The total defence strength of such a hex occupied by one or more Allied units is increased by one point when the hex is attacked across at least one fortified hexside. Allied units attacked across these Maginot Line hexsides consider both DR % and DR results as FS results: they do not retreat.
Fortifications taken in reverse
Being static, fortifications may be taken in reverse by a mobile adversary. If the fortified hex is attacked across a non-fortified hexside, the fortification is taken in reverse. In that case, the units defending in the minor fortifications are affected by DR % results, and the units of the Maginot Line are affected by DR results. Moreover, if the attack is made solely across non-fortified hexsides, the units of the Maginot Line do not benefit from the defence point bonus.
Example: a British unit 1-8 is in 1808 and a German unit 5-6 is in 1809: the ratio is 5/1. If the German had added a 2-5 unit in 1708, the bonus would have been played and the ratio would have fallen to 6/2, that is 3/1 (the 2-5 being divided by two).
11 - Airborne Operations
Parachute units and glider-borne units are called airborne units. Such a unit may be dropped directly into any land hex up to ten hexes away from a city situated in friendly territory, including in a hex occupied by an enemy unit. This drop may be carried out at the start of any movement phase.
If, at the end of a combat phase, an airborne unit is stacked with an enemy unit, it is eliminated.
Airborne units do not have to be on the map before being dropped. They may be kept off the map and, when used, drop from any city controlled by the German player (in supplied position).
If an airborne unit can trace a supply line at the start of an assault, it may be removed from the map: it will no longer re-enter play, but will be protected from a possible elimination.
Parachute regiments
They have neither a combat factor nor a movement factor, and they exert no ZOC. An Allied unit may enter without difficulty, during one of its movement phases, a hex containing only such a regiment; the regiment is then eliminated.
22nd Airborne Division
It may be used either as a normal reserve unit (rule 14) or as an airborne unit. During the assault in which it is dropped, it loses its ZOC and may not attack.
Effects of an airborne operation
An airborne unit dropped into a hex occupied by the enemy cancels the effects of all the sides of that hex (except for the hexes of the Maginot Line, see below) concerning an attack on that hex during the following combat phase. Only the hexsides see their effects cancelled, not the hexes themselves.
Example: a Dutch unit 2-6 is in 0509. A German parachute regiment is dropped into the hex; a German unit 4-6 comes in at 0508 and another at 0608. The two 4-6 attacks, because of the airborne operation, neither the fortified hexside nor the river hexside influences the combat, and the ratio is 8/2 (4/1). Without the parachutists, it would have been 3/2 (1.5/1).
Fortifications and airborne operations
The cancellation of the effect of the sides of minor fortifications means that the units defending are affected by DR % results. A drop into a hex of the Maginot Line makes the defenders vulnerable to DR results. The defence point bonus continues to count. If a hex of the Maginot Line is targeted by an airborne drop and at the same time attacked from behind (rule 10), the defenders also become vulnerable to DR % results.
12 - Armoured Units
Armoured units (including Panzers) receive a combat bonus under certain conditions. When an armoured unit attacks a non-motorised unit, the strength ratio is shifted one column to the right (so 2/1 becomes 3/1). Armoured units in defence, or attacking motorised units, are not entitled to this bonus.
Armoured units are entitled to this bonus only if they attack alone or combined with other motorised units. If they attack with non-motorised units, the bonus is not granted. Moreover, if armour attacks with non-armoured motorised units, the bonus is granted only if there are at least as many armoured divisions as non-armoured divisions. (A corps counts as three divisions.) Thus, there will be no bonus if a French armoured division attacks with the French mechanised cavalry corps.
13 - Neutral Countries
Holland, Belgium, Luxembourg and Switzerland are neutral at the start of the game. The German player may invade one or more of these countries if he wishes. The Allied player may not. If the German player invades a neutral country, that country and its units pass under the control of the Allied player. All Allied units may then enter the country concerned, and all hexes of that country not controlled by the German player are friendly territory for the Allied player.
Neutrality
Units of a neutral country may not move. They exert no ZOC outside their country until the assault following that in which their country is invaded. They exert a ZOC inside their own country. Allied units may not enter a neutral country. German units may, but even in the absence of combat, this constitutes an invasion.
Holland
Holland remains neutral as long as it is not invaded. Dutch units may voluntarily leave their country as long as a German unit occupies it. If they leave Holland under the effect of a DR or DR %, they may operate normally afterwards.
Holland surrenders, and Dutch units are removed from play, if at the end of an Allied turn, the German player occupies at least two major cities.
Maastricht possesses an intrinsic fortress point which functions as the intrinsic strength of Eben Emaël (see rule 10). Maastricht is not a fortification.
Belgium
Belgium joins the Allies if Germany invades one of the Benelux countries. Belgian units may normally operate in Belgium, Luxembourg, Holland (if that is invaded) and in Germany. They may enter France only if forced to do so by a DR or DR %, or if all the major Belgian cities are controlled by the German player. Once they have entered France, Belgian units may operate normally.
Belgium surrenders and Belgian units are withdrawn from play if, at the end of an Allied turn, both of the following conditions are fulfilled at the same time: 1) both large Belgian cities are controlled by the German player; and 2) one or more corps of the BEF have been evacuated.
Luxembourg
The status of Luxembourg is the same as that of Belgium. If Belgium joins the Allies, Luxembourg does the same. It has no units, but its alliance permits the Allies to pass through its territory.
Switzerland
Switzerland remains neutral as long as it is not invaded. Swiss units may not voluntarily leave their country as long as a German unit occupies it. If they leave it under the effect of a DR or DR %, they may then operate normally.
From the invasion of Switzerland, Swiss reserves appear at the rate of one unit per Allied game turn. This unit may appear in any Swiss town controlled by the Allied player, or on the southern or eastern map edge in Switzerland.
14 - Reserves and Reinforcements
A certain number of units do not begin the game on the map, but enter during play. These units comprise Reinforcements and Reserves. All are marked with a point in the upper left corner to distinguish them more quickly.
Reinforcements
Two British units, the 1st and 2nd Armoured Divisions (3-10 and 2-10), enter play as reinforcements, respectively in turn 2 and turn 6. They may enter by any hex of the western edge of the map controlled by the Allied player, beginning normally by spending MP for the entry hex.
Reserves
Reserve units appear on the map at certain points depending on nationality. They are placed (except as noted below) at the start of the first assault of the player who controls them. When reserves must enter play, the interested player chooses them from his stock of units.
From the assault in which they appear, reserve units may move and fight. Only one reserve unit may be placed on the map, per hex and per game turn: two units may not be put into place in the same hex in the same turn.
German reserves
From turn 2 onward, the German player may bring into play two reserve units per turn. These units are placed in any hex of a German city controlled by the German player, but not in an Allied ZOC.
Franco-British reserves
From turn 1, the Allied player may bring into play three units from his reserve (French and/or British) per game turn. In turn 1, they may enter only during the second Allied assault; thereafter they may enter at the start of the first assault of each turn. These units may be placed in the three rally points of the reserves indicated on the map, as long as these points are not in a German ZOC and not controlled by the German player. These reserves may also be placed in a hex of Paris, or enter by the western or southern map edge, like reinforcements.
Reserves of the Armée des Alpes
The Allied player has two reserve units marked SR. They may appear, in addition to the normal reserves, in any hex of France adjacent to the Swiss border from the Allied assault following a German invasion of Switzerland. Otherwise, they may enter play like normal reserves once all the other Allied reserves have entered.
Swiss reserves
See rule 13.
15 - Optional Units
The German and French forces include optional units, marked Op and bearing a point in one corner.
German XXXIX Panzerkorps
At the end of a German movement phase, the German player may bring the XXXIX Panzerkorps into play. To do so, he must remove from the map a stack made up of two armoured divisions and one motorised division and replace it with this Panzerkorps. At the start of a movement phase, the German player may carry out the reverse operation.
German mountain corps
Before starting the game, the German player may replace an infantry corps with the mountain corps (Geb). This corps may neither attack nor leave Germany, except to invade Switzerland.
Note: The German player is not obliged to invade Switzerland merely because he chooses the mountain corps. He may do so solely to deceive his opponent about his intentions.
French armoured corps
The Allied player has an armoured corps which he may exchange for two armoured divisions and one motorised division, just like the German XXXIX Panzerkorps.
16 - Plans and Deployment
Before the start of play, both players must secretly choose their campaign plans and divide their armies into three groups whose boundaries are printed on the map.
Allied plan
The Allied player first chooses which army group (1st, 2nd or 3rd) will be responsible for opposing the German attack (see rule 18), and writes down its number. Then he divides his armies among his three groups, writing down this allocation. He uses all his counters, apart from the optional units, reinforcements and reserves. All the units of one army must be assigned to the same group; an army may not be divided between two groups. Units with no army designation deploy freely. The BEF must be assigned to the 1st Army Group. Each group must include at least one army.
German plan
The German player first chooses his main objective and writes it down: 1) Occupy the Maginot Line, 2) Take Paris, 3) Take the ports and cities of Belgium and northern France (see rule 19).
Then he chooses the army group (B, A or C) that will make the main attack and must include all the armoured corps.
Finally, he divides his units among the army groups, in the same way as the French player, with the difference that, let us repeat, all the armoured corps must be assigned to the group making the main attack. The airborne units are kept off the map.
Deployment of the belligerents
The Allies deploy first. All units assigned to an army group must be deployed in the zone of their group. Free-deployment units may be placed anywhere in France.
The Germans deploy second. Units assigned to an army group must be deployed in the zone of their group. Free-deployment units may be placed anywhere in Germany.
Deployment of the neutrals
- Switzerland: one 1-6 infantry XX in Zurich and another in Basel; one 1-6 mountain XX in Bern.
- Holland: one 3-6 infantry XXX in 0310; one 2-6 infantry XXX in 0111, one in 0409, one in 0509; one 1-8 infantry XX in 0709.
- Belgium: one 2-6 infantry XXX in 0911, one in 0912, one in 1010; one 3-6 infantry XXX in 0812, one in 0915, one in 1013 and one in 1211; one 2-8 infantry XXX in 1409.
17 - Command
French command restrictions
Only the armies assigned to the group responsible for opposing the German attack may leave the deployment zone of their group on turns 0 and 1; the 1st Army Group nevertheless always has the option of entering Belgium if Belgium is invaded.
Allied air power may support Belgian, Dutch or Swiss troops only if a French or British unit takes part in the combat.
British command restrictions
The BEF may not leave the zone of the 1st Army Group during turns 0 and 1, even if that group is responsible for opposing the German attack, except to enter Belgium.
The British air point may no longer be used once a BEF corps has been evacuated, except to support British counters defending in the zone of the 1st Army Group or in Belgium.
German command restrictions
On turns 0 and 1, the German panzer corps may attack only hexes located in the zone of operations of their army group. Outside Germany, the boundary between the zones of groups B and A runs between hex rows 1200 and 1300; the boundary between the zones of groups A and C runs between rows 1800 and 1900.
18 - The Attack (Turn 0)
Since turn 0 represents only two days of real time instead of 5, the players have only the first assault of their game turn.
Units of invaded neutral countries have only half of their normal movement allowance (do not round).
19 - Victory Conditions
Victory is judged after the end of turn 10, on the basis of losses and the execution of the German plan.
Losses
- The German player receives the following victory points (VP):
- 3 VP per British strength point eliminated;
- 2 VP per strength point of French motorised unit eliminated;
- 1 VP per strength point of French non-motorised unit eliminated;
- no VP for the elimination of Belgian, Dutch or Swiss units.
- The Allied player receives the following VP:
- 5 VP per German airborne unit eliminated;
- 3 VP per strength point of German motorised unit eliminated;
- 2 VP per strength point of German non-motorised unit eliminated.
Execution of the German plan
-
The Maginot Line is considered occupied if, at the end of turn 10, no hex of that line is occupied by an Allied unit.
-
Paris is taken if, at the end of turn 10, the three hexes of the city are friendly territory for the German player.
-
The ports and cities of Belgium and northern France are occupied if, at the end of the game, the German player controls the four ports, all the Belgian cities and Lille.
Note: If Germany invades Holland and does not force it to surrender, the German plan is automatically considered to have failed.
Levels of victory
- Allied total victory: the Allied player must have more VP than his opponent, make the German plan fail and control at least two hexes of the Ruhr.
- Allied decisive victory: the Allied player must have as many or more VP than the German AND make the German plan fail.
- Allied marginal victory: the Allied player must have as many or more VP than the German OR make the German plan fail.
- Draw: the German player must accomplish his plan and have more VP than the Allied player.
- German marginal victory: the German player must fulfil the conditions for the draw AND achieve one of the two objectives he did not choose.
- German decisive victory: the same, but the German player must have at least twice as many VP as the Allied player (historical result).
- German total victory: as above, but the German player must also achieve the third objective, or else destroy at least 12 British strength points.
20 - Options
1) Gamelin and Co. (historical option)
- Rule 15: The French player may not use the optional armoured corps.
- Rules 16, 17 and 18: All Allied units must be deployed one or two hexes from the borders, except free-deployment units. The armies of the Allied groups not designated to oppose the German attack may not move on turn 0, nor may the units of neutrals attacked during that turn. The armies of the group designated to oppose the German attack may move only towards the north or north-east. This group must be revealed to the German player before he chooses his main objective.
Allied armies may not cross the boundaries between the deployment zones of the army groups. From turn 1, the Allied player may give freedom of movement to one army per turn (the BEF being "released" automatically on the turn following the "release" of all the French armies of the 1st Army Group).
2) Common sense for the Belgians
Despite the obviousness of German intentions, the Belgian government refused until 10 May to adopt a sensible defence policy! This option assumes that the Belgians showed a little more common sense.
The Allied player places the Belgian counters freely. Eben Emaël is considered, in addition to its intrinsic strength of two points, as a Maginot Line hex (without the Line's "bonus" strength point). But it is destroyed if the Germans occupy it. Belgian units move normally on turn 0.
If this option is combined with option no. 1, Allied units of Army Groups 1 and 2 may enter Belgium on turn 0 even if they are not part of the group designated to oppose the German attack.
3) Reorganisation of the Armée de l'Air
(Option concerning rule 9, recommended to fully explore the possibilities opened up by the standard game.)
- When the German player attacks, he must indicate first, in each combat, whether he is using air points, and how many.
- The Allies receive one additional French air point.