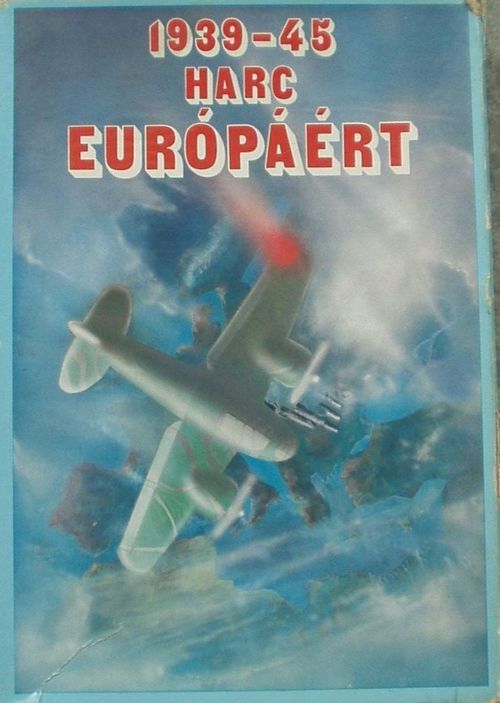
1939-45 Harc Európáért
1939-45 Harc Európáért Rulebook
Table of Contents
Table of Contents
- 1. Introduction
- 2. General Course of the Game
- 3. Map
- 4. The Units (Tokens) Described
- 5. The Phases of Action
- 6. Movement Outside Battle
- 7. Placement of New Units
- 8. Strategic Relocation of Units
- 9. Supply
- 10. Annual Economic Reckoning
- 11. Capture of Great Powers
- 12. Advanced Variant
- 13. Special Rules of the Game Variants
- 14. Game Variants
- 15. Tables
- 16. Sample Game Excerpt
- 17. Optional Rules
- Components
- Annex (Official 1986 Supplement, Melléklet)
1. Introduction
On 1 September 1939 Germany attacked Poland, and with this the Second World War began. This war differed significantly from all earlier wars: in the enormous number of combatants, in the speed and extent of operations, in the unprecedented use of tanks and aircraft, and in the enormous strain placed on economic resources.
Our game is a strategic simulation of the war, in which tactical considerations play a significant role alongside economic decisions. The game can be played by two to five players, who represent the Axis Powers (Germany, Italy) and the Allies (England, France, the Soviet Union and the USA). The complete European and North African campaign can be played, as well as shorter games covering individual significant events of the war (the Sichelschnitt operation, the Barbarossa plan, and the Bagration and Overlord operations). The game is not rigid: the players have the opportunity to carry out actions that did not happen during the war, or were planned but not executed (such as the German landing in England).
The game is made in two difficulty levels: a basic and an advanced variant. Further decision options are provided by the Optional (supplementary) Rules.
2. General Course of the Game
The players decide which variant (basic or advanced) and which game scenario they wish to play, and accordingly who represents which country. The data for each variant are given in section 14 and on the fact sheets of the respective countries. Here the Military Production Points (HPP, Hadi Produkciós Pontok) available to each country at the start, the types and number of units, their placement order and their restrictions are given.
The strength of a country is not determined by the amount of its base HPP alone!
The players carry out the placement of units in the order prescribed for the given variant. The game is played in turns, in which every country acts in the given order.
I. The annual turns of the game:
- spring
- summer
- autumn
- winter
The variants state when the game begins: e.g. the Sichelschnitt operation begins in autumn 1939; the Barbarossa plan starts in summer 1941. The first player given in the variant may, for example in the summer turn, carry out various actions; their order is given by the Phases of Action, which are the following:
II. Phases of action:
- Declarations of war, movement, battle Within battle the order is: a) Air battle b) Naval battle c) Land battle
- Movement outside battle
- Placement of new units
- Strategic relocation of units
After the first player has carried out all of his planned actions, the next player determined by the variant does so. After everyone has moved, for example in the summer turn, the time marker is advanced to the square marking autumn, and the phases under II are repeated for each player.
After the winter turn follows the
III. Annual Economic Reckoning,
which every player carries out simultaneously. During it, each player determines the number of HPP available to his country for the new year, and pays off any debts possibly remaining from the previous year. Afterwards the game continues with the spring turn of the next year.
The Military Production Points (HPP) cover the replacement of losses, the costs of placing new units, and the costs of declarations of war, battle and invasion. During the game HPP can deliberately never be spent on credit; only what is available may be spent.
The variant gives the end date of the game. At that point, the winner is decided on the basis of the victory conditions.
3. Map
One side of the terrain table depicts the European and North African theatres of World War II, while the other side shows, enlarged, the theatres of the Sichelschnitt, Bagration and Overlord operations. The political borders of the countries show the situation after the fall of Poland. To make the game playable, certain inaccuracies had to be accepted (e.g. the course of the Rhine, the sizes of the Pripet Marshes and the Caucasus mountains, etc.).
On the map, the movement of troops is determined by the areas bounded by black lines: 1 movement point allows entry into 1 area. The same applies to movement on the seas.
The map contains the following markings: (the symbols are graphic and are not reproduced in the retyped text)
These generally do not affect the movement of combat units, but do affect the Defence Value of the troops defending there (section 5.2.). Some mountains and the fortress of the Maginot Line give a Defence Value Modifier only against attacks coming from certain directions: e.g. the mountains of Lyon defend only against attacks from Italy; the Maginot Line counts as a fortress only with respect to Germany and Belgium, etc.
Ground troops may be transported across the seas separating the areas only by fleet. At three points an arrow marks that ground troops may cross without a fleet (Sicily, Sevastopol and Istanbul). Ground units cannot pass directly from Denmark to Sweden. The same applies between Finland and Sweden.
FINLAND has no port; an invasion cannot be attempted against it, and units cannot be brought to it by sea.
The areas belonging to each country are marked with the same colour. The individual areas are referred to by the names of their main cities.
Fleets can leave the Mediterranean for the Atlantic Ocean only through Gibraltar. Here the current owner of Gibraltar controls the movement of fleets: only his allies may pass through. At the start of the game, for example, French ships may pass, but German or Italian ships may not (even though Italy is still neutral at that time).
The situation is similar between the North Sea and the Baltic Sea: here the possession of Denmark decides passage. As long as Denmark is neutral, the fleets of opposing parties (or of a neutral state, e.g. the Soviet Union) may not cross.
However, the German fleet may carry out actions in both the North Sea and the Baltic Sea through the area of Kiel. If an opponent captures the area of Kiel, this possibility ceases (the canal is made impassable).
Between the Mediterranean and the Black Sea, the holder of Istanbul and Izmit controls the passage. As long as Turkey is neutral, Italian, French, British or Soviet ships may not pass here.
4. The Units (Tokens) Described
The combat unit token used in the game looks as follows (the token diagram is graphic; its three values are listed here):
Attack Value (AV) | Defence Value (DV) | Number of movement points
ATTACK VALUE: shows at what value the given unit scores a hit: if one die shows the given value or a smaller number, it has scored a hit; otherwise it has not.
DEFENCE VALUE: similar to the Attack Value, but applies to defence. Hits are scored similarly: a hit is scored if the die result is equal to or less than this number. Defensive terrain may increase this value, e.g. units defending behind a river get +1. The various modifiers are found in section 5.2 and in Table I.
NOTES: a) Similar unit types may have different Attack and Defence Values; these differences reflect the differences in weaponry and fighting strength of the troops. b) A unit generally takes part in only one attack in a turn (except tanks, which may attack twice (see 4.2.)), but of course it may defend against an attack even if it has previously taken part in an attack (except aircraft and fleets (see 4.3 and 4.4)).
EXAMPLE: A tank attacking hits on a roll of 1, 2 or 3. If it defends, it hits on a 1 or 2; if this happens behind a river, in a marsh, or on a mountain (+1 modifier), it hits on a 1, 2 and 3. If the tank defends in a fortress, or tries to repel an invasion, it hits on a roll of 1, 2, 3, 4 or 5.
MOVEMENT POINT: shows how many areas the given unit can pass through in one turn, when moving into battle or in the movement phase outside battle. A unit may move only once in a turn (except tanks and Strategic Relocation, see 8.).
In the BASIC VARIANT only the troops of the currently active attacking player may move; defending units may not.
In the ADVANCED VARIANT the air and naval units of the defenders may intervene: they may attack the enemy's air and naval units advancing to attack; the rules for this are given in section 12.2.
4.1. Infantry
Infantry can attack or defend only on land territory, and has 1 movement point. Upon invasion, a fleet carries it to the coast to be attacked, and it may not move either before boarding the ship or after landing. The same applies in the case of sea transport. While they are on the ship, neither the infantry nor the fleet carrying it may take part in any battle that takes place between fleets and aircraft.
4.2. Tanks
Tanks can attack or defend only on land territory. They have two movement points and may carry out two attacks in one turn. Upon invasion, a fleet carries them to the coast to be attacked. They may not move before boarding the ship; after a successful invasion they may move further and attack an adjacent area. The same applies to sea transport: after disembarking they may move one more area. While they are on the ship, neither the tanks nor the carrying fleet may take part in any battle that takes place between fleets and aircraft.
4.3. Aircraft
Aircraft can attack and defend both on land and at sea. They always operate from an air base, and return there after an action. (Base: the place where air and naval units are located before their movement.) Before an attack, or in the movement phase outside battle, they may change their base by a distance of two areas. They have two movement points, i.e. they can carry out an attack from a base one or two areas away (a sea-surrounded area also counts), (they may fly over enemy units), but they may attack or defend only once in a turn. If the opponent attacks the area where the defender's base is located, and the defender's aircraft have already fought in that turn, the defender's aircraft may not take part in the battle and may not be removed as losses. If the attacker captures the area where the defender's air base was, the defender's remaining fighting aircraft, and those which did not fight because of the previous rule, may escape to a new base within a distance of two areas. The same aircraft may not escape twice in one turn: if the opponent also captures the second base, the aircraft are automatically lost (they must be removed). Aircraft alone (without ground units) may not defend an area against ground units; however, they may take part in an attack only against naval or only against air units. In an invasion they may take part in the battle only if the invasion site is at most two areas away from the air base. (E.g.: aircraft located in the area of Dover may assist with an attack on an invasion directed at the areas of Calais, Brest, Belgium or the Netherlands.) Therefore an air force that takes part in an invasion cannot be transported by fleet to the site.
A rule similar to that for tanks applies to the transport of aircraft.
In the ADVANCED VARIANT the air force may intervene in the action of enemy air forces or fleets (section 12.2), if it occurs within a distance of two areas of its base.
4.4. Fleets
Fleets may move and fight only at sea, or on a coastal section bordering the sea. Like air forces, they set out from bases, which are located in coastal areas (e.g. Dover, Brest, Calais, Belgium, the Netherlands, etc.), and return there after an action. Thus a fleet may not remain in an open-sea area at the end of the turn. They may not take part in land battles, and they may not defend their base area against ground troops. If the base is captured by enemy ground troops, the fleets must withdraw to another friendly base. A second withdrawal is not permitted: if the base used for withdrawal is also captured by the opponent in the same turn, the fleets are lost (they must be removed). A fleet is needed for the following actions: for invasion, to transport the landing units (one unit per fleet), and for the sea transport of troops (two units per fleet). In these actions an escort fleet may also take part. For the Strategic Relocation of units across the sea an escort fleet must likewise be provided – though these do not actually move. A fleet must be used to supply armies located in overseas territory, if this cannot be solved otherwise. In an invasion, a landing may be attempted only if there is no enemy fleet on the attacked coastline. If there is, these must first be destroyed in a naval battle (in which air forces may also take part). Transported units may not change to another ship during invasion and sea transport. A fleet may carry out only one action in a turn.
In the ADVANCED VARIANT a fleet may intervene in the action of an enemy fleet if it occurs within six movement points of its base; details are given under section 12.2. The shipment sent within the framework of the Lend-Lease Agreement must likewise be provided with an escort fleet (section 12.3).
5. The Phases of Action
The following describes in detail the actions each player may carry out. The variants state which territories each country controls and which countries it is at war with. The player whose turn it is is called the attacker; all the others are called defenders.
5.1. Declarations of War, Movement and Battle
The attacking player decides where he wishes to initiate battle, and with all the units that wish to take part in the battle and can reach the place of battle (that is, have enough movement points), enters the defender's territory. Attacking units may come from different areas.
THE COST OF A BATTLE IS 1 HPP (the mobilisation cost), which must be paid immediately: if the attacking country has already run out of HPP, it may not initiate a battle. If the attacker wishes to initiate action against a country with which it is not at war, it must declare war and pay the cost of the declaration.
THE COST OF A DECLARATION OF WAR: Against a Great Power (England, France, Germany, Italy, the Soviet Union, USA): 7 HPP. Against the other countries: 2 HPP.
It is sufficient for one of the Allies or one of the Axis Powers to declare war; it is not necessary for every other Great Power separately.
A war may be declared only if the declaring attacking side carries out at least one attack against the attacked party or occupies one of its areas. The army of an attacked neutral country is set up by the strongest member of the enemy alliance (the one with the most HPP). If the capital of the neutral country falls, all its units are immediately removed and the whole country is controlled by the conqueror. If the attacked neutral country does not fall in the turn of its attack (that is, its capital is not captured), the other side may rush to its aid, and from then on it belongs to that alliance until its fall. In both cases the country's HPP can be added to the conqueror's or the ally's HPP only at the next Annual Economic Reckoning (that is, after the winter turn). The cost of a declaration of war is always paid by the attacking side, and this must be paid immediately.
EXAMPLE: If Germany attacks Belgium, the cost is 2 HPP (declaration of war) +1 HPP (battle cost) = 3 HPP. If France does this, the same cost applies, but if England also takes part in the attack, England then pays only 1 HPP (the battle cost) – that is, it does not need to declare war separately. Of course France must carry out at least one attack in order to declare war (that is, it cannot pay the declaration cost on England's behalf). In the given example Italy could not declare war on Belgium if it could not attack it.
EXAMPLE: At the start of the game Italy is neutral and is not at war with England and France. If it attacks Yugoslavia, the cost is 2 HPP (declaration of war) + 0 or 1 HPP (depending on whether it has to fight a battle to enter Yugoslav territory). If Germany wishes to join the Yugoslav war, it too must pay the 2 HPP (declaration of war), unless the alliance with Italy already exists. (This happens if either Italy declares war on one of the Allies (England or France), or vice versa; one of them declares war on Italy.) If the Allies wish to intervene in an Italo-Yugoslav war while Italy is still neutral, they must declare war on Italy (7 HPP), but they do not have to attack Italy; it is enough to send troops to Yugoslavia.
After all the attacker's troops have reached the defender's area, the place of battle, the battle begins. It takes place in rounds in the following manner: first the
5.1.1. Air Battle
takes place between attacker and defender. The attacker rolls as many dice as there are aircraft with the same Attack Value taking part in the battle, and collects the number of Hit tokens corresponding to the hits. So if 3 aircraft with AV = 3 and 2 aircraft with AV = 2 attack, then in one roll 3 dice are rolled and every 1, 2 or 3 is a hit, and in the same round 2 dice are rolled, and every 1 or 2 is a hit. It must always be clearly stated for which units the dice are rolled! If in the example the die results for AV = 3 were 2, 4 and 5, and for AV = 2 were 1 and 3, then two hits have been scored. At the same time the defender also rolls similarly according to the Defence Values of its units, and collects Hit tokens corresponding to its hits. Afterwards each side removes as losses a number of its own aircraft tokens equal to the hits of its opponent (if it has fewer, then of course fewer). This ends the first round of the air battle. The attacker may now withdraw, or continue the air battle if it still has aircraft. The air battle may end in the following ways:
- the attacker withdraws, or the attacker wins the air battle (that is, the defender has no aircraft left), or the defender wins the air battle (that is, the attacker loses all its aircraft). If the attacker withdraws, its aircraft return to the starting location. Of course an air battle can take place only if both sides have aircraft in the given area.
Next comes the
5.1.2. Naval Battle
which takes place if both sides have fleets in the given area. The surviving aircraft of any preceding air battle may also take part in it. The naval battle takes place in rounds similar to the air battle, and the attacker may withdraw after each round. Its resolution is entirely similar to that of the air battle. Finally comes the
5.1.3. Land Battle
which takes place if both sides have land units in the given area. The surviving aircraft of any preceding air battle may also take part in it. Aircraft alone may not attack land units (but yes, according to the errata list, see the annex, question 5.8: aircraft may attack land units, but aircraft alone cannot capture the attacked area); they may do this only together with land units (aircraft may also be removed as losses). Likewise, aircraft alone (without land units) may not defend an area against land units, but they may defend against e.g. fleets. The land battle takes place in rounds similar to the air battle, and the attacker may finish and withdraw after each round.
EXCEPTION: invasion; landed units may no longer withdraw. The cost of an invasion is always 5 HPP, regardless of success – so the attempt must also be paid for (even if the landing did not take place).
EXAMPLE: Invasion Four English fleets from Plymouth attempt an invasion of Calais, which is defended by the Germans. Two fleets carry the English infantry and a tank, and the other two fleets escort the invading army. In addition 3 English aircraft from Plymouth also give air support to the invasion. Calais is defended by one German fleet, one German aircraft and German infantry. The course of the battle is as follows: Air battle: the English AV = 3; the dice rolls: 1, 1, 5 – two hits; the German aircraft DV = 4, the die roll: 2 – one hit. The air battle has ended: the English have two aircraft left, the German aircraft has been lost. Naval battle: two English fleets may take part in it (the other two ships do not, because they are carrying troops) and the two remaining aircraft. Each of them has AV = 3, so rolling four dice: 4, 4, 5, 6 – no hits. The German fleet has DV = 5 (because it defends against an invasion), the die roll: 3 – one hit. The English remove one aircraft as a loss and continue the attack: the three die rolls: 2, 3, 3 – three hits. The German ship's roll: 3 – one hit. The English choose one ship as a loss (the aircraft are still needed for the landing), and the German fleet is lost. The landing may take place and the Land battle begins: one English aircraft (AV = 3), one infantry (AV = 1) and one tank (AV = 3) face one German infantry (DV = 5, because of the invasion). The English die rolls (two rolls with AV = 3 = 1 and 5 and one roll with AV = 1 = 4) gave one hit; the German roll = 5: one hit. The German unit is lost, the invasion succeeded, but the English must still remove one unit (the infantry, the tank or an aircraft) as a loss. The same happens in the following way if, for example, there is no German fleet at Calais and the air battle result is similar to the previous one: the English land unopposed and, supported by the two aircraft, fight the land battle against the German infantry. If now, for example, there is also no German infantry at Calais, and no German fleet, but six German aircraft defend it, then the result of the air battle: 1, 2, 2 = 3 hits – German: 1, 2, 3, 4, 5, 5, 6 = 3 hits – that is, the English air force is lost and 3 German aircraft remain. The English may now turn back and complete the action (that is, the 5 HPP were paid in vain) or continue. In the latter case their two fleets fight the 3 German aircraft: the English die rolls: 2 and 3 = 2 hits; the German: 2, 2 and 4 = 3 hits. So three English ships are sunk (one of them carrying the infantry, which is also lost) and two German aircraft are lost – one remains to defend the coast. The last English fleet must turn back, and the tank may not attempt the landing. If the German aircraft had been lost, the English could have landed.
NOTES: a) Only tanks may attack twice in one turn; that is, tanks surviving the first attack may move one more area further (if they have a movement point left) and attack again (this naturally costs a further 1 HPP). b) Air forces or fleets may carry out only one action in a turn, so if, for example, they attacked, they may no longer defend, and if their base is captured they must flee further. It is therefore advisable to turn the units that took part in the action face-down and turn them face-up again only at the start of the next turn. c) No HPP needs to be paid for occupying enemy territory where there was no enemy defence. d) On withdrawal, land units (tanks included) may move only one area. Air and naval units return to their starting base. After the attacker has finished the first battle, it may begin the next one – it continues movement and battles until all planned engagements have taken place. Then follows Movement Outside Battle (section 6).
5.2. Modifiers to the Defence Value
The ATTACKER'S Attack Value changes only against a fortress; in this case AV = 1 for every (land or air) unit.
The DEFENCE VALUE of FLEETS changes only when they defend against an invasion of their base; in this case DV = 5. The attacking side may not begin a landing while a defending fleet or air force exists on the coastline concerned.
The DEFENCE VALUE of LAND UNITS (infantry and tanks) increases by one when they defend in mountains, marshes or behind rivers. Land units defending against a fortress or against landed land units have their DV changed to DV = 5. (The Maginot Line counts as a fortress only towards Germany, that is, it does not count from the direction of France (Calais or Lyon).) If an enemy captures a fortress, it ceases to be a fortress for the rest of the game. If units defending behind a river or on a coast are attacked also by an attack to which the Defence Modifier does not apply, then the Defence Modifier loses its effect for all defenders.
6. Movement Outside Battle
After the attacking player has carried out all movement of its units leading into battle and has finished its battles, it may move all its units not yet moved. These may move the number of areas corresponding to their movement points, but these areas must be controlled by it or its allies – and they may enter only enemy territory where there are no enemy troops. In this phase sea and air units may change base (a new starting area). Here the sea transport of land and air units also takes place, in the manner described in the description of the units: between two areas controlled by oneself or an ally, and each fleet may transport two units in any combination.
7. Placement of New Units
The list of units available to each country is given in the description of the game variants (see 14). This includes the building of units not yet placed and the replacement of units lost in battles. The building cost of each unit is given in Table II. When placing new units the following restrictions apply: a) Only the maximum number of units stated in the game variant may be placed (so if, for example, France has all its units on the board, it cannot place more units even though it still has HPP). b) Newly placed units may be placed only within the original borders of the country in question, not within conquered or colonial territories (so, for example, all new English units are placed on the island; in Egypt, for example, it may not build new units, but must transport them there from England). c) The number of new units that may be placed, apart from their availability, is limited by the fact that in one turn a total of at most half of the total HPP may be spent (rounded up), including the costs of declarations of war and battles already paid in the turn. d) Rebuilding fleets lost in battle is lengthy: the HPP cost must be paid in advance, but the rebuilt fleet can be used only three turns later. The construction area must be designated (the coastal area of one's own country), and if the enemy occupies it in the meantime, the fleet under construction is lost. It is advisable to place the fleet being built on the time track at the turn when it becomes available, and the HPP paid for its construction on the construction site.
8. Strategic Relocation of Units
Every Great Power has the possibility of relocating the number of units given on its fact sheet: these units may be freely selected and may be relocated any distance through areas controlled by the country and its allies. Relocation may not take place through neutral countries or through enemy territory. The following restrictions apply: a) Strategic relocation of air forces across the sea is possible only if there is an area controlled by oneself or an ally within two areas. b) For strategic relocation of land units across the sea, an escort fleet must be provided, which can do nothing else in the turn: one fleet per unit (which may also be an aircraft). This escort fleet makes the relocation possible within its movement points – if a unit is to be relocated over a greater distance, another ship is needed to carry the unit further, whose base the previous ship reaches. Thus, for example, to strategically relocate an English unit from England to the Middle East, two ships are needed: one in England, the other e.g. in Gibraltar. Ships used for Strategic Relocation remain at their base (they do not move!), but they may not and could not do anything else in the turn.
9. Supply
Only land troops that have supply at the start of their turn may carry out any movement. Supply is provided by every capital controlled by oneself or an ally (including that of a conquered country) if the troops can find a route to this capital through areas controlled by oneself or an ally. If at the start of our turn the troops in an area have no supply (because the enemy has cut it off) and we cannot restore it with outside troops by the end of the first phase of our turn (Movement and Battle), then all land units located in that area are lost: at the end of our Strategic Relocation phase they must be removed (that is, these units can no longer be replaced in the turn). The supply of land units located in an overseas area may be solved by a fleet (at most six land units per fleet), if it does nothing else in the given turn. Of course the fleet must be located in an area with supply at its base. Thus the supply of the Allies can also be solved in this way. A fleet may also provide supply for units located in several areas, up to the amount of six units. Providing supply with a fleet, like the escort fleet provided for Strategic Relocation, does not constitute real movement; the fleet remains at its base. IMPORTANT: air and naval units always count as having supply – even if their base is in an area cut off from supply.
EXAMPLE: a) Italy must keep at least one fleet in reserve for supply, if it has land units in Albania (or in Africa). If Italy captures Yugoslavia, it does not need to use a fleet for the supply of Italian units in Albania. b) In Africa the supply of British and French units (except the units in Morocco, Algeria and Tunisia, as long as Libya is Italian) can be solved from Cairo; no fleet is needed for this.
10. Annual Economic Reckoning
This takes place after the winter turn of every year, before the spring turn of the next year. The HPP available in the new year comes from the following sources: a) the base HPP value of the given year of each Great Power, as stated on its fact sheet, b) the HPP of small countries conquered, which is shown on the map; this is added to the conqueror's HPP, c) only half (rounded up) of the base HPP of 1939 of the Great Powers conquered is added to the conqueror's HPP, d) the entire HPP debt remaining from the previous year of the Great Power (for example because in the winter turn it failed to reconquer a lost country) – this is deducted. The sum of these gives the amount of HPP the country may spend in the new year; the corresponding number of tokens is placed on the player's country fact sheet. HPP remaining from the previous year is lost and cannot be carried over to the new year.
EXAMPLE: After the winter turn of 1939 Germany has conquered Poland, Denmark, the Netherlands, Belgium–Luxembourg, and has 7 HPP left. Then for 1940 Germany's financial position is the following: 30 (according to point a)) + (4 + 2 + 4) (according to point b)) = 42 HPP (the remaining 7 HPP are lost). If it conquers France in 1940, this increases by 9 HPP (17:2) rounded up (see point c)); if it loses Denmark, it decreases by 2 HPP (see point b)).
IMPORTANT: in one turn at most half of the HPP available at the beginning of the year (rounded up) may be spent. If a country or territory conquered by a Great Power is taken by the opponent and it is not possible to recapture it in the next turn, then the HPP corresponding to it is deducted in the turn of the unsuccessful recapture from the former owner's HPP. This counts towards the HPP spendable in that turn, and so an unintended HPP overspend can occur (because only at the end of the "Movement and Battle" phase does it become clear that the area in question could not be recaptured).
11. Capture of Great Powers
If the capital of a Great Power (France, England, Italy, Germany) is captured by enemy units, then in its next turn this Great Power may only attempt to recapture it. Its allies may help in this. The condition for the counter-attack is that its units have supply under point 9. If the counter-attack was successful, the turn continues in the usual order. If the counter-attack fails, the Great Power has fallen: its units are immediately removed and the country's territory is controlled by the conqueror (except those areas where other enemy units stand). The conquered Great Power's earlier conquests, and its overseas territories, become neutral. At the next Annual Economic Reckoning the conqueror receives half (rounded up) of the base HPP of the conquered Great Power. This is so even if a former ally is later recaptured, e.g. if England recaptures France, which was permanently eliminated during the game, the HPP increase is only 9 HPP.
IMPORTANT: a) The fall of Moscow does not mean the conquest of the Soviet Union; it only means the immediate loss of the HPP shown on the table. The Soviet Union continues the war with HPP reduced by the corresponding amount – in this case the eastern edge of the table provides supply. Attacks may also be launched from here. b) The USA cannot be captured.
12. Advanced Variant
In the advanced variant the rules of the basic variant remain in force (apart from the supplements already mentioned there and detailed here), but the game is expanded with new units and rules.
12.1. New Units
12.1.1. Paratroopers
Paratroops: movement points for air deployment; ground movement.
They do not need a separate aircraft for transport. They may pass over enemy territories. When deployed, the modifiers to ground defence for defending behind rivers or on the coast (i.e. the case of a landing) are invalid. This applies to the other ground forces attacking the same area as well. A paratroop unit that is lost in an air deployment without the support of ground units cannot be replaced during the game.
EXAMPLE: a) If, after the capture of Belgium, the Germans drop a paratroop unit on London and it is lost because of the resistance of the English ground and air units there, then this unit cannot be rebuilt later. The same happens if London was empty and so was taken by the German paratroopers, but they are lost in the next counter-attack (which is compulsory for the English, because otherwise they lose the country). Of course, if the English do not succeed in recapturing London, because they have no ground units within the appropriate distance, then they have lost the war. Self-invasion is permitted in this case, so a fleet may bring an English tank from a greater distance, which e.g. from Plymouth may attempt to recapture London in its second movement. b) If the Germans drop their paratroop unit on Plymouth or Dover (air support can also be brought here) and capture the area, then during the Strategic Relocation phase (point 8) further units may be brought here and thus a bridgehead may be built. (In this case the cost of the action is at most 1 HPP (if there was an English unit defending the area), not the 5 HPP needed for an invasion.) This bridgehead naturally needs at least one German fleet to provide supply, and this fleet may do nothing else in the turn. If the English eliminate the bridgehead, even in the next round (that is, all ground units there, including the paratrooper, are lost), the German paratroop unit can still be replaced, because it was lost fighting together with German ground units. Remember: an area can be attacked only once – that is, an invasion by Germans cannot be carried out against Dover, which was captured by German paratroopers alone, for the purpose of having German tanks attack London further. If, however, a German invasion takes place against Dover with simultaneous paratrooper insertion (where these remove the defender's modifier), then the tanks may proceed against London. In the first version of the English invasion (the section 5.3 referred to here is not present in the retyped text), the deployment of English paratroopers reduces the Defence Value of the defending German infantry to the original DV = 2, from DV = 5.
12.1.2. (Long-range) Bombers
Movement points: the unit's air base; the base may be changed by up to three areas.
Their movement is similar to that of aircraft (4.3.), but their range is greater – their use, however, is different. In air battle they may only defend, but they may attack ground and naval units. Bombers may carry out Strategic Bombing: this is an attack that is aimed not at specific units but at ground targets. For this the bomber must fly from its base into the enemy country's original borders (conquered or colonial territories do not count) – and this causes an immediate loss of 1 HPP per bomber to the defender (even if the bomber(s) are lost there because of the enemy's air intervention (see 12.2.)). The attacker does not have to pay any extra HPP for Strategic Bombing (in this sense it is not a battle). Strategic Bombing cannot be carried out against France and the Soviet Union.
12.1.3. Submarines
Their movement is similar to that of fleets (4.4.), but their use is different. They may not transport any unit (air or ground), but may take part in naval battles. However, they have no Defence Modifier against invasion. Only Germany may build submarines, and their main use is attacks against English and US merchant ships. For this the submarines must sail out into the North Atlantic Ocean. Every surviving submarine immediately reduces England's economic strength by 1 HPP. Submarines may be attacked from the air only in one round (and this does not count as an action for the aircraft); submarines may not defend against this. Under the Lend-Lease Agreement (12.3.) relief shipments arrived in England and the Soviet Union from the USA. England also sent such shipments to the Soviet Union. These arrived at the port of Murmansk (not on the map). In the convoys, German submarines can cause serious damage. A convoy sent from the USA to England may be attacked in the North Atlantic Ocean; a shipment to the Soviet Union (from England or the USA) may be attacked in the Norwegian Sea. If such a shipment existed, its value is reduced by 2 HPP by every surviving submarine that attacks it.
12.1.4. Torpedo Boats
Their movement is similar to that of fleets (4.4.), but their main task is the protection of warships and merchant fleets against submarines. They may not transport any unit (air or ground), but may take part in naval battles: the same rules apply to them as to Fleets, except that against an invasion (or in a fortress) they have no Defence Modifier. In naval battles torpedo boats and submarines may also be removed as losses. The phases of action in the advanced variant are also the same as those described in point 2, but they are modified at two points. The first change allows the defender's air force and ships to intervene during the movement of the attacker's air force and ships:
12.2. Intervention
If the attacker's air force passes within the range of its aircraft near the base of the defender's aircraft not yet used for another attack or defence, then the defender may intervene: it may attack the attacking aircraft. Although this attack is initiated by the defender, the Defence Value of the defender's aircraft determines the probability of a hit (no HPP is paid for intervention). An air force intervention always takes place, so aircraft may be sent to the place of attack as well. Of course the attacker may also intervene in the defender's attempt at intervention if it still has aircraft not used for other purposes – the previous principles apply. The resulting chain of events is resolved backwards, and the surviving aircraft of the corresponding air battles may take part in the planned battle. Similar principles apply to the intervention of naval units – but whereas the intervention of air units always takes place, that of naval units does not; the method of deciding is as follows: the attacker indicates the planned route of the movement of its naval units (which it may then no longer change), and the defender decides with which units and where it wishes to intervene. The intervention of the defender's air force takes place automatically (although the attacker may prevent it by deploying further air force of its own). The intervention of naval units is successful if the defender rolls a die one higher than the distance between its base and the place of intervention. (So if the distance is two areas, intervention succeeds on a roll of 3, 4, 5 and 6.) Of course the attacker may likewise intervene in the defender's naval units' movement of this kind.
IMPORTANT: the same rules allow intervention in the enemy's air force and naval units' movement outside battle, when these units want to change their starting base.
EXAMPLE: The English invasion (the section 5.3 referred to here is not present in the retyped text) proceeds as follows, if 8 German submarines are in Brest, two German aircraft are in Paris, two English aircraft are in London and 4 English torpedo boats are in Liverpool: the four English fleets sail out from Plymouth, their route leading through the English Channel to Calais. The 8 German submarines try to intervene in the English Channel from Brest: the distance is 1 area, the die roll is 3 – so the intervention succeeds. The 4 English torpedo boats from Liverpool want to prevent this: the distance is 2 areas, the die roll is 4, so this also succeeds. Then the 2 German aircraft from Paris intervene in the fight, and the 2 English aircraft from London want to prevent this (these happen automatically, no die roll is needed). The outcome of the battle is determined backwards: first the two English aircraft (DV = 4) fight the two German aircraft (AV = 3). The die rolls: 1 and 5, and 2 and 6. One aircraft was lost on each side, the German aircraft withdraws and may attack or defend no further in this turn. Now the 8 German submarines (AV = 1) fight the 4 English torpedo boats (AV = 1), the two English fleets (AV = 3) and the remaining English aircraft (AV = 3), which, however, may attack only once. The die rolls: German (AV = 1) = 1,3,4,6,2,3,4,6 = 1 hit; English (AV = 1) = 3,4,4,5; (AV = 3) = 1,2,5 = 2 hits. In this round the Germans lost two submarines, the English one torpedo boat, and the aircraft returns to London (its turn has also ended). Continuing: Germans (AV = 1) = 2,5,5,6,3,6 = 0 hits; English (AV = 1) = 2,3,4 and (AV = 3) = 5,5 = 0 hits; etc. The final result: 5 German submarines sink, the others withdraw to Brest; the English lose 3 torpedo boats (the fourth returns to Liverpool) and the 4 fleets may continue their way to Calais for the site of the invasion. If the Liverpool torpedo boats had not been able to intervene in the action of the German submarines, the invasion would probably have failed.
IMPORTANT: it is not possible to intervene in the Strategic Relocation of units – it always succeeds, if its conditions are met.
12.3. Lend-Lease
On 11 March 1941 the American Congress adopted the so-called lend-lease law. Under it the USA lent war materials and weapons to England. This was extended to the Soviet Union after its German attack. The following rules simulate this: If France has already been captured by the Germans, the USA may send HPP aid to England from the spring turn of 1941 onwards. Both the USA and England may send HPP aid to the Soviet Union as soon as the Germans have attacked it. Aid sent on a single occasion may not be more than a quarter of the sending country's base HPP and counts towards the maximum HPP amount that may be spent. The sending of aid takes place in the Strategic Relocation phase: the HPP sent, or the empty tokens (if we do not send in the given turn), are placed face-down, half of each token, on the North Atlantic Ocean or the Norwegian Sea area respectively, depending on whether England or the Soviet Union is the aim of the aid. The aid arrives in the Allies' next New Unit Placement phase and may be spent immediately. If the convoy carrying the aid is attacked by German submarines, its value is reduced as described under 12.1.3. If the Germans capture the area of Vologda, no aid shipment may be sent to the Soviet Union. HPP aid sent by the USA in 1941 is deducted from the HPP available to it in 1942.
13. Special Rules of the Game Variants
The following are rules valid in both the basic and advanced variants that relate to the special circumstances of the war. The individual game variants refer back to these, and they all apply in the Total War (14.4). In the multiplayer version of Total War the historical alliances are not necessarily formed, but attacking a historical ally is forbidden (e.g. Italy may remain neutral throughout Total War, but may not attack Germany).
13.1. Cooperation
The degree of undisturbed cooperation between the individual Allies varied. The following rules describe this: a) There was much friction between the French and English troops. Accordingly, English and French troops may not carry out combined, joint attacks against enemy troops; they must attack and defend separately. English troops may not enter the territory of the Maginot Line until it has fallen. b) There is no such restriction between English and American troops, nor between German and Italian troops: these may defend and attack combined. In this case the players agree who leads the joint troops and who controls the jointly captured territories. If no such agreement is reached, they must attack and defend separately, as before. In this case too they must agree on the control of the captured territory: if this fails, the area is controlled by the army of greater strength; with equal strength, by the country that has more armies on the board. c) Soviet troops and English, American or French troops may not enter the same area.
13.2. Vichy France
After the fall of Paris and its unsuccessful recapture, all French forces are removed, and then the Vichy puppet state is formed (the Vichy and Lyon areas). Its colonial territories in Africa that remained under French control also belong to it. If the Allies wish to attack territory controlled by Vichy France, they must declare war on it first. Vichy France's units defend against any invasion by the Allies, but may not take part in any attack against them. If Paris or Vichy is captured by the Allies, the Vichy state ceases to exist immediately, all its units are removed, and its territories are again controlled by the Allies. Vichy's units (which are identical to the former French units: 2 infantry, 1 tank, 1 aircraft, 2 fleets) are placed and moved by the German player.
13.3. Soviet–German Rules
a) The Soviet Union may first attack Germany or the German satellite states (Finland, Hungary, Romania, Bulgaria) only in the autumn of 1941. It must then pay the 7 HPP great power declaration of war cost + the 2 HPP declaration of war cost if it attacks a satellite state. b) Germany may attack the Soviet Union at any time; for this it must pay the 7 HPP great power declaration of war cost. If this happens, the satellite states (Finland, Hungary, Romania and Bulgaria) immediately join (no further declaration of war is needed) and Germany immediately receives their HPP (this is the only case when a country's number of Military Production Points may increase before the Annual Economic Reckoning), and their troops are immediately placed on the board: they may move and attack. These troops may be removed as losses and replaced – the costs fall on Germany. c) The German attack on the Soviet Union was a surprise; accordingly, in the turn of the declaration of war, every German and allied unit may roll twice for the result of each attack against any Soviet unit. Winter caught the aggressors unprepared, so in the winter turn of the year in which the Soviet Union was attacked, the Germans and their allies may not launch attacks within the borders of the Soviet Union, and in the Soviet attacks launched against them in this winter turn, the Soviet units may roll twice for the result of the attack. d) Bulgaria may not take part in an attack against Soviet troops – if it has to defend against Soviet troops, it is immediately lost. e) If the Soviet Union attacks Germany, the satellite states (Finland, Hungary, Romania, Bulgaria) remain neutral and the German troops must withdraw in the following turn. If they do not do so, Germany must declare war and must engage the armed forces of the neutral country. f) Ploiești–Grozny rule: for the continuation of the war the oil in these areas was very important, so if the Allies capture Ploiești, then the Axis Powers may carry out only one attack per turn until it is recaptured. Conversely: if the Axis Powers capture the area of Grozny, then until it is recaptured the Soviet Union may carry out only one attack per turn.
13.4. Mediterranean Rules
a) Supply for England arriving through the Suez Canal and via Gibraltar was very important: therefore if the Axis Powers capture Gibraltar or Suez, England's base HPP immediately decreases by 5 HPP. If the Allies succeed in regaining the captured territory, then at the next Annual Economic Reckoning England regains its original base HPP. b) On Malta at most one infantry or tank unit, one fleet and one air unit may be present. c) In Africa at most three German units may be present. Each British fleet or air force stationed on Malta always reduces the number of fighting German units by one – so if the British garrison of Malta is complete, at most one of the three German units may attack.
13.5. America Enters the War
The USA may declare war on the Axis Powers in the spring of 1942; it must then pay 7 HPP. It does not have to launch an attack immediately. American units start from the map's USA territory, and first they must be moved to England in the Strategic Relocation phase. In this way at most four units may be transferred per turn from overseas to Europe out of the six units of Strategic Relocation that the USA is allowed. The overseas transfer does not require an escort fleet; for transfers from England, the rules of point 8 apply. Units that have been freshly relocated from the USA to England may be moved further, but they count towards the permitted number of relocations.) If England has fallen, American units can reach the theatre of war only as a result of an invasion; but once they have managed to establish a bridgehead, units may reach it from the USA by Strategic Relocation, though then their number may be at most two. No invasion may be attempted against the USA.
14. Game Variants
Gap in the source: the variant descriptions are given on the printed fact sheets (adatlapok) of the game, which are not included in the retyped rules text. The rulebook's own note for this section reads: "(In the Vassal module the game variants can be called up with the 'Játékvariánsok' (Game Variants) button.)" The starting positions, the forces of each country and the variant details, including the Sichelschnitt sample described in section 16, are therefore not reproduced here.
15. Tables
Table I. Defence Value Modifiers
| Unit | Terrain | Modifier |
|---|---|---|
| Infantry | Mountain, marsh | +1 |
| Tank | Behind a river | +1 |
| Attacker | Fortress | AV = 1 |
| Ground units | In a fortress, against an invasion | DV = 5 |
| Fleet | Against an invasion | DV = 5 |
Table II. Unit costs (HPP)
| Unit | Cost (HPP) | Other cost | Cost (HPP) |
|---|---|---|---|
| Infantry | 1 | Battle | 1 |
| Tank | 2 | Invasion | 5 |
| Aircraft | 3 | Declaration of war against a small country | 2 |
| Fleet | 6 | Declaration of war against a Great Power | 7 |
| Paratroopers | 2 | ||
| Bomber | 3 | ||
| Submarine |
Table III. Number and type of units of the small countries
| Country | Infantry | Tank | Aircraft | Fleet |
|---|---|---|---|---|
| Belgium | 1 | |||
| Denmark | 1 | |||
| Greece | 2 | |||
| Netherlands | 1 | |||
| Yugoslavia | 2 | |||
| Norway |
Note: the source table prints "Belgjum" and "Bornbázó" (bomber); these are typographical errors in the retyped copy and are corrected here.
16. Sample Game Excerpt
As a sample game, the first two turns of the basic variant of the Sichelschnitt operation (variant 14.11) are presented.
Gap in the source: the variant 14.11 is referred to here but its fact sheet is not part of the retyped text (see section 14). The starting positions are given below as printed.
Placement of units: France: Calais: 1 fleet, Brest: 1 fleet, La Rochelle: 1 fleet, Maginot Line: 4 infantry, 1 tank, 2 aircraft. England: Malta: 1 fleet, Gibraltar: 2 fleets, Dover: 1 fleet, 3 infantry, 2 tanks, 3 aircraft, Plymouth: 1 fleet, Manchester: 1 fleet. Germany: Kiel: 2 fleets, 2 tanks, Finland: 1 infantry, Hungary: 1 infantry, Romania: 1 infantry, Bulgaria: 1 infantry, Kraków: 2 tanks, 4 aircraft.
Autumn 1939
Germany: The turn begins with the Movement Outside Battle phase; within it the troops in the area of Kraków march through Breslau to Stuttgart. Then follows Placement of New Units: 10 infantry, 1 tank, 1 aircraft – cost 15 HPP (no more may be bought). Their placement: Kiel: 2 infantry, Essen: 8 infantry, 1 tank, 1 aircraft. Strategic Relocation: 1 infantry from Essen to Warsaw (compulsory, because no occupying unit remained in Poland), 2 tanks and 3 aircraft from Stuttgart to Essen (this uses up the maximum of 6 Strategic Relocations). The German autumn turn has ended.
France and England: In the Declarations of War, Movement and Battle phase France declares war on Belgium+Luxembourg (2 HPP), and 2 aircraft (which first move their base to Calais), 1 tank and 2 infantry move into this area (1 HPP), which is defended by 1 Belgian infantry. Result of the battle: France: rolls with 3 dice: (AV = 2) = 2, 3, 6 and 2 dice. (AV = 1) = 1, 1 = 3 hits; Belgium: 1 die (DV = 1) = 5 – so Belgium falls, the French suffer no losses, and the aircraft return to Calais. In this phase England passes (does not wish to move or act). Movement Outside Battle phase: France passes; England: 3 aircraft fly from Dover to Belgium, and the Dover fleet transports 2 tanks to Belgium (this fleet turns half face-down and may do nothing else in this turn).
Placement of New Units: France: 2 infantry (Calais), 1 tank (Maginot Line) – this is in total 4 HPP + 3 HPP (declaration + attack) = 7 HPP, leaving 17 – 7 = 10 HPP. England: 1 fleet (Edinburgh), 1 aircraft (Dover), 2 infantry (London), 1 tank (Dover), this is 13 HPP in total, leaving 12 HPP. Strategic Relocation: France: 2 infantry from Belgium to Calais, 1 tank from Belgium to the Maginot Line. England: 1 aircraft, 3 infantry from Dover to Belgium (for the latter 3 escort fleets are needed: the new fleet and the two unused fleets). This ends the autumn 1939 turn.
Winter 1939
Germany: Declarations of War, Movement and Battle:
a. Declaration of war on Denmark (2 HPP), 1 tank + 2 infantry enter Denmark from the area of Kiel (1 HPP), which is defended by 1 infantry. Result of the battle: Germany: dice rolls: 1 (AV = 3) = 4 and 2 (AV = 1) = 3, 2 = no hits – Denmark: 1 (DV = 1) = 4 = 0 hits; second round: Germany: 1 (AV = 3) = 2; 2 (AV = 1) = 2, 6 = 1 hit; Denmark: 1 (DV = 1) = 1 = 1 hit – Denmark falls, 1 German infantry is lost.
b. Declaration of war on the Netherlands (2 HPP), 1 tank (Kiel) + 2 infantry (Essen) enter the territory of the Netherlands (1 HPP), which is defended by 1 infantry. Result of the battle: Germany: dice rolls: 1 (AV = 3) = 3 and 2 (AV = 1) = 1, 3 = 2 hits – Netherlands: 1 (DV = 1) = 1 hit – the Netherlands falls, 1 German infantry is lost.
c. Attack on the English units in Belgium (1 HPP): 5 infantry (Essen 4 + 1), 5 aircraft (Essen + Stuttgart), 3 tanks (Essen) + 1 tank (Netherlands – this is its second attack, and with it it removes the English +1 Defence Modifier, which would have applied if the attack had come only from Essen across the river) enter Belgium. There 4 aircraft, 2 tanks and 3 infantry defend. Result of the battle: first the air battle: Germany: dice rolls: 5 (AV = 3) = 1, 1, 2, 2, 6 = 4 hits; England: 4 (DV = 4) = 2, 4, 5, 5 = 2 hits. As a result of the air battle the English lost all 4 of their aircraft, and the Germans have 3 aircraft left, which take part in the following land battle. Germany: 7 (AV = 3) = 2, 3, 4, 5, 6, 6, 1 and 5 (AV = 1) = 3, 3, 5, 6, 6 = 3 hits; England: 5 (DV = 2) = 1, 2, 3, 3, 5 = 2 hits. Germany loses 2 infantry, England loses 3 infantry. Second round: Germany: 7 (AV = 3) = 2, 3, 4, 4, 5, 6, 4 and 3 (AV = 1) = 2, 4, 5 = 2 hits – England: 2 (DV = 2) = 1, 2 = 2 hits. So the Germans captured Belgium, again losing 2 infantry, while the English lost the 2 remaining tanks. The 3 remaining German aircraft return to Essen, half face-down; in this turn they can do nothing further. The 3 German tanks could continue as a second attack against the French at Calais, but without air support that would be very risky.
Movement Outside Battle: – Placement of New Units: Germany has so far spent 7 HPP, buys 2 aircraft and 2 infantry (in total 8 HPP) – so no HPP remains unused. These are placed in Essen. Strategic Relocation: the 2 new aircraft + 2 new infantry from Essen to Belgium, 1 tank from Denmark likewise to Belgium.
France and England: Declarations of War, Movement and Battle: France with all its strength attacks the German units in Belgium from Calais and the Maginot Line (1 HPP). So 2 aircraft, 2 tanks and 6 infantry attack 2 aircraft (which are usable, because they are newly built, unlike the 3 aircraft resting in Essen), 5 tanks and 3 infantry. Result of the battle: France: 2 (AV = 2) = 2, 3 = 1 hit; Germany: 2 (DV = 4) = 1, 4 = 2 hits. So France has lost its aircraft, and Germany has 1 aircraft left, which takes part in the defence. Land battle: France: 2 (AV = 2) = 2, 6 and 6 (AV = 1) = 1, 2, 2, 3, 6, 6 = 2 hits; Germany: 1 (DV = 4) = 1 and 8 (DV = 2) = 2, 3, 4, 4, 4, 5, 2, 6 = 3 hits. France loses 3 infantry, Germany 2 infantry. Second round: France: 2 (AV = 2) = 1, 4 and 3 (AV = 1) = 1, 3, 4 = 2 hits; Germany: 1 (DV = 4) = 5 and 6 (DV = 2) = 1, 2, 3, 3, 4, 4 = 2 hits. France loses 2 infantry, Germany 1 infantry and 1 tank. Third round: France: 2 (AV = 2) = 1, 2 and 1 (AV = 1) = 3 = 2 hits; Germany: 1 (DV = 4) = 3 and 4 (DV = 2) = 1, 2, 2, 6 = 2 hits. Lost: 1 French infantry, 1 French tank and 2 German tanks. The last remaining French tank does not continue the attack, but withdraws to the Maginot Line. England turns the Dover fleet back, which can be used again, but does nothing else. Movement Outside Battle: – Placement of New Units: France: 3 infantry (Paris), 3 infantry + 1 tank (Maginot Line) – this is 8 HPP + 1 HPP (attack) = 9 HPP, leaving 1 HPP. England: 4 aircraft (Dover) = 12 HPP. Strategic Relocation: France: – England: 2 infantry from London to Calais, 1 tank from Dover to Calais (for these 3 escort fleets were needed) and 2 aircraft from Dover to Calais.
This ends the winter 1939 turn. The Annual Economic Reckoning follows, which the three countries carry out simultaneously. Germany: it has conquered Poland, Denmark, the Netherlands, Belgium+Luxembourg; so for 1940 its number of Military Production Points is: base HPP (for 1940) = 30 HPP + 4 HPP (Poland) + 2 HPP (Denmark) + 2 HPP (the Netherlands) + 4 HPP (Belgium+Luxembourg) = 42 HPP. France: its position is unchanged, it keeps its 17 HPP (the 1 remaining HPP is lost). England: its position is unchanged, it keeps its 25 HPP.
The game then continues with the spring 1940 turn. Germany's dilemma will be whether to attack the English units at Calais (for which it could use 2 tanks and 4 aircraft), the success of which would put it in a more favourable position for the summer attack against Paris – or to make up its losses and put everything into the great summer offensives (Calais – Paris, or the invasion of Norway).
Remarks: a. If there had been French units alongside the English units in Belgium during the German winter turn in 1939, the Germans could have attacked them separately, in any order they chose. b. Likewise, if there had been an English unit in Calais during the 1939 winter Allied turn, then after paying 1 HPP it could have joined the attack against the German units in Belgium, but only before or after the French attack – the forces may not be combined.
17. Optional Rules
These rules simulate the military-technical developments and diplomatic efforts that took place during the war, or could have taken place. Germany, England and the USA (after its entry into the war) may use these possibilities, but only in the game variant that sets out to play the complete war.
The procedure is as follows: after the Strategic Relocation of units, the country concerned decides whether it wishes to use this possibility. If so, it selects from the list below what it wishes to achieve (several goals may be chosen). The given goal is achieved if two dice rolls plus the modifiers reach or exceed 12. The right to roll for this costs 5 HPP. After each attempt this amount adds a cumulative +1 modifier to the dice rolls for that goal (so for example the third attempt has a modifier of +2 – and up to this point it has cost 15 HPP in total). England and the USA must carry out the developments separately: if one of the sides has succeeded, the other side may not obtain the result.
The options:
England and USA:
- Use of the radar principle: from then on torpedo boats and aircraft may roll twice against submarines.
- Deployment of air forces: the result is more effective bombing: the losses caused are 2 HPP per bomber instead of the previous 1 HPP.
- Longer-range bombers: the result is that bombers may now move 4 areas away.
- Turkey (if still neutral) joins the Allies, and its units may be rebuilt by England or the USA.
Germany:
- Development of long-range submarines: from then on the HPP losses caused by surviving submarines are doubled: that is, they cause 2 HPP losses to England in the North Atlantic Ocean, and 4 HPP losses in convoys.
- Spain joins the Axis Powers; its status is the same as that of the satellite states (13.3.b). If this happens and Vichy France was neutral, then Vichy France immediately joins the Allies.
- Turkey joins the Axis Powers; its status is the same as that of the satellite states (13.3.b). If Stalingrad has been captured by the Germans, it gives +1 (to the other modifiers) to the dice rolls.
- Vichy France joins the Axis Powers; its status is the same as that of the satellite states (13.3.b). This can happen at the earliest after the fall of Paris; it may occur 4 turns later.
Components
- 1 double-sided map / terrain sheet
- 2 sheets of punch-out combat tokens
- 17 game variant descriptions (= 3 + 5 + 4 + 5)
- 6 fact sheets
- 12 dice
- rulebook
Annex (Official 1986 Supplement, Melléklet)
The official 1986 annex contains a historical outline, a sample end-game, a rule supplement, an errata list and questions and answers. The historical outline (Történelmi vázlat, a chronology of 1929–1945 events with its literature reference) is background, not rules, and is omitted here. The remaining parts follow.
Sample End Game: 1945
The 1939-45 game reproduces the historical events well. The sample below describes a typical end game of the 1939-45: Total War (Teljes háború) variant, turns 23 and 24 (section 14.4). Naturally the scale of the playing area (the division of the map into areas) and of time (quarterly turns, and the countries moving one after another rather than simultaneously) produces certain inaccuracies. For example, the historical counterpart of the German counter-attack against the English and Americans in the sample, in the Ardennes, is Operation Herbstnebel, which began on 16 December 1944 but whose clean-up extended into January 1945. The siege of Budapest began on 26 December 1944, its liberation fell on 13 February 1945, but (as is well known) Hungary was liberated only on 4 April 1945. Likewise the liberation of Warsaw was completed only on 17 January 1945, etc. At the same time the game reproduces well how the Soviet armies encircled the German forces in East Prussia, or eliminated the German units at Kraków. The Soviet attack on Berlin and the western campaign of the Allies are also close to the actual events in detail. The military collapse of Germany is inevitable, rapid and very spectacular.
The following therefore describes the course of a typical end game of the 1939-45: Total War variant.
SAMPLE GAME EXCERPT
The sample describes the basic variant of the typical end game of the 14.4 1939-45: Total War variant. The sample begins with a description of the situation that arose in the game in spring 1945: France and Italy have dropped out of the war; the Soviet Union has liberated Bulgaria, Romania, Yugoslavia, Finland and Poland; the Western Allies keep all of Africa under their control, have captured much of Italy, liberated France, Greece, Albania and Belgium-Luxembourg; Germany still holds the Netherlands, Denmark, Norway and the following territories: the areas of Poznan and Kraków (Polish), Zagreb (Yugoslav), Budapest (Hungarian) and Milan and Genoa (Italian). We refrain from detailing the battles (examples can be found in section 16 of the rules) – only the final results are given. The description begins with the result of the Annual Economic Reckoning of turn 22. The order of play within the turns is: Germany, England, USA, Soviet Union.
Winter 1944 (turn 22) Annual Economic Reckoning: GERMANY: 62 HPP (base) + 2 HPP (Netherlands) + 2 HPP (Denmark) + 2 HPP (Norway) + 2 HPP (Hungary) = 70 HPP. ENGLAND: 44 HPP (base) + 1 HPP (Morocco) + 1 HPP (Algeria) + 1 HPP (Tunisia) + 1 HPP (Libya) + 1 HPP (Lebanon–Syria) + 2 HPP (Greece) + 1 HPP (Albania) + 4 HPP (Belgium–Luxembourg) + 8 HPP (Italy) = 64 HPP. USA: 80 HPP (base) + 9 HPP (France) = 89 HPP. SOVIET UNION: 62 HPP (base) + 2 HPP (Bulgaria) + 3 HPP (Romania) + 4 HPP (Yugoslavia) + 2 HPP (Finland) + 4 HPP (Poland) = 77 HPP.
THE POSITION OF THE UNITS: GERMANY: Denmark: 1 infantry; Netherlands: 2 infantry; Essen: 3 infantry + 4 tanks; Stuttgart: 3 infantry + 4 tanks; Milan 1 infantry; Genoa: 1 infantry; Berlin: 1 infantry + 1 tank + 2 aircraft; Leipzig: 2 aircraft; Zagreb: 1 infantry; Budapest: 1 infantry + 1 tank; Vienna: 2 infantry; Poznan: 3 infantry + 2 tanks; Kraków: 3 infantry + 2 tanks; Breslau: 1 infantry; Kolberg: 2 infantry; Slovakia: 1 infantry; East Prussia: 1 infantry + 1 tank. GERMANY could not build two aircraft in the winter 1944 turn, because it did not have enough HPP left. ENGLAND: Belgium+Luxembourg: 2 infantry + 1 tank + 2 aircraft; Maginot Line: 2 infantry + 2 tanks + 2 aircraft; Lyon: 1 infantry; Marseille: 1 infantry; Dover: 5 fleets; Gibraltar: 4 fleets; Pescara: 1 infantry + 1 tank + 1 aircraft; Livorno: 1 infantry + 1 tank + 1 aircraft. USA: Belgium–Luxembourg: 1 infantry + 1 tank + 2 aircraft; Maginot Line: 3 infantry + 4 tanks + 2 aircraft; Lyon: 1 infantry; Marseille: 1 infantry; Plymouth: 5 fleets; Gibraltar: 2 fleets; Pescara: 1 infantry + 1 aircraft; Livorno: 1 infantry + 1 aircraft. SOVIET UNION: Leningrad: 3 fleets; Riga: 3 infantry + 1 aircraft; Kulm: 3 infantry + 4 tanks + 1 aircraft; Warsaw: 5 infantry + 4 tanks + 1 aircraft; Lvov: 1 infantry + 1 tank; Debrecen: 1 infantry + 1 tank; Belgrade: 2 infantry; Sarajevo: 1 infantry; Bucharest: 1 infantry.
SPRING 1945 (turn 23)
GERMANY: attacks the Maginot Line (which no longer counts as a fortress because it was already captured at the start of the game). For the attack the aircraft fly from Berlin and Leipzig over to Stuttgart, and from there take part in the fighting. All units from the areas of Essen and Stuttgart take part in the attack, so on the German side 6 infantry + 8 tanks + 4 aircraft attack the armies of the English (made up of 2 infantry + 2 tanks + 1 aircraft) and the Americans (made up of 3 infantry + 4 tanks + 2 aircraft). THE ALLIES receive a +1 modifier for defence, because they are behind a river. The German attack fails; the two surviving German tanks withdraw to Stuttgart. In the Maginot Line one American tank and one American aircraft remain, the rest are lost, that is, removed. GERMANY may carry out no further attacks in this turn, because it has lost Ploiești (13.3.f). New Unit Placement: 6 infantry + 6 tanks + 5 aircraft, which in total costs 34 HPP (including the battle cost) – that is, 1 aircraft again cannot be built because of a lack of HPP. These are placed in Berlin (1 aircraft), Kiel (2 infantry), Leipzig (2 tanks), Breslau (1 tank) and Essen (2 infantry + 1 tank + 2 aircraft), and further Strategic Relocation: to Poznan (1 infantry + 1 tank + 1 aircraft) and Kraków (1 infantry + 1 tank + 1 aircraft). GERMANY has 36 HPP left in total. This ends the German spring turn.
THE ALLIES:
ENGLAND and USA: launch an attack against Essen; all units from the areas of Belgium–Luxembourg and the Maginot Line take part. So from the English side 2 infantry + 1 tank + 2 aircraft, and from the American side 1 infantry + 2 tanks + 3 aircraft attack the German units of 2 infantry + 1 tank + 2 aircraft. The outcome of the battle is clear, although now the Germans receive a +1 modifier because they defend behind a river. THE ALLIES win, the German units are removed; England keeps 1 infantry + 1 tank + 2 aircraft, the Americans 1 infantry + 2 tanks + 2 aircraft. The tanks move on against Stuttgart, where 2 German tanks defend. They win here too, losing 1 English tank. On the Mediterranean front they launch an attack against Genoa and Milan. In the former the units of Lyon and Marseille take part, with the loss of 1 English infantry; in the latter the units of Livorno and Pescara take part, and capture Milan without loss. With this the western Allies' sequence of attacks ends. SOVIET UNION: the turn begins with the attack against Budapest. In it take part 1 infantry + 1 tank from Debrecen, 1 tank from Lvov, and 1 infantry unit from Belgrade, against the German 1 tank + 1 infantry. The Germans lose, but 2 Soviet infantry are also lost there. The tank from Debrecen continues its journey and, as its second attack, captures Slovakia. The strongest attack is directed against Poznan; in it take part the units from Warsaw and Kulm, as well as the 1 aircraft that flew from Riga to Warsaw: in total 8 infantry + 8 tanks + 3 aircraft. The Germans, with 4 infantry + 2 tanks + 1 aircraft, defend and have a +1 modifier because of the river. Nevertheless they have no chance; the Soviet losses: 1 aircraft and 2 infantry. The tanks immediately continue the attack: 3 tanks against Breslau, 5 tanks against Kolberg; at the cost of 1 tank loss each they capture these areas. Movement Outside Battle: 1 infantry each moves from Bucharest to Belgrade, from Belgrade to Budapest (this is not the same as the previous one!), from Lvov to Debrecen, and 3 infantry from Riga to Kulm.
New Unit Placement
ENGLAND: rebuilds its lost units, which are the following: 4 infantry + 3 tanks + 1 aircraft; the costs together with the battle costs: 17 HPP, leaving 47 HPP in total. Of the new units 2 infantry + 1 aircraft are placed at Dover, the others are placed by Strategic Relocation. USA: likewise replaces its losses, which are 3 infantry + 3 tanks + 2 aircraft: these cost 19 HPP together with the battle costs, leaving 70 HPP in total. Of these, 1 infantry + 1 tank + 2 aircraft remain in the USA, as there are not enough Strategic Relocation options to bring them over. The rest are transferred to Europe. SOVIET UNION: the replacement of losses (4 infantry + 2 tanks + 1 aircraft) and the battle costs total 16 HPP, leaving 61 HPP in total. Of these, 2 infantry are placed in Lvov, 1 aircraft in Minsk; the rest are relocated strategically.
Strategic Relocation of Units:
ENGLAND: 1 infantry + 1 tank to Belgium–Luxembourg, 1 infantry + 2 tanks to Essen. USA: 2 infantry from Genoa to Stuttgart, 2 tanks from the USA via England likewise to Stuttgart. SOVIET UNION: 2 infantry to Kolberg, 2 tanks to Breslau. Note: in East Prussia the German 1 infantry + 1 tank unit, and in Kraków 4 infantry + 3 tanks + 1 aircraft were encircled. These cannot fight in the next turn, because they have no supply (point 9). With this the 23rd turn, spring 1945, ends.
SUMMER 1945 (turn 24)
GERMANY: its position does not permit it to attack; it must devote all its strength to making good the losses of the previous turn. Therefore it begins its turn immediately with New Unit Placement. The cost of partially replacing the losses is 34 HPP, which includes the loss of 2 HPP because of the loss of Hungary. The new units: 13 infantry + 8 tanks + 1 aircraft; now there is not enough HPP left to rebuild 2 aircraft. The Germans place these units for the defence of Berlin and its environs. So in Berlin 8 infantry + 5 tanks + 2 aircraft, in Kiel 5 infantry + 2 tanks, and in Leipzig 3 infantry + 4 tanks + 1 aircraft await the final assault. The German units in Kraków and East Prussia are removed. GERMANY has 2 HPP left in total.
THE ALLIES:
ENGLAND and USA: launch an attack from Essen against Kiel. In it the English take part with 2 infantry + 2 tanks + 2 aircraft, the Americans with 1 infantry. The successful attack costs: 2 English infantry and 1 English tank; 1 English tank and 1 American infantry move into the area of Kiel. From Milan 1 English and 1 American aircraft fly to Stuttgart, from where they carry out an air strike against the 2 German aircraft in Berlin. In this battle every participant is removed. The Americans also launch an attack from the area of Stuttgart (2 infantry and 4 tanks + 2 American aircraft from Essen) against Leipzig, where the Germans defend with 3 infantry + 4 tanks + 1 aircraft. The attack fails: 1 American tank withdraws, 2 German tanks remain – the other units are lost in the battle. SOVIET UNION: from the area of Breslau 4 tanks set out against Leipzig, where 2 German tanks defend. The Soviet tank in Slovakia also joins this attack. The attack succeeds: 1 Soviet tank (the one from Slovakia) is the loss. The remaining 4 tanks continue their way against Berlin and thereby remove the +1 modifier of the defending German units. The Soviet force that joins this attack from Kolberg – made up of 2 infantry + 8 tanks + 3 aircraft – is also added. Opposed to them stands the German army corresponding to 8 infantry + 5 tanks. The result of the battle: the German force is annihilated, 3 Soviet tanks move into Berlin, while the 2 surviving Soviet aircraft return to Poznan.
The game ends at this point: no German unit is in a position to launch an attack to recapture Berlin (it does not even reach it, and it has no supply from a capital either). The balance of forces has also shifted completely in favour of the Soviet Union and its allies. This is well illustrated by the position after the replacement of losses. ENGLAND: the replacement of losses (2 infantry, 1 tank + 2 aircraft) and the battle costs: 13 HPP, leaving 34 HPP. USA: the replacement of losses (2 infantry + 3 tanks + 1 aircraft) and the battle costs: 14 HPP, leaving 56 HPP. SOVIET UNION: the replacement of losses (2 infantry + 6 tanks + 1 aircraft) and the battle costs: 13 HPP, leaving 42 HPP. Thus the strength of the Allies is fully restored, while Germany has only 2 HPP left, and the following units: 2 infantry in Vienna, 2 infantry in the Netherlands, 1 infantry in Denmark, 1 infantry in Zagreb. GERMANY ALWAYS LOSES THE WAR, BUT CAN WIN THE GAME, in the event that it loses the war after the summer of 1945.
Rule Supplement: Partisan Rule
Considerable partisan activity took place in the Soviet Union and in other parts of Europe, which made German supply difficult and cut it off. The following rule corresponds to this: At the start of every German turn, full German supply in the territory of the Soviet Union requires an unbroken chain of German and allied-of-Germany units (that is, a continuous series of areas where such units are located). If this chain is broken anywhere (for example as the result of a Soviet attack), but there are areas from which supply can be obtained, then in the Soviet Union in that turn the Germans may carry out one and only one attack. Likewise, at the end of every German turn at least one German or allied unit must be present in the territory of Poland, France, Yugoslavia and Greece (the latter after their capture), otherwise these countries become neutral.
Errata (Sajtóhibák, javítások jegyzéke)
4.1 The base HPP of the Soviet Union is correctly:
| 1939 | 1940 | 1941 | 1942 | 1943 | 1944 | 1945 | |
|---|---|---|---|---|---|---|---|
| Base HPP | 18 | 23 | 30 | 40 | 52 | 62 | 62 |
4.2 According to the placement restrictions of the Sichelschnitt operation, one English fleet must be placed at Malta, but Malta does not appear on the Sichelschnitt operation map. This unit is set aside, since it cannot change its location, and does not take part in this game. The Bagration and Overlord operations can also be played on the Sichelschnitt map (somewhat more comfortably because of the larger areas), but if necessary the areas no longer shown on the map must be temporarily used.
4.3 The individual areas are bounded by black lines, in some cases by red national borders and blue rivers or green coastlines. Denmark is a special case, because it consists of one land area and an unnamed stretch of sea. On the latter the movement of ships is controlled by the holder of Denmark. The name of the area opposite Gibraltar was left out: it is Spanish Morocco, which belongs to Spain; and the name of the river to the right of Berlin, which is the Oder, was left out. The name of Marseille is wrong on the map. The accepted name of the English Channel on the Continent is La Manche. The Kiel Canal does not cut the area of Kiel in two; it extends as far as the Danish border.
4.4 The tenth English fleet shown among the tokens can be built from 1942 onwards.
4.5 The eastern edge of the table always provides supply to Soviet units, but only through land.
4.6 HPP aid sent by the USA or England under the Lend-Lease Agreement (12.3) is deducted from the number of Strategic Relocations available to the sending country. (Note from the transcriber: the body of section 12.3 says that USA HPP aid sent in 1941 is deducted from the HPP available in 1942. The errata above instead deducts lend-lease aid from the sender's Strategic Relocations. Both statements are reproduced as printed; players should apply the errata as the official correction and treat the body text as superseded where they differ.)
Questions and Answers on the Rules (Kédezz-felelek a játékszabályról)
Basic variant
5.1 Question: How are the Hadi Produkciós Pontok (HPP) of the Great Powers, e.g. Italy, to be counted? What is the situation with the points of Libya and Albania? Answer: In the HPP calculation the value given on the fact sheet is the starting figure; points from one's own territories do not add to it. However, if an opponent has captured them, these points are deducted from the starting HPP. E.g. in 1943 Italy starts with 18 HPP, but if it has lost Libya, then only with 17 HPP. If, for example, in this year England captures Italy, it still receives the rounded-up value of Italy's 1939 HPP (that is, 8 HPP), if it has not captured Libya and Albania. England also does not get more HPP for Italy even if it earlier captured e.g. Libya – it gets +1 HPP for this only in the Annual Economic Reckoning following the capture of Libya, as long as Italy has not been captured.
5.2 Question: If Italian and German units take part together in an attack, who pays the costs of the attack? Answer: Both pay; the same applies if English and American units attack jointly – England and the USA both pay the cost of the joint attack.
5.3 Question: How is the double roll in point 13.3.c to be understood, for the results of the attacks? Answer: The sum of the hits of the two rolls gives the number of units to be removed.
5.4 Question: What happens to the units in fortresses if the enemy cuts off the supply of the fortresses? Answer: Units in a fortress (but only those) always have supply. However, new units may be placed in them only if they have an external supply source – so if the opponent has cut these off, no units may be built in the fortress.
5.5 Question: Does occupying an empty (undefended) area, or moving into it, count as an attack? Answer: No, except for an invasion of an empty area, for which the 5 HPP invasion cost must always be paid. However, an area may be attacked only once during a player's turn.
5.6 Question: Does the actual return of fleets to their base count towards the movement points of the ships? Answer: No. Ships must always return to their starting base, but this is not charged to movement points, and in the advanced variant no intervention may then be carried out.
5.7 Question: May a fleet attack an enemy fleet at its base? Answer: No, only in an invasion. However, it may be attacked by aircraft, but then the fleet's Defence Value is 5.
5.8 Question: May aircraft attack land units? Answer: Yes, but only aircraft cannot capture the attacked area.
Advanced variant
5.9 Question: What is the difference between transport by fleet and Strategic Relocation? Answer: At most two units may be transported by one fleet in a turn; those units may not move either before embarkation or after landing, and may not change ships; but the units may be picked up and set down anywhere within the fleet's 6 movement points. A fleet carrying out transport may not fight in battle; if intervention takes place against it and there is no escort fleet beside it, it is automatically sunk together with its cargo. In an invasion the units to be transported must be at the base of the transporting fleets at the start. In Strategic Relocation at most one unit/fleet may be transferred within 6 movement points; intervention cannot be made against it – but the unit to be transferred must be able to reach the base of the fleet (so, for example, the English fleet at Gibraltar cannot be used directly for the Strategic Relocation of an English unit from England to Africa).
5.10 Question: In case of intervention, who is the attacker and who the defender? When may one withdraw? Answer: Intervention is possible during any movement of ships and aircraft, except Strategic Relocation and withdrawal. However, the aircraft or ships located in one area may take part only in the same action: so, for example, from among the English ships in Hull any number may take part in intervention against the submarines heading for the Norwegian Sea, and a single die roll decides for all the ships setting out from there whether the intervention succeeded (if the intervention took place in the North Sea, it succeeds on a roll of 2, 3, 4, 5 or 6) – but the ships remaining behind may no longer take part in another intervention. Units intervening in the same area fight together, even if they came from different areas. Units that were attacked first may not intervene against the units attacking them. The player whose turn it is counts as the attacker; all the other defenders count as the defender. Either side may withdraw after the first exchange of fire (or later).
5.11 Question: May intervention be made against the movement of paratroopers? Answer: Yes, paratroopers in the air have an Attack and Defence Value of 1, like bombers. If a paratrooper unit is lost as a result of such intervention, it may be rebuilt.
5.12 Question: How does an air battle against submarines take place, if the submarines cannot defend? Answer: The opponent's air force that reaches the submarines heading for the North Atlantic Ocean or the Norwegian Sea (in the battle phase!) has one free attack (it does not count as an action and no HPP is paid for it), but these submarines may not be attacked from the air any more afterwards. If an air intervention is made against a convoy of submarines and fleets (in case of invasion, troop transport or change of base), then the battle takes place in the usual way, that is, the submarines also defend: there is no free attack against them.
(End of the official 1986 annex.)