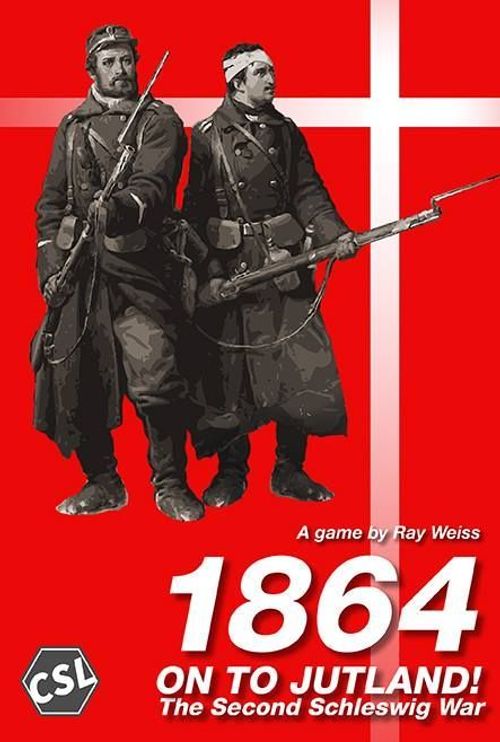
1864: On To Jutland!
1864: On To Jutland! Rulebook
Table of Contents
Table of Contents
1.0 Introduction
1864 simulates the Second Schleswig War pitting Austria and Prussia ("Germans") against Denmark. The First Schleswig War had been fought once several years before, with a Danish victory thanks in part to disunity amongst the various German allies. The Second Schleswig War would have a huge impact on the unification of Germany several years later, but also served as a practice run for the numerous Prussian victories during the 1860s and 1870s. While the rest of the world was focused on the massive American Civil War in its third year by now, Prussia began perfecting their Auftragstaktik (Mission-Tactics) that would ultimately lead to the German development of squad-tactics in 1918, tactics that would persist throughout WW2. 1864 provides a simple, quick-playing simulation of this war so wargamers may finally see this war played out with hexes and counters.
Abbreviations and Glossary
| Term | Meaning |
|---|---|
| 1d10 | Die roll with one 10-sided die (all die rolls are 1d10), and a '0' counts as a zero. |
| AAC | Advance after Combat (see 7.7) |
| AFT | Artillery Fire Table (see 7.1) |
| Dr | Defender Retreat (see 7.6) |
| EZOC | Enemy Zone of Control (see 3.3) |
| German | Prussians and Austrians |
| LOC | Line of Communications (see 8.1) |
| MA | Movement Allowance (see 6.0) |
| MP | Movement Points (see 3.1) |
| NAC | Naval Operations Check (see 6.2) |
| SL | Step Loss (see 3.2.1) |
2.0 Scale
Each Strength Point (SP) is equal to roughly 1000 rifles, 300 horses, or 6 guns. Each hex is roughly 2.5 miles. Each turn covers 1 month of maneuvers. Headquarters represent planning capacity and the ability to improve cooperation.
3.0 Important Concepts
The following concepts are all essential to understanding how to play and have fun playing 1864. Some of these things will seem familiar for wargamers, but its recommended that both newbies and grognards review this chapter carefully. These items will also be noted in the appropriate charts and/or rules. They are highlighted here to emphasize items that are new, different, or particularly important to playing 1864.
3.1 Terrain
Terrain is always taken into account when moving or during combat, and can encompass both hexes and hexsides. The following types of terrain are present in 1864:
- Clear: Costs 1 Movement Point (MP). No combat effects.
- Woods: Costs 2 MP. Attacking cavalry multiply SP by 0.5.
- Marsh: Costs 3 MP. Attacking infantry or cavalry multiply SP by 0.75.
- Minor Rivers/Bridge Hexsides: Costs +1 MP. Defending infantry multiply SP by 1.5.
- Major River Hexside: Costs +1 MP for Danish or Swedish units. German units must spend all their MA adjacent to a Major River hexside and roll 1d10, consulting the River Crossing Chart on the Map. Any attack across an unbridged Major River hexside is resolved 2 column shifts left on the CRT.
- Fortress Hexsides: Fortress hexsides have no effect on movement. Only Danish infantry units can benefit from defending fortress hexsides. If attacked solely through fortress hexsides, defending units double their SP, and may also substitute up to 2 retreat results during bombardments or assault by eliminating a full strength (or two half-strength) infantry or cavalry unit. A fortress is destroyed once enemy units enter the hex covered by the fortress hexside.
- Towns: Towns use the other terrain in the hex for movement costs. Infantry units defending in town hex multiply SP by 1.5. Units defending in a town hex during bombardment or assault may substitute 1 retreat result by suffering a step loss on an infantry or cavalry unit.
- Roads: When moving along contiguous road hexes, units only pay 0.5 MP per hex. Roads negate the movement cost of the in-hex terrain.
- Rails: When moving along contiguous rail hexes, units only pay 1 MP per hex. Rails negate the movement cost of the in-hex terrain.
During an assault, the effects of in-hex terrain are not cumulative, such as a town in a woods hex. Use the single best modifier for the defender. The effects of hex terrain and hexside terrain are cumulative. Meaning that, for example, for an assault across a fortress hexside into a town hex, a Danish defender would multiply the SP of any infantry by 3 (by 2 for the fortress hexside multiplied by 1.5 for the town hex) and the SP of any other units by 2 (for the fortress hexside only), plus the defender could substitute 3 retreat results by suffering step losses.
3.2 Units
1864 has six basic unit types; infantry, cavalry, artillery (including a few horse-artillery units), replacement units, headquarters and depots. Each unit box is color-coded by division. Units feature a Strength Point (SP) and its organizational information which is important for stacking and use of headquarters (see 6.1). The main color of a unit counter indicates its nationality which is important for using the Combat Result Table (CRT) in terms of determining which nationality row to use.
Replacement units and depots have an SP value of 0. They may not enter an EZOC and are immediately removed from the map if they are alone in a hex and an enemy moves adjacent. They do not project a ZOC.
3.2.1 Steps
All units of brigade size or larger have 2 steps. On the front side, a unit is at full strength. On the backside, it is at half-strength. Units are Routed after the third step loss. Place Routed units in a pile off map. All steps inside of a headquarters unit must be eliminated before the headquarters itself can be eliminated.
3.3 Zones of Control
A Zone of Control (ZOC) refers to the 6 hexes adjacent to a hex occupied by a combat unit. During the Movement Phase, once a friendly unit moves into an Enemy ZOC (EZOC), the friendly unit must stop moving. All units except for an empty headquarters, artillery, replacements and depots project a Zone of Control. ZOCs do not extend through Major River hexsides, even if bridged. Units that retreat into an EZOC suffer a step loss. An EZOC is negated by the presence of a friendly unit for supply purposes only, otherwise the presence of a friendly unit has no effect on an EZOC. A ZOC does not extend into a Fortress but does project out of one (e.g. A Danish unit behind a Fortress hexside projects its ZOC into the hexes across the Fortress hexside. The presence of an enemy ZOC has no effect if the enemy unit projecting it is behind a fortress hexside.)
3.4 Stacking
Two units, only one of which may be infantry, may stack in one hex, regardless of division. Units of the same division (unit box color) may stack up to 3 units, up to 2 of which may be infantry. Division headquarters may contain up to 5 units of the same division, up to 3 of which may be infantry. Corps headquarters may contain 8 units from any division, up to 4 of which may be infantry. No unit may be stacked with a headquarters, only inside of one (see 6.1). A single unit or a stack of units in a hex are sometimes called a force. It costs +1 MP to move into a hex containing force, even if only one unit. One Prussian and one Austrian unit may stack together, but only one of which may be infantry. Replacement units do not count towards stacking limits, but still must spend +1 MP to enter a hex with another unit.
3.5 Disruption
Disruption is a negative status that halves SP when attacking (round down), before any terrain effects. Disruption occurs whenever a force retreats 2 hexes as a result of combat or (German only) failing to cross a major river. If a Disrupted unit becomes Disrupted again it instead become Demoralized. Units remove Disruption if in Supply during their own Supply & Recovery Phase (see 8.5).
3.6 Demoralization
Demoralized units may not attack or move towards enemy units and halve their SP (round down) while defending. Demoralization occurs whenever a force retreats 3 hexes as a result of combat or if a Disrupted force becomes Disrupted again. Demoralized units that become Disrupted stay Demoralized. Demoralized units that become Demoralized again instead are Routed. Units remove Demoralization if in Supply during their own Supply & Recovery Phase (see 8.5).
3.7 Routed
Units that are Routed in combat are kept in a pile off map and may only return to play through the use of replacement units stacked with the appropriate headquarters. The enemy player earns 1 VP for each Routed friendly unit. Note that replacing a Routed unit will not negate the VP earned from Routing that unit.
3.8 Rounding Rule
Whenever left with a numerical fraction after applying all relevant modifiers during combat always round down the fraction.
(The manual's Table of Contents lists this section as "Rounding Table"; the heading in the body of the manual reads "Rounding Rule", and that heading is used here.)
3.9 Weather
Players may choose to either use historic weather as indicated on the game map, or use the Variable Weather rules given here. If using the Variable Weather rule, a d10 is rolled by the German player at the start of each Game Turn using the Weather Table on the map to determine the weather for the turn.
3.9.1 Clear
Clear weather has no effect on any aspects of the game.
3.9.2 Mud
Mud adds a +1-movement cost to all hexes that are off road/rail. Both the German and Danish sides are affected by Mud, except when using road or rail.
3.9.3 Snow
Snow only effects the German player. It adds +1 MP to the movement cost for each hex entered, except when using road or rail, and reduces the LOC (see 8.1) to 2 hexes.
3.10 Swedish Intervention (Optional)
Designer's Note: While I was unable to find definitive information on the organization of Swedish forces in the mid-1860s, as they had not been involved in any major campaigns, they had prepared to mobilize an expeditionary force to assist Denmark but the effort was never successfully brought to fruition. The question of Swedish intervention was never completely outside the realm of possibility. While Sweden wisely decided it wasn't worth their trouble getting into an argument with an upstart Prussia and cohort Austria, it makes for interesting wargaming so at the player's discretion, players may use these rules optionally. The Order of Battle for Swedish forces is representative of what could possibly have been deployed given the historical timeline.
After each full game turn starting on turn 5, a check is made for Swedish Intervention table by rolling 1d10 and cross referencing the current VP score. The roll must be less than or equal to the listed number in order for the Swedish to successfully intervene. Swedish units enter the map on any Danish-controlled coastal town hexes and may temporarily violate stacking limits until the movement phase. Danish and Swedish units may not stack, nor cooperate on attacks together. If Danish and Swedish units are under circumstances where they must stack as a result of combat or retreat, the stacked unit is instead Routed.
| VP score | Swedish Intervention roll (1d10) |
|---|---|
| 1-4 VP | No Swedish Intervention Possible |
| 5-9 VP | 0 |
| 10-14 VP | 1 |
| 15-16 VP | 2 |
| 17-19 VP | 3 |
4.0 Sequence of Play
- Weather Determination
- German Turn
- Replacement Phase
- Movement Phase
- Assault Phase
- Supply & Recovery Phase
- Danish Turn
- Replacement Phase
- Movement Phase
- Combat Phase
- Supply & Recovery Phase
Advance the Game Turn Marker.
5.0 Replacement Phase
5.1 Replacement Unit Entry
The phasing player rolls for replacement units during this phase, but this phase is always skipped on the first turn of the game. Roll 1d10 and consult the following table below to determine the number of replacement units to enter. Each replacement unit represents 1 step of replacements. Austrian replacements are always received on the following turn's Replacement Unit Entry Phase. German Replacements are placed on any hexes on the south/southeast board edge. Danish/Swedish Replacements may be placed on friendly controlled town hexes.
Danish
| Die roll (1d10) | Replacement units |
|---|---|
| 0 | 4 |
| 1-3 | 3 |
| 4-5 | 2 |
| 6-7 | 1 |
| 8-9 | 0 |
Prussian
| Die roll (1d10) | Replacement units |
|---|---|
| 0-1 | 4 |
| 2-4 | 3 |
| 5-6 | 2 |
| 7-8 | 1 |
| 9 | 0 |
Austrian
| Die roll (1d10) | Replacement units |
|---|---|
| 0 | 3 |
| 1-2 | 2 |
| 3-5 | 1 |
| 6-9 | 0 |
5.2 Rebuilding
A replacement unit that is stacked with a half-strength unit or inside of a headquarters may be used to either bring a half-strength unit up to full strength, or rebuild a Routed unit at half strength. The Routed unit will re-enter on the following Replacement Phase, placed in the same way as new replacement units as outlined in 5.1. Replacements are not necessary to rebuild Depot units; if a depot unit is Routed it re-enters the map on the next turn in the same way as new replacement units.
5.3 Ship Generation
During the Danish Replacement Phase, after rolling for replacement units, the Danish player must roll for the number of ship units they receive that turn. The number of Danish ships is equal to the result of rolling 1d10 and dividing the result by 2 (round up). If a 0 is rolled, no ships are awarded for the turn. These ship units are used for Naval Operations during the Movement or Assault Phases. If the Swedes have intervened, they receive Swedish Ship units using the same procedure, although Swedish and Danish unit may not perform functions together, meaning, for example, a Swedish ship could not transport a Danish unit. Design note, the Danish navy was a bit of a mess during this war, there would have been little to no ability to cooperate with a foreign power, even a friendly one.
6.0 Movement
Units have a Movement Allowance (MA) of Movement Points (MP) based on their type. Infantry, artillery and depots have an MA of 4, and cavalry, headquarters and replacement units have an MA of 6 (exception: cavalry with 1 SP have an MA of 7). A force moves from hex to hex, paying the MP cost of the terrain in each hex entered, up to the total of its movement allowance. It costs +1 MP to move into a friendly occupied hex. A stack of units that begins movement together moves as fast as its slowest unit. An advantage of headquarters is that they allow all contained units to move with 6 MA. Units must stop moving if they move into an EZOC. Players may move any or all of their on-map units during the Movement Phase. The Danish player may also conduct Naval Operations with Danish ships (and Swedish if they have intervened) during this phase.
6.1 Headquarters and Units
Headquarters represent centers of command and control, and allow for greater stacking than normal. Headquarters have no SP; instead their SP is determined by the units contained within. No units may stack with a headquarters unit and units inside of a headquarters have separate stacking limits (see 3.4). On the player aids are Headquarters Boxes for each division/corps; these serve as holding boxes that facilitate stacking and fog of war. At no point may either player inspect the contents of each other's Headquarters Boxes except during combat.
Units must still pay an additional +1 MP when entering a hex with a headquarters. If the units remain in the hex then they will be removed from the map and placed on the Headquarters Boxes on the player aid as the units are now inside the headquarters. Units leaving a headquarters do not need to spend +1 MP to exit the headquarters, but must leave the hex (no stacking allowed with a headquarters).
If a unit joins a headquarters and the headquarters unit has not moved yet that turn then if the headquarters is moved its MA is temporarily reduced by the number of MP already spent by the infantry unit joining the headquarters (the largest amount of MP spent if more than one unit joined). For example, if an infantry unit in an adjacent hex spends 2 MP to move into the headquarters' hex, the headquarters will be able to move but with only 4 MA that turn (6-2). Headquarters can drop off units along its movement path but such units can move no further that turn.
When Routed, a headquarters is placed 2 turns ahead on the turn track and enters as a reinforcement on that turn, placed in the same way as replacement units as outlined in 5.1. Reinforcements move normally during their own movement phase.
6.2 Naval Operations
Both Swedish and Danish sides may attempt to conduct Naval Operations during the Movement or Combat Phases. A Naval Operations Check (NAC) is needed to see if a ship unit may be used for Naval Operations. To make a NAC, roll 1d10; if the result is 0-2, the NAC is successful. Otherwise the ship unit attempting the NAC is discarded. After completion of the Naval Operation, the ship is discarded.
6.2.1 Naval Transport
Units in a coastal Town hex during the Movement phase may attempt to use Naval Transport by spending 2 MP and making an NAC granted they have a Ship unit available.
6.2.2 Naval Support
During either player's Combat Phase, if an assault is taking place within 2 hexes of a coastal hex, the Danish player may make a NAC with an available Ship unit. If successful, the combat is shifted 1 Column in the Danish Player's Favor. Only 1 Ship may be used for each combat eligible for Naval Support, meaning each assault may not receive more than 1 column shift of Naval Support regardless of the number of ship units available.
6.2.3 Danish/Swedish Naval Evacuation and Redeployment
Whenever enemy units move into a Danish (or Swedish) ZOC while they are in a coastal town hexside, town hex or fortress hexside adjacent to a major river, the Danish player may use one of their ship units and make a NAC to immediately move all eligible friendly forces to Farbourg (hex 3718). Units in Farbourg on the next turn may use a ship unit to make a free Naval Transport move, or may spend 2MP to move into Fynshav (hex 3518) and continue Movement with remaining MP. In addition, Danish/Swedish units forced to retreat from a coastal town hex may use a ship unit and make a NAC to attempt an evacuation to any friendly coastal town hex of their choice.
7.0 Combat
During the Combat Phase, the phasing side may bombard and assault adjacent enemy units. The player may undertake multiple Assault sub-phases as long as friendly units are next to enemy units. Units may participate in more than one Assault sub-phase.
7.0.1 Combat Sequence
Bombardment sub-phase: Artillery units may bombard adjacent enemy units.
Assault sub-phase: All units may conduct combat against adjacent enemy units.
The attacking player may continually repeat the Assault sub-phase so long as there are friendly units adjacent to enemy units and capable of undertaking an assault. Any attacks in these subsequent Assault sub-phases will result in the attacking units becoming disrupted after combat, regardless of the result. If already disrupted they instead become Demoralized and may not initiate another Assault.
Artillery units used during the Bombardment step can be used again during the assault step(s) at no penalty.
7.1 Bombardment Procedure
Attacking artillery units may bombard an adjacent hex. A differential is produced by totaling all attacking artillery SP and subtracting the defending artillery SP total in and adjacent to the combat hex (design note: counter-battery fire). The differential produced indicates the correct column to use on the appropriate terrain row on the AFT when resolving combat. The presence of Towns or Fortresses (into or through combat hexes/hexsides) modifies the final column used on the AFT. Finally, 1d10 is rolled on the indicated SP column/terrain row and results are applied as listed below.
7.1.2 Artillery Fire Table Results
- Dr: Defender retreat.
- Dr#: Number of hexes to retreat.
- SL: Reduce the highest SP non-artillery unit by 1 step.
7.1.3 Artillery Fire Modifiers
- Fortress: Firing through a Fortress hexside shifts the AFT column used 2 to the left. Danish artillery firing out of a fortress hexside shifts the AFT column used 1 to the right.
- Town: Firing into a town hex shifts the AFT column used 1 to the left.
Artillery Fire Table (AFT)
Printed on the last page of the manual as an image; transcribed here. The first table gives the terrain modifier applied to each Artillery Differential column; the second gives the result for each 1d10 die roll (rows) in each column. A "*" is printed on three cells of the first table and is not explained in the manual's text; it is reproduced as printed. A dash (-) means no effect.
Terrain modifiers, by column:
| Terrain | Col 1 | Col 2 | Col 3 | Col 4 | Col 5 | Col 6 | Col 7 |
|---|---|---|---|---|---|---|---|
| Clear | -3 | -1 | -1 | 0* | +1 | +2 | +3 |
| Woods | -1 | -1 | 0* | +1 | +2 | +3 | (none) |
| Marsh | -1 | 0* | +1 | +2 | +3 | (none) | (none) |
Results by 1d10 die roll (Dr = Defender Retreat, Dr# = number of hexes, SL = Step Loss):
| Die roll | Col 1 | Col 2 | Col 3 | Col 4 | Col 5 | Col 6 | Col 7 |
|---|---|---|---|---|---|---|---|
| 0 | Dr | Dr | Dr2 | Dr3 | SL | SL | SL |
| 1 | - | Dr | Dr | Dr2 | Dr3 | SL | SL |
| 2 | - | - | Dr | Dr | Dr2 | Dr3 | SL |
7.2 Unsupplied Artillery
Artillery that cannot trace a LOC (see 8.3) at the instant of combat may not bombard nor assault. If defending, against either bombardment or assault, multiply its strength by 0.5.
7.3 Assault Procedure
Assaults are attacks against a single enemy hex. Friendly units in adjacent hexes to an enemy unit may all attack the enemy unit together. No enemy units may be attacked twice in a single Assault sub-phase. Assaults are never mandatory. Both players total their SP involved in the combat and modify these totals by any modifiers such as Disruption, Demoralization, and/or terrain. Divide the modified attacking SP total by the defending modified total SP, and locate the closest ratio column on the Combat Result Table (CRT), rounding down in favor of the defender. The attacker then rolls 1d10 cross referencing the die result with the appropriate column on the CRT, applying the listed results.
The CRT features 2 rows of odds, one for Prussian forces and another for Danish/Austrian forces. The composition of the attacking force determines which row of odds to use. The Prussian row is used only in cases where only Prussian units are attacking with no Austrian unit's cooperating in the attack. Otherwise, the Danish/Austrian row is used in all other instances. Design Note, this is a somewhat heavy handed approach to showcasing Prussian competence, the effect means that a purely Prussian attack needs less SP than would attack by other nationalities.
Combat Results Table (CRT)
Printed on the last page of the manual as an image; transcribed here. Rows are the 1d10 die roll; columns are the odds ratio. The Prussian (PRU) odds row is used when only Prussian units attack with no Austrian units cooperating; otherwise the AU/DA (Danish/Austrian) odds row is used.
| Die roll | PRU 1:3 / AU/DA 1:2 | PRU 1:2 / AU/DA 1:1 | PRU 1:1 / AU/DA 1,5:1 | PRU 1.5:1 / AU/DA 2:1 | PRU 2:1 / AU/DA 3:1 | PRU 3:1 / AU/DA 4:1 | PRU 4:1 / AU/DA 5:1 | PRU 5:1 / AU/DA 6:1 | PRU 6:1 / AU/DA 7:1 |
|---|---|---|---|---|---|---|---|---|---|
| 0 | Dr | Dr | Dr2 | Dr2 | Dr3 | Dr4 | DR | DR | DR |
| 1 | EX | Dr | Dr | Dr2 | Dr2 | Dr3 | Dr4 | DR | DR |
Result key: see 7.4.
7.4 Assault Result Explanations
- Ar/Dr: Attacker/Defender retreats 1 hex.
- Ar/Dr#: Attacker/Defender retreats by # hexes. Apply Disruption when retreating 2 hexes, Demoralization when retreating 3 hexes.
- AR/DR: Attacker/Defender Routed.
- EX: The defending hex is Routed and the attacking units must Rout steps equal to half the total defending steps Routed (round down).
Whenever forces suffer a Step Loss, the highest SP non-artillery unit must always take the first Step Loss before other units may suffer any losses.
7.5 Combined Arms
If units attacking an enemy hex only in clear terrain include at least one of each type (i.e. infantry, cavalry, artillery) the combat is resolved 1 column to the right on the CRT. This bonus does not apply to attacks against woods, swamp, town hexes or fortress hexsides.
7.6 Retreats
As a result of bombardment or assault, forces may be forced to retreat a designated number of hexes. If possible, units must retreat away from the enemy unit it was just fighting, towards a source of Supply (8.1) and avoid EZOCs. A force must retreat together and may not split up during a retreat. Units may not retreat into enemy-occupied or sea hexes (see 6.2.3 for an exception.). Retreats are counted in hexes as opposed to MP. Units forced to retreat 2-3 hexes may disrupt, demoralize, or rout depending on their condition at the start of the retreat (see 3.5-3.7). Depending on the terrain a unit is defending in, they may be able to substitute Step Losses for retreat results.
7.6.1 EZOCs and Retreats
Friendly units that retreat into an EZOC lose one step each; this can result in a unit becoming Routed if it only has 1 step or is already at half strength.
7.7 Advance After Combat (AAC)
If a defending enemy hex is completely vacated of enemy units either through retreats or rout, the attacking force may advance into the combat hex up to normal stacking limits. Artillery units, unless inside of a headquarters, may never AAC. Defending units may never AAC. Cavalry units may advance up to 2 hexes after combat (only if the enemy has retreated at least 2 hexes or is routed) and may move 1 hex in any chosen direction after advancing into the combat hex. Forces may split up from a stack (or Headquarters) and advance. The decision to AAC must be made and acted upon before the next assault is resolved.
8.0 Supply & Recovery
Both sides must stay in Supply in order to operate at full efficiency. During each side's Supply & Recovery Phase, the phasing player checks all of their on-map units to see if they are in Supply. Units found not to be in Supply during the Supply & Recovery Phase do not recover from Disruption or Demoralization.
8.1 Sources of Supply
In order to be considered in supply, a force must be able to trace a Line of Communication (LOC). A LOC is a path of 3 or less hexes to either a continuous line of road or rail hexes that leads towards a source of supply. Sources of supply for the Danish player are intact Fortress hexsides, depot units or Danish towns. A Ship unit, if adjacent to a coastal hex, is also a source of supply for the Danish player. The German player uses either the southern edge of the board or a depot as a source of supply. Note that a LOC cannot be traced through an EZOC anywhere along its path unless the EZOC is also occupied by a friendly force.
8.2 Artillery Supply
Artillery units may not bombard if at the moment of bombardment, they cannot trace a LOC. Artillery units unable to trace a LOC in assault multiply their SP by 0.5. This may result in them being unable to participate in combat if SP is reduced to 0.
8.3 Cavalry Supply
Cavalry units are considered always in supply regardless of their ability to trace an LOC.
8.4 Combat Supply
At the instant of assault, if any attacking units are unable to trace an LOC, those units are immediately Demoralized after combat regardless of the result (unless Routed, obviously).
8.5 Recovery
Units in supply remove Disruption or Demoralized markers.
9.0 Setup
The Danish player sets up on the map first in town hexes along with hexes adjacent to Fortress hexsides within stacking limits, followed by the German player who arranges their forces adjacent to the South edge of the board within stacking limits. All forces are considered in Supply on turn 1. Skip immediately to the Movement Phase of the First turn for both players.
10.0 Victory
Victory is won by either player earning Victory Points (VP) through capturing town hexes or Routing enemy units. A hex is considered controlled by the side who last moved through the hex. All hexes on the map start under Danish control at the start of the game. Each town hex is worth 1 VP when captured by a German unit, and worth 2VP to the Danish player if recaptured. This can happen multiple times for the same town. Each Routed unit is worth 1 VP to the opposing player.
VP starts on the 10 box, and VP are subtracted from the VP total when the Danish side earns VP, and added to the VP total when the Germanic player earns VP. The Danish player wins an automatic victory if VP reaches 0 and the German player wins an automatic victory if VP reaches 20. An Automatic Victory is classified as a Major Strategic Victory covering all the others in terms of scope.
If neither player scores an Automatic Victory, use the following table to determine the result of the game:
| VP | Result |
|---|---|
| 7-10 VP | Danish Minor Victory |
| 4-6 VP | Danish Tactical Victory |
| 1-3 VP | Danish Political Victory |
| 11-14 VP | German Minor Victory |
| 15-17 VP | German Tactical Victory |
| 18-19 VP | German Political Victory (Historical Result) |
11.0 Design Notes
While the Danish army had won the First Schleswig War, the second was largely stacked against them in terms of numbers. The Prussian army, while not the juggernaut they would become in '66 and '70, they had the most advanced Artillery on the face of the planet at that time. During this point in military history, straight on attacks against entrenched positions were often ordered regardless of the insane amount of danger it exposed men to. The Danes expected a repeat of the last war in which their entrenchments and sea power would out-maneuver and out-shoot the Prussian army. This wishful thinking generally came to an end once the reality of modern Prussian and Austrian artillery set in. The high trajectory fire of the Krupp Siege guns meant that the open top entrenchments dug into the earth were relatively useless against very devastating artillery. This was a problem that continued to give armies issues up until 1916-18 and new tactical doctrines were finally developed for artillery in support of infantry.
The Danish army fought bravely and in miserable conditions, but no amount of bravery could have realistically saved them from the combined efforts of the Prussian and Austrian armies. Hence why I in general see this design as more of a game than simulation. Without Swedish intervention, the chances are fairly miserable for the Danes. A more historic experience would likely include less Danish ship units or activities as they were largely unable to render themselves effective during the war.
Design-wise this game was a bit of a puzzle. It had started with a really in-depth sequence of operational movement followed by tactical combat, similar to the old GDW Crimea game by Frank Chadwick. Ultimately the detail in this system had to be scrapped because it would have likely added hours of hours upon playtime to the game which would be antithetical to the approach of the 2140 series. That said, I had come up with some good ideas in the process and wanted to see what I could do to use them. One idea that I did end up taking away from the old Crimea game was the idea of perpetual combat. Having players be able to engage in combat as many times as they like so long as they are adjacent to an enemy and disrupt themselves after the second combat, allows players to realistically play out 2-week turns as opposed to locking them into 1 combat like most wargames.
As a result, this game went from being one of the more complicated designs, with signs I've made, to one that is far simpler. The most abstract aspect of the design is artillery fire, and while that may take a few times to get right, you'll see it's a fairly innovative mechanic which changes the way players figure in Artillery normally. The scale ends up being Grand Tactical I would argue, due to the fact that all of the armies are represented though at a brigade level, creating tactical situations that replicate command at the top level. If players end up liking this system, I would be happy to extend it to other conflicts as well.