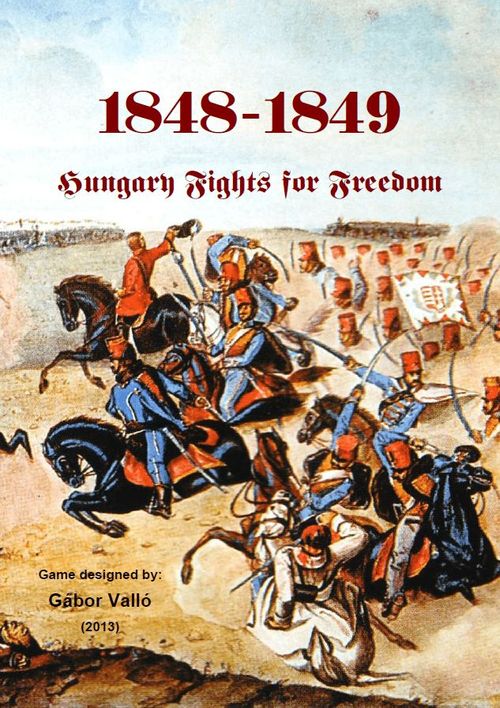
1848-1849: Hungary Fights for Freedom
1848-1849: Hungary Fights for Freedom Rulebook
Table of Contents
Table of Contents
1. 1848-49: A Glorious Year (an historical overview)
1.1 Prelude to War
The year 1848 marks a milestone in the history of Hungary. The revolution that started in France quickly set fire to the countries of Europe. It reached Hungary in March, and in mere months it transformed the country from a relatively backward feudal state to a modern democratic country: the new constitution of April liberated the serfs, guaranteed basic human rights, and gave voting rights to 6-7% of the population (a percentage comparable to contemporary Britain, a model for European democracies). The engine behind this transformation was Lajos Kossuth, who – although a simple member of Parliament – became recognized as the foremost leader of the country.
There were problems, however. Hungary was part of the Austrian Empire, and the government in Vienna saw the revolution as threatening the unity of the empire. (Other parts of the empire, most notably Italy, were also in revolt.) Also, Hungary was ethnically mixed, with the majority of the population being composed of Rumanians, Slovaks, Serbs, Croats and Germans. The nationalities were pursuing their own national agendas and it generally made them hostile to the Hungarian revolution.
The ethnic tensions flared up quickly as the Serbs revolted in the Bánát in the summer of 1848. Also the policy of the Austrians gradually turned against the Hungarian government. Finally in September Josip Jelačić¹, the loyalist Ban of Croatia, attacked Hungary in force. Although the Croats were stopped before Budapest, it become clear that open war was inevitable.
Organization began of the new Hungarian army (the Honvédség). The army was made up of militias, as well as units and officers of the previous imperial army, and reached a strength of 80,000 within months. Since Hungary's industry was underdeveloped, supplying the army with clothes, weapons and munitions was always problematic. Inexperienced at first and inadequately supplied, the soldiers were nevertheless inspired to defend the revolution's achievements.
¹ Generals who appear in the game have their names written in bold.
1.2 The Winter Campaign
By December the Austrian government – led by the young emperor Franz Joseph I – had put down the other revolts in the empire (in Italy, Bohemia and Vienna itself), and saw the time fit to launch a full invasion of Hungary from several directions. The 50,000-strong main Austrian army under Alfred zu Windisch-Grätz started its advance along the Danube towards the Hungarian capital, while smaller enemy corps invaded from Galicia (under Franz von Schlik) and Styria (under Laval Nugent).
Meanwhile the Serb and Rumanian insurgents were given official help as well. In the Bánát, an Austro-Serb corps under Kuzman Todorović was aiding the Serb forces fighting under the Serbian general Stevan Knićanin. In Transylvania, the Rumanian insurrection was organized by a lawyer, Avram Iancu, whose Rumanian legions were aided by the Austrian forces of Anton von Puchner, the governor of Transylvania. The large fortresses chose sides as well. Temesvár and Arad rebelled and became strongholds of resistance against the Hungarian government. Komárom and Pétervárad stayed loyal, but they were encircled and put under siege by the enemy.
The Hungarian army was ill-prepared to deal with so many fronts and all seemed lost. The main army under the talented young general Artúr Görgei retreated to Upper Hungary, and the capital was evacuated before the Austrians took it in January 1849. But Hungary did not surrender. The government continued to organize the war effort from Debrecen, behind the river Tisza. There were small successes as well. In Transylvania the old Polish general Józef Bem reorganized the Hungarian forces and pushed back the Austrians. In the Bánát, the experienced troops held the enemies in check. Another young general, György Klapka, held the line of the upper Tisza, while the impetuous Mór Perczel campaigned successfully along the middle Tisza region.
However, the biggest relief came from Windisch-Grätz himself, who lost his determination after capturing Budapest and did not continue his advance for weeks. The Hungarian government decided to concentrate all available forces near the Tisza for a major counterattack. Veteran forces under János Damjanich (a Serb by birth) were redeployed from the Bánát to the north, joined by the remnants of Görgei's army and Klapka's corps.
Then Kossuth committed a grave mistake by appointing the famous Polish veteran Henryk Dembiński as commander-in-chief of the concentrated forces. (For political reasons, Kossuth did not trust Görgei, the most talented Hungarian general.) Dembiński's desultory leadership almost wasted the previous efforts, as the combined army was defeated by Windisch-Grätz at the end of February. The ineffective general was brought down by the revolt of the officers, and Görgei was appointed as temporary commander.
1.3 The Spring Campaign
The Hungarian army prepared the plan for a two-pronged offensive against the Austrian army. This maneuver was brilliantly implemented in April. Windisch-Grätz's army was outflanked and defeated in a series of battles, culminating in the battle of Isaszeg. The enemy was demoralized, but managed to retreat largely intact to Budapest. Görgei did not attack them from the front, but bypassed them again and relieved the besieged fort of Komárom.
Meanwhile the Hungarians moved forward on the other fronts as well. After months of siege, the enemy-held fort of Arad was taken by Károly Vécsey. Transylvania was freed from the Austrians, even though they got some help from Russia. Negotiations were under way to end the Serb and Rumanian rebellions. These successes meant that most of the territory of Hungary was freed from enemy troops – quite an achievement for a nascent army!
The successful Hungarian counterattack had many important consequences. On the political side, it encouraged Kossuth and the Parliament in Debrecen to issue the Declaration of Independence that broke all ties with Austria and the Habsburg dynasty. On the Austrian side Windisch-Grätz was relieved from office, and his successor, Ludwig von Welden ordered a general retreat to the borders of Austria. (Except for Jelačić, who was sent to the south to revitalize the Serbian resistance.)
But then the impetus was lost. Damjanich suffered an accident that made him unable to continue field service. Many in the army and in Parliament diasgreed with the Declaration of Independence and sought some compromise with the Habsburgs. The army leaders disagreed on strategy as well. Görgei did not pursue the Austrians towards Vienna, but turned the army back towards Budapest. The capital was fortified and defended by 5,000 Austrians. It took almost a month, until the end of May, to capture it.
This gave time for the Austrians to reorganize their army and ask help from the Russian Empire. Tzar Nicholas I made a treaty with Emperor Franz Joseph I to lend assistance against the Hungarian insurgents. The Tzar mobilized his immense army to put down the revolution, the last of the revolutions of 1848 in Europe that was still fighting.
1.4 The Summer Campaign
The joint offensive of the two empires started in June. The new Austrian commander-in-chief, the relentless Julius von Haynau invaded with 70,000 troops, while the main Russian army of 160,000 under Ivan Paskevich descended from Galicia. Another Russian corps under Alexander von Lüders invaded Transylvania. The Hungarian army of 170,000 was hopelessly outnumbered by the 370,000 allied troops.
The only hope was to quickly defeat the weaker Austrians. Görgei fought a series of indecisive battles with Haynau around Komárom, then finally he was wounded in the head. The decision was made to concentrate all armies around Szeged, to where the government evacuated again. Haynau left a small masking force around Komárom, then captured the empty capital and marched without stopping for Szeged. The Russians advanced in the north, slowed down by Görgei's diversional maneuvers. In Tranyslvania, Bem managed to hold off the Russian invasion for a month, but his army was annihillated in the process.
Since the Russians were still far away, there was a chance that the combined Hungarian southern army could defeat the forces of Haynau. Kossuth again appointed Dembiński as commander-in-chief. Dembiński retreated his numerically superior army before Haynau and his leadership again demoralized the soldiers. Finally he accepted battle near Temesvár in August. Thanks to the terrible leadership, the battle became a disaster: the army was routed and largely dissolved in the process. Haynau, who was surprised to learn that he had defeated the main Hungarian army, relieved Temesvár.
The revolution collapsed after that. Although there were still some troops fighting, they were left without central leadership. Kossuth and many other politicians and generals emigrated to Turkey. The only intact troops, Görgei's corps, finally surrendered to the Russians (!). The fortresses of Komárom (defended by Klapka) and Pétervárad held out until October, when they were given honors of war.
For the other soldiers, however, a much grimmer future awaited. The Honvédség was disbanded. Hundreds who had led or sympathized with the revolution were put to trial and imprisoned or executed, including the captured generals. From among them, thirteen were executed in Arad in October. The whole country was punished for the rebellion against the "rightful King". After the fierce retribution, two decades of absolutism followed before the dynasty and the country were reconciled again by the Compromise of 1867.
But now YOU are in charge! Can you change history?
2. Components
The game requires the following components:
- a map,
- 50 counters (8 enemy armies, 3 Hungarian generals, 11 army markers, 4 division markers, 5 battle modifier markers, 9 fortress markers, 4 siege point markers, 4 event markers, 1 Comissars marker, 1 morale marker),
- 30 Event Cards (separated into three seasonal decks: Winter, Spring, Summer),
- one die (supplied by you),
- this rulebook.
2.1 The Map
The map depicts Hungary in the middle of the 19th century. There are a number of cirles and squares connected by arrows: these are the spaces on which the enemy armies approach the center. All enemy armies start from an outside space (e.g. Austria) and follow the direction of the arrows until they reach Debrecen. (Haynau is an exception, see 6.1.) Circles represent undefended towns, while squares represent fortresses that need to be besieged. The three spaces named in red denote your capitals.
Tricolor cockards on spaces show the value of the space in Morale points (if the space is captured, you lose this number, if you later retake it, you gain this number). On five spaces there are factory icons, these are centers of industrial production (this is important for recruiting new divisions, see 8.3).
The spaces belong to different tracks, as differentiated by their color. There are five tracks: the main (white), the northern (red), the Transylvanian (brown), the southern (blue) and the Bánátian (green) tracks. Beside each track there are three squares of the same color: this is the place for the markers of the Hungarian army defending that track. Each Hungarian army consists of one (or more) commanding general(s), an army marker and battle modifiers (if any).
The map also has a Morale track. Morale shows the enthusiasm and will of Hungary to continue the war. High Morale gives battle bonuses and speeds up recruitment, low Morale yields the opposite. Morale can also cause defeat and victory.
There is also a place for Reserves, where you put your new divisions and those generals and divisions that were strategically relocated.
2.2 Event Cards
Event cards show the name of an event (the background color denotes the deck it belongs to), its effect and a short description (this has no game effect). Underlined events are optional – their effect only activates when you decide so.
Cards also denote those enemy armies that move in the turn, and the number of Action Points you gain for that turn. The upper part of the card may show the names of Iancu or Knićanin (these are enemy insurgent generals, see 6.2).
2.3 Counters
The markers of enemy armies show the name and portrait of the commanding enemy general, and a number showing the strength of the army. Hungarian generals only contain a modifier beside the name and the portrait. The enemy generals Iancu and Knićanin are special in that they also contain a modifier (and a black 'M' on one side signifying Morale loss, see 8.1).
Army Strength markers show the strength of the Hungarian army in the form of a modifier – this can range between -3 and +1 (in the case of a single army it can rise to +3). Each level equals one division, i.e. around 8,000 Hungarian Honvéds. Division markers denote new and strategically relocated divisions. Battle modifiers give bonuses or penalties for battle.
Fortress markers show the owner of the five important fortresses (Komárom, Budapest, Pétervárad, Arad, Temesvár), and also the strength of the masking/besieging force around them (+0 or +1). Siege Points show how successful the siege has been so far.
The Comissars marker can be used once per season for an extra action (and a +1 for any roll with that action). (Comissars were the representatives of the revolutionary government sent to the counties and the armies to organize war supplies and ensure loyalty.) Don't forget to flip it when used and flip back at the start of a new season! The Morale marker is used to show the current level of Morale. Finally, Event markers are there to remind you of the lasting effects of some events.
3. The Hungarian Armies
Hungarian armies are not represented by counters on the map – instead they are handled in an abstract way. Each track on the map includes a Hungarian army defending that track. Only this army can attack the enemy army approaching on the track. If there are multiple enemy armies on the same track, the Hungarians can only attack that which is closer to Debrecen. Imagine that the Hungarian army stands adjacent to the enemy army, one space towards Debrecen (e.g. if Puchner is in Kolozsvár, then the Hungarian army defending Transylvania stands in Somlyó.)
Some special cases are detailed below:
- If an enemy army stands on Debrecen itself, only the Hungarian army from whose track it entered the Debrecen space may attack it.
- The Hungarian Southern army defends Szeged instead of Debrecen, so its location must be counted from that space. In Summer, two enemy armies can be on that track at the same time (Haynau and Jelačić), and in that case the Hungarians are standing adjacent to the enemy closer to Szeged. (If Szeged is occupied, the Hungarian army stands on the closest free space, if any.)
- If the northern track is empty of enemies (because Schlik/Paskevich has left it), the Hungarian Northern army stands on Miskolc.
Four of the Hungarian armies have a general printed on the map – he is the one that usually led that army during the war. You have three more generals (Dembiński, Klapka and Damjanich) that you can move around with some limitations (see 7.1).
4. Starting the Game
Deploy the enemy armies: Windisch-Grätz (6) in Austria, Schlik in Galicia, Puchner in Kolozsvár, Todorović in Versec, Nugent in Styria. Put Knićanin in the box near the Bánátian track on his -2 side, put Iancu in the box near the Transylvanian track on his -1 (no Morale loss) side.
Fill up the Hungarian armies: the main army has -1, the Northern army -3, the Transylvanian army -2, the Bánátian army -1, the Southern army -3 strength. Add Damjanich to the Bánátian army. Give the Transylvanian army a +1 Battle modifier. (Set aside Dembiński and Klapka; they arrive with Event Cards.)
Put the fortress markers on the map, all on their +0 side: Komárom, Budapest and Pétervárad are Hungarian, Arad and Temesvár are Austrian. (Budapest has no Hungarian fortress marker, see 6.3.)
The Starting Morale level is 7. Put a division in the Recruitment 2 box. Put the Comissars marker in the Reserve area on its unused side.
Shuffle separately the three Event card decks. (Optionally, you may arrange the cards within each deck in numerical order from lower to higher – this roughly corresponds to the chronological order.) Put the Summer deck on the bottom, then the Spring deck and finally the Winter deck on top. This will be your draw pile. Now you are ready to play!
4.1 Adjusting the Difficulty Level
If you find the game too hard or too easy, you can fine tune the difficulty by altering the setup, e.g. the Morale level or the strength of the Hungarian armies. Another solution is to exclude from the game the event cards #10 from each deck – these are additions for version 1.5 to make the game harder.
5. Turn Sequence
At the start of each turn you must flip a new Event card, apply its effects and move the enemy armies printed on it. Then you have a number of Action Points (also printed on the card) that you may use for different Actions. At the end of the turn, you must do some administration, e.g. modify the Morale, check for victory or defeat, do recruitment and redeployment.
5.1 The Russian Intervention
At the start of the Summer season (at the moment the first Summer card is flipped, but before its effects are applied or any enemies are moved), the Russian army intervenes on behalf of the Austrians. Now you must do the following steps:
- Remove Windisch-Grätz and deploy Haynau (9) in his place. If Schlik is still on the map, deploy Haynau on his weaker (7) side. If Windisch-Grätz was standing on Gyöngyös or Tiszafüred, deploy Haynau on Budapest.
- Flip Schlik to the Paskevich side. If Schlik was previously removed, put Paskevich in Galicia. If Schlik is on the map, put Paskevich on Miskolc (this way the northern track will again be occupied, so reduce Morale by 1.)
- Flip Puchner to the Lüders side.
- Flip Nugent to the Jelačić side, also flip the Hungarian fortress marker of Pétervárad to its +1 side (if not already done).
- Reduce Morale by 1.
- Remove the Proclamation of Vác event marker.
From now on, Szeged also counts as a capital, so the enemy must take it as well to win.
6. Enemy Movement
Each Event card lists those enemy armies that move in that turn. The listed armies are activated:
- If they stand on a Hungarian-held fortress, instead of moving the besiege the fortress. Komárom is an exception from this rule: Windisch-Grätz and Haynau advance normally from this space. (They leave a masking force around Komárom that is not depicted in the game, see also 6.3).
- Otherwise move the army one space, following the direction of the arrows. If there are no more arrows leading from the space (i.e. it's Debrecen or Szeged), the enemy stays in place.
All spaces that are located between the enemy army and its starting space (e.g. Nugent and Styria), including the space the enemy stands on, are considered conquered, except the fortresses (these can only be occupied through siege).
6.1 Rules Concerning the Movement of Certain Enemy Generals
Although the game greatly simplifies the complex maneuvering of armies that occurred during the War of Independence, several special rules are still necessary in order to maintain a reasonable level of historical simulation. Below are listed those enemy generals whose movement are special.
Schlik
- After Miskolc, Schlik moves to Gyöngyös, which means that he leaves the northern track and continues on the main track. If he must retreat because of your successful attack, he retreats from Gyöngyös back to Miskolc.
- If Schlik stands on Gyöngyös when an Event card would move him and Windisch-Grätz is still in Austria, Pozsony, Komárom or Budapest, you must move Windisch-Grätz instead of Schlik.
- If Schlik is on the main track when an Event card would move him and Windisch-Grätz is in Tiszafüred or Debrecen, Schlik advances on the main track towards Windisch-Grätz.
- If Windisch-Grätz (6) and Schlik are on the same space at any moment (regardless of which moved onto the other), the two armies unite. Remove Schlik and flip Windisch-Grätz to its stronger side (8). If after this an Event card dictates that Schlik be moved, simply ignore it. IMPORTANT: if this happens, all spaces on the northern track (Miskolc, Kassa) are automatically liberated! (You get +1 Morale and a factory because Kassa is now free.)
Windisch-Grätz
- If Windisch-Grätz (8) retreats from Budapest to Komárom, then flip him to his weaker (6) side. At the same time flip Nugent to the Jelačić side, also flip the Hungarian fortress marker of Pétervárad to its +1 side. If after this an Event card dictates that Nugent be moved, move Jelačić instead.
Haynau
- After conquering Budapest, Haynau moves to Kecskemét, leaving the main track and continuing on the Southern towards Szeged. From now on, only the Hungarian Southern army can attack him.
- If Haynau stands on Budapest when an Event card would move him and Paskevich is still on the northern track, you must move Paskevich instead of Haynau.
Paskevich
- After Miskolc, Paskevich moves to Gyöngyös, which means that he leaves the northern track and continues on the main track. If he must retreat because of your successful attack, he retreats from Gyöngyös back to Miskolc. (In this case Haynau, if he's already on the southern track, immediately retreats to Budapest so the main track is never empty.)
- If Paskevich stands on Gyöngyös when an Event card would move him and Haynau is still in Austria, Pozsony or Komárom, you must move Haynau instead of Paskevich.
6.2 Iancu and Knićanin
These two generals represent the Rumanian and Serbian insurgents who were fighting against the Hungarian government. They do not move on the map, but give a penalty to the Hungarian armies attacking in Transylvania or the Bánát. They can be attacked separately (see 7.2).
Both have a stronger and a weaker side (their stronger side is the one with the Morale penalty.) If the turn's Event card shows their name on the top, they must be flipped to their stronger side if possible. (Their strength fluctuates because these were irregular forces; the Morale loss represents the atrocities committed by the Serb and Rumanian insurrectionists against the Hungarian populace.)
6.3 Enemy Sieges
Enemy sieges can take place:
- in Komárom: if the turn's Event card lists 'Komárom siege' among the names of moving enemies, and Windisch-Grätz or Haynau stands on Komárom or has left it;
- in the case of the other fortresses: if an enemy army standing on the fortress is activated by the Event card.
In these cases you must make a siege roll. Modifiers: +1 if the masking force is strength +1 (as shown on the fortress marker); -2 if Klapka is defending Komárom (as per the Event card War Planning). If the modified result is 5+, the besieger gains 1 Siege Point. If the enemy has accumulated 2 Siege Points, you lose a Morale point. If the enemy's Siege Points reach 3, the fortress falls and the space is captured: apply the Morale loss and other effects. (If it's Komárom and Klapka was the defender, put him in the Reserve.) If the modified result is 1, the garrison made a successful sortie: reduce the Siege Points by one.
If the besieging enemy (in the case of Komárom, Windisch-Grätz or Haynau) must retreat from the fortress, you have relieved it, and the Siege Points are nullified. If there were 2 Siege Points on it, you gain a Morale point as well.
Budapest is a special case. If the enemy has conquered it, it becomes a fortress that the Hungarians must take by siege. For the Austrians, however, it counts as a simple space that is conquered the instant the enemy moves to it; hence it has no Hungarian fortress marker. (The Austrians took the capital without resistance twice during the war.)
7. Actions
7.1 Strategic Redeployment
With this action you can move a single division or general between a track and the Reserve. If a division is redeployed, you must reduce the corresponding army's strength by one level.
Limitations: The same division or general can only be redeployed once per a turn. The redeployed divisions and generals arrive at the end of the turn. (So it takes 2 turns to redeploy from one track to another: in the first turn it is redeployed to the Reserve, in the second to the other track, and you can use it in the third turn. This is about one month in game time.)
In some cases you may redeploy directly between tracks, so that they don't move to the Reserve and are usable in the next turn. This is possible if the two Hungarian armies between which you redeploy the division or general stand close to each other (see the rules about the location of the Hungarian armies, 3.). This means:
- if there are max. 2 spaces between them – for this rule Szeged and Arad are considered to be adjacent spaces (so you can redeploy directly between e.g. Tiszafüred and Somlyó or Arad and Kecskemét);
- between an army and a fortress' masking force in the same track (see 7.3).
Redeploying generals: Dembiński may be moved anywhere, Klapka to the main army or the Northern army, Damjanich to the main army or the Bánátian army (so the main army may include all of them). IMPORTANT: while Klapka and Damjanich cooperates with the army's commander (printed on the map), Dembiński will take his place and become the new commander of that army! E.g. if Klapka is with the main army, his bonus will be added to Görgei's for a +3, while if Dembiński is there, he'll take the place of Görgei for a +0. At the start of the game Damjanich cooperates with the Bánátian army's commander Vécsey for a total bonus of +2.
7.2 Attack
This is perhaps the most important action, as it enables you to push back the enemies before they can conquer your capitals. For the attack you must select a Hungarian army and add up the modifiers from the general(s), the army's strength and the battle modifiers. (E.g. if the main army under Görgei is 40,000 strong and attacks with a -1 penalty, the modifier for the attack is +2+1-1 = +2.) Don't forget to include Iancu's and Knićanin's penalties, if applicable.
If you got negative battle modifiers at the end of last turn, you must use them for your first attack; the positive modifiers may be distributed as you see fit.
Roll a dice and add the modifiers. If the result was higher than the enemy army's strength, you have won and the enemy retreats one space (following the arrows backwards). If the result is equal to the enemy's strength, you have won a hard victory: the enemy retreats one space, but you must reduce your army's strength by one level (i.e. you lose a division). Armies with a strength of -3 ignore losses.
If the modified result is lower that the enemy's strength, the attack has failed and the enemy remains where it was. In this case you may instantly and freely reroll with a +1 modifier (all modifiers from the previous roll also remain). After the reroll, you must reduce your army by one level regardless of the result.
After the battle, you must remove all battle modifiers that were used.
Dembiński: If an attack led by Dembiński failed (including a possible reroll), you must roll a die. If the result is 1-4, the officers revolt against the inept commander: put Dembiński in the Reserve.
Attacking insurgents: Iancu and Knićanin may be attacked separately as well. Treat Iancu as a strength 3 and Knićanin as a strength 4 enemy army. Add up the modifiers as normal, but do not include the penalties they give themselves. If you roll equal to their strength, you don't need to reduce your strength. If you win, flip their marker to the weaker side. (They can't be removed by normal Attack actions.)
7.3 Siege
Enemy fortresses may be besieged if no enemy army stands on the fortress itself or has left it on the track. The action requires you to make a siege roll, with the same modifiers and results as with enemy sieges (see 6.3, sorties are also possible). The enemy can relieve the fortress if it moves onto it. Remember that an enemy-held Budapest counts as a fortress for you, the only bonus being that 2 Siege Points are enough for you to take it (instead of the normal 3).
If you are not besieging Budapest and you have accumulated 2 Siege Points, you gain a Morale point as well. If the enemy relieves it later, you lose 1 Morale.
You can enhance your chances of taking the fortress if you mask it with +1 instead of +0 (this way you get a bonus for yor siege rolls). For this you need to redeploy a division from the corresponding track's Hungarian army to the fortress. Reduce the army's strength by one level, and at the end of turn flip the fortress marker to the +1 side. If the enemy relieves the fortress, the marker is flipped back and the masking division returns to its original army at the end of the turn.
The same fortress may only be besieged once per turn. No battle modifiers are used (either negative or positive) and no reroll is possible.
7.4 Raise Morale
Roll the dice to raise your Morale by one level. If the Morale is currently between 0 and 2, you succeed on a 3+, if it is between 3 and 10, on a 4+, and if it is 11 or more, you need 5+.
8. Administration
8.1 Battle Modifiers and Morale
Remove all battle modifiers, negative and positive. (Exception: the penalty of the event Russian Intervention in Transylvania.)
Modify your Morale:
- Check Iancu and Knićanin: if one of them is on his Morale loss side, you lose 1 Morale on a die roll of 1-3; if both are on that side, your Morale loss is automatic.
- If the Proclamation of Vác event is in effect, check if any of the following two is true: 1) Görgei is the commander of the main army and this army has not attacked or besieged during the turn; 2) Dembiński is in Reserve. If one of them is true, you lose 1 Morale on a die roll of 1-3; if both are true, your Morale loss is automatic.
- Apply the effect of the Declaration of Independence, if you chose it.
Check the current level of Morale if there will be any positive or negative battle modifiers for next turn (see the small symbols on the Morale track). Put these markers in the Reserve box. (Remember, you must use the negative modifiers in the first battle next turn.)
8.2 Victory and Defeat
You lose if your Morale has fallen to 0 (the peace party wins a majority in the Parliament, surrendering to the Habsburgs) or the enemy has captured Budapest, Debrecen and (in the Summer) Szeged as well (military defeat).
You win if it's at least Spring, your Morale is at 13, the Declaration of Independence has not been issued and you roll 5+ on a die (a fair compromise with the Austrians) or the last Event card has been drawn (seeing a quick military solution as impossible, the other powers force the Austrians and Russians to negotiate).
8.3 Redeployments and Recruitment
This is the moment when the strategically redeployed divisions and generals arrive at their destinations. If a division arrives at an army, remove its marker and raise the strength of the army by one level.
Next comes the recruitment of new divisions:
- If there is a division in the Recruitment 1 or 2 box, move it forward one space: from Recruitment 1 to Recruitment 2, and from there to the Reserve. A division in the Reserve is ready – you may redeploy it to the battlefield next turn.
- If the Recruitment boxes are empty, you can start recruiting a new division. You must count how many factories you own on the map (there are five factories: Budapest, Kassa, Nagyvárad, Temesvár and Székelyföld). If none of these spaces is yours, you can't recruit (in this unlikely event your war industry is paralyzed.) If you have one factory, put a new division on the Recruitment 1 box. If you have two or three, put it on Recruitment 2. If you have four or five, the division is instantly ready, put it in the Reserve box.
IMPORTANT: your number of factories may be modified by low or high Morale and the effect of the event Duschek's Manipulations!
9. Example of Play
In this example of play, two turns of the Spring season will be played to demonstrate how the rules work. If you wish, you may set up the markers and follow the actions on the map.
Since it is Spring, the enemy armies have already made some progress into the country. Windisch-Grätz (6) stands on Budapest, Nugent on Pétervárad, Schlik on Gyöngyös, Puchner on Marosvásárhely and Todorović on Temesvár. Iancu is on his stronger (Morale loss), Knićanin on his weaker side. The Hungarian main army is led by Dembiński, its strength is +1, that of the northern army is -3, the Transylvanian army +0, the Bánátian army +0 and the southern army -3. Klapka is with the main army, Damjanich in the Reserve. Morale is a bit low at level 6. The Comissars marker is still unused, and we have a division in the Recruitment 2 box.
9.1 First Turn Example
We flip the first Event card: Austrian victory in Italy (#3). Since Knićanin's name is displayed on the top, we flip his marker to the stronger side. Then we move Windisch-Grätz one space forward to Gyöngyös. Now Windisch-Grätz and Schlik are on the same space, so their armies join (see 6.1): we remove Schlik and flip Windisch-Grätz to his strength 8 side. The only good news is that the northern track is freed: we instantly get a Morale point for Kassa. At the same time, Todorović advances to Arad (but does not capture it, since it's already an Austrian fortress). Then we apply the card's effects: Morale is reduced to 5 and we flip the fortress marker of Komárom to the +1 side (from now on enemy siege rolls will succeed on a 4+).
The card gives 3 Action Points. Since Windisch-Grätz is now dangerously close to Debrecen, we must strengthen the main army: Damjanich is redeployed there from the Reserve (he was moved from the Bánátian track for that purpose). Dembiński will need to be removed from the main army, but only if we intend to attack with it, since Görgei's leadership would probably cause Morale losses because of the effect of the Proclamation of Vác (see 8.1).
But first we have more urgent matters to tend to: the low Morale and the two insurgents, who will automatically reduce it further at the end of the turn. We roll an attack against the weaker of the two, Iancu. The roll is 4, so we don't even need Bem's +2 bonus to achieve success (a 3 is enough against Iancu). Iancu's marker is flipped to the weaker side. We have one action left, which we spend on an attack against Todorović. The result is 3, modified by Vécsey (+1) and Knićanin (-2), which results in a 2, just equal to the enemy's strength. A hard victory: Todorović retreats to Temesvár, but the strength of the Bánátian army is reduced to -1. This is bad news as the casualties are difficult to replace.
At the end of the turn we check Morale. We roll for Knićanin, the result is 5, so no Morale penalty. We don't get any battle modifiers. A division is ready (moved from the Recruitment 2 box to the Reserve) and Damjanich arrives at the main army. If we manage to get rid of Dembiński, the main army will attack with +5 against Windisch-Grätz, which means a good chance of success. Next turn comes.
9.2 Second Turn Example
The next Event card is Serbian volunteers return home (#1). Since Schlik is no longer on the map, his move is ignored (see 6.1). Nugent is moved by the card, but he stands on the fortress of Pétervárad, so instead of moving him we roll an enemy siege (see 6.3). The result is 4: no effect. The card instructs us to roll for 'Komárom siege'. Since Windisch-Grätz has already left Komárom, it is under enemy siege, so we must roll. The result is again a 4, but the enemy besieging force gives +1, which means a hit: we put 1 Siege Point on Komárom (two more and the fortress will fall). The event also causes Knićanin to be flipped to his weaker side, and the Bánátian army gains a +1 battle modifier.
From the four actions available, we must use one to raise the Morale. The roll results in a 2, which is not enough. We roll for Morale again. Now the result is a 5, so the Morale is raised to 6. It is worthwhile to attack with the Bánátian army, because the +1 bonus would be lost at the end of the turn. Our attack roll is a 6, success: Todorović retreats to Versec. With our last action we redeploy the new division from the Reserve to Bem's Transylvanian army: it is time to prepare for the liberation of the Székelyföld.
At the end of the turn, we check Morale (nothing). The redeployed division arrives at Transylvania, this army's strength is raised to +1. We can begin recruiting another division. Currently we have two factories (in Kassa and in Nagyvárad), so we put the new division's marker in the Recruitment 2 box. And a new turn begins...