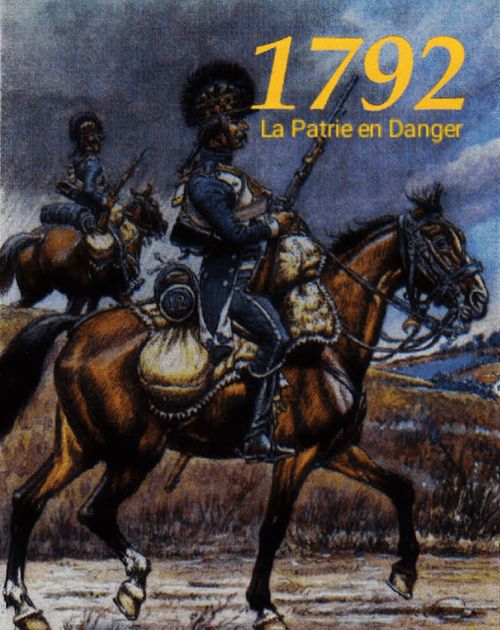
1792: La Patrie en Danger
1792: La Patrie en Danger Rulebook
Table of Contents
Table of Contents
- 1.0 Components
- 2.0 Sequence of Play
- 3.0 Command
- 4.0 Zone of Control
- 5.0 Communications
- 6.0 Movement Orders
- 7.0 Initiative
- 8.0 Movement
- 9.0 Attrition
- 10.0 Combat
- 11.0 Retreat After Combat
- 12.0 Pursuit
- 13.0 Disorganisation and Rallying
- 14.0 Reinforcements
- 15.0 Fortifications and Bridges
- 16.0 Weather
- 17.0 Morale
- 18.0 Victory Conditions
- Order of Battle
- Charts and Tables
1.0 Components
1.1 The Map
The map represents the Champagne-Ardennes region, the theatre of operations of the campaign. A hex grid is superimposed on it to facilitate placement and movement of the counters. Each hex (abbreviated as hex. in what follows) is numbered: for example, the village of Valmy is at 1020.
1.2 The Counters
The counters are of three types:
- combat units, placed on the army roster (tableau des effectifs) of each army;
- commanders, placed on the map to represent the formations of units they control;
- game markers.
1.3 The Different Types of Counters
To distinguish the nationalities, the French counters bear the initial of their army (generals: a tricolour flag), the Prussians a royal monogram, the Austrians an eagle, and the Émigrés a fleur-de-lis.
Commander counters are named when they represent commanders of senior rank, and designated by letters when they represent subordinates (generals). French commanders are blue, Prussian ones Prussian blue, Austrian ones white, and the émigré one beige.
Combat units belong to the infantry, the cavalry or the artillery.
Similar colours are used for the uniforms of the armies present, so unit counters carry the symbol of the army they belong to.
Game markers are placed on the map or on the corresponding tracks (turn, weather, morale...).
1.4 Player Aids
They consist of: the French and Coalition army rosters, the order of battle, and a summary of the tables.
1.5 Scale
1792 is an operational game: each game turn represents 2 days of real time and one hex is about 3.2 km wide. One strength point equals 500 men (infantry and cavalry) or 20 cannons (artillery).
1.6 Setting Up the Game
Place the map between the players, each of whom places his army roster in front of him: the French player to the north, and the Coalition player (who commands the Prussians, Austrians and Émigrés) to the south. Place the commander counters on the map in the hex indicated by the order of battle, or on the calendar at the arrival date if they are reinforcements. Place the units commanded by the commanders on the army roster at the value shown on the order of battle. Finally, adjust the morale, weather and calendar markers according to the chosen scenario.
2.0 Sequence of Play
2.1 Course of the Game
1792 consists of a series of 18 turns. Each turn is made up of an intermediate phase and two player periods (one per player), each comprising three successive phases. The player whose period is in progress is called the active player, and his opponent the passive player. During each phase, the players' actions must take place in the precise order detailed in 2.2. A game ends when the victory conditions are met.
2.2 Turn Sequence
A. Intermediate Phase
One player determines the weather for the turn and adjusts the weather marker on the map.
B. Coalition Player's Turn
1. Command Phase
The active player may simultaneously:
- designate a temporary supply source;
- transfer units between commanders located in the same hex;
- transfer strength points between units of the same type under the same command;
- create or remove generals;
- place reinforcement units on the map.
2. Movement Phase
a. Movement by Order: the active player may move his forces by spending one order per force that moves.
b. Movement by Initiative: the active player may attempt to move his forces that have not received an order during this turn, using the initiative of the commander.
c. Movement: each force that moves, by order or by initiative, spends a certain number of movement points to enter each hex. The active player must finish the movement of one force and determine its attrition before attempting to move another.
d. Attrition: the active player must determine the attrition of all forces that did not move during the turn.
e. Consolidation: the active player must reorganise all hexes that contain more than one commander.
f. Engineers: the active player may damage or repair bridges.
3. Combat Phase
a. Forced March Movement (passive player only): the passive player may attempt to move his forces following the movement-by-initiative procedure.
b. Consolidation (passive player only): the passive player must consolidate all hexes that contain more than one commander, following the forced-march movement.
c. Combat: combat is mandatory for all friendly forces located in enemy zones of control. The forces of the active player attack, and those of the passive player defend. A combat takes place in three phases:
- the active player attacks;
- the passive player may counter-attack;
- the loser retreats and the winner may pursue.
Phases 1 and 2 may be repeated several times, at the choice of the players.
d. Disorganisation and Rallying.
C. French Player's Turn
The French player becomes the active player and repeats the sequence of command, movement and combat phases described above.
D. End of Turn
The active player advances the turn marker on the calendar located on the map.
3.0 Command
A commander may lead a force comprising combat units attached to him on the army roster, and subordinate commanders who must be located in the same hex as him or adjacent to him. A subordinate commander may not have subordinates of his own, and his force must be composed only of the combat units attached to him on the army roster. The number of combat units and subordinates he directs depends on his command capacity. Generals of infantry and generals of cavalry may be created to command independent combat units.
3.1 Army Roster
Each player has an army roster (tableau des effectifs). The commanders each have a strength counter on which are placed the combat units they command. During play, only the commander counters are placed on the map, and the strength of a force is unknown as long as it is not engaged in combat.
All combat units placed on the counters of a commander and of his subordinates located in the same hex must respect the stacking limits.
The counter key ("Symboles des pions") printed on the map sheet reads as follows:
- Nationality: A, C, N = France (tricolour flag); Prussia (royal monogram); Austria (eagle); Émigrés (fleur-de-lis).
- Infantry: Line; Federals (Fédérés); National Guards (Gardes nationaux); Volunteers.
- Light infantry: Grenadiers; Chasseurs and fusiliers.
- Artillery: foot artillery (Art. à pied); horse artillery (Art. à cheval).
- Heavy cavalry: Cavalry; Carabiniers; Dragons; Cuirassiers.
- Light cavalry: Hussars; Chasseurs.
- Unit size: X = Brigade; III = Regiment; II = Battalion.
- Unit counter: army/nation (Armée/nation), unit number (N° de l'unité), unit size and type, maximum strength (Force maxi), cost of subordination (coût de subordination), and movement (Mouvement).
- General counter: name, army/nation, initiative, bonus, command capacity (Capacité de commandement), nationality, and cost of subordination.
3.11 Use
At the start of the game, place all combat units on the counters of the commanders they belong to, following the order of battle. The number of the placement box on the counter represents the value of the unit in strength points. When a unit suffers losses, its counter is moved on the counter track to the box corresponding to its reduced strength. When the strength value of a combat unit becomes zero, the counter is removed from the game and cannot be reused.
3.12 Transfer of Strength Points
During the command phase, a unit may receive strength points from units of the same type located in the same hex. The donor counter's value is reduced and the recipient counter's value is increased by the same number of strength points, simultaneously. A combat unit can never exceed its maximum strength.
3.13 Transfer of Units
During the command phase, a combat unit may be transferred from one commander to another if they are in the same hex and if the command capacity is not exceeded. The unit is placed on the counter of the new commander with the same combat value in strength points.
3.2 Generals
3.21 Use
Generals may be created or removed from the game during the command phase, by detaching units from the forces commanded by a named commander. To create a general, the active player places an available counter of the appropriate type in the hex of the original force, and transfers the combat unit or units from the commander's counter to the general's counter, with the same value in strength points. To remove a general, follow the reverse procedure. No more generals may be created than there are available counters.
3.22 Types of Generals
A general of infantry commands any type of unit, and a general of cavalry commands only cavalry or light infantry units. A general of cavalry commanding infantry units has his initiative reduced to 2.
3.23 Elimination
A general counter represents a commander of minor rank. Any general who is left without an attached unit during the command phase is removed from the map. In addition, if he is eliminated by attrition or in combat, he may be reused during the next command phase.
3.3 Hierarchy
The hierarchy has four levels, from highest to lowest: the commander-in-chief, the corps commanders, the army commanders, and the generals. A commander may never command another commander of a higher or equal rank. Generals command only combat units.
3.4 Command Capacity
The number of units on a commander's counter and the number of subordinates he controls depend on his command capacity. Units and commanders have a subordination cost, and the total of these costs must not exceed the command capacity of the commander of the force. Example: a commander with a command capacity of 5 may control 5 infantry units, or 4 infantry units and 2 cavalry units, or 3 infantry units and a commander with a subordination cost of 2.
3.5 Forces
A force is led by a commander called the commandant and may comprise combat units attached to him, as well as subordinate commanders who themselves have attached units.
3.51 Types of Forces
When all the units and subordinate commanders occupy the same hex, the force is said to be monohex and the subordinates are placed on the army roster in the box of the force's commander. A force commander may also control subordinate commanders located in hexes adjacent to the hex where he is; the force is then multihex and the subordinates are left on the map.
3.52 Movement
During the movement phase, the active player must announce the composition of each force before moving the counters. A player may detach subordinate commanders from a force in motion, but they may not move afterwards. Attrition is determined for the whole force as defined before the movement, whatever the number of subordinates detached en route.
3.53 Combat
During the combat phase, the passive player designates each force that makes a forced march before it moves, and the active player designates each attacking force before the combat.
3.54 Consolidation
After a normal movement or a forced march, the forces or parts of forces located in the same hex must be consolidated (consolidation phase), that is, there must be a commander present in the hex able to command the whole. During consolidation, if one or more forces or parts of forces cannot be placed simultaneously under the command of the commander designated for the hex, the one that moved last, or in case of a tie the one with the fewest strength points, must be pushed back to the first hex free of units along the path followed during the movement.
3.6 Nationalities
Commanders may command only units of the same nationality, but a force commander may have subordinates of different nationalities. In this case, the nationality of the force commander is always considered to determine the attrition resulting from movement. Units of different nationalities may never be stacked in the same hex at the end of the movement or forced-march phase.
4.0 Zone of Control
The hex occupied by a unit and the 6 hexes surrounding it constitute its zone of control (abbreviated as ZoC in what follows).
4.1 Effects of ZoC on Movement
A force in motion must stop when it enters an enemy ZoC. A force located in an enemy ZoC at the start of the movement or forced-march phases may attempt to leave it only under the modified initiative of its commander. Leaving an enemy ZoC costs 2 movement points in addition to the cost of the first hex entered. A force may never move directly from one enemy ZoC to another enemy ZoC.
4.2 Reduction of ZoC Effects on Movement
4.21 Reduced Force
Leaving the ZoC of a force comprising only 1 or 2 strength points of infantry costs no additional movement point. Leaving the ZoC of a force of 3 or 4 strength points of infantry costs only 1 additional movement point.
4.22 Cavalry
A force comprising only cavalry units may leave an enemy ZoC without movement penalty. If an enemy force includes at least 1 strength point of cavalry, leaving its ZoC always costs 2 movement points.
4.3 Effect of ZoC on Retreats and Pursuits After Combat
A force may retreat through hexes of enemy ZoC (if in doing so it respects the priorities for the retreat path) without stopping. However, the losses due to pursuit are then doubled. A force authorised to pursue after combat ignores all enemy ZoCs located on the pursuit path.
5.0 Communications
Forces must maintain a line of communication from the theatre of operations to their rear base represented by the permanent supply source.
5.1 Supply Sources
5.11 Types of Supply Sources
At the start, the Coalition player has a permanent supply source (hex 4405) and the French player has two (hexes 1600 and 4421). During the command phase, a player may designate a town or fortification as a temporary supply source, on condition that it is connected to a permanent supply source by a continuous path of road or track hexes free of enemy ZoCs or enemy unit occupation.
5.12 Occupation
A supply source occupied by an enemy force becomes inactive, that is, it can no longer be used to trace a line of communication. A permanent supply source becomes active again as soon as the occupying enemy force leaves the hex.
5.13 Limitation
The French may not cross the frontier. If they are led to do so following a pursuit after combat, they must stop before it, and the effects of the pursuit are determined as if they had gone to the end.
5.2 Line of Communication
The line of communication is the shortest path linking a force's commander to an active supply source. It allows him to receive movement orders. This path may be traced across all types of terrain using the movement cost of cavalry. A line of communication may never exceed 10 movement points. It may not pass through a hex controlled by the enemy unless a friendly force occupies that hex. It may not pass through a hex occupied by an enemy force.
5.3 Isolated Force
A force that cannot trace a line of communication is said to be isolated. It cannot receive movement orders and determines its attrition using a particular column on the table.
6.0 Movement Orders
Movement orders are received at the start of the movement phase, according to the number of active permanent supply sources. At most, the Coalition player may therefore receive one and the French player two. Orders are distributed from the sources they come from, except in the case of an extended march. Movement orders not distributed during the turn are lost; they cannot be accumulated from one turn to the next.
6.1 Distribution of Orders
Movement orders guarantee that a force may move during the movement phase. They may be given only during the movement-by-order phase; in all other cases, a force may move only by initiative. To receive a movement order, a force must have a line of communication and not be in an enemy ZoC. Announce which force receives the order and carry out the movement immediately. A force may receive only one movement order per turn, unless it performs an extended march.
6.2 Extended March
To make an extended march, a force must have a line of communication at the start and at the end of the movement-by-order phase. It then receives two movement orders: a first for the normal movement and a second to lengthen the march. A force may spend 4 movement points during an extended march, in addition to the allowance for the normal march. Attrition is then determined in a single step, at the end of the extended march and for the total number of movement points spent.
6.3 Strategic Movement
Strategic movement allows a force that has received an order to continue, in the following turns, toward a designated objective without spending an additional order. To receive a strategic movement order, the force must be more than 5 hexes away from any enemy force and have a line of communication. The active player designates the objective, a town or fortification, notes it on a piece of paper, and places a strategic-movement marker on the force's commander. The movement must take place exclusively on road or track and by the shortest route between the starting point and the objective. Attrition is resolved normally. Strategic movement ceases as soon as the objective is reached, as soon as the force comes within 5 hexes of an enemy force, or as soon as it receives a new order or makes an initiative test.
7.0 Initiative
The initiative of commanders is used for the movement of forces that have not received an order, for forced marches, and during the pursuit of enemy forces retreating after combat.
7.1 Movement by Initiative
To move a force that has not received a movement order during the movement phase in progress, the active player must obtain on a die roll a number less than or equal to the initiative of the force's commander, modified by the army's morale. If he fails, the subordinate commanders may not test their initiative in turn in order to move.
7.2 Modification of Initiative
The initiative of the commander of a force located in an enemy zone of control, or which pursues an enemy force retreating after combat, may be modified by comparison with the initiative of the enemy force's commander. The resistance table used depends on the weather conditions of the turn. The crossing between the initiative of the commander who must test his initiative and that of the enemy commander gives the modified initiative of the commander.
7.3 Leaving a Zone of Control
A force located in an enemy ZoC may attempt to leave it during the movement phase. It may do so only under the modified initiative of its commander. The enemy commander whose initiative is used in the initiative modification table may be any commander capable of commanding a force comprising the units located in the hex adjacent to the friendly force.
7.4 Forced March
At the start of the combat phase, the passive player may attempt to bring reinforcements to a force located in the ZoC of an enemy force, following the movement-by-initiative procedure. The force performing the forced march must not start in an enemy ZoC and may end its movement only in a hex occupied by a friendly force, or located in the ZoC of a friendly force and of an enemy force. Attrition resulting from a forced march is resolved with +4 on the die.
7.5 Pursuit After Combat
An enemy force retreating after combat may be pursued. The initiative of the commander of the retreating force (or the highest, if several forces retreat) is then used to determine the modified initiative of the commander of the pursuing force. The modified initiative of the pursuer is compared with the length of the retreat to determine a column on the pursuit table. A die roll in this column gives the number of pursuit hexes authorised.
8.0 Movement
Movements take place during the movement and combat (forced march) phases. There may be no enemy movement or combat during movements.
8.1 Movement of Forces
All the units composing a force, represented on the map by a commander, move together. A monohex force moves along a single path. A multihex force moves along multiple paths, provided that all parts of the force are adjacent or merged at the end of the movement, even if the paths followed by subordinate commanders are not always adjacent or merged with the path followed by the commander of the force. To determine the attrition of a multihex force, one always considers that it has spent the number of movement points of the component that spent the most. A force commander may detach subordinate commanders during the movement; these may not continue to move.
8.2 Movement of Commanders
Commanders with no units, or with attached subordinates, may move without spending a movement order or testing their initiative. They do not suffer attrition and have a movement capacity of 9 movement points. They may pass through enemy ZoCs without stopping, but not through hexes occupied by enemy units.
8.3 Movement Capacity
The movement capacity depends on the nature of the unit and represents the potential distance it is able to cover during one turn of play:
- infantry and foot artillery: 5 movement points;
- heavy cavalry and horse artillery: 7 movement points;
- light cavalry and commanders without units: 9 movement points.
A force may continue to move as long as its movement capacity has not been exceeded, but it may not enter a hex if none of the units composing it has enough movement points left to do so. Unspent movement points during a phase may not be accumulated for later phases.
8.4 Terrain Effects
The movement point cost of each hex and hexside is expressed on the terrain table. It varies according to the nature of the terrain and of the units in motion. The costs are cumulative: entering a forest hex while crossing a river costs 3 movement points for infantry (2+1) and 5 (4+1) for cavalry. A force moving along a road or track pays only the cost of the road or track, whatever the type of terrain crossed.
8.5 Limits and Prohibitions of Movement
A unit may never enter a hex occupied by the enemy unless it succeeds in a forced passage. It must stop as soon as it enters an enemy ZoC. A force entering a hex that contains no enemy units, but contains enemy commanders, displaces those enemy commanders into an adjacent hex chosen by the passive player. A force may cross freely, without penalty, a hex occupied or controlled by a friendly force. A force may never voluntarily leave the map, except to fulfil a condition of victory, following a retreat after combat, or after declaring an off-map movement.
8.6 Off-Map Movement
To make an off-map movement, a force must leave by a road or track hex. The commander of the force is then placed on the calendar 3 turns after the current turn. Attrition is determined for the length of the movement made on the map before leaving. A force making an off-map movement suffers no attrition and cannot be reorganised. At the end of the 3 turns of off-map movement, the force may re-enter the map during the movement or combat (forced march) phases, through a road or track hex located at most 20 hexes from the exit hex, following the north or south edge of the map in the direction of the east for the Coalition and of the west for the French. A force may not enter through a hex occupied by the enemy, but may do so if the hex is merely controlled. If no entry hex is available, the commander of the force is placed on the calendar for the following turn and may attempt to enter the map each turn.
8.7 Forced Passage
During the movement phase, the active player may attempt to push back any enemy unit located on the path followed by one of his forces. He must announce the attempt at forced passage, and designate the unit he wishes to push back, as soon as his force enters the enemy ZoC. He may do so only if his force has enough residual movement capacity to enter the occupied hex, and if all units in contact are pushed back or attacked during the combat phase. The values are compared in strength points: a forced passage requires a minimum force ratio of 7 to 1, taking into account all terrain effects. If this ratio is reached, the pushed-back unit is immediately retreated 2 hexes by the player who controls it, and the movement of the force may continue, with possibly further forced-passage attempts. If the ratio is 6 to 1 or less, the movement of the force is stopped in the enemy ZoC, and the confrontation is resolved as a normal combat during the combat phase, with a shift of 2 columns to the left on the combat table.
9.0 Attrition
All forces must determine their attrition (wear on units from losses not due to combat: sickness, desertion, stragglers, etc.) during the movement phase, whether they moved or not. All forces making forced marches during the combat phase also determine their attrition.
9.1 Determining Attrition
Each side has a reference column on the attrition table; isolated units of both sides use a special column. Determine the line used according to the total number of strength points composing the force that moved. Compare a modified die roll with the number of movement points spent to find the corresponding column of the table, and read the result at the intersection of the two. The result is the number of strength points lost to attrition following the movement, which must be removed immediately from the units composing the force. The attrition die roll is modified by the weather conditions (+1 if Rain or Mud), by the type of movement made (+4 if forced march), and by the bonus of the force commander (-1).
9.2 Distribution of Losses
Losses due to attrition must be distributed as equitably as possible among the different units composing the force that moved. Before a second point is removed from a unit, every unit of the force must already have lost at least one.
9.3 Attrition by Arm
Even if infantry, artillery and cavalry units may belong to the same force and move together, attrition is always resolved separately for the cavalry. There are therefore two attrition procedures for forces combining the three arms: one for the infantry, and a second for the cavalry. Artillery is never counted to determine attrition.
10.0 Combat
Forces of the active player that are in an enemy ZoC at the start of the combat phase must attack at least one adjacent enemy force. The result of combat is expressed by any strength-point losses on each side, the retreat of one side, and the pursuit by the other. The retreating force may be disorganised, and the result of combat may modify the morale level of one or both sides.
10.1 Combat Obligations
Combat is mandatory between units that are in their respective ZoCs. A force located in an enemy ZoC at the start of the combat phase must attack at least one hex containing enemy units. All enemy forces adjacent to friendly forces must be attacked. The active player determines which units attack each defending hex. All units attacking the same hex must belong to the same force and must be adjacent to the attacked hex. All enemy units stacked in the same hex defend together, whatever their force of origin. Stacked units may never be attacked individually.
10.11 Multihex Combat
A force must always attack by combining the totality of its strength points. If it occupies several hexes, each of them may not separately attack a hex occupied by enemy units. A combat may involve attacking and defending units in as many hexes as necessary, on condition that all attacking units belong to the same force and that they are all adjacent to the enemy units that defend. Two distinct forces may not attack together, but separately from each other and against different hexes. A hex may be attacked only once per combat phase. Two different forces may be attacked simultaneously in a single combat by a force adjacent to all the defending units.
10.12 Multiforce Combat
If a player has more than one force adjacent to a hex occupied by the enemy, only one of them may attack. The surplus forces do not take part in the combat but suffer all the results in common with the attacking force.
10.2 Terrain Effects on Combat
The terrain of the attacked hex, that of the attacking hex, and the hexside between them may modify the strength ratio in combat. The effects are summarised in the terrain table and apply hex by hex. When the terrain of one of the hexes modifies the combat ratio (indicated by an M on the terrain table), the corresponding line of the combat table is used.
- Wood, wooded hill: the strength points of cavalry are divided by 2 if it attacks toward or defends in the hex.
- Marsh: cavalry is divided by 2 if it defends in the hex.
- Crest, wooded crest: a maximum of 3 infantry units may defend in or attack from the hex. They suffer the losses. The other units present in the hex must retreat with the 3 if necessary. One unit among the 3 may be changed at each attack turn. Infantry is doubled in defence.
- Marsh, river: a force is divided by 2 if it attacks from a marsh hex or exclusively across a river.
- Fortifications: a maximum of 10 strength points may be doubled or tripled.
- Rivers, streams: the combat is modified if the watercourse separates all the attacking units from all the defending units.
10.3 Combat Resolution Procedure
Combat follows a procedure comprising several steps, some of which are conditioned by the choices made by the players:
- the active player indicates the attacking force;
- the active player indicates the hex or hexes that defend;
- each player secretly chooses a battle-type marker (set-piece battle, rangée, or pursuit);
- the active player carries out his artillery fire;
- the active player determines the ratio on the combat table, rolls a die, applies any modifications, and announces the result of the combat;
- the winner removes the strength points lost;
- the loser reveals his battle-type marker;
- if the loser chose a pursuit battle: the loser retreats, the winner may pursue, the losses are applied, and the battle ends;
- if the loser chose a set-piece battle: the loser removes the strength points lost and the combat continues;
- the passive player defines the force that counter-attacks;
- the passive player indicates the hex or hexes that defend;
- the passive player carries out his artillery fire;
- the passive player determines the ratio on the combat table, rolls a die, applies any modifications, and announces the result of the combat;
- the winner removes the strength points lost;
- the loser reveals his battle-type marker;
- if the loser chose a pursuit battle: the loser retreats, the winner may pursue, the losses are applied, and the battle ends;
- if the loser chose a set-piece battle: the loser removes the strength points lost and the combat resumes from step 1.
10.4 Restrictions on Combat
Generals may never choose to conduct a set-piece battle. A commander may choose to conduct as many set-piece battle rounds as his initiative, but no more.
10.5 Distribution of Losses
Each turn, the attacker and the defender distribute their losses as they wish, on condition that:
- half of them are inflicted on a single unit;
- the rest is distributed equitably among the other units (same procedure as for attrition);
- 1 strength point of cavalry is eliminated for every 4 strength points lost (counted on the cumulative losses, if several set-piece battle rounds take place).
10.6 Advance After Combat
When a force is completely eliminated by combat losses, outside a pursuit, the attacker may occupy the vacant hex with any force or part of a force that took part in the combat. This advance does not count as a pursuit hex for the morale modification.
10.7 Artillery
Artillery is never counted to determine attrition or the strength ratio of combat. Artillery may fire in each round of set-piece battle. Its purpose is to eliminate enemy strength points before the strength ratio for the combat is calculated. On the bombardment table, the intersection of the column corresponding to the number of artillery strength points of the attacking force and the row corresponding to the die roll taken in the cavalry-ratio column gives the number of strength points eliminated.
10.71 Artillery Losses in Combat
Artillery may never lose strength points as a result of artillery fire, unless it is the only component of the attacked force. A force composed only of artillery units is eliminated in combat if it is attacked by an enemy force comprising at least one strength point. Artillery never loses strength points in a set-piece battle; it loses one if the force on which it depends is pursued by at least 5 hexes.
10.72 Artillery Movement
An artillery unit may not make an extended march, nor take part in a pursuit. Artillery loses a strength point in attrition following movement only if, during a Mud turn, the force must lose at least 5 strength points.
11.0 Retreat After Combat
A force that must retreat following a combat must move the number of hexes required in the direction of its permanent supply source. Stacked units must retreat together. The retreat is measured in hexes, but it must be made by the path least costly in movement points. A force completely surrounded is eliminated if the attacking force can pursue it by at least one hex. A retreating force may enter enemy ZoCs, but its losses due to pursuit are then doubled. A retreating force may enter hexes occupied by friendly units, after moving these latter by one hex.
11.1 Multihex Forces
Adjacent commanders may not retreat in different directions if they took part in the same combat or belong to the same force that fought. They must end their retreat adjacent. In this case, the path of retreat is considered to be the one followed by the commander of the force.
11.2 Path of Retreat
The retreat must be made in decreasing order of priority:
- in the direction of a permanent supply source;
- through hexes not adjacent to the path already followed;
- through hexes not controlled by the enemy;
- through hexes not occupied by friendly units, and if necessary through the hex occupied by the units with the lowest strength points, which are moved one hex;
- through the hexes that cost the fewest movement points.
If the retreat can no longer be made while respecting these priorities, the force is blocked.
11.3 Movement of Units
If the only hex available to trace the retreat path is occupied by a friendly force, the latter is moved one hex as if it were the result of a combat. A force may not, for this reason, enter an enemy ZoC. If this is the only possibility, the retreating force is then blocked. A movement of a friendly unit may in turn drag others along by reaction and form a chain of displaced units.
11.4 Off-Map Retreat
A force may, if it is obliged to, retreat off the map. It is then automatically disorganised, and re-enters as a reinforcement through the exit hex as soon as it is rallied.
12.0 Pursuit
The force victorious in combat may pursue the retreating defeated force following the path of retreat. It may cross enemy ZoCs and enter the hex occupied by the pursued force, in which case the latter is eliminated. The victor is never obliged to pursue. He must announce his intention at the end of the combat. If he does not pursue, the defeated force immediately loses as many strength points as the victor.
12.1 Pursuing Units
The whole force that took part in the combat may pursue. The victor may also detach one or more commanders to form a force intended to conduct the pursuit, and leave the rest of the force in place. The initiative of the commander of the pursuing force is used to determine the length of the pursuit. The pursuing force must comprise at least as many strength points as the number of pursuit hexes authorised.
12.2 Length of Pursuit
To determine the length of the pursuit, expressed as a number of hexes:
- use the resistance table to determine the modified initiative of the pursuing (active) commander relative to the retreating (passive) commander;
- on the pursuit table (upper part), compare the modified initiative and the length of the retreat to find the resolution column;
- determine the applicable cavalry differential by comparing the number of cavalry strength points present in the pursuing and pursued forces. If the ratio is 1/1, the differential is -1 in favour of the majority side; if it is 2/1 the differential is -2, and so on. The maximum differential is -3 or +3. In the case of perfect equality, it is 0;
- roll a die modified by the cavalry differential and by the nature of the force (-1 if cavalry).
The pursuing force must take exactly the path of retreat followed by the defeated force. The length of the pursuit in hexes gives the number of strength points lost by the defeated force, which is at least equal to the losses of the victor. The pursuit always stops in the hex occupied by the pursued force, which is then eliminated.
12.3 Off-Map Pursuit
A pursuing force must always stop at the edge of the map, even if the number of pursuit hexes authorised is greater. A force that retreated off the map loses as many strength points as if the pursuit had been carried out to the end, including for its possible elimination.
13.0 Disorganisation and Rallying
A force retreating after combat may be disorganised. At the end of the combat phase, for each force that retreated, the active player rolls a die and compares the result with the initiative of the force's commander, modified by the army's morale. If the result is higher, the force is disorganised and a disorganisation marker is placed on the commander's counter on the map. When the retreating force comprises several subordinate commanders, whether or not they are on the map, disorganisation may be rolled for each of them.
13.1 Effects of Disorganisation
A disorganised force may not make a forced march nor attempt to move under the initiative of its commander. If it receives a movement order, it must end its movement closer (in movement points) to its supply source. A disorganised force may not enter a hex controlled by the enemy, unless that hex is already occupied by a friendly unit. It may be integrated into a non-disorganised force commanded by another leader, but that force may then only make movements by order and must approach its supply source. A disorganised force may not attack but defends normally. If a force composed entirely of disorganised units is obliged to attack an enemy force, the attack is resolved by shifting the force ratio 3 columns to the left on the table at the moment of the die roll. A disorganised force may not be modified in its composition on the army roster (transferring or receiving units or strength points). Finally, a force already disorganised that retreats after combat does not roll a second time for its disorganisation.
13.2 Rallying
Commanders of forces disorganised in preceding turns may attempt to reorganise them at the end of the combat phase. To reorganise a force, it is enough to succeed on a die roll less than or equal to the initiative of the commander, modified by the army's morale. There is no limit to the number of times a force may be disorganised and reorganised.
14.0 Reinforcements
Reinforcements enter play during the movement phase at the hex indicated on the calendar. They may receive a movement order or attempt to move under the initiative of the force's commander. Reinforcements pay the normal cost of terrain from the entry hex. They may enter the map if the entry hex is controlled by the enemy, but not if it is occupied by an enemy unit. In both cases, the active player may decide to have them immediately make an off-map movement, or to bring them into the hex nearest to them that is free of enemy influence.
15.0 Fortifications and Bridges
15.1 Fortifications
There are two types of fortifications: citadels and fortresses. ZoCs extend normally into and out of fortifications, but combat is not mandatory between a force located inside and an adjacent enemy force. Fortifications modify the combat ratio. A maximum of 10 strength points may be doubled in fortresses and tripled in citadels. Because of their reduced dimensions, a maximum of 40 strength points may be placed in a fortification.
15.11 Combat
During the combat phase, for each of his forces in fortifications located in an enemy ZoC, the passive player indicates whether he wishes to fight in the open field or to benefit from the advantage of the fortification. In the first case, it is a normal combat; in the second case, the active player may choose to storm or to besiege. A storm is resolved like a set-piece battle having only one round and without counter-attack by the defender. Each side applies its losses and the combat stops. There may be no retreat by the defender and no pursuit by the attacker.
15.12 Siege
A force is considered besieged as soon as it benefits from the advantage given by the fortification to avoid combat, and the adjacent enemy force possesses at least as many strength points. It is not necessary for the besieger to occupy or control all the hexes adjacent to a fortification to begin a siege. A besieged force with at most 12 strength points determines its attrition normally. Above 12 strength points, the column for isolated forces is used. A fortification surrenders as soon as, at the end of a turn, there are at most 4 besieged strength points. All surviving strength points and commanders are eliminated and removed from the game, and the besieging force may then enter the fortification. The besieging force is considered to occupy the 6 hexes surrounding the fortification. To break the siege, it is enough to interpose a non-besieged force in a hex adjacent to the fortification. Otherwise, the besieged force may leave the fortification only by first attacking the besieging force. A friendly force may not enter a besieged fortification unless the siege has first been broken.
15.3 Garrisons
French frontier fortifications are occupied at the start of the game by garrisons represented by a single unit attached to the commander of the place. Garrisons may receive strength points from any type of unit, but may not transfer them to other units. Garrison forces may not voluntarily leave their fortification of attachment, nor choose on their own to fight in the open field.
15.4 Bridges
Only rivers (fleuves) are crossed by bridges, which may be damaged or repaired at the end of the movement phase. (The Semuy between hexes 0807 and 0908 is a ford that does not cancel the +2 movement penalty for crossing the Aisne.) To damage or repair a bridge, a force adjacent to the bridge's hexside must succeed on a die roll on the bridge destruction and repair table. If an enemy force occupies the other end of the bridge, add 1 to the die roll to damage it, and repair is impossible.
A damaged bridge is shown by a marker on the map and no longer cancels the +2 movement-point penalty for crossing the river. A repaired bridge works normally. A bridge may be damaged and repaired several times during the game.
16.0 Weather
The weather is determined at the start of each turn using the weather table (+1 on the die if it was Rain in the previous turn). The effects are:
- Fair (Beau): no effect.
- Mud (Boue): +1 on the attrition die roll; the fifth strength point lost to attrition must be artillery.
- Rain (Pluie): +1 on the attrition die roll; use the "rain" column of the resistance table.
17.0 Morale
The morale of each side is recorded during play by the marker on the map. Morale is added to the commander's initiative for movement. It may be modified by:
- the loss of a fortification following an assault or a siege (-1 to French morale);
- the sortie through hex 0123 of a Coalition force with at least 40 strength points and a line of communication at the start of the movement phase (+2 to Coalition morale, applicable only if the morale is already at or above +2);
- any set-piece battle in which a commander with a command capacity of 6 or more takes part, which includes at least one combat round (attack and counter-attack) and at least one authorised pursuit hex (the winner chooses between -1 to the loser's morale and +1 to his own morale, within the limit of the morale track);
- any set-piece battle in which a commander with a command capacity of 6 or more takes part, where the loser is completely eliminated, which includes at least one combat round and the occupation of the vacant hex (the winner chooses between -1 to the loser's morale and +1 to his own morale, within the limit of the morale track);
- the elimination in combat of a commander with a command capacity of 6 or more (same consequences as 3);
- the elimination in combat of the Duke of Brunswick (same consequences as 3, except that French morale may exceed the limit of the track).
18.0 Victory Conditions
Victory is determined mainly by the morale level of each side. The game ends as soon as a player manages to exceed the upper limit of the morale track (beyond the +3 level). Otherwise, at the end of the 18 turns of play, the degree of victory is judged by comparing the morale of each side:
- decisive victory = a difference of 4 intervals;
- marginal victory = a difference of 3 intervals;
- draw = a difference of at most 2 intervals.
For the championship, the calculation of victory levels will be refined by taking into account secondary objectives (towns) and strategic objectives (river crossings), as well as the losses of each side.
Order of Battle
This order of battle corresponds to the situation of the troops on 19 August 1792, the date of entry into France of the Coalition armies. The game begins directly at the Coalition movement phase of the first turn (19-20 August). The weather is fair, and the morale levels are 0 for the Coalition and +1 for the French, because of "La patrie est en danger!" The order of battle gives the placement on the map of each commander or general, his hierarchical rank, and the list of the units he commands directly. Each unit, designated by its number and type, is followed by its initial strength in strength points in brackets.
French Armies
Garrisons
- General Lavergne (3408): garrison of Longwy (6)
- General Beaurepaire (2418): garrison of Verdun (8)
- General Wimpfen (4313): garrison of Thionville (10)
- General de Ligniville (2508): garrison of Montmedy (10)
- General Gar. Metz (4321): garrison of Metz (8)
- General Gar. Sedan (1601): garrison of Sedan (8)
Armée du centre
- Deprez-Crassier, commanding the advance guard (3913): 1-chasseurs (2), 1-hussars (1), 2-chasseurs on horse (1).
- General E (La Barolière) (4214): 2-grenadiers (2), 3-chasseurs on horse (1).
- Kellermann, commanding the army of the centre (4221): foot artillery (3), horse artillery (1).
- Lynch, commanding the 1st line (4221): 3-line (6), 4-line (6), 4-cuirassiers (1), 5-dragoons (2).
- Muratel, commanding the 2nd line (reinforcement 4-5 September, 4421): 5-line (4), 6-volunteers (2), 6-cavalry (2), 7-chasseurs on horse (2).
- Valence, commanding the reserve (4221): 7-grenadiers (4), 8-national guards (2), 8-carabiniers (2).
Armée des Ardennes
- Dumouriez, commander-in-chief of the French army, commanding the Armée des Ardennes (1601): foot artillery (3), horse artillery (1).
- Dillon, commanding the advance guard (2104): 1-line (3), 2-chasseurs (2), 1-hussars (2), 2-chasseurs on horse (2).
- Le Veneur, commanding the 1st line (1904): 3-line (6), 4-line (3), 5-volunteers (8), 3-cavalry (2), 4-hussars (2).
- Chazot, commanding the 2nd line (2004): 6-line (6), 7-line (3), 8-volunteers (8), 5-cavalry (1), 6-dragoons (1), 7-chasseurs on horse (2).
- Stengel, commanding the reserve (1601): 9-grenadiers (6), 8-dragoons (1), 9-dragoons (2).
- General Luckner, commanding the camp of Châlons (conditional reinforcement, 0123): 10-federals (10). [Footnote 1]
Armée du nord [Footnote 2]
- Duval (reinforcement 6-7 September, 0105): 1-line (3), 2-volunteers (2), 1-dragoons (1).
- Beurnonville (reinforcement 12-13 September, 0105): 3-line (4), 4-volunteers (6), 5-volunteers (5), 2-dragoons (2), 3-chasseurs on horse (1).
Footnote 1: the conditional reinforcement of Luckner appears on hex 0123 during any phase of the game, even an enemy one, as soon as an enemy unit is within 5 hexes of hex 0123 (the road to Châlons and Paris). Luckner is represented by a general of infantry. If none is available, the entry of the federals is postponed to the next French command phase in which a general of infantry is available.
Footnote 2: the reinforcements of the Armée du nord are attached to the Armée des Ardennes.
Coalition Armies
Armée du roi de Prusse (army of the King of Prussia)
- Hohenhole, commanding the advance guard (4108): 1-line (10), 2-fusiliers (2), 1-hussars (4), 2-dragoons (2).
- General G (Kohler) (4409): 5-hussars (4), 9-fusiliers (2).
- General H (Eben) (3906): 6-hussars (4), 10-fusiliers (2).
- Brunswick, commander-in-chief of the Coalition army, commanding the Prussian army, commanding the 1st line (4306): 3-line (9), 4-line (9), 5-line (9), foot artillery (6).
- Courbière, commanding the 2nd line (4306): 6-line (9), 7-line (9), 8-line (4).
- Lottum, commanding the cavalry reserve (4306): 3-cuirassiers (4), 4-dragoons (7), horse artillery (2).
- Landgrave of Hesse, commanding the Hessian corps (4306): 1-fusiliers (1), 2-line (6), 1-hussars (2), 2-dragoons (1), 3-carabiniers (1).
- De Castries, commanding the Émigré corps (4405): 1-line (6), 1-cavalry (3).
Corps autrichiens (Austrian corps)
- Clerfayt (reinforcement 21-22 August, 3305 or 4105): 1-line (9), 2-line (9), 3-line (7), 1-cavalry (4), 2-hussars (2).
- Hohenhole-Kirschberg (reinforcement 23-24 August, 4410): 4-line (9), 5-line (7), 6-line (7), 3-cavalry (4), 4-hussars (2).
Total Strength Points
| Side | Infantry | Garrison | Cavalry | Artillery |
|---|---|---|---|---|
| French | 103 | 50 | 31 | 8 |
| Coalition | 126 | - | 44 | 8 |
Charts and Tables
Terrain Table
Movement cost in movement points: column ● (infantry), column ⊠ (cavalry), and the ⊿ column, which carries the "M" marks as printed on the chart. "M" means the terrain modifies the combat ratio, so the modified line of the combat table is used.
| Terrain | ● | ⊠ | ⊿ (M) | Effect on combat |
|---|---|---|---|---|
| Clear (Clair) | 1 | 1 | . | . |
| Wood (Bois) | 2 | 4 | . | Cavalry/2 if attacking into or defending in the hex. |
| Hill (Colline) | 2 | 2 | M | . |
| Wooded hill (Colline boisée) | 2 | 4 | M | Cavalry/2 if attacking into or defending in the hex. |
| Crest (Crête) | 4 | 6 | M |
Attrition Table
Not transcribed. The attrition table (printed magazine page 101) is a staircase grid whose cell values the scan does not render reliably. This transcription does not reproduce its cells. Use it as follows, per rule 9.1: find the line for the force's total strength points (French, Prussian/Austrian/Émigré, or isolated-unit column), compare the modified attrition die roll with the movement points spent to find the column, and read the strength points lost at the intersection. Die modifiers: +1 if Rain or Mud; +4 if forced march; -1 if the commander has a bonus. "-" means no loss; "•" means the movement is forbidden: reduce the movement length by one level and determine attrition again without re-rolling the die. Consult magazine page 101 for the full grid.
Combat Table
Columns: strength ratio attacker/defender (no artillery). The first header row is the normal ratio, the second is the modified ratio (used when the terrain is marked M). Rows: the die roll (0 to 6). Result: (attacker losses)/(defender losses). If the attacker retreats in the shaded zone, the defender retreats instead; otherwise the defender retreats. The losses of the side that does not retreat are the strength points lost in set-piece battle or pursuit combat; the losses of the side that must retreat are the length of the retreat (pursuit combat) or the strength points lost (set-piece battle).
| Die | 1-5 | 1-4 | 1-3 | 1-2 | 1-1 | 2-1 | 3-1 | 4-1 | 5-1 | 6-1 |
|---|---|---|---|---|---|---|---|---|---|---|
| Normal | 1-5 | 1-4 | 1-3 | 1-2 | 1-1 | 2-1 | 3-1 | 4-1 | 5-1 | 6-1 |
| Modified (M) | 1-4 | 1-3 | 1-2 | 1-1 | 2-1 | 3-1 | 4-1 | 5-1 | 6-1 |
Notes: if the ratio is above 6-1 it is treated as 6-1; ratios below the minimum give an automatic 10/0 (defender retreats). Modifiers: +1/-1 for a commander's bonus; column shift if the force was pushed back.
Bombardment Table
Used for artillery fire before the combat ratio. Enter with the artillery strength points of the attacking force (columns) and the die roll taken in the cavalry-differential column (rows). The result is the number of strength points of the defender eliminated, to be removed immediately while respecting the distribution rules. Note: if the cavalry differential is below 1-1 and the defender is in a fortification, use the 1-1 column; if above 3-1, use the 3-1 column.
| Cavalry differential (attacker/defender) 1-1 | 2-1 | 3-1 | Artillery 1,2 | 3 | 4 | 5 | 6 | 7 | 8+ |
|---|---|---|---|---|---|---|---|---|---|
| 1 | 0 | 0 | 0 | 0 | 0 | 0 | 1 | ||
| 2 | 1 | 0 | 0 | 0 | 0 | 0 | 0 | 1 | |
| 3 | 2 |
Pursuit Table
Two-step lookup. First, the upper table (not reproduced here, see the note below) gives the pursuit column from the modified initiative of the pursuing commander (rows 0-1, 2, 3, 4) and the length of the retreat (columns 8+ to 1). Second, enter the lower table below with that column and the die roll (rows 0-, 1-2, 3-4, 5-6, 7+). The number printed is the number of pursuit hexes authorised; the retreating force loses as many strength points, and "•" means no pursuit.
Modifiers: cavalry differential from +3 to -3; -1 if the pursuing force is exclusively cavalry. The pursuing force must have at least as many strength points as pursuit hexes authorised.
Transcription note: the upper table is laid out diagonally on the scan and its cells are not reproduced here. Consult magazine page 101 for it.
| Die | Pursuit columns (as printed, from the lower table) |
|---|---|
| 0- | 9 8 7 6 5 4 3 2 1 0 • |
| 1-2 | 8 7 6 5 4 3 2 1 0 • • |
| 3-4 | 7 6 5 4 3 2 1 0 • • • |
| 5-6 | 6 5 4 3 2 1 0 • • • • |
| 7+ | 5 4 3 2 1 • • • • • • |
Resistance Table
Entry: active commander's initiative (rows 1-4) against the passive commander's initiative (columns 0-4). Result: the modified initiative of the active commander.
| Active initiative | Fair/Mud: passive 0 | 1 | 2 | 3 | 4 | Rain: passive 0 | 1 | 2 | 3 | 4 |
|---|---|---|---|---|---|---|---|---|---|---|
| 1 | 1 | 1 | 0 | 0 | 0 | 1 | 0 | 0 | 0 | 0 |
| 2 | 2 | 2 | 1 | 1 | 0 | 2 | 1 | 0 | 0 |
Weather Table
| Die | Weather |
|---|---|
| 1 | Fair |
| 2 | Fair |
| 3 | Mud |
| 4 | Rain |
| 5 | Rain |
| 6 | Rain |
Modifier: +1 if the weather was Rain in the previous turn.
Bridge Destruction and Repair Table
| Die | Result |
|---|---|
| 1-3 | Success |
| 4-6 | Failure |
Modifier: +1 to destroy if an enemy force occupies the other end of the bridge.