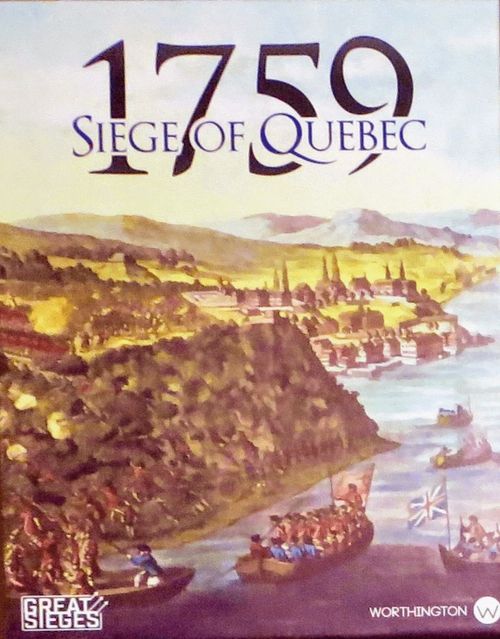
1759 Siege of Quebec
1759 Siege of Quebec Rulebook
Table of Contents
Table of Contents
- 1. Introduction
- 2. Game Overview
- 3. Game Board
- 4. Game Markers
- 5. Player Field Orders Book
- Deck
- 7. Setup
- 8. Sequence of Play
- 9. Issuing Orders from the Field Orders Book
- 10. Using the Solitaire Counter Orders Deck
- 11. Executing Your Command Order for the Turn
- 12. Battle
- 13. Movement
- 14. Reductions to Morale
- 15. How to Win the Game
- 16. Keep It Simple
- 17. Two Player Version of the Game
- 18. Designer and Historical Notes
- 19. History of the 1759 Siege of Quebec Campaign
1. Introduction
1759: The Siege of Quebec is the first in our Great Sieges game series. These games are designed for easy setup, quick game play, and can be finished in under an hour. Game marker placement is shown on the game board. Command orders and cards are used to shorten the rules. Developed for solitaire play, the game can also be played by two players. Both versions of the game require you to make great decisions based on good strategy, keeping your wits about you when orders do not turn out well, and pressing on to victory.
2. Game Overview
Game play is centered around using your Field Orders Book to issue orders as the British or French commanders. The opposing side uses a solitaire counter orders deck of cards to issue actions and counter orders against you. The French can win the campaign if they hold out until the British Navy departs. The British can win the campaign by occupying Abraham and eliminating the French troop markers from Quebec. Either side can be defeated by their morale falling too low.
Many game rules of what can and cannot be done are within the Field Orders Book orders and the solitaire counter orders deck of cards.
A player can issue one order per game turn from their orders available in their Field Orders Book for the side they are playing. He also has the option of using an Aggressive Commander action with the one order played. The order is carried out based on your strategy, the current situation faced, and the actions and counter order issued by the solitaire opponent. Your choices can cause multiple actions and reactions with results that cause troop marker eliminations, morale reductions, and events to occur.
In solitaire play, one side is played by you (either British or French) and uses player orders from the Field Orders Book for the side being played. The solitaire opponent uses the solitaire counter orders deck of cards for the other side for actions and issuing counter orders.
These game rules are for solitaire play. The rules adjustments for the two-player game are a separate section at the end of these rules.
3. Game Board
The game board map represents the locations around Quebec that were prominent during the siege. There are 10 land locations and 3 river locations. British locations are in red and they are Montmorency, Orleans (reserve), Levis, Abraham and the 3 river locations. French locations are in blue and are Beauport, North Shore Villages, Indians, South Shore Villages, Cap Rouge, and Quebec (reserve). Each location is named and has spaces for troop markers on the land locations and ship markers on the river locations. The markers spaces are also in red for the British and blue for the French.
The terms "Locations" and "Areas" are synonymous. The same for "Troop Spaces" and "Slots"; "Vacant" and "Empty"; and "Action" and "Event".
The game board map is used to display the impact of orders by either removing troop markers from play, moving troop and ship markers, or recording affects to morale. The Morale Track on the game board is used to track reductions and additions to the morale of the British and French.
Orders sometimes refer to Lower and Upper Quebec. These references are to the geographic position of the city in regards to how the St. Lawrence River flows and the land locations around Quebec. In general, Lower Quebec is broadly represented by Montmorency, Orleans, Beauport and North Shore Villages. Upper Quebec is broadly represented by Abraham, Levis, Indians, South Shore Villages, Cap Rouge, and Quebec. A light line depicts this separation in the St. Lawrence River.
4. Game Markers
The troops of the French and British and ships of the British are represented by wooden markers placed in the game board location spaces. Blue markers represent the French and red markers represent the British.
Markers are also used to track morale and to show the selection of orders and Aggressive Commander Actions.
5. Player Field Orders Book
There is a Field Orders Book for the British and a Field Orders Book for the French. You use the Field Orders Book for the side you choose to play in the campaign. Each book is laid out with the orders available for you to issue each turn.
There is also a section in the Field Orders Book for Aggressive Commander Actions. These can be played with, and as an addition to, most orders. The orders are numbered. Each turn place a marker on the one order you plan to use for the turn. If an aggressive commander action is used place an additional marker on it.
Deck
There is a British solitaire counter orders card deck that is used when you play as the French Commander. There is a French solitaire counter orders card deck that is used when you play as the British commander. The solitaire cards are used by the solitaire opponent to bring actions into play and to issue counter orders against your side.
The cards of the solitaire counter orders deck have two parts; actions and counter orders. Actions are events that generally affect or require decisions by the side for which you are the commander. The solitaire counter order portion is the solitaire commander's effort to counter the order you issued.
Each card shows: Title, Deck Card Number, Action/Event, (French or British) Counter Order, and Card History.
For example, if you are the French Commander and decide to issue order 4, "Attack British in Lower Quebec" and the British solitaire counter order played is "A: Defend Lower Quebec" the results will probably turn out poorly for the French as your point of attack was anticipated. However, if the British solitaire counter order played is "B: Defend Upper Quebec" the results will probably turn out poorly for the British.
7. Setup
Place the same color marker on the game board in the locations with troop and ship spaces of the corresponding color. If a location has spaces that have diagonal lines in it, leave it empty (Abraham, Upper St. Lawrence and South Channel Safe Anchorage) to start the game.
On the game Morale Track place a corresponding wooden marker (blue for French, red for British) on the 10 space to start the game.
Select the side you want to play, British or French. Use the Field Orders Book for that side. Next set the solitaire orders card deck for the other opposing side nearby. The Field Orders Book for the solitaire side is NOT used. The solitaire orders card deck for the side you are playing is NOT used.
Decide how strong the solitaire opponent is by the number of cards in the solitaire counter orders card deck. Use the chart below to determine solitaire opponent skill.
7.1 Solitaire Card Deck Size
British Solitaire Opponent Skill:
- STRONG: 27 cards or more
- GOOD: 24 cards
- WEAK: 20 cards or less
French Solitaire Opponent Skill:
- STRONG: 20 cards or less
- GOOD: 24 cards
- WEAK: 27 cards or more
Once the skill level is decided, shuffle the card deck and deal out that many cards face down from the shuffled solitaire counter orders card deck. The cards remaining in the deck are set aside unrevealed and not used for this game.
8. Sequence of Play
The Sequence of Play is based on a "turn" that is comprised of you selecting one command order, flipping face up one solitaire opponent counter order card and carrying out the actions and results of those two orders played. Once completed the turn is over and a new one begins.
Each turn uses the following Sequence of Play:
- Select one of your command orders available by placing a marker on the choice in your Field Orders book.
- Decide if you want to use one aggressive commander action. If so place a marker on it.
- Select the top card of the solitaire counter orders draw deck of the solitaire opponent and place it face up.
- Execute the actions portion from the solitaire counter order card played.
- Execute your command order and compare its results to the solitaire counter order issued on the solitaire opponent card revealed. If an aggressive action is played roll the aggressive commander action die (black die) with any command order die (white die) rolled.
- Apply the results.
- Begin next turn.
The game ends when one player or the other has zero morale on the Morale Track. The game also ends when no cards are available to draw from the solitaire counter orders card deck or if Quebec is vacant of French troops.
9. Issuing Orders from the Field Orders Book
As the British or French player you have the choice of 7 Orders that can be issued from your Field Orders Book plus aggressive command actions that can be played with your orders. The orders fall into general types based on results. Attack type orders, like Attack Quebec or Attack Abraham, generally cause troop losses. Morale type orders, such as Bombard Quebec and Indian Raids, generally cause morale reductions. Move type orders, such as Move Troops and Move One Ship, allow the movement of troops and ships into the empty spaces of locations.
Each order card/page shows: Order Title, Order Execution, Order Restriction, and Results Chart.
Each turn you may issue one order. Place a marker on the order being issued. If you decide to use an aggressive commander action with the order, place a marker on it too. Follow the instructions for the order issued and carry out the results.
Sequence of Play Example
First, select your Command Order by placing a marker on your choice in your Field Orders book.
Then, decide if you want to use one of your aggressive commander actions. If so place a marker on it.
Select the top card of the solitaire opponent draw deck and place it face up. Execute the action instructions from the card played.
Next, execute your command order by rolling both the Order and the Aggressive Commander Action dice. Compare the Order die results to the counter order played on the solitaire opponent card played.
The 6 rolled by the Order die caused one British troop reduction.
Since an Aggressive Commander Action was chosen, apply the Aggressive Commander Action die too.
A 2 was rolled for the Aggressive Commander Action die which results in removing 2 French troops and 1 British troop from the board.
Your orders and aggressive commander actions are generally played after following the actions portion of the solitaire card played for the turn. The counter order portion (A Defend Quebec, B Defend Upper Quebec, etc.) of the solitaire card is played with and applies to your order.
Each order in the Field Orders Book has an Order Execution section that explains how the order is executed and an Order Restrictions section that lays out the conditions required to be able to use the order.
Each order has a results chart that shows the results of the order when compared to the counter order played by the solitaire opponent and a die roll which is the Order Die. If modifiers are used (i.e. +1 or -1), these are applied to the results of the die roll.
The results chart show the impact of the order you issued compared to the counter order played by the solitaire opponent. The results can be No Effect and Success which is a gray box. Results of Success or Failed apply to troop and ship moves. Results for troop and morale losses are shaded to show which side it applies n. Red shaded boxes mean that the troop and/or morale losses are applied to the British. Blue shaded boxes mean that the troop and/or morale losses are applied to the French. Troop losses are designated by a number. Morale losses show a minus sign and say "morale".
Aggressive Commander Actions
Each side has Aggressive Commander Actions (ACA) available to them. In a turn they may play one ACA in addition to the one order issued. Some orders do not allow ACA. Track them with a marker as they are used. Losses and morale reductions from your aggressive actions are in addition to any losses and morale reductions resulting from your orders. The marker for the ACA remains on the track on the field order book to show how many have been played and how many remain. Canceled orders also cancel aggressive actions played.
The French also have two ACA Fire Ship actions. Fire Ship actions and French aggressive actions must be played separately. Both cannot be played in the same turn.
The Field Orders Book text for the aggressive commander actions reads: the French are allowed 2 aggressive commander actions and 2 Fire Ship actions during the campaign, using only one per turn; the British are allowed 4 aggressive commander actions during the campaign, using only one per turn. Track them with a marker as they are used. Losses and morale reductions from your aggressive actions are in addition to any losses and morale reductions resulting from your orders. Canceled orders also cancel aggressive actions played. ("1 Safe Anchor" = French moves 1 ship to safe anchorage.)
Each order will state from which locations troop losses come from and each troop marker lost causes an adjustment one space downward on the Morale Chart.
Morale losses not involving troop losses are taken directly from the Morale Chart.
For example, if the results say -2 morale and is red shaded, then British morale on the Morale Chart would be moved two spaces downward.
The Command Orders restrictions section will note when an order cannot be played.
10. Using the Solitaire Counter Orders Deck
The cards of the solitaire counter orders deck have the actions and the counter orders of the solitaire opponent.
The solitaire counter order cards are used by the solitaire opponent to bring actions into play and to issue counter orders against your side. Their card is revealed after you select an order to issue from the Field Orders Book. The solitaire counter order card revealed is in play for the current turn only.
On each solitaire counter order card played there is an action and a counter order (lettered A, B, C, and D) that the solitaire player issues that is his play for the turn. The solitaire card actions are resolved first. Then your order is executed and it is compared with the solitaire opponent counter order to determine results. Generally, a die is rolled and a results table is used for your order when compared to the counter order played by the solitaire opponent.
It is important to resolve the solitaire counter order card action first. Sometimes actions will cancel your order.
For example, if you as the British commander issued a "Bombard Quebec" order and the solitaire French opponent card revealed was "Raid on British Batteries; you may not bombard Quebec this turn"; your Bombard Quebec order is effectively canceled.
Sometimes solitaire counter order card actions will change what you decide to do with your order issued.
For example, if you as the French commander issued an Attack British In Upper Quebec order and the solitaire British opponent card revealed "Command Conflict; Cancel order issued for the turn OR Proceed with order at a -1 modifier"; you may decide to cancel your order instead of going forward with an attack that the odds are against you.
Sometimes solitaire counter orders card actions will not be playable against you.
For example, if you as the French commander issued a Skirmish order and the British solitaire opponent card revealed "Poor Command Coordination; your Move Troops Order cannot be played this turn", the action has no effect on the order you issued. Had you issued a Move Troops order it would have affected you by canceling your order.
CANCELED ORDERS: If an order is canceled by a solitaire action, the effect is as if the order had never been issued.
11. Executing Your Command Order for the Turn
Your orders are executed against the solitaire counter orders card revealed for the turn which has actions and counter orders that impact the order played. The action portion of the solitaire counter orders card is executed first. It has an action that must be resolved. That action may or may not affect the order you played. Once the action is resolved, then execute your order and it is affected by the solitaire counter order played.
The British and French solitaire player have 4 counter orders available to them. The solitaire counter order directly impacts the Command Order you play. They are lettered A through D. Each has a title such as "Defend Quebec" or "Counter Attack". The counter order played for the turn is on the bottom of the solitaire order card revealed for the turn.
Order and Counter Order Example
For example, you as the French commander issue an "Indian Raids" order by placing a marker on the order in the Field Orders Book. Markers are in the Indians location spaces so this order can be used. The British solitaire opponent counter order card is revealed and it is "Militia Desert". For the action portion of the card roll one die and it is a "5". You must remove one marker from any location except Indians and choose to remove one marker from Beauport. The British solitaire counter order issued is "B: Defend Upper Quebec". Roll one die and consult the results chart of your order. You roll a "5" which results in a British morale reduction of one. Had the die rolled been a "1" the results would be a French troop reduction of one and the troop loss would be taken from a marker in the Indians location spaces.
(Card text shown: Militia Desert - "Roll one die. On a 4-6, remove one of your troop markers from an area of your choice except Indians area." Indian Raids order: after resolving any events, roll the order die and apply results based on the chart below and British counter order played. Any troop losses are taken from Indians. British morale reductions are taken directly on the morale chart. Indian losses do not affect French Morale. Restriction: Must have Indians in play to use this order.)
12. Battle
Battle occurs when attack type orders are used. Most orders require you to roll one die and apply the results based on the counter order played by the solitaire opponent. Roll the white die to determine the results of orders. When using an aggressive commander action roll the black die to determine the results of the aggressive commander action along with the white die that determines results of the order played by you.
The order results tables on orders and aggressive commander actions (if used) are used to determine the outcome of the battle. The results are troop marker losses, no affect, and sometimes direct morale reductions. When using the results table of the order issued, use the column that matches the counter order played by the solitaire opponent. Compare the die roll (1-6) to the appropriate row to determine results.
Orders will state in what location or locations troop marker losses must be taken. When this occurs remove the troop marker(s) from the game from the designated location(s) and adjust the Morale Chart downward one space for EACH troop marker lost unless stated otherwise.
Orders Results Example
For example, you as the British commander have troop markers on Abraham. You issue the "Attack Quebec" order. The French solitaire opponent order card revealed is "Fire Ships" which for the action portion, has no effect on the order (however the action must be completed first). The French solitaire counter order portion is "A: Defend Lower Quebec." You roll a 3 on the die. The results are 2 French and 1 British troop losses. Your losses come from Abraham and you remove 1 troop marker and reduce your morale by 1 space. The French losses come from Cap Rouge 1st and Quebec. There is 1 troop marker in Cap Rouge which is removed. The second troop marker removed is from Quebec. Reduce the French morale by two spaces on the Morale Chart.
(Attack Quebec order: After resolving any events, roll the order die and apply results based on chart below and French counter order played. Any troop losses are taken from Abraham for the British; Quebec and Cap Rouge for the French. Take French losses from Cap Rouge first. Restriction: Must have troops in Abraham to use this order.)
When you attack a location and the solitaire opponent has no troop markers in the location and yet incurs troop losses, take the troop losses directly from other opponent locations of your choice, other than reserve until the reserve is the only choice.
IMPORTANT: Some solitaire card action effects can remove troop markers in an area that makes the area empty. If a card or a player order "empties" your area BEFORE your order is executed then it cancels your order.
For example the French do an Indian Raid yet if Remove Indians card "empties" the Indian area your order can not be played (no troops there) and is canceled.
Same thing can happen in a two player game where Indians are removed during the British attack before a the French "Indian Raids" order which would cancel the order.
Note that all though vacant troop spaces in a location can prevent you from using an order related to that location, the location itself can still be attacked by the solitaire opponent. When this occurs it immediately reduces your morale by 1. Any troop losses for you come from other locations of your choice, reducing morale further.
Some solitaire orders cards have die roll modifiers that are required if the order results table is used. Adjust the actual die roll up or down for the modifier to determine die roll result to use on the table.
For example, as the British you play the Attack Lower Quebec Command Order. The French solitaire order card revealed is Command Conflict which requires you to cancel your order or proceed at a +1 modifier. If you proceed with the order, then die rolls using results tables will add 1 to the die roll. If a 4 is rolled add 1 for a die roll result of 5 (4+1=5).
Example of Play
For example, you as the French commander issue a "Hold" order and use your first aggressive commander action. The British solitaire opponent order card revealed is "Superior Seamanship" which moves one British ship to the Upper St. Lawrence, which is done first. Then the solitaire order for the British is "A: Defend Lower Quebec." Roll one white die for the order played and one black die for the Aggressive Commander Action played. The white die roll is a 2 and the black die roll is a 5.
The results for the white die are a 1 troop loss for the French so you must remove one troop marker from a location of your choice. You choose Cap Rouge. The results from the black die is a one troop loss for the French and a 2 troops loss for the British, which can be removed from any location. Beauport and Levis are chosen.
The French would reduce their morale on the Morale Track by 2, for 1 troop loss on the order played and one troop loss on the aggressive commander action result. The British will lose 2 troop losses for the aggressive commander action result and reduce his morale accordingly.
Note that had the white die roll been a 4 the result would be no effect on either player for the order played but the losses from the aggressive commander action would still be applied.
(Card text shown: Superior Seamanship - "Move one British ship from Safe Anchorage or Lower St. Lawrence to an empty slot in Upper St. Lawrence, if available." Hold order: After resolving any events, roll the order die and apply results based on the chart below and British counter order played. Any troop losses are taken from British and French locations of your choice, except Indian area. Restrictions: None.)
Actions and Orders Example
For example, as the British you issue "Move One Ship" order and attempt to move one ship from Lower St. Lawrence to the Upper St. Lawrence. The French solitaire opponent order is "Good Harvests" which does not affect ship movement with the action portion of the card, though the action is played first and completed. The counter order played is "D: Defend All Positions." You roll a die and compare to the D column on the Move One Ship order. 3-6 will result in a failed ship move. A 1 or 2 will result in a Success. You roll a 1, success! Move one ship marker from the Lower St. Lawrence to the Upper St. Lawrence.
(Card text shown: Good Harvests - "Increase French Morale by the number of markers in play in the South Shore Villages." Move One Ship order: After resolving any events, roll the order die and apply results based on chart below and French counter order played. If successful, you may move ONE ship from Lower St. Lawrence to Upper St. Lawrence or vice versa. If moving from Safe Anchorage area to the Lower St. Lawrence, use a -3 modifier on a move. Restrictions: Must have ships in the water area you are moving from and empty ship spaces in the water area moving to. May not use Aggressive Commander Actions with this order. Cannot move from Safe Anchorage to Upper St. Lawrence. "-1 M" = -1 Morale.)
13. Movement
Troop markers can only be moved by a Move Troops order and only to land locations. British ship markers can only be moved by Move One Ship order and can only be moved in the 3 water locations, Lower St. Lawrence, Upper St. Lawrence and South Channel Safe Anchorage. Troop and ship movement can be affected by the solitaire counter order card played.
When moving troop and ship markers, the movement must be from a location that has markers in its spaces to a location that has empty spaces. If no empty spaces exist, then a move to that location is not possible.
For the British player using the Move Troops command order, the troops markers cannot move into empty ship marker spaces. For the Move One Ship order, the ship markers cannot move into empty troop marker spaces. For the British solitaire card, Wolfe Repositions Troops, the card only applies to troop markers and cannot be used on ship markers.
IMPORTANT: The British can only move troop markers to empty troop marker spaces in the Abraham location when they have at least two ship markers in the Upper St. Lawrence ship spaces.
(Move Troops order text: After resolving any events, roll the order die and apply results based on the chart below and French counter order played. If successful, you may move 1-3 troops from ONE area to one other area that has empty troop spaces. If the move is from Orleans (reserve) you may move up to 1-6 troops. Restrictions: Must have at least 2 ships in upper St. Lawrence to move any troops to Abraham. May not use Aggressive Commander Actions with this order.)
14. Reductions to Morale
Reductions to morale are recorded on the Morale Track.
Morale reductions occur in two ways:
- Troop marker losses from locations
- Direct morale reductions as a result of actions and orders results not involving troop losses
When the results of the order you played shows a troop reduction, for each troop removed from the game board there is a corresponding reduction made on the Morale Track for the side or sides affected. Results of the order played and actions on solitaire Orders Cards can cause direct reductions to morale.
For example, a 2 troop loss for the British resulting from an order played would require that 2 troops be removed from the game and a move 2 spaces downward on the British Morale Track. For example, a solitaire action result that calls for a reduction of French morale by 1 would be a direct reduction of French Morale without any troop loss and require a move of 1 space downward on the French Morale Track.
15. How to Win the Game
The solitaire opponent counter orders card deck represents the passage of time during the campaign. When the last card is played, the campaign is over. The British Navy departs to avoid being iced in the St. Lawrence during the cold seasons. If the British have not won the game at this point, then it is a French victory.
The British win if French morale drops to zero OR a turn ends with Quebec spaces empty of troop markers and Abraham occupied with British troop marker(s).
The French win if British morale drops to zero OR the solitaire opponent counter orders draw deck has no cards left in it.
Any time a side's morale reaches zero his opponent automatically wins the game at that instant. If both the British and French reach zero morale at the same time the French win.
16. Keep It Simple
It is important that game rules writers try to cover the numerous situations that can occur and try to explain what to do in each situation in the rules. But sometimes it can make "rules" overwhelming when trying to explain as much as possible. We have no doubt that we are capable of causing this too.
But in the spirit of keeping it simple, as a reminder, the essential game mechanics are:
- Select one order to play
- Reveal the solitaire counter order card
- Resolve the action portion of the solitaire counter order card first
- Apply the results of your order using the solitaire counter order card portion
- Repeat the above.
Let the guidance of the orders selected and the solitaire counter order cards actions and instructions present the game rules to you for many situations.
17. Two Player Version of the Game
1759 Siege of Quebec was designed as a solitaire game but it can also be played by two players. The two-player version of the game uses the rules from the solitaire version of the game with the exceptions noted in this section.
In summary, the major differences between the two-player version and the solitaire version are:
- Players use Orders Cards for selecting orders from their Field Orders Book.
- Players select a Counter Order card to play against their opponent's Orders Card played for the turn.
- Players use the two player Command Decision deck of cards as the draw deck for BOTH players and the card drawn each turn applies to and can be used by both players.
Components shown: Command Decision Card (e.g. "Command Conflict": Cancel order issued for the turn. OR Proceed with order at +1 modifier for the British and a -1 modifier for the French.), French Order Card (e.g. French Order 4, Attack Lower Quebec), British Counter Order Card (e.g. A: Defend Lower Quebec).
In the two-player game, both players (French and British) use their Field Orders Book to issue orders. However, once a player decides on what order to use, he selects a matching Orders Card (the cards are numbered to match Field Orders, 1, 2, 3, 4, etc.) that represents the order he is using for the turn and places it face down (so his opponent cannot see what order he has played) in front of him.
Both players also select a counter order (A, B, C, D, etc. using counter order cards) to play against their opponent's order played for the turn. The counter order card selected is placed face down in front of the player.
Once both players have selected their orders card and counter order card and placed them face down in front of themselves, a Command Decision Card is flipped face up from the draw deck and it applies to and can be used by both players. Note that some Command Decision cards require and action before players execute their orders (ex. Bad Weather, etc.).
The British player executes his orders card first by revealing his face down orders card by flipping it face up. He then decides how to use the Command Decision Card shown (if he has a choice) and announces his decision. The French player reveals his counter order card by flipping it face up. Results are applied using the Field Orders Book of the British Player for the order played (results are also on his Orders Card).
Then the process is repeated with the French player executing his order card by revealing it, deciding how to apply the Command Decision card (if he has a choice) and announcing it, and the British player revealing his counter order and applying the results using the Field Orders Book for the order played by the French player.
Two Player Sequence of Play
The Sequence of Play is based on a "turn" that is comprised of each player selecting one order and one counter order and following the sequence of play. Once completed the turn is over and a new one begins.
When playing the two-player version, shuffle the Command Decision Cards and 13 cards are dealt out of the play deck face down out of play. This will leave a Command Decision draw deck of 20 cards.
- Both players select one order from those available in their Field Orders Book for the side they are playing. Selection is done by placing the matching orders card face down in from of them. First the British, then the French.
- Both players decide if they want to use one of their aggressive commander actions. If so place a marker on it. First the British, then the French.
- Both players decide on the counter order card to be played and place it face down in front of them.
- Select the top card of the Command Decisions draw deck and reveal it face up. If it has an action that applies for the turn (ex. Bad Weather, etc.), complete the action.
- The British player reveals his face down orders card by flipping it face up. If he has a choice, he then decides how to use the Command Decision Card shown and announces his decision.
- The French player reveals his counter order card by flipping it face up. Results are applied using the Field Orders Book of the British Player for the order issued (results are also on his orders card).
- The French player reveals his face down orders card by flipping it face up. If he has a choice, he then decides how to use the Command Decision Card shown and announces his decision.
- The British player reveals his counter order card by flipping it face up. Results are applied using the Field Orders Book of the French Player for the order issued (results are also on his Orders Card).
- Begin next turn.
Note that some Command Decision card choices may result in a player canceling his order. When that occurs the order played is NOT revealed and the counter order played by the opposing player is not played or revealed.
If you want to handicap one player or the other it is possible by adjusting the Command Decision Cards draw deck. Reducing the draw card deck below 24 cards makes it more difficult on the British player. Increasing the draw deck above 24 cards makes it harder on the French Player.
In the two-player game if a player attacks an opponent's location that is empty of troop markers in the location spaces he gets a modifier to his die roll; -1 for the British and +1 for the French. Troop losses for the empty location are taken by the owning player from any other location of his choice in which he has troop markers.
Two Player Example of Play for a Turn
The British player selects Order 3; "Attack Villages" and Counter Order D; "Rangers". He places those cards face down in front of him.
The French player selects Order 3; "Hold" and Counter Order C; "Defend Quebec". He places those cards face down in front of him.
The top card of the two player Command Decision Card draw deck is drawn and revealed face up. It is "Command Conflict".
(Card text shown: British Order 3, Attack Villages - Any troop losses are taken from Montmorency and/or Levis for the British and North Shore and/or South Shore Villages for the French. Restrictions: Must have troops in Montmorency or Levis to use this order. French Order 3, Hold - Any troop losses are taken from British and French locations of your choice, except Indian area. Restrictions: None. Command Conflict - Cancel order issued for the turn. OR Proceed with order at +1 modifier for the British and a -1 modifier for the French.)
The British player decides he is going to proceed with his order at a +1 modifier so he reveals his Order 3 "Attack Villages" card. The French player then reveals his Counter Order card C "Defend Quebec". The British player rolls 1 die and rolls a 3 which is modified to a 4 (3+1) resulting in a 1 troop loss for the French. The French troop is removed from South Shore Villages and morale is reduced 1 for the troop loss. This completes the British order for the turn.
The French player now decides how to use the Command Decision card. He decides to cancel his order for the turn. So his Order 3 "Hold" is NOT revealed and the British Counter Order D "Rangers" is NOT revealed. This completes the French Order for the turn.
Now the next turn begins.
18. Designer and Historical Notes
We wanted easy mechanics yet have enough decision points to provide meaningful and historical choices for players based on what the solitaire opponent threw at them in the way of actions and counter orders that could adversely affect their choices.
As the British solitaire opponent, a larger deck provides more time before the British Navy leaves and therefore makes him a more difficult opponent. As the French Solitaire opponent, the smaller the deck reduces the time you have to win as the British before the British Navy leaves.
The principle of the of the player Field Orders Book and the Solitaire Counter Order Cards is they represent the army units and commanders of the siege campaign and their potential capabilities. They lay out the possible results based on the choice of the order you issue and the actions and counter orders by the solitaire opponent as they relate to the order you played.
The Field Orders and Counter Orders represent the options available to each side during the siege of Quebec. Both armies were very different and their commanders faced tough decisions based on the capabilities of their units and those of the opponent contesting them.
The French army had a small regular army and large militia forces available. Montcalm controlled the regulars, but Vaudeville as governor controlled the militia and Indians. Both commanders did not get along well nor coordinate their forces as well as possible. But they had the advantage of well-fortified positions and terrain advantages. They pursued a strategy of defense with the idea if they could hold out until the fall, the threat of ice would force the British fleet and therefore the British army to return to England and lift the siege.
The British army was a highly trained force supported by the greatest navy in the world. The problem they faced was the cliffs along the river and around Quebec protected the approaches to the city and its defenders. The French batteries and river conditions limited naval movement, and time was against them as the navy would depart in the fall. They pursued a strategy of wearing down French morale by constant attacks on the villages of the militia, the burning of crops, and bombarding the city. Further they continued to use the navy to seek a way to get at the city and the French forces.
The solitaire counter order deck size helps create some of the pressure associated with the British navy departure for both sides. As the British solitaire opponent, a larger deck provides more time before the British Navy leaves and therefore makes the French player have to hold out longer. As the French solitaire opponent, the smaller the deck reduces the time you have to win as the British before the British Navy leaves.
Commanders in campaigns must make decisions that have risks, rewards, and consequences. We have tried to build those elements in the choices you make in issuing orders and the counter moves the opposing side makes. If you can attack or move to an area where they are weak, your chances are better. But if they anticipate your attack or move, the odds of success will be stacked against you. Regarding, in any decision you make, there are no guarantees.
During the campaign, Wolfe wanted to have a grand battle and Montcalm wanted to avoid one. Their strategy reflected this as well as a battle of attrition over the course of time. The game design presents these choices. One can pursue the grand battle strategy for the British IF they are able to get naval support in the Upper St. Lawrence and land with enough force in Abraham. The French may want to avoid this, and have some counter measures available with risks. Both sides can pursue a strategy of attrition by their order choices.
The strategies you choose to pursue can change over the course of the campaign as the results of your choices take effect. Further, the solitaire opponent play is never predictable as the solitaire counter order deck can vary greatly from game to game.
19. History of the 1759 Siege of Quebec Campaign
General James Wolfe had approximately 7,700 regular troops available for the Quebec campaign. They were supported by a fleet of 49 ships and 140 smaller craft led by Admiral Charles Saunders. In the summer of 1759 they sailed up the St. Lawrence River to Quebec. The British strategy was to take the city and end the war by cutting off supplies, support and reinforcements from France.
Wolfe and his men landed on the Île d'Orléans on 28 June and established a base camp. The French attempted to attack the fleet by sending fire ships downriver to disrupt the landing, but British sailors in longboats were able to pull the flaming craft clear of the fleet.
Next, Wolfe's troops landed on the south bank of the river at Point Levis, directly across the river from Quebec. An artillery battery was established there in early July that nearly leveled the lower town by bombardment.
The French, led by General Montcalm, focused preparations for the British attacks on Beauport. Montcalm distributed some 12,000 troops in a collection of fortified redoubts and batteries from Quebec to the Montmorency Falls.
In late July, the first serious attempt by Wolfe's troops to land on the northern shore led to the Battle of Beauport, also known as the Battle of Montmorency. Approximately 3,500 troops, supported by a heavy bombardment, attempted to land, but were caught under fire in the river shallows. A thunderstorm ended the fight and allowed Wolfe to retreat after taking some 450 casualties to Montcalm's 60.
For the remainder of the summer, Wolfe's focus changed, possibly due to frustration with Montcalm's tactics and the strong natural and man-made defenses. Wolfe's troops, along with American Rangers, attacked and destroyed small French settlements along the St. Lawrence. An estimated 1,400 stone houses and manors were destroyed, and many colonists killed. The effort was likely an attempt to force Montcalm's army out of its fortifications, but was unsuccessful. However, the attacks did reduce the amount of supplies available to the French and lowered their morale.
Through the summer siege, illness spread through the British camps causing already low morale to slump even further among the British troops. With many men in camp hospitals, British fighting numbers were thinned. In addition, his frustration with Montcalm's defensive stance continued to grow. Wolfe wrote, "The Marquis of Montcalm is at the head of a great number of bad soldiers, and I am at the head of a small number of good ones that wish for nothing so much as to fight him; but the wary old fellow avoids an action, doubtful of the behavior of his army." Montcalm also expressed frustration over the long siege.
After considering and rejecting a number of plans for landings on the north shore, a decision was made in late August by Wolfe and his brigadiers to land upriver of the city. If successful, such a landing would force Montcalm to fight, as a British force on the north shore of the St. Lawrence, would cut his supply lines to Montreal. Following the failed British assault on Beauport, Montcalm altered his deployment, sending approximately 3,000 men under Bougainville upriver to Cap Rouge to monitor the British ships upstream. He further strengthened his positions on the Beauport shore.
The British, meanwhile, prepared for their risky deployment upstream. Wolfe selected a cove situated west of the city at the bottom of a high cliff leading to the plateau above.
Wolfe's plan of attack depended on secrecy and surprise. His plan required that a small party of men should land by night on the north shore, climb the tall cliff, seize a small road, and overpower the French pickets that protected it. Then the bulk of his army would ascend the cliff by the small road and deploy for battle on the Abraham plateau.
On September 12, a group of volunteers led by Colonel William Howe with fixed bayonets were sent to clear the picket along the road. They climbed the steep slope and captured the French pickets quickly. Thus, by the time the sun rose over the Plains of Abraham, Wolfe's army had a solid foothold at the top of the cliffs.
Montcalm was taken aback to learn of the British deployment. Though he might have awaited reinforcement by Bougainville's column at Cap Rouge (allowing simultaneous frontal and rear attacks on the British position) or avoided battle while he concentrated his forces, he instead elected to confront Wolfe's force immediately and directly.
Wolfe's army formed a line first with their backs to the river, then spread out across the Plains of Abraham with its right anchored along the St. Lawrence and its left by a bluff and thick woods. While the regular French forces were approaching from Beauport and Quebec, the Canadian militia and native sharpshooters engaged the British left flank, sheltering in the trees and scrub.
Montcalm, one of few mounted men on the field, decided that a swift assault was the only way to dislodge the British from their position. Accordingly, he deployed the forces immediately, without waiting for further reinforcements from Beauport or Cap Rouge. Montcalm, riding his horse and waving his sword to encourage his men, ordered a general advance on the British line.
As the French approached, the British lines held their fire. The French fired two disorganized volleys. Wolfe had ordered his soldiers to charge their muskets with two balls each and returned fire. After the first volley, the British lines marched forward a few paces towards the shocked French force and fired a second general volley that shattered the attackers and sent them into retreat.
Wolfe had moved to a rise to observe the battle and was struck by two shots that were mortal. With Wolfe dead and several other key officers injured, British troops fell into a disorganized pursuit of the retreating French troops.
General Townshend took charge of the British forces and realized that Bougainville's column was approaching from Cap Rouge. He quickly formed up two battalions to meet the oncoming French. Bougainville retreated back to Cap Rouge while the rest of Montcalm's army retreated to Beauport.
During the retreat, Montcalm, still mounted, was struck by musket fire and mortally wounded. The battle resulted in similar numbers of casualties on both sides of the field; the French had 644 men killed or injured, while the British were left with 658 killed or wounded.
In the wake of the battle, a state of confusion spread through the French troops. Governor de Vaudreuil, decided to abandon Quebec and the Beauport shore, retreating west towards Montreal. Quebec City surrendered to the British, ending the campaign.
Source: Wikipedia (edited)