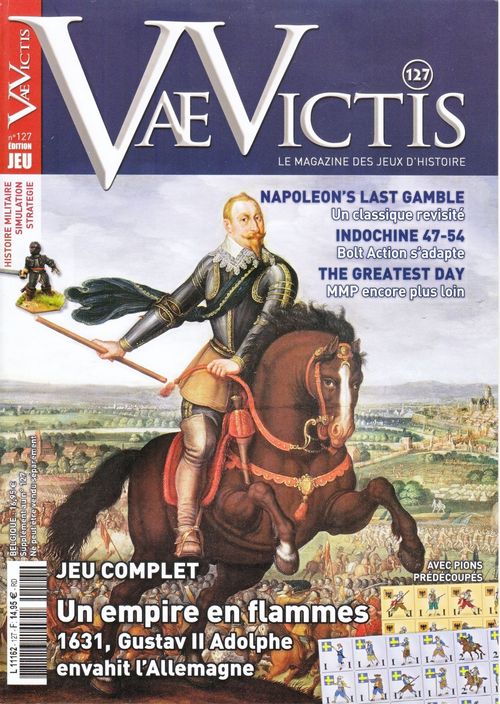
1631: Un Empire en Flammes
1631: Un Empire en Flammes Rulebook
Table of Contents
Table of Contents
1 - In general
The game pits the invading Swedes against Imperial and Catholic League forces. The Swedes' aim is to secure control of strong points and resources and to gain an alliance with the powerful electorates of Brandenburg and Saxony, therefore enabling them to push further south and dictate terms for a general peace. The Imperial side (together with their Catholic League allies) are aiming to block this process before it gets out of hand.
1.1 - Scale
The campaign area (the map) represents a 400 by 400 kilometre area of the north of the Holy Roman Empire. Each turn is approximately a month with each action being 10 - 15 days. The movement lines on the map are on average 60 kilometres. Infantry and cavalry units represent 3,000 soldiers plus camp followers, but Saxon units represent 6,000 musketiamen. Artillery units represent 12 demicannon (24 pdr) and their supply train. Garrison control markers are 500 to 1,000 men. Supply points represent various resources of approximately 6,000 florins worth.
2 - Game components
2.1 - Units and commanders
Imperial and League units are yellow, Swedish and Saxon one are blue. A flag is used to specify the belonging of each unit.
Units can be either infantry, cavalry or artillery.
Units can be either fresh or spent. Spent units suffer a negative to hit modifier in combat. Units become spent by suffering a step loss and are destroyed if they suffer a second step loss. Spent units are marked by flipping the counter over to the side with a darker band running along its side.
Commanders are marked with the portrait and name of the commander in question. They too can be fresh or spent. Fresh commanders are required to engage enemies and they grant a defensive bonus when attacked. Each commander has his own army box on the army board, where units can be placed.
An army includes all the units and commanders in an area or moving together. The composition of armies is not fixed, as some units and commanders move out of areas while others remain behind or units are destroyed.
Game note: units should be placed on the army boxes of commanders in their area and only the commanders left to occupy the area on the game board. This will facilitate movement, turning over counters and calculations of various kinds.
2.2 - Map board
All names are in German on the map. See lexicon in section 11.
2.2.1 - Areas and movement lines
Gameplay occurs on the map. The map is composed of a number of areas, which armies occupy and where the action occurs. Areas are joined together with movement lines which determine movement between the areas.
There are three types of lines:
- Dotted blue: river move
- Double black: road move
- Bridge: bridge
There are three types of areas:
- Green areas have no major cities.
- Square areas contain a major city (or group of smaller cities).
- Star shaped areas contain a major city, which is also a fortress.
Cities provide victory points (as indicated by the number superimposed on a blue flag) and supply points (as indicated by the number superimposed on a black hexagon). Cities also provide protection to units, slow the enemy's advance and control bridges over rivers, making them the focus around which fighting occurs. Fortresses are harder to capture, but in all other respects are normal cities.
The colour of areas indicates their political allegiance. Black and yellow-bounded areas belong to Saxony, red and yellow-bounded areas to Brandenburg and black and grey to minor states.
Cities are generally garrisoned by either Imperial or Swedish troops. This is marked by placing the appropriate garrison control marker over the city. A Brandenburg or Saxon city that is not garrisoned by either Imperial or Swedish troops will automatically have a Brandenburger or Saxon garrison control marker, which is printed onto the map.
Units and commanders in an area are placed over a friendly or allied garrison control marker. Neutral and hostile units and commanders are placed next to the garrison control marker, indicating that they do not control the city.
2.2.2 - Strategic areas
There are four strategic areas: Lower Saxony, Franconia, Bohemia and Silesia. They represent larger regions bordering the main theatre of operation. Imperial reinforcements arrive from strategic areas and the Swedes gain victory points for units that occupy them. Special rules regarding strategic areas are outlined in section 10.3.
2.2.3 - Regions
Each area on the map is contained in one of thirteen regions (ex: Mittelelbe). The regions are indicated by different coloured boundaries each with its own name. Regions are used solely for looting in the supply phase (9.1.3).
2.3 - Army board
The army board is a separate sheet containing an army box for each of the eight commanders. Units moving together with a commander are placed in the corresponding army boxes.
2.4 - Track board
2.4.1 - Turn track
This is used to indicate the game turn and phase, as well as any reserves and special rules (10.0) that are in play each turn. The lighter coloured boxes with only a number denote campaign phases (6.0) while the darker-coloured boxes with an "S" and a number denote supply phases (9.0).
Game note: The turn marker can be rotated to remind the players how many of the five actions of the campaign phase have been played. After the fifth action, move the marker to the supply phase box. The two sides of the turn marker can be used to remind the players whether it is Swedish (blue) or Imperial (yellow) initiative.
Reserves and recruited new units yet to enter play, as well as the Révolte (Rebellion) marker are placed on the appropriate supply phase of the turn track.
2.4.2 - Supply Point and Victory Point Track
Used to record Swedish Victory Points as well as Supply Points for both sides.
2.4.3 - Diplomacy Track
Used to record modifiers that affect Swedish diplomacy actions.
3 - Factions and allegiance
One player plays the Swedish faction (blue). The other plays with the Imperial faction (yellow), which comprises Imperial and allied Catholic League forces. The Swedish and Imperial factions are hostile towards each other.
Brandenburg (red and yellow bonded areas) and Saxony (black and yellow bounded areas) are initially neutral towards both Swedish and Imperial factions. However, these two can change their allegiance during the game via a diplomacy action (6.7).
Once this succeeds, they become a Swedish ally and hostile towards the Imperial faction for the rest of the game.
Each player has full control over the units and commanders of its allies. Allied units and commanders can operate together in the same army. The player also gains the supply points and victory points generated by all allied cities.
There are restrictions to movement in neutral and hostile areas, as detailed in the movement rules (6.1).
The distinction between Imperial and Catholic League forces is purely for historical interest and doesn't affect gameplay.
3.1 - Garrison control markers
Saxon and Brandenburg garrison control markers are printed on the board and are in place unless a Swedish or Imperial garrison control marker (physical marker) is placed over them. Minor states don't have a garrison control marker unless specifically garrisoned by the Imperial or Swedish faction.
A city with a Swedish or Imperial garrison control marker ceases to belong to its original faction and belongs to the controlling faction.
Garrison control markers are placed when a city is captured during pursuit (7.9) or as a result of siege attrition (9.2.1).
4.0 - Sequence of play
The game lasts for 10 turns. Each turn has three phases, which are played in the following order:
A - INITIATIVE DETERMINATION PHASE
B - CAMPAIGN PHASE (6.0)
- Initiative Player action
- Player 2 action
- Initiative Player action
- Player 2 action
- Initiative Player action
C - SUPPLY PHASE (9.0)
- Supply forces (9.1)
- Resolve sieges (9.2)
- Place reserves (9.3)
- Check victory conditions (9.4)
5 - Initiative determination
Initiative goes automatically to one side or the other after certain special events occur. Swedes automatically gain the initiative: On the first turn. On the turn after Habsburg Panic! occurs (10.1). On the turn after Révolte occurs (10.2).
Otherwise, initiative is determined at the start of the turn with a die roll.
- 1-2: Swedish initiative
- 3-4: Initiative retained from previous turn
- 5-6: Imperial initiative
6 - Campaign phase
The players operate during the campaign phase by performing actions. Actions are performed one by one alternately between the players. The initiative player goes first.
Campaign phase actions
- Initiative player: 3 Actions.
- Non-initiative player: 2 Actions.
There are five possible actions:
- Engage (move one area and attack, or two areas and attack if both moves are along river lines)
- March (move up to 2 areas)
- Forced March (move up to 4 areas but suffer attrition)
- Regroup (move 2 units and make 1 spent unit fresh)
- Diplomacy (attempt alliances)
6.1 - Movement
Most actions involve movement, which happens between areas along the different movement lines.
The engage, march and forced march actions allow one army to move, while the regroup action allows two individual units or commanders anywhere on the board to move.
At the start of an action, before making any moves, you may choose which units and commanders to include in an army and which to leave behind in the starting area. During movement the army may drop off and pick up units anywhere along its path of movement.
Movement along roads and blue rivers movement lines takes one move. Movement across bridges is free, but an army must still undertake an action to move along them.
Example: a marching army (2 moves) could first move across a bridge, then move two moves along road lines and finally move across a bridge.
6.1.1 - Neutral and hostile areas
Armies from both sides can freely move into and through areas that are either friendly or allied.
Armies can move into and through neutral areas, but can't move across bridge movement lines connected to neutral cities, unless actually attacking the neutral city with an engage action. There is a negative effect diplomatically for moving through neutral areas or attacking them, as detailed in section (6.7).
Areas that are hostile or contain hostile units can only be entered by taking an engage action to attack the enemy (6.1.1).
6.1.2 - Movement in strategic areas
Strategic areas can only be entered with an engage or march action. Strategic areas can be exited with any action.
Units from both sides can be in strategic areas at the same time and evading (7.3) units do not need to leave the area. Units cannot intercept (7.2) out of strategic areas.
6.2 - Engage action
An army may make one move along a road line or two moves if both are along river lines. It can enter an area with hostile or neutral garrison control markers and units. This will initiate combat (7.0).
- An army taking an engage action must either include a fresh commander or a fresh commander must already be in the area where combat will be fought (a siege situation where a commander is either besieged or besieging).
- The Swedish player may not engage neutral units or areas, but may engage Imperial units that are in an area containing a neutral garrison control marker.
6.3 - March action
An army may make two moves. It cannot enter an area with hostile units or garrison control markers, unless they are already besieged (7.10).
6.4 - Forced march
An army may make up to four moves. It cannot enter an area with hostile units or garrison control markers, unless they are already besieged (7.10).
An army making a forced march takes losses unless moving along rivers. One unit in three (rounding down) takes a step loss unless more moves were made along river than road movement lines.
Example: An army making a forced march along three river and one road movement line doesn't take step losses, but an army moving along two river and two road movement lines takes losses.
Include all units that moved during the action to determine the size of the army, including units dropped off and units picked up during the movement (but excluding units which are left in the area where the army started its movement).
All commanders in the army become spent (including those dropped off), even if the majority of moves were along river movement lines.
6.5 - Overrun
An activated army can overrun an area containing a vastly smaller enemy force if the following requirements are met:
- The activated army's units outnumber enemy units in the area by at least 4/1. (Remember that commanders are not units).
- The area does not contain an enemy garrison control marker.
- The area is not entered using a bridge movement line.
If these requirements are met, then an army is allowed to enter the enemy area using a March or Forced march action and continue moving further on if it still has movement available. An army taking an Engage action can likewise move further and engage enemies in another area, if it still has movement available.
Any enemy units and commanders in an overrun area must attempt to evade (7.1) as soon as the active army enters the area but before they complete their movement. If the test to evade is failed, then all enemy units are destroyed and enemy commanders complete the evasion.
6.6 - Regroup action
Up to two individual units or commanders may move up to four moves. They cannot enter an area with hostile units or garrison control markers, unless they are already besieged (7.10).
Additionally, one spent unit may be made fresh.
These units can be in different areas and anywhere on the board, except for units being besieged.
6.7 - Diplomacy action
This action is available for the Swedish player only. It allows the Swedes to attempt to gain an alliance with both Brandenburg and Saxony. One action is sufficient to test for both. To see if the action is successful, roll a die. The minimum score needed is shown in the chart below:
| VPs | Brandenburg | Saxony |
|---|---|---|
| 0-10 | 8 | 11 |
| 11-20 | 7 | 10 |
| 21-30 | 6 | 9 |
| 31-40 | 5 | 8 |
| 41-50 | 4 | 7 |
| 51-60 | 3 | 6 |
| 61-70 | 2 | 5 |
| 71-80 | 1 | 4 |
Modifiers: Add/subtract the value on the Diplomacy Track to the die score rolled.
The alliance of Brandenburg and Saxony with Sweden lasts for the rest of the game. Move the Swedish Supply Point and Victory Point markers up by the total amount generated by the allied cities.
Brandenburg and Saxon cities with an Imperial garrison control marker are unaffected and remain under Imperial control.
After the alliance, Saxony and/or Brandenburg become hostile to the Imperial side, which consequently restricts Imperial movement in these areas.
6.7.1 - The Diplomacy Track
The diplomacy track is used to keep track of modifiers that affect the die roll of the diplomacy action. A diplomacy marker is moved up and down along the track as events transpire in the game.
Adjust the marker as follows:
- +1 At the start of turn 4
- +1 At the start of turn 7
- +1 When Imperial or League units move into or through Saxon areas
- +2 When Imperial or League units take an engage action against neutral Brandenburg or Saxon units or areas
- -1 When Swedish units move into or through neutral Saxon areas
Note: Swedish units cannot take an engage action against Brandenburg or Saxony.
7 - Combat
Combat occurs after an army has taken an engage action into an area with a hostile unit or garrison control marker.
Combat may also occur if a player manages to intercept (7.2) an enemy move.
In either case, the player taking the action (active player) is defined as the attacker, while the other player is the defender.
After the attacker has made its move, the defender may attempt to intercept (7.2) or evade (7.3), after which any remaining units must either fight the attackers or withdraw to garrison (7.4) a friendly city in the area.
There are some variations depending on the combat situation (7.5) which will be discussed later on, but all combats proceed in the following manner:
Combat Procedure
- Attacker moves into area
- Defender may attempt to intercept or evade with some units
- Defender may withdraw remaining units to garrison
- Determine combat situation
- Make attacks
- Allocate hits
- Determine victor
- Pursuit
7.1 - Commander skill rating
Each of the commanders used in the game has a skill rating of 0, 1 or 2. This skill rating is indicated by a number on the commander marker. Note that most commanders have a different skill rating depending on whether they are fresh or spent.
A commander's skill rating affects the chances of an army to intercept (7.2) or evade (7.3) an enemy as well as enabling the defender to ignore some hits in certain combat situations (7.5).
7.2 - Intercept
The defender may attempt to intercept the attacker's move with an army from a neighbouring area.
An intercept move may not be made into an area that already contained the attacker's units or garrison control marker prior to the action.
Before the attempt is made, the defender must state which units and commanders are attempting to intercept. Note that not all the units and commanders from an area need participate in the interception, though they must all come from the same area.
Intercept test
An attempt to intercept succeeds on a die roll of 4 or more with the following modifiers:
- +1 if the intercepting army has a commander that has a higher commander skill rating than in the attacking army
- +1 if the intercepting army has less units than the attacking army
- -1 if the intercepting army has no cavalry units
If the intercept fails, the attacker may continue his action. If the intercept succeeds, the intercepting army is moved into the area intercepted. The attacker now has the choice to cancel his last movement and leave the army in the last area it was in before it was intercepted, or to fight the intercepting army in combat.
If a combat is fought, the intercepting army plus any friendly units that were already in the area will act as the defender.
If an intercept is attempted (even if it is failed), the defender may not attempt to evade (7.3) during the same action. However, they may still withdraw to garrison (7.4).
Only one attempt to intercept a movement can be made during an enemy action (irrespective of how many areas the movement passes through).
7.3 - Evade
After an attacker has moved into an area and if an intercept is not attempted, the defender may attempt to evade.
Evade test
An attempt to evade succeeds on a die roll of 4 or more with the following modifiers:
- +1 if the evading army has a commander that has a higher commander skill rating than in the attacking army
- +1 if the evading army has less units than the attacking army
- -1 if the evading army has no cavalry units
If the test is successful, the evaders move up to two areas with as many units as they like. The remaining units will withdraw to garrison a friendly city in the area or be destroyed (7.4).
Evading units move together and may not enter any areas with enemy units or garrison control markers or the area the attacker just vacated. They may drop off units in an area they evade through. A bridge movement line connected to a neutral or hostile city may not be crossed.
Exception: During pursuit, attackers who lost a combat may evade into the area they just vacated (7.9).
If an evading army can't fulfil these requirements, then all units and commanders are destroyed.
Units in strategic areas do not need to move out of the area when evading (though they may if desired).
Whether the evasion is successful or not, all evading commanders become spent. One in three units (rounding down) making a successful evasion move suffers a step loss.
7.4 - Withdraw to garrison
Up to four units and as many commanders as desired can withdraw to garrison the city of the area they're in, as long as it has a friendly or allied garrison control marker.
Units that intercept into the area or which are left behind after others evade can withdraw to garrison. If an attempt to evade fails, then the defending units must either all fight or all withdraw to garrison.
If more than four units withdraw to garrison then the controlling player must destroy any units exceeding this limitation.
7.5 - Determine the combat situation
If the defender has units that did not evade or withdraw to garrison, fight a battle (example A below). If the last move made by the attacker was across a bridge, fight a river assault instead (example B below).
Example of combat situations: Tilly does not evade or withdraw to garrison. In situation A Gustav moves along a river line so a battle is fought. In situation B Baner moves across a bridge so a river assault is fought. If Tilly withdraws to garrison then A can make a siege assault but B cannot.
If at least some of the defender's units withdrew to garrison or there was only an enemy garrison control marker to begin with, the city in the area becomes besieged (7.10).
The attacker may make a siege assault (but doesn't have to) as long as its last move was not across a bridge (example A above). If the last move was across a bridge the city becomes besieged but the attacker cannot make a siege assault with this action (example B above).
Combat situation
- Attacker's last move along road or river line
- If the Defender does nothing, intercepts or fails an evade test then fight a battle.
- If the Defender withdraws to garrison, the city is besieged with a siege assault if desired.
- Attacker's last move across a bridge
- If the Defender does nothing, intercept or fail an evade test then fight a river assault.
- If the Defender withdraw to garrison, the city is besieged, no siege assault this turn.
If all the defenders evaded and none withdrew to garrison the city, the attackers are victorious automatically.
Treat the combat as having been a battle if the last move of the attackers was along a road or river movement line and a river assault if the last move was across a bridge. See section (7.9) for effects.
If the enemy ends up besieged but the attacker doesn't launch a siege assault, combat ends with no victor.
7.5.1 - Unusual situations with neutral powers
It can happen that the Imperial side attacks an area containing hostile Swedish units and a neutral garrison control marker. If the hostile units choose to evade, then the attacker may choose to besiege a neutral garrison. As long as the last move wasn't across a bridge the attacker may also choose to make a siege assault.
7.5.2 - Voluntary battle
The defender can choose to fight a battle instead of a river assault. This might be a good idea if he has a large cavalry superiority.
7.6 - Make attacks
In combat, each unit rolls as many dice as it has combat strength, as indicated on the counter.
- If the combat is a battle, both sides roll all their attacks simultaneously.
The combat strength number in the left corner of the unit counter is used in battles.
- If the combat is a siege assault or river assault, the defender rolls all of his attacks first. After resolving any step losses, the attacker then rolls all of his attacks.
The combat strength number in the right corner of the unit counter is used in siege assaults and river assaults.
Rolling to hit
Each die scores a hit on 4 or more with the following modifiers:
- -1 for spent units
- -1 for cavalry units in an assault
7.7 - Allocate hits
After rolling to hit for all attacks, apply the following modifiers to reflect defended positions:
- Battle or river assault: The defender may ignore a number of hits equal to the skill rating of ONE commander in the area.
- Siege assault against a city: The defender may ignore the first hit suffered.
- Siege assault against a fortress: The defender may ignore the first two hits suffered. The defender automatically causes one extra hit against the attacker.
After these modifiers have been calculated, apply hits to each side. The defender applies hits to the attacker and vice versa.
Use the following prioritization
- Artillery cannot be hit
- Fresh units take hits before spent ones
- Allocate one hit to each unit before a second hit is allocated to them
- All infantry must be destroyed before cavalry units are allocated a second hit
For each hit, a unit suffers a step loss. Fresh units become spent and spent units are destroyed.
Mark spent units by flipping them over to their spent side. Destroyed units are removed, but can be recruited in later supply phases (9.1.4).
7.8 - Determine victor
The victor is determined according to the following prioritization:
- If one side suffers more step losses than it can take, it loses (remember that artillery, commanders and garrison control markers do not sustain hits).
- The side that destroyed more units is the victor.
- The side that caused more hits is the victor.
- The defender is the victor.
7.9 - Pursuit
After determining the victor of a combat, conduct pursuit. The nature of pursuit depends upon the combat situation (7.5).
7.9.1 - Pursuit after a battle
The victor captures (7.11) a hostile city in the area where combat occurred and places a friendly garrison control marker in it.
If the loser lost any units in the battle, then all of their artillery units are destroyed and they suffer as many step losses as they had infantry and cavalry units destroyed. These step losses are allocated by the controlling player.
All of the loser's commanders become spent. The loser's army evades, taking an additional step loss for every three units (7.1).
7.9.2 - Pursuit after a siege assault
- Attacker wins: This is exactly as per pursuit after a battle. Additionally, if the city captured generates more than one supply point, roll a die. If the result is less than or equal to the number of hits suffered by the attacker, the city is sacked. Replace the garrison control marker of the city with a sacked garrison control marker.
If the city is sacked, the attacker can make as many spent units fresh as the city generates supply points. A sacked city will generate only one supply point for the remainder of the game.
- Defender wins: The loser (attacker) suffers as many step losses as they had units destroyed and all of its commanders become spent.
There are no other effects (the attacker does not evade and artillery is not lost).
7.9.2 - Pursuit after a river assault
- Attacker wins: The defender must evade with any or all units and withdraw to garrison a city with the remainder. For every three units that evade, one unit suffers a step loss. The attacker may choose to besiege a hostile or neutral city in the area. The city IS NOT captured outright even if all defenders evade and the attacker may not make a siege assault upon it this action.
- Defender wins: The attacker must evade, taking a step loss for every three units. The evasion move must pass back across the bridge to the area the army just vacated. No additional hits are inflicted upon the loser for units destroyed and no artillery is lost after a river assault.
All commanders on the loser's side become spent.
7.10 - Besieged cities
A city is besieged as long as at least one hostile unit is kept in the area. Being besieged affects how units from either side can move through the area.
Units from the besieger's side can move through a besieged city area as if it had no enemy units (including marches and forced marches). Units can also move and evade freely across any bridge movement lines connected to a besieged city area.
Units from the besieged side may not move into or out of the besieged area unless they are engaging the besiegers. If accompanied by a fresh commander, the garrison within a besieged city may engage the besiegers in a subsequent action.
Another army may also engage the besiegers, in which case any garrisoning units must participate in the combat.
This is treated as a battle, unless the attacker's last move is along a bridge movement line, in which case it is a river assault.
If there are enough besieging units, the city will also suffer from siege attrition, which affects supply to and from the city and means that the city might surrender in the supply phase. This is explained in section (9.2.1).
7.11 - Captured cities
As soon as a city is captured adjust the Swedish victory point, Swedish supply point and Imperial supply point markers.
8 - Spent commanders
Commanders become spent if they:
- Attempt to evade (even if unsuccessful)
- Lose a combat
- Participate in a forced march
At least one fresh commander must be present for an army to be able to engage the enemy.
A spent commander becomes fresh at the end of the next action of its side.
9 - Supply phase
The supply phase is conducted simultaneously by both players and in the following order:
- Supply forces (9.1) a. Calculate supply points b. Calculate supply need c. Looting d. Recruit units e. Refresh units f. Implement attrition
- Resolve sieges (9.2)
- Place reserves and recruits (9.3)
- Check victory conditions (9.4)
9.1 - Supply forces
Armies need to be supplied and recruited with Supply Points (SP). Supply points are generated from off-board sources and for each city controlled (unless suffering from siege attrition).
Supplying forces works by comparing the available supply points, as indicated by the supply marker, to the supply need, as indicated by the attrition marker.
Note that cities and their garrisons suffering from siege attrition (9.2.1) are ignored when supplying forces. These cities do not generate supply points and their garrisons are not supplied, nor can they be reinforced. Siege attrition is dealt with separately when resolving sieges (9.2).
9.1.1 - Calculate supply points
Each side has a number of supply points as determined by their off-board supply and the cities they control. Swedish and Imperial off-board supply are marked on the supply track and are as follows:
- Swedish off-board supply points: 12
- Imperial off-board supply points:
- 4 on turns S1 to S3
- 8 on turns S4 to S10
Add to these numbers the supply point value of all friendly and allied controlled cities that are not suffering from siege attrition and mark the total on the supply point track using the supply point marker.
The marker should be adjusted during gameplay as changes occur (eg. when a city is besieged or captured) in order to avoid extra calculation and possible error in the supply phase.
9.1.2 - Calculate supply need
Every unit except those suffering from siege attrition (9.2.1) needs to be supplied. Garrison control markers and commanders are not units and need not be supplied. Units on the turn track (in reserve) need not be supplied.
The supply need is as follows:
- 1 SP per Swedish unit in Swedish supply port (marked with an anchor)
- 1 SP per unit in strategic areas (Lower Saxony, Franconia, Bohemia, Silesia)
- 2 SP per unit for all other units
Count the supply need for each side and mark this on the supply point track using the attrition marker.
9.1.3 - Looting
Regions may be looted by each player if they have friendly units in it.
Looting Procedure
- Looting is conducted by regions. The initiative player chooses in which order looting occurs.
- Roll three dice for each side wishing to loot a region. The die result used depends on how ravaged the region is:
- Unravaged: pick highest
- Ravaged: pick middle result
- Ravaged x 2: pick lowest
- Both sides gain as many supply points as they rolled, up to a maximum of the number of friendly units (excluding those suffering from siege attrition) they have in the region.
- If the modified die result is less than or equal to the number of units, the region is ravaged worse than it already was.
If this happens, an unravaged region gains a ravaged-marker whilst a ravaged region gains a ravaged x 2 marker. This level only increases once per supply phase even if both sides rolled less than or equal to their number of units. A region that has a ravaged x 2 marker can't be ravaged any worse.
After determining the amount of loot generated for a region, adjust the attrition marker down by this amount.
Do not move the supply marker up.
9.1.4 - Recruit units
Up to 4 new units can be recruited per turn. No more units may be recruited than there are counters available.
Recruitment cost
- 4 SP to recruit an infantry unit
- 6 SP to recruit a cavalry or artillery unit
Recruited units are placed on the next turn's supply phase (place the units on the turn track to remind you).
Adjust the attrition marker up accordingly.
9.1.5 - Refresh units
Units (excluding those suffering from siege attrition) can be made fresh for 1 SP each.
Adjust the attrition marker up accordingly.
Units can be refreshed only so long as the attrition marker doesn't move above the supply marker (you can't refresh units by making other units spent).
9.1.6 - Implement attrition
After recruiting and refreshing units, the players must inflict a step loss for each point that the attrition marker exceeds the supply marker.
These must be allocated as follows:
- First step loss to a unit in the player's largest army (area with most units).
- Second step loss to a unit in an army besieging an enemy city.
- Remaining step losses can be allocated in any way the player wishes.
Note: The first two step losses can be to units in the same army, if it is the largest army and besieging an enemy city.
After implementing attrition, remove the attrition marker from the supply track.
9.2 - Resolve sieges
If a city is besieged (7.10) and there are Three more besieging units than besieged units in the area, it suffers siege attrition.
Example: At the start of the game Magdeburg has 2 Swedish units besieged by 5 Imperial and League units so it suffers siege attrition. Kolberg and Greifswald each have only a garrison control marker (0 units) besieged by 3 Swedish units so they too suffer from siege attrition.
9.2.1 - Siege attrition
A city does not generate any supply points to its side's supply pool when suffering from siege attrition. Make any adjustments on the supply point track as soon as a siege with three more besieging units commences.
Units garrisoning a city suffering from siege attrition may not be supplied from their side's supply pool, instead a special siege supply pool is generated that the besiegers must use in each supply phase.
The siege supply pool is created by doubling the supply points normally generated by the city. Mark the value of the pool with a die placed on top of the garrison control marker.
Units suffering from siege attrition only need to be supplied with 1 SP per unit. In each supply phase reduce the value of the siege supply pool by the number of besieged units in the city.
Once the siege supply pool reaches zero the besieged units can take a step loss but will never actually be destroyed due to lack of supply. Instead, not being supplied affects the chances of the garrison surrendering as indicated below.
The siege supply pool is removed and siege attrition ends if the ratio of besieging to besieged units ever drops too low.
9.2.2 - Siege surrender
After implementing siege attrition (9.2.1), each besieged city suffering from siege attrition must test for surrender.
Test for surrender. Roll a die.
- 0: All besieged units and commanders are destroyed. The city is Sacked, if eligible (7.9.2). The besiegers capture the city by placing a garrison control marker.
- 1-2: The remaining besieged units and commanders make an evasion move, after which the besiegers capture the city by placing a garrison control marker.
- 3-6: The garrison holds out and the siege continues.
Modifiers
- -1 For each besieged unit that would have been destroyed due to lack of supply
- -1 For each artillery unit in the besieging army
- +1 If the city is a fortress
- +1 For each besieged unit that can be supplied
9.3 - Reserves and recruits
Reserves are units scheduled to enter play on a certain turn and in a certain place. The reserves for each turn and where they should be placed are indicated on the turn track.
Imperial units recruited in the previous supply phase are placed in any of the four strategic areas.
Swedish units recruited in the previous supply phase are placed in Swedish supply ports (marked with an anchor) that have a Swedish garrison control marker. They can be placed in besieged coastal fortifications. This reflects Swedish control of the sea.
Saxon recruits are placed in any Saxon city.
9.4 - Check victory conditions
9.4.1 - Victory points (VPs)
Victory points are indicated with a blue flag on the map. Only Swedish points are monitored.
Victory points are awarded for:
- Cities: The victory point value of cities that have a Swedish garrison control marker or are allied to Sweden
- Units in strategic areas: 1 VP for each unit that the Swedes and Saxons have above the number of Imperial and League units in Lower Saxony and Bohemia. 2 VPs per unit more in Franconia and Silesia.
- Révolte marker active: 10 VPs
- Units at the end of the game: 1 VP per step of Swedish and allied Saxon units on the board (including strategic areas). -1 VP per step of Imperial and League units.
Example: If the Swedes have a commander and four units in Silesia and the Imperials have two units, the Swedes gain four points (two more units for the Swedes at 2 VPs each).
Accumulated victory points are marked on the victory point track. Adjustments should be made whenever they occur. Victory points are not gained permanently and may be lost. Note that unlike supply points, victory points are not gained or lost when a city is besieged, but only after it is captured.
9.4.2 - Victory conditions
Victory conditions are checked at the end of each supply phase and at the end of the game (supply phase S10).
- The Swedes win if they have more than 90 VPs at the end of two consecutive supply phases.
- The Imperial side wins if they control all the Swedish supply ports (marked with an anchor) or if Gustav Adolph is killed.
If neither side wins before the end of the game, count up victory points awarded for units and consult the chart below.
- 91 or more: Swedish major victory
- 81-90: Swedish minor victory
- 71-80: Draw
- 61-70: Minor Imperial victory
- 60 or less: Major Imperial victory
10 - Special rules
10.1 - Habsburg Panic!
Once Frankfurt is garrisoned by the Swedes or Swedish units enter Silesia, Imperial off-board supply points are permanently raised by 4 points.
The Swedes automatically have the initiative on the following turn after Habsburg Panic! occurs.
10.2 - Révolte
A protestant rebellion starts in Franconia at the beginning of supply phase S4, S5 or S6. At the beginning of each of these phases, assuming the rebellion has not yet started, roll a die:
- S4 = 5-6: Rebellion starts
- S5 = 3-6: Rebellion starts
- S6 = Automatic: Rebellion starts
If the rebellion does not start on supply phase S4 or S5, move the Révolte counter to the next supply phase and roll again next turn. The rebellion starts automatically on S6.
Once it starts, place the Révolte counter in Franconia. While it is in play and fresh, Imperial supply points are reduced by 4 and the Swedes gain 10 victory points.
The Swedes automatically have the initiative on the following turn after Révolte occurs.
The rebellion can be crushed by taking an engage action into or within Franconia.
Ending the rebellion in Franconia (modified roll)
- 12 or +: The rebellion ends. Remove the Révolte counter from play and return Imperial supply points and Swedish victory points to normal.
- 9-11: The rebellion ends temporarily. Turn the Révolte counter onto its spent side and adjust Imperial SPs and Swedish VPs to normal. At the start of each subsequent supply phase roll a die. On the score of 1 the rebellion resumes. Turn the counter back to its fresh side and adjust Imperial supply points and Swedish victory points.
- 1-8: The rebellion continues.
Modifiers
- +1 For each Imperial and League unit taking part in the engage action.
The Imperial player may continue to attempt to remove a spent Révolte counter with subsequent engage actions. A failed attempt to end the rebellion does not make a commander spent.
10.3 - Strategic areas
Strategic areas can only be entered with an engage or march action. Strategic areas can be exited with any action.
Units from both sides can be in strategic areas at the same time and evading units do not need to leave the area. Units cannot intercept out of strategic areas.
Units in strategic areas need to be supplied with only 1 SP per unit in the Supply Phase. The Swedes gain victory points for units in strategic areas (9.4.1). Imperial and League units that are recruited enter play in strategic areas.
10.4 - Harvest
At the start of supply phase S7 (marked in orange on the turn track) all ravaged markers go down one level. Areas ravaged twice are now only ravaged once and those ravaged once remove the marker altogether.
10.5 - Winter attrition
After an army moves as part of an Engage, March or Forced March action or makes an intercept move in a winter turn (marked in blue on the turn track), one in three units (rounding down) takes a step loss. Apply the step loss before combat is fought.
Winter attrition is cumulative with attrition from a Forced March action, but does not affect armies that are evading.
10.6 - Magdeburg captured
If Magdeburg is captured by the Imperial player, then its victory point value is reduced to 6 for the rest of the game.
10.7 - Werben crossing (gué)
The two black parallel movement lines connected to Werben may only be crossed on the roll of 4+.
- Make the roll for an army or individual unit when it attempts to cross. If it fails, its action ends.
- When evading roll for each unit. Those that fail suffer a step loss but then get across.
If the attempt to cross is successful, treat the Werben crossing as a bridge movement line.
10.8 - Saxony under attack
As soon as Saxony becomes a Swedish ally, remove Saxon reserves, except those due to arrive in the next supply phase. These units can be recruited (9.1.4) using supply points as normal (but they are not "free" units).
If Dresden, including Arnim's army, is engaged before Saxony has become a Swedish ally, Arnim's army will automatically withdraw to garrison Dresden.
10.9 - Imperial supply boost
From the beginning of supply phase S4, Imperial off-board supply points are increased by 4. This reflects increased flow of supplies from the Catholic League and improved control imposed by Tilly. The increase is marked on the turn track and supply point track.
11 - Game setup
Place commanders, units and markers according to the following list. Regions are listed starting from the top. Note that some units and ALL Imperial commanders start the game spent, noted with an (S). Commanders are in italic.
- Mecklenburg (Ravaged marker)
- Dömitz: imperial garrison
- Wismar: imperial garrison
- Rostock: imperial garrison + 1 x inf. (S)
- Neu Brandenburg: imperial garrison
- Vorpommern (Ravaged marker)
- Demmin: imperial garrison + Savelli (S)
- Stralsund: swedish garrison + 1 x swedish inf.
- Greifswald (besieged); Supply = 0: imperial garrison + Banér
- Stettin: swedish garrison + Gustav Adolf
- Hinterpommern (Ravaged marker)
- Kolberg (besieged); Supply = 0: imperial garrison + Tott
- Greifenhagen: 1 x imperial inf. + 1 x imperial cav. (S)
- Prignitz (Brandenburg)
- Havelberg: imperial garrison
- Brandenburg: imperial garrison
- Mittelmark (Brandenburg)
- Garz: imperial garrison + Schauenburg (S)
- Frankfurt: imperial garrison
Armies
- Tilly: 2 x catholic league inf.
- Pappenheim: 1 x Inf.; 1 x cav.; 1 x art. all catholic league; 2 x imperial inf. one (S)
- Schauenburg: 2 x inf. one (S); 1 x cav.; 1 x art. (S) all imperials
- Savelli: 2 x imperial inf. one (S)
- Banér: 1 x Inf.; 1 x cav. (S), 1 x art. all swedish
- Tott: 2 x Inf. one (S); 1 x art. all swedish
- Gustav Adolf: 4 x Inf.; 2 x cav.; 1 x art. all swedish
- Arnim: 1 x Inf.; 1 x art. saxons
On the turn track
- Turn 1: swedish initiative
- S3: (Niedersachsen): 2 x inf. + 1 x cav. all catholic league
- S4: Révolte marker
- S5: (Arnim): 1 x inf. saxon
- S6: (Arnim): 1 x cav. saxon
- S7: (Franken): 3 x inf. + 1 x cav all imperial
- S8: (Arnim): 1 x inf. saxon
SPs and VPs track
- Swedish VPs marker = 22
- Swedish SPs marker = 15
- Imperial SPs marker = 20
Diplomatic track
- Marker = 0
Lexicon
- Böhmen: Bohême, BOHEMIA
- Franken: Franconie, FRANCONIA
- Hinterpommern: Poméranie orientale, EASTERN POMERANIA
- Niedersachsen: Basse-Saxe, LOWER SAXONY
- Sachsen: Saxe, SAXONY
- Schlesien: Silésie, SILESIA
- Vorpommern: Poméranie occidentale, WESTERN POMERANIA
12 - Example
The Swedes automatically have initiative for the first turn so the initiative determination phase is skipped. They decide to take an engage action with Gustav Adolf, moving his entire army to Garz. Every third unit takes a step loss due to winter attrition. Gustav has seven units, so he makes two of the fresh infantry spent.
Schauenburg has four options. The first is to stay put and fight the Swedes, in which case it would be a good idea to attempt to intercept with the units at Greifenhagen and have as large an army as possible. The second option is to attempt to evade with his entire force, thus surrendering Garz without a fight. The third option is to evade with some forces and leave the remainder to garrison Garz. The fourth option, which can be undertaken even if an intercept or evade fails, is to withdraw to garrison Garz with up to four units.
Outnumbered and with his force in poor conditions, Schauenburg decides to evade with his entire force. The test succeeds on the roll of 3, since Schauenburg's army is smaller than Gustav's and he has cavalry. The army moves two areas south to Frankfurt, taking a step loss to a fresh infantry unit. As all the enemy evaded, the Swedes are victorious and Garz is captured. The Imperial garrison control marker is flipped over to the Swedish side and the supply and victory point track is adjusted to provide three victory points and one supply point to the Swedes and reduce one from the Imperials.
The second action of the turn belongs to the Imperial faction. The eastern sector requires bolstering. Pappenheim's army is tied down besieging Magdeburg but Tilly is free. With two units, Tilly makes a forced march from Halberstadt to Frankfurt. The first move takes the army to Magdeburg (which can be entered as it is besieged) and across the Elbe along the green line (free move). The second move, with another free move across the Havel, takes the army to Brandenburg and the last two moves go through Berlin to Frankfurt. Tilly's army doesn't take any step losses for the forced march or the winter movement since he only has two units. At the end of the action all the Imperial commanders who were spent at deployment become fresh, with the exception of Tilly who just made a forced march.
The third action sees Gustav Adolf's army engaging the two Imperial units at Greifenhagen. Two Swedish units are left behind to garrison Garz so only one of the remaining five suffers a step loss from winter attrition. This time the Imperial units roll a 1 and fail to evade. As the engage move came along a green line, this is a river assault.
As the Imperial units are defending in a river assault, they get to roll their attacks first. Both units have an assault combat strength of 1, so two dice are rolled. The infantry unit hits on 4 or more, but the spent cavalry unit only hits on a 6 (-1 to hit for spent units, -1 to hit for cavalry units in assaults). The Imperial units cause one hit, which the Imperial player chooses to allocate on a fresh infantry unit (artillery can't be hit and fresh units must take hits before spent ones). The Swedes now roll their attacks and score two hits. One hit must be allocated to each unit before any units take a second hit, so the fresh infantry becomes spent and the spent cavalry is destroyed. The Swedes have won since they have destroyed more units. If this had been a battle, the Imperial infantry would now be destroyed during pursuit (the loser taking as many step losses as they had units destroyed). As it was a river assault, the Imperial unit simply evades, retreating to Landsberg.
For their last action, the Imperial player contemplates counter-attacking Garz with the units in Frankfurt. However, the army is in a sorry state, which will be made worse after winter attrition from movement. Furthermore, there is a great chance that Gustav will intercept with part or all of his army from across the Oder. The Imperial player decides to act more cautiously and makes a regroup action instead. One of the Imperial infantry units at Frankfurt is made fresh. Two units can also be moved. The Imperial player decides to use only one of these moves to relocate one infantry unit from Savelli's army to garrison Neu-Brandenburg in case Gustav Adolf decides to attack. After the action, Tilly is made fresh.
The Swedish player has the last action of the first turn. The player contemplates three options: attempting an alliance with Brandenburg and Saxony, staying put and refreshing a unit or pushing on to make a third attack. With 25 victory points and no modifiers on the diplomacy track, an alliance with Brandenburg is still unlikely (needing a roll of 6) and an alliance with Saxony is impossible. Regrouping would give Gustav's worn down army time to regain its strength, but afford little else. Gustav opts to continue the offense and take an engage action against Landsberg. This is a bit risky since Gustav's army will be very worn down and vulnerable to a counter-attack. However, as the Swedish player is likely to retain the initiative (and have the first action) next turn, the risk seems worth it. Moving Gustav's army into Landsberg, situated in the un-ravaged region of Neumark, will also facilitate supplying the Swedes in the Supply Phase, which comes after this action.
Gustav's army of five units takes another step loss from winter attrition before reaching Landsberg. The lone Imperial unit in Landsberg elects to withdraw to garrison the city and thus a siege begins. The Imperial supply point marker is reduced by one since Landsberg doesn't generate a supply point whilst besieged. A siege supply pool is generated by doubling the supply points generated by Landsberg and this is marked by placing a die with number 2 on top of the garrison control marker. Gustav decides to launch a siege assault against Landsberg. The defending Imperial unit rolls its attacks first but doesn't cause any hits. Gustav's forces manage to cause a single hit, but the city negates this due to it being a defended position. As neither side has caused any hits, the defender wins and Gustav becomes spent for having lost a combat.
On to the supply phase. Both sides calculate their supply needs by totalling their non-besieged units. The Swedes have 7 units in coastal areas (Baner's and Tott's armies and the unit left in Stralsund) plus 7 units in other areas. The two besieged units in Magdeburg are ignored as they are suffering from siege attrition and will be supplied from their siege supply pool. The units in coastal areas require one supply point each and the other units require two supply points each, making the Swedish supply need 21. The Swedish attrition marker is placed at 21. There are 14 Imperial and League units (excluding the ones in reserve or besieged at Landsberg) each requiring two supply points. The Imperial attrition marker is placed at 28.
Figure: Supply Phase: Supply and attrition markers placed.
The regions with units from one side or the other may then be looted. There are only Swedish units in Eastern Pomerania so only they get to roll. The Swedish player rolls three dice, rolling 6, 4 and 2. The middle die roll, 4, is used because Eastern Pomerania is ravaged. There are three Swedish units in the area so it does not become more ravaged (the score is not less than or equal to the number of units). The attrition marker is brought down by three points (the maximum that can be gained is the number of units in the region). Central Brandenburg is unravaged and has units from both sides (2 Swedish, 6 from the Imperial faction) so both sides roll three dice and pick the highest. The Swedes roll 5, 5, 2; the Imperials 6, 5 and 1. The Swedes reduce their attrition marker by two, since they only have two units, and the Imperials by 6. The region becomes ravaged as the Imperials have 6 units in the region.
After all remaining regions have been looted the Swedish attrition marker is at 9 while their supply point marker is at 16. The Swedes choose to recruit another infantry unit (4 points) and refresh 3 units, thereby bringing their attrition marker up to 16. The recruited unit will arrive in one month's time and is placed on the S2 supply phase on the turn track. The Imperial attrition marker is at 15 and their supply point marker at 18. The Imperial player also chooses to refresh three units.
Figure: Supply Phase: Attrition markers brought down after looting.
Before the first turn ends, the four outstanding sieges are resolved. With two Swedish units in Magdeburg, the city's siege supply pool is reduced by 2. The players make a test to see if Magdeburg surrenders. However, with the modifiers involved (+2 for the two garrisoning units that were supplied, +1 for Magdeburg being a fortress, -1 for the single artillery unit in Pappenheim's army), it is impossible to score 2 or less on the test and thus the siege of Magdeburg continues. Landsberg is a different matter. The siege supply pool is reduced by one for the single Imperial garrisoning unit, after which a test for surrender is made. The modifiers are +1 for the supplied unit and -1 for Gustav's artillery unit. A score of 4 is rolled so the siege continues.
Kolberg and Greifswald will both surrender on the roll of 2 or less (+1 for being a fortress, -1 for the besieging artillery unit). Greifswald continues to hold out while Kolberg, rolling a 2, is captured by the Swedes. The Imperial garrison control marker is replaced with a Swedish one. Swedish supply and victory point markers are brought up. The Imperial supply point marker isn't brought down as this was done already at the start of the siege. With this the turn ends. Turn 2 starts with initiative determination – on the roll of 1-4 the Swedes will retain the initiative.
Reference card
The publisher's reference card printed at the back of the rules, transcribed as printed.
Sequence of play
A - Initiative determination phase
- 1-2: Swedish initiative
- 3-4: Initiative retained from previous turn
- 5-6: Imperial initiative
Swedes automatically gain the initiative nn the turn after Habsburg Panic! and Rebellion occurs
B - Campaign phase (6)
- Initiative player: 3 actions
- Non-initiative player: 2 actions
C - Supply phase (9)
- Supply forces (9.1)
- a- Calculate supply points
- b- Calculate supply need
- c- Looting
- d- Recruit units
- e- Refresh units
- f- Implement attrition
- Resolve sieges (9.2)
- Place reserves and recruits (9.3)
- Check victory conditions (9.4)
Combat procedure
- Attacker moves into area
- Defender may attempt to intercept or evade with some units on 4+
- Modifiers: +1 if better commander; +1 if smaller army; -1 if no cavalry units
- Defender may withdraw remaining units to garrison
- Determine combat situation: battle, river assault or siege assault
- Make attacks, hit on 4+
- Modifiers: -1 if unit is spent; -1 if cavalry in an assault
- Simultaneously if battle; Defender first if assault. Fortress causes one extra hit against the attacker
- Hit allocation
- Battle or river assault: The defender may ignore a number of hits equal to the skill rating of ONE commander in the area
- Siege assault against a city/fortress: Defender may ignore 1/2 hits suffered
- Determine victor: 1. Elimination. 2. Destroyed units. 3. Hits. 4. Defender is the victor
- Pursuit
- Battle: city captured, loser suffers as many step losses as they had infantry and cavalry units destroyed.
- Siege assault: same as battle but attacker is not obliged to evade. If attacker wins, roll a die for sacking the city
- River assault: loser evades.
Actions
- Engage: make one move along a brown line or two moves if both are along blue lines and initiate combat.
- March: make two moves.
- Forced march: make up to four moves and suffer attrition.
- Overrun: outnumber enemy units in the area by at least 4:1.
- Regroup: two individual units or commanders may move up to four moves; one spent unit may be made fresh.
- Diplomacy: attempt to gain an alliance.
Siege surrender
Roll a die.
- 0: All besieged units and commanders are destroyed. The city is Sacked.
- 1-2: City is captured. Remaining besieged units and commanders make an evasion move.
- 3-6: Garrison holds out.
Modifiers
- -1 For each besieged unit that would have been destroyed due to lack of supply
- -1 For each artillery unit in the besieging army
- +1 If the city is a fortress
- +1 For each besieged unit that can be supplied