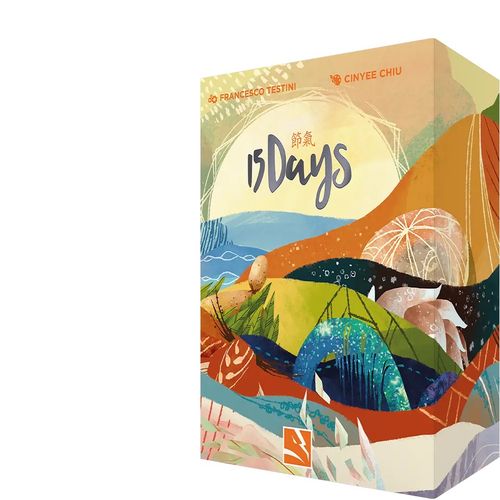
15 Days
15 Days Rulebook
Table of Contents
Table of Contents
About
15 Days is a set collection game where 1-4 players will compete to establish order within the seasons as well as with the wildlife that thrive in them.
Components
- 90 Season Cards (Card backs: 30 green, 30 brown, & 30 blue)
- 5 Feather cards
- 8 Wild cards
- 4 Wooden animal tokens
- 4 Player tableau cards
- 4 Animal action cards
Setup
- Shuffle the 90 season cards together so that the sides showing numbers are face down. Note: When setting up a 2 player game you must first sort the deck into three piles with matching backs for green, brown, and purple. Remove 5 random cards from the top of each pile and place them in the box. Then shuffle the three stacks together to form a 75 card deck.
- Deal 2 random season cards into each player's hand, they may look at these cards but should keep the card-fronts hidden from others.
- Draw 9 season cards and place them face-up into three columns. The second and third cards in each column should partially cover the previously placed cards so that only one card per column is fully visible, but all values are still shown.
- Draw one card and place it face-up above the middle card row so that it does not overlap any cards. This is now designated as the discard pile for the game.
- Divide the remaining season cards into two similar decks and place one to the left of the discard pile and one to the right of the discard pile.
- Place the 4 animal action cards above the season decks and place the corresponding wooden animals on top of these cards. Make sure the side showing the flower icons is not showing.
- Take 2 wild cards per player and place them in a stack near the season decks.
- Each player takes one Player tableau card and places it in front of them.
- Place one Feather card next to the wild cards and then give each player 1 Feather card which they place in front of them, not into their hand. Any remaining feathers are placed back in the box.
- Randomly determine a Starting Player.
Season Card Explanation
- The color indicates the card's season:
- Orange - Spring
- Green - Summer
- Brown - Autumn
- Purple - Winter
- The animal symbol also indicates the card's season:
- Otter - Spring
- Frog - Summer
- Squirrel - Autumn
- Rabbit - Winter
- The number indicates the card's value.
- Each season & value pair has a unique illustration.
Each card is associated with one of four seasons, and this is indicated on the side which shows a value as well as an illustration. The back of each card also shows an icon for a specific season and this will usually match the card-front. Spring cards are special because no cards show the spring symbol on their back, instead spring cards all show a symbol for one of the other three seasons on their back. There are 30 cards that have backs showing the Summer, Autumn, and Winter season symbols and within each set there are 24 correctly matching cards and 6 spring cards.
On Your Turn
Players will take turns in clockwise order, beginning with the starting player. On each turn players will perform 2 actions from 4 possible options. They may choose the same action twice within one turn. The action options are explained in detail below:
Action Option 1: Draw 2 Face-Down Cards
Draw 2 cards into your hand from the face-down season card decks. You may draw both from one deck, or one card from both decks. You may look at your first card before drawing your second.
Note: There is a small chance that every drawn card could actually be a spring card and you won't know this until the card is drawn.
Action Option 2: Draw 1 Face-Up Card
Draw 1 card from one of these locations and add it to your hand:
- The top-most face-up card in a column. The card drawn must not have any other cards on top of it. Afterward, if there are no more cards in that column then draw 3 more from the season decks, choosing which deck to draw from for each subsequent card.
- The top card on the discard pile. Afterward, if there are no more cards in the discard pile then leave it empty. New cards will be discarded into this pile later, for a number of reasons.
Action Option 3: Place Cards
Place any number of cards from your hand into your tableau, paying a cost for each by discarding other cards from your hand. The cards must be placed next to one of your Player tableau card's corners, and each corner can only have cards from one season. The first card placed will dictate that corner's associated season, and each season can only be present in a single corner.
Card Corner Rules
Each corner has a card placement direction that is indicated in that corner. Cards placed into (1-) corners are played to the right of the Player tableau card and continue to the right. Cards placed into (-6) corners are placed to the left of the Player tableau card and continue to the left.
Cards should overlap each other so that all values are visible and the topmost cards are the farthest away from the Player tableau card.
Card values must always ascend from the lowest on the left to the highest on the right within each corner and there can never be more than one card of each value in each corner.
Card Placement Rules
Each newly placed card can go into one of these locations:
- Onto the end of a set of cards so that it's on top of the previous top card. A "top card" is a card that has no other cards overlapping on top of it.
- In between two already placed cards. You are allowed to place between the Player tableau card and the bottom-most card in a corner.
- You may replace a previously placed wild card with the newly placed card, as long as the new card doesn't conflict with any placement rules. Immediately move the wild card into any corner following the placement rules explained in the "Take and place 1 wild card" action section below.
After placing each card you must pay a cost by discarding 1 or 2 other cards from your hand into the discard pile:
Discard 1 Card
- For the first card placed into an empty corner.
- For each card placed into the topmost position of a set of already played cards.
- For replacing a wild card with the newly placed card.
Discard 2 Cards
- For each card placed between two already placed cards or between the Player tableau card and the bottom-most card.
Action Option 4: Take and Place 1 Wild Card
Discard 2 cards from your hand into the discard pile to take a wild card from the supply, if one is available. Each discarded card must be identical to a card that is already placed in one of your corner season sets.
Note: This cost is only paid when gaining a new wild card from the supply, not when moving a previously placed card.
Upon receiving the wild card, it must immediately be placed into one of your corner season sets. The wild card can be placed so that it represents a currently missing number in that corner. This means it could go on the top, bottom, or into the middle of a set of played cards. The wild card now acts as any valid missing number in that position. You are not allowed to have more than 1 wild card in each corner.
Note: Wild cards can act as value 0 or 7 cards. This means each set can have at most 7 cards in it.
Player Hand Limit
After taking 2 actions the last thing a player must do is check for the hand limit. If they have more than 5 season cards in their hand, not including feathers, they must discard cards until they have 5 season cards total.
Gaining Wooden Animals
The first player to have 3 season cards of the same type placed into their tableau can then take that season's associated animal token. The animal token will move to another player as soon as that player has the same number or more season cards of the associated type than the player who currently holds the animal token. When this happens, the player who lost the animal token may draw 1 feather card from the supply if there is one available.
Note: Wildcards placed into a corner count as one card for obtaining that season's animal token.
The player on the right would now take the Frog token from the player on the left.
Each animal token has a specific ability which is usable by the player who has that token. The Animal action cards show a graphical reminder for each animal's effect. Many animal abilities enhance specific actions and you must have the animal token before the action starts in order to make use of it for that action.
- Frog (green) - During each "Place Cards" action pay 1 less card total, no matter how many cards are placed.
- Squirrel (brown) - During each "Draw 2 face-down cards" action, instead draw 3 face-down cards.
- Rabbit (purple) - During each "Draw 1 face-up card" action, instead draw 2 face-up cards. They are drawn one at a time and can come from a combination of columns and the discard pile.
- Otter (orange) - That player's hand size is increased up to an overall limit of 8 cards.
Playing Feather Cards
As a free action during their turn, each player may discard a feather card back to the supply (not the season discard pile) to temporarily gain the effect of any one animal token. They do not gain the token, but instead gain the animal's ability for a single action during that turn. You are allowed to play multiple feather cards in one turn, but cannot use a single animal's ability more than once per action.
Note: When using the feather for the Otter ability, your hand limit will be increased to 8 cards at the end of that one turn.
How the Game Ends
There are two ways the game can come to an end:
- Once a player has 4 complete season sets the game will end immediately, even if it is in the middle of a player's turn. A set is complete when it has 6 cards in it, even if one of them is a wild card.
- Once one of the season card decks becomes empty. In this case the active player will finish their current turn as normal and then perform a free "Take and place 1 wild card" action without having to discard 2 cards. After this, each other player will take one more turn as normal.
Endgame Scoring
Once the game has ended, each player calculates their final score by adding and subtracting points for the following scoring conditions:
- 1 point for each placed card in their longest uninterrupted sequence within each of the four corner season sets. Wild cards used in the scored sequence are worth 1 point since they act as the card they are replacing.
- 2 points for each wooden animal token each player has.
- -2 points for each corner that has no cards placed next to it.
The player with the most points wins the game! In the case of a tie, the currently tied player with the most cards still in their hand will be the winner. If there is still a tie, the currently tied player who has the most wild cards placed in their tableau will be the winner. If there is still a tie, the tied players share the victory.
Example: 3 + 2 + 2 + 1 + 3 - 2 = 9
Solo Rules
In the Solo game you will play against an artificial opponent, the Automa. You must gain more victory points than the Automa once the game is over in order to be victorious.
Solo Setup
Follow the multiplayer game set up rules substituting the following points:
- Setup the game as if there were 4 players (use all 90 season cards and 8 wild cards).
- Only 2 Player tableau cards are needed, one for you and one for the Automa. Place the Automa Player tableau card nearby, with enough room to place cards next to its corners.
- Place all feathers back into the box, they are not used in the solo game.
Solo Gameplay
You will be the starting player, and you and the Automa will alternate taking turns.
Your turns work the same as the multiplayer game with the exception of the "Take 1 face-up card" action. Perform this action as explained for the multiplayer game, but after taking a card you must discard one top card from a market column. If this empties a column then refill it as explained in the multiplayer game.
When it is the Automa's turn, perform the following steps:
- Draw each card one at a time, choosing either deck each time.
- Choose 1 of the 3 drawn season cards and discard it.
- Place the 2 remaining cards into the Automa player's tableau, each going on top of their associated season corners. If no cards of that season are shown then place into any empty corner. Placed season cards do not have to be in any order. If the Automa has already placed a card that is identical to a new card it's trying to place, then remove the duplicate from the game instead of placing it into a corner. If 2 cards are removed from the game in this way within one turn, then the Automa takes a wild card from the supply and puts it near their tableau. The Automa never places wild cards into their corner card sets.
After this it is then time for you to take your next turn.
Wooden Animals
You and the Automa will gain and lose animal tokens in the same way as the multiplayer game.
When you have control of an animal token, you gain the effects as explained for the multiplayer game. Whenever the Automa takes an animal you should flip the corresponding animal action card over to show the Automa animal effect (flower icon), these will make the game harder for you. If you take the animal back from the Automa then flip the card again to show the standard benefit you gain from it. Below are the Automa animal effects:
- Frog (green) - During each of your "Place Cards" actions pay 1 more card total, no matter how many cards are placed.
- Squirrel (brown) - During each Automa turn, do not discard one of the 3 cards. This means they will try to place 3 cards instead of 2.
- Rabbit (purple) - If during a "Take 1 face-up card" action you drew from the market, then instead of discarding one market card afterward you must give that card to the Automa and place it according to their rules.
- Otter (orange) - The Automa takes 1 wild card each time they remove a single card from the game while placing due to already having that card placed. (Normally they gain a wild card only after 2 cards are removed within one Automa turn).
How the Game Ends
The game end triggers from the multiplayer version of the game are used. The Automa is considered to have completed a set when they have all 6 different values showing within that season corner, even if they are not in order. If the automa has a completed set, you immediately lose. If a season deck runs out during the Automa's turn, it will gain 1 wild card as a bonus after that turn and then you take one more turn before the game ends.
Scoring
You calculate your score according to the multiplayer rules.
The Automa calculates their score using the following conditions:
- 1 point for every placed season card, even if they are not in order.
- 2 points for each wooden animal they have.
- 3 points for every 2 wild cards they have collected.
The player with the most points wins the game, in the case of a tie the Player wins!
Example: 4 + 2 + 2 + 1 + 4 + 3 + 3 + 1 = 20