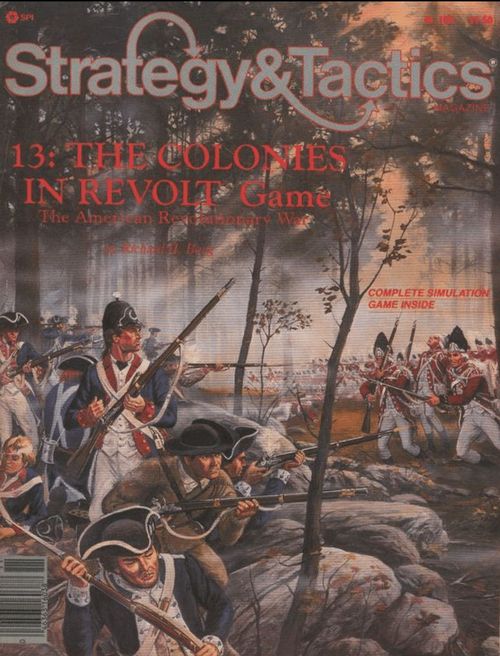
13: The Colonies in Revolt
13: The Colonies in Revolt Rulebook
Table of Contents
Table of Contents
- 1.0 Introduction
- 2.0 Game Parts
- 3.0 Sequence of Play
- 4.0 Operations
- 5.0 Land Movement
- 6.0 Water Movement
- 7.0 Interception
- 8.0 Stacking
- 9.0 Combat
- 10.0 Artillery
- 11.0 Entrenchments and Forts
- 12.0 Supply
- 13.0 Detachments
- 14.0 Reinforcements and Replacements
- 15.0 Commanders
- 16.0 French, Spanish, and Indians
- 17.0 Victory
- 18.0 Campaign Game
- 19.0 Southern Campaign Scenario
- 20.0 Designer's Notes
- 21.0 Unit Abbreviations
1.0 Introduction
A. 13: The Colonies in Revolt is an operational simulation of the American Revolutionary War from late 1775 (the siege of Boston and the two Canadian expeditions) through the end of 1781. The British side consists of British regular, German mercenary, Loyalist militia, and Indian units, and must try to stop the revolt by reconquering half a continent.
B. The American side controls Continental Army, Rebel militia, French, and Indian units, and needs only avoid the British victory conditions to win.
C. Players conduct movement and combat, alternating the initiative back and forth from fall 1775 until the winter 1781 turn or until the British achieve their victory requirements. With the emphasis on planning, command, and operational coordination, players will soon see why the American Revolutionary War was the first major modern guerrilla war.
2.0 Game Parts
A. Each 13: The Colonies in Revolt Game includes:
- One 22" x 33" game map
- One sheet of 200 cardboard counters
- One 16-page rules booklet
B. In addition, two 6-sided dice are required for play and must be supplied by the players.
C. If there are any problems with the game components, please write to: TSR, Inc., Consumer Service, P.O. Box 756, Lake Geneva, WI 53147.
2.1 The Map
2.1.1 In General
The map shows the area of the British colonies in North America over which the American Revolutionary War was fought, including the 13 colonies, Canada, Florida and the Caribbean, and the Western Territories. A hexagonal grid has been superimposed over the map terrain to regulate movement of counters. The British player sits on the Atlantic Ocean side of the map, and the American player sits on the Western Territories side.
2.1.2 Divisions
The map consists of two major portions: the North American mainland for land movement (5.0), and the off-map land areas (Nova Scotia, Florida, and the Caribbean) and Atlantic sea sections for naval transport (6.4).
2.1.3 North American Mainland
The North American mainland is divided into:
A. Areas of operations: the South, the Middle Colonies, New England, Canada, and the Western Territories. These are denoted by red dot-dash lines.
B. Colonies: individual colonies and other territories within areas of operation. These are denoted by black dash lines.
2.1.4 Inhabited Locations
A. There are several types of inhabited locations on the map:
- Cities: built-up, urbanized hexes (Boston, New York, and Philadelphia) denoted by a diagonal line grid. Each has a red hexagon (key objective) symbol in it. Cities and towns are the same in the game rules other than that Indians cannot burn cities.
- Towns: denoted by black dots.
- Port towns: have an anchor symbol by them.
- Indian settlements: denoted by red triangles.
B. Key towns and port towns are important for area control and are denoted by red hexagons.
2.1.5 Sea and Off-Map Territories
The other major map portion consists of the Atlantic Ocean sea sections and off-map territories. The sea sections are important for naval transport (6.4), while the off-map territories (Nova Scotia, Florida, and the Caribbean) can receive supply units and transferred British combat units.
2.1.6 Errata
There is an uncrossable falls (the Ohio Falls) just above Fort Nelson at 4225/4326 and 4325/4326.
2.2 Game Charts and Tables
Various charts and tables are provided on the game map and Page 16 of the game rules to aid in game play.
2.3 The Counters
2.3.1 Types
A. The game's 200 cardboard counters are divided into three types for game play:
B. Combat units are foot (infantry), horse (cavalry and dragoon), and Indian units.
C. Support units are noncombat pieces that aid in movement and combat, including commander, supply, artillery, fleet, and bateaux units.
D. Informational markers are pieces aiding in game play, including fort, entrenchment, operations points, destroyed, and game turn markers.
2.3.2 Sample Counters
The sample counters illustrate the units and markers described above. (The counter artwork is graphic and is not reproduced as text. Its captions are: Sample British Regular; Sample Continental Army; Sample Commander; Depleted Combat Unit; Indian; Militia; Artillery; Destroyed; Supply; Fleet; Bateaux; Fort; Entrenched; Operations Point; Game Turn.)
A. Commanders have one and two stars. A 2-star commander is an army commander while a 1-star commander is a detachment commander.
B. A depleted unit has a line through it.
C. Militia has a capital M to the right of the unit type box.
D. Artillery and supply units' movement allowance (MA) is the large number underneath the symbol.
E. The number above the supply unit's type box represents the quantity of supply units.
F. The number below the fleet symbol and above the bateaux symbol is the strength point capacity.
G. The number below the bateaux symbol is its portage cost.
2.3.3 Counter Information
Army Commander: A commander who can lead any number of units and can command in an area of operations. One army commander is the supreme commander for each side.
Colony: The colony of origin, where the unit must be raised. This includes Loyalist militia, Continental Army, and Rebel militia units.
Combat Rating: The commander's ability to lead in battle; the higher the number, the better leader he is.
Commander Movement: The commander's MA in movement points (MPs). His forced march allowance is the same as his regular MA.
Coordination: The commander's rating for movement coordination.
Depleted: A bar through a combat unit on its reverse sides indicate its depleted (reduced) status.
Detachment Commander: A commander who can lead up to 10 strength points (SPs). The counter represents the leader and his staff.
Foot: Infantry unit.
Forced March Allowance: The additional MPs that units can use to move from hex to hex in the same segment. Units must be stacked with a commander to use this bonus. Terrain costs per hex are the same.
Horse: A cavalry or dragoon unit.
Initiative Rating: The cost in operations points to forced march or attempt interception with units led by that commander.
Militia: Denotes Rebel militia units.
Morale Unit: A unit with higher morale, which adds a modifier when resolving combat.
Movement Allowance: The rate in MPs at which units can move from hex to hex on the map. The Terrain Effects Chart (TEC) lists the cost in MPs to enter hexes.
Name/Number: The unit's abbreviated name and regimental or else brigade number (in game terms). German mercenary units are named by their principality, while American Continental and militia units are named by their colony. Some British units are in groups of two or three regiments. Commanders have their names on their counters.
Number: The number of supply units the counter represents.
Operations Point Cost: The number of operations points required to raise the unit.
Portage Cost: The additional 1 MP cost per hex units pay when carrying each bateaux unit overland.
Strength Point Capacity: The maximum number of SPs that can be carried per movement segment by a fleet or bateaux unit.
Strength Rating: The relative combat strength of a unit when attacking or defending, expressed in SPs. The reverse (depleted side) always has a lower rating.
Type: The unit's category. British side: British Regular, German Mercenary, Loyalist Militia, Indian. American side: Continental Army, Rebel Militia, French, Indian.
2.3.4 Colors
A. Colors on counters denote ownership. (The source prints the British and American colors as two parallel lists; they are paired below in the same order as the unit types listed in 2.3.3.)
| Side | Owner | Color |
|---|---|---|
| British | British Regular | Red |
| British | German Mercenary | Green |
| British | Loyalist Militia | Tan |
| British | Indian | Red w/ Orange |
| American | Continental Army | Blue |
| American | Rebel Militia | Light Blue |
| American | French | Purple |
| American | Indian | Light Blue w/ Orange |
B. Both sides use red and blue artillery units and operations point markers.
C. White is used for informational markers and supply and bateaux units.
2.4 Game Scale
A. Each hex on the map represents approximately 26 miles from side to side.
B. Each turn represents two months' time (except for the four-month winter turn).
C. Unit sizes are more abstract. A British regiment of regulars is usually worth 2 SPs, and most British units are regiments or combinations of 2 or 3 regiments. German mercenary units are grouped according to the German principality from which they came. Both American Continental regulars and militia are grouped by colony. The French are grouped in equal units.
2.5 Abbreviations
| Abbr | Explanation | Abbr | Explanation |
|---|---|---|---|
| BP | Battle Point | OP | Operations Point |
| CRT | Combat Results Table | RP | Replacement Point |
| DRM | Die Roll Modifier | SP | Strength Point |
| MA | Movement Allowance | TEC | Terrain Effects Chart |
| MP | Movement Point |
2.6 Points
A number of game terms define different types of points in this game. These are:
Battle Points: The modifying number applied to the combat resolution die roll to modify combat results.
Loss Points: The Combat Results Table (CRT) die roll result. One loss point depletes a unit; two eliminates it.
Movement Points: The allowance which units spend to move from hex to hex.
Operations Points: The operations allowance spent by players per turn to initiate movement and other game functions.
Replacement Points: The number of replacements (equal to strength points) to rebuild or replace combat units.
Strength Points: The combat rating of units which are used to calculate combat odds.
3.0 Sequence of Play
3.1 In General
A. 13: The Colonies in Revolt is played in a series of game turns, each of which is divided into phases. These phases are undertaken in a specific order: the sequence of play. Some phases are conducted simultaneously by both sides. These are usually planning and recordkeeping phases. The Operations Phase, the heart of the sequence of play, is conducted alternately by each side (4.0).
B. The side to actually move first in the Operations Phase is determined in the Initiative Phase, but this can vary from turn to turn (though most of the time the British move first, if they wish). When all the phases are completed, the turn is over.
3.2 Sequence of Play
3.2.1 Operations Capability Phase
Each side randomly picks an operations point marker, keeping it secret until the end of the turn. The number on the marker is the number of operations points (OPs) available to each side for that turn.
3.2.2 Strategic Planning Phase
The three segments in this phase can be conducted simultaneously.
3.2.2.1 American Planning Segment
The Americans spend OPs to raise supplies in eligible towns.
3.2.2.2 British Reinforcement Segment
The British plot the port towns in which their reinforcements, replacements, and supplies will arrive for the following turn, keeping such locations secret.
3.2.2.3 American Continental Segment
A. The Americans can raise or rebuild Continental Army units by paying OPs. The units are placed on the map this time, and the Operations Point Expenditure Track is adjusted.
B. The Americans can also raise artillery units at this time.
3.2.3 Militia Raising Phase
Both sides (the British first) can raise local militia in the colonies, where eligible (14.3, 14.5). Militia units so raised are placed on the map immediately.
3.2.4 Reinforcement Arrival Phase
A. Place on the map all scheduled British regular and German mercenary reinforcements and supplies.
B. British/German units eligible to receive replacements can do so from arriving replacement points (RPs).
C. All British withdrawals (14.6) occur in this phase.
3.2.5 Initiative Determination Phase
A. The British roll one die to determine which side moves first in this turn's Operations Phase:
- On a 1-5, the British go first.
- On a 6, the Americans go first.
B. The Americans can spend OPs to influence the die roll in their favor (4.5.2).
3.2.6 Operations Phase
The two sides alternate segments (4.2.1) until both have passed, at which time this phase is concluded.
3.2.6.1 First Player Segment
The player who, as per the initiative rules, goes first spends OPs to move, to engage in combat, to build forts, and take other actions requiring OPs. If that player has no more OPs or simply desires not to spend any more OPs, play is then transferred to the second player.
3.2.6.2 Second Player Segment
The opposing player now repeats the above segment. If that player has no more OPs or simply desires not to spend any more OPs, play goes back to the first player, who then repeats the segment. When both players have passed in consecutive segments (i.e., not undertaken any actions by spending OPs), the Operations Phase ends.
3.2.7 Rebel Militia Disbandment Phase
The Americans determine whether any of their militia units have disbanded and gone home. If so, these units are simply removed from play, regardless of where they are on the map.
3.2.8 Victory Determination Phase
The players determine whether either has won the game by attaining certain strategic objectives (17.1, 17.2).
3.2.9 Attrition/End Turn Phase
A. At the end of each winter turn, the players adjust the condition of their units according to their supply status and their location.
B. Advance the Game Turn marker one box on the Reinforcement Schedule/Turn Track, and the turn is completed.
4.0 Operations
A. The number of actions a player is limited by the number of OPs each side has for that turn. Use OPs to move, to engage in combat, to build fortifications, to raise supplies (Americans), to raise troops, to activate Indians, and to do any other actions requiring them.
B. OPs are received from the OP marker each player picked in the Operations Capability Phase. The number on the counter is the point total for the turn, but it can be modified downward (4.2.7).
C. OPs apply only to the turn in which they are chosen; they cannot be saved from turn to turn.
4.1 Operations Points Markers
A. There are nine OP markers, which are a design limit in the counter mix. They are printed on both sides, the blue side applying to the Americans, the red side to the British.
B. At the start of the Operations Capability Phase, place all nine OP markers in an opaque cup. Each player then takes one marker, without looking, consulting the applicable side of that counter. The number on that counter is the OPs for that turn.
C. Players keep their OP marker (and available points) secret from the opposing player until the end of the turn, when the two markers are returned to the cup.
4.2 Using Operations Points
Certain actions in the game cost OPs to undertake. The player using them must have – and spend – the OPs necessary for that action, keeping track of the points spent on the Operations Point Expenditure Track. Use a blank counter or coin for this purpose, consulting the Operation Points Table for a list of the costs of all applicable actions.
4.2.1 Alternating Segments
A. The first player starts the Operations Phase and may do as much or as little as desired, depending on the OPs s/he wishes to spend. When the first player does not want to or cannot spend any more points, play goes to the second player.
B. The second player now undertakes as many or as few actions as desired, spending OPs as needed, after which the segment goes back to the first player. Alternate segments until both pass (4.2.2) in consecutive segments.
4.2.2 Passing
A player passes when s/he does not spend any OPs in a segment, either voluntarily or involuntarily. If a player has no OPs remaining, s/he must pass. When both players have passed in consecutive segments, the Operations Phase ends.
4.2.3 No Spending Requirement
A. There is no minimum number of OPs a player must spend during a given segment or the Operations Phase.
B. A player does not have to use all his/her points during a turn, but cannot save them for the next turn.
4.2.4 Using OPs to Move
A. For movement (5.1.2), it costs 1 OP to move all units in a hex. Thus, each unit in a hex can move separately, or a stack of units can move together, or any combination of the two can move.
B. Units stacked with commanders have the capability of making forced marches (i.e., move again in that turn) by spending more OPs (5.3).
4.2.5 OP Cost per Stack
The OP spent in 4.2.4 applies only to the units in one given hex. A moving stack cannot pick up other combat units along the way, nor can it combine movement with another stack. All movement by a given stack of units must be completed before any other units are moved (however, see 4.2.6).
Exception: Units that can be picked up by a stack during movement are supply, bateaux, and artillery units. The stack can continue movement after pickup.
4.2.6 No OP Cost for Commander Movement
It does not cost any OPs to move a commander without other units (i.e., alone or with other commanders). A stack of units can also move without a commander (except as in 4.4.4).
4.2.7 OP Reduction
A. Beginning in 1778, players lower the numbers on the OP markers as follows:
| Year | Reduction | Year | Reduction |
|---|---|---|---|
| 1778 | 1 | 1780 | 3 |
| 1779 | 2 | 1781 | 5 |
B. This represents war-weariness on both the American and British sides, and the increasing costs due to inflation. However, each side always has a minimum of 1 OP per turn, regardless of the final adjusted OP total for that turn.
4.3 Coordination
One major problem both sides had during the Revolutionary War was coordinating operations. A perfect example of this was the British failure to coordinate their three-pronged New York attack in 1777, leading to Burgoyne's disastrous defeat at Saratoga. To simulate this problem, players cannot automatically coordinate the movement of their forces; the ability of one army to link up with another is dependent upon the caliber of leadership involved.
4.3.1 Moving Different Stacks
Normally, a player can continue to move different stacks of units during his operations phase segment, as long as s/he has the OPs to pay for movement of each stack.
4.3.2 When Coordination Required
There is an exception to rule 4.3.1. Whenever opposing forces are in the same hex (8.2) and a player has already moved at least one stack in that segment, if s/he wishes to move an additional stack that is within one movement segment of that mutually occupied hex (i.e., it could reach the mutually-occupied hex), that player must roll for coordination.
4.3.3 Determining Coordination
A. Coordination determines whether or not the movement described in 4.3.2 can take place at that time. To do so, roll one die and compare it with the coordination rating of the commander leading the stack to be moved (4.3.4).
- If the die roll is higher than the commander's coordination rating, the stack can move in that segment.
- If the roll is less than or equal to the commander's rating, play immediately passes to the other player.
B. There is no cost in OPs to check coordination.
4.3.4 Commander Required for Coordination
A commander is needed to coordinate units. Stacks without a commander cannot move in the circumstances described in 4.3.2. They must wait until the play first passes to the opposing player and then back to the initial player.
4.3.5 Effect of Enemy Stacks within MA
If there is an enemy stack within the MA distance of more than one commander-led friendly stack, the friendly commander with the lowest/best coordination rating must move first. If the commanders have equal ratings, the choice of which stack moves first is up to the owner.
4.3.6 Example of Coordination
An American army is in hex 1710. Three British forces are in the area: an army under General Clinton in New York (2107), a large force under Gen. Burgoyne in 1312, and a detachment without a leader in Ft. Stanwix (1714). The British move first in the Operations Phase and march Burgoyne's army into 1710 in anticipation of a battle with the American army. As it is still the British segment, they attempt to move Clinton's force up from New York. Since Clinton is within moving distance of the mutually-occupied hex 1710, and since the British have already moved one stack in that segment, they must check Clinton's coordination rating to see if that force can move. The British roll a 2, which is lower than Clinton's rating of 4; therefore, Clinton cannot move, and the segment automatically passes to the Americans. Remember, the Ft. Stanwix detachment cannot move in this segment because it has no leader; it must wait until a later segment. Again, the prohibition is not against movement itself, but against moving a unit after another unit has already moved in that segment when there is a mutually occupied, reachable hex. (This situation is an approximation of what led to the two Saratoga battles in September 1777.)
4.4 Initiative
4.4.1 Determining Initiative
To determine who moves first in the Operations Phase, the British roll one die in the Initiative Determination Phase. On a 1-5, the British go first. On a 6, the Americans go first.
4.4.2 Influencing Initiative Determination
The Americans can spend up to 2 OPs to influence the initiative die roll after the roll has been made. For each OP spent, add one to the die roll. Thus, if the British roll a 4, and the Americans spent 2 OPs, the adjusted total would be 6, and the Americans would go first.
4.5 Areas of Operation
A. Aside from being divided into colonies, the land portion of the game map is also partitioned into areas of operation. These define major military commands and are used to determine victory.
B. The areas are Canada, New England, the Middle Colonies, the South, and the Western Territories.
- Canada consists both of the area north of Lake Erie and Lake Ontario and of the upper St. Lawrence River; it does not include the lands between Lake Erie and Lak Michigan (part of the West).
- New England consists of Maine (part of Massachusetts), New Hampshire, Hampshire Grants (later Vermont), Massachusetts, Rhode Island, and Connecticut.
- The Middle Colonies consist of New York, New Jersey, Pennsylvania, Delaware, and Maryland.
- The South consists of Virginia, North Carolina, South Carolina, and Georgia.
C. Sea sections (6.4.2) are not areas of operation.
5.0 Land Movement
A. During its operations segment, the phasing (moving) side can move as many units that are capable of movement within the restrictions of the rules, up to the limit of their MAs. Most units have two different MAs, reflecting basic movement and a forced march capability. Units can also move during the opposing player's segment (Interception, 7.0).
B. Units can move either one at a time or in stacks. (Given the OP system, it is easier to move in stacks rather than individually, as OPs must be spent each time a player makes a different move.)
C. Units move through the hex grid, tracing a path of connecting hexes and paying MPs for each hex entered, and for certain hexsides crossed. Units can never exceed their MA, though they do not have to move a minimum number of hexes.
5.1 Movement Allowances
A. Most of the units in the game have two MAs. Essentially, this reflects a unit's ability to move twice within a given Operations Phase.
B. The first MA is the regular MA; the second number is the forced march allowance (5.3). Units that have only one MA can move only once in an Operations Phase. Exception: Commanders (15.1.2).
C. A unit's MA has nothing to do with interception or retreat.
D. When moving a stack of units, the MA of that stack is that of the slowest unit. However, players can always drop off a unit and move other units to their fullest capacity (per 4.2.4).
5.2 How to Move
5.2.1 In General
Units can be moved either individually or in stacks of units, regardless of the number of units in that stack. (However, see 6.2.7 and 6.4.8.) There is no requirement that a player move any units, though 1 OP must be spent each time a stack conducts basic movement. The cost to move units for forced march is covered in 5.3.
5.2.2 Terrain Costs
A. The cost in MPs to enter a given hex or to cross a given hexside is in the TEC.
B. A unit can never enter a hex for which it cannot pay the cost to enter; however, a unit can always move one hex in a given turn, regardless of the cost of the hex, as long as such movement is not otherwise forbidden (such as crossing major rivers with out bateaux).
5.2.3 MPs Non-Transferable
MPs cannot be saved from one segment to the next, nor can points from the regular MA be saved and transferred to the forced march MA.
5.2.4 Crossing Major River, Lake, and Ocean Hexsides
No land unit can cross a major river or lake/ocean hexside without the help of naval transport (British only) or bateaux units (6.0). However, certain rivers are bridged; land units can cross at these places without ships or bateaux.
Example: The river crossing between Trenton and Philadelphia (2607/2708).
5.2.5 Zones of Control
There are no zones of control in this game.
5.2.6 Enemy-Occupied Hexes
A. Combat units can enter hexes occupied by enemy units. However, once they have entered such a hex, they must stop and cannot move again during that turn, though they can retreat after a battle.
B. This prohibition applies only against units entering such a hex, not to units originally in the hex.
Clarification: This restriction applies only to the turn the units move into the mutually-occupied hex; not subsequent turns. Moreover, it only applies if the units remain in the hex (they may be withdrawn due to battle, which would allow them to move again if otherwise eligible).
5.2.7 Restrictions
Remember that a unit's or stack's ability to move within a given phase or segment is somewhat restricted by the coordination rules (4.4), and by the availability of OPs. Units can never move without spending OPs.
5.2.8 Commander Not Required for Regular MA
A unit or stack of units can always use its regular MA (i.e., move), regardless of the presence of a commander (provided the player pays the 1 OP cost). However, only units with a commander can use their second/forced march MA.
5.3 Forced March
5.3.1 Eligible Units
Units with two MAs (and commanders) have the capability of moving twice in an Operations Phase. If a unit other than a commander does not have two such numbers printed on its counter, it cannot move twice, such as Indian, supply, and artillery units. For game purposes, the second movement is called forced march.
5.3.2 Commander Required
Units must be stacked with a commander to use their additional MA.
5.3.3 OP Cost
It costs OPs to force march, as with regular movement. The cost in OPs to force march is the initiative rating of the commander leading such a march. Thus, it would cost a stack of units commanded by Greene only 1 OP to force march, but an army commanded by Clinton would cost 2 OPs to forced march.
5.3.4 All Movement Rules Applicable
All regular movement rules apply to forced marching, including the restrictions imposed by coordination.
5.3.5 Combine with Regular Movement
A unit can force march immediately after it has used its regular movement, provided that it can pay the cost and keeps moving in that segment. The amount in OPs is paid at this time. Also, coordination does not apply to a stack of units so moving; it applies only to different stacks.
5.3.6 Forced March Later in Operations Phase
Conversely, a unit or stack does not have to use its forced march capability immediately after its normal movement. It can wait and use it later in the Operations Phase. However, a unit which enters a hex occupied by enemy units cannot move again in that Operations Phase.
5.4 The Post Road
5.4.1 In General
The Post Road was the only highway, so to speak, on the entire continent. It was a rough, hard-dirt thoroughfare that was used to speed delivery of mail, messages, and goods. It has limited use in the game, but has been added to enhance historical flavor.
5.4.2 Use
A. The Post Road can be used only by commanders or individual combat units (i.e., unstacked) of 2 SPs or less. Moreover, it costs 1 OP per unit using regular movement along the Post Road.
B. For forced march movement, the OP cost is whatever the commander's cost in OPs is (5.3.3) to lead that unit.
C. Commanders pay no OP cost to move alone.
5.4.3 MP Cost
A. The Post Road costs ½ MP to enter, assuming that the unit is moving from one connecting road hex to another. This cost applies to both regular and forced march movement.
B. However, though the Post Road negates any terrain within the hex, it does not negate the rivers it crosses, unless there is a river crossing (such as the bridge from Trenton to Philadelphia). Thus, units using the Post Road must pay all normal river crossing costs.
5.5 Off-Map Areas
5.5.1 In General
A. There are three off-map areas that represent minor theaters of war which have some effect upon the game.
B. The three off-map areas are:
- Nova Scotia, which is part of Canada and is in the Canadian sea section.
- Florida, the territory south of Georgia. At the start of the game, it is garrisoned by two British regiments.
- The Caribbean, the islands south and southeast of Florida held by the British, is part of the Caribbean sea section.
- Both Florida and the Caribbean are discussed in 14.6.
5.5.2 Nova Scotia and the Caribbean
Both Nova Scotia and the Caribbean are ports and can hold land units (British only). Movement to and from them is by naval transport (6.4).
5.5.3 Florida
A. Florida can be entered only by the British, through any land hex in Georgia on the southern map edge by paying 1 MP or by sea per 6.4.4.
B. The cost to enter Georgia from Florida is the cost of entering the first hex in Georgia.
C. For game purposes, Florida is not considered a port, but rather land adjacent to Georgia.
6.0 Water Movement
A. Land units can use the river network to speed up movement. To do this, they can build or make use of bateaux, flat-bottomed river craft constructed specifically for this type of movement along minor rivers.
B. Bateaux can also be used to cross major rivers and some ocean or lake hexsides normally not fordable by land units.
C. British fleets (6.4) cannot use river movement (6.2), nor can they be used for river crossing. They are used solely for transporting British land units from port to port by sea.
Clarification: Bateaux can use river movement on both major and minor rivers, as stated elsewhere.
6.1 Bateaux
6.1.1 In General
In order to move along rivers or cross otherwise unfordable rivers, players must use bateaux. There is no design limit on bateaux counters; players can make additional units with blank counters.
6.1.2 Capacity
A. Each bateaux can carry a maximum of twenty (20) SPs, plus one artillery unit, one supply unit, and any number of commanders when using river movement.
B. When using bateaux simply to cross a river, there is no limit to the number of units carried.
6.1.3 Building Bateaux
A. It costs one MP to build each bateaux, and such a counter can be built in any hex.
B. There is no cost in OPs to build.
Example: It costs 2 MPs to build bateaux for 30 SPs.
6.1.4 Movement Costs
A. There is no cost to launch bateaux (to move them from a hex into a river hexside). However, it costs to carry them overland (portage). If a bateaux unit is with a stack, increase the cost to enter any given hex by 1 MP.
B. There is no cost to carry them across river hexsides.
6.1.5 Bateaux Alone in a Hex
Any bateaux left alone in a hex can be picked up and used by any other combat or commander units during that turn at no extra cost.
6.1.6 Bateaux Alone at the End of the Turn
At the end of a turn, any bateaux not stacked with a combat unit are removed from play.
6.2 River Movement
6.2.1 In General
Land units can move along rivers, usually at a much faster rate than on land, depending on whether they are going downriver or upriver. They can do this in any turn, with one exception: no river movement is allowed north of and including hex row 2000 in winter turns.
6.2.2 Bateaux Required
To move along a river, land units need bateaux (6.1.2). No river movement can take place without bateaux.
6.2.3 Movement Along Hexsides
A. Bateaux-aided river movement is along hexsides, rather than through hexes. The movement rates given are for travel along hexsides.
B. Such movement can take place only along hexsides that are directly between opposing sides (banks) of a river or lake; both hexes separated by the river hexside must contain land.
C. Thus, bateaux-aided river movement can take place up the St. Lawrence, down the Ohio, and into Potomac Sound, but not through most of Lake Erie or the Atlantic coast line. Both American and British units can use bateaux movement to reach Long Island and Staten Island by crossing water hexsides between land hexes (i.e., the Hudson River and New York Harbor).
River Movement Example: Land units using bateaux can move upriver (toward A) at ⅓ MP per hexside and downriver (toward B) at ⅕ MP per hexside. Bateaux river movement is allowed along a major river with land in two adjacent hexes (C), but is not into all-water hexes (D).
6.2.4 Upstream and Downstream Movement
A. River movement is either downstream (with the flow/faster) or upstream (against the flow/slower).
B. Rivers flow downstream toward the body of water into which they empty (usually the ocean, a lake, or a larger river). Thus, the Ohio flows southwest into the Mississippi (which flows south itself), and the Mohawk flows into the Hudson, which in turn flows south into the Atlantic.
C. None of the rivers in New England or New York flows into those small lakes; they flow out of those small lakes.
D. The St. Lawrence flows north for game purposes.
6.2.5 Movement Costs
A. The cost to move downstream is ⅕ MP per hexside.
B. To move upstream costs ⅓ MP.
C. Units can combine upstream and downstream movement in the same segment.
D. Fractions for river movement used in one segment are rounded up to the nearest whole MP.
Example: If ⅖ MP are spent for river movement in a movement segment, this is treated as 1 MP.
6.2.6 Land MAs Used
A. River movement uses the MAs and capabilities (both regular and forced march) of the land units (again, slowest in the stack); land units can combine normal land movement with river movement.
B. There is no cost in MPs to embark or land from bateaux, though there is a cost for carrying the bateaux overland (portaging, 6.1.4).
6.2.7 OP Costs
It costs 1 OP to move each bateaux unit (and its passengers) along a river hexside; each bateaux unit must be moved separately. However, the rules for coordination do not affect units starting in the same hex intended to move by river (6.1.2).
6.2.8 Landing
A. When a unit has completed its river movement during a given segment, it is considered to have landed. Place the unit in the land hex on either side of the last river hexside of movement. There is no cost for landing, as the unit is considered to be on the hexside of the river bank.
B. Units can resume river movement in the next turn at no additional MP cost when they enter the same hexside to resume river movement. Otherwise, they must pay overland movement costs and portage costs (+1 MP for portage costs per hex).
C. If, after river movement, a land hex is entered containing an enemy unit (combat or noncombat), it costs the usual terrain cost for that hex.
D. Under no circumstances can land units end a movement segment in a river/water hexside; they must land, otherwise, they are eliminated.
6.2.9 Blocked River Movement
A. The presence of enemy land units blocks river movement.
B. A land unit using river movement cannot enter a hexside that is part of one of the following hexes:
- The river is a minor river, and the is occupied by any enemy land combat unit.
- It is a major river or lake (i.e., unfordable), and the hex is occupied and fortified.
Example: The British have a combat unit in 4024 and a combat unit in Fort Nelson, which is fortified. The Americans start with a small detachment under Clark in Pittsburgh and begin moving down the Ohio River. They can move past the unit in 4024 without stopping (#2 above), but must stop either in 4225 or 4226 because units cannot enter hexside 4325/4326 (as it is adjacent to Fort Nelson).
6.3 River Crossings
6.3.1 Types
There are two types of rivers in the game: minor rivers, such as the Miami River, and major rivers, such as the lower portion of the Ohio River. Included in the major rivers category for game purposes are lakes, sounds (such as the Long Island Sound), and all ocean hexes.
6.3.2 Minor Rivers
Minor rivers can be crossed without the aid of any bridges (6.3.7) or bateaux at the cost of +2 MPs.
6.3.3 Major Rivers
All major rivers, lakes, and other all-water hexes are unfordable, unless there is a river crossing (bridge) across the hexside (6.3.7). In all other cases, to cross these rivers, bateaux are needed.
6.3.4 Major River and Lake Crossing
Land units carrying bateaux can cross any allowed major river or lake hexside at a cost of +1 MP with a bateaux unit. There is no limit to how many land units can cross on one bateaux unit (as opposed to the limits for actual river movement).
6.3.5 Minor River Crossing
Land units can cross a minor river hexside without bateaux and a major river with bateaux or by bridge and enter directly into an enemy-occupied hex (as opposed to river movement rules). See the TEC for movement costs.
6.3.6 Prohibited Crossings
Units cannot cross from Fort Niagara into Canada (hex 2219/2220), nor can they use bateaux to cross from Lake Ontario into Lake Erie via Niagara Falls.
6.3.7 Bridges
River crossings (bridges) already printed on the map negate the river hexsides they cross; thus, it costs no extra MPs to cross a river by bridge, but remember the Post Road itself is not a river crossing.
6.4 Naval Transport
6.4.1 In General
A. The British can use fleets to transport troops from one port town to another relatively quickly.
B. The Americans have no fleet. For purposes of playability, the French fleet has been abstracted into the Caribbean. (Historically, most naval encounters between the French and the British during this period took place there, or in European and Indian Ocean waters. See 9.3.3 for the only land combat effect of seapower.)
6.4.2 Sea Sections
The Atlantic coastline of North America is divided into three sea sections – North, Middle, and South – with two additional boxes representing the sections for Nova Scotia and Canada and for Florida and the Caribbean. Thus, there are five sea sections on the map, running north to south: Canada (Nova Scotia), North, Middle, South, and Caribbean. The Canada sea section also includes the port towns of Quebec and Montreal.
6.4.3 Fleet Unit Capacity
Each British fleet marker can carry and transport up to 24 British and British-controlled combat SPs, plus one artillery unit and any number of supply units and commanders.
6.4.4 Transport
A. Land units are transported only from one port town to another; as a general rule there are no amphibious landings or upriver fleet excursions in this game. Exception: British fleets are permitted to land combat units on Florida and Long Island only by moving to such a coastal hex and debarking their passengers. Combat units can then move and fight immediately.
B. All fleet MPs are based on the MA (regular and forced march) of the land units, not the fleets. Fleet units moving alone pay no movement costs; it costs no MPs to move an empty fleet counter but it does require OPs (6.4.6).
6.4.5 End Turn in Port
Fleets must end a given movement segment in a port town hex. If, for some reason, it is impossible to do so, the fleet is placed back in the port town from which it started (losing all OPs and MPs spent).
6.4.6 OP Cost
It costs 1 OP to operate a fleet, regardless of any points paid for the land units it is carrying or whether it is empty.
6.4.7 Embark/Debark MP Costs
A. It costs land units 2 MPs to embark (get onto) fleets in a port town hex; they can do this at any time in a British movement segment, even in the middle of land movement, as long as the fleet unit is there.
B. It costs 1 MP for land units to debark (land), plus the terrain cost for that hex.
C. Units can land in enemy-occupied hexes in port towns or on Long Island.
6.4.8 MP Costs for Land Units Being Transported
A. It costs land units embarked on fleets 1 MP to move to any port town within the sea section in which it starts.
B. It costs +1 MP per sea section to move into any other sea section.
Example: A unit being transported from Boston to New York would use only 1 MP, while a unit being transported from Quebec to the Caribbean would consume 5 MPs (one per sea section) in addition to any embark/debark MPs required.
6.4.9 Enemy Units Effects on Fleets
Fleets can stay in any given port town hex, even if enemy-occupied. They are impervious to harm to that extent, and their movement can be neither blocked nor impeded, except as noted above (or combat: see 9.3.3).
7.0 Interception
A. Units with commanders can intercept enemy movement and attack the moving units. Interception is always undertaken by the non-phasing side.
B. It costs OPs to attempt interception, and it is not always successful.
C. A special form of interception, ambush, is discussed under the section for the Swamp Fox, Francis Marion (15.5.4.)
7.1 Interception Restrictions
A. A stack can attempt only one interception per Operations Phase, whether or not the attempt succeeds.
B. A moving stack of enemy units can be successfully intercepted by only one friendly stack, regardless of how many other friendly stacks are adjacent to it. However, if one such stack fails to intercept, another eligible stack can try interception.
C. Interception cannot be attempted across any river, lake, or water hexside. Interception cannot be attempted into a swamp hex (Exception: 15.5.4), city hex, or mountain hex. Nor can interception be attempted from or into a hex also occupied by other opposing units (5.2.6).
D. Only combat units can be intercepted. Commanders moving alone are immune from interception.
E. Interception takes place only when a unit is voluntarily moving, not during retreat.
F. Units moving along waterways (6.2) cannot be intercepted.
G. There is no restriction as to how small a force can intercept how large a force, and vice versa.
7.2 How to Intercept
A. Only a unit or units stacked with a commander can attempt interception. Moreover, whether a unit or stack of units has moved previously in that turn has no effect on whether or not it can intercept.
B. Non-moving units can attempt to intercept any enemy units that move through any hex adjacent to them. However, if the phasing side states its units will enter a hex occupied by non-moving units and does so, no interception takes place.
Clarification: A non-moving force cannot intercept a force that is moving to enter its own hex. It can attempt to intercept an enemy force moving to attack a different hex.
C. It costs the number of OPs equivalent to the commander's initiative rating to attempt an interception. Such points are paid regardless of the success of the interception.
D. To attempt an interception, the non-phasing side announces such an attempt when an enemy unit has moved adjacent. The non-phasing side pays the cost in OPs and rolls one die. If the die roll is higher than that commander's coordination rating, the attempt is successful. (The source prints "coordination rating,-." here; the stray mark is treated as punctuation.) If the stack attempting the interception has any cavalry/dragoon units, apply a +1 die roll modifier (DRM) to the interception die roll.
E. If the attempt is successful, the moving units stop immediately. The intercepting units are moved into that hex at no cost in MPs, and a battle takes place immediately at no cost in OPs, as it is part of the interception attempt fee. The intercepted units cannot move again in that segment, but can use forced march after interception, if eligible.
F. If the interception attempt is unsuccessful, the moving force simply keeps moving. Units that fail to intercept stay where they are.
G. If successful, not all units from the stack attempting the interception must move to attack; however, the commander of the intercepting units must move, as must at least one cavalry unit present, if the cavalry bonus is used.
8.0 Stacking
8.1 Friendly Units
Friendly units are all units controlled by the same side. Any number of friendly units can stack in a hex or can pass through one other. The only limits on stacking apply to river movement (6.1.2), naval transport (6.4), and the Post Road (5.4).
8.2 Enemy Units
Enemy units are all units controlled by the opposing side. Friendly units can enter hexes occupied by enemy units. Again, there are no restrictions to the number of units that can be in any one hex. Moreover, opposing units can remain stacked in the same hex as long as they wish (unless a battle occurs, after which one side usually retreats).
8.3 Command Boxes
On the map are boxes corresponding to the army commanders in the game. These are solely for use when the stack of units being led by that commander becomes too unwieldy. Simply place the combat units being led by that commander in that box, leaving the commander on the map.
9.0 Combat
A. Combat occurs between land forces occupying the same hex during an Operations Phase. Attacking is always voluntary, except after interception.
B. It costs 1 OP to attack; the side paying the OP cost is the attacker.
C. Success in battle depends not only on the relative strengths of the forces involved, but also their commanders (if any), their morale, their supply status, and their defensive position, all of which are used as adjustments to the CRT. The CRT produces losses for both sides (which are relatively few and are rarely permanent) as well as the battle results.
9.1 Combat Units
9.1.1 Types
Most of the combat units in the game are foot (infantry). There are also a few mounted units (cavalry and dragoons) and several Indian units.
9.1.2 Strength Levels
Most combat units, except for Indians and a few foot detachments, have two strength levels. The front side represents the unit at full strength; the reverse represents the unit after it takes casualties.
9.1.3 Combat Rating (SPs)
A. All combat units have a combat rating, given in SPs. (See sample units.)
B. Certain higher morale units have asterisks printed next to their combat strength. These denote units which add one battle point (BP) in resolving combat (9.3.3).
9.2 How Combat Occurs
9.2.1 When Combat Occurs
A. Combat can occur any time during the Operations Phase when units from both sides occupy the same hex.
B. A battle must take place immediately as a result of interception or ambush.
C. Opposing forces can occupy the same hex indefinitely, without a battle occurring. Only when one side attacks the other does combat take place.
9.2.2 Initiating Combat
To initiate a battle, the phasing side announces any time during the Operations Phase that it is attacking, paying 1 OP to do so. That side is the attacker, regardless of the relative tactical and strategical situations or strengths of the opposing armies. The non-phasing side is the defender.
9.2.3 Examining Enemy Stacks
Neither side can examine the other's stacks until a battle occurs.
9.2.4 Other Stacks' Movement During Battle
Once an attack has been declared, no other movement or attacks take place until that combat is resolved.
9.2.5 Involved Units
All units in a mutually-occupied hex must engage in any combat.
9.2.6 No Overrun
There is no overrun in the game; all battles must be fought to their conclusion in the same hex.
9.2.7 Movement After Battle
Unless so stated by the result (9.3.7), combat does not restrict a unit's ability to move afterwards, provided that all other movement rules are observed. (However, see 5.2.6 and 7.2.E.)
9.3 Resolving Combat
9.3.1 Odds Calculation
A. Each side first totals the number of SPs of units that it has in the hex.
B. Then players compare the totals to obtain relative combat odds, attacker to defender, with any fractional benefit when rounding off going to the defender.
Example: 35 SPs against 12 would be odds of 2.5 to 1 (the nearest simple odds ratio when rounded down).
9.3.2 Combat Results Table
A. The CRT in this game is unusual. There are no odds ratios or comparisons on the table itself. The attacker simply rolls two dice, one before the other. The dice roll results are not added, but are read as a two-digit number.
Example: A 1 and a 5 are read as 15.
B. The attacker rolls the dice, notes the number rolled, consults the CRT, and adjusts that number either up (benefiting the attacker) or down (benefiting the defender), depending on the final BP total (9.3.4) obtained by comparing each side's adjustments.
9.3.3 Battle Points
A. Each side receives BPs for a variety of factors. Total each side's BPs, then subtract the lower amount from the higher. Adjust the dice roll by the difference in favor of the side with the larger total (9.3.2).
B. The BPs each receives are as follows.
| Modifier | Event |
|---|---|
| +1 | Each morale unit |
| X | BPs equal to the commander's combat rating |
| +2 | Each artillery unit |
| +1 | One or more supply units present* |
| +3 | Expend a supply unit* |
| +2 | Defender is first in hex and is entrenched or fortified and attacker is neither |
| X | Larger force on Odds/Ratio Chart |
| +2 | Successful attacker in interception/ambush |
| +1 | Each British fleet in port town |
| -2 | No supply unit in winter turn** |
* Only one or the other applies, and limit of +1 BP total if more than one supply unit present.
** Does not apply to units in non-hill, non-mountain hexes in SC and Ga, or in West major river hexsides.
Example: The British attack with 46 SPs against the Americans' 22 SPs. The British also have two morale units (2 BPs) and one artillery unit (2 BPs). They are in supply but does not want to spend a supply unit (1 BP), and are commanded by Burgoyne (1 BP). As they have a 2-1 odds superiority (4 BPs), they have 10 total BPs. The Americans have two morale units (2 BPs), are entrenched (2 BPs), have one artillery piece (2 BPs), are in supply and spend their supply unit (3 BPs), and are led by Washington (2 BPs), for a total of 11 BPs. The Americans thus have a 1 BP advantage; when the British (the attacker) roll a 33, that result is lowered by one to 32. The actual result is that the British have two units depleted and withdraw from the hex. The Americans have one depleted unit. There is no clear victor.
9.3.4 Reading CRT
The CRT is one that can produce an extremely wide range of results, compared to the relative forces involved. There are three results for each dice roll on the CRT: attacker's losses, defender's losses, and battle result. All results are read from the same dice roll.
9.3.5 Loss Point
A. Each result is expressed in loss points (LPs). LPs affect combat unit strength. A result of 1 LP requires either flipping over a full-strength combat unit to its depleted (reverse) side or removing a depleted combat unit.
B. Losses do not apply to artillery, commander, supply, or bateaux units.
Example: A side suffering 2 LPs would have to either deplete two units, eliminate one full-strength unit entirely, or deplete a full-strength unit and eliminate a different reduced-strength unit.
C. All combat unit losses are taken immediately, before any retreats, withdrawals, or other actions occur (9.3.9).
9.3.6 Application of Losses
A. The combat units are, obviously, of varying sizes. Therefore, the first unit affected must be the one with the greatest strength.
B. The second unit affected must be a morale unit, if present; otherwise, any unit.
C. After that, depletions or eliminations are at the owner's choice.
D. The Americans cannot take more than half of their losses in militia unless they have no other choice.
9.3.7 Explanation of Combat Results
In addition to losses, each roll produces a specific battle result, listed below.
9.3.7.1 Withdrawal
A. The side required to withdraw must move its units one hex to any adjacent hex to which it could normally move, at no extra MP cost.
B. If the withdrawing side cannot move for any reason, it remains in place, but takes an additional, one-point loss to its strongest unit.
C. Units cannot withdraw into an enemy-occupied or mutually-occupied hex.
9.3.7.2 Retreat
A. The side required to retreat must move its units at least two hexes, but can retreat up to three hexes (all of which it could normally move into) at no MP cost.
B. All supply, artillery, and bateaux units must be left behind, and the retreating units cannot move again voluntarily in that Operations Phase.
C. If unable to retreat at least two hexes, retreating units can move one hex or stay in place. If a unit retreats only one hex or remains in place, it must take two additional LPs, and all supply, bateaux, and artillery units are automatically captured by the enemy.
D. Units cannot retreat into or through enemy-occupied or mutually-occupied hexes.
9.3.7.3 Possible Major Victory
If this result occurs, and if the retreating force originally consisted of at least 25 SPs, the winner has a major victory.
9.3.7.4 Surrender
A. The loser is eliminated entirely. Commanders are temporarily removed from play, returning per 15.1.6.
B. Remove all losing units from the board.
C. This is also considered a possible major victory for the winner.
D. Artillery and bateaux units can be captured instead of being eliminated, if the winner chooses.
9.3.8 Major Victory
A. For combat purposes, a major victory occurs when an AR*, AS*, DR*, or DS* result is rolled and retreating or surrendering forces originally consisted of at least 25 SPs.
B. When this result occurs for the British, they receive on next turn, 2 OPs in addition to the number drawn.
C. When the Americans roll this result, they can consult the French Arrival Table beginning three turns later.
9.3.9 Depleted Units
A. Depleted units suffer no penalty other than being reduced in strength and, possibly, in morale advantage.
B. Regular units can be rebuilt by militia units (14.4.5) though militia units cannot.
10.0 Artillery
A. Artillery units add 2 BPs in combat. They are controlled by their owner and are appropriately colored on each side.
B. Artillery units can be captured from the opponent; they should be flipped over to the correct side when this occurs.
C. The British can never build artillery units; only the Americans can.
10.1 Artillery Units
10.1.1 Counter Mix Limit
The number of artillery units available is limited by the counter mix; however, artillery units that have been destroyed can be returned to play.
10.1.2 Combat; Capture
A. Artillery units have no combat strength. They are only used as an adjustment on the CRT.
B. If an artillery unit is alone in a hex, it can be picked up or destroyed by any other combat unit entering the artillery unit's hex and capturing it.
C. Indian units can only destroy artillery units, not capture them.
10.1.3 Movement
A. Artillery units have MAs. However, artillery units cannot move alone; they must be carried, using the artillery unit's MA as the maximum allowed.
B. Artillery units can be picked up by a stack of non-Indian combat units during movement (4.2.5) if they are alone in the hex, at the cost of +1 MP to the moving stack or unit.
10.1.4 Movement During Forced March
Artillery units have no forced march MA; they can only be moved once in a given Operations Phase. They can be moved during the carrying unit's regular or forced march movement portions.
10.2 Artillery Reinforcements
10.2.1 British Artillery
A. Aside from the artillery units that start on the map at the beginning of play, the British receive a few more as reinforcements.
B. The British cannot build artillery units, but can capture them.
10.2.2 American Artillery
A. The Americans can raise one artillery unit per year, beginning in 1776.
B. During the American Continental segment of the Strategic Planning Phase, the Americans pay 2 OPs, then placing the unit in any non-British controlled town or city in Massachusetts, New York, Pennsylvania, or Virginia. The colony may not in an area of operations completely controlled by the British.
11.0 Entrenchments and Forts
11.1 Entrenchments
11.1.1 In General
A. Players can augment a defensive position by entrenching their forces or by building forts. Of the goodly number of forts listed on the game map, few start as full-fledged forts. Most of these were built in the last two decades before the war, and had fallen into such disrepair that they were worthless.
B. For game purposes, simply because a location on the map indicates a fort, do not consider it to be a fort with any defensive bonuses.
11.1.2 Procedure
A. Entrenchments may be built in any hex other than a swamp or mountain.
B. To entrench, spends 1 OP and two MPs from any one combat unit that is in a hex.
C. As soon as this is done, place an entrenchment marker over the entrenched units.
11.1.3 Adding Units to Entrenchment; Mutual Entrenchment
A. Once units are entrenched, any friendly unit can enter that hex and also become entrenched, regardless of enemy units in that same hex.
B. Both sides in a mutually-occupied hex can entrench.
11.1.4 Removal
A. Remove an entrenched marker at the end of any turn during which there is an entrenched marker in the hex and no combat units. Otherwise, there is no way to destroy entrenchments.
B. There is no design limit on entrenched markers, and players can make additional markers as needed.
11.2 Forts
11.2.1 In General
A. Forts can be constructed in any town or city hex by having at least one combat unit present.
B. Indian units cannot construct forts, nor can forts be built in Indian settlements.
C. A fort cannot be constructed when enemy units are present in the hex.
D. To construct a fort, spend 1 OP, 4 MPs, and 1 supply unit.
E. Place the fort marker over the units inside the fort.
F. Friendly units can enter that fort only if no enemy units are in that hex; if they are, then all subsequent entering friendly units are in the hex, but not in the fort.
G. Forts can be used by any units which enter them.
11.2.2 Destruction
A. Forts remain in place unless specifically destroyed.
B. To destroy a fort, a friendly unit must be present in the hex and spend 1 MP to destroy the fort and remove the fort marker.
C. There is no design limit on fort markers, and players can make additional markers as needed.
11.2.3 Forts and Entrenchments
A. A friendly fort cannot exist in the same hex as a friendly entrenchment.
B. A fort can exist in a hex with an entrenchment if the entrenchment is enemy-occupied, and vice versa.
C. A fort may be built in a hex with an entrenched marker alone already in it, but the entrenched marker is removed.
11.2.4 Defensive Benefit
The defensive bonus for forts (9.3.3) applies only if at least half of the defenders (in terms of SPs) are inside the fort.
12.0 Supply
A. Supply is simulated in general terms. Basically, supply affects combat and attrition. Both sides use supply units, which represent ammunition, as well as food and clothing.
B. The British receive supply units as reinforcements.
C. The Americans must buy supply units using OPs.
D. Supply units can be carried (like bateaux) or can be left in towns for later use.
E. Having a supply unit aids in combat, and not having a supply unit during winter can produce fearsome attrition, especially for the Americans.
12.1 Supply Units
12.1.1 Movement
Supply units are like artillery and bateaux: they cannot move by themselves. They must be carried by non-Indian combat units (4.2.5).
12.1.2 Movement Allowance
Supply units do have a MA. Use the MA of the supply unit unless the carrying unit's MA is smaller.
12.1.3 Movement During Forced March
A. Because supply units have no forced march MA, they can be only moved once in a given Operations Phase, regardless of what the units that are carrying them have done.
B. They can be moved during the carrying unit's regular or forced march movement portions.
12.1.4 Combat
A. Supply units have no combat value.
B. They are capable of being used by either side. If a supply unit is alone in a hex, a player can capture it simply by moving a combat unit into that hex and picking up the supply unit. There is no cost in MPs to do so (but remember 12.1.2).
12.1.5 Destruction
A. Supply units can be destroyed in one of two ways:
- They can be consumed in a combat before the combat is resolved, thus increasing BPs (9.3.3), or
- During a friendly movement segment, the phasing side states that it is destroying the supply unit (for whatever reason) and then removes it from play.
B. In both of these cases, the supply unit must be in the same hex as the combat unit destroying it.
C. Supply can also be consumed during fort construction.
12.1.6 Lone Supply Units
A. Supply units remain on the map without being stacked with combat units under the following circumstances.
- Any number of supply units can remain for any length of time in a key town or city.
- One supply unit can remain for any length of time in any town. If more than one supply unit is in such a location at the end of a turn, remove all supply units in excess of one.
- Any number of supply units can be stacked indefinitely with combat units.
B. Any supply units not stacked with a combat unit in any other hex are removed at the end of the turn.
12.1.7 Denominations
A. Supply unit counters come in denominations of 1, 2, and 5. Use them like change, as necessary.
B. There is no design limit on supply units, and players can make additional counters as needed.
12.2 British Supply
The British receive supply from home (England). How much is somewhat random (simulating the shipping of foodstuffs and ammunition in creaky wooden ships over long voyages). The British choose where to receive supply.
12.2.1 Eligible Arrival Locations
A. British supply units can arrive in any one of the following port towns or areas in a given game turn: Nova Scotia, Quebec, Boston, New York, Philadelphia, Charleston, or the Caribbean.
B. Only one port town can receive supplies in a turn, and it must be British-controlled (i.e., be the last to occupy or last to pass through it).
12.2.2 Choosing Place of Arrival
A. The British choose the port town to receive supply units during the Strategic Planning Phase one turn before their actual arrival.
B. Write down the chosen port, keeping it secret from the Americans and revealing the choice upon arrival of the supply units.
Example: The port town receiving supply units in the May/June 1777 turn is chosen by the British in the March/April 1777 turn.
12.2.3 Winter
A. Because the British do not receive supplies during the winter turn, they do not have to make a port choice in the preceding September/October turn.
B. However, for the March/April turn, the British must make their port choice in the winter turn.
12.2.4 Arrival
A. Even though they have chosen a port town, the British are never quite sure how much (if any) supplies they will receive in a given turn.
B. During the Reinforcement Arrival Phase, the British announce the port town chosen last turn, consult the British Supply Table, and roll one die. The result is the number of supply units available in that port town that turn.
C. Place any arriving supply units in the port town hex at no movement cost.
12.2.5 Chosen Port Not Controlled
If the port is not controlled by the British as expected, the British can place the supply units in Nova Scotia or the Caribbean (12.2.6). They are not lost.
12.2.6 Availability of the Caribbean
The Caribbean is available as a supply port (and for the purposes of 12.2.5) only until the French send a fleet to the Caribbean (14.6.2). After that, the Caribbean is no longer available as a supply port.
12.3 American Supply
12.3.1 In General
A. The Americans must buy supply units with OPs.
B. They can purchase supply units in the American supply segment of the Strategic Planning phase.
C. These are bought from cities and towns, but never Indian settlements, and are paid for in OPs at the time of purchase.
12.3.2 Eligible Cities and Towns
A. The Americans can purchase supplies from any city or town that is not occupied by enemy combat units (including Indians) within 5 MPs of an American commander.
B. Such a path cannot be traced through enemy combat units or across unfordable hexsides.
C. The Post Road MA cannot be used to trace the radius (which is in MPs, not hexes).
Example: Washington is in Morristown (3109). He can attempt to purchase supply units (i.e., place a supply unit counter) in any of the following locations: West Point, Princeton, Easton, or Morristown.
12.3.3 Procedure
To purchase one supply unit, the Americans specify the town or city from which they are trying to obtain supplies, consult the American Supply Table (also known as the Black Market Table), and roll one die, using the column for the month in which they are buying. The result is the cost in OPs to buy 1 supply unit. (The N/A result means that no supplies can be purchased in that town.)
12.3.4 Effect of Nearby British Units and Control
A. If there is a British-controlled combat unit within its basic MA of that town, apply a +1 DRM to the roll.
B. If the British control the operational area (4.6), apply a +2 DRM to the roll.
C. These additions are not cumulative.
12.3.5 Choice Whether to Purchase
A. The Americans do not have to buy supply units in any one given town, but must roll separately for each town in which they go shopping.
B. However, they can only roll once per turn per town.
C. If the price is right, they simply pay the OPs, placing a supply unit in that location.
12.3.6 Limit on Purchases
There is no limit to the number of supply unit counters the Americans can buy at any one time from any one location, other than their OP limit for that turn.
12.3.7 Marion, Arnold, Clark
A. For purposes of 12.3.3, American commanders Francis Marion and Benedict Arnold (detachment mode only; see 15.4) cannot be used to buy supply units.
B. George Rogers Clark can purchase supply units, but only in the Western Territories.
12.4 Supply in Combat
12.4.1 Supply Not Required
A. Supply is not necessary to engage in battle; it just helps.
B. Supply units can be used to add BPs in combat, per 9.3.3.
C. The supply unit to be used, must be in the same stack as the unit fighting the battle.
12.4.2 Supply Unit Present
If a stack includes at least one supply unit, add one to that side's BPs.
12.4.3 Expending a Supply Unit
A side that expends (uses) a supply unit in combat adds three to its BPs. Remove the supply unit from the board.
12.4.4 Adjustments Mutually Exclusive
A. 12.4.2 and 12.4.3 are mutually exclusive; they cannot be added together.
B. Moreover, the maximum points gained from spending a unit is three, regardless of how many supply units are destroyed.
12.4.5 Destruction
Either side can destroy a supply unit (or units; see 12.1.5) at any time during the Operations Phase simply by saying so (and there being a combat unit in that hex).
12.5 Attrition
12.5.1 In General
A. During the Attrition Phase in winter turns, both armies can suffer the rigors of attrition: bad weather, lack of food and clothing, etc.
B. The British will usually suffer only minimally, if at all.
C. The Americans will probably suffer heavy losses to their Continental Army units. (Rebel militia have their own built-in disbandment rate, and are not affected by attrition in this phase.)
D. French units never suffer attrition.
E. Attrition never affects commander, Indian, artillery, or supply units (other than to spend them).
12.5.2 Effects on British Units
A. Attrition for the British affects all of their combat units, including Loyalist militia and German units.
B. The British check for attrition for all units in a hex except for the following cases:
- Units are in a key city/town.
- The hex contains fewer than 7 SPs.
- Units are stacked with a supply unit and spend that counter in the Attrition Phase.
C. In all other conditions, the British check for attrition in the Attrition Phase.
12.5.3 British Procedure
The British roll one die per hex subject to possible attrition. On a 5 or 6, one unit of their choice is depleted. (This will obviously be the worst unit, and this is intentional.)
12.5.4 Effects on American Units
A. American attrition applies only to Continental Army (regular) units, not to militia or French units.
B. The Americans check for attrition in every hex containing Continental Army units.
C. Detachments (13.0) are not Continental Army units.
12.5.5 Procedure
To determine the extent of attrition in a given hex, the Americans consult the American Continental Attrition Table and roll one die, applying relevant DRMs to the roll.
12.5.6 Calculating Losses
All results on the Attrition Table apply to the total Continental SPs in that hex, not the number of units. Results are in percentage of total points present that are removed, with all fractions rounded up.
12.5.7 Applying Losses
Points are removed by either flipping a unit over to its depleted side or by removing the unit entirely.
Example: If a 9-strength-point unit is flipped to its 5-point, depleted side, 4 SPs have been removed. Therefore, if there are 9 Continental SPs in a hex, and a ½ (50%) attrition result is obtained, at least 5 points (4 ½ rounded up to 5) must be removed, even if it means removing all 9 SPs.
12.5.8 Availability of Eliminated Troops
Continental units eliminated entirely by attrition are always available when the Americans raise new troops.
13.0 Detachments
The Americans (only) can raise small units of men (detachments) for whatever purposes they need them. This occurs in the Militia Building Phase.
13.1 Detachment Units
A. There are eight American detachment units: two per area of operations except Canada, which has no such units.
B. Detachments operate like normal combat units in all ways, except that when they take a loss they are eliminated, not depleted. They can be raised again immediately in the next militia raising phase; there is no time-lag. They do not suffer attrition.
13.2 Raising Detachments
13.2.1 Requirements
A. To raise a detachment, the Americans must have a militia unit active from the area from which that detachment comes.
Example: To raise a New England detachment, there must be an active Rebel militia unit from any of the New England colonies on the board.
B. In the Militia Raising Phase, the Americans pay 1 OP and place the detachment in the same hex as any eligible militia unit. It can then function normally.
13.2.2 Special Cases
In addition to the above, there are two other ways of raising detachments without Rebel militia units being present.
A. The Western Territories detachments can be raised in any town hex in which George Rogers Clark is present (by paying 1 OP per detachment during the Militia Raising Phase).
B. Either or both Southern detachments can be raised in any town hex in which Francis Marion is present (in the South only) in the same fashion. To raise units, Marion cannot be hidden (15.5.2).
14.0 Reinforcements and Replacements
A. Both sides receive reinforcements (new units) and replacements (SPs for depleted units).
B. The British receive reinforcements for British regulars and German mercenaries per the Reinforcement Schedule, though their arrival must be planned one turn in advance.
C. They also receive RPs for British Regulars and German Mercenaries.
D. The British must raise the Loyalist militia.
E. The Americans have Continental Army units (regulars), Rebel militia, Continental Army replacements, and possible help from the French and Spanish (16.0). The Americans raise forces by spending OPs.
14.1 British Regulars and German Mercenaries
14.1.1 British Regulars
A. British regular units sometimes represent one regiment (e.g., the 42nd Black Watch), and other times represent two or three regiments (e.g., 76/80 or 35/38/40).
B. All of these units are foot, except for the 16th and 17th Light Dragoons which, for game purposes, are cavalry.
14.1.2 Appearance of British Regulars
British regulars either start the game in play or arrive via the Reinforcement Schedule. The schedule specifies the arriving units and their turn of arrival. Where they arrive is up to the British.
14.1.3 Place of Arrival
All British regulars arriving in one turn are placed in any one British supply port (12.2.1) under the same conditions as the arrival of supply units.
14.1.4 German Mercenaries
A. The British Army is fleshed out with a large contingent of German mercenaries hired for the conflict, since the standing British Army was seriously undermanned at the time and the conflict was an unpopular one. These mercenary units are represented by mini-brigades grouped together according to their place of origin (e.g., Brunswick or Hesse-Hanau).
B. Mercenaries arrive in the same fashion as British regular units, and for all game purposes are the same.
14.2 British/German Replacements
14.2.1 In General
In addition to receiving new units (14.1), British regulars and German mercenaries also receive replacements to rebuild depleted units.
14.2.2 Effect of Surrender
British regular regiments and German brigades cannot be rebuilt if they have surrendered (9.3.7.4).
14.2.3 Replacement Points
RPs are the equivalent of SPs, and are used either to replace the SPs lost by a unit when depleted or to rebuild an eligible unit that has been destroyed.
Example: It would take three RPs to rebuild the depleted 52/63/64 British unit back to full strength (6 SPs) from its depleted strength of 3 SPs. It would cost 6 RPs to rebuild this unit from scratch.
14.2.4 Arrival
RPs arrive via the Reinforcement Schedule. They are also assigned to arrive in specific supply ports. To keep track of how many RPs are available at a specific port town, use the British Planning Sheet.
14.2.5 Assigned to Port of Arrival
A. RPs stay in the port in which they arrive until assimilated into actual units (14.2.6). They cannot move.
B. Moreover, they have no combat value until they become part of actual units. If an enemy combat unit enters a port town where there are British/German replacements and there are no protecting combat units, those RPs are lost permanently.
14.2.6 Rebuilding Depleted Units
To rebuild a depleted unit to full strength, the unit in question must be in the same hex as the RPs in the Reinforcement Arrival Phase. Rebuild the unit (flipping it over) by spending the necessary RPs (noting same in the appropriate box).
14.2.7 Rebuilding Destroyed Units
A. To rebuild a destroyed unit that is available to be rebuilt (any unit destroyed by means other than surrender), take the destroyed unit and rebuild it in any port with available RPs.
B. Complete rebuilding cannot take place in the turn immediately after the turn in which the unit was destroyed; it can occur any turn after.
Example: A unit completely destroyed in March/April can be rebuilt anytime starting in the July/August turn.
C. It is convenient to place the destroyed unit counter on the Turn Track in the turn box it becomes available.
14.2.8 Nationality Restrictions
British RPs are used for British regular units, and German RPs are used only for German units. Neither applies to Loyalist militia.
14.2.9 No OP Cost
There is no cost in OPs to receive British or German reinforcements or replacements, or to rebuild units.
14.3 Loyalist Militia (Tories)
A. Not everyone in the colonies was against King George. Certain areas were Loyalist hotbeds, such as New York and Pennsylvania, which raised the largest number of Tory units. The Tory units raised were mostly of the militia variety, but a good many were much better than their Rebel counterparts.
B. Though militia, Loyalist units are permanent in that, once raised, they are subject to losses only through combat and winter attrition. They do not disband like American militia.
C. They are raised by spending OPs.
14.3.1 Raising Loyalist Militia
Loyalist militia are like any other British combat unit, except that they are raised by the expenditure of OPs. Moreover, they cannot be rebuilt when depleted, though they can be raised again once eliminated.
14.3.2 When and Where Raised
A. The British raise Loyalist militia in the Militia Raising Phase.
B. Loyalist militia can be raised in any town or city under British control (occupied or last passed through) in the colony of its designation (noted on the counter).
C. Any such militia units raised are placed on the map immediately; there is no delay, unlike other British units.
D. Loyalist militia units are always raised before the Rebels raise their own militia units.
14.3.3 OP Cost
The cost in OPs to raise a militia unit is equal to the number of SPs that unit has at full strength.
Example: To raise the New York Volunteers would cost 2 OPs; the Guides and Pioneers unit, only 1 OP.
14.3.4 Special Cases
Two Loyalist units must be raised in the same hex as their leader.
A. The British Legion unit can be raised only in New York in a town by Banastre Tarleton.
B. The American Legion unit can be raised only in New York by Benedict Arnold in any hex (15.4).
14.3.5 Depleted Militia Cannot Use RPs
A. Loyalist militia cannot be rebuilt if depleted. However, they can be raised again after they are eliminated entirely, using the same turn delay for return to play as given in 14.2.7.
B. They can be reraised per 14.3.3.
14.3.6 No Movement Restrictions
Unlike Rebel militia, Loyalist militia units can move anywhere on the map within the normal movement restrictions of game play, regardless of their colony of origin.
14.4 The Continental Army
14.4.1 Raised Through OP Expenditure
Other than those units that start the game in play, the Americans must raise Continental Army (Continental) units by spending OPs.
14.4.2 When Raised and Cost
A. The Americans can raise as many Continental units as they can afford in the American Continental segment of the Planning Phase.
B. Units must be raised at full-strength unit, and the OP cost to do so is printed on each unit.
14.4.3 Effect of British Control of Colony
Continental units cannot be raised in a colony in an area of operations controlled by the British.
14.4.4 Where Raised
A. Continental units for a given state can only be raised in the state listed on that counter. Thus, 1 NC must be raised in North Carolina.
B. Continental units can be raised in any town or city not controlled by the British.
14.4.5 Rebuilding Continental Army Units with Militia
A. The number of Continental units that can be raised is limited by the counter mix. However, beginning in the American Continental segment of the Strategic Planning Phase of the March/April 1779 turn, any two Rebel militia SPs from the same colony can be used to rebuild or replace one Continental SP(. For some colonies, this will be impossible.)
B. This occurs anywhere on the board where the Rebel militia unit(s) and the depleted Continental unit are together in a town or city hex not within five hexes of a British combat unit.
C. For destroyed Continental units to be replaced, simply exchange the Rebel militia unit(s) with the Continental unit on the map.
D. There is no OP cost to convert militia units.
E. Once militia units are converted to Continental units, however, one militia unit is permanently removed from play while any others (if used) are available for reappearance on the game map as militia units two turns after their conversion to a Continental unit.
14.4.6 Restoring Depleted Units
A. Depleted Continental units can be restored to full strength by the expenditure of 1 OP per unit, regardless of strength.
B. Reforming such units can occur anywhere on the map, but it can take place only during the American Continental segment of the Strategic Planning Phase.
14.4.7 Raising Eliminated Units
Continental units that have been eliminated entirely can be raised again, without any time lag, in the appropriate phase. This includes surrendered Continental units.
14.4.8 Special Cases
There are four Continental units that are not from any specific colony:
A. The Continental Cavalry unit, which can be raised in Virginia or Pennsylvania;
B. The Lee's Legion unit, which can be raised in Virginia;
C. The Marines unit, which can be raised in any New England port; and
D. The Light Infantry unit, which can be raised in Boston, New York, Philadelphia, or Charleston.
14.5 Rebel Militia
The colonies not only provided troops for the Continental Army, but also raised local militia. These militia units were unreliable at best. Most units were formed for three or maybe at most six months' duration, and few ventured farther than their own area of operation borders. Moreover, when things calmed down in their area, the militia tended to disappear. They were not exactly the sort of units to be counted on.
14.5.1 Raising and Disbanding Rebel Militia
A. Rebel militia are like any other combat unit but can come and go quite rapidly. They can be raised (by the Americans in their Militia Raising Phase. There is no OP cost to raise Rebel militia (however, see Detachments, 11.6).
B. These units can just as quickly disappear in the Militia Disbandment Phase.
14.5.2 Effect of British Control and Units
In the Militia Raising Phase, check the status of each separate colony. There are three possible conditions for each colony. Loyalist militia units count for British presence in a colony or area of operations, including militia raised that turn.
14.5.2.1 British Control
All key cities/towns are under British control, as per 17.1.2.
14.5.2.2 British Presence in Colony
British do not control the colony, but have combat units or active Indian allies in the colony.
14.5.2.3 British Presence in Area of Operations
British do not control the colony, but have combat units or active Indian allies in the area of operations.
14.5.2.4 No British
There is no control and no British units.
14.5.3 Raising Militia
To raise militia, the Americans look up the colony's status on the Rebel Militia Raising Table. The number of militia units allowed to be raised, if they are available within the counter mix and not already in play, are placed in any town not under British control in that colony. If all towns are under British control, place in any hex in that colony.
14.5.4 Disbanding Militia
A. In the Militia Disbandment Phase, the Americans check each rebel militia unit in play to see whether it disbands or goes home. Rolls one die for each unit, applying the DRMs below.
| DRM | Condition |
|---|---|
| +1 | Unit is outside its home colony. |
| +1 | Unit is not stacked with a commander. |
| +2 | There are no British in its home colony. |
B. On an adjusted roll of 5 or higher, remove the militia unit from the map. It has disbanded.
C. All these adjustments are cumulative; moreover, if a militia unit qualifies for all three it automatically disbands, as any die roll would be a 5 or higher.
14.5.5 Restoring Depleted Units
Depleted militia units cannot be rebuilt. However, once disbanded (or eliminated), they can be returned at full strength.
14.6 British Withdrawals
A. Upon the entry of France and Spain into the war, Britain had to spread out its army to meet these new threats. These rules cover these events.
B. Withdrawals occur in the Reinforcement Arrival Phase.
C. All units dispatched to Florida and the Caribbean remain there for the remainder of the game.
14.6.1 July/August 1776
A. In the July/August 1776 turn, the British must move any one 2-SP British regular unit to the Caribbean via naval movement. A morale unit must be sent, if available.
B. Remove the unit selected from play. Failure to do so results in the British receiving zero OPs the next turn and every subsequent turn until the turn following compliance.
14.6.2 Effect of French Arrival on Caribbean Supply
On the turn the first French units arrive in America, the Caribbean is no longer a British supply port (12.2.6).
14.6.3 First Withdrawal After French Arrival
One turn after the first French units arrive in America (16.1.2), the British must send a fleet and 20 SPs of British regulars, including at least 2 morale units, if available, to the Caribbean.
14.6.4 Second Withdrawal After French Arrival
Four turns after the first French units arrive on the board, the British must remove (send to the Caribbean) 4 SPs of British regulars; this follows the same procedure as in 14.6.1.
14.6.5 Effect of Spanish Arrival
On the turn the Spanish enter the conflict (abstractly; see 16.2), the British must send 4 SPs to Florida.
15.0 Commanders
A. Commanders not only aid in battle, but also enable units to move greater distances and to coordinate maneuvering. The number and use of commanders in play are limited.
B. Only one commander in any stack can command that stack (15.2, 15.3).
15.1 Command Units
15.1.1 Ratings
Commanders are rated in three areas: initiative, coordination, and combat.
15.1.1.1 Initiative
The cost in OPs to forced march or to attempt interception with units in his command.
15.1.1.2 Coordination
Affects the coordination of movement of different stacks (4.4) or interception attempts (7.1.4).
15.1.1.3 Combat
Combat rating added to BPs (9.3.3).
15.1.2 Movement Allowances
Though only one MA is printed on the commander counters, all commanders have both regular movement and forced march, using the same MA for both.
15.1.3 Rank
A. Commanders are either army commanders (two stars) or detachment commanders (one star).
B. Each side also has one army commander as its supreme commander.
C. Army commanders can lead an army of any size.
D. Detachment commanders can command a stack of no more than 10 SPs.
E. Benedict Arnold begins as a detachment commander, but in the May/June 1777 turn, he can be promoted to full command status (15.4).
15.1.4 Appearance
A. Commanders start the game in play or are brought on as reinforcements in the Reinforcement Arrival Phase.
B. Arriving American and British commanders are listed on the Reinforcement Schedule.
15.1.5 Reinforcements
A. Arriving British commanders are placed in play just as if they were regular reinforcements (14.1.3).
B. When American commanders are scheduled to arrive, they are placed in the same hex as General Washington (15.3).
15.1.6 Removal
A. Commanders cannot be killed. If their entire force is wiped out (other than surrender), that commander is removed from play. He will return on the next turn.
B. However, if a commander is part of a force that surrenders, he is removed from play for that turn and the next three turns, to return the fourth turn after removal.
Example: A commander surrendering in a March/April turn can return in that year's winter turn.
C. When a commander returns, place him in the same hex with his supreme commander.
15.1.7 Enemy Encountering Lone Commander
If a commander is alone in a hex into which enemy units enter, treat such an occurrence as if it were a surrender (15.1.6).
15.2 British Commanders
15.2.1 At Start
At the start of the game the British has four army commanders: Howe, Clinton, Burgoyne, and Carleton.
15.2.2 Supreme Commander
A. At the start, Howe is the British supreme commander. The supreme commander is nominally in charge of all operations.
B. The supreme commander always commands those combat units with which he is stacked.
C. Any time after the Americans gain a major victory (9.3.8), or if by the first turn of 1778 the British have not yet gained a major victory, the British can remove Howe from the game, placing Clinton in supreme command. Cornwallis then takes Howe's place as an area commander.
15.2.3 Area Commanders
A. Area commanders are army commanders in charge in their own area of operations.
B. In that area, they always command those combat units with which they are stacked (except if the supreme commander is in that stack).
C. They can operate in other areas as well, but they are subordinate to that area commander if in that same stack.
15.2.4 Carleton
Sir Guy Carleton is in charge of Canada. He can leave that province only to enter an adjacent colony, but he can go no farther. He cannot operate in the Western Territories.
15.2.5 Assigning Area of Command
The remaining commanders, plus Howe, must be assigned a nominal area of command (as must Cornwallis, if and when he enters).
15.2.6 Detachment Commanders
The British detachment commanders are Tarleton and Hamilton. They can go anywhere on the map. They enter play per the Reinforcement Schedule.
15.2.7 Benedict Arnold
Benedict Arnold can also become a British detachment commander (15.4).
15.3 American Commanders
15.3.1 Supreme Commander
Washington is the American supreme commander. He does not have an area of command, nor can he be given one. He always commands any units with which he is stacked. He can never be removed or replaced.
15.3.2 Area Commanders
A. In addition to Washington, the Americans can have no more than three army commanders in the game at any time.
B. The areas of command for these army generals are New England, Middle Colonies, and the South. At the start, there are three American commanders present: Lee, Gates, and Greene. Each must be assigned to one of these areas.
C. The rules for British area commanders apply to the Americans.
15.3.3 Replacement Commanders
A. Two additional army commanders become available to the Americans: Lincoln in March 1777, and Arnold in May 1777 (12.4).
B. The Americans can use them when available to replace any other area commander under the following circumstances.
- Another commander is captured by surrender (15.1.6, 15.1.7). If another commander may take his place during the time he is gone, if available.
- The Americans can dismiss an area commander any time after that commander loses a major victory to the British.
C. However, the Americans must always have three area commanders (plus Washington) if the commanders are available.
15.3.4 Return of Dismissed Area Commander
A dismissed area commander can be brought back again, using 15.3.3.
15.3.5 Detachment Commanders
The Americans have three detachment commanders: Clark, Marion, and Arnold. (See 15.4 for special rules on Arnold.) They follow the same detachment commander rules as for the British (15.2.6).
15.4 Benedict Arnold
We all know about this fellow, synonymous with treachery over the last 200 years. What many people do not remember is that, tragically, he was an extremely capable commander, one of the best in the American Army. The Americans have the opportunity to use him; but he can switch sides.
15.4.1 At Start
At the start of the game, Arnold is an American detachment commander. He can assume army command status starting any time with the May/June 1777 turn, though the Americans can continue to use him as a detachment commander (as did the Continental Congress). He simply has the capability of assuming full command in May 1777.
15.4.2 British Turning of Arnold
A. Starting with the March/April 1778 game turn, the British can attempt to get Arnold to come over to the British side. At anytime during or after the March/April 1778 turn, the British can attempt to turn Arnold by paying 1 OP and rolling the die. On a 6 or greater, Arnold joins the British side as a detachment commander.
B. For each additional OP (up to two more), the British can apply a +1 DRM. Therefore, if the British spend 3 OPs, they apply a +2 DRM.
C. The British can try to turn Arnold only once per year.
15.4.3 Effect of Turning
A. If Arnold is successfully turned, all units stacked with him surrender and are removed.
B. Any supply or artillery units are captured or destroyed at the British's option.
C. Any town Arnold is in immediately is considered British-controlled.
D. Arnold immediately becomes a British detachment commander (flipped side), which status he retains for the remainder of the game.
15.5 The Swamp Fox: Francis Marion
These rules are named after the famous South Carolina guerrilla fighter, Francis Marion, but they include the activities of a number of other similar leaders, such as Thomas Sumter and Francis Pickens.
15.5.1 In General
The American detachment commander, Gen. Francis Marion, has special rules enabling him and any units he leads to become true guerrillas. In all other ways, Marion is a normal detachment commander.
15.5.2 Hiding in Swamp
As soon as Marion and his force enter a swamp hex, they can be removed from the board, and the rest of their movement (see 15.53) becomes hidden. The Americans simply note from and to where Marion moves.
15.5.3 Becoming Visible
A. If Marion starts and ends a movement segment in a swamp hex, his movement and location can remain hidden.
B. Otherwise, he must be placed back on the map as soon as he enters a non-swamp hex or performs any other activity other than movement.
15.5.4 Interception While Hidden
Marion can, while hidden, intercept opposing, moving forces in an adjacent swamp hex.
15.5.5 Ambush
A. If, while Marion is hidden, any British force enters Marion's hex, the Americans have the choice to remain silent and let the British force pass (an exception to 5.2.6) or to announce an ambush and conduct the ensuing combat as if it were a successful interception.
B. Marion is the attacker even though the British were moving, and gets the interception BPs (9.3.3).
16.0 French, Spanish, and Indians
16.1 The French
16.1.1 American Major Victory Required
The French enter the war on the side of the Americans as soon as the Americans win a major victory.
16.1.2 Rolling on French Entry Table
A. Beginning three turns after the Americans win their first major victory, they can check the French Entry Table to see when they receive as reinforcements three French units in any port town controlled by the Americans.
B. This reflects the uncertainties as to when the French would precisely enter the conflict.
Example: If the Americans won their first major victory in the Sept/Oct 1777 turn, they could begin rolling on the French Entry Table in the May/June 1778 turn.
16.1.3 Final French Reinforcements
Eight turns after the first French units arrive, the last two French units arrive as reinforcements, per 16.1.2.
16.1.4 Use of French Units
A. French units are treated like Continental regulars, except that they do not suffer any winter attrition and get no replacements.
B. French units can be led by any American commander.
C. Once removed from the board by combat, French units cannot return.
16.1.5 Effects on British
French arrival triggers certain British withdrawals and also restricts British use of the Caribbean as a port (14.6).
16.2 The Spanish
A. The Spanish also entered the war on the American side, though not with too much gusto. Eight turns after the first American major victory, the British must move 4 SPs of regulars (not militia nor German) into Florida, where they remain for the rest of the game.
B. In addition, starting with that turn, the Creek Indians cannot be activated.
16.3 Indians
The Indians were of little use to either side during the Revolutionary War, though they could cause problems by raiding towns, burning supplies, and attacking small detachments.
16.3.1 In General
A. There are four Indian counters for the British, with one back-printed for the Americans. These represent Indian tribes allied to Britain or to the colonies.
B. The counters do not represent specific tribes, but are placed in specific Indian tribal settlements representing these tribes when in play.
C. Only four Indian counters can be in play at any one time.
D. The British cannot use the fourth (American) Indian unit unless the other three Indian units are in play.
16.3.2 Activation
A. Indians can be activated by either side at any time during the Operations Phase, if a counter is available.
B. It costs 2 OPs to attempt to activate an Indian tribe, which is paid in the Strategic Planning Phase. Only a tribe that is not already active (16.3.6) may have an activation attempt.
C. Once activated, an Indian unit may remain in play at a cost of 1 OP per additional turn.
16.3.3 Activation Procedure
A. The side wishing to activate an Indian specifies the tribe and spends 2 OPs (whether or not the attempt is successful).
B. Roll one die.
- The British activate any tribe except the Catawba on a roll of 1-4.
- The Americans can activate only the Catawba tribe on a roll of 1-2.
C. If successful, place the appropriate Indian counter in the chosen Indian settlement.
D. Indians can be activated any number of times during the game, but only one counter can represent any one Indian settlement at any one time.
16.3.4 Capabilities
A. Indians are like normal combat units, except that they have no forced march allowance.
B. Indians cannot capture supply, artillery, or bateaux units, but they can destroy them at no cost in MPs.
C. They can move anywhere on the board, but they cannot enter city or port town hexes.
D. They can use river movement and can cross rivers without bateaux. (For game purposes, they have canoes with them.)
E. Indian units do cost OPs to move like any other unit (13.3.8).
16.3.5 Removal
A. Indians can be voluntarily removed from the board at any time in a turn by the side that activated them, simply by removing the counter.
B. They can also be used to take losses in battle, which also removes them.
16.3.6 Destruction of Indian Settlements
A. Either side can destroy an Indian settlement by entering the hex and burning it down, at a cost of 1 MP.
B. All of these must be true for this to be able to occur:
- The associated Indian tribe must presently active or active in the past,
- The associate Indian tribe is allied to the other side, and
- There are no Indian or enemy units in that hex.
16.3.7 Effects of Destruction
A. A destroyed settlement cannot be used for activation for one full year after the destruction.
B. If the tribe is active while the destruction takes place, it remains on the board and functions normally.
C. Destruction of settlements only affects ability to activate.
16.3.8 Destruction of Towns by Indians
A. Indians can attack and destroy towns (and any supply or artillery units in them).
B. Only non-occupied towns can be burned, though the Indians can first eliminate any enemy units and then burn the town. It costs 1 MP to burn a town, which remains useless for one full year.
C. The town can then be returned to working status in the same turn it was destroyed one year later.
D. Indians cannot attack and destroy cities or port towns.
E. Players can make extra destroyed markers if needed.
17.0 Victory
Determined victory during the Victory Determination Phase of a turn.
17.1 Control
17.1.1 Cities and Towns
A. A city or town is controlled by:
- The side with a combat unit in that location (or, in the case of mutually-occupied hexes, the first one there), or
- The last side to have a combat unit pass through it.
B. Indian units do not count for this purpose.
C. Boston is considered controlled by the British at the start of the game, as the British were there before the American forces were.
17.1.2 Control of a Colony
A. The British control a colony by controlling every key city and town in that colony.
B. There are four colonies without key cities which the British can control as follows:
- New Hampshire: Control Falmouth (in Maine) and Norwich.
- New Jersey: Control two of the three towns in that colony.
- Maryland: Control Annapolis and Baltimore.
- Delaware: Control Wilmington.
17.1.3 Control of an Area of Operations
A. The British control an area of operations (4.6) by controlling all key cities/towns in that area. The provisions in 17.1.2 for New Jersey, New Hampshire, Maryland, and Delaware do not apply here.
B. The British cannot control an area of operations where a key town has been burned.
17.1.4 Effects of a Burned Town
A. For game purposes, towns burned by Indian units are not controlled by either side, as the towns do not technically exist until five turns after burning.
B. Strategically, the British may wish to burn key towns in areas outside their control to deny supply units to the Americans.
17.2 British Victory
17.2.1 Automatic Victory in 1775/1776
During the Victory Determination Phase at the end of any turn in which the Americans have not already won a major victory and the year is either 1775 or 1776, the British win by controlling the following objectives:
A. Canada,
B. Any one area of operations other than the Western Territories, and
C. Boston, New York, Philadelphia, and Charleston.
17.2.2 Automatic Victory: Additional Method
The British may also win if during the Victory Determination Phase at the end of any turn they control:
A. New England, the Middle Colonies, the South, and
B. Canada or the Western Territories.
17.3 Americans Victory
The Americans win if the British have not won by the end of the winter 1781 turn.
18.0 Campaign Game
A. Suffice to say that it is handy to keep all the different types of units in different piles for easy location.
B. Remember that many of the counters are back-printed with other information so that they can serve a number of purposes.
18.1 Game Length
A. The game starts with the Sept/Oct 1775 game turn.
B. It ends either when the British have won (17.2) or at the conclusion of the winter 1781 turn.
18.2 Initial Deployment
The following abbreviations are used for the two sides' initial deployment:
| Abbr | Explanation | Abbr | Explanation |
|---|---|---|---|
| ART | Artillery | FT | Fort |
| BAT | Bateaux | INF | Infantry |
| CA | Continental Army | MIL | Militia |
| DET | Detachment | SU | Supply Unit |
18.2.1 British Initial Deployment
The British start with the following units on the map.
| Location | Hex | Units |
|---|---|---|
| Quebec | 0214 | Royal Highland Emigrants (MIL), 1 ART, 1 SU, FT |
| Montreal | 0815 | 7th Rgt., 1 BAT, 1 SU, Carleton |
| St. Johns | 0814 | 26th Rgt., FT |
| Detroit | 2926 | 8th Rgt., FT, 1 SU, Hamilton |
| Boston | 1305 | 4th King's Own, 5/10/22, 17th Light Dragoons, 35/38/40, 23rd Royal Welsh Fusiliers, 43/45/47, 52/63/64, 1st Light INF, 2nd Light INF, 1st Grenadiers, 2nd Grenadiers, Marines, 1 ART, 1 SU, Howe, Clinton, Burgoyne (all entrenched), 1 Fleet |
| Norfolk | 3605 | Dunmore's Ethiopians, Queen's Own Loyal Virginians (MIL) |
| Florida (off-map) | – | 14th and 60th Rgts |
| Caughnawaga Settlement |
18.2.2 American Initial Deployment
The Americans start with the following units on the map.
| Location | Hex | Units |
|---|---|---|
| Fort Western | 0607 | 1 Mass MIL, 1 RI MIL, 1 Middle det. (foot), 1 BAT, 1 SU, Arnold (DET commander) |
| Crown Point | 1113 | 1 New England det. |
| Ticonderoga | 1212 | 1 NY MIL, 1 ART, 1 BAT, 1 SU, FT |
| Albany | 1610 | 1 NY (CA), 1 Conn MIL |
| Boston | 1305 | 1 and 2 Mass (CA), 1 NH (CA), 1 Conn (CA), 1 RI (CA), 1 SU, Washington, Gates, Greene, Lee |
| Springfield | 1607 | 2nd Mass MIL |
| Fort Stanwix | 1714 | FT |
| Pittsburgh | 3117 | 1 Western det., FT |
19.0 Southern Campaign Scenario
A. This scenario did not appear with the game in S&T 104 due to space limitations. It used the Lord Rawdon counter included in the original game.
B. A shorter, simpler game (three hours long) can be played by using the three southern colonies, plus lower Virginia, to simulate the southern campaigns of 1780-1781.
C. The scenario runs from the March/April 1780 turn through the September/October 1781 turn.
D. Play is confined to all hexes south of the 3900 hex row and the Dan River.
E. In addition, British units only are restricted to south of hexes 4133 and 4134 and east of the Appalachian Mountains, beginning in hex 4414 through 5216.
F. American units operate in the same area of operations as the British units. They can also cross north of the Dan River (19.13). The two Western Detachments can operate in and west of the Appalachian Mountains (19.14).
G. All game rules apply except as stated below.
19.1 Special Rules
19.1.1 Operations Points
The operations point rules remain in effect for this scenario; however, OP markers drawn have only ⅓ of face value (fractions rounded down).
Example: The Americans draw the marker with 32 on it. Dividing this number by 3 and rounding the fraction down, yields 10 OPs for that turn.
19.1.2 Supply
A. Each turn if the British control Charleston in the Strategic Planning Phase, they roll one die. On a 5-6, they receive one supply unit immediately.
B. If the British do not control Charleston, they receive no supply units.
C. American supply rules remain in effect.
D. There is no winter attrition for either side.
19.1.3 Other Special Rules
A. Any turn prior to May/June 1781, American combat units can cross north of the Dan River (in order to go outside the scenario boundary), and are able to return south of the Dan River during any current or following Operations Phase. This creates a safe haven for the Americans to rest and replace their units.
B. For both players, the cost of OPs to build bateaux is doubled in this scenario.
19.1.4 Replacements and Reinforcements
A. There are no British or German RPs in this scenario.
B. British reinforcements appear (19.2.3) at Charleston or any other port town.
C. Loyalist militia units from the three southern colonies (NC, SC, Ga) can be raised and reraised, per 14.3.
D. American, Continental, and militia units from the same three colonies can also be raised and reraised in the same manner.
E. The 1st Md and 2nd Md Ca, 1st and 2nd Va Ca, and Lee's Legion units are available as replacements in the March/April 1781 and succeeding turns. The latter units appear in any hex south of the Dan River.
F. All of the above units require OP expenditures per the Operations Point Chart.
G. The two American Western detachments appear at Ft. Loudon (5019) in the Militia Raising Phase immediately after Fort 96 (5312) becomes British-controlled, at no OP cost.
H. There are no French or Indian units in the scenario.
19.1.5 Major Victory in Combat
A. The British win a major victory by capturing Charleston or defeating 10 American SPs (not the usual 25 SPs). They receive only one extra OP in the following Operations Capability Phase.
B. The Americans achieve no effects nor receive bonuses for any major victory combat result.
19.1.6 Commanders
A. The British begin the scenario with Clinton and Tarleton.
B. If Charleston becomes controlled by the British, Clinton is replaced in the next British Reinforcement Phase in the same hex by Cornwallis.
C. Cornwallis is replaced by Rawdon if Cornwallis moves into Virginia (19.1.7).
D. The Americans begins with Lincoln and Marion.
E. After any British major victory (including British control of Charleston), Lincoln is replaced by Gates.
F. After a second British major victory, Gates is replaced by Greene, who remains as army commander for the rest of the scenario.
G. Gates and Greene are placed in any hex south of the Dan River in the next American Planning Phase after a British major victory.
19.1.7 British Withdrawals
A. Cornwallis and Tarleton and 8 SPs of British regular must be exited through hex row 3900 north of the Dan River into Virginia in the May/June 1781 turn.
B. This rule does not apply if the British control fewer than two of the three colonies (NC, SC, Ga).
C. With that exception, for each succeeding turn this rule is not complied with, the Americans receive in the next American Continental segment 1 Continental unit south of the Dan River at no OP cost.
19.1.8 Victory Conditions
A. The British win an automatic victory by controlling the three southernmost colonies (NC, SC, Ga) for two consecutive turns.
B. The Americans win by avoiding an automatic British victory by the end of the September/October 1781 turn.
19.2 Scenario Deployment
19.2.1 British
The following units begin the scenario on the map.
| Location | Hex | Units |
|---|---|---|
| Charleston | 5306 | Clinton, Tarleton, 7th RoyFs, 23rd RWFs, 52/63/64, 42nd BW, 1 LtInf, 1 Gren, 17th LtDg, 4 HsC, SQnRgr, BrtLeg, Gd&Pr, 1 SU, 1 ART, all under entrenched marker; 1 fleet. |
| Savannah | 5807 | 3 Lt Inf (depleted), Marines (depleted), 60th, 71st FrHd units, 1 ART, 1 SU, all under Fort |
| Augusta | 5611 | DeLncy, NYVol, KngRgr, NC Vol, SC Roy units, all under entrenched marker |
19.2.2 American Deployment
A. The Americans control Charleston at the start.
B. The following units begin the scenario on the map.
| Location | Hex | Units |
|---|---|---|
| Charleston | 5306 | Lincoln, 1 SC CA (depleted), 1 Ga CA, 1 NC CA, South DET (foot), 1 ART, all under Fort marker |
| Anywhere in South Carolina* | – | Marion, 1 SC MIL, 2 SC MIL, 3 SC MIL. |
| Cheraw | 4709 | 1 Va CA, South DET (horse) |
| Warrenton | 4008 | 2 Va CA |
* The militia must be in separate hexes and may not be in any key towns.
19.2.3 Reinforcements
A. American units are placed on the map during the American Continental segment or Militia Raising Phase for the American side, as appropriate.
B. British units are place on the map in the British Reinforcement Phase.
C. All arrive at no OP cost.
| Turn | Side | Units/Location |
|---|---|---|
| May/June 1780 | Am | 1 Md CA, 2 Md CA, in any hex south of the Dan River |
| July/August 1780 | Br | Guards, Waldeck, LoyAm, RoyVIr, NJ Vol, Am Vol, KngAm, at Charleston or any British-controlled port town |
| September/October 1780 | Am | Lee's Legion, ConCav (depleted), Middle DET (horse) (depleted), in any hex south of the Dan River |
| September/October 1780 | Br | 82/84 at any British-controlled port town |
| March/April 1781* | Am | 1 Va MIL, 2 Va MIL, in any hex south of the Dan River |
| May/June 1781 | Br | 3 Buffs, 19/30 at any British-controlled port town |
*Neither unit can be replaced in the scenario.
20.0 Designer's Notes
It has been approximately ten years since Randy Reed's 1776 game appeared (published by the Avalon Hill Game Company). Despite some initial reservations, I found that it was quite and interesting and challenging design, with a remarkable (for that day) accent on maneuver and planning. As fascinated as I was by the system, I was somewhat disappointed by the stark nature of its historicity; no commanders, no named units, and no chrome anywhere to be found. Thus, given the opportunity to do a game on the American Revolution, I seized it.
13: The Colonies in Revolt underwent several metamorphoses during its somewhat tortured development. At first, the map bore a great resemblance to 1776, a 17" by 44" beanpole covering Maine to upper Georgia, with the Appalachians on the western edge. When certain other game mechanics failed to work, I changed gears midstream and completely redid the map. The final map is remarkably busy, considering how underpopulated the colonies were then. However, there is an awful lot of important terrain, and the scarcity of "cities" makes those which did exist all the more important.
The major design problem was my desire to simulate the game on the regimental level. Initial research revealed this was not possible within a 200-counter mix. We would have needed at least 300 counters, aside from the ensuing stacking problems. The question then became how to reduce the units while retaining their flavor. The answer was to use mini-brigades. Some of the combat strengths might seem askew; I did not count rifles here, but included a great number of other factors. Moreover, combat strengths are a two-edged sword; the larger the strength, the greater the losses (in SPs) taken. Thus, while British units seem individually weak, there are a great number of British units, which can absorb losses at minimal SP cost, as compared with German and Continental units. This becomes a great advantage to the British as the game wears on.
The system of operations points, revolving movement, and initiative originally appeared in my Druid game. Added to that was coordination, all of which together served to emphasize maneuver, opportunity, and planning. The two-tiered movement allowances and the ability to keep in-turn game potentials secret creates an atmosphere in which surprise is not only possible; but necessary for success. This fits in with the general course of the war: large, set-piece battles often produced little result, while rapid movements and surprise actions (Trenton and King's Mountain) brought key victories.
It was to that end that the unusual Combat Results Table was developed. In researching the various battles and campaigns, I was struck by the fact that while most actions were between forces of about equal size, the combat results were wildly variable, which is what happened historically, at King's Mountain or Fraser's Farm/Saratoga. Out of this appraisal grew a CRT in which almost any result is possible between two equal forces, with battle points taking into account as many factors as possible. Though I know that the first player who launches a massive attack only to roll an 11 will toss the game through the nearest aperture, similar results did occur in the historical campaign (e.g., Guilford Court House).
Above all, I tried to get as much flavor of the period – and the Rebellion – into the game. Thus, detachment commanders such as George Rogers Clark and the infamous Banastre Tarleton (and extremely interesting) affect minor and major events. Indians will most likely keep things interesting, and the fluctuating cost of purchasing supplies for the Americans will show how difficult it was to plan ahead for this sort of thing. [Source note: the printed line order at this point is garbled; the parenthetical "(and extremely interesting)" is placed after "Tarleton" here to read as a sentence.]
Finally, players will soon earn that it is not easy for the British to win. This reflects my view of the military situation as well as my basic design theories, one of which is that the players should play the situation, not some manufactured set of victory conditions. Thus, the game is a great challenge to the British, who seemingly have to hold four bundles with two arms... and with little help from home. Then again, things are not that easy for the Americans, who have to overcome so much bad luck that they will feel like they are fighting themselves more than their red-coated opponents. And that's the way it should be.
21.0 Unit Abbreviations
21.1 British Regulars
| Abbr | Unit |
|---|---|
| 4 K.O. | 4th King's Own |
| 16, 17 LtDg | 16th, 17th Light Dragoons |
| 23 RWFs | 23rd Royal Welsh Fusiliers |
| 1 LtInf | 1st Light Infantry |
| 1 Gren | 1st Grenadiers |
| 7th RoyFs | 7th Royal Fusiliers |
| 26 Camr | 26th Cameronians |
| 42BW | 42nd Black Watch |
| 71 FrHd | 71st Fraser's Highlanders |
| 18 RoyIr | 18th Royal Irish |
21.2 Loyalist Militia
| Abbr | Unit |
|---|---|
| RHE | Royal Highland Emigrants |
| SQnRgr | Simcoe's Queen's Rangers |
| DeLncy | DeLancey's Tory Battalion |
| RoyGrn | Royal Greens |
| LoyAm | Loyal American Regiment |
| DunEth | Dunmore's Ethiopians |
| BrtLeg | British Legion |
| NC Vol | North Carolina Volunteers |
| McLHd | McLeod's Highlanders |
| SC Roy | Innes's South Carolina Royalists |
| QOLVa | Queen's Own Loyal Virginians |
| MdVol |
21.3 German Mercenaries
| Abbr | Unit |
|---|---|
| HsC | Hesse-Cassel |
| Brnk | Brunswick |
| HsHn | Hesse-Hanau |
| AnsByr | Ansbach-Bayreuth |
| AnZrb | Anhalt-Zerbst |
| Waldk | Waldeck |