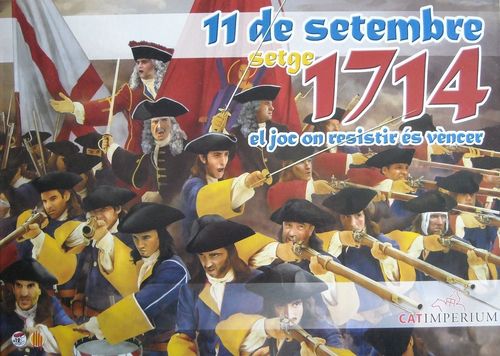
11 de Setembre. Setge 1714
11 de Setembre. Setge 1714 Rulebook
Table of Contents
Table of Contents
1. Introduction
"11 de Setembre 1714" is a game that recreates the battle that took place during 1714 in the city of Barcelona. One player (or a team) takes control of the attacking forces, known as the Army of Two Crowns (France and Spain), while the other one (player or team) takes the role of the Catalan army that defended the city. The game is divided into a given number of turns. Each game-turn is subdivided into "phases" during which players move combat units and attack with them, trying to seize key points of the city and eliminating enemy units.
2. Components
2.1. The playing pieces
Both armies are represented by playing pieces. Each one represents a specific combat formation (also called unit), showing its name. The colour defines its army. Catalan units (Regular regiments, Coronela militiamen and armed citizens) have a blue background. The Army of the Two Crowns has white background. The figure represented in each piece shows the kind of combatant that forms the unit. Each unit has a combat strength value, symbolizing his experience, effectiveness, weapons, and other important factors. This combat strength is displayed as a number located at the bottom of the piece.
Apart from these counters, called combat units, the game has some other pieces that represent special elements: leaders, artillery guns and barricades.
[Figure: Combat Units]
[Figure: Special Units]
2.2. The game map
The game map depicts the East zone of Barcelona, between the church of Santa Maria del Mar and the outside of the city wall, where Bourbons established their batteries and barricades of siege. This is the zone where the battle was fought on 11th September 1714.
The background of the map shows the urban fabric of Barcelona at the time of the siege, as well as some features (walls, convents, defensive lines, breaches). On top of this historical background a group of polygonal areas has been displayed. These areas, called zones, regulate movement and combat of units. The size of each zone is related to the difficulty to move through it: small zones mark areas crowded with buildings, where the advance is slow. On the other hand, big zones show wider and emptier spaces. Each unit must be clearly inside any one of the zones.
[Figure: Zones and lines in the map]
2.2.1. Types of zones
Each zone has a background whose colour determines the type of terrain it represents:
- Ochre and green zones. Ochre zones are streets, orchards, moats, wide spaces, fields, etc. Green zones are located outside the wall. Both types of zone don't give any defence bonus, as they represent spaces without any protection for the defenders.
- Grey zones. Zones with grey colour are dense urban areas, bastions and curtain walls. These zones are difficult to cross for combat units, and the defenders get protection bonus.
- Blue zones. These zones are big medieval buildings that can be easily defended. They have huge walls, able to hold artillery bombardment. The three monasteries near the city walls (Santa Clara, Sant Agustí and Sant Pere) are represented with this colour, as well as the convents of Santa Caterina and Jonqueres. Units located in these zones enjoy important defensive benefits.
Additionally, some sides of zones are painted with a different colour, showing features that can be important on combat:
- Blue line. It represents fortified lines (walls, parapets, trenches). It is possible to move through them, but units which defend behind a blue line receive a protection bonus against attacks across the line.
- Red line. These lines represent walls and bastions. It is not allowed to cross them, as they are a barrier to any kind of movement. In terms of play there cannot be movement or combat through them, apart from artillery fire. Sides of zones marked as breaches are the only way to cross walls.
2.3. Dice
The game includes ten six-sided dice to resolve combats and some other mechanics (artillery fire, mines, leader casualties, etc.).
(Note: the printed source reads "diec"; corrected to "dice" here.)
3. The Scale
3.1. Units
Each combat unit represents around 60 to 100 soldiers, equivalent to the strength of a company.
3.2. Map
A centimetre of the map is equal to 10 metres of actual space.
3.3. Time
Each game-turn represents between 60 and 90 minutes of actual combat.
4. Game setup
The player who commands the Catalan forces deploys his units in the map according to the instructions found in these rules. Afterwards, the player who commands the troops of the Two Crowns does the same. Some Catalan units don't start the game on the map, as they enter on later turns as reinforcements.
The piece with two flags is situated on the first space of the turn track, with the side which represents the Two Crowns facing the players.
Finally, the cards are shuffled, and put face-down on a single deck, besides the board.
Now the game can be started. Bourbon player goes first.
5. Sequence of play
During each turn players follow this sequence of actions on strict order. The player who is carrying out actions is called active player while the other one is the non-active player.
5.1. Actions of the Two Crowns
In this phase the player who commands the Two Crowns carries out the following phases:
5.1.1. Royal breach check. The Bourbon player checks if it is possible to cross through the Royal Breach. He or she rolls a six-sided die. If the result is a 6, the Breach is assured, and can be used by the Bourbon combat units. Once a 6 is achieved, it is not necessary to repeat the check in subsequent turns.
5.1.2. Random events phase. The active player draws the top card of the deck, reading the event written on it. The card can trigger different actions that modify movement and combat for the remaining of the phases of the active player.
5.1.3. Artillery fire phase. Possible artillery fire is declared and resolved against enemy positions.
5.1.4. Movement phase. If the player receives reinforcements in this turn, the new troops enter the map. Afterwards, the Bourbon player may move all his units, following the procedures described on these rules.
5.1.5. Combat phase. Once all moves are performed the attacker may declare and resolve combats. On each combat he can choose to make salvo fire or an assault.
5.1.6. Discard phase. The card used during the turn is discarded, removing it from the game area.
5.2. Actions of the Catalan Army
The counter which marks the current turn is turned around, showing now the Catalan army's insignia (Saint George's cross).
The player who represents Catalan forces becomes the active player in this second half of the turn, and executes the phases in an identical way as his opponent (except for the verification of the Royal Breach).
5.2.1. Random events phase.
5.2.2. Artillery fire phase.
5.2.3. Movement Phase.
5.2.4. Combat Phase.
5.2.5. Discard phase.
5.3. Turn Final phase
If the turn played was the last one, victory conditions are checked in order to know which of the two sides has won the game.
If this was not the last turn players check whether automatic victory conditions are achieved.
Finally the turn marker is advanced to the following turn track space, and then the Bourbon player becomes the active player again.
6. Stacking
6.1. Stacking limit
Stacking is the placement of more than one unit into a single zone at the same time. A player may stack up to 5 combat units in the same map zone (leaders, artillery and barricades never count against this limit, because they are not combat units). If a zone is ever found to be overstacked, the owning player must eliminate enough combat units to meet the stacking limit of 5 combat units per zone. On each given zone there can be only units belonging to one of the sides. The only way to enter an enemy zone with combat units is to assault them in the combat phase.
6.2. Bourbon deployment's zones
There are three special zones corresponding to the deployment areas of the Two Crowns army; Left Two Crowns, Centre Two Crowns; and Right Two Crowns. In these zones stacking limit are not applied, since they represent wide zones outside the city with enough space to deploy all the attacker army.
6.3. Stacking during movement and combat
Stacking limits apply at all times during all the game. Thus, it cannot be infringed during movements, combats and retreats. The only exception about this rule is the arrival of reinforcements (see 10.1).
7. The mine under the Royal Breach
During the assault of 11th September, the wider breach created on Barcelona's wall wasn't crossed by the attackers until mid-day, because Bourbons thought that the defenders had constructed a mine under it. They only were able to use it when they had assured that the mine's gunpowder was wet, and so it wouldn't explode.
To depict this important fact in the game, the Bourbon player rolls a six-sided die at the beginning of each turn. A result of 6 means that Bourbon engineers have assured the Royal Breach, thus letting Bourbon troops to cross it. None of the units can cross the Royal Breach until it has been assured. Once it has happened the rule has no effect on the game, and the Bourbon player doesn't need to make this check anymore. If that's not the case, the Bourbon player will continue carrying out the check every turn.
8. Random events (optional use)
The game uses a deck of cards to simulate random events which introduce player in the typical chaos of a battle like the one who took place on 11th September. At the beginning of the game, the deck of cards is shuffled, putting them face down. At the beginning of his turn, the active player picks up the topmost card, revealing the face with text, reading it and executing the event described. If the text specifies that the event is active through all the phases of the active player the card will remain face up until the end of his actions. Finally the card is discarded and left apart from the rest of the game.
(Note: The use of cards is optional. Players can decide not to use them, skipping the "Random events" phase).
9. Artillery fire
Each player has at his disposal several artillery units, symbolizing batteries of big cannons. In his artillery fire phase the active player can fire his batteries against enemy combat units. Catalan cannons only can fire at adjacent zones (bordering) to the zone in which artillery units are located, while the Bourbon player can fire at a distance of two zones, because his cannons have higher calibres.
Every artillery unit can bombard only one opponent combat unit in each turn. To resolve the attack to an adjacent zone, the active player defines what his target is and rolls a die, being this target eliminated with a result of 4, 5 or 6. In case of Bourbon artillery units attacking combat units at a distance of 2 zones, the target is eliminated with a result of 5 or 6.
Artillery units cannot be moved from their original place during the game, and if enemy combat units enter their zone for any reason the artillery unit is captured and eliminated from the game.
Example of artillery fire. At the beginning of a game turn the situation in the Bastion of Llevant is the one shown in the image. During the artillery phase of the Bourbon player he decides to bombard the Catalan regular soldiers present at the bastion (which have combat strength of 5). The die roll gives a result of 4, but because the artillery unit is at a distance of two zones from the objective it doesn't make any damage.
The situation in the zone doesn't change during the rest of the turn. In the next Catalan artillery fire phase the artillery inside the Bastion of Llevant attacks the grenadiers' unit adjacent to the breach, which will be eliminated with a value of 4 or more. The die roll gives a 5, so the Bourbon grenadier's counter is eliminated.
10. Movement
During the movement phase the active player may move all, some, or none of his units. Units can move up to three zones (apart from artillery units, that can't move). In order to enter a zone it needs to be adjacent to the zone where the unit is located. However, when a moving unit enters a zone adjacent to enemy combat units it must stop. A unit which begins the movement phase in a zone adjacent to enemy units may move freely 3 zones like other units, but must stop if it enters again in a zone adjacent to enemy combat units. Additionally, any unit that enters a deployment Bourbon zone must stop immediately (see section 6.2).
Example of movement. Movement phase of the Bourbon turn. A Bourbon unit located inside the bastion of Portal Nou wants to advance inside the city. It starts moving towards the zone where there is a Catalan artillery unit. Being alone in a zone without combat units the artillery unit is captured by the Bourbon player, and eliminated. The Bourbon unit continues advancing, but as the new zone is adjacent to Catalan combat units is must stop, finishing its movement.
10.1. Reinforcements
Both sides have reinforcements available at specific moments of the game. If the player receives reinforcements on a given turn the new units are put on the board. In the Catalan case they are placed inside zones marked with an R and not controlled by enemy units.
Regarding Bourbon reinforcements, they are composed of recreated units. In the turn when the Bourbon player receives reinforcements he can recover as many eliminated units as the number that is given in the rules for this turn. These recreated units must be deployed into one of the 3 special deployment zones of the Bourbon side. If there are more eliminated units than the established number of recovered units the remainder are lost.
Thus, if for instance in 5th turn 20 units have to be recovered, but only 16 have been eliminated, the player can deploy the 16 units, deploying them among the 3 special deployment zones as he wishes. On the contrary, if the player has lost 25 units, he can only recover 20, chosen at his will.
When reinforcements are deployed on the map they can infringe stacking limits, but they have to comply to them as fast as he can move (in other words, units must exit of the overstacked zones as soon as they can).
Wherever reinforcements are deployed they are considered active units, so they move and combat in the same manner than the other units on play.
11. Combat
In the combat phase the active side can declare attacks against opponent zones. Players can choose among two types of combat: salvo fire or an assault. One combat can be declared for each zone with friendly troops. Units of the same zone must do the same action, and each friendly zone can declare only one action. Declaring combat is always voluntary. It is possible to declare any number of combats against one defending zone if each combat is declared from a different attacking zone.
11.1. Defence value of zones
Each zone of the map has a defence value which helps defending units when they are attacked. The defence value is given by its colour:
- Ochre and green zones have a value of 0.
- Grey zones have a value of 2.
- Blue zones have a value of 3.
11.2. Salvo fire
This type of combat represents an attack at distance with musket fire, addressed to reduce the defender's effectiveness before assaulting a zone in order to conquer it.
The active player chooses one zone with its own troops, adjacent to a zone controlled by the enemy. A combat with salvo fire cannot be done against opponents who are placed in a zone with higher defence value; salvo fire can be done from one zone to adjacent zones with equal or lower defence value. On the other hand, salvo fire is blocked by barricades and blue lines inside ochre and green attacked zones if these defences are covering the line of contact between attacking and defending zones.
In order to do salvo fire the active player declares the attacking and defending zones. A die is rolled for every combat unit inside the attacking zone; on each result of 6 a defending unit is eliminated at the choice of the defender.
Example of combat. The Bourbon player who commands the Army of the Two Crowns wants to advance towards Pla de Palau, so he plans a concentrated attack against the Catalan troops which defend this approach (see figure A). He declares salvo fire coming from the French combat units located in the upper grey zone. He can't shoot against Santa Clara, since the convent is a zone with a higher defence value (blue zone against grey zone). He could fire against the Catalan unit located in the adjacent grey zone, but he chooses to weaken the Catalan defences in the big ochre zone. On the other hand, the barricade located in the big ochre zone protects against attacks coming from the ochre zone (in the side where the barricade is situated), so salvo fire from the grey zone is possible (see section 12 of rules).
Figure A: Situation at the beginning of the combat.
As the Bourbon player has 4 combat units there he rolls 4 dice (salvo fire needs a value of 6 to be successful). The result is 4, 1, 3, 6, so the combat eliminates one of the defending units (the Catalan player chooses to eliminate a Coronela militiamen unit, see figure B).
Then the Bourbon declares an assault with his units located at the north of the Catalan troops (see figure C).
Figure B: Situation after Bourbon fire.
The attacker chooses one of the grenadiers as lead unit, and his assault value is 9 (The lead unit has a combat strength of 5, +4 due to having four additional combat units in the attacking zone).
Figure C: First Bourbon assault.
The Catalan player chooses not to withdraw, but he uses the commander located adjacent to the defending zone. He chooses as a lead unit one of his mountain fusiliers combat units, and his assault value is 12 (The lead unit has a combat strength of 5, +3 for three additional combat units in the defending zone, +1 due to the commander, +3 for defending behind a barricade).
The Bourbon player roll die gives a 5 against a 2 to the Catalans. The final result is a draw (14 to 14), so the defender wins the assault and the attacking lead unit (grenadiers) is eliminated. Finally the Catalan player must check leader casualties for his commander. He gets bad luck and the die roll result is a 6, so the commander is eliminated (see figure D).
Figure D: Situation after the first assault.
To subdue the Catalan defenders, the Bourbon player starts another assault, but this time crossing the blue coloured defensive line known as "Travessera". The attacker chooses the grenadiers as a lead unit, giving an assault value of 9 (Combat value of 5 given by the grenadier lead unit, +4 for four additional combat units in the attacking zone). The defender chooses again mountain fusiliers as lead unit, achieving an assault value of 11 (Combat value of 5 given by the lead unit, +3 for three additional combat units in the defending zone, +3 for defending behind a blue line). The Catalan player decides to withdraw, summing up +2 for a final assault value of 13 (see Figure E).
Figure E: Second Bourbon assault.
Bourbon roll gets a 5 against the Catalan 6. Thus, the defender wins the combat, but as he declared withdrawal he must retreat his troops from the defending zone. He distributes his troops in adjacent empty or friendly controlled areas, at his will. Finally, the Bourbon player eliminates his lead unit because he has lost the combat, but he advances into the empty defending zone with some attacker units at his will. On the other hand, the barricade counter is eliminated because it can't retreat and now is isolated (see Figure F).
Figure F: Situation at the end of combat phase.
11.3. Assault
The assault is the type of combat which attacking troops try to rout the defender and occupy its zone. It is more costly for the attacker than the salvo fire, but the combat results can be devastating for the defender.
The active player (attacker) can announce an assault from one of his zones where he has units and which have not made any attack yet. He declares the zone that is assaulting among the adjacent zones that contain enemy combat units (it is the attacked or defending zone). Each player chooses a lead unit from those present in the zone (starting with the attacker). The combat strength of the lead unit is the basic assault value, that can be modified by other factors:
Attacker
- +1 for each additional unit inside the attacking zone.
- +1 if there is a friendly commander adjacent to the attacked zone.
Defender
- Defence value of the attacked zone (+2 for grey zones, +3 for blue zones).
- Or: +3 if the attack crosses a blue line present in the attacked zone.
- Or: +3 if the attack crosses a barricade present in the attacked zone.
- +1 if there is a friendly commander in the attacked zone or adjacent to it.
- +1 for each additional unit inside the attacked zone.
- +2 if the defender declares a withdrawal.
The player can choose not to use any commander in the assault (thus not adding this modifier) in order not to risk him. Only one commander for each side can take part in an assault (being the only exception the Santa Eulàlia's flag).
Each side adds up the possible modifiers to its basic assault value deciding, if it is possible, the use of a commander. Afterwards the defender can declare a withdrawal. Finally, each player rolls one die which is added to his total assault value (basic + modifiers + die).
If the defender has not declared a withdrawal the result is calculated as follows:
- The attacker value is higher than the defender value: the assault is a success. Defender lead unit is eliminated. Remaining defending units must retreat out of the assaulted zone, then it must be occupied by the attacker.
- The values are equal, or the defender value is higher than the attacker value. The assault fails. Attacker lead unit is eliminated. Remaining attacking units simply stays in their zone.
If the defender has declared a withdrawal the result is calculated as follows:
- The attacker value is higher than the defender value: the assault is a success. Defending units must retreat out of the assaulted zone without taking casualties. The assaulted zone must now be occupied by the attacker.
- The values are equal, or the defender value is higher than the attacker value. The assault is a success after taking heavy losses. Attacker lead unit is eliminated. Defending units must retreat out of the assaulted zone without taking casualties. The assaulted zone must now be occupied by the attacker.
If the defender must retreat his units they have to go to adjacent zones without enemy units on them. They can be retreated to different zones, as player wishes. If he is forced to retreat towards a friendly zone where the stacking limit is infringed he must eliminate enough units in order not to exceed the maximum of 5 units per zone. If the units can't retreat because they are surrounded by enemy units they are captured and eliminated.
If the defender zone is empty after the assault (due to retreat or destruction of defending combat units) the attacker must advance and occupy it. He must advance with at least his lead unit if it has survived (or with another combat unit if the lead unit was eliminated during the assault). The attacker can advance more units, but all of them must have started to assault inside the attacking zone.
Finally, players roll a die for each commander involved in the combat in order to check whether they were wounded during the assault. A result of 6 implies that this commander is a casualty, since he is injured or has died. Therefore, the leader is eliminated from the game. Other commanders present in the attacked zone must retreat if their troops do the same. If the leader is surrounded he is captured and eliminated from the game.
On the other hand, artillery units and barricades can't retreat; if their zone is occupied by the enemy they are captured.
12. Barricades
Barricades are an obstacle which can help the defence of an approach.
The Catalan player has some barricade counters. They can move 3 ochre or green zones during the corresponding movement phase. At the end of every movement a barricade must be placed in one of the sides of the zone, facing an adjacent zone which must be ochre and green too. The zone can't have a blue or a red line drawn on this side.
Any unit which defends behind a barricade adds three points to its combat value. Only one barricade can be placed by zone, and this protects exclusively the forces which are inside the zone against attacks from the zone adjacent to where the barricade is located. If the barricade must to retreat or withdraw it is eliminated.
13. The Santa Eulalia's flag
The presence of Santa Eulàlia's flag was an important moral element for the Catalan troops during the siege of 1713-1714. In the game, the flag is represented with a counter. The flag moves and affects combat exactly as a commander, contributing its bonus in any assault started at the zone where it is placed, or at any adjacent zone.
Exceptionally the modifier of the flag can be summed up to any other contributed by a commander (in other words, the Catalan player can sum up +2 to his assault value if, during an assault, the flag and a commander affect the combat).
The Santa Eulàlia's flag cannot be eliminated during assaults. Therefore, it can be used without danger in any combat. The only way of being eliminated is during a retreat, if it is surrounded by enemies (in the same manner that the rest of units).
13. How to win
Note: the printed rulebook numbers both this section and the flag section "13". Numbering is kept as printed here; section 14 does not appear in the source.
The Army of the Two Crowns wins automatically if, at the end of any turn:
- Annihilates all the Catalan units,
- Or: the Bourbon player holds all the bastions and blue-coloured zones: bastions of Migdia, Llevant, Santa Clara, Portal Nou, Jonqueres; Santa Eulalia's redoubt, Sant Pere de les Puel·les's monastery and convents of Santa Clara, Sant Agustí Vell, Jonqueres and Santa Caterina. To control a convent with two zones a player must have combat units on both of them.
If, at the end of the last turn, an automatic victory has not been achieved, Catalan forces have avoided a total defeat. In this case, each side must count all its victory points (VP) as follows:
- 1 VP for each eliminated enemy combat unit.
- 2 VP for each eliminated enemy commander.
- 2 VP for each bastion or redoubt hold.
- 4 VP for each convent or monastery hold.
- 4 VP for holding the "Pla de Palau" zone.
The side which sums up more victory point wins the game. In case of ending in a draw, the game is extended one more turn.
15. Playing with more than 2 players
If there are more than two available players, it is possible to create two teams:
- 3 players: One player controls the Catalan army, another does the same with the Spanish forces, and the third commands French forces.
- 4 players: The Catalan side is divided into 2 players, controlling one of them the left and the Catalan centre, and another the right and reserves placed in Pla de Palau. The Bourbon side is divided into Spanish and French forces.